
Verwandte Anleitungen für Next Level Racing F-GT ELITE


Inhaltszusammenfassung für Next Level Racing F-GT ELITE
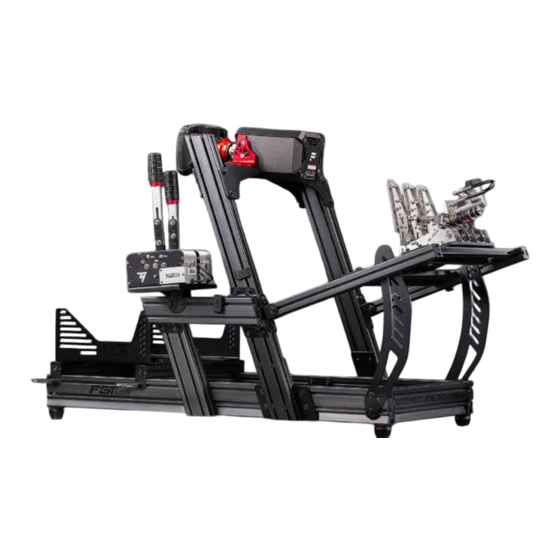
- Seite 1 T A K E R A C I N G T O T H E N E X T L E V E L® Video Instruction: bit.ly/nlrbuild INSTRUCTION MANUAL *electronics not included...
- Seite 2 T O T H E N E X T L E V E L® instruction booklet to fully optimize your product. N E X T L E V E L R A C I N G . C O M ASSEMBLY VIDEO bit.ly/nlrbuild @next_level_racing @nextlevelracingOfficial @nextlvlracing Next Level Racing FOLLOW support@nextlevelracing.com...
- Seite 3 • If in doubt consult the installation video or contact support@nextlevelracing.com • The F-GT Elite is a two person build with the complete cockpit a two person move • Beware of sharp edges on the extrusion pieces LEFT PEDAL ARM...
- Seite 4 Video Instruction: bit.ly/nlrbuild support@nextlevelracing.com 3 X SHIFTER MOUNTING CORNER 5 X END CAP 40X40 6 X END CAP ANGLED 40X80 3 X END CAP LEFT 40X100 3 X END CAP RIGHT 40X100 2 X PEDAL PLATES 4 X SEAT SLIDER TABS SHIFTER EXTENSION PLATE BRACKETS 68 X M8 16MM BOLT...
- Seite 5 ALUMINIUM EXTRUSION TIPS ADJUSTMENT POINTS The F-GT Elite is fully adjustable from almost every attachment point making it great for all sized users • Please do not use power tools for assembly as over tightening can damage your frame whether that be in GT or Formula position.
- Seite 6 Video Instruction: bit.ly/nlrbuild support@nextlevelracing.com PARTS PARTS 8 X M8 full width T-nuts 12 X M8 full width T-nuts Note: Slide 2 x Note: Slide 2 x T-Nuts to front. T-Nuts to front. FRONT LEFT FRONT LEFT RIGHT BACK RIGHT BACK Note: For easier install hand screw M8 bolt in to T-nut to assist sliding T-nut in to channel...
- Seite 7 Video Instruction: bit.ly/nlrbuild support@nextlevelracing.com *RECOMMENDED TOOLS PARTS 4 X Adjustable feet 4 X regular t-nut Note: Foot alignment tab should sit in the channel ALLEN KEYS RATCHET WRENCH Note: Height of the foot can be adjusted only when it’s installed on to the the cockpit 04: Install feet PARTS 4 X M8 45mm bolt...
- Seite 8 Video Instruction: bit.ly/nlrbuild support@nextlevelracing.com PARTS PARTS 8 X M8 35mm bolt 12 X M8 regular T-nut 8 X M8 washer 4 X sticky felt pads 10mm x 90mm Note: Recess holes to be on outside Note: Install felt pads to inside of mounting arm Note: Parts are labeled for left and right side application...
- Seite 9 Video Instruction: bit.ly/nlrbuild support@nextlevelracing.com PARTS PARTS 4 X low profile M8 14mm bolt 4 X M8 nylon washer 13b: Bolt through side mount brackets in to the wheel front mount plate 13d: Loosen bolt in the slot to adjust angle of wheel base PARTS PARTS 4 X low profile M8 25mm bolt...
- Seite 10 Video Instruction: bit.ly/nlrbuild support@nextlevelracing.com PARTS PARTS 4 X low profile M8 14mm bolt 13f: Bolt spacer plates to the wheel base as shown 13i: Loosen the bolt in the slot to adjust the angle of the wheel base PARTS PARTS 4 X low profile M8 25mm bolt 4 x M8 flange nut 4 x M8 nylon washer...
- Seite 11 Video Instruction: bit.ly/nlrbuild support@nextlevelracing.com PARTS PARTS 8 X M8 16mm bolt 4 X M8 16mm bolt 8 X M8 washer 4 X M8 washer Repeat on other side 18: Bolt pedal plates to the pedal arms with slots* facing each other using T-Nuts previously installed on step 17 15: Bolt pedal arm brackets to wheel post using T-Nuts previously installed in step 12a PARTS PARTS...
- Seite 12 Video Instruction: bit.ly/nlrbuild support@nextlevelracing.com PARTS 4 X M8 regular t-nut 23: Install 4 x T-Nuts into the outside channels of the wheel posts on shifter side left or right from 1a or 1b PARTS 4 X M8 16mm bolt 4 X M8 washer 21: Choose pedal angle 24: Install the shifter mounting corner brackets to the wheel post using T-Nuts previously installed in step 23 PARTS...
- Seite 13 Video Instruction: bit.ly/nlrbuild support@nextlevelracing.com PARTS PARTS 4 X M8 16mm bolt 4 X M8 16mm bolt 4 X M8 washer 4 X M8 washer 29: Bolt through shifter arm bracket into previously installed T-Nuts from step 28 26: Select your height then bolt through the shifter brackets into T-Nuts from step 25 PARTS PARTS 4 X M8 regular T-nut...
- Seite 14 Video Instruction: bit.ly/nlrbuild support@nextlevelracing.com PARTS PARTS 2 X M8 regular t-nut 2 X M8 16mm bolt 2 X M8 washer 33: Install 2 x T-Nuts into the bottom channel of the medium shifter support arm then bolt through bracket into the T-Nuts PARTS 34a: These instructions help with step 34b: (1) Align T-Nut with channel (2) Place T-Nut sideways into the channel (3) Push 31: Slide the shifter support bar to align with shifter arm...
- Seite 15 Video Instruction: bit.ly/nlrbuild support@nextlevelracing.com PARTS PARTS 4 X M8 16mm bolt 4 x Felt pads 4 X M8 washer 4 x regular T-nut 37: (A) Apply felt shown in green to the bottom of the motion adapter plates. (B) Slide 2 x T-Nuts (each side) in to top 35: Bolt through safety step into T-Nuts previously installed in step 34b and adjust to desired position channel of base frame PARTS...
- Seite 16 Video Instruction: bit.ly/nlrbuild support@nextlevelracing.com PARTS PARTS 2 X Seat Slider Ratchet Handles 6 x M8 20mm countersunk bolt 42: Bolt through alignment bracket on the front seat slider with the ratchet handle into T-Nuts previously 40: Bolt through motion plate into Motion V3 installed in step 1a and 1b PARTS PARTS...
- Seite 17 Video Instruction: bit.ly/nlrbuild support@nextlevelracing.com PARTS PARTS 4 X M8 16mm bolt 4 X M8 washer Repeat on other side 45: Align seat bracket slots to seat sliders 48: Bolt shifter plate to shifter arm using T-Nuts previously installed on step 30a PARTS PARTS 4 X M8 16mm bolt...
- Seite 18 Video Instruction: bit.ly/nlrbuild support@nextlevelracing.com PARTS PARTS 2 x regular T-nut Cable Management Clip Note: Depress locater tab on back of clip 53: Install 2 x T-Nuts into the lower side channel of the medium shifter support arm PARTS 2 X M8 16mm bolt 2 X M8 nylon washer 51: Align cable clip with channel (cable clip can only be inserted from the end of the channel) 54: Bolt through tool holder using T-Nuts previously installed in step 53...
- Seite 19 DIRECT SHIFTER MOUNT Video Instruction: bit.ly/nlrbuild support@nextlevelracing.com (OPTIONAL) ASSEMBLY MAY VARY PARTS PARTS 3 X regular T-nut End caps A : Install T-Nuts into inside lower channel on large shifter arm PARTS 1 x 40x80 end cap A: Align end-cap B: Depress the centre C: Finished end-cap to corner of extrusion...
- Seite 20 SEAT DIRECT SHIFTER Video Instruction: bit.ly/nlrbuild support@nextlevelracing.com MOUNT (OPTIONAL) PARTS PARTS 3 X M8 16mm bolt 2 X M8 16mm bolt 3 X M8 washer 2 X M8 washer D : Screw bolts into previously installed T-Nuts from step A G : Bolt the shifter corner mounting bracket to the T-Nuts previously installed in step E PARTS PARTS...
- Seite 21 Video Instruction: bit.ly/nlrbuild support@nextlevelracing.com YOUR DIRECT SHIFTER MOUNT IS COMPLETE PARTS 1 x 40x80 end cap J : Install the plastic cap PARTS 4 X regular T-nut K : Install 4 x T-Nut in to channels as shown PARTS 4 X M8 16MM bolt 4 X M8 washer Repeat on other...
- Seite 22 12 x 110MM bolts TRACTION: The F-GT Elite will mount directly to the Traction Plus Platform using 12 x 110MM bolts. 6 x bolt in the front of the base frame through the pre-drilled holes in the aluminium extrusion & 6 x bolt in the back of base frame through the...
- Seite 23 RAADPLEEG HET LAATSTE AFBEELDING: TRACTIE: De F-GT Elite wordt rechtstreeks op het Traction Plus-platform gemonteerd met behulp van 12 x 110 MM bouten. 6 x bout aan de voorkant van het basisframe door de voorgeboorde gaten in de aluminium extrusie &...
- Seite 24 13c: Fare riferimento all’immagine - Bullone attraverso le staffe di montaggio laterali nel braccio di montaggio. Nota: utilizzare il livello fornito. La staffa della ruota deve essere mantenuta piatta e livellata durante l’installazione per evitare inclinazioni. FARE RIFERIMENTO ALL’IMMAGINE FINALE: TRAZIONE: F-GT Elite si monterà direttamente sulla piattaforma Traction Plus utilizzando 12 bulloni da 110 mm. 6 bulloni nella parte anteriore del telaio di base attraverso i fori preforati nell’estrusione di alluminio e 6 bulloni 13d: Fare riferimento all’immagine - Allentare il bullone nella fessura per regolare l’angolo dell’interasse...
- Seite 25 El F-GT Elite es totalmente ajustable desde casi todos los puntos de conexión, lo que lo hace ideal para usuarios de todos los tamaños, ya sea en la posición GT o Formula.
- Seite 26 VERWEIS AUF DAS ENDGÜLTIGE BILD: TRAKTION: Der F-GT Elite wird mit 12 x 110 mm Schrauben direkt an der Traction Plus-Plattform montiert. 6 x Schraube an der Vorderseite des Grundrahmens durch die vorgebohrten Löcher in der Aluminiumextrusion und 6 x...
- Seite 27 シートダイレクトシフターマウント(オプション) 06:画像を参照してください-ステップ5で取り付けたTナットに足をねじ込みます G:画像を参照してください-シフターコーナー取り付けブラケットを、ステップEで以前に取り付けたTナットにボルトで固定します 07:画像を参照してください-チャネル内の足の[位置合わせ]タブ H:画像を参照してください-(小さな)シフターダイレクトマウント垂直アームに示されているように、2 xTナットをチャネルに取り付けます 08:画像を参照してください-六角レンチで足の内側のネジを締めて高さをロックします I:画像を参照してください-ステップHで以前に取り付けたTナットを使用したシフターアームへのボルトコーナーシフターアームブラケット 09:画像を参照してください-対応する「T」プレートを左右の垂直押し出し材に取り付け、レーザー彫刻された線をプレートの内側に向けます。注:くぼみの穴は外側にあります。注:パーツには、左側と右側のアプリケーション用にラベル J:画像を参照してください-プラスチックキャップを取り付けます が付けられています。 K:画像を参照してください-4 xTナットを図のようにチャネルに取り付けます 10:画像を参照してください-前に手順1bで取り付けたTナットを使用して、右の支柱を右のベースメンバーにボルトで固定します。注:示されているコックピットのような画像の後方への角度 L:画像を参照してください-シフタープレートを介して、ステップkで前に取り付けたTナットにボルトで固定します。希望の角度に調整し、ボルトを締めて所定の位置に固定します 11:画像を参照してください-反対側で手順10を繰り返します フルコックピットの最終画像を参照してください 12a:画像を参照してください-4 x Tナットを両方のアップライトのフロントチャネルにスライドさせ、ペダルプレートブラケットの下部に2つのTナットを押し込みます。 2 xTナットを両方のアップライトの背面チャネルにスライドさせます。 最終画像を参照してください:トラクション:F-GT Eliteは、12 x110MMボルトを使用してトラクションプラスプラットフォームに直接取り付けます。アルミニウム押し出し材の事前に開けられた穴を通してベースフレームの前に6xボルト、 注:取り付けアームの内側にフェルトパッドを取り付けます ベース押し出しの事前に開けられた穴を通してベースフレームの後ろに6xボルト 12b:画像を参照してください-12aに取り付けられたTナットに取り付けアームをボルトで固定します 13a:画像を参照してください-ホイールフロントマウントブラケットをホイールベースにボルトで固定します 13b:画像を参照してください-サイドマウントブラケットをホイールフロントマウントプレートにボルトで固定します 13c:画像を参照してください-サイドマウントブラケットを取り付けアームにボルトで固定します。注:提供されている使用レベル。取り付け中は、スキューを避けるためにホイールブラケットを平らで水平に保つ必要があります。 13d:画像を参照してください-ホイールベースの角度を調整するには、スロットのボルトを緩めます 13e:画像を参照してください-ホイールベースの角度をロックするためにスロットのボルトを締めます 13f:画像を参照してください-図のようにホイールベースにスペーサープレートをボルトで固定します 13g:画像を参照してください-取り付けアームにサイドマウントブラケットをボルトで固定します。注:提供されている使用レベル。取り付け中は、スキューを避けるためにホイールブラケットを平らで水平に保つ必要があります。注:ホイ ールベースの位置が合うまで、ボルトを完全に締めないでください。 13h:画像を参照してください-13fに取り付けられたスペーサープレートにサイドマウントブラケットをボルトで固定します 13i:画像を参照してください-スロットのボルトを緩めてホイールベースの角度を調整します 14a:画像を参照してください-示されている角度調整範囲 14b:画像を参照してください-スロットのボルトを締めて、角度を所定の位置にロックします...
- Seite 28 Le F-GT Elite est entièrement réglable à partir de presque tous les points d’attache, ce qui le rend idéal pour les utilisateurs de toutes tailles, qu’ils soient en position GT ou Formula. Utilisez le niveau fourni avec les marqueurs de réglage...
- Seite 29 CONSULTE A IMAGEM FINAL: TRAÇÃO: O F-GT Elite será montado diretamente na plataforma Traction Plus usando parafusos 12 x 110 MM. 6 parafusos na frente da estrutura de base através dos orifícios pré-perfurados na extrusão de alumínio...
- Seite 30 перекоса. СМОТРИТЕ НА ОКОНЧАТЕЛЬНОЕ ИЗОБРАЖЕНИЕ: ТЯГА: F-GT Elite крепится непосредственно к платформе Traction Plus с помощью болтов 12 x 110 мм. 6 х болт в передней части несущей рамы через предварительно просверленные отверстия в 13d: См. Изображение - Ослабьте болт в пазу, чтобы отрегулировать угол колесной базы.
- Seite 31 09: Lütfen resme bakın - Sol ve sağ dikey ekstrüzyonlara, lazerle kazınmış çizgiler plakaya içe bakacak şekilde ilgili “T” Plakasını takın. Not: Dışarıda olacak girinti delikleri. Not: Parçalar, sol ve sağ taraf uygulamaları için etiketlenmiştir. SON RESMİNE BAKIN: ÇEKİŞ: F-GT Elite, 12 x 110 MM cıvatalar kullanarak doğrudan Traction Plus Platformuna monte edilecektir. Alüminyum ekstrüzyonda önceden delinmiş deliklerden taban çerçevesinin önünde 6 x cıvata ve taban ekstrüzyonunda önceden delinmiş...
- Seite 32 53: Viz obrázek - Nainstalujte 2 x T-matice do spodního bočního kanálu podpěrného ramene středního řadiče. F-GT Elite je plně nastavitelný téměř z každého připojovacího bodu, takže je skvělý pro všechny velké uživatele, ať už v pozici GT nebo Formula. Použijte poskytnutou úroveň spolu se značkami pro nastavení na rámu, abyste dosáhli dokonalého vyrovnání.
- Seite 33 F-GT Elite jest w pełni regulowany z prawie każdego punktu mocowania, dzięki czemu jest świetny dla wszystkich użytkowników, niezależnie od tego, czy są w pozycji GT, czy Formula. Użyj poziomnicy dostarczonej wraz ze znacznikami regulacji na ramie, aby upewnić się, że...
- Seite 34 تيبثتب مق - ةروصلا ىلإ عوجرلا ىجري :جT-Nuts ريبكلا ةكرحلا لقان عارذ ىلع ةيلخادلا ةيلفسلا ةانقلا يف ليدعت نكميF-GT Elite عضو يف اوناك ءاوس نيمدختسملا عيمجل ةعئار اهلعجي امم ا ًبيرقت قفرم ةطقن لك نم ا ًمامتGT وأFormula. .ةيلاثملا ةاذاحملا ىلع كلوصح نم دكأتلل راطإلا ىلع طبضلا تامالع عم مدقملا ىوتسملا مدختسا...
- Seite 35 support@nextlevelracing.com support@nextlevelracing.com...