Checchi & Magli TRIUM Bedienungs- Und Wartungsanleitung
Umpflanzmaschine
Vorschau ausblenden
Andere Handbücher für TRIUM:
- Bedienungsanleitung (95 Seiten) ,
- Bedienungsanleitung (114 Seiten)
Inhaltsverzeichnis
Werbung
Verfügbare Sprachen
Verfügbare Sprachen
Quicklinks
Werbung
Inhaltsverzeichnis

Verwandte Anleitungen für Checchi & Magli TRIUM


Inhaltszusammenfassung für Checchi & Magli TRIUM
- Seite 1 TRIUM MANUALE D'USO E MANUTENZIONE USE AND MAINTENANCE MANUAL MANUEL D’UTILISATION ET D’ENTRETIEN BEDIENUNGS-UND WARTUNGSANLEITUNG MANUAL DE USO Y MANTENIMIENTO Istruzioni originali Original instruction Notices originales Originalanleitung Instrucciones originales Cod. 998571/5 10/2015...
- Seite 3 SOMMARIO 1 INFORMAZIONI GENERALI ........................1 2 INFORMAZIONI TECNICHE ........................3 3 INFORMAZIONI SULLA SICUREZZA ....................10 4 INFORMAZIONI SULLA MOVIMENTAZIONE E INSTALLAZIONE ..........11 5 INFORMAZIONI SULLE REGOLAZIONI ....................14 6 INFORMAZIONI SULL’USO ........................23 7 INFORMAZIONI SULLA MANUTENZIONE ..................29 8 INFORMAZIONI SULLE SOSTITUZIONI ....................
- Seite 4 Pulizia del vomere aprisolco ........................29 Raccomandazioni di sicurezza per la movimentazione e il trasporto ......... 11 Raccomandazioni di sicurezza per le regolazioni ................14 Raccomandazioni di sicurezza per le sostituzioni ................32 Raccomandazioni di sicurezza per l’uso....................23 Raccomandazioni per la manutenzione ....................29 Regolazione carico del ruotino .........................
-
Seite 5: Informazioni Generali
INFORMAZIONI GENERALI Scopo del manuale Il manuale è stato realizzato dal costruttore per fornire le PERICOLO informazioni necessarie e i criteri da seguire a tutti colo- ro che interagiscono con la trapiantatrice, nel proseguo Indica informazioni o procedure che, se non stretta- del manuale denominata anche macchina operatrice. -
Seite 6: Esclusione Di Responsabilità
INFORMAZIONI GENERALI Esclusione di responsabilità La macchina viene consegnata alle condizioni valide - la carenza di manutenzione al momento dell’acquisto e specificate nel contratto di - l’inosservanza totale o parziale delle istruzioni d’uso e vendita. manutenzione - l’utilizzo di ricambi non originali o non specifici per il - Qualsiasi modifica non autorizzata dal costruttore modello - l’uso improprio della macchina... -
Seite 7: Informazioni Tecniche
INFORMAZIONI TECNICHE Descrizione generale La macchina operatrice è stata progettata e costruita per do sono a contatto con il terreno) e dalla marcia della la messa a dimora di piantine (ad esempio piantine orti- trattrice. cole, floricole, di tabacco, allevate in vivaio, ecc.), radicate La piantina cade per gravità... -
Seite 8: Dimensioni D'ingombro
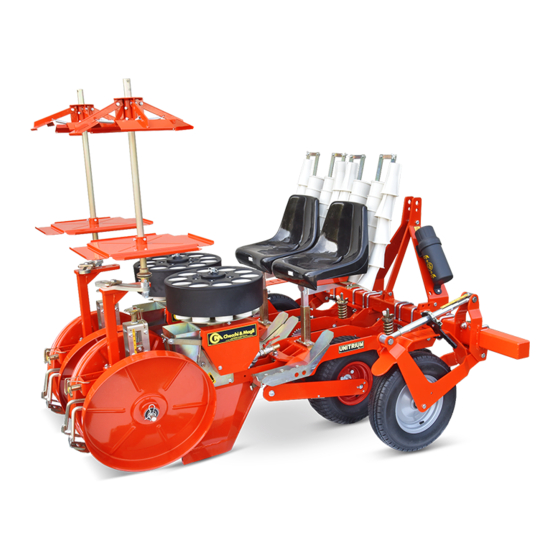
INFORMAZIONI TECNICHE Dimensioni d’ingombro L’illustrazione raffigura le dimensioni d’ingombro delle macchine operatrici. TRIUM/1 TRIUM/2 TRIUM/3 TRIUM/4 TRIUM/5 TRIUM/6 UN41-0132MF Caratteristiche tecniche TRIUM/1 TRIUM/2 TRIUM/3 TRIUM/4 TRIUM/5 TRIUM/6 Potenza trattrice richiesta Distanza minima interfila (distributore con 6 - 10 bicchieri) Distanza minima interfila... - Seite 9 Budrio TRIUM/1, TRIUM/2, TRIUM/3, TRIUM/4, TRIUM/5, TRIUM/6 sono conformi ai Requisiti Essenziali di Sicurezza e di Tu- CHECCHI & MAGLI s.r.l tela della Salute di cui alla Direttiva 2006/42/CE.
-
Seite 10: Segnali Di Sicurezza E Informazione
INFORMAZIONI TECNICHE Segnali di sicurezza e informazione L’illustrazione raffigura la posizione e il significato delle ATTENZIONE targhe di sicurezza. Verificare che le targhe siano leggibili; in caso contra- rio pulirle e se danneggiate sostituirle applicandole nella posizione originale. UN41-0617IN A) Targa di pericolo: leggere il manuale d’uso e manu- F) Targa di pericolo: lubrificare la catena all’interno del tenzione prima di utilizzare la macchina operatrice. - Seite 11 INFORMAZIONI TECNICHE L’illustrazione raffigura la posizione e il significato delle targhe applicate (Rapid Shift). UN41-0618IN A) Targa interpianta (standard): applicata sul cambio B) Targa interpianta (standard): applicata sul cambio “Rapid Shift destro”, indica, in funzione dell’interpian- “Rapid Shift sinistro”, indica, in funzione dell’inter- ta, i pignoni da scegliere.
-
Seite 12: Accessori Opzionali
Porta-vassoi trasversale a 2 ripiani cm 400 (completo di telaio posteriore e ruote di appoggio) Porta-vassoi supplementare a 6 ripiani Ripiano supplementare porta-vassoi a 6 ripiani Sincromicro TRIUM, microgranulatore a distribuzione localizzata e sincronizzata in ogni linea o ad ogni pianta (non fornibile per macchine già in servizio) Separatore di zolla profondità registrabile... -
Seite 13: Rischi Residui
INFORMAZIONI TECNICHE Rischi residui Il costruttore in fase di progettazione e costruzione ha posto particolare attenzione agli aspetti della sicurezza, tuttavia rimangono i rischi descritti. - Pericolo di taglio e sezionamento tra il distributore (A) e il disco di distribuzione (B) su ogni unità di trapian- - Pericolo di trascinamento e intrappolamento con gli organi in movimento. -
Seite 14: Informazioni Sulla Sicurezza
INFORMAZIONI SULLA SICUREZZA Leggere attentamente questo manuale prima di pro- In caso di avaria evitare di eseguire interventi di ripa- cedere alle operazioni di impiego, manutenzione o razione sul luogo se non si è sicuri di operare in am- altri interventi sulla macchina operatrice. biente idoneo e se non si dispone delle attrezzature adeguate. -
Seite 15: Informazioni Sulla Movimentazione E Installazione
Il tipo di imballo viene scelto in funzione del mezzo di utilizzato. trasporto prescelto ed al luogo di destinazione. Per contenere gli ingombri dell’imballo la macchina è smontata in uno o più colli. UN41-0004AF Dimensioni indicative dell’imballo TRIUM (distributore 6 - 10 bicchieri) TRIUM/1 TRIUM/2 TRIUM/3 TRIUM/4 TRIUM/5... -
Seite 16: Disimballo E Montaggio
INFORMAZIONI SULLA MOVIMENTAZIONE E INSTALLAZIONE UN41-0077GF Disimballo e montaggio In fase di disimballo controllare l’integrità e l’esatta quan- ATTENZIONE tità dei componenti; in caso di danni segnalare al riven- ditore o direttamente al costruttore i danni subiti entro 8 Il montaggio della macchina operatrice deve essere giorni dal ricevimento della macchina. - Seite 17 ATTENZIONE macchine operatrici specificati nel manuale. Nella fase di sollevamento prestare attenzione alle Nei modelli TRIUM/1, TRIUM/3, TRIUM/5 deve essere oscillazioni del carico perché il punto di presa non è smontato il sedile per permettere il montaggio dell’at- mai perfettamente baricentrico.
-
Seite 18: Informazioni Sulle Regolazioni
INFORMAZIONI SULLE REGOLAZIONI Raccomandazioni di sicurezza per le regolazioni Gli interventi di regolazione devono essere effettuati accensione rimossa e adottando tutti gli accorgimen- su terreno pianeggiante e compatto, con la trattrice ti necessari per operare in sicurezza. spenta, il freno di stazionamento tirato, la chiave di Regolazione distanza delle ruote costipatrici dal vomere Le ruote costipatrici (C) servono a rincalzare e compri- Regolare la distanza delle ruote costipatrici dal vomere... - Seite 19 INFORMAZIONI SULLE REGOLAZIONI Regolazione dell’efficacia di costipazione Regolare adeguatamente la distanza tra le ruote costipa- Maggiore è la distanza tra le ruote, minore è l’efficacia di trici (B) in funzione dell’esigenza. costipazione. UN41-0140MF Procedere come descritto. 3) Regolare di conseguenza i raschietti (C) (vedere “Re- golazione raschietto ruote costipatrici”).
- Seite 20 INFORMAZIONI SULLE REGOLAZIONI Regolazione profondità di trapianto UN41-0142NI Procedere come descritto. profondità del solco. 3) Dopo aver effettuato la regolazione bloccare il po- 1) Agire sul fermo (B) per liberare il pomello. mello con il fermo (B). 2) Ruotare il pomello (A) per aumentare o diminuire la Regolazione carico del ruotino Procedere come descritto.
- Seite 21 INFORMAZIONI SULLE REGOLAZIONI Regolazione posizione piatto flessibile UN41-0614IN Per questa operazione procedere come descritto. Avvitare il dado (C). Riposizionare il vomere nella posizione di lavoro. Allentare il dado ad alette (A). Verificare che il dispositivo Plant Control (E) sia Ruotare la leva di sicurezza (B). all’interno del vomere.
-
Seite 22: Allestimento Standard
INFORMAZIONI SULLE REGOLAZIONI 10 - 12 10 - 12 10 - 12 10 - 12 UN41-0608IN Regolazione interpianta La distanza tra una pianta e quella successiva è determi- nata dal numero di denti dei pignoni installati. Possono essere montate diverse serie di pignoni al fine di ottenere la distanza di interpianta richiesta. - Seite 23 INFORMAZIONI SULLE REGOLAZIONI ALLESTIMENTO 14 - 50 RAPID SHIFT DX Distanza interpianta N° denti pignoni inches z 1 z 1 z 2 z 3 z 4 z 5 z 6 5 - 1/2 6 - 3/4 7 - 7/8 8 - 5/8 9 - 1/2 10 - 1/4 12 -3/8...
- Seite 24 INFORMAZIONI SULLE REGOLAZIONI ALLESTIMENTO OPZIONALE 26 - 81 RAPID SHIFT SX Distanza interpianta N° denti pignoni inches z 1 z 1 z 2 z 3 z 4 z 5 z 6 10 - 1/4 14 - 5/8 15 - 5/16 18 -1/8 20 - 1/2 21 - 5/8...
- Seite 25 INFORMAZIONI SULLE REGOLAZIONI Regolazione del carico dell’unità di trapianto Il gruppo di regolazione viene solitamente montato in Il gruppo (B) consente di aumentare o diminuire ulte- posizione (A1). riormente il peso esercitato dal gruppo (A) sulle ruote Il gruppo (A) in posizione (A1) consente di diminuire il costipatrici.
- Seite 26 INFORMAZIONI SULLE REGOLAZIONI Regolazione del disinnesto automatico di sicurezza UN41-0147MF Il disinnesto automatico ha lo scopo di preservare gli or- Per la regolazione procedere come descritto. gani di trasmissione da sovraccarichi (ad esempio in caso 1) Ruotare la ghiera (A) in senso orario per aumentare la di bloccaggio del distributore ecc.).
-
Seite 27: Informazioni Sull'uso
INFORMAZIONI SULL’USO Raccomandazioni di sicurezza per l’uso Consentire l’uso della macchina solo a personale au- Pulire gli elementi di appoggio dei piedi per evitare torizzato, in buona salute, adeguatamente formato e perdite di equilibrio nelle fasi di salita e discesa. dotato di idonea patente di guida per la trattrice. - Seite 28 INFORMAZIONI SULL’USO Attacco e distacco della macchina operatrice dalla trattrice ATTENZIONE ATTENZIONE Il collegamento della macchina operatrice alla trattri- Collegare la macchina operatrice solo ad una trat- ce è uno dei momenti più rischiosi poiché potrebbe ri- trice di adeguata potenza e provvista di sollevato- chiedere la necessità...
- Seite 29 INFORMAZIONI SULL’USO Sistemazione sedile Una scorretta posizione di lavoro affatica l’operatore che potrebbe compiere operazioni non corrette, per cui, pri- ma dell’inizio del lavoro regolare e bloccare il sedile nella posizione di massimo comfort. Procedere come descritto. 1) Allentare le viti (A) e regolare in altezza il sedile. 2) Avvitare le viti (A) per bloccare il sedile nella posizio- ne appropriata.
- Seite 30 INFORMAZIONI SULL’USO Cambio rapporto trasmissione (Rapid Shift) ATTENZIONE ATTENZIONE Spegnere il motore della trattrice, disinserire e custo- Il cambio del rapporto della trasmissione ha lo scopo dire la chiave di accensione per prevenire il pericolo di ottenere l’interpianta richiesto. di infortunio durante la fase del cambio del rapporto Fare riferimento al capitolo “Regolazione interpian- di trasmissione.
- Seite 31 INFORMAZIONI SULL’USO Valutare se la distanza tra le ruote costipatrici è ade- 2) Fermare la trattrice e fare salire a bordo della macchi- na gli operatori. guata per esercitare sulla zolla la giusta pressione Nella fase di trapianto, gli operatori devono assume- (vedere “Regolazione dell’efficacia di costipazione”...
- Seite 32 INFORMAZIONI SULL’USO Lavoro notturno o con scarsa visibilità Il lavoro notturno o la scarsa visibilità aumenta i rischi disporre un’adeguata illuminazione per operare in sicu- derivanti dall’uso della macchina: in tali condizioni pre- rezza. Circolazione su strade pubbliche Nel trasferimento del complesso macchina operatrice- ATTENZIONE trattrice osservare le prescrizioni del codice della strada.
-
Seite 33: Informazioni Sulla Manutenzione
INFORMAZIONI SULLA MANUTENZIONE Raccomandazioni per la manutenzione Gli interventi di manutenzione devono essere ef- di manutenzione ordinaria previsti nel manuale di fettuati su terreno pianeggiante, compatto, con la istruzioni. trattrice spenta, il freno di stazionamento tirato, la Per gli interventi straordinari occorre disporre di chiave di accensione rimossa e adottando tutti gli ac- un’officina aziendale avente le caratteristiche indica- corgimenti necessari per operare in sicurezza. - Seite 34 INFORMAZIONI SULLA MANUTENZIONE Controllo pneumatici Verificare lo stato di usura dei pneumatici e se presenta- pneumatici (vedere tabella “Caratteristiche tecniche”). no lacerazioni o segni d’invecchiamento devono essere Il controllo della pressione deve essere effettuato con il sostituiti. peso della macchina operatrice scaricato a terra e senza Controllare e se necessario ripristinare la pressione dei nessun peso a bordo (persone o cose).
- Seite 35 INFORMAZIONI SULLA MANUTENZIONE Schema punti di lubrificazione Lubrificare gli organi raffigurati nei tempi e nei modi in- Usare grasso universale per autotrazione di macchinari dicati. agricoli e industriali, idrorepellente con punto di goccia Prima di effettuare la lubrificazione pulire accuratamen- 180°.
- Seite 36 INFORMAZIONI SULLE SOSTITUZIONI Raccomandazioni di sicurezza per le sostituzioni La sostituzione di componenti usurati o danneggiati le avente le caratteristiche indicate dalla legislazione deve essere effettuata con ricambi originali. vigente in materia (attrezzature adeguate, personale Per gli interventi straordinari (non compresi in que- idoneo, ecc.), altrimenti occorre rivolgersi ad officine sto manuale) occorre disporre di un’officina azienda- autorizzate.
- Seite 37 INFORMAZIONI SULLE SOSTITUZIONI Sostituzione catena ruota motrice (Rapid Shift) UN41-0511MM Per questa operazione procedere come descritto. 4) Muovere il tenditore (D) e rimuovere la catena (E). 1) Azionare la leva (C) per sollevare la ruota con lo sco- PRUDENZA po di ridurre la tensione della catena. 2) Svitare i dadi (A).
- Seite 38 INFORMAZIONI SULLE SOSTITUZIONI Sostituzione vomere UN41-0159NI Procedere come descritto. INFORMAZIONE 1) Rimuovere l’anello elastico (A). Nella fase di montaggio mettere la lamella scorrevo- 2) Svitare il dado ad alette (B). le (Plant Control) all’interno del vomere. 3) Alzare e tenere alzato il dispositivo di bloccaggio Verificare che il piatto flessibile sia centrato al vome- re (vedere “Regolazione centratura del piatto flessi- (D).
- Seite 39 INFORMAZIONI SULLE SOSTITUZIONI Per questa operazione procedere come descritto. 11) Verificare la posizione del piatto flessibile rispetto al vomere (vedere “Regolazione posizione piatto fles- Allentare il dado ad alette (A). sibile”). Ruotare la leva di sicurezza (B). 12) Avvitare le viti (D). Spingere in avanti il vomere e ruotarlo verso il bas- 13) Riposizionare il vomere nella posizione di lavoro.
- Seite 40 INFORMAZIONI SULLE SOSTITUZIONI Lingua italiana Uso e manutenzione...
- Seite 41 SUMMARY 1 GENERAL INFORMATION ..........................1 2 TECHNICAL INFORMATION ........................3 3 SAFETY INFORMATION .......................... 10 4 SAFETY INFORMATION CONCERNING HANDLING AND INSTALLATION ......11 5 ADJUSTMENT INFORMATION ......................14 6 INFORMATION FOR USE ........................23 7 MAINTENANCE INFORMATION ......................29 8 INFORMATION CONCERNING REPLACEMENTS ................32 ANALYTICAL INDEX Adjusting the automatic safety release function ................
- Seite 42 Main parts ................................3 Maintenance advice ............................29 Maintenance intervals schedule ....................... 29 Manufacturer and machine registration details ..................1 Night-time work or poor visibility conditions ..................28 Noise ..................................8 Optional accessories ............................8 Overall dimensions ............................4 Overview ................................3 Packing ................................11 Permitted gradients ............................5 Planting depth adjustment ........................
-
Seite 43: General Information
GENERAL INFORMATION Aim of the manual This instruction manual is produced by the manufactur- DANGER er to provide all those who have dealings with the plant- ing machine (which may also be referred to hereinafter This indicates information or procedures which, if as the “work vehicle”) with all the necessary information not strictly followed, cause death or serious personal and criteria to apply for its use. -
Seite 44: Glossary Of Terms
GENERAL INFORMATION Disclaimer notice The machine is delivered to the user under the condi- - lack of maintenance tions applicable at the time of purchase and specified in - total or partial failure to comply with the use and main- the sale agreement. -
Seite 45: Technical Information
TECHNICAL INFORMATION Overview This work vehicle is designed and built for planting seed- The seedling falls from the dispenser into the furrow cre- lings of various kinds (e.g. horticultural, floral, tobacco, ated by the ploughshare and the packing wheels fill back nursery-grown, etc.), rooted in conical or pyramid- up and compact the soil around the seedling root ball. -
Seite 46: Overall Dimensions
TECHNICAL INFORMATION Overall dimensions The illustration shows the work vehicles’ overall dimensions. TRIUM/1 TRIUM/2 TRIUM/3 TRIUM/4 TRIUM/5 TRIUM/6 UN41-0132MF Technical characteristics TRIUM/1 TRIUM/2 TRIUM/3 TRIUM/4 TRIUM/5 TRIUM/6 Required tractor power Minimum row spacing (dispensing unit with 6 - 10 cups) - Seite 47 EN 13857, on machine safety. hereby declares, under its own responsibility that the Budrio planting machine in question, i.e. models: TRIUM/1, TRIUM/2, TRIUM/3, TRIUM/4, TRIUM/5, TRIUM/6 CHECCHI & MAGLI s.r.l comply with the Essential and Health Safety Require- Legal representative ments provided for by Directive 2006/42/CE.
- Seite 48 TECHNICAL INFORMATION Information and safety signs The illustration shows the locations and meanings of the WARNING safety signs. Check that all the plates are legible; if they are not, clean them or - if they are damaged - replace them, applying the new ones in the same place as the old ones.
- Seite 49 TECHNICAL INFORMATION The illustration shows the locations and meanings of the signs affixed (Rapid Shift). UN41-0618IN A) Plant spacing plate (standard): applied on the B) Plant spacing plate (standard): applied on the “left “right Rapid Shift” wheel, it indicates the pinions to Rapid Shift”...
-
Seite 50: Optional Accessories
Inserts for TRIUM cups adapter (for very small plants) Hosepipe laying device Skid TRIUM (for compacting, used in conjunction with packing wheels for both spongy and dry soil) Hydraulically removable frame (3 rows, width: 240 cm - 350 cm) Kit containing disks to be located in front of the ploughshare... -
Seite 51: Residual Risks
TECHNICAL INFORMATION Residual risks During the design and construction stages, the manufac- turer has focused particular attention on safety aspects; nevertheless the risks described below remain. - Risk of cuts and shearing between the dispenser (A) and the dispenser disc (B) on each planting unit. - Risk of getting caught/dragged/trapped by the mov- ing parts. -
Seite 52: Safety Information
SAFETY INFORMATION Read this manual carefully before proceeding with In the event of a failure, do not carry out any repairs any operations concerning use, maintenance or oth- on site unless you are certain that the area you are in er work on the work vehicle. - Seite 53 The illustration shows the type of packing most com- To contain packing as far as possible, the machine is de- monly used. UN41-0004AF Approximate packing dimensions - TRIUM (dispensing unit with 6 - 10 cups) TRIUM/1 TRIUM/2 TRIUM/3 TRIUM/4...
-
Seite 54: Unpacking And Assembly
SAFETY INFORMATION CONCERNING HANDLING AND INSTALLATION UN41-0077GF Unpacking and assembly During unpacking, check that the components are in good condition and tally with the number stated; in the WARNING event of damage, report the damage to the retailer or The assembly of the work vehicle must be carried out directly to the manufacturer within 8 days of receiving at an authorised service centre or at company facili- the machine. - Seite 55 The lifting procedure shown applies for all the work ve- WARNING hicle models specified in the manual. For models TRIUM/1, TRIUM/3, TRIUM/5 the seat must During lifting watch out for the load swinging, as the hook-up point is never perfectly at the centre of be removed to allow the lifting means to be fitted.
-
Seite 56: Adjustment Information
ADJUSTMENT INFORMATION Safety advice concerning adjustments Maintenance and adjustment work must be carried ignition key removed, and adopting all the necessary out with the work vehicle on flat, compact ground, safety measures required to work safely. with the tractor engine off, parking brake engaged, Adjusting the spacing between the packing wheels and the ploughshare The packing wheels (C) are used to ridge and compact The distance between the packing wheels and the... - Seite 57 ADJUSTMENT INFORMATION Adjusting the packing efficiency Adjust the spacing between the packing wheels (B) as The farther apart the wheels are, the less efficient the required. packing is. UN41-0140MF Proceed as outlined below. 3) Adjust the scrapers (C) accordingly (see “Adjusting the packing wheel scraper”).
- Seite 58 ADJUSTMENT INFORMATION Planting depth adjustment UN41-0142NI Proceed as outlined below. of the furrow. 3) After adjustment, tighten the nut to secure the knob 1) Use the lock (B) to release the knob (A). with the lock (B). 2) Turn the knob (A) to increase or decrease the depth Adjusting the small wheel load Proceed as outlined below.
- Seite 59 ADJUSTMENT INFORMATION Adjusting the flexible plate position UN41-0614IN For this operation, proceed as outlined below. Tighten the nut (C). Refit the share in the work position. Loosen the wing nut (A). Check that the Plant Control device (E) is inside the Turn the lock lever (B).
- Seite 60 ADJUSTMENT INFORMATION 10 - 12 10 - 12 10 - 12 10 - 12 UN41-0608IN Adjusting the plant spacing The gap between one plant and the next depends on the number of teeth on the pinions installed. A series of pinions may be fitted to ensure the required plant spacing is obtained.
- Seite 61 ADJUSTMENT INFORMATION EQUIPMENT PACKAGE 14 - 50 RAPID SHIFT (RH) Plant spacing distance N. teeth on the pinions inches z 1 z 1 z 2 z 3 z 4 z 5 z 6 5 - 1/2 6 - 3/4 7 - 7/8 8 - 5/8 9 - 1/2 10 - 1/4...
- Seite 62 ADJUSTMENT INFORMATION OPTIONAL EQUIPMENT PACKAGE 26 - 81 RAPID SHIFT (LH) Plant spacing distance N. teeth on the pinions inches z 1 z 1 z 2 z 3 z 4 z 5 z 6 10 - 1/4 14 - 5/8 15 - 5/16 18 -1/8 15 18...
- Seite 63 ADJUSTMENT INFORMATION Adjusting the planting unit load The adjustment unit is usually mounted in position The unit (B) enables to increase or decrease the weight (A1). applied by the unit (A) to the packing wheels. With the unit (A) in position (A1) the weight on the pack- The weight (load) to be applied to the packing wheels ing wheels can be reduced.
- Seite 64 ADJUSTMENT INFORMATION Adjusting the automatic safety release function UN41-0147MF The automatic release is designed to protect the trans- For adjustments, proceed as outlined below. mission components from overloads (e.g. if the dispens- 1) Turn the ring nut (A) clockwise to increase the release er jams).
-
Seite 65: Information For Use
INFORMATION FOR USE Safety advice concerning use This ensures the machine can only be used by fit and for the tractor with the equipment mounted on it healthy personnel, who are suitably trained and au- (see tractor user manual). thorised, and hold the appropriate category driving Keep the parts where operators tread clean to pre- licence for a tractor. - Seite 66 INFORMATION FOR USE Hitching and unhitching the work vehicle to and from the tractor WARNING WARNING Hitching the work vehicle up to the tractor is one of The work vehicle must only ever be coupled to a the riskiest moments as it could required the involve- tractor with an appropriate power rating which is ment of several people at once, carrying out synchro- equipped with a lift that complies with the regula-...
- Seite 67 INFORMATION FOR USE Seat positioning Poor work posture will tire the operator and could lead to mistakes being made; therefore, before starting work, adjust the seat and secure it in the position that offers maximum comfort. Proceed as outlined below. 1) Loosen the screws (A) and adjust the seat height.
- Seite 68 INFORMATION FOR USE Changing the transmission ratio (Rapid Shift) WARNING WARNING Switch off the tractor engine, remove the ignition The aim of the change of the transmission ratio is to key, and store in a safe place to prevent an accident obtain the required plant spacing.
- Seite 69 INFORMATION FOR USE Decide whether the gap between the packing In the planting stage, the operators on the work ve- wheels is large enough to ensure the correct pres- hicle must adopt a correct posture (with their feet sure is applied to the root ball (see “Adjusting the resting on the footboard (G) and must agree - to- packing efficiency”...
- Seite 70 INFORMATION FOR USE Night-time work or poor visibility conditions Working at night or in poor visibility conditions increases proper lighting must be provided to ensure safe work. the risks arising from machine use; in these conditions, Transit on public roads When transporting the work vehicle / tractor assembly, WARNING the regulations of the highway code must always be...
-
Seite 71: Maintenance Advice
MAINTENANCE INFORMATION Maintenance advice Maintenance work must be carried out with the work maintenance envisaged in the instruction manual. vehicle on flat, compact ground, with the tractor en- Special maintenance operations require a special- gine off, parking brake engaged, and ignition key re- ised workshop on the premises which meets the moved, and adopting all the necessary safety meas- requirements specified by the relative laws in force... - Seite 72 MAINTENANCE INFORMATION Tyres check Check the tyres for wear and if they feature tears or signs The pressure must be checked with the weight of the of ageing, they must be replaced. work vehicle entirely on the ground and with nothing Check tyres pressure and restore if necessary (see “Tech- and nobody on the work vehicle.
- Seite 73 MAINTENANCE INFORMATION Lubrication points diagram Lubricate the parts shown at the times and in the ways Use universal grease for traction in farming and industri- specified. al machinery, which is water-repellent with a 180° drop Before lubricating, clean the components concerned point.
- Seite 74 INFORMATION CONCERNING REPLACEMENTS Safety advice concerning replacements When replacing worn or damaged parts, original the premises which meets the requirements speci- spares must always be used. fied by the relative laws in force (appropriate equip- Special maintenance operations (non included in ment suitably trained staff etc.);...
- Seite 75 INFORMATION CONCERNING REPLACEMENTS Replacing the driving wheel chain (Rapid Shift) UN41-0511MM For this operation, proceed as outlined below. 4) Move the tensioner (D) and remove the chain (E). 1) Move the lever (C) to lift the wheel in order to slacken CAUTION off the chain.
- Seite 76 INFORMATION CONCERNING REPLACEMENTS Replacing the ploughshare UN41-0159NI Proceed as outlined below. NOTICE 1) Remove the circlip (A). During assembly, fit the plant control plate inside the 2) Unscrew the wing nut (B). ploughshare. 3) Lift and hold the clamping device (D). Make sure the flexible plate is centred with respect 4) Push the ploughshare forwards and turn it so it is fac- to the ploughshare (see “Adjusting the flexible plate...
- Seite 77 INFORMATION CONCERNING REPLACEMENTS For this operation, proceed as outlined below. 11) Check the position of the flexible plate with respect to the ploughshare (see “Adjusting the flexible plate Loosen the wing nut (A). position”). Turn the lock lever (B). 12) Tighten the screws (D). Push the share forwards and turn it so it is facing 13) Refit the share in the work position.
- Seite 78 INFORMATION CONCERNING REPLACEMENTS English language Use and maintenance...
-
Seite 79: Inhaltsverzeichnis
SOMMAIRE 1 INFORMATIONS GENERALES........................1 2 INFORMATIONS TECHNIQUES ........................3 3 INFORMATIONS CONCERNANT LA SECURITE ................10 4 INFORMATIONS CONCERNANT LA MANUTENTION ET L’INSTALLATION ......11 5 INFORMATIONS CONCERNANT LES REGLAGES ................14 6 INFORMATIONS CONCERNANT L’UTILISATION................23 7 INFORMATIONS CONCERNANT L’ENTRETIEN ................. 29 8 INFORMATIONS CONCERNANT LES REMPLACEMENTS ............. - Seite 80 Objectif du manuel ............................1 Pentes admises ..............................5 Période d’inactivité prolongée de la machine opératrice ............... 28 Principaux éléments ............................3 Problèmes, causes, solutions........................30 Protections ................................5 Recommandations pour la sécurité d’emploi ..................23 Recommandations pour l’entretien ......................29 Recommandations relatives à la sécurité lors des remplacements ..........32 Recommandations relatives à...
-
Seite 81: Informations Generales
INFORMATIONS GENERALES Objectif du manuel Le manuel a été réalisé par le constructeur pour fournir DANGER les informations nécessaires et les critères à suivre à tous ceux qui interagisssent avec la repiqueuse, également Il fournit des informations ou des procédures qui, si dénommée dans la suite du manuel machine opératri- elles ne sont pas strictement suivies, provoquent des blessures graves voire la mort. - Seite 82 INFORMATIONS GENERALES Modalités à suivre pour les demandes d’assistance La machine est livrée aux conditions en vigueur à l’achat - le manque d’entretien et spécifiées sur le contrat de vente. - la non observation totale ou partielle des instructions d’utilisation et d’entretien - Toute modification non autorisée par le constructeur - l’utilisation de pièces de rechange non originales ou - l’usage impropre de la machine...
-
Seite 83: Description Générale
INFORMATIONS TECHNIQUES Description générale La machine opératrice a été conçue et construite pour (lorsqu’elles sont au contact du sol) et par la marche du la mise en terre de plants (par exemple des plants de lé- tracteur. gumes, de fleurs, de tabac, élevés dans une pépinière, Le plant tombe par gravité... -
Seite 84: Dimensions D'encombrement
TRIUM/2 TRIUM/3 TRIUM/4 TRIUM/5 TRIUM/6 UN41-0132MF Caractéristiques techniques TRIUM/1 TRIUM/2 TRIUM/3 TRIUM/4 TRIUM/5 TRIUM/6 Puissance requise pour le tracteur Distance minimale entre les rangs (distributeur avec 6 -10 pots) Distance minimale entre les rangs (distributeur avec 12 pots) standard minimale 14 - maximale 50... -
Seite 85: Déclaration De Conformité
Déclare, sous sa propre responsabilité, que les machines repiqueuses en question: Budrio TRIUM/1, TRIUM/2, TRIUM/3, TRIUM/4, TRIUM/5, TRIUM/6 sont conformes aux Exigences Essentielles de Sécurité et CHECCHI & MAGLI s.r.l de Sauvegarde de la Santé de la Directive 2006/42/CE. -
Seite 86: Signaux De Sécurité Et D'information
INFORMATIONS TECHNIQUES Signaux de sécurité et d’information L’illustration représente la position et la signification des ATTENTION plaques de sécurité. Vérifier que les plaques sont lisibles; dans le cas contraire, les nettoyer et, si elles sont endommagées, les remplacer en les appliquant dans leur position d’origine. - Seite 87 INFORMATIONS TECHNIQUES L’illustration représente la position et la signification des plaques appliquées (Rapid Shift). UN41-0618IN A) Plaque distance entre les plants (standard): ap- B) Plaque distance entre les plants (standard): appli- pliquée sur la boîte de vitesse “Rapid Shift de droite”, quée sur la boîte de vitesse “Rapid Shift de gauche”, elle indique les pignons à...
-
Seite 88: Accessoires En Option
Porte-plateaux supplémentaire à 6 niveaux Niveau porte-plateaux supplémentaire à 6 niveaux Sincromicro TRIUM, microgranulateur à distribution localisée et synchronisée sur toute ligne ou pour tout plant (ne peut pas être fourni pour des machines déjà en service) Séparateur de mottes profondeur réglable Kit soc étroit TRIUM... -
Seite 89: Risques Résiduels
INFORMATIONS TECHNIQUES Risques résiduels En phase de conception et de construction, le construc- teur a veillé en particulier aux aspects de la sécurité ; tou- tefois, les risques décrits persistent. - Danger de coupure et de sectionnement entre le dis- tributeur (A) et le disque de distribution (B) sur chaque unité... -
Seite 90: Informations Concernant La Securite
INFORMATIONS CONCERNANT LA SECURITE Lire attentivement ce manuel avant de procéder aux En cas de panne, éviter les interventions de répara- opérations d’utilisation, d’entretien ou à d’autres in- tion sur place si l’on n’est pas certain d’opérer dans terventions sur la machine opératrice. un milieu adéquat et si l’on ne dispose pas d’un équipement adéquat. -
Seite 91: Informations Concernant La Manutention Et L'installation
Pour limiter l’encombrement de l’emballage, la machine est démontée en un ou plusieurs colis. UN41-0004AF Dimensions indicatives de l’emballage TRIUM (distributeur 6 - 10 pots) TRIUM/1 TRIUM/2 TRIUM/3 TRIUM/4 TRIUM/5... -
Seite 92: Déballage Et Montage
INFORMATIONS CONCERNANT LA MANUTENTION ET L’INSTALLATION UN41-0077GF Déballage et montage Au déballage, contrôler l’état et la quantité exacte des ATTENTION composants; en cas de dégâts, signaler au revendeur ou directement au constructeur les dommages subis dans Le montage de la machine opératrice doit être réalisé un délai de 8 jours à... - Seite 93 Les modalités de levage sont valables pour tous les mo- ATTENTION dèles de machines opératrices spécifiés dans le manuel. Sur les modèles TRIUM/1, TRIUM/3, TRIUM/5 démonter Durant la phase de levage, faire attention aux oscilla- le siège pour permettre le montage de l’outil de levage.
-
Seite 94: Informations Concernant Les Reglages
INFORMATIONS CONCERNANT LES REGLAGES Recommandations relatives à la sécurité pour ce qui concerne les réglages Les interventions de réglage doivent être effectuées de contact retirée du tableau de bord; prendre tou- sur un terrain plat et compact; le moteur du tracteur tes les mesures nécessaires pour opérer en toute sé- doit être coupé, le frein de stationnement tiré, la clé... - Seite 95 INFORMATIONS CONCERNANT LES REGLAGES Réglage de l’efficacité du tassement Régler minutieusement la distance entre les roues tas- Plus la distance entre les roues est grande, moins le tas- seuses (B) suivant les exigences. sement est efficace. UN41-0140MF Suivre la description. 3) Régler ensuite les racloirs (C) (voir “Réglage du racloir des roues tasseuses”).
- Seite 96 INFORMATIONS CONCERNANT LES REGLAGES Réglage de la profondeur de repiquage UN41-0142NI Suivre la description. profondeur du sillon. 3) Après avoir effectué le réglage, bloquer la poignée au 1) Agir sur l’arrêt (B) pour libérer la poignée (A). moyen de l’arrêt (B). 2) Tourner la poignée (A) pour augmenter ou réduire la Réglage de la charge du rouet Suivre la description.
- Seite 97 INFORMATIONS CONCERNANT LES REGLAGES Réglage de la position du disque flexible UN41-0614IN Pour cette opération, suivre la description. Visser l’écrou (C). Repositionner le soc dans la position de travail. Desserrer l’écrou à ailettes (A). Vérifier que le dispositif Plant Control (E) se trouve à Tourner le levier de sécurité...
-
Seite 98: Equipement Standard
INFORMATIONS CONCERNANT LES REGLAGES 10 - 12 10 - 12 10 - 12 10 - 12 UN41-0608IN Réglage de la distance entre les plants La distance entre deux plants est déterminée par le nom- bre de dents des pignons installés. On peut monter différentes séries de pignons pour obte- nir la distance nécessaire entre les plants. - Seite 99 INFORMATIONS CONCERNANT LES REGLAGES EQUIPEMENT 14 - 50 RAPID SHIFT (D) Distance entre les plants N° dents des pignons inches z 1 z 1 z 2 z 3 z 4 z 5 z 6 5 - 1/2 6 - 3/4 7 - 7/8 8 - 5/8 9 - 1/2...
- Seite 100 INFORMATIONS CONCERNANT LES REGLAGES EQUIPEMENT EN OPTION 26 - 81 RAPID SHIFT (G) Distance entre les plants N° dents des pignons inches z 1 z 1 z 2 z 3 z 4 z 5 z 6 10 - 1/4 14 - 5/8 15 - 5/16 18 -1/8 15 18...
- Seite 101 INFORMATIONS CONCERNANT LES REGLAGES Réglage de la charge de l’unité de repiquage Le groupe de réglage est généralement monté dans la Le groupe (B) permet d’augmenter ou de réduire ul- position (A1). térieurement le poids du groupe (A) sur les roues de Le groupe (A) dans la position (A1) permet de réduire le compactage.
- Seite 102 INFORMATIONS CONCERNANT LES REGLAGES Réglage du débrayage automatique de sécurité UN41-0147MF Le débrayage automatique a pour but de préserver Pour le réglage, suivre la description. les organes de transmission contre les surcharges (par 1) Tourner la bague (A) en sens horaire pour augmenter exemple en cas de blocage du distributeur, etc.).
-
Seite 103: Description Des Commandes
INFORMATIONS CONCERNANT L’UTILISATION Recommandations pour la sécurité d’emploi Ne confier l’utilisation de la machine qu’à du person- manuel d’utilisation du tracteur). nel autorisé, en bonne santé, dûment formé et muni du permis de conduire pour les tracteurs. Nettoyer les éléments d’appui des pieds pour éviter les pertes d’équilibre lorsqu’on monte ou descend de S’assurer que ni des personnes ni des animaux ne se la machine. -
Seite 104: Attelage Et Dételage De La Machine Opératrice Du Tracteur
INFORMATIONS CONCERNANT L’UTILISATION Attelage et dételage de la machine opératrice du tracteur ATTENTION ATTENTION Le raccordement de la machine opératrice au tracteur N’atteler la machine opératrice qu’à une tracteur est l’un des moments les plus dangereux car il pour- d’une puissance adéquate et équipé d’un dispositif rait exiger l’intervention simultanée de plusieurs per- de levage conforme aux normes en vigueur respec- sonnes accomplisant des manœuvres synchronisées... -
Seite 105: Réglage Du Siège
INFORMATIONS CONCERNANT L’UTILISATION Réglage du siège Une position de travail incorrecte fatigue l’opérateur qui pourrait effectuer des opérations erronées; aussi, avant de commencer son travail, il doit régler et bloquer le siège dans la position de confort maximum. Suivre la description. 1) Desserrer les vis (A) et régler le siège en hauteur. -
Seite 106: Changement De Rapport De Transmission (Rapid Shift)
INFORMATIONS CONCERNANT L’UTILISATION Changement de rapport de transmission (Rapid Shift) ATTENTION ATTENTION Couper le moteur du tracteur, extraire et conserver la Le changement de rapport de transmission a pour clé de contact pour prévenir tout danger d’accident but la réalisation du repiquage souhaité. au cours de la phase du changement de rapport de Voir le chapitre “Réglage de la distance entre les transmission. - Seite 107 INFORMATIONS CONCERNANT L’UTILISATION Evaluer si la distance entre les roues tasseuses est 2) Arrêter le tracteur et faire monter les opérateurs à bord de la machine. correcte pour exercer la bonne pression sur la mot- Durant la phase de repiquage, les opérateurs doivent te (voir “Réglage de l’efficacité...
-
Seite 108: Circulation Sur La Voie Publique
INFORMATIONS CONCERNANT L’UTILISATION Travail nocturne ou en cas de faible visibilité Le travail nocturne ou la faible visibilité augmente les telles conditions, disposer un éclairage adéquat pour risques dérivant de l’utilisation de la machine: dans de opérer en toute sécurité. Circulation sur la voie publique Durant le transfert du groupe machine opératrice-trac- teur, observer les prescriptions du code de la route. -
Seite 109: Recommandations Pour L'entretien
INFORMATIONS CONCERNANT L’ENTRETIEN Recommandations pour l’entretien Les interventions d’entretien doivent être effectuées tuer à l’exploitation, consulter les interventions d’en- sur un terrain plat et compact; le moteur du tracteur tretien ordinaire prévues dans le manuel d’instruc- doit être coupé, le frein de stationnement tiré, la clé tions. -
Seite 110: Contrôle Des Pneus
INFORMATIONS CONCERNANT L’ENTRETIEN Contrôle des pneus Vérifier l’état d’usure des pneus et la présence de déchi- (voir tableau “Caractéristiques techniques”). Le contrôle rures ou de signes de vieillissement; le cas échéant, les de la pression doit être effectué avec le poids de la ma- remplacer. - Seite 111 INFORMATIONS CONCERNANT L’ENTRETIEN Schéma des points de lubrification Lubrifier les organes illustrés en respectant les délais et Utiliser une graisse universelle pour moteurs de machi- les modalités indiqués. nes agricoles et industrielles, hydrofuge avec un point Avant d’effectuer la lubrification, nettoyer soigneuse- de goutte à...
- Seite 112 INFORMATIONS CONCERNANT LES REMPLACEMENTS Recommandations relatives à la sécurité lors des remplacements Le remplacement des composants usés ou endom- à l’exploitation ayant les caractéristiques indiquées magés doit être effectué avec des pièces de rechange par la législation en vigueur en la matière (équipe- originales.
- Seite 113 INFORMATIONS CONCERNANT LES REMPLACEMENTS Remplacement de la chaîne de la roue motrice (Rapid Shift) UN41-0511MM Pour cette opération, suivre la description. 4) Déplacer le galopin (D) et enlever la chaîne (E). 1) Actionner le levier (C) pour soulever la roue afin de PRUDENCE réduire la tension de la chaîne.
- Seite 114 INFORMATIONS CONCERNANT LES REMPLACEMENTS Remplacement du soc UN41-0159NI Suivre la description. INFORMATION 1) Enlever l’anneau élastique (A). Au cours de la phase de montage, mettre la lamelle 2) Dévisser l’écrou à ailettes (B). coulissante (Plant Control) à l’intérieur du soc. 3) Soulever le dispositif de blocage (D) et le maintenir Vérifier que le disque flexible est centré...
-
Seite 115: Démolition De La Machine Opératrice
INFORMATIONS CONCERNANT LES REMPLACEMENTS Pour cette opération, suivre la description. 11) Vérifier la position du disque flexible par rapport au soc (voir “Réglage de la position du disque flexi- Desserrer l’écrou à ailettes (A). ble”). Tourner le levier de sécurité (B). 12) Visser les vis (D). - Seite 116 INFORMATIONS CONCERNANT LES REMPLACEMENTS Langue française Utilisation et entretien...
- Seite 117 INHALTSANGABE 1 ALLGEMEINE INFORMATIONEN ......................1 2 TECHNISCHE INFORMATIONEN ......................3 3 INFORMATIONEN ZUR SICHERHEIT ....................10 4 INFORMATIONEN ZUR BEWEGUNG UND ZUR INSTALLATION ..........11 5 INFORMATIONEN ZU DEN EINSTELLUNGEN .................. 14 6 INFORMATIONEN ZUR BENUTZUNG ....................23 7 INFORMATIONEN ZUR WARTUNG...................... 29 8 INFORMATIONEN ZU DEN ERSETZUNGEN..................
- Seite 118 Geräusch ................................8 Glossar ...................................2 Haftungsausschließung ..........................2 Hauptelemente ..............................3 Heben und Transport der Arbeitsmaschine ..................13 Informations- und Sicherheitssignale ......................6 Inhaltsangabe ..............................III Konformitätserklärung ............................5 Kontrolle der Reifen ............................30 Laden, Transport und Abladen der Arbeitsmaschine - Schlepper..........13 Längere Nichtbenutzung der Arbeitsmaschine .................. 28 Plan der Schmierungspunkte ........................
-
Seite 119: Allgemeine Informationen
ALLGEMEINE INFORMATIONEN Zweck des Handbuches Das vorliegenden Handbuch wurde vom Hersteller enthalten, wurden einige Symbole angewendet, deren verfasst, um die erforderlichen Informationen und die Bedeutung im Folgenden beschrieben wird. anzuwendenden Kriterien zu liefern, die alle befolgen müssen, die mit der Umpflanzmaschine umgehen, die GEFAHR im weiteren Verlauf des Handbuches auch als Arbeits- Weist auf Informationen oder Verfahren hin, die zum... -
Seite 120: Haftungsausschließung
ALLGEMEINE INFORMATIONEN Haftungsausschließung Die Maschine wird zu den Bedingungen geliefert, die oder durch unbefugtes Personal zum Zeitpunkt des Verkaufs gültig sind und im Kaufver- - Unterlassungen bei der Wartung trag angegeben werden. - die vollständige oder teilweise Nichtbeachtung der Anweisungen zur Benutzung und Wartung - Sämtliche vom Hersteller nicht genehmigte Abände- - die Benutzung von Ersatzteilen von Drittanbietern rungen... -
Seite 121: Allgemeine Beschreibung
TECHNISCHE INFORMATIONEN Allgemeine Beschreibung Die Arbeitsmaschine wurde für das Umpflanzen von angetrieben (wenn sie im Kontakt mit dem Boden sind) Pflanzen (zum Beispiel kleinen Gemüsepflanzen, Blu- sowie von der Fahrt des Schleppers. men, Tabakpflanzen, in Gewächshäusern vorgezogenen Die Pflanze fällt durch Schwerkraft vom Distributor in Pflanzen usw.) entwickelt und konstruiert, die in Torf mit die Furche, die von der Pflugschar gebildet wird, und die konischer oder zylindrischer Form wurzeln, auch mit... -
Seite 122: Abmessungen
TRIUM/1 TRIUM/2 TRIUM/3 TRIUM/4 TRIUM/5 TRIUM/6 UN41-0132MF Technische Eigenschaften TRIUM/1 TRIUM/2 TRIUM/3 TRIUM/4 TRIUM/5 TRIUM/6 Erforderliche Leistung des Schleppers Minimaler Reihenabstand (Verteiler mit 6 - 10 Bechern) Minimaler Reihenabstand (Verteiler mit 12 Bechern) Standard min. 14 - max. 50 Mindestreihenabstand Option 31 - 82 min. -
Seite 123: Zulässiges Gefälle
40054 – BUDRIO (BOLOGNA) - ITALIA UNI EN 13857 zur Maschinensicherheit. erklärt auf eigene Verantwortung, dass die Umpflanzma- schinen: Budrio TRIUM/1, TRIUM/2, TRIUM/3, TRIUM/4, TRIUM/5, TRIUM/6 den wesentlichen Anforderungen der EU-Richtlinie CHECCHI & MAGLI s.r.l 2006/42 zur Sicherheit und zum Schutz der Gesundheit Gesetzlicher Vertreter entsprechen. -
Seite 124: Informations- Und Sicherheitssignale
TECHNISCHE INFORMATIONEN Informations- und Sicherheitssignale Die Abbildung gibt die Position und die Bedeutung der ACHTUNG Sicherheitsschilder an. Stellen Sie sicher, dass die Schilder leserlich sind; rei- nigen Sie sie anderenfalls oder bringen Sie neue in der Originalposition an. UN41-0617IN A) Gefahrenschild: bitte lesen Sie das Handbuch zur F) Informationsschild: die Kette im Inneren der Benutzung und Wartung vor der Benutzung der Ar- Schutzverkleidung schmieren, auf der das Schild an-... - Seite 125 TECHNISCHE INFORMATIONEN Die Abbildung zeigt die Position und die Bedeutung der angebrachten Schilder (Rapid Shift). UN41-0618IN A) Schild zum Pflanzabstand (Standard): gibt an der B) Schild zum Pflanzabstand (Standard): gibt an der Schaltung “Rapid Shift rechts” angebracht, je nach Schaltung “Rapid Shift links” angebracht, je nach dem dem Pflanzabstand die zu wählenden Ritzel an.
-
Seite 126: Sonderzubehör
Schalenhalter in Querrichtung mit zwei Ablagen 400 cm (einschließlich hinterem Rahmen und Auflagerädern) Zusätzlicher Schalenhalter mit 6 Ebenen Zusätzliche Ablage für Schalenhalter mit 6 Ablagen Sincromicro TRIUM, Mikrogranulatstreuer zur stellenweisen und synchronisierten Verteilung in allen Reihen oder an jeder Pflanze (nicht für bereits in Betrieb befindliche Maschinen lieferbar) Einstellbarer Klumpenräumer Kit für schmale Pflugschar TRIUM... -
Seite 127: Restrisiken
TECHNISCHE INFORMATIONEN Restrisiken Der Hersteller hat in der Phase der Entwicklung und Kon- struktion besondere Sorgfalt auf die Sicherheitsaspekte verwendet; die beschriebenen Risiken konnten jedoch nicht vermieden werden. - Schneid- und Abschergefahr zwischen dem Verteiler (A) und der Verteilerscheibe (B) an jeder Pflanzeinheit. - Einzieh- und Erfassungsgefahr durch die Organe in Be- wegung. -
Seite 128: Informationen Zur Sicherheit
INFORMATIONEN ZUR SICHERHEIT Bitte lesen Sie das vorliegende Handbuch aufmerk- Vermeiden Sie bei Funktionsstörungen Reparatu- sam vor sämtlichen Eingriffen zur Benutzung und reingriffe vor Ort, falls die Arbeitsumgebung nicht Wartung oder sonstigen Eingriffen an der Arbeits- sicher ist und falls keine geeigneten Werkzeuge ver- maschine. -
Seite 129: Informationen Zur Bewegung Und Zur Installation
Transportfahrzeug sowie vom Bestimmungsort Die Abbildung gibt den üblicherweise verwendeten Ver- ausgewählt. packungstyp wieder. Zur Begrenzung der Abmessungen der Verpackung wird UN41-0004AF Unverbindliche Abmessungen der Verpackung TRIUM (Verteiler mit 6 - 10 Bechern) TRIUM/1 TRIUM/2 TRIUM/3 TRIUM/4 TRIUM/5 TRIUM/6 Packstücke... -
Seite 130: Auspacken Und Montage
INFORMATIONEN ZUR BEWEGUNG UND ZUR INSTALLATION UN41-0077GF Auspacken und Montage Kontrollieren Sie in der Phase des Auspackens die Un- versehrtheit und die genaue Anzahl der Komponenten; ACHTUNG benachrichtigen Sie bei Schäden innerhalb von 8 Tagen Die Montage der Arbeitsmaschine muss bei den zu- vom Erhalt der Maschine den Händler oder direkt den gelassenen Kundendienststellen oder Vertragswerk- Herstellern. -
Seite 131: Heben Und Transport Der Arbeitsmaschine
Arbeitsmaschine, die im vorliegenden Handbuch be- handelt werden. Achten Sie beim Heben auf die Schwingungen der Bei den Modellen TRIUM/1, TRIUM/3, TRIUM/5 muss Last, da die Aufnahmestelle niemals genau dem der Sitz abgebaut werden, um die Montage der Hebe- Schwerpunkt entspricht. -
Seite 132: Informationen Zu Den Einstellungen
INFORMATIONEN ZU DEN EINSTELLUNGEN Sicherheitsempfehlungen für die Einstellungen Die Einstelleingriffe müssen auf ebenem und kom- Zündschlüssel ausgeführt werden; dabei müssen paktem Untergrund mit abgeschaltetem Schlepper, sämtliche Maßnahme angewendet werden, die zur angezogener Feststellbremse und abgezogenem Gewährleistung der Sicherheit erforderlich sind. Einstellung des Abstands der Verdichtungsräder zur Pflugschar Die Verdichtungsräder (C) dienen zum Umwälzen und Stellen Sie den Abstand der Verdichtungsräder zur Pflug-... -
Seite 133: Einstellung Der Verdichtungseffizienz
INFORMATIONEN ZU DEN EINSTELLUNGEN Einstellung der Verdichtungseffizienz Stellen Sie den Abstand zwischen den Verdichtungsrä- Je größer der Abstand zwischen den Rädern, desto ge- dern (B) wie erforderlich ein. ringer ist die Verdichtungseffizienz. UN41-0140MF Gehen Sie wie beschrieben vor. und arretieren Sie sie mit den Stiften (A) in ihrer Posi- tion. -
Seite 134: Einstellung Der Umpflanztiefe
INFORMATIONEN ZU DEN EINSTELLUNGEN Einstellung der Umpflanztiefe UN41-0142NI Gehen Sie wie beschrieben vor. 2) Drehen Sie den Knauf (A), um die Tiefe der Pflugschar zu erhöhen oder zu verringern. 1) Betätigen Sie den Feststeller (B), um den Knauf zu lö- 3) Arretieren Sie nach der Einstellung den Knauf mit sen. -
Seite 135: Einstellen Der Position Der Flexiblen Platte
INFORMATIONEN ZU DEN EINSTELLUNGEN Einstellen der Position der flexiblen Platte UN41-0614IN Gehen Sie für diesen Vorgang wie beschrieben vor. Ziehen Sie die Mutter (C) fest. Positionieren Sie die Pflugschar wieder in der Ar- Lockern Sie die Flügelmutter (A). beitsposition. Drehen Sie den Sicherheitshebel (B). Prüfen Sie, ob sich die Plant Control- Vorrichtung (E) Schieben Sie die Pflugschar nach vorne und drehen im Inneren der Pflugschar befindet. -
Seite 136: Einstellung Des Pflanzenabstands
INFORMATIONEN ZU DEN EINSTELLUNGEN 10 - 12 10 - 12 10 - 12 10 - 12 UN41-0608IN Einstellung des Pflanzenabstands Der Abstand zwischen einer Pflanze und der folgenden wird durch die Anzahl der Zähne der installierten Ritzel bestimmt. Es können verschiedene Ritzelserien montiert werden, um den gewünschten Pflanzenabstand zu erzielen. -
Seite 137: Ausstattung 14 - 50 Rapid Shift (Rechts)
INFORMATIONEN ZU DEN EINSTELLUNGEN AUSSTATTUNG 14 - 50 RAPID SHIFT (RECHTS) Pflanzenabstand Zahnzahl Ritzel inches z 1 z 1 z 2 z 3 z 4 z 5 z 6 5 - 1/2 6 - 3/4 7 - 7/8 8 - 5/8 9 - 1/2 10 - 1/4 12 -3/8... -
Seite 138: Sonderausstattung 26 - 81R Apid Shift (Links)
INFORMATIONEN ZU DEN EINSTELLUNGEN SONDERAUSSTATTUNG 26 - 81R APID SHIFT (LINKS) Pflanzenabstand Zahnzahl Ritzel inches z 1 z 1 z 2 z 3 z 4 z 5 z 6 10 - 1/4 14 - 5/8 15 - 5/16 18 -1/8 20 - 1/2 21 - 5/8 25 - 5/8... -
Seite 139: Einstellung Der Last Der Umpflanzeinheit
INFORMATIONEN ZU DEN EINSTELLUNGEN Einstellung der Last der Umpflanzeinheit Die Regelvorrichtung wird gewöhnlich in Position (A1) Die Baugruppe (B) erlaubt ein weiteres Erhöhen oder montiert. Verringern des von der Baugruppe (A) auf die Stampfrä- der ausgeübten Gewichtes. Die Baugruppe (A) in Position (A1) ermöglicht es, das Das Gewicht (Last), das auf die Stampfräder ausgeübt Gewicht auf den Stampfrädern zu verringern. -
Seite 140: Einstellung Der Automatischen Sicherheitsentkupplung
INFORMATIONEN ZU DEN EINSTELLUNGEN Einstellung der automatischen Sicherheitsentkupplung UN41-0147MF Die automatische Entkupplung hat den Zweck, die An- Gehen Sie bei der Einstellung wie beschrieben vor. triebsorgane gegen Überlastungen zu schützen (zum 1) Drehen Sie die Überwurfmutter (A) in Uhrzeigersinn, Beispiel beim Blockieren des Distributors oder des Aus- um den Widerstand der Kupplung zu vergrößern werfers). -
Seite 141: Informationen Zur Benutzung
INFORMATIONEN ZUR BENUTZUNG Sicherheitsempfehlungen zur Benutzung Gestatten Sie die Benutzung der Maschine aus- Reinigen Sie die Auflageelemente der Füße, um ei- schließlich dazu befugtem Personal mit gutem Ge- nen Verlust des Gleichgewichts in den Phasen des sundheitszustand, angemessener Ausbildung sowie Anhebens und des Absenkens zu vermeiden. -
Seite 142: Anbringen Und Ablösen Der Arbeitsmaschine Am Schlepper
INFORMATIONEN ZUR BENUTZUNG Anbringen und Ablösen der Arbeitsmaschine am Schlepper ACHTUNG ACHTUNG Schließen Sie die Arbeitsmaschine nur an einen Das Anbringen der Arbeitsmaschine am Schlepper Schlepper mit ausreichender Leistung sowie mit ist einer der gefährlichsten Momente, da gleichzeitig Kraftheber an, der den geltenden Bestimmungen mehrere Personen mit synchronisierten Manövern entspricht;... -
Seite 143: Einstellung Des Sitzes
INFORMATIONEN ZUR BENUTZUNG Einstellung des Sitzes Eine falsche Arbeitsposition ermüdet den Bediener, der falsche Operationen ausführen könnten; stellen Sie da- her vor Arbeitsbeginn den Sitz in die bequemste Posi- tion ein. Gehen Sie wie beschrieben vor. 1) Lösen Sie die Schrauben (A) und stellen Sie die Sitz- höhe ein. -
Seite 144: Übertragungsverhältnis Der Schaltung (Rapid Shift)
INFORMATIONEN ZUR BENUTZUNG Übertragungsverhältnis der Schaltung (Rapid Shift) ACHTUNG ACHTUNG Schalten Sie den Motor der Zugmaschine aus, ziehen Der Wechsel des Übertragungsverhältnisses hat den Sie den Zündschlüssel ab und verwahren Sie ihn, um Zweck, den gewünschten Pflanzabstand zu erzielen. der Unfallgefahr während des Wechsels des Übertra- Nehmen Sie auf das Kapitel “Einstellung des Pflan- gungsverhältnisses vorzubeugen. - Seite 145 INFORMATIONEN ZUR BENUTZUNG tungsrädern, damit der richtige Druck auf den Be- Während des Umpflanzens müssen die Bediener reich des Wurzelballens ausgeübt wird (siehen “Ein- sicher und mit den Füßen auf der Fußraste (G) sit- stellung der Verdichtungseffizienz” - Seite 15). zen und die richtige Fahrgeschwindigkeit mit dem Drehen Sie die Hebel (E) gleich weit, um den oder Schlepperfahrer vereinbaren.
-
Seite 146: Arbeit Bei Nacht Oder Bei Schlechter Sicht
INFORMATIONEN ZUR BENUTZUNG Arbeit bei Nacht oder bei schlechter Sicht Bei der Arbeit bei Nacht oder bei schlechter Sicht neh- bei diesen Bedingungen ist für ein sicheres Arbeiten eine men die Risiken durch die Benutzung der Maschine zu: angemessene Beleuchtung erforderlich. Fahrt auf öffentlichen Straßen Beachten Sie beim Fahren mit dem Schlepper und ange- bauter Arbeitsmaschine die Bestimmungen der Straßen-... -
Seite 147: Informationen Zur Wartung
INFORMATIONEN ZUR WARTUNG Empfehlungen für die Wartung Die Wartungseingriffe müssen auf ebenem und kom- sungshandbuch beschrieben werden, können im Un- paktem Untergrund mit abgeschaltetem Schlepper, ternehmen durchgeführt werden. angezogener Feststellbremse und abgezogenem Für außerordentliche Eingriffe ist eine Werkstatt er- Zündschlüssel ausgeführt werden; dabei müssen forderlich, die den Bestimmungen der geltenden Ge- sämtliche Maßnahme angewendet werden, die zur setzgebung entspricht (angemessene Ausrüstung,... -
Seite 148: Reinigung Der Arbeitsmaschine
INFORMATIONEN ZUR WARTUNG Kontrolle der Reifen Überprüfen Sie den Abnutzungszustand der Reifen; falls Tabelle). sie Risse oder Anzeichen von Alterung aufweisen, müs- Die Kontrolle des Reifendrucks muss mit auf dem Boden sen sie ersetzt werden. lastendem Gewicht der Arbeitsmaschine und ohne Ge- Kontrollieren Sie den Reifendruck stellen Sie ihn gegebe- wicht an Bord (Personen oder Sachen) vorgenommen nenfalls wieder her (siehen “Technische Eigenschaften”... -
Seite 149: Plan Der Schmierungspunkte
INFORMATIONEN ZUR WARTUNG Plan der Schmierungspunkte Schmieren Sie die abgebildeten Organe unter Beach- rungsvorrichtungen vor, um eine Verunreinigung des tung der angegebenen Zeiten und Modalitäten. aufgetragenen Schmiermittels zu vermeiden. Nehmen Sie vor dem Schmieren eine sorgfältige Reini- Verwenden Sie wasserabstoßendes Universalfett mit gung der betroffenen Komponenten und der Schmie- einem Tropfpunkt von 180°... -
Seite 150: Informationen Zu Den Ersetzungen
INFORMATIONEN ZU DEN ERSETZUNGEN Sicherheitsempfehlungen für die Ersetzungen Bei der Ersetzung von abgenutzten oder beschä- Handbuch nicht behandelt werden) ist eine Werk- digten Komponenten dürfen ausschließlich Origi- statt erforderlich, die den Bestimmungen der gel- nalersatzteile verwendet werden. tenden Gesetzgebung entspricht (angemessene Für außerordentliche Eingriffe (die im vorliegenden Ausrüstung, geeignetes Personal usw.);... -
Seite 151: Ersetzung Der Kette Der Umpflanzeinheit
INFORMATIONEN ZU DEN ERSETZUNGEN Austausch der Kette des Antriebsrades (Rapid Shift) UN41-0511MM Gehen Sie für diesen Vorgang wie beschrieben vor. 4) Bewegen Sie den Spanner (D) und entfernen Sie die Kette (E). 1) Betätigen Sie den Hebel (C), um das Rad mit dem Zweck zu heben, die Spannung der Kette zu verrin- VORSICHT gern. -
Seite 152: Ersetzung Der Pflugschar
INFORMATIONEN ZU DEN ERSETZUNGEN Ersetzung der Pflugschar UN41-0159NI Gehen Sie wie beschrieben vor. INFORMATION 1) Entfernen Sie den Elastikring (A). Bringen Sie die verschiebbare Lamelle (Plant Cont- 2) Lösen Sie die Flügelmutter (B). rol) bei der Montage in das Innere der Pflugschar. 3) Heben Sie die Blockiervorrichtung (D) an und halten Prüfen Sie, ob die flexible Platte zur Pflugschar zent- sie sie angehoben. -
Seite 153: Verschrottung Der Arbeitsmaschine
INFORMATIONEN ZU DEN ERSETZUNGEN Gehen Sie für diesen Vorgang wie beschrieben vor. 11) Prüfen Sie die Position der flexiblen Platte zur Pflug- schar (siehen “Einstellen der Position der flexiblen Lockern Sie die Flügelmutter (A). Platte”). Drehen Sie den Sicherheitshebel (B). 12) Ziehen Sie die Schrauben (D) fest. - Seite 154 INFORMATIONEN ZU DEN ERSETZUNGEN Deutsche Sprache Gebrauch und Wartung...
- Seite 155 INDICE 1 INFORMACIONES GENERALES .......................1 2 INFORMACIONES TECNICAS ........................3 3 INFORMACIONES SOBRE SEGURIDAD ....................10 4 INFORMACIONES SOBRE DESPLAZAMIENTO E INSTALACION ..........11 5 INFORMACIONES SOBRE LAS REGULACIONES................14 6 INFORMACIONES SOBRE EL USO ....................... 23 7 INFORMACIONES SOBRE EL MANTENIMIENTO ................29 8 INFORMACIONES SOBRE LAS SUSTITUCIONES ................
- Seite 156 Modalidades de ejecución del trasplante ..................... 26 Objeto del manual ............................1 Posicionamiento del asiento ........................25 Protecciones ................................5 Recomendaciones a observar para un uso seguro ................23 Recomendaciones de seguridad para efectuar las regulaciones ..........14 Recomendaciones de seguridad para efectuar las sustituciones ..........32 Recomendaciones relativas al mantenimiento ...................
-
Seite 157: Informaciones Generales
INFORMACIONES GENERALES Objeto del manual El manual ha sido realizado por el fabricante para pro- mayor relevancia, han sido utilizados algunos símbolos porcionar las informaciones necesarias y los criterios a cuyo significado se indica a continuación. seguir a todas las personas que deben interactuar con la trasplantadora, que a continuación en el manual tam- PELIGRO bién será... -
Seite 158: Exclusión De Responsabilidad
INFORMACIONES GENERALES Exclusión de responsabilidad La máquina se entrega en las condiciones válidas exis- do o no autorizado tentes en el momento de la compra que aparezcan es- - la falta de mantenimiento pecificadas en el contrato de venta. - la inobservancia total o parcial de las instrucciones de uso y mantenimiento - Cualquier modificación no autorizada por el fabrican- - el uso de recambios no originales o que no sean espe-... -
Seite 159: Descripción General
INFORMACIONES TECNICAS Descripción general La máquina operadora ha sido diseñada y fabricada para dora (cuando están en contacto con el terreno) y por la colocar en terreno plantas (por ejemplo plantas hortíco- marcha del tractor. las, florícolas, de tabaco, cultivadas en viveros, etc.) radi- La planta cae por gravedad desde el distribuidor en el cadas en terrones de turba de forma cónica o piramidal surco creado por la reja y las ruedas apisonadoras repa-... - Seite 160 INFORMACIONES TECNICAS Dimensiones En la ilustración se indican las dimensiones de las máquinas operadoras. TRIUM/1 TRIUM/2 TRIUM/3 TRIUM/4 TRIUM/5 TRIUM/6 UN41-0132MF Características técnicas TRIUM/1 TRIUM/2 TRIUM/3 TRIUM/4 TRIUM/5 TRIUM/6 Potencia de tracción requerida Distancia mínima interhilera (distribuidor con 6 - 10 vasos) Distancia mínima interhilera...
- Seite 161 EN 13857 relativas a la seguridad de la maquinaria. declara bajo su propia responsabilidad que las máquinas trasplantadoras: Budrio TRIUM/1, TRIUM/2, TRIUM/3, TRIUM/4, TRIUM/5, TRIUM/6 reúnen los Requisitos Esenciales sobre Seguridad y Protec- CHECCHI & MAGLI s.r.l ción de la Salud establecidos por la Directiva 2006/42/CE.
-
Seite 162: Señales De Seguridad E Información
INFORMACIONES TECNICAS Señales de seguridad e información En la ilustración se presentan la posición y el significado ATENCION de las placas de seguridad. Controlar que las placas estén legibles; en caso con- trario limpiarlas y, de estar dañadas, sustituirlas con placas nuevas a aplicar en las mismas posiciones ori- ginales. - Seite 163 INFORMACIONES TECNICAS La ilustración presenta la posición y el significado de las placas aplicadas (Rapid Shift). UN41-0618IN A) Placa interplanta (estándar): aplicada en el cambio B) Placa interplanta (estándar): aplicada en el cambio “Rapid Shift derecho” indica los piñones a elegir en “Rapid Shift izquierdo”...
-
Seite 164: Accesorios Opcionales
Porta-bandejas adicional con 6 repisas Repisa adicional porta-bandejas con 6 repisas Sincromicro TRIUM, microgranulador de distribución localizada y sincronizada en cada línea o en cada planta (no puedes ser suministrado para máquinas ya en servicio) Separador de terrón profundidad regulable Kit reja estrecha TRIUM Kit reja estándar TRIUM... -
Seite 165: Riesgos Residuales
INFORMACIONES TECNICAS Riesgos residuales En las fases de diseño y producción el fabricante ha pres- tado particular atención a todo lo relativo a la seguridad, no obstante lo cual subsisten los riesgos que a continua- ción se indican. - Peligro de corte y seccionamiento entre el distribuidor (A) y el disco de distribución (B) en cada unidad de transplante. -
Seite 166: Informaciones Sobre Seguridad
INFORMACIONES SOBRE SEGURIDAD Léase atentamente este manual antes de ejecutar las En caso de avería, no ejecutar intervenciones de re- operaciones de uso o mantenimiento y otras inter- paración en el lugar mismo si no existe seguridad de venciones en la máquina operadora. operar en ambiente idóneo y no se dispone de las herramientas adecuadas. - Seite 167 Para limitar las dimensiones del embalaje, la máquina es desmontada para preparar uno, dos o más fardos. UN41-0004AF Dimensiones aproximadas del embalaje TRIUM (distribuidor 6 - 10 vasos) TRIUM/1 TRIUM/2 TRIUM/3 TRIUM/4...
-
Seite 168: Desembalaje Y Montaje
INFORMACIONES SOBRE DESPLAZAMIENTO E INSTALACION UN41-0077GF Desembalaje y montaje Al desembalar, controlar la integridad y exacta cantidad ATENCION de los componentes; en caso de constatar la existencia de daños, comunicar el hecho al revendedor o directa- El montaje de la máquina operadora debe realizar- mente al fabricante dentro de los ocho días sucesivos a se en los centros de asistencia autorizados o en los la recepción de la máquina. - Seite 169 En la fase de elevación prestar atención a las oscila- En los modelos TRIUM/1, TRIUM/3, TRIUM/5 el asiento ciones de la carga, ya que el punto de toma no queda debe ser desmontado para poder aplicar el utensilio de nunca perfectamente equilibrado.
- Seite 170 INFORMACIONES SOBRE LAS REGULACIONES Recomendaciones de seguridad para efectuar las regulaciones Las intervenciones de regulación deben efectuarse do, la llave de encendido extraída y adoptando todas sobre terreno plano y compacto, con el motor del las medidas necesarias para garantizar la seguridad. tractor apagado, el freno de estacionamiento aplica- Regulación de distancia de las ruedas apisonadoras respecto de la reja Las ruedas apisonadoras (C) sirven para reforzar y com-...
- Seite 171 INFORMACIONES SOBRE LAS REGULACIONES Regulación de la eficacia de apisonamiento Regular adecuadamente la distancia entre las ruedas Mientras mayor es la distancia entre las ruedas, menor es apisonadoras (B) en función de lo requerido. el efecto de apisonamiento. UN41-0140MF Proceder de la manera indicada. doras (B) y bloquearlas mediante las clavijas (A).
- Seite 172 INFORMACIONES SOBRE LAS REGULACIONES Regulación de profundidad de trasplante UN41-0142NI Proceder de la manera indicada. didad del surco. 3) Después de haber efectuado la regulación, bloquear 1) Operar con la pieza fijadora (B) para liberar el pomo. el pomo mediante la pieza fijadora (B). 2) Girar el pomo (A) para aumentar o reducir la profun- Regulación de carga de la ruedecilla Proceder de la manera indicada.
- Seite 173 INFORMACIONES SOBRE LAS REGULACIONES Regulación posición plato flexible UN41-0614IN Para efectuar esta operación proceder de la manera que Enroscar la tuerca (C). se indica. Reposicionar la reja en su posición de trabajo. Verificar que el dispositivo Plant Control (E) esté en Aflojar la tuerca con aletas (A).
- Seite 174 INFORMACIONES SOBRE LAS REGULACIONES 10 - 12 10 - 12 10 - 12 10 - 12 UN41-0608IN Regulación interplanta La distancia entre las plantas es determinada por el nú- mero de dientes de los piñones que están instalados. Es posible instalar diferentes series de piñones a fin de obtener la distancia interplanta requerida en cada caso.
- Seite 175 INFORMACIONES SOBRE LAS REGULACIONES PREPARACION 14 - 50 RAPID SHIFT (DER.) Distancia interplanta N° dientes piñones inches z 1 z 1 z 2 z 3 z 4 z 5 z 6 5 - 1/2 6 - 3/4 7 - 7/8 8 - 5/8 9 - 1/2 10 - 1/4...
- Seite 176 INFORMACIONES SOBRE LAS REGULACIONES PREPARACION OPCIONAL 26 - 81 RAPID SHIFT (IZQ.) Distancia interplanta N° dientes piñones inches z 1 z 1 z 2 z 3 z 4 z 5 z 6 10 - 1/4 14 - 5/8 15 - 5/16 18 -1/8 13 22 20 - 1/2...
- Seite 177 INFORMACIONES SOBRE LAS REGULACIONES Regulación de carga de la unidad de trasplante Normalmente la unidad de regulación es montada en La unidad (B) permite aumentare o reducir ulteriormen- posición (A1). te el peso ejercido por la unidad (A) sobre las ruedas api- La unidad (A) en posición (A1) permite reducir el peso en sonadoras.
- Seite 178 INFORMACIONES SOBRE LAS REGULACIONES Regulación del desacoplamiento automático de seguridad UN41-0147MF El desacoplamiento automático tiene por objeto pro- Para efectuar esta regulación proceder de la manera in- teger los órganos de transmisión respecto de sobrecar- dicada. gas (por ejemplo en caso de bloquearse el distribuidor 1) Girar la virola (A) en sentido horario para aumentar la resistencia de desacoplamiento (menor sensibili- etc.).
-
Seite 179: Informaciones Sobre El Uso
INFORMACIONES SOBRE EL USO Recomendaciones a observar para un uso seguro Permitir el uso de la máquina sólo a personal auto- el manual de uso del tractor). rizado, en buen estado de salud, adecuadamente capacitado y poseedor de la respectiva licencia de Limpiar las superficies de apoyo de los pies para evi- conducción para tractores. - Seite 180 INFORMACIONES SOBRE EL USO Conexión y desconexión de la máquina operadora al tractor ATENCION ATENCION Acoplar la máquina operadora sólo a un tractor de El acoplamiento de la máquina operadora al tractor adecuada potencia, provisto de elevador conforme es una de las operaciones de mayor riesgo, ya que con lo establecido por las normas vigentes, respe- puede requerir la intervención simultánea de varias tándose el peso máximo sobre el eje trasero y el peso...
- Seite 181 INFORMACIONES SOBRE EL USO Posicionamiento del asiento Una posición incorrecta de trabajo provoca cansancio excesivo al operador, el que podría ejecutar operaciones incorrectas, por lo que es importante regular y fijar el asiento en la posición de máximo confort antes de co- menzar el trabajo.
- Seite 182 INFORMACIONES SOBRE EL USO Cambio de relación de transmisión (Rapid Shift) ATENCION ATENCION Apagar el motor del tractor y extraer y guardar la lla- El cambio de la relación de transmisión tiene por ob- ve del encendido para prevenir el peligro de acciden- jeto obtener la interplanta requerida.
- Seite 183 INFORMACIONES SOBRE EL USO Verificar que la distancia entre las ruedas apisona- 2) Detener el tractor y hacer subir a bordo de la máqui- doras sea correcta a fin de ejercer la presión más na los operadores. Durante el trasplante, los opera- adecuada sobre el terrón (ver “Regulación de la efi- dores deben asumir una posición adecuada, con los cacia de apisonamiento”...
- Seite 184 INFORMACIONES SOBRE EL USO Trabajo nocturno o con escasa visibilidad ciones se debe utilizar iluminación adecuada a fin de ga- El trabajo nocturno o la escasa visibilidad aumenta los riesgos derivados del uso de la máquina: en tales situa- rantizar la seguridad laboral. Circulación por carreteras Al trasladar el conjunto máquina operadora-tractor de- ATENCION...
-
Seite 185: Informaciones Sobre El Mantenimiento
INFORMACIONES SOBRE EL MANTENIMIENTO Recomendaciones relativas al mantenimiento Las intervenciones de mantenimiento deben efec- indicadas en el manual de instrucciones. tuarse sobre terreno plano y compacto, con el motor Para efectuar las intervenciones extraordinarias se del tractor apagado, el freno de estacionamiento debe disponer de un taller interno en la empresa con aplicado, la llave de encendido extraída y adoptan- características conformes según las normas vigen-... -
Seite 186: Inconvenientes, Causas Y Remedios
INFORMACIONES SOBRE EL MANTENIMIENTO Control de los neumáticos Controlar el nivel de desgaste de los neumáticos, los que neumáticos (ver tabla “Características técnicas”). El con- deberán ser sustituidos en caso de presentar desgarros trol de la presión debe efectuarse con el peso de la má- o signos de envejecimiento. - Seite 187 INFORMACIONES SOBRE EL MANTENIMIENTO Esquema puntos de lubricación Lubricar los órganos ilustrados según frecuencias y con Usar grasa universal para vehículos y maquinarias agrí- modalidades indicadas. colas e industriales, hidrorrepelente y con punto de go- Antes de lubricar, limpiar cuidadosamente los compo- teo a 180°.
- Seite 188 INFORMACIONES SOBRE LAS SUSTITUCIONES Recomendaciones de seguridad para efectuar las sustituciones La sustitución de componentes desgastados o daña- taller interno de la empresa con características con- dos debe efectuarse utilizando recambios originales. formes según las normas vigentes (equipos adecua- Para efectuar intervenciones extraordinarias (no dos, personal idóneo, etc.);...
- Seite 189 INFORMACIONES SOBRE LAS SUSTITUCIONES Sustitución cadena rueda motriz (Rapid Shift) UN41-0511MM Para efectuar esta operación proceder de la manera que 4) Operar con el tensor (D) para desmontar la cadena se indica. (E). 1) Accionar la palanca (C) para elevar la rueda a fin de PRUDENCIA reducir la tensión de la cadena.
- Seite 190 INFORMACIONES SOBRE LAS SUSTITUCIONES Sustitución de la reja UN41-0159NI Proceder de la manera indicada. INFORMACION 1) Desmontar el anillo elástico (A). En la fase de montaje poner la lámina corrediza (Plant 2) Desenroscar la tuerca con aletas (B). Control) en el interior de la reja. 3) Alzar y mantener alzado el dispositivo de bloqueo Verificar que el plato flexible está...
- Seite 191 INFORMACIONES SOBRE LAS SUSTITUCIONES Para efectuar esta operación proceder de la manera que 11) Verificar la posición del plato flexible respecto de la se indica. reja (ver “Regulación posición del plato flexible”). 12) Enroscar los tornillos (D). Aflojar la tuerca con aletas (A). 13) Reposicionar la reja en su posición de trabajo.
- Seite 192 INFORMACIONES SOBRE LAS SUSTITUCIONES Lengua español Uso y mantenimiento...
- Seite 193 NOTE / NOTES / REMARQUES / ANMERKUNGEN / NOTAS...
- Seite 196 VIA GUIZZARDI, 38 40054 BUDRIO (BO) - ITALY TEL. (051) 80.02.53 - FAX (051) 69.20.611 www.checchiemagli.com info@checchiemagli.com...