Herunterladen Inhalt Inhalt Diese Seite drucken
Klarstein Kingsize Kamado Bedienungsanleitung

Klarstein Kingsize Kamado Bedienungsanleitung

Vorschau ausblenden Andere Handbücher für Kingsize Kamado:

Werbung

Verfügbare Sprachen
  • DE

Verfügbare Sprachen

  • DEUTSCH, seite 1
KINGSIZE
Kamado-Grill
Kamado Grill
Barbacoa Kamado
Kamado Grill
Kamado Griglia
10028282
www.klarstein.com

Werbung

Inhaltsverzeichnis
loading

Inhaltszusammenfassung für Klarstein Kingsize Kamado

  • Seite 1 KINGSIZE Kamado-Grill Kamado Grill Barbacoa Kamado Kamado Grill Kamado Griglia 10028282 www.klarstein.com...
  • Seite 3: Inhaltsverzeichnis

    Sehr geehrter Kunde, wir gratulieren Ihnen zum Erwerb Ihres Gerätes. Lesen Sie die folgenden Hinweise sorgfältig durch und befolgen Sie diese, um möglichen Schäden vorzubeugen. Für Schäden, die durch Missachtung der Hinweise und unsachgemäßen Gebrauch entstehen, übernehmen wir keine Haftung. Scannen Sie den folgenden QR-Code, um Zugriff auf die aktuellste Bedienungsanleitung und weitere Informationen rund um das Produkt zu erhalten:...
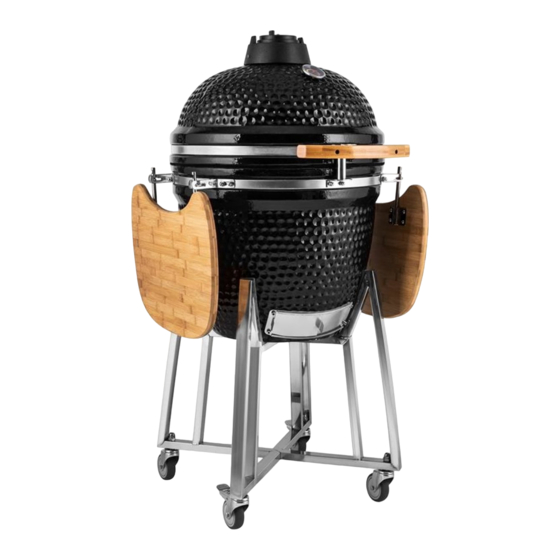
  • Seite 4: Technische Daten

    TECHNISCHE DATEN Artikelnummer 10028282 Maße gesamter Grill 132 x 125 x 75 cm Maße Keramikdom ohne Ablagen 54 x 68 cm Gewicht 87 kg SICHERHEITSHINWEISE WARNUNG Erstickungsgefahr! Der Grill ist nur zur Nutzung im Freien bestimmt. Er darf nicht in Gebäuden, Garagen oder anderen geschlossenen Bereichen verwendet werden.
  • Seite 5 VORSICHT! VERWENDEN SIE KEIN ALKOHOL ODER BENZIN ZUM ANZÜNDEN ODER WIEDERANZÜNDEN!
  • Seite 6: Lieferumfang

    LIEFERUMFANG Montageteile 1 (4x) 6 (1x) 10 (2x) 11 (1x) 7 (1x) 8 (1x) C (2x) 12 (1x) D (2x) 2 (2x) 9 (1x) 13 (2x) 3 (2x) 14 (2x) 4 (2x) 15 (2x) 5 (1x) Montagematerial 10 (2x) 11 (1x) C (2x) 12 (1x) D (2x)
  • Seite 7: Zusammenbau

    ZUSAMMENBAU WICHTIG - Entfernen Sie vor Gebrauch alle Verpackungen, bewahren Sie jedoch die Sicherheitshinweise auf und lagern Sie sie zusammen mit diesem Produkt. Stellen Sie sicher, dass der Deckel vor der Montage geschlossen ist. Schritt 1: Die vier vorgeschraubten Rollen (2 & 3) an jeder der vier Halterungen (1) befestigen, indem Sie sie durch das Loch drücken.
  • Seite 8 Schritt 4: Befestigen Sie die Halterungen (1) an den Querstreben (4), indem Sie 16 Schrauben (A) verwenden. Überprüfen Sie vor dem Aufsetzen des Grillkörpers (9), dass der Ständer sicher ist. Schritt 5: Entfernen Sie vor den Aufsetzen des Grillkörpers (9) alle Gegenstände im Grill, um ihn leichter anheben zu können.
  • Seite 9 Schritt 8: Wenn der Grillkörper fest auf dem Untergestell angebracht ist, setzen Sie den Keramikeinsatz (8), die Kohlenplatte (7), den oberen Ring (6) und den Rost (5) zusammen. Schritt 9: Drücken Sie die Hebel der Rollen (2) nach unten, um das Wegrollen des Grills zu verhindern.
  • Seite 10 Schritt 10: Anbringung des Griffs (10) am Deckel (9). Bringen Sie Griffhalterungen (1 1) mit den beiden vormontierten Schrauben und Hutmuttern an. Befestigen Sie die Griffe (1 1) an den Halterungen (10) an. Verwenden Sie 2 Schrauben (C) und Muttern (E). Schritt 11: Um den oberen Luftauslass (12) am Grillkörper (9) anzubringen, setzen Sie ihn auf und richten ihn an beiden Bohrungen aus.
  • Seite 11 Schritt 14: Setzen Sie die beiden Seitentischscharniere in die Seitentischhalterungen (14, 15).
  • Seite 12: Zubehör (Separat Käuflich)

    ZUBEHÖR (SEPARAT KÄUFLICH) Zweite Grillebene Rostfreier Stahlrost für zusätzliche Grillkapazitäten Pizzastein mit Standbeinen Wesentliches Zubehör zum Garen von Pizzen, Fladenbroten und anderen Speisen. Clip Damit können Sie den Pizzastein einen Grillrost heben, wenn sie zur Handhabung zu heiß sind. Regenplane Wenn der Grill abgekühlt ist und nicht verwendet wird, können Sie ihn mit der Regenplane.
  • Seite 13: Bedienungshinweise

    BEDIENUNGSHINWEISE Grill anzünden • Legen Sie zum Anzünden eine aufgerollte Zeitung mit Anzündwürfeln oder feste Feueranzünder auf die Kohlenplatte. Legen Sie anschließend 2 oder 3 Handvoll Grillkohle auf die Zeitung. • Verwenden Sie zum Anzünden kein Benzin, Alkohol, Flüssiganzünder oder Ähnliches.
  • Seite 14: Reinigung

    Reinigung • Der Grill ist selbstreinigend. Erhitzen Sie den Grill 30 Minuten lang auf 260 °C. Alle Lebensmittel und Ablagerungen werden verbrannt. • Verwenden Sie kein Wasser oder andere Arten von Reinigungsmitteln, um das Innere Ihres Grills zu reinigen. Die Wände sind porös und absorbieren alle verwendeten Flüssigkeiten, was dazu führen kann, dass der Grill bricht, wenn der Ruß...
  • Seite 15 Grilltipps für den unteren Temperaturbereich • Zünden Sie die Holzkohlestücke gemäß der obigen Anleitung an. Bewegen oder schüren Sie die Kohlen nicht, nachdem sie angezündet sind. • Öffnen Sie die untere Öffnung vollständig und lassen Sie den Deckel für ca. 10 Minuten offen, um ein kleines Bett mit heißer Glut zu erzeugen.
  • Seite 16 Grilltipps für den hohen Temperaturbereich 1. Die Kohlestücke nach obiger Anleitung anzünden. 2. Den Deckel schließen und die Lüftungsschlitze vollständig öffnen. 3. Überwachen Sie den Grill, bis er auf die gewünschte Temperatur gestiegen ist (siehe Leitfaden Grilltemperaturen). 4. Schließen Sie die obere Entlüftung auf halbem Weg und überprüfen Sie die Temperatur noch einige Minuten lang.
  • Seite 17: Leitfaden Grilltemperaturen

    LEITFADEN GRILLTEMPERATUREN Fleischsorte Grillzeit Obere Untere Luftzufuhr Luftzufuhr Langsames Garen / Räuchern (110 °C - 135 °C) Rinderbrust 2 Std. pro 500 g. Gezupftes 2 Std. pro Schweinefleisch 500 g. Ganzes Huhn 3-4 Std. Rippen 3-5 Std. Braten über 9 Std. Langsames Garen / Räuchern (110 °C - 135 °C) Fisch 15-20 Min.
  • Seite 19 Dear Customer, Congratulations on purchasing this equipment. Please read this manual carefully and take care of the following hints to avoid damages. Any failure caused by ignoring the items and cautions mentioned in the instruction manual is not covered by our warranty and any liability. Scan the QR code to get access to the latest user mannual and other information about the product.
  • Seite 20: Technical Data

    TECHNICAL DATA Item number 10028282 Dimensions entire grill 132 x 125 x 75 cm Dimensions ceramic dome 54 x 68 cm Weight 87 kg SAFETY INSTRUCTIONS WARNING Danger of suffocation! The fi replace is only intended for use in the Free determined.
  • Seite 21 CAUTION! DO NOT USE SPIRIT OR PETROL FOR LIGHTING OR RE-LIGHTING!
  • Seite 22: Parts List

    PARTS LIST Parts 1 (4x) 6 (1x) 10 (2x) 11 (1x) 7 (1x) 8 (1x) C (2x) 12 (1x) D (2x) 2 (2x) 9 (1x) 13 (2x) 3 (2x) 14 (2x) 4 (2x) 15 (2x) 5 (1x) Mounting parts 10 (2x) 11 (1x) C (2x) 12 (1x)
  • Seite 23 ASSEMBLY IMPORTANT - Remove any packaging before use, but retain the safety instructions and store them with this product. Ensure that the lid is closed prior to assembly. Step 1: Attach the four pre-threaded castor wheels (2 & 3) to each of the four brackets (1) by pushing them through the hole.
  • Seite 24 Step 4: Secure the brackets (1) to the cross pieces (4) by using the 16x screws (A). Make sure the cart is secure and all of the screws are tight before placing the Kamado Grill (9) into it. Step 5: To place the Kamado Grill (9) on the cart first remove all of the items that are inside of the grill to make lifting easier.
  • Seite 25 Step 8: When the grill is securely placed on the cart add the firebox (8), charcoal plate (7), upper ring (6) and cooking grill (5) inside of the Kamado Grill as displayed in the assembly diagram. Step 9: Press down on the castor levers (2) to lock the castor wheels to ensure the Kamado can not move when in use.
  • Seite 26 Step 10: To attach the handle (10) to the lid of the Kamado Grill (9) start by attaching 2x handle brackets (1 1) using the 2x pre-attached bolts and dome headed nuts. Attach the handle (1 1) to the brackets (10) using 2x bolts (C) and nuts (E). Step 11: To attach the top vent (12) to the Kamado Grill (9) place it on top and align both the bolt holes.
  • Seite 27 Step 14: The Kamado Grill is now ready to use but please ensure that you have read the curing instructions thoroughly prior to use.
  • Seite 28 ACCESSORIES (AVAILABE FOR PURCHASE) Raised cooking grid Stainless steel extra grill for additional cooking space Pizza stone with support frame Essential accessory for evenly cooking chrispy pizzas, flat breads and other delights. Clip tool Allows you to lift the pizza stone or cooking grills whenthey are too hot to handle.
  • Seite 29 OPERATION INSTRUCTIONS Curing the Kamado • To start a fire place rolled up newspaper with some lighter cubes or solid firelighters on the charcoal plate in the base of the Kamado. Then place 2 or 3 handfuls of lump charcoal over the top of the newspaper. •...
  • Seite 30 Cleaning • The Kamado is self cleaning. Heat it up to 260ºC for 30 minutes and it will scorch off all of the food and debris. • DO NOT use water or any other types of cleaning product to clean the inside of your Kamado.
  • Seite 31 Low temperture cooking guide • Light the lump charcoal according to the the instructions above. Do not move or stoke the coals once lit. • Open the bottom vent fully and leave the lid open for about 10 minutes to build a small bed of hot embers.
  • Seite 32 High temperature cooking guide 1. Light the lump charcoal according to the the instructions. 2. Close the lid and fully open the top and bottom vents. 3. Monitor the Kamado until it has risen to the desired temperature. See temperature cooking guide.
  • Seite 33 COOKING TEMPERATURE GUIDE Meat type Cooking Top vent Bottom vent time Slow cook / Smoke (110 ºC-135 ºC) Beef Brisket 2 hrs. per lb. Pulled Pork 2 hrs. per lb. Whole Chicken 3-4 hrs. Ribs 3-5 hrs. Roasts 9 hrs. Grill / Roast (160 ºC - 180 ºC) Fish 15-20 min.
  • Seite 35 Chère cliente, cher client, Toutes nos félicitations pour l’acquisition de ce nouvel appareil. Veuillez lire attentivement et respecter les instructions de ce mode d’emploi afin d’éviter d’éventuels dommages. Le fabricant ne saurait être tenu pour responsable des dommages dus au non- respect des consignes de sécurité...
  • Seite 36: Fiche Technique

    FICHE TECHNIQUE Numéro d'article 10028282 Dimensions totales du barbecue 132 x 125 x 75 cm Dimensions du dôme en 54 x 68 cm céramique sans les étagères Poids 87 kg CONSIGNES DE SÉCURITÉ MISE EN GARDE Risque d‘étouffement ! Le barbecue est destiné à un usage en extérieur uniquement.
  • Seite 37 ATTENTION ! NE PAS UTILISER D‘ALCOOL OU D‘ESSENCE POUR ALLUMER OU RALLUMER !
  • Seite 38: Contenu De L'emballage

    CONTENU DE L'EMBALLAGE Pièces d'assemblage 1 (4x) 6 (1x) 10 (2x) 11 (1x) 7 (1x) 8 (1x) C (2x) 12 (1x) D (2x) 2 (2x) 9 (1x) 13 (2x) 3 (2x) 14 (2x) 4 (2x) 15 (2x) 5 (1x) Matériel de montage 10 (2x) 11 (1x) C (2x)
  • Seite 39: Assemblage

    ASSEMBLAGE IMPORTANT - Retirez tous les emballages avant utilisation, mais conservez les consignes de sécurité et stockez-les avec ce produit. Assurez-vous que le couvercle est fermé avant le début du montage. Étape 1: Fixez les quatre roulettes pré-boulonnées (2 et 3) à chacun des quatre supports (1) en les poussant à...
  • Seite 40 Étape 4: Fixez les supports (1) aux croisillons (4) à l’aide de 16 vis (A). Avant de monter le corps du barbecue (9), assurez-vous que le support est bien fixé. Étape 5: Avant de placer le corps du barbecue (9), retirez-en tous les objets pour faciliter le levage.
  • Seite 41 Étape 8: Lorsque le corps du barbecue est bien fixé à la base, placez l’insert en céramique (8), la plaque de carbone (7), la bague supérieure (6). Étape 9: Appuyez sur les leviers des roulettes (2) pour empêcher le barbecue de rouler.
  • Seite 42 Étape 10: Fixation de la poignée (10) sur le couvercle (9). Montez les poignées (1 1) avec les deux vis pré montées et les écrous borgnes. Fixez les poignées (1 1) aux supports (10). Utilisez 2 vis (C) et écrous (E). Étape 11: Pour fixer la sortie d’air supérieure (12) au corps du barbecue (9), installez- la et alignez-la sur les deux trous.
  • Seite 43 Étape 14: Placez les deux charnières de la table d'appoint dans les supports (14, 15).
  • Seite 44: Accessoires (Achetables Séparément)

    ACCESSOIRES (ACHETABLES SÉPARÉMENT) Deuxième niveau de cuisson Grille en inox pour plus de capacité de cuisson au barbecue Pierre à pizza avec pieds de support Accessoire indispensable pour cuire les pizzas, le pain pita et d'autres plats. Clip Il vous sert à soulever la pierre à pizza d'une grille de cuisson si elle est trop chaude pour être prise à...
  • Seite 45: Consignes D'utilisation

    CONSIGNES D‘UTILISATION Allumage du barbecue • Pour allumer le barbecue, posez sur la plaque à charbon (7) un journal roulé avec un cube allume-feu ou un allume-feu solide. Ensuite, placez 2 ou 3 poignées de charbon sur le journal. • N‘utilisez pas d‘essence, d‘alcool, d‘allume barbecue liquide ou autre produit pour l‘éclairage.
  • Seite 46 Nettoyage • Le barbecue est autonettoyant. Faites chauffer le barbecue pendant 30 minutes à 260 °C. Toute la nourriture et les dépôts seront brûlés. • N‘utilisez pas d‘eau ou d‘autres types de nettoyants pour nettoyer l‘intérieur de votre barbecue. Les parois sont poreuses et absorbent tous les fluides utilisés, ce qui peut provoquer la rupture du barbecue si la suie s‘accumule excessivement.
  • Seite 47 Conseils pour les grillades dans la zone de température inférieure • Allumez les morceaux de charbon selon les instructions ci-dessus. Ne déplacez pas et ne remuez pas les braises après leur allumage. • Ouvrez complètement l’ouverture du bas et laissez le couvercle ouvert pendant environ 10 minutes pour former un petit lit de braises.
  • Seite 48 Conseils pour des grillades dans la zone de haute température Allumez les morceaux de charbon en suivant les instructions ci-dessus. Fermez le couvercle et ouvrez complètement les fentes de ventilation. Surveillez le barbecue jusqu‘à ce qu‘il atteigne la température désirée (voir le guide de température du barbecue).
  • Seite 49: Guide Des Témperatures Du Barbecue

    GUIDE DES TÉMPERATURES DU BARBECUE Type de Durée de Ventilation Ventilation viande cuisson supérieure inférieure Cuisson lente / fumage (110 à 135 °C) Poitrine de bœuf 2 h par 500 g. Viande de porc 2 h par effilochée 500 g. Poulet entier 3-4 h Côtes...
  • Seite 51 Gentile cliente, La ringraziamo per aver acquistato il dispositivo. La preghiamo di leggere attentamente le seguenti istruzioni per l’uso e di seguirle per evitare possibili danni tecnici. Non ci assumiamo alcuna responsabilità per danni scaturiti da una mancata osservazione delle avvertenze di sicurezza e da un uso improprio del dispositivo.
  • Seite 52: Dati Tecnici

    DATI TECNICI Numero articolo 10028282 Dimensioni del barbecue 132 x 125 x 75 cm Dimensioni della cupola in 54 x 68 cm ceramica senza appoggi Peso 87 kg AVVERTENZE DI SICUREZZA AVVERTIMENTO Pericolo di soffocamento! Il dispositivo è adatto solo all’utilizzo all’aperto.
  • Seite 53 ATTENZIONE! NON UTILIZZARE ALCOOL O BENZINA PER ACCENDERE O RIACCENDERE IL BRACIERE!
  • Seite 54: Materiale Di Montaggio

    VOLUMEN DI CONSEGNA Componenti di montaggio 1 (4x) 6 (1x) 10 (2x) 11 (1x) 7 (1x) 8 (1x) C (2x) 12 (1x) D (2x) 2 (2x) 9 (1x) 13 (2x) 3 (2x) 14 (2x) 4 (2x) 15 (2x) 5 (1x) Materiale di montaggio 10 (2x) 11 (1x)
  • Seite 55 MONTAGGIO IMPORTANTE – Prima dell’utilizzo, rimuovere tutto l’imballaggio. Conservare però le avvertenze di sicurezza insieme al prodotto. Assicurarsi che il coperchio sia chiuso prima del montaggio. 1° passaggio: Fissare le 4 rotelle preavvitate (2 & 3) su ciascuno dei quattro supporto (1), premendole attraverso il foro.
  • Seite 56 4° passaggio: Fissare i supporti (1) alle traverse (4) utilizzando 16 viti (A). Prima di posizionare il corpo del barbecue (9), controllare che il basamento sia stabile e sicuro. 5° passaggio: Prima di posizionare il corpo del barbecue (9), rimuovere tutti gli oggetti dal suo interno per poterlo sollevare più...
  • Seite 57 8° passaggio: Una volta montato saldamente il corpo del barbecue sul basamento, posizionare l’inserto in ceramica (8), la piastra della carbonella (7), l’anello superiore (6) e la griglia di cottura (5). 9° passaggio: Premere la leva delle rotelle (2) verso il basso per evitare che il barbecue si muova.
  • Seite 58 10° passaggio: Montaggio dell’impugnatura (10) sul coperchio (9). Montare i supporti dell’impugnatura (1 1) con entrambe le viti premontate e i dadi ciechi. Fissare le impugnature (1 1) ai supporti (10). Utilizzare 2 viti (C) e dadi (E). 11° passaggio: Per montare il componente per il rilascio dell’aria (12) al corpo del barbecue (9), poggiarlo sopra, orientandolo sui due fori.
  • Seite 59 14° passaggio: Inserire entrambe le cerniere del tavolo laterale nei supporti (14, 15).
  • Seite 60 ACCESSORI (ACQUISITABILI SEPARATAMENTE) Griglia aggiuntiva Griglia in acciaio inox per avere una maggiore superficie per la cottura. Pietra refrattaria con gambe di supporto Accessorio essenziale per preparare pizze, pane e altri piatti. Clip Per sollevare la pietra refrattaria o la griglia quando sono troppo calde.
  • Seite 61 ISTRUZIONI PER L’UTILIZZO Accendere la griglia • Poggiare sulla piastra per la carbonella un giornale arrotolato con diavolina o accenditore solido. Mettere poi 2 o 3 manciate di carbonella sopra al giornale. • Non utilizzare benzina, alcool, accenditore liquido o similari. Non mettere troppa carbonella.
  • Seite 62 Pulizia • La griglia è autopulente. Scaldarla per 30 minuti a 260 °C. Tutti i residui di cibo e i depositi verranno bruciati. • Non utilizzare acqua o altri detergenti per pulire l’interno della griglia. Le pareti sono porose e assorbono tutti i liquidi, causando la possibile rottura della griglia se la fuliggine diventa eccessiva.
  • Seite 63 Consigli per grigliare nel settore inferiore • Accendere la carbonella come descritto in precedenza. Non smuovere la carbonella dopo averla accesa. • Aprire completamente la fessura inferiore e lasciare aperto per 10 minuti il coperchio, in modo da creare un letto di braci. •...
  • Seite 64 Consigli per grigliare nel settore superiore Accendere la carbonella come descritto in precedenza. Chiudere il coperchio e aprire completamente le fessure di ventilazione. Controllare la griglia fino a quando ha raggiunto la temperatura desiderata. Consultare la guida per le temperature di cottura. Chiudere a metà...
  • Seite 65 GUIDA SULLE TEMPERATURA Tipo di carne Tempo di Afflusso Afflusso aria cottura aria inferiore superiore Cottura lenta/Affumicatura (110 °C – 135 °C) Petto di manzo 2 ore per 500 g. Straccetti di 2 ore per maiale 500 g. Pollo intero 3-4 ore.
  • Seite 67 Estimado cliente: Le felicitamos por la adquisición de este producto. Lea atentamente el siguiente manual y siga cuidadosamente las instrucciones de uso con el fin de evitar posibles daños. La empresa no se responsabiliza de los daños ocasionados por un uso indebido del producto o por haber desatendido las indicaciones de seguridad.
  • Seite 68: Datos Técnicos

    DATOS TÉCNICOS Número de artículo 10028282 Medidas del grill 132 x 125 x 75 cm Dimensiones cúpula 54 x 68 cm cerámica sin estantes Peso 87 kg INDICACIONES DE SEGURIDAD ADVERTENCIA ¡Peligro de asfi xia! La barbacoa está pensada únicamente para su uso en el exterior.
  • Seite 69 ¡ATENCIÓN! NO UTILICE ALCOHOL O GASOLINA PARA ENCENDER O REENCENDER!
  • Seite 70: Contenido Del Envío

    CONTENIDO DEL ENVÍO Componentes de ensamblaje 1 (4x) 6 (1x) 10 (2x) 11 (1x) 7 (1x) 8 (1x) C (2x) 12 (1x) D (2x) 2 (2x) 9 (1x) 13 (2x) 3 (2x) 14 (2x) 4 (2x) 15 (2x) 5 (1x) Material de montaje 10 (2x) 11 (1x)
  • Seite 71 MONTAJE IMPORTANTE - Retire todo el embalaje antes de utilizarlo, pero conserve y guarde las instrucciones de seguridad con este producto. Asegúrese de que la tapa esté cerrada antes del montaje. Paso 1: Fije las cuatro ruedas pre-atornilladas (2 y 3) a cada uno de los cuatro soportes (1) empujándolas a través del agujero.
  • Seite 72 Paso 4: Fije los soportes (1) a los travesaños (4) con 16 tornillos (A). Compruebe que el soporte está bien sujeto antes de colocar el cuerpo de la parrilla (9). Paso 5: Antes de colocar el cuerpo de la parrilla (9), retire todos los objetos que haya en la parrilla para facilitar su elevación.
  • Seite 73 Paso 8: Cuando el cuerpo de la parrilla esté firmemente unido a la base, monte el inserto de cerámica (8), la placa de carbón (7), el anillo superior (6) y la parrilla (5).  Paso 9: Empuje hacia abajo las palancas de las ruedas (2) para evitar que la parrilla se desplace.
  • Seite 74 Paso 10: Fije el asa (10) a la tapa (9). Fije los soportes de las asas (1 1) con los dos tornillos y tuercas ciegas premontados. Coloque las asas (1 1) en los soportes (10). Utilice 2 tornillos (C) y tuercas (E). Paso 11: Para fijar la rejilla de ventilación superior (12) al cuerpo de la parrilla (9), colóquela en su lugar y alinéela con ambos agujeros.
  • Seite 75 Paso 14: Coloque las dos bisagras de la mesa lateral en los soportes de la mesa lateral (14, 15).
  • Seite 76 ACCESORIOS (SE COMPRAN POR SEPARADO) Segundo nivel de parrilla Parrilla de acero inoxidable para una mayor capacidad de asado Piedra para pizza con patas Accesorio esencial para cocinar pizzas, panes planos y otros alimentos. Clip Esto le permite levantar la piedra de la pizza una rejilla de la parrilla cuando están demasiado calientes para manejar.
  • Seite 77 MANUAL DE INSTRUCCIONES Encender la barbacoa • Para encender la barbacoa, coloque un periódico enrollado con cubos de leña o encendedores sólidos en la placa de carbón. A continuación, coloque 2 o 3 puñados de carbón vegetal sobre el periódico. •...
  • Seite 78 Limpieza • La parrilla es autolimpiable. Calentar el grill a 260 °C durante 30 minutos. Toda la comida y los restos se quemarán. • No utilice agua ni otros tipos de agentes de limpieza para limpiar el interior de su parrilla.
  • Seite 79 Consejos para asar a baja temperatura • Enciende los trozos de carbón según las instrucciones anteriores. No mueva ni avive las brasas una vez encendidas. • Abra la ventilación inferior completamente y deje la tapa abierta durante unos 10 minutos para crear un pequeño lecho de brasas calientes. •...
  • Seite 80 Consejos para asar a alta temperatura 1. Encienda los trozos de carbón según las instrucciones anteriores. 2. Cierre la tapa y abra completamente las ranuras de ventilación. 3. Supervise la parrilla hasta que haya alcanzado la temperatura deseada (consulte la Guía de temperaturas de la parrilla). 4.
  • Seite 81 GUÍA DE TEMPERATURAS DE LA BARBACOA Tipo de carne Tiempo Arriba Abajo de asado Ventilación Ventilación Cocción lenta/ahumado (110ºC - 135ºC) Falda de ternera 2 horas cada 500 gr Cerdo 2 horas cada despiezado 500 gr Pollo entero 3-4 horas Costillas 3-5 horas Asar...

Inhaltsverzeichnis