Elmo Rietschle 2BV7 060 Instandsetzungsanleitung

Verwandte Anleitungen für Elmo Rietschle 2BV7 060


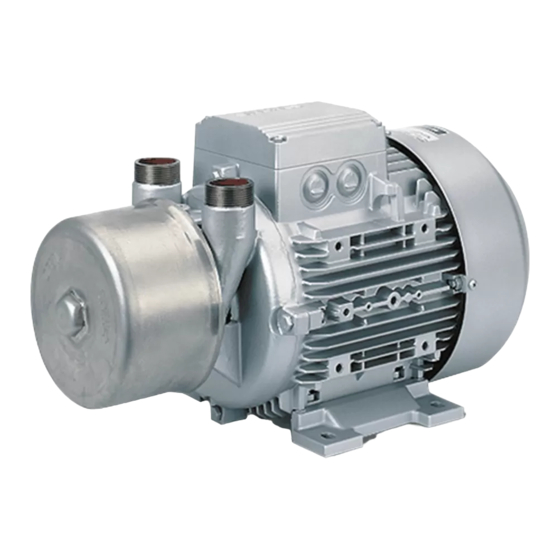
Inhaltszusammenfassung für Elmo Rietschle 2BV7 060
- Seite 1 Edition 01.2012 · 610.48060.02.300 Original Instandsetzungsanleitung/Repair Instructions · Deutsch/English Instandsetzungsanleitung L-BV7 Repair Instructions L-BV7 2BV7 060 2BV7 061 2BV7 070 2BV7 071 L-Serie L-Series Flüssig- keitsring Liquid Ring...
- Seite 2 © 2012 Gardner Denver Deutschland GmbH · Industriestraße 26 · 97616 Bad Neustadt · Germany Weitergabe sowie Vervielfältigung, Verbreitung und / oder Bearbeitung dieses Dokumentes, Verwer- tung und Mitteilung seines Inhaltes sind verboten, soweit nicht ausdrücklich gestattet. Zuwiderhand- lungen verpflichten zu Schadenersatz. Alle Rechte für den Fall der Patenterteilung, Gebrauchsmuster- oder Geschmacksmustereintragung vorbehalten.
-
Seite 3: Inhaltsverzeichnis
Inhaltsverzeichnis / Table of Contents Inhaltsverzeichnis / Table of Contents 1 Bestimmungsgemäße Verwendung / Intended use ................4 2 Demontage / Disassembly ........................5 Demontage Pumpengehäuse / Disassembly of pump casing ..........5 Demontage Haltescheibe / Disassembly of retaining washer...........5 Demontage Laufrad / Disassembly of impeller .................6 Demontage Steuerscheibe / Disassembly of port plate............7 Demontage Gleitringdichtung / Disassembly of mechanical seal ..........7 Demontage Lüfterhaube / Disassembly of fan guard ...............8... -
Seite 4: Bestimmungsgemäße Verwendung / Intended Use
Bestimmungsgemäße Verwendung / Intended use Bestimmungsgemäße Verwendung / Intended use Bestimmungsgemäße Verwendung Intended use Diese Reparaturanleitung ist nur für den These repair instructions are only intended for Gebrauch von zertifiziertem Fachpersonal use by certified, specially trained personnel. bestimmt. Entsprechendes Fachpersonal steht Corresponding specially trained personnel is in von Gardner Denver Deutschland GmbH available at workshops certified by Gardner... -
Seite 5: Demontage / Disassembly
Demontage / Disassembly Demontage / Disassembly Demontage Pumpengehäuse / Disassembly of pump casing Demontage Haltescheibe / Disassembly of retaining washer © Gardner Denver Deutschland GmbH 5 / 22 610.48060.02.300... -
Seite 6: Demontage Laufrad / Disassembly Of Impeller
Demontage / Disassembly Demontage Laufrad / Disassembly of impeller Empfohlenes Werkzeug / Recommended tool: KUKKO Nr. 202S00 Fa. Kukko, Herderstraße 10 D-42853 Remscheid 610.48060.02.300 6 / 22 © Gardner Denver Deutschland GmbH... -
Seite 7: Demontage Steuerscheibe / Disassembly Of Port Plate
Demontage / Disassembly Demontage Steuerscheibe / Disassembly of port plate Demontage Gleitringdichtung / Disassembly of mechanical seal © Gardner Denver Deutschland GmbH 7 / 22 610.48060.02.300... -
Seite 8: Demontage Lüfterhaube / Disassembly Of Fan Guard
Demontage / Disassembly Demontage Lüfterhaube / Disassembly of fan guard Demontage Sicherungsring DIN 471 / Disassembly of retaining ring DIN 471 for shafts Nur / Only: 2BV7 070-3..2BV7 071-1..2BV7 071-2..2BV7 071-3..610.48060.02.300 8 / 22 © Gardner Denver Deutschland GmbH... -
Seite 9: Demontage Außenlüfter / Disassembly Of Outer Fan
Demontage / Disassembly Demontage Außenlüfter / Disassembly of outer fan Demontage Lagerschild NS / Disassembly of end shield on non-drive-end © Gardner Denver Deutschland GmbH 9 / 22 610.48060.02.300... -
Seite 10: Demontage Federband / Disassembly Of Spring Strip
Demontage / Disassembly 2.10 Demontage Federband / Disassembly of spring strip Nur / Only: 2BV7 060-3..2BV7 061-1..2BV7 070-1..2BV7 070-2..2BV7 070-3..2BV7 071-1..2BV7 071-2..2BV7 071-3..Anzahl / Quantity: 2BV7 060-1..(1x) 2BV7 070-1..(2x) 2BV7 071-2..(2x) 2BV7 060-2..(1x) 2BV7 070-2..(2x) -
Seite 11: Demontage O-Ring / Disassembly Of O-Ring
Demontage / Disassembly 2.12 Demontage O-Ring / Disassembly of O-ring Nur / Only: 2BV7 070-1..2BV7 070-2..2BV7 070-3..2BV7 071-1..2BV7 071-2..2BV7 071-3..2.13 Demontage Sicherungsring DIN 472 / Disassembly of retaining ring DIN 472 for bores Sicherungsring lösen Remove retaining ring ©... -
Seite 12: Demontage Läufer / Disassembly Of Rotor
Demontage / Disassembly 2.14 Demontage Läufer / Disassembly of rotor 2.15 Demontage Rillenkugellager / Disassembly of deep-groove ball bearing 610.48060.02.300 12 / 22 © Gardner Denver Deutschland GmbH... -
Seite 13: Demontage Gleitringdichtung / Disassembly Of Mechanical Seal
Demontage / Disassembly 2.16 Demontage Gleitringdichtung / Disassembly of mechanical seal 2.17 Demontage Klemmenkasten / Disassembly of terminal box Anzahl / Quantity: 2BV7 060-1..(1x) 2BV7 060-2..(1x) 2BV7 060-3..(1x) 2BV7 061-1..(1x) 2BV7 070-1..(2x) Nur / Only: 2BV7 070-2..(2x) 2BV7 070-3..(2x) 2BV7 060-1.. -
Seite 14: Demontage Gehäusefuß / Disassembly Of Foot
Demontage / Disassembly 2.18 Demontage Gehäusefuß / Disassembly of foot Nur / Only: 2BV7 070-3..2BV7 071-1..2BV7 071-2..2BV7 071-3..610.48060.02.300 14 / 22 © Gardner Denver Deutschland GmbH... -
Seite 15: Montage / Assembly
Montage / Assembly Montage / Assembly Montage DS / Assembly of drive-end Dichtmittlel "Epple 03213" Dichtfläche, Gewinde und lückenlos auf Motorzentrier- O-Ring-Nut der Laterne lü- Anzugsmoment Gehäuse rand auftragen. = 50 5 Nm. ckenlos mit "OKS 250" einfet- Pos. 002A: M ten. -
Seite 16: Montage Ns / Assembly Of Non-Drive-End
Montage / Assembly Montage NS / Assembly of non-drive-end Dichtmittel " Epple 03213" lückenlos auf Motorzentrierrand auftragen. Apply sealing agent " Epple 03213" to entire motor centering edge. Gleitfläche der Welle mit "UNIREX N3" einfetten. Grease sliding surface of shaft with "UNIREX N3". -
Seite 17: Montage Steuerscheibe / Assembly Of Port Plate
Montage / Assembly Montage Steuerscheibe / Assembly of port plate LOCTITE NR. 510 Dichtmittel gem. Skizze und entspr. Verlauflinie aufbringen. Dichtflächen von Steuerscheibe und Laterne vorher entfetten. LOCTITE # 510 Apply sealing agent as shown in drawing and in accordance with running line. -
Seite 18: Montage Ventil-, Halteplatte / Assembly Of Valve, Holding Plate
Montage / Assembly Montage Ventil-, Halteplatte / Assembly of valve, holding plate Anzugsmoment der Schrauben: = 0,5 – 0,7 Nm. Tightening torque of screws: = 0.5 – 0.7 Nm. 610.48060.02.300 18 / 22 © Gardner Denver Deutschland GmbH... -
Seite 19: Anziehdrehmomente / Tightening Torques
Montage / Assembly Anziehdrehmomente / Tightening torques Gewinde- M10 M12 M16 Thread Anziehdrehmo- min. [Mn] ment max. Tightening torque Anziehdrehmo- 10 % [Mn] ment Tol. Tightening torque Anziehdrehmo- min. ment [Mn] 12.5 max. Tightening torque Anziehdrehmo- min. ment [Mn] 10.5... - Seite 20 Tabelle [2] / Table [2]: Spalt Laufrad – Steuerscheibe / Gap impeller – port plate MLFB Laufradbreite Measure impeller Spalt messen width [in] [mm] [mil] 2BV7 060 — — 0,08 – 0,10 3.150 – 3.938 2BV7 061-..0 — — 0,08 – 0,10 3.150 – 3.938 2BV7 061-..8...
- Seite 21 © Gardner Denver Deutschland GmbH 21 / 22 610.48060.02.300...
- Seite 22 79650 Schopfheim · Deutschland 97616 Bad Neustadt · Deutschland Tel. +49 7622 392-0 Tel. +49 9771 6888-0 Fax +49 7622 392-300 Fax +49 9771 6888-4000 Elmo Rietschle is a brand of Gardner Denver‘s Industrial Products Group and part of Blower Operations.