Seite 1
ROBOT ASPIRADOR / ROBOT ASPIRAPOLVERE SSRA1 ROBOT ASPIRADOR ROBOT ASPIRAPOLVERE Instrucciones de utilización y de seguridad Indicazioni per l’uso e per la sicurezza ROBÔ DE ASPIRAÇÃO ROBOT VACUUM CLEANER Instruções de utilização e de segurança Operation and safety notes SAUGROBOTER...
Seite 2
Antes de empezar a leer abra las dos páginas que contienen las imágenes y, en seguida, familiarícese con todas las funciones del dispositivo. Prima di leggere aprire le due pagine con le immagini e prendere confidenza con le diverse funzioni dell’apparecchio.
Indice Legenda dei pittogrammi utilizzati ............... Pagina 34 Introduzione ..........................Pagina 34 Utilizzo conforme alla destinazione d’uso ..................Pagina 34 Descrizione dei componenti ......................Pagina 35 Contenuto della confezione ......................Pagina 35 Specifiche tecniche ......................... Pagina 35 Avvertenze sulla sicurezza ..................
Omologato TÜV SÜD / GS imballaggio e del prodotto. Trasformatore di sicurezza anti-cortocircuito Robot aspirapolvere SSRA1 Utilizzo conforme alla destinazione d’uso Introduzione Questo prodotto è adatto all‘aspirazione di sporco sparso e asciutto, come ad esempio polvere, peluc- Congratulazioni per l‘acquisto del vostro nuovo pro-...
Introduzione / Avvertenze sulla sicurezza fisiche, sensoriali o mentali ridotte Requisiti di sistema: iOS dalla versione 9.0, oltreché da persone inesperte, Android™ dalla versione 4.4 solamente qualora sorvegliate o preventivamente istruite circa Avvertenze sulla un utilizzo sicuro del prodotto, e sicurezza quindi se consapevoli dei pericoli ad esso legati.
Seite 9
Avvertenze sulla sicurezza addetto alla manutenzione onde Non collocarsi nell‘area di lavoro evitare di incorrere in pericoli. del robot aspirapolvere. Altrimenti Non utilizzare il prodotto qualora il robot aspirapolvere non può non potesse funzionare corretta- pulire queste aree. mente a causa di Non far finire capelli, vestiti e dita - cadute, in prossimità...
Avvertenze sulla sicurezza di sicurezza e circa la prepara- In caso di utilizzo, avvisare zione della stanza. eventualmente le altre persone Verificare prima di ogni messa presenti nella stanza in modo in funzione che la stazione di che nessuno calpesti o inciampi carica, il cavo di alimentazione sul prodotto.
Seite 11
Avvertenze sulla sicurezza Non esercitare alcuna pressione Non mischiare le batterie / gli meccanica sulle batterie / sugli accumulatori vecchi con quelli accumulatori. nuovi! Rimuovere le batterie / gli accu- Rischio di perdita di mulatori, quando il prodotto non liquido dalle batterie / viene utilizzato a lungo.
Avvertenze sulla sicurezza / Messa in funzione / Uso è necessario avvertire che questo Nota: nell‘area della stazione di carica non è prodotto contiene una batteria. consentito che vi siano specchi o altri oggetti forte- mente riflettenti fino a 15 cm sopra il pavimento. Coprirli ove necessario.
Nota: se la pausa dura più di 10 minuti, il ro- A causa della complessità dell‘ambiente domestico, il prodotto potrebbe escludere alcune aree durante bot aspirapolvere passa alla modalità standby la pulizia. Per ottenere un migliore risultato della e il tasto „Avvio / Pausa“ si spegne.
Modalità Classica Modalità Spot Questa modalità è adatta ad un‘area molto sporca o con un‘elevata concentrazione di polvere. Nella modalità di pulizia spot, il prodotto si focalizza su un‘area da pulire. In questa modalità il prodotto va in tutte le direzioni. Questa modalità...
Parete virtuale Modalità Angoli Questa modalità è adatta alla pulizia degli angoli e degli spigoli di una stanza. Nella „Modalità Angoli” il prodotto si sposta lungo un limite (ad esempio una parete). In questa modalità, il prodotto ritorna alla La parete virtuale suddivide la casa / l‘apparta- stazione di carica una volta terminata la proce-...
Nota: qualora non si esegua alcuna opera- zione entro 15 secondi, il robot aspirapolvere L‘app „SILVERCREST SSRA1 Robot“ è disponibile gra- esce dall‘impostazione dell‘orario, la quale tuitamente nell‘App Store di Apple e su Google Play. non viene salvata.
„Il mio robot“. Collegamento del prodotto con il WLAN Variante 1 Installare l‘app „SILVERCREST SSRA1 Robot“ sullo smartphone. Aprire l‘app e cliccare su „Profilo“. Cliccare su „Login / Registrazione“. Nel menu del login cliccare su „Registrazione“.
Seite 18
Cliccare su „Aggiungi robot“ nel menu „Il mio aspirapolvere. robot“ oppure su per aggiungere il robot Selezionare il modello „SSRA1“. aspirapolvere. Inserire la propria password del WLAN e clic- Selezionare il modello „SSRA1“. care su „Connessione in corso“ per collegarsi Cliccare su „Assenza di connessione? Premi qui“...
Gestione tramite app Collegamento del prodotto con l‘app Il robot aspirapolvere è collegato con successo alla rete WLAN quando si sente il beep del robot aspi- rapolvere e il display del WLAN si illumina costan- temente. Il primo utente collegato al prodotto diventa l‘am- ministratore del prodotto.
Gestione tramite app Interruzione del collegamento Pulizia tramite app Modalità Automatica Interruzione da parte dell‘amministratore Selezionare il proprio robot nel menu „Il mio robot“ e scrollarlo a sinistra. Cliccare su „Disconnetti“ per interrompere il collegamento. Interruzione tramite il robot aspirapolvere Accendere il robot aspirapolvere e attendere 30 secondi per capire se il robot aspirapolvere si connette con la rete WLAN.
Seite 21
Gestione tramite app Modalità Classica Modalità max Selezionare il proprio robot nel menu „Il mio robot“. Selezionare il proprio robot nel menu „Il mio robot“. Cliccare su per passare al menu „Imposta- Cliccare su per passare al menu „Imposta- zioni“. zioni“.
Gestione tramite app Attività di pulizia Modalità Spot programmate Selezionare il proprio robot nel menu „Il mio robot“. Selezionare per avviare questa modalità. Modalità spot Cliccare su per far concludere in anticipo Pulizia spot la pulizia al robot aspirapolvere. Nota: terminata la pulizia spot, il robot aspi- rapolvere passa alla modalità...
Gestione tramite app Selezionare il proprio robot nel menu „Il mio robot“. Selezionare il proprio robot nel menu „Il mio robot“. Cliccare su per passare al menu „Imposta- Cliccare su per passare al menu „Imposta- zioni“. zioni“. Cliccare sul menu „Attività di pulizia Cliccare su „Attività...
Gestione tramite app Impostazioni Cerca robot Selezionare il proprio robot nel menu „Il mio robot“. Cliccare su per passare al menu „Imposta- zioni“. Cliccare su „Stato materiali di consumo“. In questo menu è possibile verificare la durata Selezionare il proprio robot nel menu „Il mio robot“.
Gestione tramite app Modifica del nome del robot aspirapolvere Ripristino delle impostazioni Solo l‘amministratore del robot aspirapolvere pos- siede questo diritto. Questa procedura elimina tutti i dati, inclusi i protocolli di pulizia, la durata dei pezzi di ricambio e così via. Allo stesso tempo, vengono eliminati tutti i collegamenti esistenti tra gli utenti e il robot aspirapolvere.
Seite 26
Gestione tramite app Attivazione del robot aspirapolvere per Cliccare su „Condividi robot“ nel menu altri utenti „Profilo“. Selezionare il proprio robot. L‘app mostra infine il codice QR e l‘utente può scansionare il codice QR per ricevere l‘autorizzazione di comandare il robot aspirapolvere. L‘altro utente deve cliccare su „Scannerizza codice QR“...
Pulizia e conservazione / Risoluzione degli errori /dei problemi Pulizia e conservazione Estrarre le spazzole laterali e rimuovere i capelli e lo sporco. Collocare l‘interruttore in posizione „O“ prima di pulire il prodotto. Pulizia dell‘alloggiamento principale Staccare il cavo di alimentazione dalla Pulire la ruota anteriore per rimuovere i...
Risoluzione degli errori /dei problemi Motivo Display Segnale acustico Soluzione Il robot aspirapolvere è Beep: tre volte Spostare il robot aspirapolvere incastrato. su un punto libero e riavviarlo. Disturbo alla ventola Beep: tre volte Riavviare il robot aspirapolvere. Si prega di rivolgersi al nostro ser- vizio di assistenza clienti qualora non si possa risolvere il problema.
Risoluzione degli errori /dei problemi / Smaltimento Problema Motivo Soluzione Il robot aspirapolvere ritorna Se la batteria è quasi scarica, il robot Caricare il robot aspirapolvere. all stazione di carica aspirapolvere ritorna automaticamente per caricarsi prima che la al punto di carica. pulizia sia terminata.
Smaltimento / Garanzia / Assistenza E’ possibile informarsi circa le possibilità propri diritti di garanzia sarà necessario (escludendo di smaltimento del prodotto usato presso una restrizione dei propri diritti legali) l’amministrazione comunale o cittadina. Quanto segue: Per questioni di tutela ambientale non get- 1.
Garanzia / Assistenza / Dichiarazione di conformità Per tutte le richieste si prega di conservare lo scon- trino ed il codice dell‘articolo (ad es. IAN 12345) a prova dell‘avvenuto acquisto. Orari del numero di assistenza: dal lunedì al venerdì dalle 09:00 alle 18:00 (CET) Dichiarazione di conformità...
Seite 33
Table of contents List of pictograms used ..................... Page 90 Introduction ..........................Page 90 Intended use ............................. Page 90 Parts description ..........................Page 90 Delivery contents ..........................Page 91 Technical data ..........................Page 91 Safety notes ..........................Page 92 Safety instructions for batteries / rechargeable batteries .............. Page 94 Set-up ...............................
Introduction List of pictograms used SMPS (Switched Mode Observe the warnings and safety notes! Power Supply) Read the instructions! Note polarity / battery pack data This product is only suitable for use Polarity of the power supply indoors, in dry and enclosed spaces. Direct current EU compliant Dispose of the packaging and...
Safety notes Verify the line voltage matches Safety notes that specified on the charging dock KEEP ALL SAFETY NOTES AND Only use the original rechargea- INSTRUCTIONS FOR FUTURE ble battery and charging dock REFERENCE! included from the manufacturer. Never use primary batteries. For more information about the battery DANGER TO LIFE AND please see chapter “Technical...
Seite 37
Safety notes Do not use the product in rooms example fuel or toner from print- with children. ers or photocopier. Do not use the product on wet Do not allow the product to or damp floors. vacu um up burning items, for Do not use the product near example cigarettes, matches, open fire.
Safety notes Do not cover or tape off the an- Overheating, fire or bursting can ti-drop sensors on the product. be the result. Otherwise the product will be Never throw batteries / recharge- unable to navigate. able batteries into fire or water. Regularly clean the anti-drop Do not exert mechanical loads to sensors.
Safety notes / Set-up Do not mix used and new batter- Set-up ies / rechargeable batteries. Charging the product Remove batteries / rechargeable batteries if the product will not Fully charge the product before using it for the first time. be used for a longer period.
Set-up / Operation Note: Do not switch off the product after use. Keep the product in the charging dock so it will be ready for the next vacuuming. Operation Cleaning Due to the complexity of domestic environments the product may skip some areas. For better cleaning Press the “Start / Pause”...
Operation Note: If pause more than 10 minutes the robot Auto mode vacuum cleaner will enter Sleep mode and the “Start / Pause” button will go off. Press the “Start / Pause” button on the robot vacuum cleaner or the remote control again to exit Sleep mode.
Operation MAX mode Return mode This mode is suitable if the floor is very dirty or dusty. Use this mode to return the product to the charging dock In Classic, Auto or Corner mode press the Note: The robot vacuum cleaner automatically re- “MAX mode“...
“Awake“. The robot vacuum cleaner will emit a sound, the display will flash and the robot The “SILVERCREST SSRA1 Robot“ app is available vacuum cleaner will enter “Set clock mode”. for free from the Apple App Store and Google Play.
After successfully logging in the app will auto- matically switch to the “Robot“ menu. Connecting the product to WIFI Option 1 Install the “SILVERCREST SSRA1 Robot“ app on your smartphone. Open the app and click on “Profile“. Click “Log-In / Sign up“.
Seite 45
In the “Robot“ menu click “Add new robot“ or to add the robot vacuum cleaner. Select robot model “SSRA1“. Enter your WIFI password and click “Connect- ing“ to connect to the WIFI network. The robot vacuum cleaner should connect to the WIFI network after a short time.
Operation via app Click “Connecting“ to connect to the WIFI net- Click “Settings“ and make a note of the default work. The robot vacuum cleaner should connect password for “Robot-XXXX“ in the “Network to the WIFI network after a short time. configuration“...
Operation via app Cleaning via app on the robot vacuum cleaner and it will auto- matically reconnect to the same WIFI network. Auto mode Disconnecting Disconnecting through the administrator In the “Robot“ menu, select your robot and swipe left. Click “Disconnect“. Disconnecting through the robot vacuum cleaner Switch on the robot vacuum cleaner and wait...
Seite 48
Operation via app Classic mode Select your robot from the “Robot“ menu. Click to switch to the “Settings“ menu. Activate the “MAX mode“ slider for the robot to use increased suction the next time it is started via the app. Disable the “MAX mode“...
Operation via app Return mode Select your robot from the “Robot“ menu. Select to start this mode. Charging Note: The robot vacuum cleaner returns to the charging dock to recharge. Click Charging again and the robot vacuum cleaner will stop searching for the charging dock Schedule Select your robot from the “Robot“...
Operation via app Product maintenance Click “Add schedule“ to add another schedule. Click “Activate all“ to activate and disable all vacuuming schedules. Cleaning records Select your robot from the “Robot“ menu. Click to switch to the “Settings“ menu. Click “Cleaning records“. Review the vacuum schedule history.
Operation via app Renaming the robot vacuum cleaner Hold the button approx. 2 seconds to reset the life of the replaced part. Click “Confirm“ to reset. Settings Search robot Select your robot from the “Robot“ menu. Click to switch to the “Settings“ menu. Click “Search robot“...
Seite 52
Operation via app Resetting the product Sharing the robot vacuum cleaner with other users This option is only available to the administrator of the robot vacuum cleaner. This process will erase all data including cleaning records, the life of parts, etc.
Operation via app / Cleaning and storage / Troubleshooting Cleaning and storage In the “Profile“ menu, click “Share your robot“. Select your robot. The app will then show the QR code and the user can scan the QR code Set the power switch to “O“...
Seite 54
Troubleshooting Reason Display Signal tone Solution Beeps: once Left wheel malfunction Check left wheel malfunction E12 Beeps: once Right wheel Check right wheel Left brush malfunction Beeps: once Check left brush Right brush malfunction E14 Beeps: once Check right brush Main brush malfunction E15 Beeps: once...
Seite 55
Troubleshooting Problem Reason Solution The robot vacuum cleaner The robot vacuum cleaner is not mak- Ensure there is good contact be- does not charge. ing good contact with the charging tween the robot vacuum cleaner contacts on the charging dock and the charging contacts the charging dock We recommend continuous...
Disposal / Warranty / Service Disposal Robot vacuum cleaner only The built-in rechargeable battery cannot be removed The packaging is made entirely of recyclable mate- for disposal. Return the entire product to a waste rials, which you may dispose of at local recycling electronics collection point.
Warranty / Service / Declaration of conformity Service GB Tel.: 00800-83300000 E-Mail: support.lidl@ksr-group.com IAN 305857 Please have your receipt and item number (e.g. IAN 12345) ready as your proof of purchase when enquiring about the product. Hotline hours: Monday to Friday 09:00 to 18:00 (CET) Declaration of conformity This product fulfils the requirements of the applicable European and national directives.
Seite 59
Inhaltsverzeichnis Legende der verwendeten Piktogramme ............Seite 116 Einleitung ............................Seite 116 Bestimmungsgemäße Verwendung ....................Seite 116 Teilebeschreibung ..........................Seite 117 Lieferumfang ............................. Seite 117 Technische Daten ..........................Seite 117 Sicherheitshinweise ......................Seite 118 Sicherheitshinweise für Batterien / Akkus ..................Seite 120 Inbetriebnahme ........................
36 Monate Garantie Lassen Sie Kinder niemals unbeaufsich- TÜV SÜD / -GS zertifiziert tigt mit Verpackungsmaterial und Produkt. Kurzschlussfester Sicherheitstransformator Saugroboter SSRA1 Bestimmungsgemäße Verwendung Einleitung Dieses Produkt ist zum Aufsaugen von losem, trocke- nem Schmutz wie zum Beispiel Staub, Fusseln oder Wir beglückwünschen Sie zum Kauf Ihres neuen...
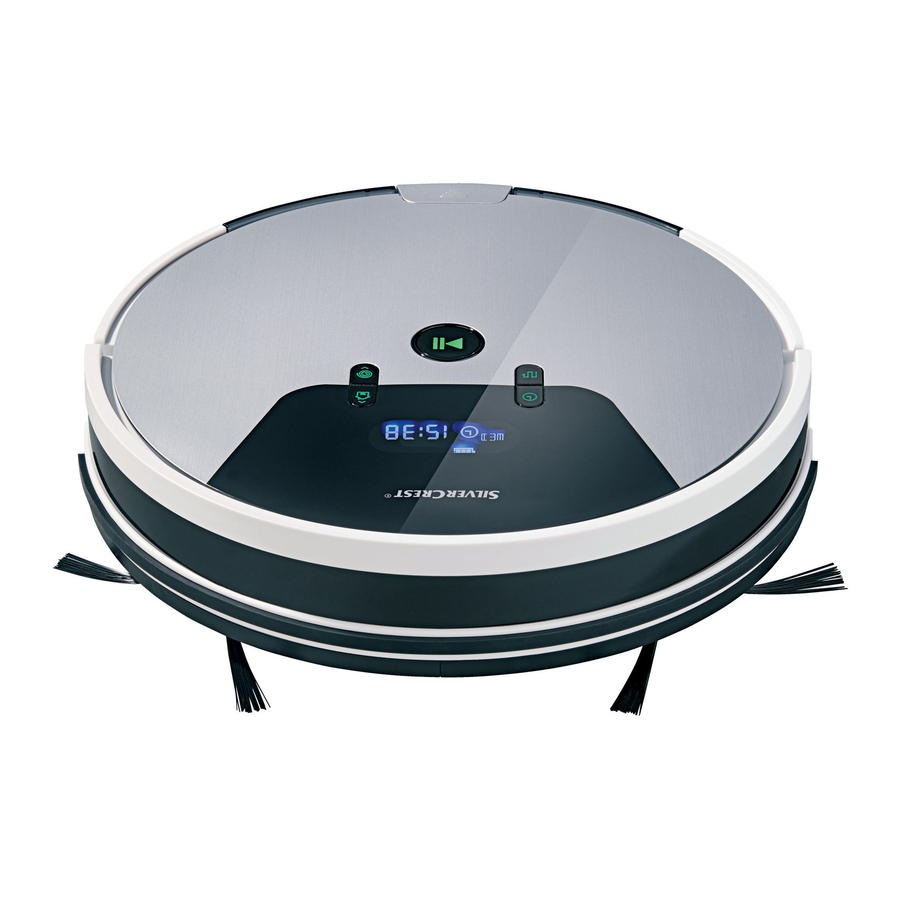
Sicherheitshinweise Stellen Sie sicher, dass die Span- Sicherheitshinweise nung der Stromzufuhr mit der auf der Ladestation angege- BEWAHREN SIE ALLE SICHERHEITS- benen übereinstimmt. HINWEISE UND ANWEISUNGEN Verwenden Sie nur die originale, FÜR DIE ZUKUNFT AUF! vom Hersteller gelieferte, wieder aufladbare Batterie und Ladesta- tion .
Seite 63
Sicherheitshinweise nicht ordnungsgemäß arbeiten Öffnungen oder Betriebsteile des kann. Lassen Sie das Produkt vom Produkts gelangen. Hersteller bzw. von seiner Kun- Lassen Sie das Produkt keine dendienstabteilung reparieren. Materialien aufsaugen, die das Verwenden Sie das Produkt nicht Produkt verstopfen könnten, zum in einem Zimmer, in dem sich Beispiel Steine, Papierabfall etc.
Sicherheitshinweise Netzkabel bzw. den Netzadapter Verwenden Sie das Produkt nicht auf etwaige Schäden. mehr, wenn die Kunststoffbauteile Überprüfen und reinigen Sie die Risse oder Sprünge haben oder Filter und den Staubbehälter re- sich verformt haben. Ersetzen Sie gelmäßig, um die Lebensdauer beschädigte Bauteile nur durch Ihres Produkts zu verlängern.
Sicherheitshinweise / Inbetriebnahme können z. B. auf Heizkörpern / Setzen Sie Batterien / Akkus ge- direkte Sonneneinstrahlung. mäß der Polaritätskennzeichnung Wenn Batterien / Akkus ausge- (+) und (-) an Batterie / Akku und laufen sind, vermeiden Sie den des Produkts ein. Kontakt von Haut, Augen und Reinigen Sie Kontakte an Batterie / Schleimhäuten mit den Chemika-...
Inbetriebnahme / Bedienung Seitenbürsten anbringen Hinweis: Platzieren Sie 1 m von der linken / rechten Seite sowie 2 m von der Vorderseite keine Gegenstände. Montieren Sie die Seitenbürsten entsprechend Schalten Sie vor dem Aufladen den Betriebs- der Farbe des Einschubs, indem Sie die Bürsten schalter am Produkt ein (Position „–“).
Bedienung Hinweis: Wenn das Produkt die Arbeit nach einer Aufgrund der Komplexität der häuslichen Umgebung lässt das Produkt beim Reinigen möglicherweise einige Pause wiederaufnimmt, plant er den Bereich neu Bereiche aus. Für ein besseres Reinigungsergebnis und reinigt möglicherweise den bereits gereinigten empfehlen wir, das Produkt täglich zu verwenden.
Seite 68
Bedienung Auto-Modus MAX-Modus In diesem Modus wird das Produkt einen Kurs in Dieser Modus eignet sich für einen stark verschmutz- parallelen, überlappenden Bahnen fahren. Zur Ori- ten oder staubigen Boden. entierung und Raumbemessung werden davor die Raumränder gesaugt. Drücken Sie im Classic-, Auto- oder Ecken- Modus auf die Taste „MAX-Modus“...
Bedienung Rückkehr-Modus Vor der Verwendung der virtuellen Wand müssen Sie 2 AA-Batterien (im Lieferumfang ent- halten) einsetzen. Öffnen Sie dazu die Batterie- fachabdeckung und setzen Sie die Batterien ein. Achten Sie dabei auf die angezeigte Polarität. Schieben Sie den Schalter an der virtuellen Wand auf „ON“, um diese einzuschalten.
Das Produkt kann aus der Ferne mit Hilfe einer App bedient werden. Installieren und registrieren Die App „SILVERCREST SSRA1 Robot“ ist im Apple App Store und bei Google Play kostenlos verfügbar. Installieren Sie die App „SILVERCREST SSRA1 Robot“ auf Ihrem Smartphone.
Piepton zu hören ist. Der Saugroboter wechselt in den Einrichtungs- Modus für die WLAN-Verbindung und die Netzwerkanzeige blinkt. Klicken Sie im Menü „Roboter“ auf „Roboter hinzufügen” oder auf , um den Saugroboter hinzuzufügen. Wählen Sie das Robotermodell „SSRA1“. DE/AT/CH...
Seite 72
Per App bedienen Geben Sie Ihr WLAN-Passwort ein und klicken Wählen Sie das Robotermodell „SSRA1“. Sie zum Verbinden mit dem WLAN auf „Verbin- Klicken Sie auf „Keine Verbindung? Hier tippen”, den”. Der Saugroboter sollte sich nach kurzer um die Netzwerkkonfiguration zu verwenden.
Per App bedienen Wenn Sie den Piepton des Saugroboters hören und die WLAN-Anzeige durchgehend leuchtet, wurde der Saugroboter erfolgreich mit dem WLAN-Netz- werk verbunden. Der erste mit dem Produkt verbundene Benutzer wird der Administrator des Produkts. Nur der Administrator- Benutzer hat die Berechtigung, das Produkt für andere Benutzer freizugeben.
Per App bedienen Netzwerk verbunden ist, erinnert er Sie mit einem Wählen Sie im Menü „Roboter“ Ihren Roboter aus. Piepton und die WLAN-Anzeige des Saugrobo- Klicken Sie auf , um ins Menü „Einstellungen“ ters wechselt von Blinken auf Dauerleuchten. zu wechseln. Halten Sie die Taste „Spot-Modus / Zeiteinstellung Wählen Sie „Auto-Modus“, damit der Roboter senken“...
Seite 75
Per App bedienen MAX-Modus Spot-Modus Wählen Sie im Menü „Roboter“ Ihren Roboter aus. Wählen Sie , um diesen Modus zu starten. Spot Modus Klicken Sie auf , damit der Saugroboter Spot Reinigung vorzeitig mit dem Reinigen aufhört. Hinweis: Nach der Spot-Reinigung versetzt sich der Saugroboter in den Standby-Modus.
Per App bedienen Saugtermine Wählen Sie im Menü „Roboter“ Ihren Roboter aus. Klicken Sie auf , um ins Menü „Einstellungen“ zu wechseln. Klicken Sie auf das Menü „Saugtermine“. Wählen Sie die gewünschte Reinigungszeit und die gewünschten Reinigungstage. Bestätigen Sie diese mit einem Klick auf „Speichern“. Klicken Sie auf „Saugtermine hinzufügen“, um einen weiteren Zeitplan hinzuzufügen.
Per App bedienen Wählen Sie im Menü „Roboter“ Ihren Roboter aus. Klicken Sie auf , um ins Menü „Einstellungen“ zu wechseln. Klicken Sie auf „Erledigte Saugtermine“. Überprüfen Sie die Historie der Saugtermine. Produktwartung Wählen Sie im Menü „Roboter“ Ihren Roboter aus. Klicken Sie auf , um ins Menü...
Per App bedienen Einstellungen Saugroboter umbennenen Roboter suchen Wählen Sie im Menü „Roboter“ Ihren Roboter aus. Klicken Sie auf , um ins Menü „Einstellungen“ zu wechseln. Klicken Sie auf „Roboter suchen“ und der Roboter erzeugt einen Piepton für 10 Sekunden. Wählen Sie im Menü...
Per App bedienen Einstellungen zurücksetzen Saugroboter für andere Anwender freigeben Über diese Berechtigung verfügt nur der Administ- rator des Saugroboters. Dieser Vorgang löscht alle Daten, einschließlich der Reinigungsprotokolle, der Lebensdauer der Ersatzteile etc. Gleichzeitig werden alle Verbindungen zwischen den Benutzern und dem Saugroboter gelöst.
Per App bedienen / Reinigung und Lagerung / Fehlerbehebung / Problemlösung Reinigung und Lagerung Klicken Sie im Menü „Profil“ auf „Roboter teilen”. Wählen Sie Ihren Roboter. Anschließend zeigt die App den QR-Code an und der Anwender kann Stellen Sie den Betriebsschalter auf die den QR-Code scannen, um die Berechtigung Position „O“, bevor Sie das Produkt reinigen.
Seite 81
Fehlerbehebung / Problemlösung Grund Display Signalton Lösung Piepton: einmal Linkes Rad gestört Linkes Rad prüfen Rechtes Rad gestört Piepton: einmal Rechtes Rad prüfen Piepton: einmal Linke Bürste gestört Linke Bürste prüfen Piepton: einmal Rechte Bürste gestört Rechte Bürste prüfen Hauptbürste gestört Piepton: einmal Hauptbürste...
Seite 82
Fehlerbehebung / Problemlösung Problem Grund Lösung Der Saugroboter kann nicht Der Saugroboter ist nicht vollständig mit Stellen Sie sicher, dass der Saug- aufgeladen werden. den Ladestiften der Ladestation roboter und die Ladestifte verbunden. Ladestation vollständig Kon- takt haben. Es wird empfohlen, dauerhaft Die Ladestation ist ausgeschaltet zu laden, wenn der Saugroboter...
Entsorgung / Garantie / Service Entsorgung Nur für Saugroboter Der eingebaute Akku kann zur Entsorgung nicht aus- Die Verpackung besteht aus umweltfreundlichen gebaut werden. Geben Sie das Produkt vollständig Materialien, die Sie über die örtlichen Recyclingstel- an einer Sammelstelle für alte Elektronik ab. len entsorgen können.
Garantie / Service / Konformitätserklärung – selbstverursachte Schäden durch z. B. Schlag, Stoß, Fall – Nichtbeachtung der Bedienungsanleitung – normalem Verschleiß – eigenmächtigen Reparaturversuchen Die Bedienungsanleitung kann bei unserem Kunden- dienst im PDF-Format angefordert werden. Service DE AT CH Tel.: 00800-83300000 E-Mail: support.lidl@ksr-group.com IAN 305857...
Seite 85
KSR GROUP GMBH Im Wirtschaftspark 15 A-3494 Gedersdorf www.ksr-group.com Estado de las informaciones · Versione delle informazioni · Estado das informações · Last Information Update · Stand der Informationen: 07 / 2018 · Ident.-No.: SSRA1072018-5 IAN 305857...