Stryker 1079 Bedienungsanleitung
Stretcher für augenoperationen
Inhaltsverzeichnis
Verfügbare Sprachen
Verfügbare Sprachen
Quicklinks
For parts or technical assistance call:
Service technique et pièces de rechange:
Ersatzteile oder technische Unterstützung:
Para solicitar asistencia técnica o piezas, llame al teléfono:
Per parti o assistenza tecnica chiamare i seguenti numeri:
Voor onderdelen of technische bijstand belt u:
Zapytania dotyczące części lub pomocy technicznej należy kierować pod numer tel.:
USA/États-Unis/EE.UU./EUA/VS:
1-800-327-0770 (option/opción/opção/opzione/optie/opcja 2)
2010/01
Model/Modèle/Modell/Modelo/Modello 1079
Operations Manual
1079-009-005 REV E
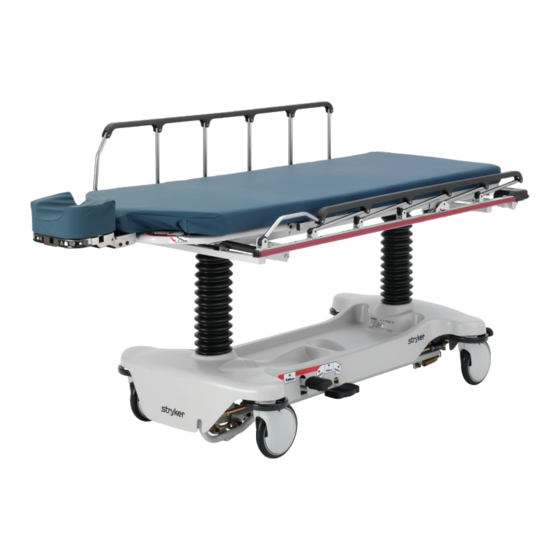
Eye Surgery Stretcher
Brancard de chirurgie oculaire
Stretcher für Augenoperationen
Camilla para cirugía ocular
Maca para cirurgia ocular
Barella per chirurgia oculistica
Brancard voor oogchirurgie
Manuel d'utilisation
Bedienungsanleitung
Manual de Utilização
Gebruikshandleiding
Instrukcja obsługi
Manual de uso
Manuale d'uso
www.stryker.com
Kapitel
Inhaltsverzeichnis

Verwandte Anleitungen für Stryker 1079


Inhaltszusammenfassung für Stryker 1079
- Seite 1 Para solicitar asistencia técnica o piezas, llame al teléfono: Per parti o assistenza tecnica chiamare i seguenti numeri: Voor onderdelen of technische bijstand belt u: Zapytania dotyczące części lub pomocy technicznej należy kierować pod numer tel.: USA/États-Unis/EE.UU./EUA/VS: 1-800-327-0770 (option/opción/opção/opzione/optie/opcja 2) 2010/01 1079-009-005 REV E www.stryker.com...
- Seite 65 Internationale Garantieklausel ............3-29 www.stryker.com 1079-009-005 REV E...
-
Seite 66: Symbole Und Definitionen
Geräts und die nötigen Vorsichtsmaßnahmen, um Beschädigungen des Geräts zu vermeiden, die als Ergebnis des Gebrauchs oder der unsachgemäßen Benutzung auftreten könnten. HINWEIS Hinweise enthalten Informationen, die die Wartung erleichtern oder wichtige Anweisungen verdeutlichen. Zurück zum Inhaltsverzeichnis 1079-009-005 REV E www.stryker.com... -
Seite 67: Einführung
Diese Anleitung wurde entworfen, um Ihnen bei der Bedienung des Stretchers, Modell 1089, für Augenoperationen von Stryker behilflich zu sein. Vor der Verwendung des Geräts oder vor Beginn von Wartungsarbeiten ist diese Bedienungsanleitung sorgfältig zu lesen. Um einen sicheren Betrieb dieses Geräts zu gewährleisten, wird empfohlen, Schulungsmethoden und -verfahren einzurichten, um das Personal im sicheren Betrieb dieses Stretchers zu unterweisen. -
Seite 68: Zusammenfassung Der Sicherheitsvorkehrungen
Zur Vermeidung eines Einklemmrisikos beim Verstellen des Kopfstücks die Finger von den Gelenkstellen fernhalten. • Wenn der Stretcher mit den optionalen Schiebegriffen am Fußende ausgestattet ist, bei der Installierung von Bettverlängerung/Defibrillator-Tablett vorsichtig vorgehen, um ein Einklemmen der Finger zu vermeiden. Zurück zum Inhaltsverzeichnis 1079-009-005 REV E www.stryker.com... - Seite 69 Die Haube nicht als Trittstufe verwenden. HINWEIS • Den Aufbewahrungsbereich für die Haube regelmäßig reinigen. • Die Unterseite der Bremsbeläge muss regelmäßig gereinigt werden, um zu verhindern, dass sich Wachs oder Fußbodenabrieb ansammelt. Zurück zum Inhaltsverzeichnis www.stryker.com 1079-009-005 REV E...
-
Seite 70: Einsatzvorbereitung
Das Pedal an einem der Enden des Stretchers vollständig heruntertreten, um die vier Rollenbremsen zu aktivieren, und sicherstellen, dass alle vier Laufrollen blockiert sind • Sicherstellen, dass die Seitenbügel sich leicht höher und tiefer stellen lassen und in der obersten Position sicher einrasten (siehe Seite 3-12) Deutsch Zurück zum Inhaltsverzeichnis 1079-009-005 REV E www.stryker.com... -
Seite 71: Bedienungsanleitung
(B) heruntertreten, um das Fußende des Stretchers zu senken. Die dem Kopfende am nächsten gelegene Seite von Pedal (B) heruntertreten, um das Kopfende des Stretchers zu senken. Pedal (C) - Brems- (Brake) und Lenkfunktionen (Steer) STEER NEUTRAL BRAKE Zurück zum Inhaltsverzeichnis www.stryker.com 1079-009-005 REV E... -
Seite 72: Bedienen Der Steuerungen An Der Basis - 3-Seitige Steuerung
Stretchers zu senken. Mitte von Pedal (C) oder Pedale (B) und (D) zusammen heruntertreten, um beide Enden des Stretchers zusammen zu senken. STEER NEUTRAL BRAKE Pedal (E) - Brems- und Lenkfunktionen (Fußende) Zurück zum Inhaltsverzeichnis 1079-009-005 REV E www.stryker.com... -
Seite 73: Höhe Der Liegefläche Nach Oben Oder Unten Verstellen - Seitensteuerung
Pedal (C) heruntertreten (siehe Abbildung 2 auf Seite 3-8). Hinweis: Die Basis ist möglicherweise mit der optionalen verstellbaren Absenksteuerung ausgestattet. Mit der verstellbaren Absenksteuerung wird die Liegefläche umso schneller gesenkt, je weiter das Pedal nach unten getreten wird. Zurück zum Inhaltsverzeichnis www.stryker.com 1079-009-005 REV E... -
Seite 74: Trendelenburg-/Anti-Trendelenburg-Lagerung Einstellen - Seitensteuerung
Hinweis: Je höher die Liegefläche vor der Aktivierung von Pedal (B) ist, umso größer wird der Winkel der Trendelenburg bzw. Anti-Trendelenburg-Lagerung. (Der maximale Trendelenburg-Winkel beträgt +18°. Der maximale Anti-Trendelenburg- Winkel beträgt -18°.) Zurück zum Inhaltsverzeichnis 3-10 1079-009-005 REV E www.stryker.com... -
Seite 75: Anwenden Des Bremssystems
Mithilfe des fünften Rads kann der Stretcher entlang einer geraden Linie und um Ecken herum gelenkt werden. Um das fünfte Rad zu aktivieren, die Seite eines Brems-/Lenkpedals mit der Aufschrift „STEER“ (Lenken) vollständig nach unten treten. Zurück zum Inhaltsverzeichnis www.stryker.com 1079-009-005 REV E 3-11... -
Seite 76: Bedienen Der Seitenbügel
Um Verletzungen oder Beschädigung der Ausrüstung zu vermeiden, die Seitenbügel nicht herunterfallen lassen. Die korrekte Funktion des Verriegelungsmechanismus der Seitenbügel muss zu jedem Zeitpunkt sichergestellt sein. Wenn dieser nicht funktioniert, schlagen Sie in der Wartungsanleitung unter „Justierung der Seitenbügel-Verriegelung“ nach. Zurück zum Inhaltsverzeichnis 3-12 1079-009-005 REV E www.stryker.com... -
Seite 77: Umlagerung Eines Patienten Mit Der Patientenumlagerungshilfe
Position) verstaut sein. Der Stützpfosten kann beschädigt werden, BETT wenn er gegen einen Stretcher, Tisch etc. gedrückt wird. AUF GLEICHER MATING HÖHE BEFINDLICHES BETT Abbildung 6: Patientenumlagerungshilfe als Armstütze Abbildung 5: Patientenumlagerungshilfe Zurück zum Inhaltsverzeichnis www.stryker.com 1079-009-005 REV E 3-13... -
Seite 78: Bedienen Der Kurbel Zur Kopfteilverstellung/Der Kurbel Zur Fußteilverstellung
Zum Anheben des Fußteils den Kurbelgriff (B) im Uhrzeigersinn drehen. Zum Absenken des Fußteils den Kurbelgriff (B) gegen den Uhrzeigersinn drehen. Hinweis: Der Stretcher verfügt unter Umständen über ein stationäres Fußende anstelle eines verstellbaren Fußteils. Zurück zum Inhaltsverzeichnis 3-14 1079-009-005 REV E www.stryker.com... -
Seite 79: Bedienen Der Pneumatischen Kopfteilverstellung (Fowler)
Rahmen für die Kopfteilverstellung herauszuhalten. Wenn beim Herunterfahren der Kopfteilverstellung keine Sorgfalt angewandt wird, kann es zu Verletzungen kommen. Wenn das pneumatische Kopfteil schwierig zu bedienen ist, schlagen Sie bitte in der Wartungsanleitung für die „Justierung des pneumatischen Kopfteils“ nach. Zurück zum Inhaltsverzeichnis www.stryker.com 1079-009-005 REV E 3-15... -
Seite 80: Bedienen Des Kopfstücks Mit Vergrößertem Abstand
Zum Ziehen an dem Lösegriff nicht zwischen die Seite der Kopfverlängerung und dem artikulierenden Kopfstück fassen. Es könnte zu Fingerverletzungen kommen. • Zur Vermeidung eines Einklemmrisikos beim Verstellen des Kopfstücks die Finger von den Gelenkstellen fernhalten. Abbildung 9: Bedienung des Kopfteils Zurück zum Inhaltsverzeichnis 3-16 1079-009-005 REV E www.stryker.com... -
Seite 81: Verwendung Der Optionalen Präop-/Postop-Kopfverlängerungen
Das optionale aufblasbare Kopfstützkissen verfügt über zwei innere Luftkammern zur Polsterung und besseren Stabilisierung des Kopfs des Patienten. Zum Aufblasen der Kammern die Blase (A) zusammendrücken. Zum Entleeren der Kammern das Öffnungsventil (B) drücken. Abbildung 11: Kopfstützkissen Zurück zum Inhaltsverzeichnis www.stryker.com 1079-009-005 REV E 3-17... -
Seite 82: Verwendung Der Optionalen Handgelenkauflagen
Die Montagelasche (A) in die Halterung für den Infusionsständer am Kopfende des Stretchers einschieben und den Sauerstoffzufuhrschlauch in die dafür vorgesehene Halterung (B) einführen. Hinweis: Die Einheit ist für maximalen Patientenkomfort verstellbar. Abbildung 13: Sauerstoffschlauch Zurück zum Inhaltsverzeichnis 3-18 1079-009-005 REV E www.stryker.com... -
Seite 83: Bedienen Des Optionalen, Fest Installierten 2-Stufen-Infusionsständers
Um Beschädigung zu vermeiden, sollte das Gewicht des Infusionsbeutels 18 kg nicht überschreiten. • Um Beschädigung beim Transport zu vermeiden, sicherstellen, dass der Infusionsständer tief genug gestellt ist, um Türöffnungen und Beleuchtungseinrichtungen sicher zu passieren. Zurück zum Inhaltsverzeichnis www.stryker.com 1079-009-005 REV E 3-19... -
Seite 84: Bedienen Des Optionalen, Fest Installierten 3-Stufen-Infusionsständers
Um Beschädigung zu vermeiden, sollte das Gewicht des Infusionsbeutels 18 kg nicht überschreiten. • Um Beschädigung beim Transport zu vermeiden, sicherstellen, dass der Infusionsständer tief genug gestellt ist, um Türöffnungen und Beleuchtungseinrichtungen sicher zu passieren. Zurück zum Inhaltsverzeichnis 3-20 1079-009-005 REV E www.stryker.com... -
Seite 85: Benutzen Der Optionalen Bettverlängerung/Des Defibrillator-Tabletts
Abbildung 19: Optionale Bettverlängerung/ Defibrillator-Tablett - Fußende WARNUNG Wenn der Stretcher mit den optionalen Schiebegriffen am Fußende ausgestattet ist, bei der Installierung von Bettverlängerung/Defibrillator-Tablett vorsichtig vorgehen, um ein Einklemmen der Finger zu vermeiden. Zurück zum Inhaltsverzeichnis www.stryker.com 1079-009-005 REV E 3-21... -
Seite 86: Verwenden Des Optionalen Serviertabletts
Tablett in den Halter schieben (siehe Abbildung 21). Deutsch Abbildung 21: Optionales Serviertablett - Abbildung 20: Optionales Serviertablett Fußende VORSICHT Um Beschädigungen zu vermeiden, keine Gegenstände mit mehr als 13 kg Gewicht auf das Tablett stellen. Zurück zum Inhaltsverzeichnis 3-22 1079-009-005 REV E www.stryker.com... -
Seite 87: Reinigung
Reinigung REINIGUNG DES STRETCHERS Diese Anleitung enthält die empfohlenen Reinigungsmethoden für den Stretcher, Modell 1079. EMPFOHLENE REINIGUNGSMETHODE Hinweis: Die Verdünnungsanweisungen des Herstellers der Reinigungslösung sind genau zu befolgen. • Die Matratze ist vor der Reinigung zu entfernen; die Matratze nicht gemeinsam mit dem Stretcher waschen. -
Seite 88: Matratzenreinigung
Quartäre Reinigungsmittel: zu erkennen am Ausdruck „…yl-Ammoniumchlorid“ in den Inhaltsstoffen Quartäre/Isopropanol-Reinigungsmittel: zu erkennen an einem quartären Inhaltsstoff (s.o.) und Isopropanol- Alkohol Phenol-Reinigungsmittel: zu erkennen an Inhaltsstoffen mit dem Suffix „-phenol“ Chlorbleiche: unter der Allgemeinbezeichnung „Natriumhypochlorit“ bekannt Zurück zum Inhaltsverzeichnis 3-24 1079-009-005 REV E www.stryker.com... -
Seite 89: Besondere Anweisungen
Bevor die Matratze wieder benutzt wird, müssen die Oberflächen, die mit der Lösung in Kontakt gekommen sind, mit klarem Wasser abgespült werden. Hinweis: Nichtbefolgen der obigen Anweisungen beim Gebrauch dieser Reinigungsmittel kann zum Garantieverlust für dieses Produkt führen. Zurück zum Inhaltsverzeichnis www.stryker.com 1079-009-005 REV E 3-25... -
Seite 90: Vorbeugende Wartung
Vorbeugende Wartung Vorbeugende Wartungen sollten mindestens einmal im Jahr durchgeführt werden. Für alle medizinischen Ausrüstungsgeräte von Stryker Medical sollte ein Programm zur vorbeugenden Wartung aufgestellt werden. Je nach Gebrauchsintensität des Produkts müssen vorbeugende Wartungen unter Umständen häufiger durchgeführt werden. Alle Befestigungsmittel gesichert Seitenbügel lassen sich einwandfrei bewegen und verriegeln... -
Seite 91: Preventative Maintenance
Preventative Maintenance SCHMIERSTELLEN Kurbelschraubeneinheit (1069-042-110) Die Kopfteilverstellung auf 0 Grad einstellen und Syntech-Schmierfett (3000-200-719) durch den Schlitz und die Öffnung in der Kurbelschraubeneinheit (siehe Abbildung unten) auftragen. Überschüssiges Schmierfett abwischen. Deutsch Zurück zum Inhaltsverzeichnis www.stryker.com 1079-009-005 REV E 3-27... -
Seite 92: Herstellergarantie
Strykers garantiegemäße Verpflichtung beschränkt sich ausdrücklich auf die Bereitstellung von Ersatzteilen und Arbeitskräften für – nach seiner Wahl – ein Produkt oder das Austauschen eines Produktes, das Stryker nach alleinigem Ermessen für defekt befindet. Auf Ersuchen von Stryker müssen Produkte bzw. Teile, für die ein Garantieanspruch erhoben wird, auf eigene Kosten an das Werk zurückgeschickt werden. -
Seite 93: Servicevertrag-Programme
* Ersatzteile und Arbeitszeit zur Reparatur unter dem Vertrag zur vorbeugenden Wartung werden zum reduzierten Preis angeboten. ** Die Garantie gilt nicht für Einwegteile, Infusionsständer (außer permanent befestigte HD-Infusionsständer von Stryker), Matratzen, Batterien oder Beschädigungen, die durch Missbrauch entstanden sind.