Herunterladen Inhalt Inhalt Diese Seite drucken
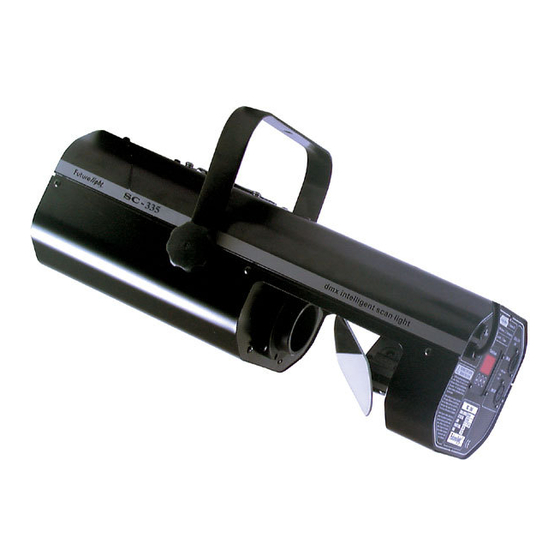
Futurelight SC-240 Scanner Bedienungsanleitung
Vorschau ausblenden Andere Handbücher für SC-240 Scanner:
Inhaltsverzeichnis

Werbung

Verfügbare Sprachen

Verfügbare Sprachen

BEDIENUNGSANLEITUNG
USER MANUAL
MODE D'EMPLOI
MANUAL DEL USUARIO
Version 2.1
© Copyright
Für weiteren Gebrauch aufbewahren!
Keep this manual for future needs!
Nachdruck verboten!
Gardez ce mode d'emploi pour des
Reproduction prohibited!
utilisations ultérieures!
Réproduction interdit!
Guarde este manual para posteriores usos.
Prohibida toda reproducción.

Werbung

Inhaltsverzeichnis
loading

Inhaltszusammenfassung für Futurelight SC-240 Scanner

  • Seite 1 BEDIENUNGSANLEITUNG USER MANUAL MODE D'EMPLOI MANUAL DEL USUARIO Version 2.1 © Copyright Für weiteren Gebrauch aufbewahren! Keep this manual for future needs! Nachdruck verboten! Gardez ce mode d’emploi pour des Reproduction prohibited! utilisations ultérieures! Réproduction interdit! Guarde este manual para posteriores usos. Prohibida toda reproducción.
  • Seite 2 FUTURELIGHT ist eine eingetragene Marke der Steinigke Showtechnic GmbH, Deutschland. FUTURELIGHT is a registered trademark of Steinigke Showtechnic GmbH, Germany. FUTURELIGHT est une marque déposée du groupe Steinigke Showtechnic GmbH, Allemagne. FUTURELIGHT es una marca registrada de Steinigke Showtechnic GmbH, Alemania.
  • Seite 3: Inhaltsverzeichnis

    SC-240 Scanner Bedienungsanleitung Inhaltsverzeichnis Einführung ......................... 4 Features.......................... 4 Geräteübersicht ......................4 Sicherheit........................... 5 Sicherheitshinweise ......................5 Bestimmungsgemäße Verwendung ................6 Installation ......................... 7 Einsetzen/Wechseln der Lampe ..................7 Strahlenverlauf........................ 8 Projektormontage......................8 Anschluss an den DMX-512 Controller / Verbindung Projektor - Projektor ....10 DMX-Protokoll .........................
  • Seite 4: Einführung

    LESEN SIE VOR DER ERSTEN INBETRIEBNAHME ZUR EIGENEN SICHERHEIT DIESE BEDIENUNGSANLEITUNG SORGFÄLTIG DURCH! Einführung Wir freuen uns, dass Sie sich für einen FUTURELIGHT SC-240 entschieden haben. Sie haben hiermit ein intelligens, leistungsstarkes und vielseitiges Beleuchtungssystem erworben. Nehmen Sie den FUTURELIGHT SC-240 aus der Verpackung.
  • Seite 5: Sicherheit

    Rückseite: 6 - DMX Ausgang 7 - DMX Eingang 8 - Netzanschluss 9 - Sicherungshalter 10 - Control Board Control Board: 11 - Enter-Taste 12 - Up-Taste 13 - Down-Tasten 14 - Display Sicherheit Sicherheitshinweise ACHTUNG! Seien Sie besonders vorsichtig beim Umgang mit gefährlicher Netzspannung. Bei die- ser Spannung können Sie einen lebensgefährlichen elektrischen Schlag erhalten! Dieses Gerät hat das Werk in sicherheitstechnisch einwandfreiem Zustand verlassen.
  • Seite 6: Bestimmungsgemäße Verwendung

    Lassen Sie die Netzleitung nicht mit anderen Kabeln in Kontakt kommen! Seien Sie vorsichtig beim Umgang mit Netzleitungen und -anschlüssen. Fassen Sie diese Teile nie mit nassen Händen an! Vergewissern Sie sich, dass die anzuschließende Netzspannung nicht höher ist als auf der Rückseite ange- geben.
  • Seite 7: Installation

    Nehmen Sie das Gerät erst in Betrieb, nachdem Sie sich mit seinen Funkionen vertraut gemacht haben. Lassen Sie das Gerät nicht von Personen bedienen, die sich nicht mit dem Gerät auskennen. Wenn Geräte nicht mehr korrekt funktionieren, ist das meist das Ergebnis von unfachmännischer Bedienung! Soll das Gerät transportiert werden, verwenden Sie bitte die Originalverpackung, um Transportschäden zu vermeiden.
  • Seite 8: Lampenjustierung

    Lampenjustierung Schraube A Schraube B Schraube C Der Lampenhalter des Gerätes wird ab Werk justiert. Da sich die zu verwendenden Lampen von Hersteller zu Hersteller unterscheiden, kann es u. U. notwendig sein, die Position des Lampenhalters nachzujustieren. Zünden Sie die Lampe und fokussieren Sie den Lichtstrahl auf einer ebenen Oberfläche (Wand). Zentrieren Sie den "Hot Spot"...
  • Seite 9 Die Aufhängevorrichtungen des Projektors muss so gebaut und bemessen sein, dass sie 1 Stunde lang ohne dauernde schädliche Deformierung das 10-fache der Nutzlast aushalten kann. Die Installation muss immer mit einer zweiten, unabhängigen Aufhängung, z. B. einem geeigneten Fangnetz, erfolgen. Diese zweite Aufhängung muss so beschaffen und angebracht sein, dass im Fehlerfall der Hauptaufhängung kein Teil der Installation herabfallen kann.
  • Seite 10: Anschluss An Den Dmx-512 Controller / Verbindung Projektor - Projektor

    Kabel erfolgen. Die Steckverbindung geht über 3-polige XLR-Stecker und - Kupplungen. Belegung der XLR-Verbindung: Wenn Sie die empfohlenen FUTURELIGHT-Controller verwenden, können Sie den DMX-Ausgang des Controllers direkt mit dem DMX-Eingang des ersten Gerätes der DMX-Kette verbinden. Sollen DMX- Controller mit anderen XLR-Ausgängen angeschlossen werden, müssen Adapterkabel verwendet werden.
  • Seite 11: Dmx-Protokoll

    DMX-Protokoll Funktionen der Steuerkanäle Steuerkanal 1 - Horizontale Spiegelbewegung (Pan) Wenn Sie den Regler verschieben, bewegen Sie den Spiegel horizontal (PAN). Allmähliches Einstellen des Spiegels bei langsamen Schieben des Reglers (0-255, 128-Mitte). Der Spiegel kann an jeder gewünschten Einstellung angehalten werden. Steuerkanal 2 - Vertikale Spiegelbewegung (Tilt) Wenn Sie den Regler verschieben, bewegen Sie den Spiegel vertikal (TILT).
  • Seite 12: Steuerkanal 4 - Shutter, Strobe, Gobos

    Steuerkanal 4 - Shutter, Strobe, Gobos 0 - 5 Shutter geschlossen 6 - 63 Keine Funktion (Shutter offen) 64 - 127 Strobe-Effekt langsam bis schnell (max. 8 Blitze/Sekunde) 128 - 132 Shutter geschlossen 133 - 135 Reset 136 - 143 Keine Funktion (Shutter offen) 144 - 151 Shutter geschlossen...
  • Seite 13: Control Board

    Control Board Das Control Board befindet sich am Projektorkopf und bietet mehrere Möglichkeiten. So lassen sich z. B. die DMX-Startadresse eingeben, ein Testprogramm abspielen oder ein Reset durchführen. Außerdem lassen sich Spezialfunktionen abrufen. Über die Up-/Down-Tasten können Sie sich innerhalb des Menüs bewegen. Auf dem Display erscheinen nacheinander: "001, rPA, rtil, tSt, rES".
  • Seite 14: Reinigung Und Wartung

    Gobos - 13 statische Gobos plus offen Strobe - Strobe-Effekt mit variabler Geschwindigkeit (1 - 8 Blitze pro Sekunde) Motor - 4 hochwertige Steppermotoren (gesteuert durch Mikroprozessoren) Elektronik - Digitaler Serieneingang DMX-512 - 4 Steuerkanäle: Steuerkanal 1 - Horizontale Spiegelbewegung (Pan) Steuerkanal 2 - Vertikale Spiegelbewegung (Tilt) Steuerkanal 3 - Farben Steuerkanal 4 - Shutter, Strobe, Gobos...
  • Seite 15: Anhang

    Sollten Sie noch weitere Fragen haben, steht Ihnen Ihr Fachhändler jederzeit gerne zur Verfügung. Anhang Wir wünschen Ihnen mit Ihrem FUTURELIGHT SC-240 viel Spaß. Wenn Sie sich an die Anweisungen der vorliegenden Bedienungsanleitung halten, versichern wir Ihnen, dass Ihnen das Gerät lange viel Freude bereiten wird.
  • Seite 16 SC-240 Scanner User manual Table of contents Introduction ........................17 Features........................17 Description of the fixture ....................17 Safety ..........................18 Safety instructions......................18 Installation ........................20 Fitting/Exchanging the lamp..................20 Beampath ........................21 Rigging.......................... 21 DMX-512 connection / connection between fixtures ............. 22 DMX-Protocol ........................
  • Seite 17: Introduction

    FOR YOUR OWN SAFETY, PLEASE READ THIS USER MANUAL CAREFULLY BEFORE YOU INITIAL START - UP! Introduction Thank you for having chosen a FUTURELIGHT SC-240. You acquired a versatile, powerful and intelligent lighting-effect. Unpack your FUTURELIGHT SC-240 and make sure that there are no damages caused by transportation.
  • Seite 18: Safety

    Rearpanel: 6 - DMX Output 7 - DMX Input 8 - Powercord 9 - Fuseholder 10 - Control board Control Board: 11 - Enter/release-button 12 - Up-button 13 - Down-button 14 - Display Safety Safety instructions CAUTION! Be careful with your operations. With a dangerous voltage you can suffer a dangerous electric shock when touching the wires! This device has left our premises in absolutely perfect condition.
  • Seite 19: Health Hazard

    Never let the power-cord come into contact with other cables! Handle the power-cord and all connections with the mains with particular caution! Make sure that the available voltage is not higher than stated on the rear panel. Make sure that the power-cord is never crimped or damaged by sharp edges. Check the device and the power-cord from time to time.
  • Seite 20: Installation

    Installation Fitting/Exchanging the lamp DANGER! Install the lamp with the device switched off only. Unplug from mains before! Screws X and Y To insert the lamp HIT 230 V/150 W open the small cover at the rearpanel (see the drawing) by loosening the 2 Phillips screws X and Y on the cover.
  • Seite 21: Beampath

    The lampholder is aligned at the factory. Due to differences between lamps, fine adjustment may improve light performance. Strike the lamp and focus the light on a flat surface (wall). Center the hot-spot (the brightest part of the beam) using the 3 adjustment screws "A, B, C”. Turn one screw at a time to drag the hot-spot diagonally across the projected image.
  • Seite 22: Danger Of Fire

    but instead use a professional structural rigger. Improper installation can result in bodily injury and.or damage to property. The projector has to be installed out of the reach of people. If the projector shall be lowered from the ceiling or high joists, professional trussing systems have to be used. The projector must never be fixed swinging freely in the room.
  • Seite 23: Occupation Of The Xlr-Connection

    Occupation of the XLR-connection: If you are using the recommended FUTURELIGHT-controllers, you can connect the DMX-output of the controller directly with the DMX-input of the first fixture in the DMX-chain. If you wish to connect DMX- controllers with other XLR-outputs, you need to use adapter-cables.
  • Seite 24: Dmx-Protocol

    DMX-Protocol Function of the control channels - 16 bit protocol Channel 1 - Horizontal mirror movement (Pan) Push slider up in order to move the mirror horizontally (PAN). Gradual mirror adjustment from one end of the slider to the other (0-255, 128-center).
  • Seite 25: Addressing

    Channel 4 - Shutter, Strobe, Gobos 0 - 5 Shutter closed 6 - 63 Full open position 64 - 127 Strobe-effect from slow to fast (max. 8 flashes/second) 128 - 132 Closed 133 - 135 Reset of the fixture 136 - 143 Full open position 144 - 151 Closed in reverse position...
  • Seite 26: Main Functions

    Main functions - DMX 512 Address settings The "001" flashes. Use the [ ] and [ ] keys to select required address (001 - 509) and press [ ] to confirm and return to the main menu. - Pan reverse This function allows you to invert the Pan-movement.
  • Seite 27: Cleaning And Maintenance

    - 4 control-channels: Channel 1: Horizontal mirror-movement (Pan) Channel 2: Vertical mirror-movement (Tilt) Channel 3: Colour-wheel Channel 4: Shutter, Strobe, Gobos Housing - Easy access to lamp and main components thanks to large opening cover and the projector‘s modular construction. Temperatures Maximum ambient temperature t : 55°...
  • Seite 28: Replacing The Fuse

    Replacing the fuse If the lamp burns out, the fine-wire fuse of the device might fuse, too. Only replace the fuse by a fuse of same type and rating. Before replacing the fuse, unplug mains lead. Procedure: Step 1: Unscrew the fuseholder on the rearpanel with a fitting screwdriver from the housing (anti- clockwise).
  • Seite 29 SC-240 Scanner Mode d'emploi Sommaire Introduction ........................30 Features........................30 Description de l'appareil....................30 Sécurité..........................31 Instructions de sécurité ....................31 Installation ........................33 Installer/remplacer de la lampe ..................33 Cours des rayons......................34 Montage du projecteur ....................34 Connexions au contrôleur DMX-512 / raccord projecteur - projecteur ......36 Protocole DMX.........................
  • Seite 30: Introduction

    POUR VOTRE PROPRE SÉCURITÉ, VEUILLEZ LIRE CE MODE D‘EMPLOI ATTENTIVEMENT AVANT LA PREMIÈRE MISE EN SERVICE! Introduction Nous vous remerçions et vous félicitons d’avoir choisi un FUTURELIGHT SC-240. Vous êtes en possession d’un effet lumineux puissant, intelligent et aux possibilités multiples. Sortez le SC-240 de son emballage.
  • Seite 31: Sécurité

    Dos de l'appareil 6 - Sortie DMX 7 - Entrée DMX 8 - Câble d’alimentation 9 - Porte-fusible 10 - Unité de contrôle Control Board: 11 - Touche Enter 12 - Affichage 13 - Touche Mode 14 - Touches Up/Down Sécurité...
  • Seite 32: Emploi Selon Les Prescriptions

    Ne laissez pas les câbles d'alimentation en contact avec d'autres câbles. Soyez prudent; lorsque vous manipulez les câbles et les connexions, vous êtes soumis à des risques d'électrocutions! Ne manipulez jamais les partys sous tension avec les mains mouillées! Assurez-vous que la tension électrique ne soit pas supérieure à celle indiquée au dos de l’appareil. Mettez le câble d'alimentation seulement dans des prises adaptées.
  • Seite 33: Installation

    Si vous deviez transporter l'appareil, utilisez l'emballage d'origine pour éviter tout dommage. Notez que pour des raisons de sécurité, il est interdit d'entreprendre toutes modifications sur l'appareil. Il est interdit de retirer le code barre de l'appareil. Ceci annulerait toute garantie. Si l'appareil est utilisé...
  • Seite 34: Ajustage De La Lampe

    Ajustage de la lampe Vis A Vis B Vis C Le porte-lampe de l’appareil est ajusté à l‘usine. Comme les lampes à utiliser diffèrent d’un fabricant à l’autre, il pourrait devenir nécessaire de procéder à un nouveau ajustage de la position du porte-lampe. Allumez la lampe et focussez le rayon de lumière sur une surface plane (mur).
  • Seite 35: Danger D'incendie

    Les dispositifs de suspension du projecteur doivent être construites et conceptionnés de telle manière qu’ils puissent supporter son charge utile de 10 fois pour 1 heure sans déformation permanente nuisible. L’installation doit toujours être effectuée avec une deuxième suspension indépendante, par ex. un filet de capture approprié.
  • Seite 36: Connexions Au Contrôleur Dmx-512 / Raccord Projecteur - Projecteur

    Raccord XLR 3 pôles. Occupation de la connection XLR: Quand vous utilitsez les contrôleurs recommandés de FUTURELIGHT, vous pouvez directement connecter la sortie DMX du contrôleur avec l'entrée DMX du premier appareil de la chaîne DMX. Quand vous voulez connecter des contrôleurs DMX avec des sorties DMX différentes, il est nécéssaire d'utiliser des câbles...
  • Seite 37: Protocole Dmx

    Protocole DMX Fonctions des canaux de contrôle Canal de contrôle 1 - Mouvement horizontal (Pan) Les mouvements horizontaux du miroir (PAN) sont contrôles par le régulateur. Ajuster le miroir peu à peu en poussant lentement le régulateur (0-255, 128-center). Vous pouvez arrêter le miroir à la position désirée. Canal de contrôle 2 - Mouvement vertical (Tilt) Les mouvements verticaux du miroir (TILT) sont contrôles par le régulateur.
  • Seite 38: Codage Du Projecteur

    Canal de contrôle 4 - Shutter, Strobe, Gobos 0 - 5 Shutter fermé 6 - 63 Pas de fonction (Shutter ouvert) 64 - 127 Effet stroboscopique lente à vite (max. 8 flash par seconde) 128 - 132 Fermé 133 - 135 Reset 136 - 143 Pas de fonction (Shutter ouvert) 144 - 151 Fermé...
  • Seite 39: Fonctions Principales

    Fonctions principales - DMX 512 Codage de l'adresse initiale: Le caractère "001" clignote. Pressez les touches Up/Down pour sélectioner l'adresse désirée (001-509). Pressez la touche Enter pour confirmer la séléction. - Pan reverse: Cette fonction permet d'invertir le mouvement PAN. Pressez les touches Up/Down pour sélectioner "ON" pour activer cette fonction ou "OFF"...
  • Seite 40: Dimensions Et Poids

    Canal de contrôle 1 - Mouvement horizontal (Pan) Canal de contrôle 2 - Mouvement vertical (Tilt) Canal de contrôle 3 - Roue de couleurs Canal de contrôle 4 - Shutter, Strobe, Gobos Témperatures Maximale température ambiante t : 55° C Maximale température du boîtier (à...
  • Seite 41: Appendice

    Avant le remplacement du fusible débrancher l'appareil. Procédure: Pas 1: Dévissez le porte-fusible (dans le sens inverse des aiguilles d'une montre) au dos de l'appareil avec un tournevis et le retirer du boîtier. Pas 2: Retirez le fusible défectueux du porte-fusible. Pas 3: Installez le nouveau fusible au porte-fusible.
  • Seite 42 SC-240 Scanner Manual del usuario Contenido Introducción ........................43 Características ......................43 Descripción de las partes....................43 Seguridad ........................44 Instrucciones de seguridad ................... 44 Instrucciones de manejo ....................45 Instalación ........................46 Instalación/reemplazar de la lámpara ................46 Marcha de los rayos...................... 47 Conexión al controlador DMX / conexión proyector - proyector........
  • Seite 43: Introducción

    DETENIDAMENTE ANTES DE LA CONEXIÓN INICIAL! Introducción Gracias por haber elegido un FUTURELIGHT SC-240. Verá que ha adquirido un aparato potente y versátil. Desembale su SC-240. Antes de la puesta en marcha inicial, por favor asegurese de que no hay daños causados durante el transporte.
  • Seite 44: Seguridad

    Panel trasero: 6 - Salida DMX 7 - Entrada DMX 8 - Conexion a la red 9 - Portafusible 10 - Unidad de control Unidad de control: 11 - Tecla Enter/Release 12 - Tecla Up 13 - Tecla Down 14 - Pantalla Seguridad Instrucciones de seguridad ¡PRECAUCIÓN!
  • Seite 45: Peligro Para La Salud

    ¡No deje que el cable de alimentación entre en contacto con otros cables! ¡Maneje los cables de corriente alterna y las conexiones de corriente alterna con mucha precaución! Asegúrese de que la tensión de alimentación no es mayor que la indicada en el panel trasero. Preste atención que el cable de alimentación no esté...
  • Seite 46: Instalación

    ¡Por favor tenga en cuenta que por razones de seguridad las modificaciones no autorizadas del aparato están prohibidas! El código de barras de serie no debe ser quitado del aparato, en caso de que esto ocurra la garantía ya no es válida.
  • Seite 47: Marcha De Los Rayos

    Ajuste de la lámpara Tornillo A Tornillo B Tornillo C El sistema de portalámparas está ajustado en la fábrica. Como las lámparas de los fabricantes diferentes son diferentes, puede ser necesario de reajustar la posición del sistema de portalámparas. Enciende la lámpara y foca el rayo en una superficie plana (pared). Centre el "Hot Spot" (la parte más brilliante del rayo) en tornear los 3 tornillos "A, B, C".
  • Seite 48: Peligro De Incendio

    La suspensión del proyector debe ser fabricado de una manera que puede llevar 10 vezes la carga por una hora sin sufrir deformaciones dañosas permanentes. La instalación siempre debe ser efectuada con una segunda suspensión independiente, por ejemplo una red de anclaje apropriada.
  • Seite 49: Conexión Al Controlador Dmx / Conexión Proyector - Proyector

    La conexión se efectua mediante clavijas y conectores XLR tripolares. La ocupación de la conexión XLR es: Cuando Vd. utilice los controladores de FUTURELIGHT recomendados, puede conectar la salida DMX del controlador directamente con la entrada DMX del primer aparato de la cadena DMX. Cuando Vd. quiere conectar controladores DMX con otros salidas DMX, se tiene que utilizar cables de adaptación.
  • Seite 50: Protocolo Dmx

    Protocolo DMX Fonctions de los canales de control Canal 1: Movimiento horizontal (Pan) Establezca los ajustes para mover el espejo horizontalmente. Los movimientos graduales del espejo mediante el ajuste lento de los valores DMX (0-255; 128 = centro). Canal 2 - Movimiento vertical (Tilt) Establezca los ajustes para mover el espejo verticalmente (TILT).
  • Seite 51: Direccionamiento Del Proyector

    Canal 4 - Shutter, efecto flash, gobos 0 - 5 Shutter cerrado 6 - 63 No funcion (Shutter abierto) 64 - 127 Efecto flash de lento hasta rápido (8 flashes/segondo como máximo) 128 - 132 Shutter cerrado 133 - 135 Reset 136 - 143 No funcion (Shutter abierto)
  • Seite 52: Funciones Principales

    Confirme la selección deseada con la tecla Enter. Las funciones son descritas en la parte siguiente. Funciones principales - Ajustar la dirección de comienzo DMX-512: "001" parpadea. Pulse las teclas Up/Down para ajustar la dirección de comienzo (001-509) deseada. Pulse la tecla Enter para confirmar.
  • Seite 53: Dimensiones Y Peso

    Canal 3 - Rueda de colores Canal 4 - Shutter, efecto flash, gobos Caja Aces fácil a la lámpara y a los componentes mas importantes gracias a la apertura grande y la construcción modular del proyector. Témperaturas Máxima temperatura ambiente t : 55°...
  • Seite 54: Reemplazar El Fusible

    Reemplazar el fusible Si la lámpara se funde, el fino cable del fusible del aparato podría fundirse también. Reemplazar el fusible por un fusible del mismo tipo. Antes de reemplazar el fusible desenchufar el cable de la red. Procedimiento: Paso 1: Desatornillar de la caja el portafusibles del panel trasero con un destornillador adecuado (en dirección contraria a las agujas del reloj).

Inhaltsverzeichnis