Herunterladen Inhalt Inhalt Diese Seite drucken
NEC MultiSync LCD1510V Bedienerhandbuch
Vorschau ausblenden Andere Handbücher für MultiSync LCD1510V:

Werbung

Verfügbare Sprachen
  • DE

Verfügbare Sprachen

  • DEUTSCH, seite 46
MultiSync LCD
MultiSync LCD
MultiSync LCD
User's Manual
1510
1510V
2010

Werbung

Inhaltsverzeichnis
loading

Inhaltszusammenfassung für NEC MultiSync LCD1510V

  • Seite 1 MultiSync LCD 1510 MultiSync LCD 1510V MultiSync LCD 2010 User’s Manual...
  • Seite 3 Council Directive 73/23/EEC: - EN 60950 Council Directive 89/336/EEC: - EN 55022 - EN 61000-3-2 - EN 61000-3-3 - EN 50082-1 (IEC 801-2) (IEC 801-3) (IEC 801-4) and marked with NEC Europe Ltd. Ismaning Office Steinheilstraße 4-6 D-85737 Ismaning, Germany...
  • Seite 4: Safety Instruction

    NEC is a registered trademark of NEC Corporation. ErgoDesign, IPM, OSM and ColorControl are trademarks of NEC Home Electronics, Ltd. MultiSync is a registered trademark of NEC Technologies, Inc in U.S., and of NEC Home Electronics, Ltd in Canada, U.K., Germany, France, Spain, Italy, Austria, Benelux, Switzerland, Denmark, Finland, Norway and Saudi Arabia.
  • Seite 5: Fcc Information

    For the Customer to use in U.S.A or Canada. Canadian Department of Communications Compliance Statement DOC: This Class B digital apparatus meets all requirements of the Canadian Interference-Causing Equipment Regulations. Cet appareil numérique de la classe B respecte toutes les exigences du Règlement sur le matériel brouiller du Canada.
  • Seite 6 can be determined by turning the equipment off and on, the user is encouraged to try to correct the interference by one or more of the following measures: Reorient or relocate the receiving antenna. Increase the separation between the equipment and receiver.
  • Seite 7 Multisync LCD 1510 Multisync LCD 2010 TCO'95 Congratulations! You have just purchased a TCO'95 approved and labelled product! Your choice has provided you with a product developed for professional use. Your purchase has also contributed to reducing the burden on the environment and also, to the further development of environmentally adapted electronics products.
  • Seite 8 computers. The labelling scheme was developed as a joint effort by the TCO (The Swedish Confederation of Professional Employees), Naturskyddsforeningen (The Swedish Society for Nature Conservation) and NUTEK (The National Board for Industrial and Technical Development in Sweden). The requirements cover a wide range of issues: environment, ergonomics, usability, emission of electrical and magnetic fields, energy consumption and electrical and fire safety.
  • Seite 9: Environmental Requirements

    TCO'95 is a co-operative project between TCO (The Swedish Confederation of Professional Employees), Naturskyddsforeningen (The Swedish Society for Nature Conservation) and NUTEK (The National Board for Industrial and Technical Development in Sweden). Environmental Requirements Brominated flame retardants Brominated flame retardants are present in printed circuit boards, cables, wires, casings and housings.
  • Seite 10 Mercury** Mercury is sometimes found in batteries, relays and switches and back- light system. Mercury damages the nervous system and is toxic in high doses. TCO'95 requirement states that batteries may not contain more than 25 ppm (parts per million) of mercury. It also demands that no mercury is present in any of the electrical or electronics components concerned with the display unit except the back-light system.
  • Seite 11 English Deutsch Français Español Italiano Appendix...
  • Seite 13 LA-1521JMW LA-1522JMW LA-2032JMW Printed in Japan 78133551...
  • Seite 14 English...
  • Seite 16 1510 1510V 2010 Introduction to the NEC MultiSync / LCD / LCD 1510 1510V 2010 Congratulations on your purchase of the NEC MultiSync LCD 1510 /LCD true colour monitor! 1510V 2010 Wide Viewing Angle Technology (MultiSync LCD and MultiSync LCD...
  • Seite 17 E - 2 Introduction to the NEC MultiSync LCD / LCD / LCD 1510 1510V 2010 OSM (On-Screen Manager) Controls Allow you to quickly and easily adjust all elements of your screen image via simple to use on-sreen menus. ErgoDesign Features Enhance human ergonomics to improve the working environment, protect the health of the user and save money.
  • Seite 18 Introduction to the NEC MultiSync LCD / LCD / LCD E - 3 1510 1510V 2010 FullScan Capability Allows you to use the entire screen area in most resolutions, significantly expanding image size. VESA Standard Mounting Interface Allows users to connect their MultiSync monitor to any VESA standard third party mounting arm or bracket.
  • Seite 19: Contents Of Package

    1510V MultiSync LCD monitor 2010 monitor with Video Signal Cable with 15-pin VGA to BNC Cable and AC Adapter and AC Adapter – NEC MultiSync LCD (Model LA-152lJMW)/ 1510 NEC MultiSync LCD (Model LA-1522JMW). 1510V NEC MultiSync LCD (Model LA-2032JMW).
  • Seite 20: Recommended Use

    Recommended Use E - 5 Recommended Use For optimum performance, please note the following when setting up and using the MultiSync LCD / LCD / LCD colour monitor: 1510 1510V 2010 • DO NOT OPEN THE MONITOR. There are no user serviceable parts inside and opening or removing covers may expose you to dangerous shock hazards or other risks.
  • Seite 21 E - 6 Recommended Use • Use supplied AC Adapter. • The inside of the fluorescent tube located within the LCD monitor contains mercury. Please follow the bylaws or rules of your local municipality to dispose of this tube property. •...
  • Seite 22 Recommended Use E - 7 CORRECT PLACMENT AND ADJUSTMENT OF THE MONITOR CAN REDUCE EYE, SHOULDER AND NECK FATIGUE. CHECK THE FOLLOWING WHEN YOU POSITION THE MONITOR: • Adjust the monitor height so that the top of the screen is at or slightly below eye level.
  • Seite 23: Installation

    E - 8 Installation Installation Connection to your Personal Computer The MultiSync LCD / LCD / LCD true colour monitor 1510 1510V 2010 complements PC compatible computers. Your system has one of two configurations: – the video controller is built into the computer. –...
  • Seite 24 Installation E - 9 connector on the monitor labeled VS (Figure D.1). Place the 15-pin VGA to BNC cable and the AC adapter cable under Clip A (Figure D.1A). Then place the 15-pin VGA to BNC cable and the AC adapter cable under Clip B (Figure D.1B).
  • Seite 25 E - 10 Installation Mac Adapter (not included) 15-pin mini D-SUB Figure A.1 Figure B.1 Connector Cover MultiSync monitor 1510 MultiSync monitor 2010 Figure C.1 Power Cord Figure E.1 Figure F.1 Figure D.1A Figure D.1B Figure D.1 Power Switch...
  • Seite 26 Installation E - 11 Connection to your Personal Computer (Macintosh) With the Macintosh cable adapter, the MultiSync LCD / LCD 1510 1510V / LCD colour monitor is compatible with the Macintosh family of 2010 computers. You will connect your MultiSync colour monitor one of two ways to your Macintosh computer: –...
  • Seite 27 E - 12 Installation the BNC connector on the monitor labeled H/CS. If you have a fifth BNC connector (Vertical Sync), connect it to the BNC connector on the monitor labeled VS (Figure D.1). Place the 15-pin VGA to BNC and AC adapter cable under Clip A(Figure D.1A).
  • Seite 28 Installation E - 13 Shipping Screws Loosen the two shipping screws (Figure SS.1). (The screws will not come out. Turn them until they are loosened completely.) If the screws are loosened correctly only the screen will rise up when lifting the cabinet.
  • Seite 29 E - 14 Installation Screen Rotation Before rotating, the screen must be raised to the highest level to avoid knocking the screen on the desk or pinching your fingers. To raise the screen, place hands on each side of the monitor and lift up (Figure R.1).
  • Seite 30 Installation E - 15 Phillips head screwdriver Figure SS.1 Cable Cover Lift up then remove back cover Leave sufficient length of cable Figure CM.1 Figure CM.2 Push in and slide down Figure CM.3 Figure RL.1...
  • Seite 31 E - 16 Installation Figure RL.2 Figure RL.3 Figure R.1 Figure R.2 Figure TS.1...
  • Seite 32 Installation E - 17 Remove Monitor Stand for Mounting To prepare the monitor for alternate mounting purposes: 1. Disconnect all cables. 2. Place hands on each side of the monitor screen and raise it to the maximun height (Figure R.1). 3.
  • Seite 33 E - 18 Controls Controls OSM Controls The OSM controls on the front of the monitor provide the following functions: To access OSM press any of the control buttons ( , , , ) or the PROCEED or EXIT button. To rotate OSM between Landscape and Portrait modes, press the RESET button.
  • Seite 34 Controls E - 19 Brightness/Contrast Controls BRIGHTNESS Adjusts the overall image and background screen brightness. CONTRAST Adjusts the image brightness in relation to the background. AUTO ADJUST CONTRAST Adjusts the image displayed for non-standard video inputs. Auto Adjust MultiSync LCD , LCD monitor only 1510...
  • Seite 35 E - 20 Controls Image Adjust Controls H. SIZE Adjusts the horizontal size by increasing or decreasing the this setting. FINE Improves focus, clarity and image stability by increasing or decreasing this setting. NOTE: The Image Adjust Fine control must be used to complete the setup of your MultiSync LCD monitor.
  • Seite 36 Controls E - 21 Information Indicates the current display resolution, frequency setting and type of Sync signal of the monitor. NOTE: Mode Change should only be used if a resolution is not recognized by the monitor. The user can change to the appropriate resolution by selecting the Mode information and selecting (increase or decrease) the corresponding option.
  • Seite 37: Specifications

    E - 22 Specifications Specifications MultiSync LCD / LCD 1510 1510V Display 1510: 38 cm (15 inch) viewable image size; 1024 x 768 native resolution (Pixel Count); active matrix; thin film transistor (TFT); liquid crystal display (LCD); 0.297 mm dot pitch; 180 cd/m white luminance, typical;...
  • Seite 38 ** NEC cites recommended resolutions at 75 Hz for optimal display performance. *** Active display area is dependent upon the signal timing. Technical specifications are subject to change without notice.
  • Seite 39 E - 24 Specifications Multisync LCD 2010 Display 51.1 cm (20.1 inch) viewable image size; 1280 x 1024 native resolution (Pixel Count); active matrix; thin film transistor (TFT); liquid crystal display (LCD); 0.31 mm dot pitch; 150 cd/m white luminance, typical; 150:1 contrast ratio, typical Analog 0.7 Vp-p 75 Ω...
  • Seite 40 ** NEC cites recommended resolutions at 60 Hz for optimal display performance. *** Active display area is dependent upon the signal timing. Technical specifications are subject to change without notice.
  • Seite 41: Troubleshooting/Support

    ”ghost” of that image remains, the monitor should be turned off for one hour to erase the image. NOTE: As with all personal display devices, NEC recommends using a screen saver at regular intervals whenever the screen is idle.
  • Seite 42 Troubleshooting/Support E - 27 Problem Cheak These Items Image is unstable, - Signal cable should be completely attached to the unfocused or computer. swimming is - Use the OSM Image Adjust controls to focus and apparent adjust display by increasing or decreasing the Fine Control. When the display mode is changed, the OSM Image Adjust settings may need to be re-adjusted.
  • Seite 44 Deutsch...
  • Seite 46: Vorstellung Des Nec Multisync

    / LCD D - 1 1510 1510V 2010 Vorstellung des NEC MultiSync / LCD / LCD 1510 1510V 2010 Herzlichen Glückwunsch zum Kauf Ihres NEC MultiSync LCD 1510 /LCD Farbmonitors. 1510V 2010 Weitwinkel-Technologie (nur MultiSync LCD und MultiSync LCD 1510 2010 Diese Technologie ermöglicht die Betrachtung des Bildes (Hoch- und...
  • Seite 47 D - 2 Vorstellung des NEC MultiSync LCD / LCD / LCD 1510 1510V 2010 Farbeinstellungsmenü (ColorControl System) Über das ColorControl System können die Farben Ihres Bildschirmes exakt eingestellt und die Farbintensität einer Vielzahl von Anforderungen angepaßt werden. OSM (On Screen Manager) Der On Screen Manager erlaubt eine direkte, menügesteuerte Einstellung...
  • Seite 48 Vorstellung des NEC MultiSync LCD / LCD / LCD D - 3 1510 1510V 2010 IPM-System (Intelligent PowerManager) Der Intelligent PowerManager (intelligenter Energieverwalter) ist eine fortschrittliche Einrichtung zum Energiesparen. Bei Arbeitspausen am LCD-Monitor werden 2/3 an Energie und Kosten eingespart, Emissionen reduziert und der Sauerstoffverbrauch am Arbeitsplatz wird niedriger.
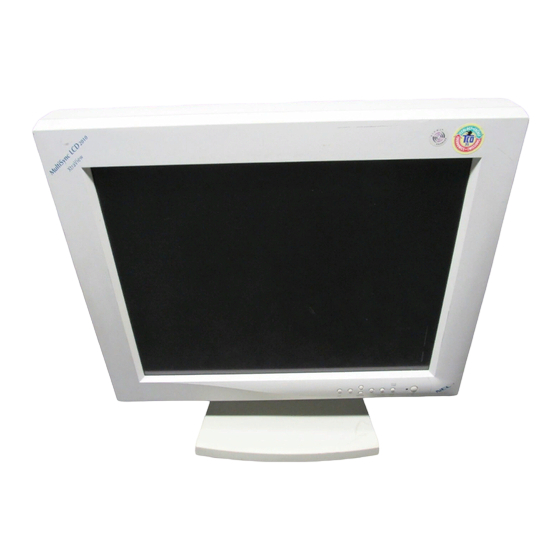
  • Seite 49 1510V MultiSync LCD Monitor mit 2010 Monitor mit Videosignalkabel und Videosignalkabel - 16 Pin VGA AC-Adapter. auf BNC - und AC-Adapter. – NEC MultiSync LCD (Modell LA-1521JMW) 1510 NEC MultiSync LCD (Modell LA-1522JMW) 1510V NEC MultiSync LCD (Modell LA-2032JMW) 2010 –...
  • Seite 50: Empfehlungen Zur Benutzung

    Empfehlungen zur Benutzung D - 5 Empfehlungen zur Benutzung Um eine optimale Leistungsfähigkeit Ihres LCD / LCD 1510 1510V Farbmonitors zu gewährleisten, sollten die nachfolgend 2010 aufgeführten Punkte bei der Aufstellung Ihres neuen Gerätes beachtet werden: • ÖFFNEN SIE DEN MONITOR NICHT. Im Inneren des Gerätes befinden sich keine Teile, die vom Benutzer selbst gewartet werden können.
  • Seite 51 D - 6 Empfehlungen zur Benutzung • Benutzen Sie den Monitor nur in sauberer und trockener Umgebung. • Transportieren Sie den Monitor mit äußerster Vorsicht. Bewahren Sie das Verpackungsmaterial für einen möglicherweise erneuten Transport auf. • Der Netzstecker ist das wichtigste Teil beim Abtrennen des Monitors vom Netz.
  • Seite 52 Empfehlungen zur Benutzung D - 7 • Wenn das Gerät bei Bedienung entsprechend des Bedienerhandbuches nicht ordnungsgemäß funktioniert. DAMIT AUGEN, NACKEN- UND SCHULTERMUSKULATUR BEIM ARBEITEN AM BILDSCHIRM ENTLASTET WERDEN, BEACHTEN SIE BEIM AUFSTELLEN UND EINSTELLEN IHRES MONITORS BITTE DIE NACHFOLGEND AUFGEFÜHRTEN HINWEISE: •...
  • Seite 53: Installation

    D - 8 Installation Installation Anschluß an Ihren PC Der MultiSync LCD / LCD / LCD Farbmonitor ist für den 1510 1510V 2010 Einsatz an PC kompatiblen Computern ausgelegt. Ihr System verfügt über eine von zwei möglichen Konfigurationen: – die Videosteuerung ist in Ihrem Computer installiert –...
  • Seite 54 Installation D - 9 mit B gekennzeichneten Anschluß an. Sollten Sie ein viertes BNC-Kabel haben, schließen Sie dieses bitte an den am Monitor mit H/CS gekennzeichneten Anschluß an. Ein möglicherweise vorhandenes fünftes BNC-Kabel (Vertikal-Synchronisation) ist an den mit VS gekennzeichneten Anschluß (Abb. D.1) anzuschließen.
  • Seite 55 D - 10 Installation Macintosh-Kabeladapter Mac Adapter (not included) 15-Pin 15-pin Mini D-SUB mini D-SUB Abb. A.1 Abb B.1 Figure A.1 Figure B.1 Connector Anschlußabdeckung Cover MultiSync MultiSync Monitor 1510 monitor 1510 MultiSync MultiSync monitor 2010 LCD2010 Monitor Abb. C.1 Figure C.1 Netzkabel Power Cord...
  • Seite 56 Installation D - 11 Anschluß an Ihren PC (Macintosh) Mit dem Macintosh-Kabeladapter ist der MultiSync LCD / LCD 1510 1510V / LCD Farbmonitor für den Anschluß an Computer der Macintosh- 2010 Familie geeignet. Ihr System verfügt über eine von zwei möglichen Konfigurationen: –...
  • Seite 57 D - 12 Installation BNC-Kabel an den auf dem Monitor mit R gekennzeichneten BNC-Anschluß, das grüne BNC-Kabel an den mit G/Sync gekennzeichneten Anschluß und das blaue BNC-Kabel an den mit B gekennzeichneten Anschluß an. Sollten Sie ein viertes BNC-Kabel haben, schließen Sie dieses bitte an den am Monitor mit H/CS gekennzeichneten Anschluß...
  • Seite 58: Transportschrauben

    Installation D - 13 Transportschrauben Lösen Sie die beiden rechts im Diagramm abgebildeten Transportschrauben. (Abbildung SS.1) (Die Schrauben kommen nicht heraus. Drehen Sie die Schrauben bis sie vollständig lose sind.) Wenn die Schrauben richtig gelöst wurden, kommt beim Anheben des Gerätes lediglich der Bildschirm nach oben (Beziehen Sie sich auf Abb.
  • Seite 59: Neigen Und Schwenken

    D - 14 Installation Bildschirmdrehung Vor dem Drehen muß der Bildschirm in die höchste Stellung gebracht werden, um zu vermeiden, daß der Bildschirm auf dem Schreibtisch aufschlägt oder Sie sich Ihre Finger klemmen. Um den Bildschirm zu drehen, fassen Sie den Schirm mit beiden Händen und drehen diesem im Uhrzeigersinn, wenn Sie vom Breitformat auf das Hochformat schwenken wollen, und umgekehrt, wenn Sie vom Hochformat in das Breitformat schwenken wollen.
  • Seite 60 Installation D - 15 Schraubendreher Phillips head mit Philips-Kopf screwdriver Figure SS.1 Abb.SS.1 Cable Cover Kabelabdeckung Lift up then remove Anheben, dann Rückwand back cover entfernen Ausreichend Restkabel Leave sufficient lassen length of cable Abb. CM.1 Figure CM.1 Figure CM.2 Abb.
  • Seite 61 D - 16 Installation Figure RL.2 Figure RL.3 Abb. RL.3 Abb. RL.2 Abb. R.1 Figure R.1 Abb. R.2 Figure R.2 Figure TS.1 Abb. TS.1...
  • Seite 62 Installation D - 17 Abnehmen des Monitorfußes für die Montage Vorbereiten des Monitors für verschiedene Montagezwecke: 1. Trennen Sie alle Kabel ab. 2. Halten Sie den Monitor an jeder Seite fest und heben Sie ihn so weit wie möglich an (Abb. R.1). 3.
  • Seite 63: Bedienungselemente

    D - 18 Bedienungselemente Bedienungselemente CSM Bedienungselemente Mit den sich vorne am Gerät befindlichen OSM Bedienungselementen werden die nachfolgend aufgeführten Funktionen ausgeführt: Um auf OSM Zugriff nehmen zu können, betätigen Sie die Steuerungstasten ( , , ) oder die PROCEED bzw. EXIT-Taste. Um OSM zwischen Quer- und Hochformat zu drehen, müssen Sie die RESET- Taste drücken.
  • Seite 64 Bedienungselemente D - 19 Hauptmenü Untermenü RESET Setzt alle Parameter Setzt alle Parameter des hervorgehobenen des hervorgehobenen Steuermenüs auf die Steuermenüs auf die Werkseinstellung Werkseinstellung zurück. zurück. HINWEIS: Wird die RESET-Taste im Haupt- oder Untermenü gedrückt, erscheint ein Warnfenster, das Ihnen die Aufhebung der RESET-Funktion durch Betätigung der EXIT-Taste ermöglicht.
  • Seite 65 D - 20 Bedienungselemente V. POSITION Steuert die Bildhöhe innerhalb des LCD-Anzeigebereiches. AUTO Stellt automatisch die horizontale und vertikale Bildposition innerhalb des LCD-Anzeigebereiches ein. Bildeinstellungsregler H. SIZE Stellt die Bildbreite durch Erhöhen oder Verringern dieser Einstellung ein. FINE Verbessert die Bildschärfe, die Deutlichkeit und Bildstabilität durch Erhöhen oder Verringern dieser Einstellung.
  • Seite 66 Bedienungselemente D - 21 (links, rechts, oben oder unten) des OSM-Steuerungsmenüs. ALL RESET Das Anwählen von ALL RESET ermöglicht Ihnen die Rückstellung aller OSM-Einstellungen auf die werkseitig eingestellten Werte. Einzelne Einstellungen können durch Hervorheben des Reglers, den Sie betätigen möchten, und anschließender Betätigung der RESET-Taste zurückgestellt werden.
  • Seite 67: Technische Daten

    D - 22 Technische Daten Technische Daten MultiSync LCD / LCD 1510 1510V Anzeige: 1510: 38 cm (15 Zoll) sichtbarer Bereich; Aktiv Matrix Dünnfilm Transistor (TFT) LCD-Anzeige; 0,297 mm Dot Pitch max. Auflösung 1024 x 768; 180 cd/m Leuchtstärke; Kontrast 100:1. 1510V: 38 cm (15 Zoll) sichtbarer Bereich;...
  • Seite 68 Entspricht die interpolierte Auflösung nicht exakt einem Vielfachen der physikalischen Auflösung, können bei der mathematischen Interpolation, gleiche Linien dicker als andere erscheinen. ** von NEC empfohlene Auflösung bei 75 Hz für optimale Bildqualität. *** Der aktive sichtbare Bereich ist abhängig vom Eingangssignal. Technische Änderungen vorbehalten.
  • Seite 69 D - 24 Technische Daten MultySync LCD 2010 Anzeige: 51.1 cm (20.1 Zoll) sichtbarer Bereich; Aktiv Matrix Dünnfilm Transistor (TFT) LCD-Anzeige; 0.31 mm Dot Pitch max. Auflösung 1280 x 1024; 150 cd/m Leuchtstärke; Kontrast 150:1. Eingangssignal: Video Analog 0,7 Vp-p/75 Ohm Sync Separate Sync.
  • Seite 70 Entspricht die interpolierte Auflösung nicht exakt einem Vielfachen der physikalischen Auflösung, können bei der mathematischen Interpolation, gleiche Linien dicker als andere erscheinen. ** von NEC empfohlene Auflösung bei 75 Hz für optimale Bildqualität. *** Der aktive sichtbare Bereich ist abhängig vom Eingangssignal. Technische Änderungen vorbehalten.
  • Seite 71 Bild zu sehen und es erscheint jetzt der “Geist” dieses Bildes, so schalten Sie den Monitor für eine Stunde lang aus, um das Bild zu löschen. HINWEIS: Wie bei allen PC-Displaygeräten empfiehlt NEC die regelmäßige Benutzung eines Bildschirmschoners während der Arbeitspausen.
  • Seite 72 Fehlersuche/Abhilfe D - 27 Störung Notwendige Überprüfungen Das Bild ist unstabil, - Das Signalkabel muß fest an der/den Display-Karte/ unscharf oder Computer angeschlossen sein. scheint unscharf - Nutzen Sie den OSM-Menüpunkt Image Adjust und oder scheint zu stellen Sie das Bild mit Hilfe des schwimmen Feinabstimmungsreglers ein, bis es scharf und klar ist.
  • Seite 74 Français...
  • Seite 76 Introduction au moniteur NEC MultiSync LCD /LCD / LCD F - 1 1510 1510V 2010 Introduction au moniteur NEC MultiSync LCD 1510 / LCD 1510V 2010 Toutes nos félicitations pour votre acquisition du moniteur “true color” NEC MultiSync LCD /LCD...
  • Seite 77 F - 2 Introduction au moniteur NEC MultiSync LCD /LCD / LCD 1510 1510V 2010 Réglages OSM (On-Screen Manager) Vous permettent de régler rapidement et facilement tous les éléments de votre image écran à l’aide de menus simples à utiliser.
  • Seite 78 Introduction au moniteur NEC MultiSync LCD /LCD / LCD F - 3 1510 1510V 2010 Technologie multifréquences Règle automatiquement le moniteur sur la fréquence de balayage de la carte vidéo, ce qui procure un affichage à la résolution requise. Caractéristique FullScan Vous permet d’utiliser toute la surface de l’écran avec la plupart des...
  • Seite 79: Contenu De La Boîte

    1510 1510V 2010 moniteur avec câble vidéo et moniteur avec câble VGA à BNC adaptateur AC à 15 broches et adaptateur CA – NEC MultiSync LCD (modèle LA-1521JMW)/ 1510 NEC MultiSync LCD (modèle LA-1522JMW). 1510V NEC MultiSync LCD (modèle LA-2032JMW) 2010 –...
  • Seite 80: Utilisation Recommandée

    Utilisation recommandée F - 5 Utilisation recommandée Pour des performances optimales, prenez les éléments suivants en considération pour installer et utiliser le moniteur couleur MultiSync /LCD / LCD 1510 1510V 2010 • N’OUVREZ PAS LE MONITEUR. Il ne contient aucune pièce pouvant être réparée par l’utilisateur.
  • Seite 81 F - 6 Utilisation recommandée • Saisissez le cordon secteur par sa fiche pour le débrancher de la prise de courant. Le moniteur doit être installé près d’une prise de courant facilement accessible. • Utilisez l’adaptateur CA fourni. • L’intérieur du tube fluorescent à l’intérieur du moniteur contient du mercure.
  • Seite 82 Utilisation recommandée F - 7 UN POSITIONNEMENT ET UN REGLAGE CORRECTS DU MONITEUR PEUVENT REDUIRE LA FATIGUE OCULAIRE ET CELLE AFFECTANT LES EPAULES ET LE COU. CONTROLEZ LES ELEMENTS SUIVANTS LORSQUE VOUS POSITIONNEZ LE MONITEUR : • Réglez la hauteur du moniteur de façon à ce que le haut de l’écran soit situé...
  • Seite 83 F - 8 Installation Installation Connexion à un ordinateur de type PC Le moniteur couleur MultiSync LCD / LCD / LCD 1510 1510V 2010 complète les ordinateurs compatibles PC. Votre système a l’une des deux configurations suivantes : – le contrôleur vidéo est intégré à la carte mère de l’ordinateur, –...
  • Seite 84 Installation F - 9 sur le connecteur BNC du moniteur portant a mention H/CS. S’il y a un cinquième connecteur BNC (synchro verticale), branchez-le au connecteur BNC du moniteur portant la mention VS (Figure D.1). Placez le câble VGA/BNC à 15 broches sous Clip B (Figure D.1B).
  • Seite 85 F - 10 Installation Mac Adapter Macintosh l’adaptateur (not included) 15-pin 15 Broches mini DSUB mini D-SUB Figure A.1 Figure A.1 Figure B.1 Connector Couvercle de Cover Moniteur connecteurs MultiSync MultiSync LCD 1510 monitor 1510 MultiSync Moniteur MultiSync LCD monitor 2010 2010 Figure C.1...
  • Seite 86 Installation F - 11 Connexion à votre ordinateur (Macintosh) Equipé de l’adaptateur de câble pour Macintosh, le moniteur couleur MultiSync LCD / LCD est compatible avec la série des 1510 1510V ordinateurs Macintosh. Votre moniteur couleur MultiSync LCD se connecte à votre Macintosh selon l’une des deux façons suivantes : –...
  • Seite 87 F - 12 Installation du moniteur portant la mention H/CS. S’il y a un cinquième connecteur BNC (synchro verticale), branchez-le au connecteur BNC du moniteur portant la mention VS (Figure D.1). Placez le câble VGA/BNC à 15 broches sous Clip B (Figure D.1B). Remontez le couvercle de connecteur.
  • Seite 88 Installation F - 13 Vis de transport Desserrez les deux vis de transport indiqués dans le diagramme à droite. (Figure SS.1). (Les vis ne se retirent pas. Tournez-les jusqu’à ce qu’elles soient entièrement desserrées). Si les vis ont été desserrées correctement, seul l’écran se lèvera lorsque vous levez le coffret (Reportez-vous à...
  • Seite 89 F - 14 Installation Rotation de l’écran Avant de le tourner, l’écran doit être levé en position supérieure afin d’éviter que l’écran heurte la table ou que vous vous coinciez les doigts. Pour lever l’écran, placez vos des deux côtés de l’écran et levez (Figure R.1).
  • Seite 90 Installation F - 15 Phillips head Tournevis Phillips screwdriver Figure SS.1 Figure SS.1 Cable Cover Couvercle de câble Levez puis enlevez le couvercle Lift up then remove arrière back cover Prévoyez une longueur de Leave sufficient câble suffisante length of cable Figure CM.1 Figure CM.1 Figure CM.2...
  • Seite 91 F - 16 Installation Figure RL3 Figure RL.2 Figure RL.3 Figure RL2 Figure R.1 Figure R.1 Figure R.2 Figure R.2 Figure TS.1 Figure TS.1...
  • Seite 92 Installation F - 17 Enlever le support du moniteur pour le montage Pour préparer le moniteur à différents types de montage: 1. Déconnecter tous les câbles. 2. Saisissez le moniteur des deux côtés et levez-le en hauteur maximum (Figure R.1). 3.
  • Seite 93: Boutons De Réglage

    F - 18 Boutons de réglage Boutons de réglage Réglages OSM Les boutons de réglage OSM situés sur l’avant du moniteur procurent les fonctions suivantes : Pour accéder au OSM, appuyez sur une des touches de commande ( , , , ) ou sur la touche PROCEED ou EXIT).
  • Seite 94 Boutons de réglage F - 19 Luminosité et contraste BRILLANCE Règle la luminosité de toute l’image et de l’arrière-plan. CONTRASTE Règle la luminosité de l’image par rapport à l’arrière-plan. CONTRASTE AUTOMATIQUE Corrige les paramètres images pour les modes vidéo non standards.
  • Seite 95: Réglage Image

    On améliore la mise au point, la netteté et la stabilité de l’image en augmentant ou en diminuant la valeur Fin. NOTE: La fonction Réglage fin doit-être utilisée pour finaliser la configuration de votre moniteur NEC MultiSync 2010 MultiSync LCD , MultiSync LCD uniquement.
  • Seite 96 Boutons de réglage F - 21 Information Indique les réglages actuels de la résolution de l’écran, de la fréquence et le type de signal Sync du moniteur. NOTE: Les changements de mode ne doivent être effectués que si la résolution utilisée n’est pas reconnue par le moniteur. L’utilisateur peut régler une résolution appropriée en sélectionnant (augmentation ou diminution) l’option Mode information puis l’option adéquate.
  • Seite 97: Spécifications

    F - 22 Spécifications Spécifications MultiSync LCD / LCD 1510 1510V Affichage: 1510: Dimensions de l’image affichable : 38 cm (15"); résolution vraie 1024 x 768 (pixels) ; matrice active ; transistor à film fin (TFT) ; affichage à cristaux liquides (LCD) ;...
  • Seite 98 épaisses que d’autres. ** NEC recommande les résolutions à 75 Hz pour un affichage optimal. *** La zone d’affichage active dépend de la fréquence de synchronisation du signal.
  • Seite 99 F - 24 Spécifications MultiSync LCD 2010 Affichage : Dimensions de l’image affichable : 51,1 cm (20,1"); résolution vraie 1280 x 1024 (pixels) ; matrice active ; transistor à film fin (TFT) ; affichage à cristaux liquides (LCD) ; pas 0,31 mm ; luminance blanche 150 cd/m taux de contraste caractéristique 150:1 Signal d’entrée Vidéo...
  • Seite 100 épaisses que d’autres. ** NEC recommande les résolutions à 60 Hz pour un affichage optimal. *** La zone d’affichage active dépend de la fréquence de synchronisation du signal.
  • Seite 101 “fantôme” de cette image reste, il faut mettre le moniteur hors tension pendant une heure pour effacer l’image. REMARQUE: tout comme dans le cas des écrans personnels, NEC recommande l’utilisation d’un écran de veille à intervalles réguliers lorsque l’écran n’est pas utilisé.
  • Seite 102 Dépannage/Support F - 27 Problème Vérifier ces éléments L’image est instable, - Le câble vidéo doit être bien connecté à la carte n’est pas nette ou graphique et à l’ordinateur. bouge - Utilisez les boutons Réglage d’image OSM pour mettre au point et régler l’affichage en augmentant ou en diminuant la valeur “Fin”.
  • Seite 104 Español...
  • Seite 106 1510 1510V 2010 Introducción al NEC MultiSync / LCD / LCD 1510 1510V 2010 Felicitaciones por su compra del auténtico monitor en color NEC MultiSync LCD /LCD /LCD 1510 1510V 2010 Tecnología de ángulo panorámico (solamente MultySync LCD y MultiSync LCD...
  • Seite 107 S - 2 Introducción al NEC MultiSync LCD / LCD / LCD 1510 1510V 2010 Controles de OSM (On-Screen Manager) (Gestor de pantalla) Le permiten rápida y fácilmente ajustar todos los elementos de la imagen de su pantalla gracias a menús que aparecen en la pantalla de uso sencillo.
  • Seite 108 Introducción al NEC MultiSync LCD / LCD / LCD S - 3 1510 1510V 2010 Tecnología de Frecuencia Múltiple Ajusta automáticamente el monitor a la frecuencia de exploración de la tarjeta del visualizador, exhibiendo así la resolución requerida. Capacidad Full Scan (exploración completa) Le permite utilizar la pantalla completa con la mayor parte de las resoluciones, expandiendo significativamente el tamaño de la imagen.
  • Seite 109: Contenido Del Embalaje

    Monitor MultiSync LCD2010 con adaptador de CA y cable de señal con cable VGA a BNC de 15 pin de video y adaptador de CA – NEC MultiSync LCD (Modelo LA-1521JMW)/ 1510 Power Cord Cable de alimentación NEC MultiSync LCD (Modelo LA-1522JMW).
  • Seite 110: Uso Recomendado

    Uso recomendado S - 5 Uso recomendado Para un rendimiento óptimo, observe lo siguiente a la hora de instalar el monitor y de utilizar el monitor en color MultiSync LCD / LCD 1510 1510V / LCD 2010 • NO ABRA EL MONITOR. No hay en su interior piezas que puedan ser reparadas por el usuario, y al abrir o quitar las tapas se puede usted ver expuesto a peligrosas descargas eléctricas o a otros riesgos.
  • Seite 111 S - 6 Uso recomendado • El conector del cable de alimentación es el principal medio utilizado para separar el sistema de la fuente de alimentación. Se debería instalar el monitor cerca de una toma de corriente fácilmente accesible. • Utilice el adaptador de CA suministrado.
  • Seite 112 Uso recomendado S - 7 UN CORRECTO EMPLAZAMIENTO Y AJUSTE DEL MONITOR, PUEDE REDUCIR LA FATIGA VISUAL, DE LOS HOMBROS Y DEL CUELLO. AL POSICIONAR EL MONITOR COMPRUEBE LO SIGUIENTE: • Ajuste la altura del monitor para que la parte superior de la pantalla quede al nivel de la mirada o ligeramente por debajo.
  • Seite 113: Instalación

    S - 8 Instalación Instalación Conexión a su ordenador personal El auténtico monitor en color MultiSync LCD / LCD / LCD 1510 1510V 2010 complementa los ordenadores compatibles o PCs. Su sistema tiene una de las dos configuraciones: – El controlador de video está incorporado al ordenador. –...
  • Seite 114 Instalación S - 9 cable BNC azul al conector BNC que tiene la etiqueta B. Si tiene un cuarto conector BNC (Sincronismo Compuesto), conéctelo al conector BNC en el monitor que tiene la etiqueta H/CS. Si tiene un quinto conector BNC (Sincronismo Vertical), conéctelo al conector BNC en el monitor que tiene la etiqueta VS (Figura D 1).
  • Seite 115 S - 10 Instalación Mac Adapter Adaptador Macintosh (not included) 15-pin 15 pin mini D-SUB mini D-SUB Figura A.1 Figure A.1 Figure B.1 Figura A.1 Cobertura del Connector conector Cover Monitor MultiSync MultiSync LCD 1510 monitor 1510 MultiSync Monitor monitor 2010 MultiSync LCD 2010...
  • Seite 116 Instalación S - 11 Conexión a su ordenador personal (Macintosh) Con el adaptador de cable Macintosh, el monitor en color MultiSync / LCD / LCD es compatible con la familia Macintosh 1510 1510V 2010 de ordenadores. Usted podrá conectar su monitor en color MultiSync eligiendo una de dos maneras a su ordenador Macintosh: –...
  • Seite 117 S - 12 Instalación azul BNC al conector BNC con la etiqueta B. Si tiene un cuarto conector BNC (Sincronismo Compuesto), conéctelo al conector BNC del monitor con la etiqueta H/CS. Si tiene un quinto conector BNC (Sincronismo Vertical), conéctelo al conector BNC del monitor con la etiqueta VS (Figura D.1).
  • Seite 118 Instalación S - 13 Tornillos de embalaje Afloje los dos tornillos de embalaje que aparecen en el diagrama de la derecha (Figura SS.1). (Los tornillos no se saldrán. Gírelos hasta que queden aflojados completamente.) Si los tornillos quedan correctamente aflojados, únicamente se elevará la pantalla al levantar la carcasa. (Consulte la Figura RL.1).
  • Seite 119 S - 14 Instalación Rotación de la pantalla Antes de rotar, se debe elevar la pantalla hasta alcanzar el máximo nivel para evitar golpear la pantalla sobre la mesa o pillarse los dedos. Para elevar la pantalla, coloque las manos en cada lado del monitor y elévelo (Figura R.1).
  • Seite 120 Instalación S - 15 Destornillador Phillips head cabeza Phillips screwdriver Figura SS. 1 Cable Cover Tapa del cable Lift up then remove Eleve y después quite back cover la tapa trasera Leave sufficient Deje suficiente longitud de cable length of cable Figura CM 1.
  • Seite 121 S - 16 Instalación Figure RL.2 Figura RL.2 Figura RL.3 Figure RL.3 Figura R.1 Figure R.1 Figura R.2 Figure R.2 Figure TS.1 Figura TS.1...
  • Seite 122 Instalación S - 17 Quite el soporte del monitor para hacer el montaje Para preparar el monitor cuando se necesite montarlo de una manera alternativa: 1. Desconecte todos los cables. 2. Coloque las manos en cada lado de la pantalla del monitor y elévelo hasta alcanzar la altura máxima (Figura R.1).
  • Seite 123 S - 18 Controles Controles Controles OSM Los controles OSM que hay en la parte frontal del monitor facilitan las siguientes funciones: Para acceder a OSM pulse cualquiera de los botones de control ( , , , ) o bien el botón PROCEED o EXIT.
  • Seite 124 Controles S - 19 Controles de Brillo y Contraste BRILLO Ajusta la imagen en su conjunto y el brillo del fondo de la pantalla CONTRASTE Ajusta el brillo de la imagen con relación al fondo. AUTO AJUSTE DEL CONTRASTE Ajusta la imagen visualizada en el caso de entradas de video no normalizadas.
  • Seite 125 S - 20 Controles Controles de Ajuste de la Imagen TAMAÑO HORIZONTAL Ajusta el tamaño horizontal aumentando o disminuyendo este ajuste. FINO Mejora el enfoque, la claridad y la estabilidad de la imagen aumentando o disminuyendo este ajuste. NOTA: El control de Ajuste Fino de la Imagen debe usarse para completar la instalación de su monitor MultiSync 2010 Únicamente el monitor MultiSync LCD...
  • Seite 126 Controles S - 21 de fábrica. Podrán restablecerse ciertos ajustes individuales resaltando el control que se vaya a utilizar y pulsando el botón RESET. Información Indica la resolución de la visualización que haya en ese momento. el ajuste de frecuencia y el tipo de señal de Sincronismo del monitor.
  • Seite 127: Especificaciones

    S - 22 Especificaciones Especificaciones MultiSync LCD / LCD 1510 1510V Pantalla 1510: Tamaño de imagen visualizable 38 cm (15 pulgadas); Resolución nativa 1024 x 768 (Número de pixels); Matriz activa; Transistor de película fina (TFT); display de cristal líquido (LCD); 0,297 mm dot pitch;...
  • Seite 128 ** NEC cita las resoluciones recomendadas a 75 Hz para un rendimiento de visualización óptimo. *** El área de visualización activa depende de la temporización de la señal.
  • Seite 129 S - 24 Especificaciones MultiSync LCD 2010 Pantalla Tamaño de imagen visualizable 51,1 cm (20,1 pulgadas); Resolución nativa 1024 x 768 (Número de pixels); Matriz activa; Transistor de película fina (TFT); display de cristal líquido (LCD); 0,31 mm dot pitch; Luminancia del blanco 150 cd/m , típica;...
  • Seite 130 ** NEC cita las resoluciones recomendadas a 60 Hz para un rendimiento de visualización óptimo. *** El área de visualización activa depende de la temporización de la señal.
  • Seite 131 NOTA: Al igual que con todos los dispositivos de display personales, la tecnología NEC recomienda utilizar un método para salvar la pantalla a intervalos regulares, cuando la pantalla no esté en pleno...
  • Seite 132 Detección de Fallos/Soporte S - 27 Problema Verificar estos puntos La imagen - El cable de señal debería estar completamente unido es inestable, está al ordenador. desenfocada o - Utilice los controles de Ajuste de Imagen de OSM parece haber olas para enfocar y ajustar la visualización, aumentando o disminuyendo el Control Fino.
  • Seite 134 Italiano...
  • Seite 136 Introduzione al monitor NEC MultiSync LCD / LCD / LCD I - 1 1510 1510V 2010 Introduzione al monitor NEC MultiSync LCD 1510 / LCD 1510V 2010 Ci congratuliamo con voi per aver acquistato questo nuovo monitor a colori NEC MultiSync LCD...
  • Seite 137 I - 2 Introduzione al monitor NEC MultiSync LCD / LCD / LCD 1510 1510V 2010 Controlli OSM (On-Screen Manager) Questi controlli vi permettono di regolare tutti gli elementi dell’’immagine sullo schermo rapidamente e facilmente usando semplici display visualizzati sullo schermo.
  • Seite 138 Introduzione al monitor NEC MultiSync LCD / LCD / LCD I - 3 1510 1510V 2010 Tecnologia di frequenze multiple Regola automaticamente il monitor alla frequenza di scansione della scheda display, visualizzando così la risoluzione necessaria. Funzione Scansione Completa Questa funzione vi permette di usare l’intero schermo con la maggior parte delle risoluzioni, espandendo così...
  • Seite 139 1510 1510V 2010 dotato di un cavo video ed un adattatore c.a. dotato di un cavo VGA-BNC da 15 pin ed un adattatore c.a. – NEC MultiSync LCD (modello LA-152IJMW)/ 1510 Power Cord Cavo di alimentazione NEC MultiSync LCD (modello LA-1522JMW).
  • Seite 140 Uso raccomandato I - 5 Uso raccomandato Per ottenere le migliori prestazioni, seguite i consigli forniti qui sotto per installare e usare il monitor a colori MultiSync LCD / LCD 1510 1510V / LCD 2010 • NON APRITE IL MONITOR. Il monitor non contiene componenti che possono essere riparati dall’utente e l’apertura oppure la rimozione dei coperchio vi può...
  • Seite 141 I - 6 Uso raccomandato • Il connettore del cavo di alimentazione è il mezzo principale per scollegare il monitor dalla rete. Il monitor va installato vicino ad una presa di corrente facilmente accessibile. • Usate l’adattatore c.a. in dotazione. •...
  • Seite 142 Uso raccomandato I - 7 UN’INSTALLAZIONE E UNA REGOLAZIONE CORRETTA DEL MONITOR PU RIDURRE GLI SFORZI DEGLI OCCHI, DELLE SPALLE E DELLA NUCA. CONTROLLATE I SEGUENTI PUNTI DURANTE L’INSTALLAZIONE DEL MONITOR: • Regolate l’altezza del monitor in modo tale che la parte superiore dello schermo sia al livello degli occhi o leggermente inferiore.
  • Seite 143: Installazione

    I - 8 Installazione Installazione Collegamento del monitor al vostro Personal Computer Il monitor a colori MultiSync LCD / LCD / LCD completa 1510 1510V 2010 i computer compatibili PC. Il vostro sistema può avere una di queste due configurazioni: –...
  • Seite 144 Installazione I - 9 composta), collegatelo al connettore BNC marcato H/CS sul monitor. Se c’è un quinto connettore BNC (sincronizzazione verticale), collegatelo al connettore BNC marcato VS sul monitor (Figura D.1). Mettere il 15-pin VGA nel BNC e il cavo adattatore AC sotto Clip A (fig D.
  • Seite 145 I - 10 Installazione Mac Adapter Adattatore del cavo (not included) Macintosh 15-pin Minispina D-SUB mini D-SUB da 15 pin Figure A.1 Figure B.1 Figura A.1 Copriconnettore Connector Cover Monitor MultiSync MultiSync LCD 1510 monitor 1510 MultiSync Monitor monitor 2010 MultiSync LCD 2010 Figura C.1...
  • Seite 146 Installazione I - 11 Collegamento dell’’apparecchio al Personal Computer (Macintosh) Grazie all’adattatore per cavo Macintosh, il monitor a colori MultiSync / LCD / LCD diventa compatibili con i computer 1510 1510V 2010 Macintosh. Collegate il monitor a colori MultiSync al computer Macintosh tramite uno dei seguenti due modi: –...
  • Seite 147 I - 12 Installazione marcato G/Sync, il cavo BNC blu al connettore BNC marcato B. Se c’è un quarto connettore BNC (sincronizzazione composta), collegatelo al connettore BNC marcato H/CS sul monitor. Se c’è un quinto connettore BNC (sincronizzazione verticale), collegatelo al connettore BNC marcato VS sul monitor (Figura D.1).
  • Seite 148 Installazione I - 13 Viti di trasporto Allentate le due viti di trasporto mostrato nell’illustrazione qui a destra (Figura SS.1). (Le viti non fuoriescono. Giratele fino a quando non saranno completamente allentate.) Se le viti non sono allentate correttamente, solo lo schermo si alzerà quando sollevate l’involucro. (Fate riferimento alla Figura RL.1).
  • Seite 149 I - 14 Installazione Rotazione dello schermo Prima di ruotare lo schermo, assicuratevi che è alzata al livello più alto per evitare di urtare lo schermo contro la scrivania o di farvi male alle dita. Per alzare lo schermo, mettete le mani ai lati del monitor e sollevate lo stesso (Figura R.1).
  • Seite 150 Installazione I - 15 Cacciavite a testa con Phillips head taglio a croce screwdriver Figura SS. 1 Cable Cover Copricavo Lift up then remove Sollevate e poi rimovete il coperchio back cover posteriore Assicuratevi che la lunghezza del cavo Leave sufficient sia sufficiente.
  • Seite 151 I - 16 Installazione Figure RL.2 Figure RL.3 Figura RL.2 Figura RL.3 Figura RL.1 Figure R.1 Figura R2 Figure R.2 Figure TS.1 Figura TS.1...
  • Seite 152 Installazione I - 17 Rimozione del sostegno del monitor prima del montaggio Per preparare il monitor per installazioni alternative: 1. Scollegate tutti i cavi. 2. Prendete lo schermo del monitor ai lati e sollevatelo fino all’altezza massima (Figura R.1). 3. Posizionate il monitor a faccia ingiù su una superficie non abrasiva.
  • Seite 153 I - 18 Controlli Controlli Controlli OSM I controlli OSM sulla parte anteriore del monitor offrono le seguenti funzioni: Per accedere ai controlli OSM, premete uno qualunque dei tasti di controllo ( , , , ) oppure il tasto PROCEED o quello EXIT. Per cambiare tra i modi Orizzontale o Verticale, premete il tasto RESET.
  • Seite 154 Controlli I - 19 Controlli di luminosità/contrasto LUMINOSIT Regola la luminosità generale dell’’immagine e dello sfondo dello schermo. CONTRASTO Regola la luminosità dello schermo rispetto allo sfondo. AUTO ADJUST CONTRAST Corregge l’immagine visualizzata per input video non stadard. Regolazione automatica Per i monitor MultiSync LCD , LCD 1510...
  • Seite 155 I - 20 Controlli Controlli di regolazione dell’’immagine FORMATO ORIZZONTALE Regola il formato orizzontale aumentando o diminuendo questa impostazione. FINE Migliora il fuoco, la nitidezza e la stabilità dell’’immagine aumentando o diminuendo questa impostazione. NOTA: Il controllo di regolazione di precisione dell’’immagine deve essere usato per completare l’impostazione del monitor MultiSync LCD 2010...
  • Seite 156 Controlli I - 21 RIPRISTINO TOTALE (ALL RESET) Selezionate l’utensile ALL RESET per ripristinare tutte le impostazioni di controllo OSM ai valori di fabbrica. Le impostazioni individuali possono essere azzerate evidenziando il controllo da usare e poi premendo il tasto RESET.
  • Seite 157 I - 22 Specifiche Specifiche MultiSync LCD / LCD 1510 1510V Display 1510: formato immagine visibile 38 cm (15 pollici); 1024 x 768 risoluzione originale (conteggio pixel); matrice attiva; transistor a pellicola sottile (TFT); display a cristalli liquidi (LCD); passo dei punti di 0,297 mm; luminanza bianca di 180 cd/m tipica;...
  • Seite 158 ** La NEC raccomanda una risoluzione di 75 Hz per ottenere le migliori prestazioni del display. *** L’area attiva del display dipende della temporizzazione dei segnali.
  • Seite 159 I - 24 Specifiche MultiSync LCD 2010 Display Formato immagine visibile 51,1 cm (20,1 pollici); 1280 x 1024 risoluzione originale (conteggio pixel); matrice attiva; transistor a pellicola sottile (TFT); display a cristalli liquidi (LCD); passo dei punti di 0,31 mm; luminanza bianca di 150 cd/m tipica;...
  • Seite 160 ** La NEC raccomanda una risoluzione di 60 Hz per ottenere le migliori prestazioni del display. *** L’area attiva del display dipende della temporizzazione dei segnali.
  • Seite 161 “fantasma” è rimasto sullo schermo, il monitor deve rimanere spento per un’ora per cancellare l’immagine. NOTA: Come con tutti i dispositivi di visualizzazione di personal computer, la NEC raccomanda di usare un salvaschermo ad intervalli regolari quando la stessa immagine rimane impressa sullo schermo.
  • Seite 162 Localizzazione dei guasti/Aiuto I - 27 Problema Punti da controllare L’immagine è - Il cavo deve essere collegato in modo ben saldo poco stabile, fuori al computer. fuoco o ci sono - Usate i controlli di regolazione dell’’immagine movimenti OSM per mettere a fuoco e regolare il display anomali nel aumentando o diminuendo il controllo Fine.
  • Seite 164 Appendix...
  • Seite 166 App. A PIN ASSIGNMENTS A - 1 App. A PIN ASSIGNMENTS MINI D-SUB 15 P Pin No. , LCD 1510 1510V 2010 GREEN GREEN BLUE BLUE NO-CONNECTION GROUND GROUND NO-CONNECTION GROUND GROUND GROUND GROUND GROUND GROUND +5V (DDC) NO-CONNECTION GROUND GROUND GROUND GROUND...
  • Seite 167 A - 2 App. B Preset Signal Timing LCD , LCD 1510 1510V App. B Preset Signal Timing LCD , LCD 1510 1510V Preset Resolution Vertical Horizontal Pixel Frequency (Hz) Frequency (kHz) Frequency (MHz) 640 x 400 56.42 24.83 21.05 640 x 480 59.99 31.47...
  • Seite 168 App. B Preset Signal Timing LCD A - 3 2010 App. B Preset Signal Timing LCD 2010 Preset Resolution Vertical Horizontal Pixel Frequency (Hz) Frequency (kHz) Frequency (MHz) 640 x 400 56.43 24.83 21.05 640 x 480 59.99 31.47 25.18 640 x 350 70.09 31.47...

Diese Anleitung auch für:

Multisync lcd1510Multisync lcd2010

Inhaltsverzeichnis