Hettich EBA 280 Bedienungsanleitung
Inhaltsverzeichnis
Verfügbare Sprachen
Verfügbare Sprachen
Quicklinks
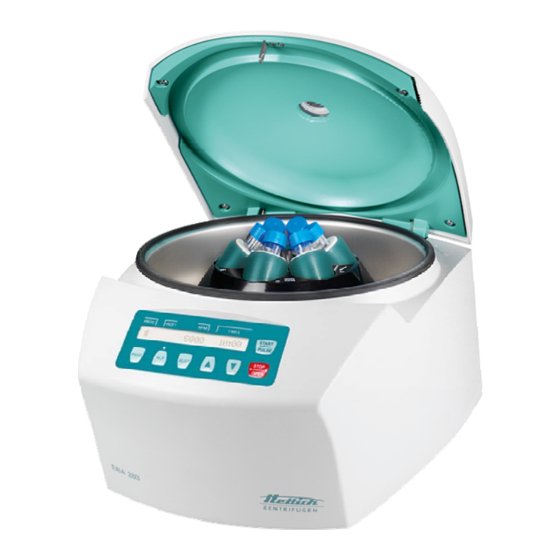
EBA 280
DE
Bedienungsanleitung...................................................... 9
EN
Operating Manual............................................................ 47
FR
Mode d'emploi ................................................................. 84
IT
Istruzioni per l'uso .......................................................... 122
Rev. 02 / 08.16
Andreas Hettich GmbH & Co. KG
EBA 280 S
AB1101DEENFRIT
Kapitel
Inhaltsverzeichnis

Verwandte Anleitungen für Hettich EBA 280


Inhaltszusammenfassung für Hettich EBA 280
- Seite 1 EBA 280 EBA 280 S Bedienungsanleitung............9 Operating Manual............47 Mode d'emploi ..............84 Istruzioni per l'uso ............122 Rev. 02 / 08.16 Andreas Hettich GmbH & Co. KG AB1101DEENFRIT...
- Seite 2 +49 (0)7461 / 705-1125 info@hettichlab.com, service@hettichlab.com www.hettichlab.com © 2014 by Andreas Hettich GmbH & Co. KG All rights reserved. No part of this publication may be reproduced without the prior written permission of the copyright owner. Änderungen vorbehalten! , Modifications reserved! , Sous réserve de modifications ! , Con riserva di modifiche! AB1101DEENFRIT / Rev.
- Seite 3 Herstellers / of the manufacturer / du fabricant / del costruttore Andreas Hettich GmbH & Co. KG Föhrenstraße 12 D-78532 Tuttlingen Germany Hiermit erklären wir in alleiniger Verantwortung, dass das bezeichnete Gerät, inklusive dem mit dem Gerät konformitätsbewertetem Zubehör laut Zubehörliste der technischen Dokumentation dieses Geräts, der Richtlinie über...
- Seite 4 The following additional European directives and ordinances have been applied: Machinery Directive 2006/42/EC EMC directive 2014/30/EU Low voltage directive 2014/35EU RoHS II Directive 2011/65/EC (without involvement of a notified body) Ordinance (EC) No. 1907/2006 (REACH) (without involvement of a notified body) Applied standards: According to the list of applied standards, which is part of the product file.
- Seite 5 Für dieses Gerät gültige Normen und Vorschriften Das Gerät ist ein Produkt mit einem sehr hohen technischen Niveau. Es unterliegt umfangreichen Prüf- und Zertifizierungsverfahren gemäß folgenden Normen und Vorschriften in deren jeweils gültigen Fassung: Elektrische und mechanische Sicherheit für Konstruktion und Endprüfung: Normbaureihe: IEC 61010 (entspricht der Normenreihe DIN EN 61010) ...
-
Seite 9: Inhaltsverzeichnis
Inhaltsverzeichnis Anwendung dieser Bedienungsanleitung......................11 Bedeutung der Symbole ............................11 Bestimmungsgemäße Verwendung ........................12 Restrisiken ................................12 Technische Daten ..............................13 Sicherheitshinweise ..............................14 Transport und Lagerung ............................15 Transport ...............................15 Lagerung ...............................15 Lieferumfang.................................15 Transportsicherung entfernen..........................16 Inbetriebnahme ..............................16 Deckel öffnen und schließen ..........................17 11.1 Deckel öffnen .............................17 11.2 Deckel schließen............................17 Einsetzen und Herausnehmen des Rotors ......................18... - Seite 10 Zentrifugation von Stoffen oder Stoffgemischen mit einer höheren Dichte als 1,2 kg/dm ........40 Notentriegelung..............................40 Pflege und Wartung ............................41 24.1 Zentrifuge (Gehäuse, Deckel und Schleuderraum)..................41 24.1.1 Oberflächenreinigung und -pflege.......................41 24.1.2 Oberflächendesinfektion ........................41 24.1.3 Entfernen radioaktiver Verunreinigungen....................41 24.2 Rotoren und Zubehör..........................42 24.2.1 Reinigung und Pflege .........................42 24.2.2 Desinfektion ............................42...
-
Seite 11: Anwendung Dieser Bedienungsanleitung
Anwendung dieser Bedienungsanleitung Vor Benutzung der Zentrifuge ist die Bedienungsanleitung zu lesen und zu beachten. Die Bedienungsanleitung ist Teil des Gerätes. Sie muss stets griffbereit aufbewahrt werden. Wird das Gerät an einem anderen Ort aufgestellt, muss die Bedienungsanleitung mitgegeben werden. Bedeutung der Symbole Symbol am Gerät: Achtung, allgemeine Gefahrenstelle. -
Seite 12: Bestimmungsgemäße Verwendung
Die Zentrifuge ist nur für diesen Verwendungszweck bestimmt. Eine andere oder darüber hinausgehende Benutzung gilt als nicht bestimmungsgemäß. Für hieraus entstehende Schäden haftet die Firma Andreas Hettich GmbH & Co. KG nicht. Zur bestimmungsgemäßen Verwendung gehört auch das Beachten aller Hinweise aus der Bedienungsanleitung und die Einhaltung der Inspektions- und Wartungsarbeiten. -
Seite 13: Technische Daten
Technische Daten Andreas Hettich GmbH & Co. KG Hersteller D-78532 Tuttlingen Modell EBA 280 EBA 280 S 1101 1101-01 1102 1102-01 Netzspannung ( 10%) 200 - 240 V 1 100 - 127 V 1 200 - 240 V 1 100 - 127 V 1... -
Seite 14: Sicherheitshinweise
Sicherheitshinweise Werden nicht alle Hinweise in dieser Bedienungsanleitung befolgt, kann beim Hersteller kein Gewährleistungsanspruch geltend gemacht werden. Die Zentrifuge ist so aufzustellen, dass sie standsicher betrieben werden kann. Vor Benutzung der Zentrifuge unbedingt überprüfen, dass der Rotor auf der Motorwelle eingerastet ist. -
Seite 15: Transport Und Lagerung
Gehängen und Zubehörteilen beeinträchtigen können, ist nicht erlaubt. Reparaturen dürfen nur von einer vom Hersteller autorisierten Person ausgeführt werden. Es dürfen nur Originalersatzteile und zugelassenes Originalzubehör der Firma Andreas Hettich GmbH & Co. KG verwendet werden. Es gelten die folgenden Sicherheitsbestimmungen: EN / IEC 61010-1 und EN / IEC 61010-2-020 sowie deren nationalen Abweichungen. -
Seite 16: Transportsicherung Entfernen
Transportsicherung entfernen Die Transportsicherung muss unbedingt entfernt werden. Die Transportsicherung aufbewahren, da sie vor dem Transport des Gerätes, wieder eingebaut werden muss. Das Gerät darf nur mit eingebauter Transportsicherung transportiert werden. Um das Gerät während des Transports vor Beschädigungen zu schützen, wird der Motor fixiert. Diese Transportsicherung muss bei der Inbetriebnahme des Gerätes entfernt werden. -
Seite 17: Deckel Öffnen Und Schließen
Deckel öffnen und schließen 11.1 Deckel öffnen Der Deckel lässt sich nur öffnen, wenn die Zentrifuge eingeschaltet ist und der Rotor stillsteht. Sollte dies nicht möglich sein, siehe Kapitel "Notentriegelung". Wenn der Zyklenzähler aktiviert ist, wird nach einem Zentrifugationslauf, während dem Öffnen des Deckels, kurzzeitig die verbleibende Anzahl der Laufzyklen (Zentrifugationsläufe) angezeigt. -
Seite 18: Einsetzen Und Herausnehmen Des Rotors
Einsetzen und Herausnehmen des Rotors Rotor mit Entriegelungsknopf Einsetzen des Rotors: Schmutzpartikel zwischen der Motorwelle und dem Rotor verhindern einen einwandfreien Sitz des Rotors und verursachen einen unruhigen Lauf. Bei Bedarf vor dem Einsetzen des Rotors die Motorwelle (B) und die Nabe des Rotors reinigen. -
Seite 19: Beladen Des Rotors
Beladen des Rotors Standard-Zentrifugiergefäße aus Glas sind belastbar bis RZB 4000 (DIN 58970 Teil 2). Den Rotor links und rechts festhalten und leicht nach oben ziehen, um zu prüfen, dass er auf der Motorwelle eingerastet ist. Bei Ausschwingrotoren müssen alle Plätze des Rotors mit gleichen Gehängen besetzt sein. ... -
Seite 20: Bedien- Und Anzeigeelemente
Bedien- und Anzeigeelemente PROG t/min:s START PULSE STOP PROG OPEN 14.1 Angezeigte Symbole Deckel entriegelt. Deckel verriegelt. Rotationsanzeige. Die Rotationsanzeige leuchtet rotierend gegen den Uhrzeigersinn auf, solange sich der Rotor dreht. 14.2 Tasten des Bedienfeldes Programme abrufen PROG Programme speichern. ... -
Seite 21: Einstellmöglichkeiten
14.3 Einstellmöglichkeiten PROG RCL Programmplatz des abzurufenden Programms. Die Programmplätze 1 bis 9 und # sind abrufbar. Laufzeit. Einstellbar von 1 - 99 min, in 1 Minuten-Schritten. t/min Laufzeit. Einstellbar von 1 - 59 s, in 1 Sekunden-Schritten. t/sec Dauerlauf "--:--". Parameter t/min und t/sec auf Null stellen. Begins at Zählung der Laufzeit. -
Seite 22: Programmierung
Programmierung Auf dem Programmplatz # sollten keine Programme gespeichert werden. Der Programmplatz # dient als Zwischenspeicher, für geänderte Zentrifugations-Parameter. Werden Zentrifugations-Parameter geändert, anschließend aber nicht auf einem Programmplatz gespeichert, wird in der Anzeige anstelle der Programmplatz-Nummer ein Strich "-" angezeigt. Nach Start des Zentrifuga- tionslaufes werden diese Zentrifugations-Parameter dann automatisch auf Programmplatz # gespeichert. - Seite 23 Beispiel: Beispiel: RPM-Anzeige (RPM) RCF-Anzeige ( RCF ) Bei Bedarf die Taste drücken, um die PROG t/min:s PROG t/min:s RPM-Anzeige (RPM) oder die RCF- Anzeige ( RCF ) anzuwählen. Die LED oberhalb der Taste leuchtet, wenn die RCF-Anzeige ( RCF ) angewählt ist. ...
-
Seite 24: Programme Abrufen
15.2 Programme abrufen Beispiel: Beispiel: RPM-Anzeige (RPM) RCF-Anzeige ( RCF ) Die Taste drücken. PROG t/min:s PROG t/min:s PROG PROG RCL : Programmplatz der angezeigten Zentrifugations-Parameter. Mit den Tasten den Programmplatz PROG t/min:s PROG t/min:s einstellen, dessen Zentrifugations- Parameter angezeigt werden sollen. -
Seite 25: Zentrifugation
Zentrifugation Während eines Zentrifugationslaufes dürfen sich gemäß EN / IEC 61010-2-020, in einem Sicherheitsbereich von 300 mm um die Zentrifuge herum, keine Personen, Gefahrstoffe und Gegenstände befinden. Nach jedem Zentrifugationslauf, während dem Entriegeln des Deckels, wird kurzzeitig die verbleibende Anzahl der Laufzyklen (Zentrifugationsläufe) angezeigt. -
Seite 26: Dauerlauf
Beispiel: Beispiel: RPM-Anzeige (RPM) RCF-Anzeige ( RCF ) Nach Ablauf der Zeit oder bei Abbruch des PROG t/min:s PROG t/min:s Zentrifugationslaufes durch Drücken der Taste STOP , erfolgt der Auslauf mit der eingestellten OPEN Bremsstufe. Die Bremsstufe wird angezeigt. Beispiel 16.2 Dauerlauf Beispiel:... -
Seite 27: Kurzzeitzentrifugation
16.3 Kurzzeitzentrifugation Beispiel: Beispiel: RPM-Anzeige (RPM) RCF-Anzeige ( RCF ) Bei Bedarf die Taste drücken, um die PROG t/min:s PROG t/min:s RPM-Anzeige (RPM) oder die RCF- Anzeige ( RCF ) anzuwählen. Die LED oberhalb der Taste leuchtet, wenn die RCF-Anzeige ( RCF ) angewählt ist. -
Seite 28: Rotorerkennung
Rotorerkennung Die Zentrifuge ist mit einer automatischen Rotorerkennung ausgestattet. Nach Start eines jeden Zentrifugationslaufes wird eine Rotorerkennung durchgeführt. Wenn der Rotorcode eines Rotors zum ersten Mal von der Rotorerkennung eingelesen wird, dann stoppt der Zentrifugationslauf nach der Rotorerkennung automatisch. Der Rotorcode (R) und die, für diese Zentrifuge zuge- lassene, maximale Drehzahl (maxRPM) des Rotors werden angezeigt. -
Seite 29: Zyklenzähler
Zyklenzähler Die Verwendungsdauer von bestimmten Rotoren und Gehängen ist auf eine maximale Anzahl von Laufzyklen (Zentrifugationsläufe) begrenzt. Die betreffenden Rotoren und Gehänge sind mit der maximal zulässigen Anzahl der Laufzyklen gekennzeichnet. Die Zentrifuge ist mit einem Zyklenzähler ausgestattet, der die Laufzyklen (Zentrifugationsläufe) der verschiedenen Rotorcodes zählt (siehe auch Kapitel "Rotorerkennung"). -
Seite 30: Einstellungen Und Abfragen
Beispiel: Überprüfen, ob die angezeigte maximal zulässige PROG t/min:s Anzahl der Laufzyklen mit den Angaben auf dem Rotor bzw. den Gehängen übereinstimmt. Wenn nicht, muss die auf dem Rotor bzw. den Gehängen angegebene maximal zulässige Anzahl der Laufzyklen eingestellt werden. Bei Rotoren und Gehängen, deren Verwen- dungsdauer nicht auf eine maximale Anzahl von Laufzyklen (Zentrifugationsläufe) begrenzt ist,... -
Seite 31: System-Informationen Abfragen
20.1 System-Informationen abfragen Folgende System-Informationen können abgefragt werden: Zentrifugen-Modell, Die maximalen Drehzahlen der verschiedenen Rotorcodes, Programmversion der Zentrifuge, Typ des Frequenzumrichters, Programmversion des Frequenzumrichters Die Abfrage kann, bei Stillstand des Rotors, wie folgt durchgeführt werden: STOP Der Vorgang kann jederzeit durch Drücken der Taste abgebrochen werden. -
Seite 32: Akustisches Signal
20.2 Akustisches Signal Das akustische Signal ertönt: nach Auftreten einer Störung im 2 s-Intervall. nach Beendigung des Zentrifugationslaufes und Stillstand des Rotors im 30 s-Intervall. Durch Drücken einer beliebigen Taste wird das akustische Signal beendet. Das akustische Signal kann, bei Stillstand des Rotors, wie folgt eingestellt werden: STOP Der Vorgang kann jederzeit durch Drücken der Taste abgebrochen werden. -
Seite 33: Optisches Signal Nach Beendigung Des Zentrifugationslaufes
Die Taste drücken, um die Einstellung zu START PROG t/min:s speichern. PULSE PROG t/min:s Die Taste einmal drücken, um das Menü Beispiel: STOP " Settings" zu verlassen oder zweimal OPEN PROG t/min:s PROG t/min:s drücken, um das " MACHINE MENU " zu verlassen. -
Seite 34: Automatisches Entriegeln Des Deckels Nach Dem Zentrifugationslauf
20.4 Automatisches Entriegeln des Deckels nach dem Zentrifugationslauf Es kann eingestellt werden, ob der Deckel, nach dem Zentrifugationslauf, automatisch entriegelt oder nicht. Bei Stillstand des Rotors kann dies wie folgt eingestellt werden: STOP Der Vorgang kann jederzeit durch Drücken der Taste abgebrochen werden. -
Seite 35: Hintergrundbeleuchtung Der Anzeige
20.5 Hintergrundbeleuchtung der Anzeige Zum Einsparen von Energie kann eingestellt werden, dass nach einem Zentrifugationslauf, die Hintergrund- beleuchtung der Anzeige nach 2 Minuten ausschaltet. Bei Stillstand des Rotors kann dies wie folgt eingestellt werden: STOP Der Vorgang kann jederzeit durch Drücken der Taste abgebrochen werden. -
Seite 36: Angezeigte Zentrifugations-Parameter Nach Dem Einschalten Des Gerätes
20.6 Angezeigte Zentrifugations-Parameter nach dem Einschalten des Gerätes Es kann eingestellt werden, ob nach dem Einschalten des Gerätes die Zentrifugations-Parameter des zuletzt benutzten Programms oder des Programms 1 angezeigt werden. Bei Stillstand des Rotors kann dies wie folgt eingestellt werden: STOP Der Vorgang kann jederzeit durch Drücken der Taste abgebrochen werden. -
Seite 37: Funktion "Dual Time" Aktivieren/Deaktivieren
20.7 Funktion "Dual time" aktivieren/deaktivieren Um die Zählung der Laufzeit (Parameter Begins at START und Parameter Begins at SPEED) einstellen zu können, muss die Funktion "Dual time" aktiviert sein. Die Funktion ist ab Werk aktiviert. Bei Stillstand des Rotors kann dies wie folgt eingestellt werden: STOP Der Vorgang kann jederzeit durch Drücken der Taste abgebrochen werden. -
Seite 38: Die Betriebsstunden Und Die Anzahl Der Zentrifugationsläufe Abfragen
20.8 Die Betriebsstunden und die Anzahl der Zentrifugationsläufe abfragen Die Betriebsstunden sind in interne und externe Betriebsstunden aufgeteilt. Interne Betriebsstunden: Gesamte Zeit, die das Gerät eingeschaltet war. Externe Betriebsstunden: Gesamte Zeit der bisherigen Zentrifugationsläufe. Die Abfrage kann, bei Stillstand des Rotors, wie folgt durchgeführt werden: STOP Der Vorgang kann jederzeit durch Drücken der Taste abgebrochen werden. -
Seite 39: Zyklenzähler Auf Null Zurücksetzen
20.9 Zyklenzähler auf Null zurücksetzen Nachdem der Rotor bzw. die Gehänge ausgetauscht wurden, muss der Zyklenzähler des betreffenden Rotorcodes wieder auf Null zurückgesetzt werden. Der Zyklenzähler darf nur auf Null zurückgesetzt werden, wenn zuvor der Rotor bzw. die Gehänge gegen einen neuen Rotor bzw. -
Seite 40: Relative Zentrifugalbeschleunigung (Rcf)
Relative Zentrifugalbeschleunigung (RCF) Die relative Zentrifugalbeschleunigung (RCF) wird als Vielfaches der Erdbeschleunigung (g) angegeben. Sie ist ein einheitsfreier Zahlenwert und dient zum Vergleich der Trenn- und Sedimentationsleistung. Die Berechnung erfolgt nach der Formel: ... -
Seite 41: Pflege Und Wartung
Pflege und Wartung Das Gerät kann kontaminiert sein. Vor der Reinigung den Netzstecker ziehen. Bevor ein anderes als das vom Hersteller empfohlene Reinigungs- oder Dekontaminationsverfahren angewandt wird, hat sich der Benutzer beim Hersteller zu vergewissern, dass das vorgesehene Verfahren das Gerät nicht schädigt. ... -
Seite 42: Rotoren Und Zubehör
24.2 Rotoren und Zubehör 24.2.1 Reinigung und Pflege Um einer Korrosion und Materialveränderungen vorzubeugen müssen die Rotoren und das Zubehör regelmäßig mit Seife oder einem milden Reinigungsmittel und einem feuchten Tuch gereinigt werden. Die Reinigung wird mindestens einmal wöchentlich empfohlen. Verschmutzungen müssen sofort entfernt werden. ... -
Seite 43: Autoklavieren
24.3 Autoklavieren Das folgende Zubehör darf bei 121°C / 250°F (20 min) autoklaviert werden: Ausschwingrotoren ohne Gehänge Reduzierungen Über den Sterilitätsgrad kann keine Aussage gemacht werden. Das Autoklavieren beschleunigt den Alterungsprozess von Kunststoffen. Außerdem kann es bei Kunststoffen Farbveränderungen verursachen 24.4 Zentrifugiergefäße ... -
Seite 44: Störungen
Störungen Lässt sich der Fehler laut Störungstabelle nicht beheben, so ist der Kundendienst zu benachrichtigen. Bitte den Zentrifugentyp und die Seriennummer angeben. Beide Nummern sind auf dem Typenschild der Zentrifuge ersichtlich[al21]. Einen NETZ-RESET durchführen: Den Netzschalter ausschalten (Schalterstellung "0"). ... -
Seite 45: Netzeingangssicherungen Wechseln
Das Gerät wieder ans Netz anschließen. Modell Sicherung Best.-Nr. EBA 280 1101 T 3,15 AH/250V E997 EBA 280 S 1102 T 3,15 AH/250V E997 EBA 280 1101-01 T 6,3 AH/250V 2266 EBA 280 S 1102-01 T 6,3 AH/250V... -
Seite 46: Rücksendung Von Geräten
Vor der Rücksendung des Gerätes muss die Transportsicherung eingebaut werden. Wird das Gerät oder dessen Zubehör an die Firma Andreas Hettich GmbH & Co. KG zurückgesandt, so muss dieses, zum Schutz von Personen, Umwelt und Material, vor dem Versand dekontaminiert und gereinigt werden. -
Seite 161: Anhang / Appendix
1147 1147 1063 Ausschwingrotor 6-fach / Swing out rotor 6-times 2078 0536 0518 90° EBA 280: 4700 RPM EBA 280S: 6000 RPM 4,5 - 7,5 – 9 – 8,5 - Kapazität / capacity 4 – 7 13 x 11 x... - Seite 162 1142 1127-A Ausschwingrotor 12-fach / Swing out rotor 12-times 0553 60° 1,6 - 5 2,6 – 3,4 2,7 - 3 Kapazität / capacity Maße / dimensions x L 13 x 75 13 x 75 13 x 65 11 x 66 Anzahl p.
- Seite 163 1137 1634 1633 1635 Winkelrotor 6-fach / Angle rotor 6-times 0521 0546 0519 0545 0518 36° 4 - 7 Kapazität / capacity 9-10 16 x 15 x Maße / dimensions x L 34 x 100 29 x 107 24 x 100 26 x 95 17 x 100 13 x 100...
- Seite 164 1054-A 1139 Winkelrotor 12-fach / Angle rotor 12-times 0518 0553 0701 35° 1,6 – 5,0 1,1 – 1,4 2,6 – 3,4 2,7 - 3 Kapazität / capacity 12 x 13 x Maße / dimensions x L 13 x 75 8 x 66 13 x 65 11 x 66...
- Seite 165 1133 Winkelrotor 12-fach / (mit Dekantierhilfe) Angle rotor 12-times with decanter aid 0553 0578 0501 35° Kapazität / capacity Maße / dimensions x L 12 x 75 12 x 82 12 x 100 Anzahl p. Rotor / number p. rotor 5000 Drehzahl / speed 2879...