Hettich EBA 200 Bedienungsanleitung
Vorschau ausblenden
Andere Handbücher für EBA 200:
- Bedienungsanleitung (38 Seiten) ,
- Gebrauchsanweisung (170 Seiten)
Inhaltsverzeichnis
Werbung
Verfügbare Sprachen
Verfügbare Sprachen
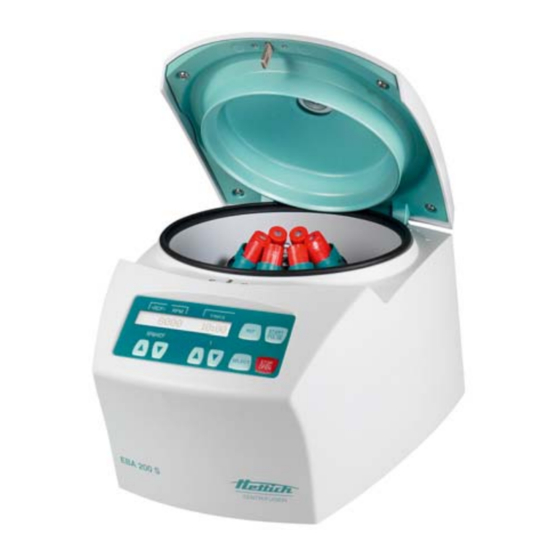
EBA 200
Bedienungsanleitung...................................................... 8
DE
Operating Instructions.................................................... 40
EN
Mode d'emploi ................................................................. 72
FR
Istruzioni per l'uso .......................................................... 104
IT
2014
Andreas Hettich GmbH & Co. KG
EBA 200 S
AB1800DEENFRIT
Werbung
Kapitel
Inhaltsverzeichnis

Verwandte Anleitungen für Hettich EBA 200


Inhaltszusammenfassung für Hettich EBA 200
- Seite 1 EBA 200 EBA 200 S Bedienungsanleitung............8 Operating Instructions............ 40 Mode d'emploi ..............72 Istruzioni per l'uso ............104 2014 Andreas Hettich GmbH & Co. KG AB1800DEENFRIT...
- Seite 2 +49 (0)7461 / 705-1125 info@hettichlab.com, service@hettichlab.com www.hettichlab.com © 2014 by Andreas Hettich GmbH & Co. KG All rights reserved. No part of this publication may be reproduced without the prior written permission of the copyright owner. Änderungen vorbehalten! , Modifications reserved! , Sous réserve de modifications ! , Con riserva di modifiche!
- Seite 3 Herstellers / of the manufacturer / du fabricant / del costruttore Andreas Hettich GmbH & Co. KG Föhrenstraße 12 D-78532 Tuttlingen Germany Hiermit erklären wir in alleiniger Verantwortung, dass das bezeichnete Gerät, inklusive dem mit dem Gerät konformitätsbewertetem Zubehör laut Zubehörliste der technischen Dokumentation dieses Geräts, der Richtlinie über...
-
Seite 4: Für Dieses Gerät Gültige Normen Und Vorschriften
Für dieses Gerät gültige Normen und Vorschriften Das Gerät ist ein Produkt mit einem sehr hohen technischen Niveau. Es unterliegt umfangreichen Prüf- und Zertifizierungsverfahren gemäß folgenden Normen und Vorschriften in deren jeweils gültigen Fassung: Elektrische und mechanische Sicherheit für Konstruktion und Endprüfung: Normbaureihe: IEC 61010 (entspricht der Normenreihe DIN EN 61010) ... -
Seite 8: Inhaltsverzeichnis
11.1 Deckel öffnen .............................15 11.2 Deckel schließen............................15 Ein- und Ausbau des Rotors..........................16 12.1 EBA 200..............................16 12.2 EBA 200 S ..............................16 Beladen des Rotors ............................17 Bedien- und Anzeigeelemente ........................18 14.1 Angezeigte Symbole ..........................18 14.2 Tasten des Bedienfeldes ...........................18 14.3 Einstellmöglichkeiten ..........................19 Zentrifugations–Parameter eingeben ......................20... - Seite 9 Einstellungen und Abfragen...........................26 19.1 System-Informationen abfragen .........................27 19.2 Akustisches Signal .............................28 19.3 Optisches Signal nach Beendigung des Zentrifugationslaufes ..............29 19.4 Automatisches Entriegeln des Deckels nach dem Zentrifugationslauf ............30 19.5 Hintergrundbeleuchtung der Anzeige......................31 19.6 Die Betriebsstunden und die Anzahl der Zentrifugationsläufe abfragen.............32 19.7 Zyklenzähler auf Null zurücksetzen......................33 Relative Zentrifugalbeschleunigung (RCF) ....................34...
-
Seite 10: Anwendung Dieser Bedienungsanleitung
Die Zentrifuge ist nur für diesen Verwendungszweck bestimmt. Eine andere oder darüber hinausgehende Benutzung gilt als nicht bestimmungsgemäß. Für hieraus entstehende Schäden haftet die Firma Andreas Hettich GmbH & Co. KG nicht. Zur bestimmungsgemäßen Verwendung gehört auch das Beachten aller Hinweise aus der Bedienungsanleitung und die Einhaltung der Inspektions- und Wartungsarbeiten. -
Seite 11: Technische Daten
Technische Daten Andreas Hettich GmbH & Co. KG Hersteller D-78532 Tuttlingen Modell EBA 200 EBA 200 S 1800 1800-01 1802 1802-01 Netzspannung ( 10%) 200 - 240 V 1 100 - 127 V 1 200 - 240 V 1 100 - 127 V 1... -
Seite 12: Sicherheitshinweise
Sicherheitshinweise Werden nicht alle Hinweise in dieser Bedienungsanleitung befolgt, kann beim Hersteller kein Gewährleistungsanspruch geltend gemacht werden.. Die Zentrifuge ist so aufzustellen, dass sie standsicher betrieben werden kann. Vor Benutzung der Zentrifuge unbedingt den Rotor auf festen Sitz prüfen. ... -
Seite 13: Transport Und Lagerung
Gehängen und Zubehörteilen beeinträchtigen können, ist nicht erlaubt. Reparaturen dürfen nur von einer vom Hersteller autorisierten Person ausgeführt werden. Es dürfen nur Originalersatzteile und zugelassenes Originalzubehör der Firma Andreas Hettich GmbH & Co. KG verwendet werden. Es gelten die folgenden Sicherheitsbestimmungen: EN / IEC 61010-1 und EN / IEC 61010-2-020 sowie deren nationalen Abweichungen. -
Seite 14: Transportsicherung Entfernen
Transportsicherung entfernen Die Transportsicherung muss unbedingt entfernt werden. Die Transportsicherung aufbewahren, da sie vor dem Transport des Gerätes, wieder eingebaut werden muss. Das Gerät darf nur mit eingebauter Transportsicherung transportiert werden. Um das Gerät während des Transports vor Beschädigungen zu schützen, wird der Motor fixiert. Diese Transportsicherung muss bei der Inbetriebnahme des Gerätes entfernt werden. -
Seite 15: Deckel Öffnen Und Schließen
Deckel öffnen und schließen 11.1 Deckel öffnen Der Deckel lässt sich nur öffnen, wenn die Zentrifuge eingeschaltet ist und der Rotor stillsteht. Sollte dies nicht möglich sein, siehe Kapitel "Notentriegelung". Wenn der Zyklenzähler aktiviert ist, wird nach einem Zentrifugationslauf, während dem Öffnen des Deckels, kurzzeitig die verbleibende Anzahl der Laufzyklen (Zentrifugationsläufe) angezeigt. -
Seite 16: Ein- Und Ausbau Des Rotors
Druckpunkts löst sich der Rotor vom Konus der Motorwelle. Die Spannmutter drehen, bis sich der Rotor von der Motorwelle abheben lässt. Den Rotor von der Motorwelle abheben. 12.2 EBA 200 S Der Rotor darf nur vom Kundendienst ein- und ausgebaut werden. 16/137... -
Seite 17: Beladen Des Rotors
Beladen des Rotors Standard-Zentrifugiergefäße aus Glas sind belastbar bis RZB 4000 (DIN 58970 Teil 2). Den Rotor auf festen Sitz prüfen. Die Rotoren dürfen nur symmetrisch beladen werden. Die Zentrifugiergefäße müssen gleichmäßig auf alle Plätze des Rotors verteilt werden. Zugelassene Kombinationen siehe Kapitel "Anhang/Appendix, Rotoren und Zubehör/Rotors and accessories". -
Seite 18: Bedien- Und Anzeigeelemente
Bedien- und Anzeigeelemente >RCF< t/min:s START PULSE RPM/RCF STOP SELECT OPEN 14.1 Angezeigte Symbole Deckel entriegelt. Deckel verriegelt. Rotationsanzeige. Die Rotationsanzeige leuchtet rotierend gegen den Uhrzeigersinn auf, solange sich der Rotor dreht. 14.2 Tasten des Bedienfeldes Die Drehzahl direkt eingeben. RPM/RCF Bei Gedrückthalten der Taste ändert sich der Wert mit zunehmender Geschwindigkeit. -
Seite 19: Einstellmöglichkeiten
14.3 Einstellmöglichkeiten t/min Laufzeit. Einstellbar von 1 - 99 min, in 1 Minuten-Schritten. t/sec Laufzeit. Einstellbar von 1 - 59 s, in 1 Sekunden-Schritten. Dauerlauf "--:--". Parameter t/min und t/sec auf Null stellen. Drehzahl Einstellbar ist ein Zahlenwert von 200 RPM bis zur maximalen Drehzahl des Rotors. Einstellbar in 10er Schritten. -
Seite 20: Zentrifugations-Parameter Eingeben
Zentrifugations–Parameter eingeben 15.1 Direkte Eingabe der Zentrifugations–Parameter Die Drehzahl (RPM), die relative Zentrifugalbeschleunigung (RCF), der Zentrifugierradius (RAD) und die Laufzeit SELECT können direkt mit den Tasten eingegeben werden, ohne dass zuvor die Taste gedrückt werden muss. Die eingestellten Zentrifugations–Parameter werden erst nach Start des Zentrifugationslaufes gespeichert. 15.1.1 Drehzahl (RPM) Beispiel:... -
Seite 21: Eingabe Der Zentrifugations-Parameter Mit Der Taste "Select
15.2 Eingabe der Zentrifugations–Parameter mit der Taste "SELECT" Die Laufzeit kann in Minuten und Sekunden eingestellt werden (Parameter t/min und t/sec). Um den Dauerlauf einzustellen müssen die Parameter t/min und t/sec auf Null gestellt werden. In der Zeit- Anzeige (t/min:s) erscheint "--:--". Beispiel: >RCF<... - Seite 22 Beispiel: Beispiel: RPM-Anzeige (RPM) RCF-Anzeige ( RCF ) Die Taste drücken. >RCF< t/min:s SELECT RAD/mm : Zentrifugierradius. Die Anzeige und Eingabe des Zentrifu- gierradius ist nur möglich, wenn die RCF- Anzeige ( RCF ) angewählt ist. Mit den Tasten den gewünschten Wert >RCF<...
-
Seite 23: Zentrifugation
Während eines Zentrifugationslaufes dürfen sich gemäß EN / IEC 61010-2-020, in einem Sicherheitsbereich von 300 mm um die Zentrifuge herum, keine Personen, Gefahrstoffe und Gegenstände befinden. Nach jedem Zentrifugationslauf, während dem Entriegeln des Deckels, wird kurzzeitig die verbleibende Anzahl der Laufzyklen (Zentrifugationsläufe) angezeigt (nur bei EBA 200). Beispiel: >RCF<... -
Seite 24: Dauerlauf
Beispiel: Beispiel: RPM-Anzeige (RPM) RCF-Anzeige ( RCF ) Nach Ablauf der Zeit oder bei Abbruch des >RCF< t/min:s >RCF< t/min:s Zentrifugationslaufes durch Drücken der Taste STOP OPEN , erfolgt der Auslauf mit der eingestellten Bremsstufe. Die Bremsstufe wird angezeigt. Beispiel 16.2 Dauerlauf Beispiel:... -
Seite 25: Kurzzeitzentrifugation
16.3 Kurzzeitzentrifugation Beispiel: Beispiel: RPM-Anzeige (RPM) RCF-Anzeige ( RCF ) Bei Bedarf die Taste drücken, um die >RCF< t/min:s >RCF< t/min:s RPM-Anzeige (RPM) oder die RCF- Anzeige ( RCF ) anzuwählen. Die gewünschten Zentrifugations–Parameter >RCF< t/min:s >RCF< t/min:s eingeben (siehe Kapitel "Zentrifugations–Parameter eingeben"). -
Seite 26: Zyklenzähler
Nachdem der Rotor ausgetauscht wurde, muss der Zyklenzähler wieder auf "0" zurückgesetzt werden (siehe Kapitel "Zyklenzähler auf "0" zurücksetzen"). 18.2 EBA 200 S Die Verwendungsdauer des Rotors ist nicht begrenzt. Aus diesem Grund wird der Zyklenzähler nicht benötigt und ist deshalb ausgeschaltet. -
Seite 27: System-Informationen Abfragen
19.1 System-Informationen abfragen Folgende System-Informationen können abgefragt werden: Zentrifugen-Modell, Programmversion der Zentrifuge, Typ des Frequenzumrichters, Programmversion des Frequenzumrichters Die Abfrage kann, bei Stillstand des Rotors, wie folgt durchgeführt werden: STOP OPEN Der Vorgang kann jederzeit durch Drücken der Taste abgebrochen werden. -
Seite 28: Akustisches Signal
19.2 Akustisches Signal Das akustische Signal ertönt: nach Auftreten einer Störung im 2 s-Intervall. nach Beendigung des Zentrifugationslaufes und Stillstand des Rotors im 30 s-Intervall. Durch Drücken einer beliebigen Taste wird das akustische Signal beendet. Das akustische Signal kann, bei Stillstand des Rotors, wie folgt eingestellt werden: STOP OPEN Der Vorgang kann jederzeit durch Drücken der Taste... -
Seite 29: Optisches Signal Nach Beendigung Des Zentrifugationslaufes
Die Taste drücken um die Einstellung zu START >RCF< t/min:s PULSE speichern. >RCF< t/min:s Die Taste einmal drücken, um das Menü Beispiel: STOP OPEN " Settings" zu verlassen oder zweimal >RCF< t/min:s >RCF< t/min:s drücken, um das " MACHINE MENU " zu verlassen. -
Seite 30: Automatisches Entriegeln Des Deckels Nach Dem Zentrifugationslauf
19.4 Automatisches Entriegeln des Deckels nach dem Zentrifugationslauf Es kann eingestellt werden, ob der Deckel, nach dem Zentrifugationslauf, automatisch entriegelt oder nicht. Bei Stillstand des Rotors kann dies wie folgt eingestellt werden: STOP OPEN Der Vorgang kann jederzeit durch Drücken der Taste abgebrochen werden. -
Seite 31: Hintergrundbeleuchtung Der Anzeige
19.5 Hintergrundbeleuchtung der Anzeige Zum Einsparen von Energie kann eingestellt werden, dass nach einem Zentrifugationslauf, die Hintergrund- beleuchtung der Anzeige nach 2 Minuten ausschaltet. Bei Stillstand des Rotors kann dies wie folgt eingestellt werden: STOP OPEN Der Vorgang kann jederzeit durch Drücken der Taste abgebrochen werden. -
Seite 32: Die Betriebsstunden Und Die Anzahl Der Zentrifugationsläufe Abfragen
19.6 Die Betriebsstunden und die Anzahl der Zentrifugationsläufe abfragen Die Betriebsstunden sind in interne und externe Betriebsstunden aufgeteilt. Interne Betriebsstunden: Gesamte Zeit, die das Gerät eingeschaltet war. Externe Betriebsstunden: Gesamte Zeit der bisherigen Zentrifugationsläufe. Die Abfrage kann, bei Stillstand des Rotors, wie folgt durchgeführt werden: STOP OPEN Der Vorgang kann jederzeit durch Drücken der Taste... -
Seite 33: Zyklenzähler Auf Null Zurücksetzen
19.7 Zyklenzähler auf Null zurücksetzen Nachdem der Rotor ausgetauscht wurde, muss der Zyklenzähler wieder auf Null zurückgesetzt werden. Der Zyklenzähler darf nur auf Null zurückgesetzt werden, wenn zuvor der Rotor gegen einen neuen Rotor ausgetauscht wurde. Der Zyklenzähler kann, bei Stillstand des Rotors, wie folgt zurückgesetzt werden: STOP OPEN Der Vorgang kann jederzeit durch Drücken der Taste... -
Seite 34: Relative Zentrifugalbeschleunigung (Rcf)
Relative Zentrifugalbeschleunigung (RCF) Die relative Zentrifugalbeschleunigung (RCF) wird als Vielfaches der Erdbeschleunigung (g) angegeben. Sie ist ein einheitsfreier Zahlenwert und dient zum Vergleich der Trenn- und Sedimentationsleistung. Die Berechnung erfolgt nach der Formel: ... -
Seite 35: Pflege Und Wartung
Pflege und Wartung Das Gerät kann kontaminiert sein. Vor der Reinigung den Netzstecker ziehen. Bevor ein anderes als das vom Hersteller empfohlene Reinigungs- oder Dekontaminationsverfahren angewandt wird, hat sich der Benutzer beim Hersteller zu vergewissern, dass das vorgesehene Verfahren das Gerät nicht schädigt. ... -
Seite 36: Rotor Und Zubehör
23.2 Rotor und Zubehör Bei der EBA 200 S darf der Rotor, aus Sicherheitsgründen, nur vom Kundendienst ein- und ausgebaut werden. 23.2.1 Reinigung und Pflege Um einer Korrosion und Materialveränderungen vorzubeugen muss der Rotor und das Zubehör regelmäßig mit Seife oder einem milden Reinigungsmittel und einem feuchten Tuch gereinigt werden. -
Seite 37: Autoklavieren
Autoklavieren Bei der EBA 200 S darf der Rotor nicht autoklaviert werden. Bei der EBA 200 darf der Rotor bei 121°C / 250°F (20 min) autoklaviert werden. Nach 10 Autoklavierungen muss der Rotor aus Sicherheitsgründen ausgetauscht werden. Über den Sterilitätsgrad kann keine Aussage gemacht werden. -
Seite 38: Störungen
Störungen Lässt sich der Fehler laut Störungstabelle nicht beheben, so ist der Kundendienst zu benachrichtigen. Bitte den Zentrifugentyp und die Seriennummer angeben. Beide Nummern sind auf dem Typenschild der Zentrifuge ersichtlich. Einen NETZ-RESET durchführen: Den Netzschalter ausschalten (Schalterstellung "0"). ... -
Seite 39: Netzeingangssicherungen Wechseln
Vor der Rücksendung des Gerätes muss die Transportsicherung eingebaut werden. Wird das Gerät oder dessen Zubehör an die Firma Andreas Hettich GmbH & Co. KG zurückgesandt, so muss dieses, zum Schutz von Personen, Umwelt und Material, vor dem Versand dekontaminiert und gereinigt werden. -
Seite 136: Anhang / Appendix
Anhang / Appendix 28.1 Rotoren und Zubehör / Rotors and accessories EBA 200: E3694 EBA 200 S: E1624 Winkelrotor 8-fach / Angle rotor 8-times 0509 33° EBA 200: 6000 RPM EBA 200S: 8000 RPM 4,5 - 5 7,5 – 8,5 9 –... - Seite 137 EBA 200: E3694 EBA 200 S: E1624 Winkelrotor 8-fach / 1063 Angle rotor 8-times 6305 SK 1/89 SK 19/85-4 0518 33° EBA 200: 6000 RPM EBA 200S: 8000 RPM 8,5 - 10 4 – 5,5 4 – 7 Kapazität / capacity Maße / dimensions ...