Werbung
Verfügbare Sprachen
Verfügbare Sprachen
Quicklinks
Fenster- und Türkontakt – optisch
Window / Door Contact – optical
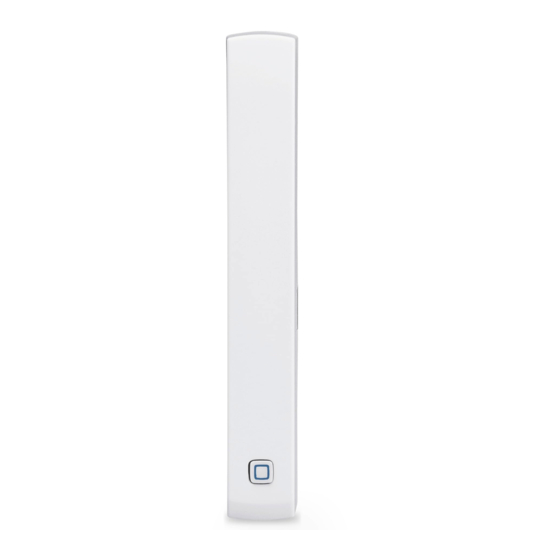
HmIP-SWDO-2 | HmIP-SWDO-A
Installations- und
DE
Bedienungsanleitung
Installation and operating
EN
manual
Notice d'installation et
FR
d'emploi
Manual de instalación
ES
y uso
Istruzioni per l'installazione
IT
e l'uso
Installatie- en
NL
bedieningshandleiding
Werbung

Verwandte Anleitungen für HomeMatic IP HmIP-SWDO-2


Inhaltszusammenfassung für HomeMatic IP HmIP-SWDO-2
- Seite 1 Fenster- und Türkontakt – optisch Window / Door Contact – optical HmIP-SWDO-2 | HmIP-SWDO-A Installations- und Manual de instalación Bedienungsanleitung y uso Installation and operating Istruzioni per l‘installazione manual e l‘uso Notice d‘installation et Installatie- en d‘emploi bedieningshandleiding...
- Seite 2 Installations- und Bedienungsanleitung Inhaltsverzeichnis Lieferumfang ....................3 Hinweise zur Anleitung ................3 Gefahrenhinweise ..................3 Funktion und Geräteübersicht ..............4 Allgemeine Systeminformationen .............4 Inbetriebnahme .....................5 Anlernen ....................... 5 Montage ........................ 6 6.2.1 Auswahl eines geeigneten Montageortes .........6 6.2.2 Klebestreifen- oder Schraubmontage ..........6 Batterien wechseln ..................8 Fehlerbehebung ....................9 Schwache Batterien ....................
- Seite 3 Lieferumfang Lieferumfang Öffnen Sie das Gerät nicht. Es enthält keine durch den Anwender Fenster- und Türkontakt – zu wartenden Teile. Im Fehlerfall optisch lassen Sie das Gerät von einer 2x Abdeckkappen (braun/weiß) Fachkraft prüfen. 1x Doppelseitiger Klebestreifen Betreiben Sie das Gerät nur in 2x Senkkopfschrauben 2,2 x 13 mm trockener sowie staubfreier Um- Reflektoraufkleber (für dunkle...
- Seite 4 Funktion und Geräteübersicht 4 Funktion und Geräteübersicht Der Homematic IP Fenster- und Tür- kontakt – optisch erkennt zuverlässig geöffnete Fenster bzw. Türen durch einen integrierten Infrarot-Sensor. Geöffnete Fenster und Türen werden unmittelbar in der Homematic IP App angezeigt – so können Sie auch von unterwegs Ihre Fenster und Türen im- mer im Auge behalten.
- Seite 5 Inbetriebnahme 6 Inbetriebnahme Sie können den Anlernmodus manuell für weitere 3 Minuten starten, indem Sie die Systemtaste Anlernen (F) kurz drücken. Bitte lesen Sie diesen Abschnitt erst vollständig, bevor Sie mit dem Anlernen beginnen. Richten Sie zunächst Ihren Homematic IP Access Point über die Homematic IP App ein, um weitere Homematic IP Geräte im System nutzen zu können.
- Seite 6 Inbetriebnahme Montage Der ideale Abstand zwischen der Gehäusekante des Fenster- und Bitte lesen Sie diesen Abschnitt Türkontakts und dem Tür-/ Fens- erst vollständig, bevor Sie mit der terflügel beträgt 3 mm Montage beginnen. (siehe Abbildung). • Befindet sich der Fenster-/Tür- 6.2.1 Auswahl eines geeigneten Montageortes griff auf der rechten Seite, müssen...
- Seite 7 Inbetriebnahme Klebestreifenmontage Um den Fenster- und Türkontakt mit- hilfe der Schrauben zu montieren, Um den Fenster- und Türkontakt mit gehen Sie wie folgt vor: dem Klebestreifen zu montieren, ge- hen Sie wie folgt vor: • Markieren Sie die Schraublöcher (A) auf dem Fenster-/Türrahmen.
- Seite 8 Batterien wechseln Batterien wechseln Wird eine leere Batterie in der App bzw. am Gerät angezeigt (s. „8.4 Fehlercodes 10), tau- und Blinkfolgen“ auf Seite schen Sie die verbrauchte Batterie ge- gen eine neue Batterie des Typs LR03/ Micro/AAA aus. Beachten Sie dabei die richtige Polung der Batterie.
- Seite 9 Fehlerbehebung 8 Fehlerbehebung In dem von uns genutzten Frequenz- bereich 868 MHz beträgt die maxi- male Sendezeit eines jeden Gerätes Schwache Batterien 1 % einer Stunde (also 36 Sekunden in Wenn es der Spannungswert zulässt, ist einer Stunde). Die Geräte dürfen bei der Fenster- und Türkontakt auch bei Erreichen des 1-%-Limits nicht mehr niedriger Batteriespannung betriebsbe-...
- Seite 10 Fehlerbehebung Fehlercodes und Blinkfolgen Blinkcode Bedeutung Lösung Funkübertragung/Sende- Warten Sie, bis die Über- Kurzes oranges Blinken versuch/Datenübertra- tragung beendet ist. gung 1x langes grünes Leuch- Sie können mit der Bedie- Vorgang bestätigt nung fortfahren. Geben Sie die letzten vier Ziffern der Geräte-Serien- Kurzes oranges Blinken Anlernmodus aktiv nummer zur Bestätigung...
- Seite 11 Werkseinstellungen abzuschließen. Str. 29, 26789 Leer, Deutschland, dass der Funkanlagentyp Homematic IP Das Gerät führt einen Neustart durch. HmIP-SWDO-2, HmIP-SWDO-A der Richtlinie 2014/53/EU entspricht. Der 10 Wartung und Reinigung vollständige Text der EU-Konformitäts- Das Gerät ist für Sie bis auf einen erklärung ist unter der folgenden Inter-...
- Seite 12 Entsorgung 12 Entsorgung Konformitätshinweis Das CE-Zeichen ist ein Freiver- Entsorgungshinweis kehrszeichen, das sich ausschließ- Dieses Zeichen bedeutet, dass das lich an die Behörden wendet und Gerät und die Batterien bzw. Ak- keine Zusicherung von Eigen- kumulatoren nicht mit dem Haus- schaften beinhaltet.
- Seite 13 Technische Daten 13 Technische Daten Geräte-Kurzbezeichnung: HmIP-SWDO-2, HmIP-SWDO-A Versorgungsspannung: 1x 1,5 V LR03/Micro/AAA Stromaufnahme: 100 mA max. Batterielebensdauer: 2 Jahre (typ.) Schutzart: IP20 Umgebungstemperatur: 5 bis 35 °C Abmessungen (B x H x T): 102 x 15 x 20 mm Gewicht: 30 g (inkl.
- Seite 14 Installation and operating manual Table of contents Package contents..................15 Information about this manual ..............15 Hazard information ..................15 Function and device overview ..............16 General system information ..............16 Start-up ......................17 Pairing ........................17 Installation ......................18 6.2.1 Selecting a suitable installation location ......... 18 6.2.2 Adhesive strip or screw installation ..........
- Seite 15 Package contents Package contents For safety and licensing reasons (CE), unauthorised change and/or Window and Door Contact – modification of the device is not optical permitted. 2x Caps (brown/white) Do not open the device. It does 1x Double-sided adhesive strips not contain any parts that need to Countersunk head screws 2.2 x 13 be maintained by the user.
- Seite 16 Function and device overview 4 Function and device Device overview: (A) Bore holes overview (B) Electronic unit The Homematic IP Window and Door (C) Battery compartment Contact – optical reliably detects open (D) Infrared sensor windows and doors by means of an (E) Cap integrated infrared sensor.
- Seite 17 Start-up 6 Start-up You can manually start the pairing mode for another 3 minutes by briefly pressing the system button Pairing (F). Please read this entire section before starting the pairing proce- dure. First set up your Homematic IP Access Point using the Homematic IP app so that you can use other Homematic IP devices in the system.
- Seite 18 Start-up Installation The ideal spacing between the housing edge of the window and Please read this entire section door contact and the window before starting the installation casement/door leaf is 3 mm (see process. figure). • If the window/door handle is locat- 6.2.1 Selecting a suitable installation location ed on the right side, you must turn...
- Seite 19 Start-up • Attach the double-sided adhesive Proceed as follows to install the win- strip to the rear of the electronic dow and door contact with the screws: unit (B) and press the electronic • Mark the bore holes (A) on the win- unit onto the desired position of dow and door frame.
- Seite 20 Changing the batteries Changing the batteries • After inserting the batteries, pay attention to the flashing sequences If a flat battery is displayed in the app (F)(see „8.4 Error codes of the LED or on the device (see „8.4 Error codes and flashing sequences“...
- Seite 21 Troubleshooting 8 Troubleshooting 868 MHz range. In the 868 MHz frequency range we use, the maximum transmission time of Weak batteries any device is 1% of an hour (i.e. 36 sec- Provided that the voltage value permits onds in an hour). Devices must cease it, the window and door contact will transmission when they reach the 1% remain ready for operation even if the...
- Seite 22 Troubleshooting Error codes and flashing sequences Flashing code Meaning Solution Radio transmission/att- Wait until the transmissi- Short orange flashes empting to transmit/data on is complete. transmission You can continue opera- 1x long steady green light Operation confirmed tion. Please enter the last four numbers of the device Short orange flashes (eve- Pairing mode active...
- Seite 23 Restoring factory settings 9 Restoring factory settings 11 General information about radio operation The device’s factory settings can be restored. If you do this, you will Radio transmission is performed on lose all your settings. a non-exclusive transmission path, which means that there is a possibility Proceed as follows to restore the of interference occurring.
- Seite 24 Disposal 12 Disposal Information about conformity The CE mark is a free trademark Instructions for disposal that is intended exclusively for the This symbol means that the device authorities and does not imply and the single-use or rechargea- any assurance or guarantee of ble batteries must not be disposed properties.
- Seite 25 Technical specifications 13 Technical specifications Device short description: HmIP SWDO-2, HmIP SWDO-A Supply voltage: 1x 1.5 V LR03/micro/AAA Current consumption: Max. 100 mA Battery life: 2 years (typical) Protection rating: IP20 Ambient temperature: 5 to 35°C Dimensions (W x H x D): 102 x 15 x 20 mm Weight: 30 g (incl.
- Seite 26 Notice d‘installation et d‘emploi Table des matières Contenu de la livraison ................27 Remarques sur le mode d’emploi ............27 Mises en garde .....................27 Fonction et aperçu de l’appareil ............. 28 Informations générales sur le système ..........28 Mise en service ................... 29 Apprentissage ....................
- Seite 27 Contenu de la livraison Contenu de la livraison mations et/ou modifications arbi- traires du produit ne sont pas Contact de fenêtre et de porte – autorisées. optique N’ouvrez pas l’appareil. Il ne 2x Caches (brun/blanc) contient aucune pièce requérant 1x Bandes adhésives double face une maintenance par l’utilisateur.
- Seite 28 Fonction et aperçu de l’appareil Toute application autre que celle Aperçu de l’appareil : décrite dans le présent mode (A) Trous pour les vis d’emploi n’est pas conforme et (B) Module électronique entraîne l’exclusion de la garantie (C) Compartiment des piles et de la responsabilité.
- Seite 29 Mise en service Vous trouverez tous les documents Vous pouvez lancer le mode d’ap- techniques actuels et les dernières prentissage manuellement pen- mises à jour sur dant 3 minutes de plus en ap- puyant brièvement sur la touche www.homematic-ip.com. système (F). 6 Mise en service Apprentissage Merci de lire attentivement cette...
- Seite 30 Mise en service Montage La distance idéale entre le bord du boîtier du contact de fenêtre et de Merci de lire attentivement cette porte et le vantail de porte/fenêtre section avant de procéder au est de 3 mm (voir figure). montage. •...
- Seite 31 Mise en service • Placez la bande adhésive double Pour monter le contact de fenêtre et face sur la partie arrière de l’unité de porte avec les vis, procédez comme électronique (B) et pressez l’unité suit : sur la position désirée sur le cadre •...
- Seite 32 Remplacement des piles Remplacement des piles • Après avoir inséré la pile, observez les séquences de clignotement de Si l’application ou l’appareil affiche la LED (F) (v. « 8.4 Codes d’erreur et une pile vide (v. « 8.4 Codes d’erreur et séquences de clignotement « à la séquences de clignotement «...
- Seite 33 Dépannage 8 Dépannage est de garantir le fonctionnement de tous les appareils fonctionnant dans la bande de fréquence de 868 MHz. Piles faibles Dans la bande de fréquence de Si la tension le permet, le contact de 868 MHz que nous utilisons, le temps fenêtre et de porte est opérationnel, d’émission maximal de chaque appa- même lorsque la tension de la pile est...
- Seite 34 Dépannage Codes d’erreur et séquences de clignotement Code de clignotement Signification Solution Transmission radio/essai Bref clignotement en Attendez que la transmis- d’émission/transmission orange sion soit terminée. des données Brille 1x longtemps en Vous pouvez poursuivre Opération activée vert avec la commande. Saisissez les quatre der- niers chiffres du numéro Bref clignotement en...
- Seite 35 Restauration des réglages d’usine 9 Restauration des réglages Nettoyez l’appareil avec un chiffon doux, propre, sec et non pelucheux. d’usine Pour enlever des salissures plus consé- Les paramètres d’usine de l’appa- quentes, le chiffon peut être légère- reil peuvent être restaurés. Tous ment humidifié...
- Seite 36 Élimination 12 Élimination Avis de conformité Le sigle CE est un sigle de libre Avis d’élimination circulation destiné uniquement Ce symbole signifie que l’appareil aux administrations ; il ne consti- et les piles ou accumulateurs ne tue pas une garantie de caracté- doivent pas être jetés avec les ristiques.
- Seite 37 Caractéristiques techniques 13 Caractéristiques techniques Désignation abrégée de l’appareil : HmIP-SWDO-2, HmIP-SWDO-A Tension d’alimentation : 1x 1,5 V LR03/Micro/AAA Courant absorbé : 100 mA max. Durée de vie des piles : 2 ans (typiquement) Type de protection : IP20 Température ambiante : 5 à 35 °C Dimensions (l x H x P) : 102 x 15 x 20 mm Poids :...
- Seite 38 Manual de instalación y uso Índice Volumen de suministro ................39 Advertencias sobre estas instrucciones ..........39 Advertencias de peligro ................39 Funciones y esquema del dispositivo ............. 40 Información general del sistema ............40 Puesta en servicio ..................41 Conexión ......................41 Montaje .......................42 6.2.1 Selección de un lugar de montaje adecuado .........42...
- Seite 39 Volumen de suministro Volumen de suministro Por razones de seguridad y de homologación (CE) no está permi- Contacto para ventanas y puer- tido realizar ninguna transforma- tas – fotoeléctrico ción o cambio en el dispositivo 2x Tapas (marrón/blanco) por cuenta propia. 1x Adhesivo de dos caras No abra el dispositivo.
- Seite 40 Funciones y esquema del dispositivo 4 Funciones y esquema del dispositivo El contacto fotoeléctrico para venta- nas y puertas Homematic IP detecta de forma fiable cuando se abre una puerta o una ventana mediante un sensor de infrarrojos integrado. Las ventanas y puertas abiertas se muestran inmediatamente en la apli- cación Homematic IP;...
- Seite 41 Puesta en servicio 6 Puesta en servicio También se puede activar manual- mente el modo de conexión du- rante 3 minutos con una pulsa- Conexión ción breve del botón del sistema Lea íntegramente este apartado (F). antes de establecer la conexión. En primer lugar, configure su Homematic IP Access Point desde la app Homematic IP para poder...
- Seite 42 Puesta en servicio Montaje La distancia ideal entre el borde de la carcasa del contacto para Lea íntegramente este apartado ventanas y puertas y la hoja de la antes de comenzar el montaje. puerta/ventana es de 3 mm (véase la figura). 6.2.1 Selección de un lugar de montaje adecuado •...
- Seite 43 Puesta en servicio 6.2.2 Montaje mediante tiras Montaje con tornillos adhesivas o tornillos El montaje con tornillos daña la Puede fijar el contacto para ventanas y puerta o la ventana. Si la vivienda puertas al marco de la ventana/puerta es de alquiler, esto podría dar •...
- Seite 44 Cambio de pilas Cambio de pilas • Introduzca una pila nueva LR03/ Micro/AAA de 1,5 V en la posición Cuando se muestre el símbolo de ba- correcta en el compartimento de la tería descargada en la aplicación o en pila (C) según las marcas de polari- el dispositivo (v.
- Seite 45 Reparación de fallos 8 Reparación de fallos todos los aparatos que trabajan en la banda de 868 MHz. En la banda de frecuencia de los Pilas descargadas 868 MHz que utilizamos nosotros, Si la carga disponible lo permite, el el tiempo de transmisión máximo de contacto para ventanas y puertas está...
- Seite 46 Reparación de fallos Códigos de errores y secuencias intermitentes Secuencia intermitente Significado Solución Transmisión inalámbrica, Luz naranja intermitente Espere hasta que finalice intento de transmisión o corta la transmisión. transmisión de datos Puede continuar con el 1 luz verde larga Proceso confirmado manejo.
- Seite 47 Leer, Alemania, declara que el tipo de to de la configuración de fábrica. instalación inalámbrica Homematic IP HmIP-SWDO-2, HmIP-SWDO-A cum- El dispositivo ejecuta un reinicio. ple la Directiva 2014/53/UE. El texto de la declaración de conformidad CE está...
- Seite 48 Eliminación 12 Eliminación Información relativa a la conformidad El distintivo CE es un símbolo de Indicaciones sobre la eliminación mercado libre dirigido exclusiva- Este símbolo significa que el dis- mente a las autoridades y que no positivo y las pilas o acumuladores implica ninguna garantía de de- no deben desecharse con la basu- terminadas características.
- Seite 49 Datos técnicos 13 Datos técnicos Nombre abreviado del dispositivo: HmIP-SWDO-2, HmIP-SWDO-A Tensión de alimentación: 1 pila LR03/Micro/AAA de 1,5 V Consumo de corriente: máx. 100 mA Duración de las pilas: 2 años (típ.) Tipo de protección: IP20 Temperatura ambiente: de 5 a 35 °C...
- Seite 50 Istruzioni per l‘installazione e l‘uso Indice Fornitura .......................51 Indicazioni su queste istruzioni ..............51 Indicazioni di pericolo................51 Funzioni e vista d’insieme dell’apparecchio Informazioni generali sul sistema ............52 Messa in funzione ..................53 Accoppiamento ....................53 Montaggio ......................54 6.2.1 Selezione di un luogo di montaggio adatto ........54 6.2.2 Montaggio tramite strisce adesive o viti..........55 Sostituzione delle batterie ...............
- Seite 51 Fornitura Fornitura Per ragioni di sicurezza o di omo- logazione (CE) non sono ammesse Contatto per finestre e porte – modifiche costruttive o di altro sistema ottico genere del prodotto. Coperchio protettivo (marrone/ bianco) Non aprire mai l’apparecchio. Questo apparecchio non contiene 1x Strisce bi-adesive parti che possano essere riparate 2x Viti a testa svasata 2,2 x 13 mm...
- Seite 52 Funzioni e vista d’insieme dell’apparecchio Qualsiasi impiego diverso da quel- Vista d’insieme dell’apparecchio: lo descritto nelle presenti istruzio- (A) Fori ni per l’uso non è conforme alle (B) Gruppo elettronico disposizioni e comporta (C) Vano batterie l’esclusione di responsabilità e la (D) Sensore a infrarossi perdita dei diritti di garanzia.
- Seite 53 Messa in funzione componenti, consultare il Manuale La modalità Inizializzazione può dell’utente di Homematic IP. Tutta la essere avviata manualmente per documentazione tecnica e gli aggior- altri 3 minuti premendo breve- namenti sono sempre disponibili su mente il tasto di sistema (F). www.homematic-ip.com.
- Seite 54 Messa in funzione Montaggio La distanza ideale tra il bordo dell’alloggiamento del contatto Leggere interamente questo para- per finestre e porte e il battente grafo prima di iniziare il montag- della porta/finestra è pari a 3 mm gio dell’apparecchio. (v. figura).
- Seite 55 Messa in funzione 6.2.2 Montaggio tramite strisce Montaggio con viti adesive o viti Il fissaggio a vite danneggia la Il contatto per finestre e porte può es- porta e la finestra. Se la casa è in sere fissato affitto, il proprietario potrebbe •...
- Seite 56 Sostituzione delle batterie Sostituzione delle batterie • Dopo aver inserito la batteria, pre- stare attenzione alle sequenze di Se nell’app o nell’apparecchio viene lampeggio dei LED (F) (v. “8.4 Codi- segnalata una batteria scarica (v. “8.4 ci di errore e sequenze di lampeg- Codici di errore e sequenze di lampeg- gio“...
- Seite 57 Risoluzione dei guasti 8 Risoluzione dei guasti namento di tutti gli apparecchi nella gamma 868 MHz. Nel campo di frequenza da 868 MHz Batterie scariche da noi utilizzato, il tempo massimo Se il valore della tensione lo consente, di trasmissione di ogni apparecchio è il contatto per finestre e porte è...
- Seite 58 Risoluzione dei guasti Codici di errore e sequenze di lampeggio Codice di segnalazione Significato Soluzione Trasmissione radio/tenta- Luce arancione lampeg- Attendere che la trasmis- tivo d'invio/trasmissione giante per breve tempo sione sia conclusa. dati Luce verde accesa a lungo Procedura confermata Si può...
- Seite 59 Ripristino delle impostazioni di fabbrica 9 Ripristino delle lucchi. Per rimuovere tracce di sporco tenaci si può inumidire leggermente il impostazioni di fabbrica panno con acqua tiepida. Non utilizza- Le impostazioni di fabbrica re detergenti a base di solventi poiché dell’apparecchio possono essere potrebbero danneggiare l’alloggiamen- ripristinate.
- Seite 60 Smaltimento 12 Smaltimento Dichiarazione di conformità Il marchio CE è un contrassegno Avvertenze per lo smaltimento del mercato libero, che si rivolge Questo simbolo indica che l’appa- esclusivamente agli enti ufficiali e recchio e le batterie non devono che non rappresenta una garanzia essere smaltiti con i rifiuti dome- delle caratteristiche del prodotto.
- Seite 61 Dati Tecnici 13 Dati Tecnici Sigla dell’apparecchio: HmIP-SWDO-2, HmIP-SWDO-A Tensione di alimentazione: 1 batteria LR03/micro/AAA da 1,5 V Corrente assorbita: 100 mA max. Durata batterie: 2 anni (tip.) Grado di protezione: IP20 Temperatura ambiente: tra 5 e 35 °C Dimensioni (L x A x P):...
- Seite 62 Installatie- en bedieningshandleiding Inhoudsopgave Leveringsomvang ..................63 Instructies bij deze handleiding .............. 63 Gevarenaanduidingen ................63 Werking en overzicht van het apparaat ..........64 Algemene systeeminformatie ..............64 Inbedrijfstelling ................... 65 Inleren ......................... 65 Montage ......................66 6.2.1 Keuze van een geschikte montageplaats ........66 6.2.2 Plakstrip- of schroefmontage ............67 Batterijen vervangen .................
- Seite 63 Leveringsomvang Leveringsomvang Om redenen van veiligheid en markering (CE) is het eigenmach- 1x Raam- en deurcontact – optisch tig verbouwen en/of veranderen 2x Afdekkappen (bruin/wit) van het apparaat niet toegestaan. 1x Dubbelzijdige plakstrip Open het apparaat niet. Het bevat Schroeven met verzonken kop 2,2 geen onderdelen die door de x 13 mm gebruiker moeten worden onder-...
- Seite 64 Werking en overzicht van het apparaat 4 Werking en overzicht van Overzicht apparaten: (A) Schroefgaten het apparaat (B) Elektronische unit Het Homematic IP raam- en deurcon- (C) Batterijvak tact – detecteert op een betrouwbare (D) Infraroodsensor optische wijze open ramen of deuren (E) Afdekkap met behulp van een geïntegreerde inf- (F) Systeemtoets (inleertoets en led)
- Seite 65 Inbedrijfstelling 6 Inbedrijfstelling U kunt de inleermodus gedurende nog eens 3 minuten handmatig starten door kort op de systeem- Inleren toets (F) te drukken. Lees dit hoofdstuk volledig door, voordat u met het inleren begint. Configureer eerst uw Homematic IP access point via de Homematic IP-app om nog meer Homematic IP-apparaten in het systeem te kunnen gebruiken.
- Seite 66 Inbedrijfstelling Montage De ideale afstand tussen de rand van de behuizing van het raam- Lees dit hoofdstuk volledig door, en deurcontact en de deur-/raam- voordat u met de montage begint. vleugel bedraagt 3 mm (zie afbeelding). 6.2.1 Keuze van een geschikte montageplaats •...
- Seite 67 Inbedrijfstelling 6.2.2 Plakstrip- of schroefmontage Montage met schroeven U kunt het raam- en deurcontact Door de schroefmontage raakt de deur of het raam beschadigd. Bij • met de meegeleverde dubbelzijdi- huurwoningen kan dit tot een ge plakstrip of schadeclaim of inhouding van de •...
- Seite 68 Batterijen vervangen Batterijen vervangen • Plaats een nieuwe 1,5 V LR03/Mi- cro/AAA-batterij volgens de polari- Als een lege batterij wordt weergege- teitsmarkeringen in het batterijvak ven in de app of op het apparaat (zie (C). ‘8.4 Foutcodes en knipperreeksen’ op 70), vervang de gebruikte pagina batterij dan door een nieuwe batte-...
- Seite 69 Storingen oplossen 8 Storingen oplossen werkende apparaten te garanderen. In het door ons gebruikte frequentie- bereik van 868 MHz bedraagt de maxi- Zwakke batterijen male zendtijd van elk apparaat 1% van Als de spanningswaarde dit toestaat, een uur (dus 36 seconden per uur). De kan het raam- en deurcontact ook bij apparaten mogen bij het bereiken van een lage batterijspanning worden ge-...
- Seite 70 Storingen oplossen Foutcodes en knipperreeksen Knippercode Betekenis Oplossing Draadloze overdracht, Wacht tot de overdracht Kort oranje knipperen zendpoging, gegevenso- beëindigd is. verdracht U kunt met de bediening 1x lang groen oplichten Proces bevestigd doorgaan. Voer de laatste vier cijfers van het apparaat-serie- Kort oranje knipperen (om Inleermodus actief nummer in ter bevestiging...
- Seite 71 Str. 29, 26789 Leer, Duitsland, gen te voltooien. dat de draadloze apparatuur van het type Homematic IP HmIP-SWDO-2, Het apparaat voert een herstart uit. HmIP-SWDO-A voldoet aan Richtlijn 2014/53/EU. De volledige tekst van de 10 Onderhoud en reiniging...
- Seite 72 Verwijdering als afval 12 Verwijdering als afval Conformiteitsinformatie De CE-markering is een label voor Informatie over verwijdering als afval het vrije verkeer van goederen Dit symbool betekent dat het binnen de Europese Unie en is uit- apparaat en de batterijen of accu’s sluitend bestemd voor de desbe- niet mogen worden weggegooid treffende autoriteiten.
- Seite 73 Technische gegevens 13 Technische gegevens Apparaatcode: HmIP-SWDO-2, HmIP-SWDO-A Voedingsspanning: 1x 1,5 V LR03/micro/AAA Stroomopname: 100 mA max. Levensduur batterijen: 2 jaar (typ.) Beschermingsgraad: IP20 Omgevingstemperatuur: 5 tot 35 °C Afmetingen (b x h x d): 102 x 15 x 20 mm Gewicht: 30 g (incl.
- Seite 74 Kostenloser Download der Homematic IP App! Free download of the Homematic IP app! Bevollmächtigter des Herstellers: Manufacturer’s authorised representative: eQ-3 AG Maiburger Straße 29 26789 Leer / GERMANY www.eQ-3.de...