Inhaltsverzeichnis
Werbung
Verfügbare Sprachen
Verfügbare Sprachen
Quicklinks
English
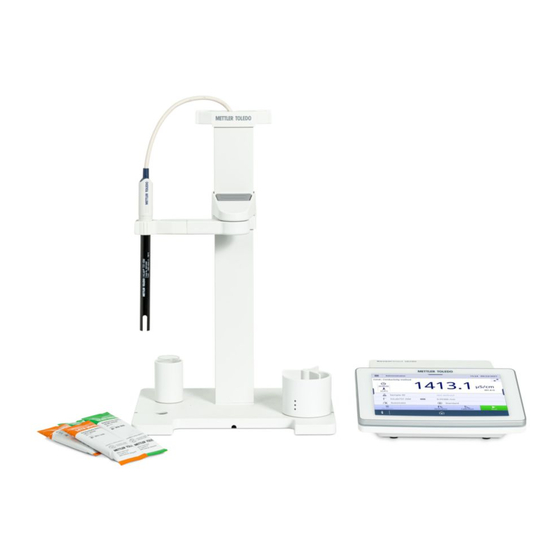
User Manual SevenDirect™ SD30 Conductivity Meter
Deutsch
Benutzerhandbuch SevenDirect™ SD30 Leitfähigkeits-Messgerät
Manuale per l'utente SevenDirect™ SD30 Misuratore di conducibilità
Italiano
Podręcznik użytkownika SD30 SevenDirect™ Konduktometr
Polski
Kullanım kılavuzu SevenDirect™ SD30 İletkenlik Ölçüm Cihazı
Türkçe
Werbung
Inhaltsverzeichnis

Verwandte Anleitungen für Mettler Toledo SevenDirect SD30


Inhaltszusammenfassung für Mettler Toledo SevenDirect SD30
- Seite 1 English User Manual SevenDirect™ SD30 Conductivity Meter Deutsch Benutzerhandbuch SevenDirect™ SD30 Leitfähigkeits-Messgerät Manuale per l'utente SevenDirect™ SD30 Misuratore di conducibilità Italiano Podręcznik użytkownika SD30 SevenDirect™ Konduktometr Polski Kullanım kılavuzu SevenDirect™ SD30 İletkenlik Ölçüm Cihazı Türkçe...
- Seite 3 Zulassungen. Benutzerhandbücher bzw. www.mt.com/contact Bedienungsanleitungen, siehe www.mt.com/pHLab- Manuals. Wenn Sie weitere Informationen oder Zulassungen benötigen, steht Ihnen Ihr METTLER TOLEDO- Vertriebspartner vor Ort gern zur Verfügung, siehe http://www.mt.com/contact ADVERTENCIA AVERTISSEMENT El uso fiable y seguro de este instrumento precisa un Le fonctionnement sûr et fiable de cet instrument...
- Seite 4 или на CD диск/USB памет), Декларацията за www.mt.com/pHLab-Manuals. съответствие и одобренията, валидни във вашата Pokud potřebujete další informace nebo certifikáty, държава. Ръководства на потребителя и kontaktujte místního distributora METTLER TOLEDO – инструкции за работа можете да намерите на viz stránka http://www.mt.com/contact адрес www.mt.com/pHLab-Manuals.
- Seite 5 χρήσης (που επισυνάπτονται ως αντίγραφο ή betjeningsvejledninger. σε CD/στικ μνήμης USB), η Δήλωση Kontakt din lokale METTLER TOLEDO-forhandler for Συμμόρφωσης και οι εγκρίσεις που ισχύουν yderligere information eller godkendelser. Se http:// στη χώρα σας. Για τα εγχειρίδια χρήστη ή τις...
- Seite 6 és a használati utasításokért lásd www.mt.com/ distributeru tvrtke METTLER TOLEDO, pogledajte pHLab-Manuals. http://www.mt.com/contact További információkért vagy jóváhagyásokért forduljon a METTLER TOLEDO helyi forgalmazójához, lásd http://www.mt.com/contact. ĮSPĖJIMAS BRĪDINĀJUMS! Kad šis instrumentas būtų patikimas ir saugus Lai šo iekārtu varētu droši un uzticami izmantot, tā ir naudoti, jį...
- Seite 7 Kontakt den lokale METTLER TOLEDO-distributøren gebruikershandleidingen of bedieningsinstructies op for mer informasjon eller godkjenninger. Se http:// www.mt.com/pHLab-Manuals. www.mt.com/contact Neem contact op met uw lokale METTLER TOLEDO- distributeur voor meer informatie of goedkeuringen, zie http://www.mt.com/contact. OSTRZEŻENIE ATENTIONARE Aby urządzenie było niezawodne i bezpieczne w Pentru utilizarea acestui instrument în condiţii de...
- Seite 8 Kullanım kılavuzu veya kullanım talimatları Manuals. için, bkz. www.mt.com/pHLab-Manuals. Om du vill ha mer information om godkännanden Daha fazla bilgi almak veya onayları görmek ska du kontakta din lokala METTLER TOLEDO- amacıyla METTLER TOLEDO Türkiye ofisi ile iletişime distributör; se http://www.mt.com/contact geçmek için, bkz.
- Seite 9 사용자 매뉴얼 또는 작동 설명서의 안전 규정, 참고 및 규격(서면 사본 또는 CD/USB 메모리 스 틱으로 첨부됨), 적합성 선언 및 귀하의 국가 내 유효한 승인. 사용자 매뉴얼 또는 작동 설명서는 www.mt.com/pHLab-Manuals를 참조하십시오. 더 자세한 정보 또는 승인을 원하는 경우 현지 METTLER TOLEDO 유통업체에 문의하십시오. http://www.mt.com/contact를 참조하십시오.
- Seite 10 ส ำ หรั บ ข ้อมู ล เพิ ่ ม เติ ม หรื อ การอนุ ม ั ต ิ ติ ด ต่ อ ตั ว แทน (прилагаются в виде бумажной копии или в จำ หน่ า ยของ METTLER TOLEDO ในประเทศของคุ ณ электронном виде на компакт-диске/карте памяти...
-
Seite 11: Inhaltsverzeichnis
Table of Contents Introduction Safety Information Definitions of signal words and warning symbols ..........Product specific safety notes ................Design and Function Overview......................Rear panel connections ................... User interface ....................3.3.1 Main sections at a glance ..............3.3.2 Home screen .................. 3.3.2.1 Display representation .............. - Seite 12 SevenDirect™ SD30...
-
Seite 13: Introduction
1 Introduction The SevenDirect is an intuitive, easy-to-operate benchtop meter for parameters such as pH, redox potential, conductivity and ion concentrations (depending on instrument version). It is designed for robustness in typical laboratory settings and supports the recording and transfer of important measurement data. Conventions and symbols Refers to an external document. -
Seite 14: Warning Symbols
NOTICE Damage to the instrument or malfunction due to the use of unsuitable parts Only use parts from METTLER TOLEDO that are intended to be used with your instrument. FCC Rules This device complies with Part 15 of the FCC Rules and Radio Interference Requirements of the Canadian Department of Communications. -
Seite 15: Design And Function
3 Design and Function 3.1 Overview Description Function On screen help To display help information for the current screen. Home To return from any menu level to Home screen. Touch screen Displays information and operates the meter. Power switch Switches the meter on/off. Press to switch on. -
Seite 16: User Interface
3.3 User interface Note The screen shots in this manual are examples and can differ from the screen on your meter. 3.3.1 Main sections at a glance The Home screen (1) is the central navigation point where all the menus and settings can be found. The Menu (2), Methods (3) and Results fly-in (4) open when using the handles along the sides of the main screen. -
Seite 17: Display Representation
Description Function Activate / deactivate Switches modes for the display representation. Details see [Display repre- uFocus™ mode sentation Page 7]. Measurement Displays the results of the current measurement, calibration or verification. reading area Results handle Enters into Results fly-in to see the list of the latest 7 results. Method information Displays the information about the sample, sensor and method. -
Seite 18: How To Operate The Touch Screen
Description Function Duration : displays the duration of the measurement. : displays the number of data points which are already recorded. Only if Methods > Measure > Interval reading is active, you can tap to switch between these 2 modes. Temperature Displays the temperature. -
Seite 19: Selecting Or Activating An Item
NOTICE Danger of damaging the touch screen with pointed or sharp objects! Pressing on the touch screen with pointed or sharp objects may be damaged it. Operate the touch screen by applying gentle pressure with the pad of your finger. 3.3.3.1 Selecting or activating an item Tap the item or function to be selected or activated. -
Seite 20: Secondary Functions For List Items
3.3.3.4 Secondary functions for list items To access the secondary functions, proceed as follows: Place the finger on the triangle symbol and slide to the left to display the secondary functions. - or - Swipe left across a list item to display its secondary functions and swipe right across to hide its secondary functions. -
Seite 21: Changing Date And Time
3.3.3.7 Changing date and time The display field (1) shows the defined date or time. Scroll to move the list up/down to change the display field. Note the format of date and time can be defined in Menu > Settings > General. 4 Putting into Operation 4.1 Scope of delivery Unpack the instrument and check the scope of delivery. -
Seite 22: Installing Power Supply
Death or serious injury due to electric shock Contact with parts that carry a live current can lead to death or injury. 1 Only use the METTLER TOLEDO AC/DC adapter designed for your instrument. 2 Keep all electrical cables and connections away from liquids and moisture. -
Seite 23: First Startup Wizard
4.5 First Startup Wizard At first startup of the instrument or after a factory reset, a First Startup Wizard guides you through the major settings of the instrument. 1 Select a Language from the language list. The user interface switches to the language selected immediately. -
Seite 24: Connecting Sensors
4.6 Connecting sensors When connecting a sensor, make sure that the plugs are properly inserted. If you are using a sensor with a built-in temperature probe or a separate temperature probe, connect the second cable to the ATC socket. Example Connect a conductivity probe to the conductivity input, a temperature probe is always built in and does not need to be connected separately. -
Seite 25: Starting A Verification
To ensure the most accurate readings, you should perform calibrations regularly. Running Direct Calibration Ensure that the appropriate buffers/standards have been selected. 1 Select an appropriate method according to [Selecting a method Page 14]. 2 Select a sensor if necessary according to [Selecting a sensor Page 14]. 3 Tap Calibration. -
Seite 26: Starting A Measurement
5 Enter the lot number if Methods > Verification > Check standard lot number is active and confirm with The verification point, sensor name, sensor status and the endpoint type are displayed. 6 Tap Read. 7 The measurement stops when the endpoint criterion is fulfilled. See [Endpoint criterion Page 16]. A window pops up with verification data. -
Seite 27: Maintenance And Care
The instrument is turned off and disconnected from the electrical outlet. Clean the housing of the instrument using a cloth dampened with water and a mild detergent. If you have questions about the compatibility of cleaning agents, contact your authorized METTLER TOLEDO dealer or service representative. -
Seite 28: Technical Data
7 Technical Data General Screen Color TFT Interfaces USB-A USB-Stick (FAT12/FAT16/FAT32)/ Printer/barcode reader USB-B Computer Ambient conditions Ambient temperature 5…40 °C Relative humidity 5…80% (non-condensing) Overvoltage category Class II Pollution degree Range of application For indoor use only Maximum operating altitude Up to 5000 m Standards for safety and EMC See Declaration of Conformity Dimensions Width... - Seite 29 Resolution Conductivity 0.1/0.01/0.001* (µS/cm, mS/cm) 0.1/0.01/0.001/0.0001* (µS/m, mS/m, S/m) 0.1/0.01/0.001 (mg/L, ppm)* 0.1/0.01/0.001/0.0001 (g/L, ppt)* Salinity 0.1/0.01 Resistivity 0.1/0.01/0.001 (Ω·cm, kΩ·cm)* 0.1/0.01 (MΩ·cm) Conductivity Temperature 0.1 °C Accuracy Conductivity ±0.5% of measured value ±0.5% of measured value Salinity ±0.5% of measured value Resistivity ±0.5% of measured value Temperature...
- Seite 31 Inhaltsverzeichnis Einführung Sicherheitsinformationen Definition von Signalwörtern und Warnsymbolen ..........Produktspezifische Sicherheitshinweise.............. Aufbau und Funktion Übersicht ....................... Anschlüsse auf der Rückseite ................Benutzeroberfläche..................3.3.1 Wichtige Abschnitte auf einen Blick ........... 3.3.2 Homescreen ................... 3.3.2.1 Displaydarstellung..............3.3.3 Bedienung des Touchscreens ............3.3.3.1 Auswählen oder Aktivieren eines Elements........
- Seite 32 SevenDirect™ SD30...
-
Seite 33: Einführung
1 Einführung Das SevenDirect ist ein intuitives, benutzerfreundliches Tischmessgerät für Parameter wie pH, Redoxpotenzial, Leitfähigkeit und Ionenkonzentration (je nach Instrumentenversion). Es ist auf Robustheit in typischen Labor- umgebungen ausgelegt und unterstützt die Aufzeichnung und Übertragung von wichtigen Messdaten. Konventionen und Symbole Bezieht sich auf ein externes Dokument. -
Seite 34: Produktspezifische Sicherheitshinweise
Es besteht Lebensgefahr oder die Gefahr schwerer Verletzungen durch einen Stromschlag Der Kontakt mit spannungsführenden Teilen kann zum Tod oder zu Verletzungen führen. 1 Verwenden Sie das AC/DC-Netzteil von METTLER TOLEDO, das speziell für Ihr Gerät ausgelegt wurde. 2 Halten Sie alle elektrischen Kabel und Anschlüsse von Flüssigkeiten und Feuchtigkeit fern. -
Seite 35: Aufbau Und Funktion
3 Aufbau und Funktion 3.1 Übersicht Beschreibung Funktion Bildschirmhilfe Zur Anzeige der Hilfeinformationen für den aktuellen Bildschirm. Startseite Zur Rückkehr von einer beliebigen Menüebene zu Startbildschirm. Touchscreen Zeigt Informationen an und bedient das Messgerät. Netzschalter Schaltet das Messgerät ein/aus. Drücken Sie ihn zum Einschalten. Halten Sie ihn zum Ausschalten drei Sekunden lang gedrückt. -
Seite 36: Benutzeroberfläche
Hinweis Verwenden Sie für eine optimale Leistung einen USB-Speicherstick mit FAT16- oder FAT32-Dateisys- tem. 3.3 Benutzeroberfläche Hinweis Die Screenshots in diesem Handbuch sind Beispiele und können sich vom Bildschirm auf Ihrem Messgerät unterscheiden. 3.3.1 Wichtige Abschnitte auf einen Blick Startbildschirm (1) ist der zentrale Navigationspunkt, von dem aus sämtliche Menüs und Einstellungen aufge- rufen werden können. -
Seite 37: Displaydarstellung
Beschreibung Funktion Datum und Uhrzeit Zeigt das aktuelle Datum und die Uhrzeit an. Das Format ist eingestellt auf Menü > Einstellungen > Allgemein. uFocus™ Modus Wechselt zwischen den Modi für die Displayanzeige. Für Details siehe [Dis- aktivieren/deaktivie- playdarstellung Seite 7]. Messwertbereich Zeigt die Resultate der aktuellen Messung, Kalibrierung oder Verifizierung an. - Seite 38 Beschreibung Funktion Methoden-ID Zeigt den Messmodus und den Namen der aktiven Methode an. 'Leitf.:': kann Leitfähigkeitsmessungen sowie Kalibrierung und Verifizie- rung des Leitfähigkeitssensors durchführen Dauer : zeigt die Dauer der Messung an. : zeigt die Anzahl der bereits aufgezeichneten Datenpunkte an. Nur wenn Methoden >...
-
Seite 39: Bedienung Des Touchscreens
3.3.3 Bedienung des Touchscreens Das Messgerät wird durch Fingerberührung auf dem Touchscreen bedient. HINWEIS Beschädigungsgefahr des Touchscreens durch spitze oder scharfe Gegenstände! Der Touchscreen kann durch spitze oder scharfe Gegenstände beschädigt werden. Bedienen Sie den Touchscreen, indem Sie leichten Druck mit Ihrer Fingerkuppe ausüben. 3.3.3.1 Auswählen oder Aktivieren eines Elements Tippen Sie auf das Element oder die Funktion, das bzw. -
Seite 40: Sekundäre Funktionen Für Listenelemente
3.3.3.4 Sekundäre Funktionen für Listenelemente Gehen Sie zum Zugreifen auf sekundäre Funktionen folgendermassen vor: Legen Sie den Finger auf das Dreiecksymbol wischen Sie nach links, um die sekundären Funktionen anzuzeigen. – oder – Wischen Sie nach links über ein Listenelement, um seine sekundären Funktionen anzuzeigen, und wischen Sie nach rechts, um seine sekundären Funktionen auszu- blenden. -
Seite 41: Ändern Von Datum Und Uhrzeit
3.3.3.7 Ändern von Datum und Uhrzeit Das Anzeigefeld (1) zeigt das definierte Datum bzw. die definierte Uhrzeit an. Scrollen Sie, um die Liste zum Ändern des Anzeigefelds nach oben/unten zu bewegen. Hinweis Das Format von Datum und Uhrzeit kann in Menü > Einstellungen > Allgemein definiert werden. 4 Inbetriebnahme 4.1 Lieferumfang Packen Sie das Instrument aus und überprüfen Sie den Lieferumfang. -
Seite 42: Installation Des Netzteils
Es besteht Lebensgefahr oder die Gefahr schwerer Verletzungen durch einen Stromschlag Der Kontakt mit spannungsführenden Teilen kann zum Tod oder zu Verletzungen führen. 1 Verwenden Sie das AC/DC-Netzteil von METTLER TOLEDO, das speziell für Ihr Gerät ausgelegt wurde. 2 Halten Sie alle elektrischen Kabel und Anschlüsse von Flüssigkeiten und Feuchtigkeit fern. -
Seite 43: Anschliessen Der Sensoren
1 Wählen Sie eine Sprache aus der Sprachliste aus. Die Benutzeroberfläche wechselt sofort zur ausge- wählten Sprache. 2 Tippen Sie auf Weiter. 3 Scrollen Sie nach unten, um den Endbenutzerlizenzver- trag zu lesen und zu bestätigen. 4 Tippen Sie auf Weiter. 5 Stellen Sie das Datumsformat, das Datum und die Uhrzeit ein. -
Seite 44: Starten Der Analyse
Beispiel Schliessen Sie eine Leitfähigkeitssonde an den Leitfähigkeitseingang an. Eine Temperatursonde ist immer eingebaut und muss nicht separat angeschlossen werden. ® Sensor ® Beim Anschliessen eines ISM -Sensors an das Messgerät, taucht das ISM Symbol auf dem Display auf und der Sensorname des Sensorchips wird registriert und auf dem Display angezeigt. Der Kalibrierverlauf, die Ursprungsdaten und die maximale Temperatur können im Datenspeicher geprüft wer- den. -
Seite 45: Starten Einer Verifizierung
Um eine optimale Genauigkeit der Messwerte sicherzustellen, sollten Sie regelmässig Kalibrierungen durch- führen. Durchführen einer direkten Kalibrierung Stellen Sie sicher, dass die geeigneten Puffer/Standards ausgewählt wurden. 1 Wählen Sie eine geeignete Methode gemäss [Auswählen einer Methode Seite 14] aus. 2 Wählen Sie ggf. einen Sensor gemäss [Auswählen eines Sensors Seite 14]. 3 Tippen Sie auf Kalibrierung. -
Seite 46: Starten Einer Messung
3 Tippen Sie auf Verifizierung. 4 Tippen Sie auf Verifizierung starten. 5 Geben Sie die Chargennummer ein, wenn Methoden > Verifizierung > Chargennummer des Standards prüfen aktiviert ist, und bestätigen Sie mit OK. Verifizierungspunkt, Sensorname, Sensorstatus und Endpunkttyp werden angezeigt. 6 Tippen Sie auf Start. -
Seite 47: Wartung Und Pflege
6 Wartung und Pflege Öffnen Sie nicht das Gehäuse des Geräts; es enthält keine Teile, die durch den Anwender gewartet, repariert oder ausgetauscht werden können. Bei Problemen mit Ihrem Gerät wenden Sie sich an Ihren autorisierten METTLER TOLEDO Händler oder Vertreter. ▶ www.mt.com/contact 6.1 Reinigung des Instruments... -
Seite 48: Entsorgung
6.3 Entsorgung In Übereinstimmung mit den Anforderungen der Europäischen Richtlinie 2012/19/EU über Elektro- und Elektronik-Altgeräte (WEEE) darf dieses Gerät nicht mit dem Hausmüll entsorgt werden. Sinngemäss gilt dies auch für Länder ausserhalb der EU entsprechend den gelten- den nationalen Regelungen. Bitte entsorgen Sie dieses Produkt gemäss den örtlichen Bestimmungen in einer getrennten Sammlung für Elektro- und Elektronikgeräte. - Seite 49 Leitfähigkeitsmessung Messbereich Leitfähigkeit 0,000 μS/cm bis 2000 mS/cm 0,00 mg/L bis 1 000 g/L Salzgehalt 0,00 bis 80,00 psu 0,00 bis 80,00 ppt Widerstand 0,00 bis 100,0 MΩ·cm Temperatur -30 bis 130 °C Auflösung Leitfähigkeit 0,1/0,01/0,001* (µS/cm, mS/cm) 0,1/0,01/0,001/0,0001* (µS/m, mS/m, S/m) 0,1/0,01/0,001 (mg/L, ppm)* 0,1/0,01/0,001/0,0001 (g/L, ppt)* Salzgehalt 0,1/0,01 Widerstand 0,1/0,01/0,001 (Ω·cm, kΩ·cm)*...
- Seite 51 Sommario Introduzione Informazioni sulla sicurezza Definizioni delle parole e dei simboli di avvertimento........... Note sulla sicurezza specifiche del prodotto ............Struttura e funzionamento Panoramica ....................Connettori del pannello posteriore ..............Interfaccia utente..................... 3.3.1 Sezioni principali in breve ..............3.3.2 Schermata Home ................3.3.2.1 Rappresentazione grafica del display..........
- Seite 52 SevenDirect™ SD30...
-
Seite 53: Introduzione
1 Introduzione Il misuratore da banco SevenDirect è uno strumento intuitivo e semplice da utilizzare che consente di determi- nare parametri quali pH, potenziale di ossidoriduzione, conducibilità e concentrazione di ioni (in base alla ver- sione). È progettato per resistere agli ambienti di laboratorio comuni e supporta registrazione e trasferimento dei dati di misura più... -
Seite 54: Note Sulla Sicurezza Specifiche Del Prodotto
Rischio di morte o lesioni gravi a causa di scosse elettriche Il contatto con elementi sotto tensione può causare morte o lesioni. 1 Utilizzare solo l'adattatore CA/CC METTLER TOLEDO specifico per il vostro strumento. 2 Tenere tutti i cavi elettrici e i collegamenti lontani da liquidi e umidità. -
Seite 55: Struttura E Funzionamento
3 Struttura e funzionamento 3.1 Panoramica Descrizione Funzione Guida a schermo Consente di visualizzare informazioni di aiuto sulla schermata corrente. Home Consente di tornare alla Schermata Home da qualsiasi livello del menu. Touchscreen Visualizza informazioni e consente di utilizzare il misuratore. Interruttore di accen- Consente di accendere/spegnere il misuratore. -
Seite 56: Interfaccia Utente
Nota Per prestazioni ottimali, usare chiavette USB con file system FAT16 o FAT32. 3.3 Interfaccia utente Nota Le schermate presenti in questo manuale sono esempi e possono differire da quelle visualizzate dal misuratore. 3.3.1 Sezioni principali in breve La Schermata Home (1) è la posizione di navigazione principale, in cui è possibile trovare tutti i menu e le impostazioni. -
Seite 57: Rappresentazione Grafica Del Display
Descrizione Funzione Data e ora Mostra data e ora correnti. Per modificare il formato, selezionare Menu > Impostazioni > Generale. Attiva/disattiva Consente di cambiare modalità di rappresentazione grafica del display. Per modalità uFocus™ maggiori dettagli, vedere [Rappresentazione grafica del display pagina 7]. - Seite 58 Descrizione Funzione ID metodo Mostra la modalità di misura e il nome del metodo attivo. "Cond.:": consente di determinare la conducibilità e tarare e verificare il sensore di conducibilità Durata : mostra la durata dell'operazione di misura. : mostra il numero di punti di dati già registrati. È...
-
Seite 59: Funzionamento Del Touchscreen
3.3.3 Funzionamento del touchscreen Il touchscreen consente l’utilizzo del misuratore. AVVISO Pericolo di danneggiamento del touchscreen con oggetti appuntiti o acuminati La pressione del touchscreen con oggetti appuntiti o acuminati può danneggiarlo. Utilizzare il touchscreen applicando una pressione morbida con il polpastrello. 3.3.3.1 Selezionare o attivare una voce Premere la voce o la funzione da selezionare o attivare. -
Seite 60: Funzioni Secondarie Per Voci Di Elenco
3.3.3.4 Funzioni secondarie per voci di elenco Per accedere alle funzioni secondarie: Posizionare il dito sul simbolo del triangolo e scorrere verso sinistra per visualizzare le funzioni secondarie. - oppure - Scorrere il dito verso sinistra su una voce dell’elenco per mostrare le relative funzioni secondarie e verso destra per nasconderle. -
Seite 61: Modificare Data E Ora
3.3.3.7 Modificare data e ora Il campo visualizzato (1) mostra la data e l’ora impostate. Scorrere per spostare le voci di elenco e modificare data e ora impostate. Nota Il formato della data può essere definito in Menu > Impostazioni > Generale. 4 Messa in funzione 4.1 Contenuto della fornitura Disimballare lo strumento e controllare i componenti forniti. -
Seite 62: Collegamento Dell'alimentazione
Rischio di morte o lesioni gravi a causa di scosse elettriche Il contatto con elementi sotto tensione può causare morte o lesioni. 1 Utilizzare solo l'adattatore CA/CC METTLER TOLEDO specifico per il vostro strumento. 2 Tenere tutti i cavi elettrici e i collegamenti lontani da liquidi e umidità. -
Seite 63: Collegamento Dei Sensori
1 Selezionare una lingua dall’elenco di opzioni. La lingua dell’interfaccia utente passa immediata- mente a quella selezionata. 2 Toccare Avanti. 3 Scorrere verso il basso per leggere l'EULA (End User License Agreement, contratto di licenza con l'utente finale) e attivarlo. 4 Toccare Avanti. -
Seite 64: Avvio Dell'analisi
Esempio Collegare una sonda di conducibilità all’ingresso di conducibilità. Una sonda di temperatura è sempre inte- grata e non occorre collegarla separatamente. ® Sensore ISM ® Se si collega un sensore ISM al misuratore, l’icona ISM compare sul display, quindi il nome del chip del sensore viene registrato e visualizzato nella schermata. -
Seite 65: Avviare Una Verifica
Eseguire una taratura diretta Assicurarsi che siano state selezionate le soluzioni tampone o gli standard corretti. 1 Selezionare un metodo appropriato secondo la procedura indicata in [Selezionare un metodo pagina 14]. 2 Selezionare un sensore secondo [Selezionare un sensore pagina 14] se necessario. 3 Toccare Taratura. -
Seite 66: Inizio Di Una Misura
3 Toccare Verifica. 4 Toccare Avvia verifica. 5 Se l’opzione Metodi > Verifica > Controlla numero lotto standard è attiva, inserire il numero di lotto e toccare OK per confermare. Vengono visualizzati punto di verifica, nome del sensore, stato del sensore e tipo di punto finale. 6 Toccare Avvio. -
Seite 67: Manutenzione E Pulizia
Non aprire l'alloggiamento dello strumento: esso non contiene parti che possono essere sottoposte a manuten- zione, riparate o sostituite dall'utente. In caso di problemi con lo strumento, è possibile contattare il rivenditore autorizzato METTLER TOLEDO o un esperto dell'assistenza. ▶... -
Seite 68: Dati Tecnici
7 Dati tecnici Generale Schermo TFT a colori Interfacce USB-A Chiave USB (FAT12/FAT16/FAT32)/ stampante/lettore di codici a barre USB-B Computer Condizioni ambientali Temperatura ambiente Da 5 a 40 °C Umidità relativa Dal 5% all'80% (senza condensa) Categoria di sovratensione Classe II Grado di inquinamento Campo di applicazione Solo per uso in ambienti interni... - Seite 69 Risoluzione Conducibilità 0,1/0,01/0,001* (µS/cm, mS/cm) 0,1/0,01/0,001/0,0001* (µS/m, mS/m, S/m) 0,1/0,01/0,001 (mg/l, ppm)* 0,1/0,01/0,001/0,0001 (g/l, ppt)* Salinità 0,1/0,01 Resistività 0,1/0,01/0,001 (Ω · cm, kΩ · cm)* 0,1/0,01 (MΩ · cm) Temperatura di conducibilità 0,1 °C Accuratezza Conducibilità ± 0,5% del valore misurato ±...
- Seite 71 Spis treści Wprowadzenie Informacje dotyczące bezpieczeństwa Definicje słów ostrzegawczych i symboli ostrzegawczych........Uwagi dotyczące bezpieczeństwa szczególne dla danego produktu ...... Budowa i zastosowanie Przegląd ......................Przyłącza na panelu tylnym ................Interfejs użytkownika ..................3.3.1 Główne obszary ekranu w skrócie ............. 3.3.2 Strona główna ................3.3.2.1 Prezentacja na wyświetlaczu ............
- Seite 72 SD30 SevenDirect™...
-
Seite 73: Wprowadzenie
1 Wprowadzenie SevenDirect to intuicyjny, łatwy w obsłudze miernik laboratoryjny do pomiaru takich parametrów, jak pH, po- tencjał redoks, przewodność i stężenia jonów (w zależności od wersji urządzenia). Został zaprojektowany z myślą o odporności w typowych warunkach laboratoryjnych oraz obsługuje rejestrację i przesyłanie ważnych danych pomiarowych. Konwencje i symbole Odnosi się... -
Seite 74: Uwagi Dotyczące Bezpieczeństwa Szczególne Dla Danego Produktu
Ryzyko śmierci lub poważnych urazów w wyniku porażenia prądem Kontakt z częściami pod napięciem może doprowadzić do urazów lub śmierci. 1 Używać tylko zasilacza AC/DC firmy METTLER TOLEDO, który jest przeznaczony do tego urządzenia. 2 Wszystkie przewody elektryczne i połączenia utrzymywać z dala od cieczy i wilgoci. -
Seite 75: Budowa I Zastosowanie
3 Budowa i zastosowanie 3.1 Przegląd Opis Funkcja Pomoc ekranowa Wyświetlanie informacji pomocy dla aktualnego ekranu. Ekran główny Powrót z dowolnego poziomu menu do Strona główna. Ekran dotykowy Wyświetlanie informacji i obsługa miernika. Włącznik zasilania Włączanie/wyłączanie miernika. Naciśnij, aby włączyć. Naciśnij i przytrzymaj przez 3 sekundy, aby wyłączyć. Gumowy element Zdejmowany gumowy element chroni miernik przed kurzem, a rowki służą... -
Seite 76: Interfejs Użytkownika
Notatka Aby zapewnić najlepsze działanie, należy użyć pamięci USB z systemem plików FAT16 lub FAT32. 3.3 Interfejs użytkownika Notatka Zrzuty ekranów przedstawione w tej instrukcji są przykładowe i mogą różnić się od wyglądu ekranu w używanym mierniku. 3.3.1 Główne obszary ekranu w skrócie Strona główna (1) jest centralnym punktem nawigacyjnym, w którym można znaleźć wszystkie pozycje menu i ustawienia. -
Seite 77: Prezentacja Na Wyświetlaczu
Opis Funkcja Data i godzina Wyświetlenie bieżącej daty i godziny. Format można ustawić w Menu > Ustawienia > Ogólne. Włączanie/wyłącza- Przełączanie trybów prezentacji na wyświetlaczu. Szczegóły: patrz [Prezen- nie trybu uFocus™ tacja na wyświetlaczu strona 7]. Obszar odczytu po- Wyświetlanie wyników bieżącego pomiaru, wzorcowania lub weryfikacji. miarów Suwak wyników Wejście do Okno wyników w celu wyświetlenia listy ostatnich 7 wyników. - Seite 78 Opis Funkcja Czas trwania : wyświetlanie czasu trwania pomiaru. : wyświetlanie liczby punktów danych, które zostały już zarejestrowa- Pomiędzy tymi 2 trybami można przełączać tylko wtedy, gdy opcja Metody > Pomiar > Pomiar interwałowy jest aktywna. Temperatura Wyświetlanie temperatury. Dotknij, aby wykonać kontrolę temperatury, gdy miernik jest w stanie bez- czynności.
-
Seite 79: Obsługa Ekranu Dotykowego
3.3.3 Obsługa ekranu dotykowego Obsługa miernika odbywa się poprzez dotykanie palcem ekranu dotykowego. NOTYFIKACJA Niebezpieczeństwo uszkodzenia ekranu dotykowego spiczastymi lub ostrymi przedmiotami! Naciskanie ekranu dotykowego spiczastymi lub ostrymi przedmiotami może spowodować uszkodzenie ekranu. Ekran dotykowy należy lekko naciskać opuszką palca. 3.3.3.1 Wybór lub aktywacja elementu Dotknij elementu lub funkcji, która ma zostać... -
Seite 80: Funkcje Pomocnicze Dla Elementów Listy
3.3.3.4 Funkcje pomocnicze dla elementów listy Aby uzyskać dostęp do funkcji pomocniczych, wykonaj następujące czynności: Umieść palec na symbolu trójkąta i przesuń w lewo, aby wyświetlić funkcje pomocnicze. - lub - Przesuń palcem w lewo po elemencie listy, aby wyświe- tlić jego funkcje pomocnicze, albo przesuń w prawo, aby ukryć... -
Seite 81: Zmiana Daty I Godziny
3.3.3.7 Zmiana daty i godziny Pole wyświetlacza (1) pokazuje zdefiniowaną datę lub godzinę. Przewiń, aby przesunąć listę w górę/w dół w celu zmiany pola wyświetlacza. Notatka Format daty i godziny można zdefiniować w pozycji Menu > Ustawienia > Ogólne. 4 Przygotowanie do pracy 4.1 Zakres dostawy Wypakuj urządzenie i sprawdź... -
Seite 82: Instalacja Zasilacza
Ryzyko śmierci lub poważnych urazów w wyniku porażenia prądem Kontakt z częściami pod napięciem może doprowadzić do urazów lub śmierci. 1 Używać tylko zasilacza AC/DC firmy METTLER TOLEDO, który jest przeznaczony do tego urządzenia. 2 Wszystkie przewody elektryczne i połączenia utrzymywać z dala od cieczy i wilgoci. -
Seite 83: Podłączanie Czujników
1 Wybierz język z listy. Interfejs użytkownika natychmiast przełączy się na wybrany język. 2 Naciśnij Dalej. 3 Przewiń w dół, aby przeczytać i aktywować umowę EU- 4 Naciśnij Dalej. 5 Ustaw kolejno format daty, datę i godzinę. 6 Naciśnij Dalej. 7 Wybierz jednostkę temperatury. 8 Dotknij Zakończ. -
Seite 84: Uruchamianie Analizy
Przykład Podłącz sondę konduktometryczną do wejścia konduktometrycznego; sonda temperatury jest zawsze wbu- dowana i nie musi być podłączana oddzielnie. ® Czujnik ISM ® Podczas podłączania czujnika ISM do miernika na wyświetlaczu pojawi się ikona ISM oraz zostanie za- rejestrowany identyfikator mikroukładu czujnika i pokazany na wyświetlaczu. Historię... -
Seite 85: Uruchamianie Weryfikacji
Wykonywanie bezpośredniego wzorcowania Upewnij się, że wybrane zostały odpowiednie bufory/wzorce. 1 Wybierz odpowiednią metodę zgodnie z punktem [Wybieranie metody strona 14]. 2 W razie potrzeby wybierz czujnik zgodnie z [Wybór czujnika strona 14]. 3 Naciśnij Kalibracja. 4 Dotknij przycisku Start. 5 Jeśli opcja Metody > Kalibracja > Sprawdź numer partii wzorca jest aktywna, wpisz numer partii i po- twierdź... -
Seite 86: Uruchamianie Pomiaru
3 Dotknij przycisku Weryf.. 4 Dotknij przycisku Rozpocznij weryfikację. 5 Jeśli opcja Metody > Weryfikacja > Sprawdź numer partii wzorca jest aktywna, wpisz numer partii i po- twierdź przyciskiem OK. Zostanie wyświetlony punkt weryfikacji, nazwa czujnika, status czujnika i rodzaj punktu końcowego. 6 Dotknij przycisku Start. -
Seite 87: Utrzymanie I Konserwacja
6 Utrzymanie i konserwacja Nie należy otwierać obudowy urządzenia; nie ma w niej żadnych części do konserwacji, naprawy ani wymia- ny przez użytkownika. W razie problemów z urządzeniem należy się skontaktować z autoryzowanym dealerem lub przedstawicielem serwisu METTLER TOLEDO . ▶ www.mt.com/contact 6.1 Czyszczenie urządzenia... -
Seite 88: Utylizacja
6.3 Utylizacja Zgodnie z dyrektywą europejską 2012/19/EU dotyczącą zużytego sprzętu elektrycznego i elektronicznego (WEEE) urządzenia nie należy wyrzucać razem z odpadami komunalnymi. Dotyczy to także państw spoza Unii Europejskiej zgodnie z przepisami prawa obowiązujący- mi na ich terytorium. Prosimy o utylizację niniejszego produktu zgodnie z lokalnymi uregulowaniami prawnymi: w punktach zbiórki urządzeń... - Seite 89 Pomiar przewodności Zakres pomiaru Przewodność Od 0,000 μS/cm do 2000 mS/cm Substancje rozpuszczone Od 0,00 mg/l do 1000 g/l Zasolenie Od 0,00 do 80,00 psu Od 0,00 do 80,00 ppt Opór właściwy Od 0,00 do 100,0 MΩ · cm Temperatura Od -30 do 130°C Rozdzielczość Przewodność 0,1/0,01/0,001* (µS/cm, mS/cm) 0,1/0,01/0,001/0,0001* (µS/m, mS/m, S/m) Substancje rozpuszczone...
- Seite 91 İçindekiler Giriş Güvenlik Bilgileri Sinyal sözcüklerinin ve uyarı sembollerinin tanımları........... Ürüne özel güvenlik notları ................Tasarım ve İşlev Genel Bakış....................Arka panel bağlantıları..................Kullanıcı arayüzü .................... 3.3.1 Bir bakışta ana bölümler ..............3.3.2 Ana ekran..................3.3.2.1 Ekran gösterimi ................3.3.3 Dokunmatik ekran nasıl çalıştırılır? ............
- Seite 92 SevenDirect™ SD30...
-
Seite 93: Giriş
1 Giriş SevenDirect; pH, redoks potansiyeli, iletkenlik ve iyon konsantrasyonları (cihaz versiyonuna bağlı olarak) gibi parametreler için pratik, kullanımı kolay bir masaüstü ölçüm cihazıdır. Normal laboratuvar ortamları için daya- nıklı şekilde tasarlanmıştır ve önemli ölçüm verilerinin kaydedilip aktarılmasını destekler. Kurallar ve semboller Haricî... -
Seite 94: Ürüne Özel Güvenlik Notları
Elektrik çarpması nedeniyle ölüm veya ciddi yaralanma Canlı akım taşıyan parçalarla temas, ölüme veya yaralanmaya neden olabilir. 1 Yalnızca cihazınız için tasarlanmış METTLER TOLEDO AC/DC adaptörünü kullanın. 2 Tüm elektrik kablolarını ve bağlantılarını sıvılardan ve nemden uzak tutun. 3 Kablolarda ve fişlerde hasar olup olmadığını kontrol edin ve hasarlı kabloları ve fişleri değiş- tirin. -
Seite 95: Tasarım Ve İşlev
3 Tasarım ve İşlev 3.1 Genel Bakış Bileşen Açıklama Fonksiyon numarası Ekran yardımı Bulunulan ekranla ilgili yardım bilgilerini görüntülemek için. Ana Sayfa Herhangi bir menü seviyesinden Ana ekran'na dönmek için. Dokunmatik ekran Bilgileri görüntüler ve ölçüm cihazını çalıştırır. Güç düğmesi Ölçüm cihazını... -
Seite 96: Kullanıcı Arayüzü
Not En iyi performans için FAT16 veya FAT32 dosya sistemli USB bellek kullanın. 3.3 Kullanıcı arayüzü Not Bu kılavuzdaki ekran görüntüleri örnek amaçlı verilmiştir ve ölçüm cihazınızın ekranından farklı olabilir. 3.3.1 Bir bakışta ana bölümler Ana ekran (1) tüm menülerin ve ayarların bulunabileceği merkezi gezinme noktasıdır. Menü (2), Metotlar (3) ve Sonuçlar penceresi (4), ana ekranın yanlarındaki tutamaçları... -
Seite 97: Ekran Gösterimi
Açıklama İşlev uFocus™ modunu Ekran gösterim modlarını değiştirir. Ayrıntılar için bkz: [Ekran gösterimi etkinleştir/devre dışı sayfa 7]. bırak Ölçüm değeri alanı Mevcut ölçüm, kalibrasyon veya doğrulamanın sonuçlarını görüntüler. Sonuçlar tutamacı En son 7 sonucun listesini görmek için Sonuçlar penceresi bölümüne girer. Metot bilgi alanı... - Seite 98 Bileşen Açıklama Fonksiyon numarası Süre : Ölçümün süresini görüntüler. : Daha önceden kaydedilmiş veri noktalarının sayısını görüntüler. Yalnızca Metotlar > Ölçüm > Aralık değerleri seçeneğinin etkin olması du- rumunda bu iki mod arasında geçiş yapmak üzere dokunabilirsiniz. Sıcaklık Sıcaklığı görüntüler. Ölçüm cihazı...
-
Seite 99: Dokunmatik Ekran Nasıl Çalıştırılır
3.3.3 Dokunmatik ekran nasıl çalıştırılır? Ölçüm cihazı, dokunmatik ekrana parmakla dokunularak çalıştırılır. DUYURU Sivri uçlu veya keskin nesneler, dokunmatik ekrana zarar verir! Dokunmatik ekrana sivri veya keskin nesnelerle dokunmak ekrana zarar verebilir. Dokunmatik ekranı parmağınızın ucuyla hafif bir baskı uygulayarak çalıştırın. 3.3.3.1 Bir öğeyi seçme veya etkinleştirme Seçilecek veya etkinleştirilecek öğeye veya işleve doku- nun. -
Seite 100: Liste Öğeleri Için Ikincil Işlevler
3.3.3.4 Liste öğeleri için ikincil işlevler İkincil işlevlere erişmek için aşağıdakileri yapın: Parmağınızı üçgen sembolüne yerleştirin ve ikincil iş- levleri görüntülemek için sola kaydırın. veya İkincil işlevleri görüntülemek için bir liste öğesi boyunca sola kaydırın, ikincil işlevleri gizlemek için sağa kaydırın. veya İkincil işlevleri görüntülemek veya gizlemek için öğesi-... -
Seite 101: Tarih Ve Saati Değiştirme
3.3.3.7 Tarih ve saati değiştirme Görüntüleme alanı (1) tanımlanan tarihi veya saati gösterir. Görüntüleme alanını değiştirmek için listeyi yukarı/ aşağı kaydırarak hareket ettirin. Not Tarih ve saat biçimi, Menü > Ayarlar > Genel bölümünde tanımlanabilir. 4 Cihazı Çalıştırma 4.1 Teslimat kapsamı Cihazı... -
Seite 102: Güç Kaynağını Takma
Elektrik çarpması nedeniyle ölüm veya ciddi yaralanma Canlı akım taşıyan parçalarla temas, ölüme veya yaralanmaya neden olabilir. 1 Yalnızca cihazınız için tasarlanmış METTLER TOLEDO AC/DC adaptörünü kullanın. 2 Tüm elektrik kablolarını ve bağlantılarını sıvılardan ve nemden uzak tutun. 3 Kablolarda ve fişlerde hasar olup olmadığını kontrol edin ve hasarlı kabloları ve fişleri değiş- tirin. -
Seite 103: Sensörleri Bağlama
1 Dil listesinden bir Dil seçin. Kullanıcı arayüzü, hemen seçilen dile geçer. 2 Sonraki ögesine dokunun. 3 EULA'yı okumak için aşağı doğru kaydırın ve kabul ettiği- nizi belirtmek üzere kutuyu işaretleyin. 4 Sonraki ögesine dokunun. 5 Tarih biçimini, tarihi ve saati tek tek ayarlayın. 6 Sonraki ögesine dokunun. -
Seite 104: Analize Başlama Metot Seçme
Örnek İletkenlik girişine bir iletkenlik probu bağlayın, dâhilî bir sıcaklık probu her zaman vardır ve ayrıca bağlan- ması gerekmez. ® sensörü ® Ölçüm cihazına bir ISM sensörü bağlarken, ekranda ISM simgesi görünür ve sensör çipinin sensör adı kaydedilip ekranda görüntülenir. Kalibrasyon geçmişi, ilk veriler ve maksimum sıcaklık, veri belleğinden incelenebilir. -
Seite 105: Doğrulama Başlatma
2 Gerekiyorsa şu bölümde anlatıldığı şekilde bir sensör seçin: [Sensör seçme sayfa 14]. 3 Kalibrasyon ögesine dokunun. 4 Kalibrasyonu başlat öğesine dokunun. 5 Metotlar > Kalibrasyon > Standart parti numarasını kontrol et seçeneği etkinse lot numarasını girin ve Tamam tuşu ile onaylayın. Sensör adı, sonlanım noktası... -
Seite 106: Ölçüm Başlatma
Doğrulama verilerini içeren bir pencere açılır. 8 Tamam öğesine dokunun. 5.5 Ölçüm başlatma 1 [Metot seçme sayfa 14] bölümünde anlatıldığı gibi uygun bir metot seçin. 2 Gerekiyorsa şu bölümde anlatıldığı şekilde bir sensör seçin: [Sensör seçme sayfa 14]. 3 Gerekirse Numune Kodu'na dokunarak Numune Kodu'nu girin. 4 Sensörü... -
Seite 107: Bakım
6 Bakım Cihazın içini açmayın; kullanıcı tarafından bakımı yapılabilecek, onarılabilecek veya değiştirilebilecek herhangi bir parça içermez. Cihazınızla ilgili sorunlar yaşarsanız yetkili METTLER TOLEDO bayinizle veya servis temsilci- nizle iletişime geçin. ▶ www.mt.com/contact 6.1 Ölçüm Cihazı Temizliği DUYURU Uygun olmayan temizlik maddeleri kullanıldığı takdirde cihaz zarar görebilir! Gövde, akrilonitril bütadien stiren/polikarbonattan (ABS/PC) yapılmıştır. - Seite 108 Ortam koşulları Ortam sıcaklığı 5-40°C Bağıl nem %5-80 (yoğuşmasız) Aşırı voltaj kategorisi Kategori II Kirlilik derecesi Uygulama aralığı Yalnızca kapalı alanda kullanım için Maksimum çalışma yüksekliği 5.000 m'ye kadar Güvenlik ve EMC standartları Uygunluk Beyanı'na bakın Boyutlar Genişlik 195 mm Derinlik 205 mm Yükseklik...
- Seite 109 Doğruluk İletkenlik Ölçülen değerin ±%0,5'i Ölçülen değerin ±%0,5'i Tuzluluk Ölçülen değerin ±%0,5'i Öz Direnç Ölçülen değerin ±%0,5'i Sıcaklık ±0,1°C (0,0 ila 100,0°C) ±0,3°C (< 0,0°C veya > 100,0°C) Giriş Mini-DIN Kalibrasyon Kalibrasyon noktaları Önceden tanımlanmış iletkenlik standartları Kullanıcı tarafından tanımlanabilen iletkenlik standartları...
- Seite 112 www.mt.com/pHLab For more information Mettler-Toledo GmbH Im Langacher 44 8606 Greifensee, Switzerland Tel. +41 22 567 53 22 Fax +41 22 567 53 23 www.mt.com/contact Subject to technical changes. © Mettler-Toledo GmbH 11/2021 30584086 30584086A 04:20 23-11-2021...