HOMCOM A90-213V01 Montageanleitung

Verwandte Anleitungen für HOMCOM A90-213V01


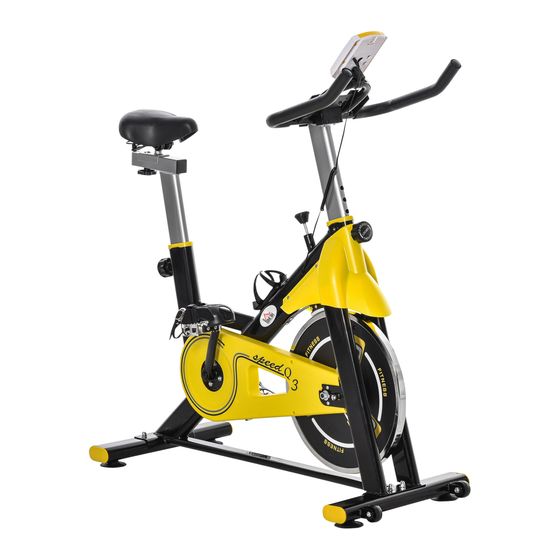
Inhaltszusammenfassung für HOMCOM A90-213V01
- Seite 1 INaoa009_DE A90-213V01 CAUTION: MAX USER WEIGHT: 150KG BEFORE USING THIS EQUIPMENT, CAREFULLY FOLLOW INSTRUCTIONS AND READ ALL PRECATION, THEN RETAIN FOR FUTURE REFERENCE. ASSEMBLY & INSTRUCTION MANUAL...
- Seite 11 INNENRAUM HEIMTRAINER BENUTZERHANDBUCH VORSICHT: MAX. BENUTZERGEWICHT: 150 kg BEVOR SIE DIESES GERÄT VERWENDEN, BEFOLGEN SIE SORGFÄLTIG DIE ANWEISUNGEN LESEN ALLE VORSICHTSMASSNAHMEN, DANN BEWAHREN SIE ES FÜR SPÄTERES NACHSCHLAGEN AUF.
- Seite 12 SICHERHEITSINFORMATIONEN WARNUNG UM DAS RISIKO SCHWERER VERLETZUNGEN ZU VERRINGERN, LESEN SIE DIE FOLGENDEN SICHERHEITSANWEISUNGEN, BEVOR SIE DAS GERÄT VERWENDEN. WICHTIG: DIESES GERÄT IST NUR FÜR DEN HEIMGEBRAUCH BESTIMMT 1. Es ist wichtig, dass Sie dieses Handbuch vor der Montage und der Inbetriebnahme des Geräts vollständig lesen.
- Seite 13 EXPLOSIONSZEICHNUNG...
- Seite 14 TEILELISTE BEZEICHNUNG GRÖßE ANZA BEZEICHNUN GRÖßE Hauptkörper Montage Einstellmutter Vorderer Stabilisator Montage Schlossschraube M8×50 Hinterer Stabilisator Montage Unterlegscheibe Φ8,5 Sattelstütze Montage Abdeckmutter Handgriffsäule Montage Unterlegscheibe Φ10,5 Handgriffrahmen Montage Linsenflachkopfs M8×16 chraube Sattelverstellrahmen Montage Federscheibe Φ8,5 Sattel Federbelas Pulskabel Monitor Vierkant Signalkabel Monitorhalter Passend...
- Seite 15 Der vordere Stabilisator (2) wird mit Schlossschrauben (16), Unterlegscheiben (17) und Abdeckmuttern (18) am Hauptkörper (1) befestigt und mit einem Maulschlüssel (25) fixiert. Hinweis: Die beweglichen Räder des vorderen Stabilisators (2) sind nach vorne gerichtet, wie abgebildet. In ähnlicher Weise wird der hintere Stabilisator (3) mit Schlossschrauben (16), Unterlegscheiben (17) und Abdeckmuttern (18) am Hauptkörper (1) befestigt und mit einem Maulschlüssel (25) fixiert.
- Seite 16 SCHRITT 3 Die Sattelstütze (4) wird in den Hauptkörper (1) eingesetzt, und der Einstellknopf (14) wird herausgezogen, so dass der Einstellknopf (14) automatisch in das entsprechende Loch der Sattelstütze (4) eingeführt wird. In gleicher Weise wird die Handgriffsäule (5) in den Hauptkörper (1) eingesetzt und der Einstellknopf (14) herausgezogen, so dass der Einstellknopf (14) automatisch in das entsprechende Loch der Handgriffsäule (5) eingesetzt wird.
- Seite 17 Der Sattelverstellrahmen (7) wird in die Sattelstütze (4) eingebaut und mit der Unterlegscheibe (19), sechs Winkelbolzen (28) und einer Einstellmutter (15) befestigt. Dann wird der Sattel (8) auf dem Sattelverstellrahmen (7) eingerichtet und mit dem Maulschlüssel (25) fixiert und festgezogen. Montieren Sie die Einstellmutter (29) am Hauptkörper (1).
- Seite 18 SCHRITT 6 Der Monitorhalter (10) wird auf den Handgriffrahmen (6) gezogen und mit der Blechschraube (24) befestigt und mit dem Innensechskantschlüssel (27) festgezogen. Der Monitor (9) wird auf dem Monitorhalter (10) montiert. Führen Sie das Pulskabel (22) in das „Puls“-Loch auf der Rückseite des Monitors (9) ein. Führen Sie das Signalkabel (23) in die „Sensor“-Bohrung auf der Rückseite des Monitors (9) ein.
- Seite 19 COMPUTERFUNKTION A, EINBAU DER BATTERIE Legen Sie zwei 1,5 V AA-Batterien in das Batteriefach auf der Rückseite ein (nach jedem Batteriewechsel sind alle Werte „0“) B, FUNKTIONSBESCHREIBUNG 1, Automatisches Scannen (SCAN): Aktivieren Sie den Bildschirm oder drücken Sie die Taste, um den SCAN-Status aufzurufen, alle Funktionen der TIME--SPD--DIST--CAL--ODO--PUL werden automatisch auf dem Hauptbildschirm angezeigt.
- Seite 20 ANWEISUNGEN FÜR DAS TRAINING ZUSÄTZLICH ZUR VERWENDUNG DES GERÄTS ZUR VERBESSERUNG DER KÖRPERLICHEN FITNESS UND ZUR ÜBUNG DER MUSKELN KANN AUCH EINE VERNÜNFTIGE ERNÄHRUNG EINE ROLLE BEI DER GEWICHTSABNAHME SPIELEN. A, Aufwärmen vor dem Training Diese Phase der Aufwärmübung kann die körpereigene Durchblutung verbessern, und die Muskeln dehnen, um ein gutes Training zu erreichen, während Sie das Risiko von Krämpfen oder Muskelschäden während des Trainings verringern.