Renson HEALTHBOX II Compact Handbuch

Verwandte Anleitungen für Renson HEALTHBOX II Compact


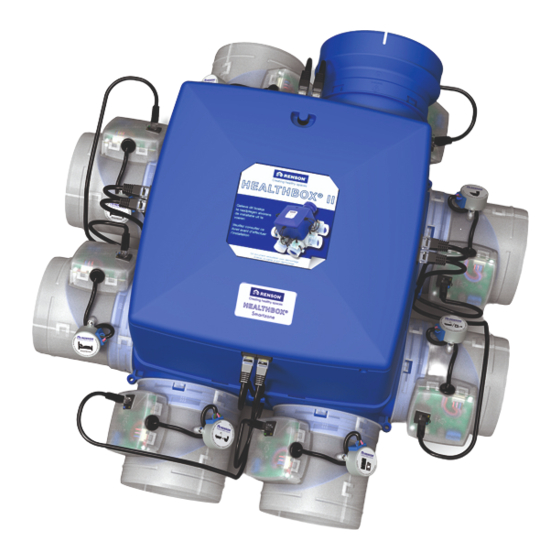
Inhaltszusammenfassung für Renson HEALTHBOX II Compact
- Seite 1 Healthbox II (Compact) Healthbox Smartzone ® ® HEALTHBOX ® Breeze Handbuch Manual Software version ≥ 0.6.40...
-
Seite 2: Inhaltsverzeichnis
Healthbox II (Compact) & Healthbox Smartzone ® ® Inhalt 1 • Einleitung ........................4 1.1 • Allgemeine Sicherheitsvorschriften ................. 4 1.2 • Allgemeine Regeln und spezifischen Maßnahmen ............ 5 2 • Zusammenstellung der Sätze..................6 2.1 • Healthbox II ....................... 6 ®... - Seite 3 Healthbox II (Compact) & Healthbox Smartzone ® ® 7.6 • Montage Design-Extraktionsgitter ................. 29 7.7 • Anschluss von Drosselventilen und Luftkanälen ............30 7.8 • Anschlussschema Healthbox ................32 ® 7.8.1 • Schaltplan Healthbox II (Compact) + XVK4-Schalter ® Schaltplan Healthbox Smartzone + XVK4-Schalter .........
-
Seite 4: Einleitung
Beachten Sie bei der Installation der Anlage jederzeit die Sicherheitsvorschriften, Warnung, Hinweise und Anweisung in der Montageanweisung. Bei Nichtbefolgung dieser Sicherheitsvorschriften, Warnungen, Hinweise und Anweisungen kann dies zu Schäden an der Healthbox oder zu körperlichen Verletzungen führen. Dafür übernimmt RENSON NV keine ®... -
Seite 5: Allgemeine Regeln Und Spezifischen Maßnahmen
Ausbreitungsrisiko für Feuer wie folgt vermindern: Achten Sie darauf, dass die Brandklappe/Flügelklappe/Manschette/… ausreichend freien Durchgang gibt um Druckverlust einzuschränken. Eine falsche Auswahl des Typs kann zum Betriebsausfall der Healthbox führen. Informieren Sie sich über das RENSON -Brandpaket. ® Die folgenden spezifischen Sicherheitsmaßnahmen müssen eingehalten werden: •... -
Seite 6: Zusammenstellung Der Sätze
Healthbox II (Compact) & Healthbox Smartzone ® ® 2 • Zusammenstellung der Sätze 2.1 • Healthbox ® • 1 x Motoreinheit EX375 HBII • 1 x Satz Küche • 1 x Satz Badezimmer + Toilette • 1 x Satz Toilette •... -
Seite 7: Healthbox ® Ii Compact Touch
Healthbox II (Compact) & Healthbox Smartzone ® ® 2.4 • Healthbox II Compact Touch ® • 1 x Motoreinheit EX325 HBII • 1 x Satz Kochen • 1 x Satz Badezimmer + Toilette • 1 x Satz Toilette • 6 x Abdeckkappe und/oder Reduzierstutzen Ø125> Ø80mm •... -
Seite 8: Zusammenstellung Sätze Regelmodule
Healthbox II (Compact) & Healthbox Smartzone ® ® 3 • Zusammenstellung Sätze Regelmodule 3.1 • Badezimmer + Toilette • 1 x Steuerregelmodul Badezimmer + Toilette • 1 x Patchkabel 0,5 m • 1 x Klemmband Ø 60 – 165 mm •... -
Seite 9: Küche
Healthbox II (Compact) & Healthbox Smartzone ® ® 3.4 • Küche • 1 x Steuerregelmodul Küche • 1 x Patchkabel 0,5 m • 1 x Klemmband Ø 60 – 165 mm • 1 x Gitterbasis XD 75 (174 x 174 mm, Ø 125 mm) mit Gipskarton 3.5 •... -
Seite 10: A • Schlafzimmer-Satz Mit Schalldämpfer
Healthbox II (Compact) & Healthbox Smartzone ® ® 3.7.A • Schlafzimmer-Satz mit Schalldämpfer • 1 x Steuerregelmodul Schlafzimmer • 1 x Patchkabel 0,5 m • 2 x Klemmband Ø 50 – 90 mm • 1 x Klemmband Ø 60 – 165 mm Smartzones •... -
Seite 11: Bedienungen
Healthbox II (Compact) & Healthbox Smartzone ® ® 4 • Bedienungen 4.1 • XVK4-Schalter • 1 x XVK4-Schalter • 1 x Abdeckplatte 4.2 • TouchDisplay mit CO -Sensor • 1 x Touchdisplay 4.3 • TouchDisplay ohne CO -Sensor • 1 x Touchdisplay 4.4 •... -
Seite 12: Zusammenstellung Des Lüftungsgeräts
Smartzone ® ® 5 • Zusammenstellung des Lüftungsgeräts Jedes Lüftungsgerät ist mit den im Folgenden beschriebenen Bauteilen ausgestattet. Healthbox Healthbox II Compact Artikel Anzahl Beschreibung 6 oder 8 Abdeckkappe und/oder Reduzierstutzen ø125 > 80 mm Adapter ø125-150 mm (Fortluftstutzen) Lüftungsgerät Gehäuse Montagebasis Lüftungsgerät Abdeckplatte... -
Seite 13: Funktion
– Der maximale Abfuhrstrom der Healthbox II beträgt 375 m³/h (bei 200 Pa). – Der maximale Abfuhrstrom der Healthbox II compact beträgt 325 m³/h (bei 200 Pa). • Healthbox Smartzone: Verfügt über acht verfügbare Ansaugpunkte (8 x Ø125 / Ø80mm). -
Seite 14: Regelmodul
Healthbox II (Compact) & Healthbox Smartzone ® ® Abluftströme und Ansaugpunkte: Luftstrom Feuchträume Detektion Speisung (m³/h) Badezimmer + Toilette Relative Feuchtigkeit + VOC Toilette Küche von der Hauptplatine (über das Patchkabel) Waschküche/Badezimmer 50 Relative Feuchtigkeit Schlafzimmer Smartzone Kein Bedarf CO Schlafzimmer Smartzonen Kein Bedarf CO 6.2 •... -
Seite 15: Breeze Funktion
Healthbox II (Compact) & Healthbox Smartzone ® ® 6.3 • Breeze Funktion Alle Typen der Healthbox (mit Softwareversion ≥ 0.6.40) sind serienmäßig mit einer Breeze- Funktion ausgestattet. Die Breeze-Funktion trägt dazu bei das Überhitzungsrisiko in der Wohnung einzuschränken. Was bedeutet die Breeze-Funktion? Wenn ein Kühlbedarf in der Wohnung festgestellt wird und das Außenklima dies gestattet, wird die bedarfsgesteuerte Belüftung deaktiviert. -
Seite 16: Montageanweisungen
Healthbox II (Compact) & Healthbox Smartzone ® ® 7 • Montageanweisungen 7.1 • Healthbox ® • Abmessungen: 700 x 600 x 340 mm (L x B x H) • Gewicht: 3,5 kg (ohne Regelmodule) • Anschlussspannung: 1 x 230V/50Hz • Durchschnittlicher Verbrauch: abhängig von der aktuellen Absaugmenge... -
Seite 17: Healthbox ® Ii Compact
Healthbox II (Compact) & Healthbox Smartzone ® ® 7.2 • Healthbox II Compact ® • Abmessungen: 700 x 600 x 180 mm (L x B x H) • Gewicht: 2,5 kg (ohne Regelmodule) • Anschlussspannung: 1 x 230V/50Hz • Durchschnittlicher Verbrauch: abhängig von der aktuellen Absaugmenge... -
Seite 18: Healthbox ® Smartzone
Healthbox II (Compact) & Healthbox Smartzone ® ® 7.3 • Healthbox Smartzone ® • Abmessungen: 700 x 700 x 340 mm (L x B x H) • Gewicht: 3,5 Kg (ohne Regelmodule) • Anschlussspannung: 1 x 230V/50Hz • Durchschnittlicher Verbrauch: abhängig von der aktuellen Absaugmenge... -
Seite 19: Installation Healthbox
Healthbox II (Compact) & Healthbox Smartzone ® ® 7.4 • Installation Healthbox ® Wichtig! Lesen Sie diese Anweisungen, bevor Sie die Installation beginnen! Installieren Sie dieses Produkt NICHT in Räumen, in denen die folgenden Punkt vorhanden sind oder auftreten können: •... -
Seite 20: Wand/Deckenmontage Healthbox ® Ii (Compact)
Lüftungsgerät an einer ausreichend stabilen Tragekonstruktion befestigt werden. Wand/Decke Seil Beachten Sie die Schritte Healthbox II Beachten Sie die Schritte aus Rubrik 7.4.3 aus Rubrik 7.4.1 Healthbox II Compact – Beachten Sie die Schritte Healthbox Smartzone – aus Rubrik 7.4.2 7.4.1 • Wand/Deckenmontage Healthbox II (Compact) ®... - Seite 21 Healthbox II (Compact) & Healthbox Smartzone ® ® ➋ • Drehen Sie den Fortluftstutzen des Regelmoduls (Schneckenhaus bezüglich Regelmodul- Anschlusskasten) in die gewünschte Richtung, wenn dies einen einfacheren Fortluft des Fortluft ermöglicht. Lösen Sie dafür die Vorderseite der Einheit (siehe Foto). Führen Sie das an den 4 Seiten durch.
-
Seite 22: Wand/Deckenmontage Healthbox ® Smartzone
foto's) Healthbox II (Compact) & Healthbox Smartzone ® ® ➍ ➎ • Haken Sie das Lüftungsgerät über die 4 bereits montierten Schrauben (Healthbox II: Achten Sie darauf, dass das Lüftungsgerät auch über die 2 nicht sichtbaren Schrauben gehängt wird) • Um Schwingungen nicht an die darunter liegende Struktur weiterzugeben, wird angeraten, zwischen dem Lüftungsgerät und der harten Oberfläche ein schwingungsfreies Material anzubringen. -
Seite 23: Montagemöglichkeit 1: Externe Befestigung
Healthbox II (Compact) & Healthbox Smartzone ® ® 7.4.2.1 • Montagemöglichkeit 1: Externe Befestigung ➊ ➋ ➌ • An den 4 Ecken des Plenums gibt es die Möglichkeit das Plenum zu befestigen. Zeichnen Sie die Positionen der 4 Löcher ab (320 x 320 mm). Bohren Sie mit einem geeigneten Durchmesser vor (z.B. -
Seite 24: Seilmontage Healthbox ® Ii
Healthbox II (Compact) & Healthbox Smartzone ® ® ➊ ➋ 7.4.3 • Seilmontage Healthbox ® ➊ • Drehen Sie die Ausgangsdüse der Ventilatoreinheit (Schneckengehäuse gegenüber Ventilatorplenum) in die gewünschte Richtung, wenn das einen einfacheren Anschluss der Düse ermöglicht. Lösen Sie dafür die Vorderseite der Einheit (siehe Foto). Tun Sie dies an 4 Seiten. SCHRAUBENZIEHER VON UNTEN IN DIE KLEMME STECKEN. - Seite 25 Healthbox II (Compact) & Healthbox Smartzone ® ® • Wenn die Ausgangsdüse der Ventilatoreinheit gedreht wird, befestigen Sie das Schneckengehäuse mithilfe von mindestens 2 selbstbohrenden Schrauben (z.B. Ø3,5 x 13 mm) am Ventilatorplenum. Positionieren Sie die selbstbohrenden Schrauben an den gegenüberliegenden Ecken. Die nachfolgende Abbildung zeigt die korrekte Positionierung der Schraube: ➋...
-
Seite 26: Montage Der Luftkanäle
® ® 7.5 • Montage der Luftkanäle • Sorgen Sie für ein luftdichtes Luftkanalnetzwerk. Renson Easyflex hat die beste Luftdichtheitsklasse D. • Vermeiden Sie weitestgehend enge Kurven (<90°), sowohl in festen Kanälen als auch bei flexiblen Leitungen. Vermeiden Sie engen Kurven in den Leitungen kurz vor der Ventilatoreinheit. -
Seite 27: Luftkanäle Für Ausgangsöffnung
– Kurve (Aluminium flexibel) bei Ventilatoreinheit und bei dem Extraktionsgitter nicht berücksichtigt – Berücksichtigt einen maximalen Druckverlust von ca. 80Pa (+ Druckverlust der Ausgangsdüse noch hinzurechnen). 7.5.2 • Luftkanäle für Ausgangsöffnung • Verwenden Sie die RENSON Fassaden- oder Dachdurchführung. Diese sind so entworfen, ® dass sie bei niedrigem Druckverlust funktionieren. -
Seite 28: Akustik
Healthbox II (Compact) & Healthbox Smartzone ® ® • Um Kondensatbildung in den Kanälen zu vermeiden, sollte man isolierte Leitungen verwenden, wenn diese Leitungen außerhalb des isolierten Volumens der Wohnung montiert werden. 7.5.3 • Akustik • Bestimmte Situationen können die Verwendung schalldämmender Materialien erfordern (z.B. Schlafzimmer, offene Küchen) –... -
Seite 29: Montage Design-Extraktionsgitter
Aufbau mit Montageflansch (Kanal Ø80 mm & Ø125 mm) Mit Einbaurahmen, Einbau flexibles Kanalsystem in MDF von 5 - 30 mm: gerader Anschluss (Kanal Ø80 mm & Ø125 mm) – Vorbereitung – Fertigstellung gerader Anschluss Folgen Sie den Anweisungen auf www.renson.de/installationsantleitung.html für eine detaillierte Erklärung und Visualisierung. -
Seite 30: Anschluss Von Drosselventilen Und Luftkanälen
Healthbox II (Compact) & Healthbox Smartzone ® ® 7.7 • Anschluss von Drosselventilen und Luftkanälen • Montieren Sie die Drosselventile an der Ventilatoreinheit ➊ • Der Sticker auf dem Drosselventil gibt an, mit welchem Raum das Drosselventil verbunden werden muss (Feuchträume: max. - Seite 31 Healthbox II (Compact) & Healthbox Smartzone ® ® • Adapter/Stopp Ø125-80 für verschiedene Funktionen: ➋ Ø125 1. Die nicht verwendeten Ansaugpunkte abdichten. Ø150 2. Anschlussstück zwischen Regelmodul und flexibel/ Luftkanal. Schneiden Sie den Deckel an der entsprechenden Rille am Adapter los: Ø125->Ø80 : wenn Anschluss eines Kanals Ø80 erfolgen muss.
-
Seite 32: Anschlussschema Healthbox
Healthbox II (Compact) & Healthbox Smartzone ® ® 7.8 • Anschlussschema Healthbox ® Zugentlastung Anschlusskabel XVK4 Zugentlastung Netzkabel Anschluss Anschlusskabel XVK4 4 3 2 1 C2 D C B A C1 4 x Kabeleinführung 0.34-1.5 mm max. 6 mm Aufmerksamkeit!: Patchkabel NICHT gekreuzt anschlussen... -
Seite 33: Schaltplan Healthbox ® Ii (Compact) + Xvk4-Schalter
Healthbox II (Compact) & Healthbox Smartzone ® ® 7.8.1 • Schaltplan Healthbox II (Compact) + XVK4-Schalter ® Schaltplan Healthbox Smartzone + XVK4-Schalter ® Opstellingsruimte Systeem C Evo II +® Healthbox ® 4 3 2 1C2 DC B A Anschlusskabel XVK4 Netzkabel Aansluitkabel XVK4 Voedingskabel... -
Seite 34: Schaltplan Healthbox ® Ii (Compact) + Touchdisplay
Healthbox II (Compact) & Healthbox Smartzone ® ® 7.8.2 • Schaltplan Healthbox II (Compact) + TouchDisplay ® Schaltplan Healthbox Smartzone + TouchDisplay ® Aufstellungsraum Systeem C Evo II +® Healthbox ® Netzkabel 3G1.5 mm Max. 30 m Vorverkabeltes Rohr 3G2.5 mm Min. -
Seite 35: Healthbox: Dipswitch Einstellungen
Healthbox II (Compact) & Healthbox Smartzone ® ® 7.9 • Healthbox: Dipswitch Einstellungen Die Healthbox hat eine feste Anzahl Regelventile, die nachfolgend beschrieben sind. Diese sind allesamt auf eine standard Luftmenge und eine standard Regelwerte (RW) vorjustiert. Wenn die Situation dies erfordert, darf ausschließlich der Installateur die Luftmenge oder Regelwerte ändern (siehe nachfolgend in dieser Rubrik). -
Seite 36: Regelventil Mit Sensor Dynamische Voc Und/ Oder H2O
Healthbox II (Compact) & Healthbox Smartzone ® ® 1 2 3 4 5 6 7 8 1 2 3 4 5 6 7 8 Smartzone Smartzones Anlage Schlafzimmer - 30 m Anlage Schlafzimmern - 105 m RW: CO = 900ppm RW: CO = 800ppm * Nur in Kombination mit dem TouchDisplay... - Seite 37 Healthbox II (Compact) & Healthbox Smartzone ® ® • Einstellung die Luftmenge (Änderung in Verantwortung des Installateurs 1 2 3 4 5 6 7 8 1 2 3 4 5 6 7 8 1 2 3 4 5 6 7 8 1 2 3 4 5 6 7 8 1 2 3...
-
Seite 38: Einstellung Des Lüftungsgerätes
Vlaams Energie Agentschap (VEA), Brussels Instituut Milieubeheer (BIM) oder Service Public de Wallonie (SPW) nötig sein. Bevor die Einstellung gestartet wird: – Wenn ein Regelventil an eine RENSON Dunstabzugshaube angeschlossen wird, sollten Sie ® darauf achten, dass die Dunstabzugshaube bei Einstellung aktiviert wird. (Öffnen Sie eine teleskopische Dunstabzugshaube) –... -
Seite 39: Einjustieren Über Den Schalter
Healthbox II (Compact) & Healthbox Smartzone ® ® 7.10.1 • Einjustieren über den Schalter Volg eerst de stappen vermeld onder rubriek 7.10 beschrieben. ➀ • LEDs ➀ und ➃ des Schalters werden dauerhaft blinken. Verfahren zum Einjustieren: Drücken Sie beide Taster ➀ und ➃ gleichzeitig längere Zeit (> 5 sec.). ➃... -
Seite 40: Einjustieren Über Die Hauptplatine
Healthbox II (Compact) & Healthbox Smartzone ® ® 7.10.2 • Einjustieren über die Hauptplatine Folgen Sie zuerst die Schritte wie in Rubrik 7.10 beschrieben. • Die Status-LED wird rot blinken. • Verfahren zum Justieren: INIT-Taster länger gedrückt halten (> 5 sec.), bis die Status-LED dauerhaft rot leuchtet. -
Seite 41: Einjustierung Über Touchdisplay
Healthbox II (Compact) & Healthbox Smartzone ® ® 7.10.3 • Einjustierung über TouchDisplay Folgen Sie zuerst die Schritte wie in Rubrik 7.10 beschrieben. • Beim Start erscheint das Fenster, auf dem Tag und Tageszeit eingestellt werden müssen: – Die Tagesangabe leuchtet auf. Mit ▲ oder ▼ kann der gewünschte Tag eingestellt werden. - Seite 42 Healthbox II (Compact) & Healthbox Smartzone ® ® • Wenn die Healthbox bereit ist zur Einjustierung, erscheint das Kalibrierungsfenster. Unten im Fenster erscheint die Meldung “Not Calibrated”. “Start Calibration” leuchtet auf. Drücken Sie ■ um die Kalibrierung zu starten. • Während der Kalibrierung erscheint unten auf dem Display die Meldung “Calibrating”.
-
Seite 43: Faqs Bei Installation
II (Compact) & Healthbox Smartzone ® ® 7.11 • FAQs bei Installation Im Handbuch für den Installateur der Healthbox werden behandelt: – LED-Feedback des Regelmoduls, Status LED und Steuerungen – Lösungen bei Problemen/Fehlermeldungen Dieses Handbuch finden Sie unter: www.renson.de/installationsantleidung.html Rubrik Installationsanweisungen. -
Seite 44: Bedienungsmöglichkeiten
Healthbox II (Compact) & Healthbox Smartzone ® ® 8 • Bedienungsmöglichkeiten 8.1 • XVK4 – 4-Stufenbedienung mit LED • NIKO , Abdeckplatte Typ "Intense", Farbe "Sterling" ® • Mit blauem LED-Feedback • Potentialfreie Schaltung • Max. 2 Bedienungen parallel (für Anschluss siehe Verdrahtungsschema Punkt 7.8.1) 8.2 •... -
Seite 45: Healthy Domestic Concept
Healthbox II (Compact) & Healthbox Smartzone ® ® 8.2.3 • Healthy Domestic Concept ® Bedarfsgeführtes System mit nominalem Systemdruck Regelung Luftstrom gemäß Sensoren im Regelmo- dul Modus, der Ihnen in den Zeiten außerhalb der Heizperiode mehr Komfort bietet. Handlung: Kurz Wiedergabe: LED blinkt nach 2 Stunden brennt eindrücken (<... -
Seite 46: Breeze Modus
Healthbox II (Compact) & Healthbox Smartzone ® ® Handlung: Lang Wiedergabe: LED 10 Stunden nach 10 Stunden leuchtet eindrücken (> 5 sec.) LANGSAM blinken ECO-LED ununterbrochen Lüftungsgerät belüftet 10 Stunden im Boost- Modus, danach wird automatisch in den EcoModus geschaltet 8.2.5 •... -
Seite 47: Spezielle Bedienungsmöglichkeiten
Healthbox II (Compact) & Healthbox Smartzone ® ® Handlung: Lang Wiedergabe: LED blinkt nach 10 Stunden leuchtet eindrücken 10 Stunden ECO-LED ununterbrochen Lüftungsgerät belüftet 10 Stunden in Full Breeze Modus, danach wird automatisch in den EcoModus geschaltet 8.3 • Spezielle Bedienungsmöglichkeiten 8.3.1 •... -
Seite 48: Wiedergabe
Healthbox II (Compact) & Healthbox Smartzone ® ® 8.3.3 • Regeldruck wiedergeben Handlung: Gleichzeitig, lang eindrücken (> 5sec) Lüftungsgerät arbeitet im aktuellen Modus weiter Wiedergabe: 100 Pa 120 Pa 140 Pa 160 Pa 180 Pa 200 Pa 220 Pa 240 Pa 260 Pa Um erneut in den normalen Belüftungsmodus zu gehen, drückt man die gewünschte Taste des Belüftungsmodus. -
Seite 49: Wiedergabe Leds
Healthbox II (Compact) & Healthbox Smartzone ® ® 8.4 • Wiedergabe LEDs EmptyHouse/ ➌ BOOST FUNKTION LÜFTUNGSGERÄT ➊ ➋ ➍ Light Breeze Mode ununter- ununter- ununter- ununter- brochen blinken brochen blinken brochen blinken brochen blinken brennen brennen brennen brennen Lüftungsgerät belüftet 30 Minuten im C-Modus, danach wird automatisch in den EcoModus geschaltet. -
Seite 50: Touchdisplay
Sorgt bei Anwesenheit mehrerer Personen für maximale Lüftung • Verwendung als Nachtkühlung zum Herausventilieren der Hitze in • kühlen Sommernächten Sie finden in der beiliegenden Anleitung des Touch Display detaillierte Informationen über den Betrieb des Touch-Display. Für weitere Produkt-Informationen können Sie jederzeit unsere Website www.renson.eu besuchen. -
Seite 51: Cooking Modus (Kochen)
Healthbox II (Compact) & Healthbox Smartzone ® ® Empty House Modus System ohne Nachfragesteuerung bei niedrigerem Systemdruck. Alle Ventile in Minimalposition. Position für geringste Lüftung, z. B. beim Verlassen der Wohnung. Cooking Modus (Kochen) Sorgt dafür, dass das Lüftungssystem fast seine gesamte Luftmenge dazu verwenden kann, die verunreinigte Luft aus der Küche abzuziehen. -
Seite 52: Einstellung Dipswitch
• Anschluss an ein Qbus Domotica System, um Ihr Ventilationssystem mit anderen Geräten im Domotica System zu verbinden (durch Kommunikation) • Anschluss an RENSON Luftkomponenten: Luftkanäle (Easyflex), Dächer und/oder ® Abluftsysteme, flexible Schalldämpfer (Acoudec), Triple Flow etc. Gehen Sie auf unsere Website www.renson.eu für weitere Informationen... -
Seite 53: Reinigung Und Wartung
Healthbox II (Compact) & Healthbox Smartzone ® ® 10 • Reinigung und Wartung 10.1 • Reinigung Verwenden Sie keine Sprays, Scheuermittel, Abwaschmittel, lösungsmittel- oder chlorhaltige Reinigungsmittel. Diese können das Gerät beschädigen. Reinigen Sie die Healthbox mit einem feuchten Tuch und etwas lösungsmittelfreier Seife. 10.2 •... - Seite 54 Bedienung zeigt nach 1 Minute wieder den aktiven Belüftungsmodus. • Montieren Sie die Abdeckplatte des Geräts erneut. Auf unserer Website www.renson.eu finden Sie einen Film über die visuelle Kontrolle der Ventilbewegung und die Reinigung des Ventilators.
-
Seite 55: Regelmodule
Healthbox II (Compact) & Healthbox Smartzone ® ® 10.3.2 • Regelmodule Ventilblatt Regelmodul Regelmäßig sollte eine visuelle Kontrolle der Ventilbewegung erfolgen (z.B. jährlich). • Schalten Sie die Healthbox in Boostmodus. Warten Sie 30 Sekunden. Das Ventilblatt jedes Regelmoduls wird in die nominale (maximale) Position gebracht. •... -
Seite 56: Dokumente
Produktkarte 11 • Dokumente Healthbox ® 11.1 • Produktkarte 11.1.1 • Healthbox ® Name oder Warenzeichen des Lieferanten Renson Ventilation nv Modellkennung Healthbox II Energieeffizienzklasse SEC - kaltes Klima -54,02 kWh/m²a SEC - durchschnittliches Klima -26,95 kWh/m²a SEC - warmes Klima -11,45 kWh/m²a... -
Seite 57: Healthbox Ii Compact
Maalbeekstraat 10 • IZ 2 Vijverdam • B -8790 Waregem • België SU N P ROT E CT IO N Tel. +32 (0)56 62 71 11 • Fax +32 (0)56 60 28 51 O U T D O O R info@renson.be • w w w.renson.eu... -
Seite 58: Healthbox ® Smartzone
Maalbeekstraat 10 • IZ 2 Vijverdam • B -8790 Waregem • België S UN PROT E C T I O N Tel. +32 (0)56 62 71 11 • Fax +32 (0)56 60 28 51 OU T D O O R info@renson.be • w w w.renson.eu... -
Seite 59: Eu-Herstellererklärung
Geschäftsführer Forschungsleiter Renson Headquarters ® VENTIL ATION Maalbeekstraat 10 • IZ 2 Vijverdam • B -8790 Waregem • België SUNPROT ECTION Tel. +32 (0)56 62 71 11 • Fax +32 (0)56 60 28 51 OUTDOOR info@renson.be • w w w.renson.eu... -
Seite 60: Garantiebedingungen Anwender
Die Garantiezeit beträgt 2 Jahre. Die Installation und die Wartung müssen entsprechend der Anweisungen und nach allen Regeln der Kunst durchgeführt werden. Für detaillierte Garantiebe- dingungen besuchen Sie bitte unsere Webseite www.renson.eu. Ausschluss: Eindringen von Bauschmutz, Einspritzen von anderen als den geeigneten Produkten, Verwendung von aggressiven Flüssigkeiten oder Lösungsmittel, Schäden infolge von falschem oder abnormalem... - Seite 61 Healthbox II (Compact) & Healthbox Smartzone ® ®...
- Seite 121 Healthbox II (Compact) & Healthbox Smartzone ® ®...
- Seite 122 Healthbox II (Compact) & Healthbox Smartzone ® ®...
- Seite 123 Healthbox II (Compact) & Healthbox Smartzone ® ®...
- Seite 124 Recht vor, technische Änderungen an den im Folgenden behandelten Produkten ® vorzunehmen. Die meist aktuelle Version dieser Broschüre kann aufgeladen werden von w w w.renson.eu RENSON reserves the right to make technical changes to the products shown.