AsViva HH1 Bedienungsanleitung
Inhaltsverzeichnis
Verfügbare Sprachen
Verfügbare Sprachen
Quicklinks
Inhaltsverzeichnis

Verwandte Anleitungen für AsViva HH1


Inhaltszusammenfassung für AsViva HH1
- Seite 1 BEDIENUNGSHANDBUCH / MANUAL VERSION: C BU www.AsVIVA.de...
-
Seite 3: Inhaltsverzeichnis
INHALTSVERZEICHNIS GEWÄHRLEISTUNGSBESTIMMUNGEN ............................ 3 WICHTIGE HINWEISE ZU IHREM PRODUKT........................... 4 WICHTIGE SICHERHEITSHINWEISE ............................5 TEILELISTE ......................................6 SPEZIFIKATIONEN .................................... 6 ZUSAMMENBAU ....................................7 SENSOR MODUL ....................................8 APP ........................................10 AKKU ........................................12 GEWÄHRLEISTUNGSRECHT ..............................13 TABLE OF CONTENTS WARRANTY TERMS..................................15 IMPORTANT INFORMATION ABOUT YOUR PRODUCT ....................16 IMPORTANT SAFETY INSTRUCTIONS ............................17 PARTS LIST ......................................18 SPECIFICATIONS .....................................18... -
Seite 4: Gewährleistungsbestimmungen
Ersatzteilbestellungen und Reparaturaufträge richten Sie bitte unter Angabe der Kundennummer bzw. Rechnungsnummer an Ihren Händler oder direkt an uns. Unsere Serviceadresse: https://www.asviva.de/kontakt-formular Damit Ihnen unsere Service-Mitarbeiter optimal weiterhelfen können, beachten Sie bitte folgende Vorgehensweise: Ist ein bestimmtes Teil beschädigt? Teilen Sie uns bitte anhand der Teileiste die genaue Teilenummer mit. -
Seite 5: Wichtige Hinweise Zu Ihrem Produkt
WICHTIGE HINWEISE ZU IHREM PRODUKT Danke, dass Sie sich für eines unserer Produkte entschieden haben und für das damit entge- gengebrachte Vertrauen. Um Ihnen ein einwandfreies Produkt liefern zu können, obliegen alle unsere Produkte und deren Produktion einer ständigen sowie ausführlichen Qualitätskontrolle. Sollte dennoch ein Fehler auftreten, Ihnen das Produkt nicht zusagen oder sollten Sie Anmerkungen und Vorschläge haben, so bitten wir Sie nicht zu zögern und Kontakt mit unserem Support unter support@... -
Seite 6: Wichtige Sicherheitshinweise
WICHTIGE SICHERHEITSHINWEISE Bitte lesen Sie die Anleitung genau durch, bevor Sie mit dem Zusammenbau beginnen! Bauen Sie das Gerät nach der Aufbauanleitung auf und verwenden Sie nur die für den Aufbau des Stellen Sie sicher, dass der Sensor korrekt eingebaut ist, so dass eine Trainingsaufzeichnung per App gewährleistet werden kann. -
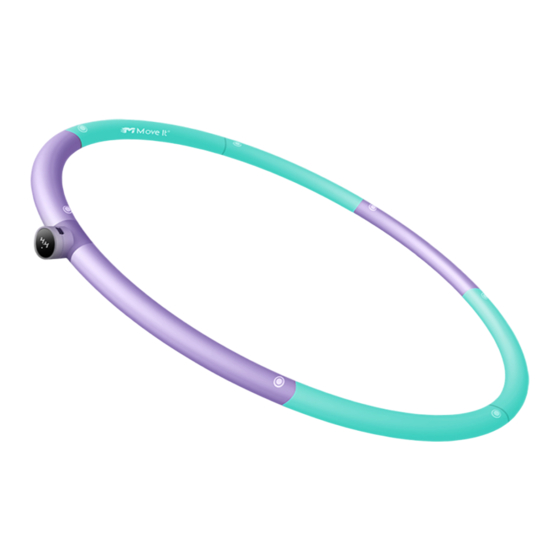
Seite 7: Teileliste
TEILELISTE 1 x Hula-Hoop-Reif mit Sensormodul 7 x Hula-Hoop-Reifen 1x USB Ladekabel SPEZIFIKATIONEN Model: ID-HH-002 Software-Plattform: Apple iOS 9.0 oder Android 4.4 oder höher Verbindung: Bluetooth 4.0 Sensor: 6-axis Gyroscope Sensor Batterie/Akku: 180mAh Lithium Batterie Ladeanschluss: Micro USB Input: 5V - 1A Abmessungen: 6 Ringteile: 75 cm 7 Ringteile: 88 cm... -
Seite 8: Zusammenbau
ZUSAMMENBAU ÜBERSICHT Verbinden Sie die gewünschte Anzahl von Abschnitten/Reifen miteinander. Befestigen Sie das Sensormodul an einem beliebigen Teil der Abschnitte. Sensor Reifen Reifen Reifen Erwachsene zwischen 6-15 Jahren über 16 Jahre HULA HOOP REIFEN ZUSAMMENBAUEN Richten Sie zwei komplementäre Abschnitte der Reifen aufeinander aus und drücken Sie den Verriegelungs- knopf des Abschnitts leicht nach unten. -
Seite 9: Sensor Modul
SENSOR MODUL AKTIVIEREN DES SMART MODULS 1. Stellen Sie bei der ersten Inbetriebnahme sicher, dass Sie das Sensormodul mindestens 20 Minuten lang laden und dass mindestens 2 Striche/Ladebalken angezeigt werden. 2. Verbinden Sie ein Ende des mitgelieferten Ladekabels mit dem Ladeanschluss des Sensors und das andere mit einem 5V-Adapter, um das Gerät sicher zu laden. -
Seite 10: Statusanzeige
SENSOR MODUL STATUS-ANZEIGE Sensor Modul Status Anzeige Akku vollständig geladen Volle Batterie Ladevorgang Warnung bei niedrigem Batteriestand Verbindung wird hergestellt Erfolgreich mit der App verbunden Ton Feedback („Beep“ = Piepton) Bluetooth ist nicht verbunden „Beep“ einmal „Beep“ zweimal Bluetooth erfolgreich verbunden „Beep“... -
Seite 11: App
INSTALLATION MOVE-IT APP Scannen Sie den QR-Code, um die Move It-App herunterzuladen. Alternativ können Sie auch im Appstore oder Playstore nach Move it Fitness suchen. KOPPELN DES GERÄTS Hinweis: Bitte koppeln Sie das Produkt über die App und nicht über die System-Bluetooth-Einstellung Ihres Mobilgerätes. -
Seite 12: Training Starten
TRAINING STARTEN Sobald Ihr Sensormodul erfolgreich mit Ihrem Mobilgerät gekoppelt ist, wählen Sie Training > Hula-Hoop, um aus der großen Auswahl an verfügbaren Trainings auszuwählen. HINWEISE App erfolgreich verbunden - - > Das Sensormodul zeigt „HH“ an. - - > Der LED-Anzeigebildschirm am Sensormodul leuchtet automatisch auf, wenn das Gerät erfolgreich mit der App verbunden ist. -
Seite 13: Akku
AKKU Akku laden Schließen Sie einfach das Micro-USB-Ladekabel an den Ladeanschluss an der Seite des Sensormoduls an. Vollständige Ladung Der Akku benötigt ca. 2 Stunden für eine volle Ladung. Das Batteriesymbol blinkt in Intervallen, während das Sensormodul geladen wird. Sobald das Gerät vollständig geladen ist, hört das Batteriesymbol auf zu blinken. Wie lange hält der Akku? Dauerbetrieb: 1 Woche... -
Seite 14: Gewährleistungsrecht
GEWÄHRLEISTUNGSRECHT Herzlichen Glückwunsch zu Ihrer Entscheidung zum Kauf eines Produkts aus dem Hause AsVIVA. Gemäß des zum 01. Januar 2002 geänderten europäischen Gewährleistungsrechts, steht Ihnen eine gesetzliche Gewährleistungsfrist von 2 Jahren zu. Die Gewährleistungsfrist beginnt mit der Übergabe der Ware durch den Fachhändler.