Herunterladen Inhalt Inhalt Diese Seite drucken
Vorschau ausblenden Andere Handbücher für 10-Serie:
Inhaltsverzeichnis

Werbung

Verfügbare Sprachen

Verfügbare Sprachen

D
Serie 10
GB
Series 10
FR
Série 10
All manuals and user guides at all-guides.com
anleitung
Seite ......... 3
Page ........ 33
Page ........ 63
Version 3.0

Werbung

Inhaltsverzeichnis
loading

Inhaltszusammenfassung für Telecom Behnke 10-Serie

  • Seite 1 All manuals and user guides at all-guides.com anleitung Version 3.0 Serie 10 Seite ..3 Series 10 Page ..33 Série 10 Page ..63...
  • Seite 2 Weitere rechtliche Hinweise finden Sie auf Seite 28. kontakt Info-Hotline Telecom Behnke GmbH Ausführliche Informationen zu Produkten, Gewerbepark „An der Autobahn“ Projekten und unseren Dienstleistungen: Robert-Jungk-Straße 3 Tel.: +49 (0) 68 41 / 81 77-700...
  • Seite 3: Inhaltsverzeichnis

    All manuals and user guides at all-guides.com Anleitung Serie 10 Inhalt inhalt 1. Kurzanleitung 1.1. Installieren ........................4 1.2. Konfigurieren........................5 1.3. Anrufen einer gespeicherten Rufnummer ............... 5 1.4. Türöffnen von innen ......................5 2. Einleitung 2.1. Allgemeine Leistungsmerkmale ..................6 2.2.
  • Seite 4: Kurzanleitung

    All manuals and user guides at all-guides.com Anleitung Serie 10 Kurzanleitung kurzanleitung 1.1. Installieren Steuerkontakt Ruhekontakt Arbeitskontakt a-Ader Tel. b-Ader – 15 V= Telefonleitung; analoger Hauptanschluss oder Nebenstelle einer Telefonanlage Relais; Relaisschaltleistung: max. 60 VA/24 W: 0,5 A, 120 V~/1 A, 24 V= (potenzialfreie Ausgänge) Zusatzversorgung;...
  • Seite 5: Konfigurieren

    All manuals and user guides at all-guides.com Anleitung Serie 10 Kurzanleitung 1.2. Konfigurieren 1.3. Anrufen einer gespeicherten Rufnummer Die Konfiguration erfolgt per Ferne über ein tonwahlfähiges Telefon: 1 ▸ Direktruftaste drücken ▸ Behnke Türstation Serie 10 anrufen 2 ▸ Gerät wählt die gespeicherte Rufnummer ▸...
  • Seite 6: Einleitung

    All manuals and user guides at all-guides.com Anleitung Serie 10 Einleitung einleitung 2.1. Allgemeine Leistungsmerkmale Die Behnke Türstation Serie 10 ist ein hoch- wertiges Freisprechtelefon, das wie ein ▸ handelsübliches (analoges) Tischtelefon an Vollduplex-Freisprechtelefon einem analogen Hauptanschluss oder einer Im Standardbetrieb arbeitet die Behnke analogen Nebenstelle einer Telefonanlage Türtation Serie 10 als Vollduplex-Freisprech- betrieben werden kann.
  • Seite 7 All manuals and user guides at all-guides.com Anleitung Serie 10 Einleitung ▸ Annehmen von eingehenden Anrufen ▸ Steuerfunktionen: automatisches oder Eingehende Anrufe können auf Tastendruck manuelles Ansteuern des Relais manuell angenommen werden oder automa- Das eingebaute Relais kann zu vielfältigen tisch nach dem ersten erkannten Klingelzei- Steuerfunktionen genutzt werden.
  • Seite 8: Technische Daten

    All manuals and user guides at all-guides.com Anleitung Serie 10 Einleitung 2.2. Technische Daten Anschlussart: analoges Telefonnetz, a/b-Schnittstelle Energieversorgung: über die a/b-Schnittstelle Schleifenspannung: 20-70 VDC Schleifenstrom: 20-60 mA Zusatzversorgung: 12 V= potentialfrei +/-3 V, max. 1200 mA Behnke Steckernetzteil oder andere Zusatzversorgung in Verbindung mit Behnke DC-DC-Wandler;...
  • Seite 9: Inbetriebnahme

    All manuals and user guides at all-guides.com Anleitung Serie 10 Inbetriebnahme inbetriebnahme 3.1. Anschluss an die Telefonleitung Zur Inbetriebnahme muss die Behnke Türsta- tion Serie 10 an einen analogen Telefonhaupt- anschluss oder an eine analoge Nebenstelle einer Telefonanlage angeschlossen werden. Dabei wird die zweiadrige Telefonleitung zur Behnke Türstation Serie 10 geführt und an der dafür vorgesehenen Anschlussklemme...
  • Seite 10: Anschlussplan

    All manuals and user guides at all-guides.com Anleitung Serie 10 Inbetriebnahme 3.2. Anschlussplan Prozessor Mikrofon Lautsprecher Tasten Taste 1 Taste 2 Relais 1 Relaisschaltleistung: max. 60 VA/24 W: 0,5 A, 120 V~/1 A, 24 V= Steuerkontakt Ruhekontakt Arbeitskontakt Erde Zusatzversorgung potentialfreie Spannung z.
  • Seite 11: Beschriftungsfeld Wechseln

    All manuals and user guides at all-guides.com Anleitung Serie 10 Inbetriebnahme 3.3. Beschriftungsfeld wechseln Beschriftungsfeld vorsichtig mit Hilfe eines Schraubendrehers aus der Türstation hebeln. Vorlage zur Beschriftung unter www.behnke-online.de/beschriftung Nutzen Sie zur Beschriftung den beiliegen- den Bogen. Den beschrifteten Papierstreifen in das Beschriftungsfeld einschieben.
  • Seite 12: Konfiguration

    All manuals and user guides at all-guides.com Anleitung Serie 10 Konfiguration konfiguration Die Konfiguration kann aus der Ferne über Die Reihenfolge, in der die Konfigurations- ein tonwahlfähiges Telefon erfolgen. Um in schritte eingegeben werden, ist beliebig. Bei den Konfigurationsmodus zu gelangen, muss einer unzulässigen Eingabe im Konfigurati- ein vierstelliger Sicherheitscode eingegeben onsmodus wird ein dunkler, etwas längerer...
  • Seite 13: Beispielkonfiguration Türstation

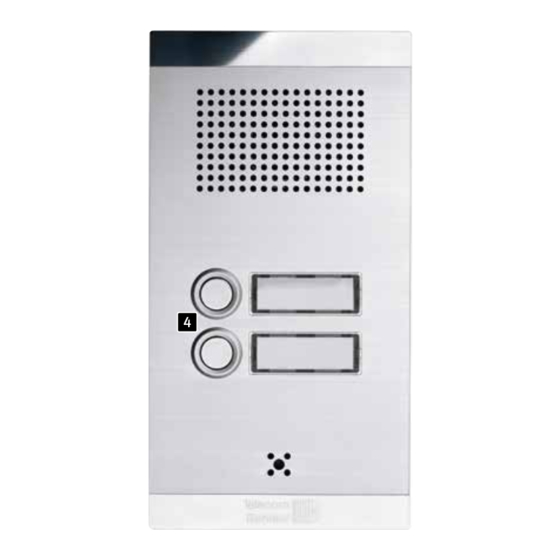
    All manuals and user guides at all-guides.com Anleitung Serie 10 Konfiguration 4.1. Beispielkonfiguration Türstation Eine Behnke Türstation Serie 10 mit zwei beschrifteten Direktruftasten soll eingesetzt werden. Dazu wurde die Türstation Serie 10 installiert und an einer Nebenstelle der Telefonanlage in Betrieb genommen, wobei das Relais als Türöffner-Relais beschaltet wurde.
  • Seite 14: Tabelle Der Konfigurationsschritte

    All manuals and user guides at all-guides.com Anleitung Serie 10 Konfiguration 4.2. Tabelle der Konfigurationsschritte Code Parameter Bestätigung Reset und Auslieferungszustand herstellen: * * * * Bei einem Reset wird der komplette Speicher gelöscht und alle Parameter auf die Vorgabe im Auslieferungszustand angepasst. Ein Reset dauert einige Sekunden.
  • Seite 15 All manuals and user guides at all-guides.com Anleitung Serie 10 Konfiguration Code Parameter Bestätigung Zusatzverstärker: Vorgabe: 2 0 = inaktiv 1 = leise 9 = laut Der eingebaute Zusatzverstärker und damit der sprachgesteuerte Wechselsprech-Betrieb kann, sofern eine Zusatzversorgung von 15 V angeschlossen ist, über diesen Konfigurationsschritt akti- viert und die gewünschte Lautstärke eingestellt werden.
  • Seite 16 All manuals and user guides at all-guides.com Anleitung Serie 10 Konfiguration Code Parameter Bestätigung Rufnummer: Vorgabe: s. Text Rufnummer ▸ Rufnummer 1 (Taste 1) ▸ Rufnummer Rufnummer 2 (Taste 2) Die Rufnummern bestehen nur aus Ziffern und sind maximal 20-stellig. Bei der Eingabe der Rufnummern sind folgende Son- dersymbole zulässig: = * wählen = # wählen...
  • Seite 17 All manuals and user guides at all-guides.com Anleitung Serie 10 Konfiguration Code Parameter Bestätigung der zur Verfügung stehenden Sprachansagen ergibt sich aus den 5 kurzen Sprachansagen und der Anzahl der festgelegten langen Spra- chansagen, d. h. es stehen je nach Konfiguration 6 (5 kurze + 1 lange) bis maximal 9 (5 kurze + 4 lange) Sprachansagen zur Verfügung.
  • Seite 18 All manuals and user guides at all-guides.com Anleitung Serie 10 Konfiguration Code Parameter Bestätigung Nach Eingabe des KS 52 und der Nummer der Ansage, die abge- spielt werden soll, wird die Ansage abgespielt. Das Abspielen wird automatisch nach Ablauf der Ansagedauer beendet. Es kann auch manuell beendet werden durch Drücken von #.
  • Seite 19 All manuals and user guides at all-guides.com Anleitung Serie 10 Konfiguration Code Parameter Bestätigung Stummer Verbindungsaufbau und warten auf Abheben: Vorgabe: 0 0 = aktiviert 1 = deaktiviert Dieser Programmschritt erlaubt die Konfiguration des Aktivie- rungszeitpunkts des Lautsprecher beim Anrufen vom Gerät aus.
  • Seite 20: Bedienung

    All manuals and user guides at all-guides.com Anleitung Serie 10 Bedienung bedienung 5.1. Anwählen einer gespeicherten 5.2. Anrufen einer Türstation Serie 10 Rufnummer auf Tastendruck Um eine Behnke Türstation Serie 10 anzuru- Die Direktruftasten einer Behnke Türstation fen, wählen Sie einfach die Rufnummer des Serie 10 können zum Anwählen einer Ruf- Telefonanschlusses, an den die Behnke Tür- nummer konfiguriert werden.
  • Seite 21: Steuerungsmöglichkeiten Während Der Sprachverbindungen

    All manuals and user guides at all-guides.com Anleitung Serie 10 Bedienung ▸ Mit dem Konfigurationsschritt 09 kann die Aktivierungsdauer für das Relais konfigu- riert werden, d. h. wie viele Sekunden der Türöffner angesteuert wird. ▸ Mit den Konfigurationsschritten 10 und 11 können die Aktivierungscodes für das Relais eingestellt werden.
  • Seite 22: Problembehandlung

    All manuals and user guides at all-guides.com Anleitung Serie 10 Problembehandlung Problembehandlung Problem Ursache Maßnahme Gerät legt bei der Für die Direktruftaste wurde Mit Konfigurationsschritt 21 bzw. Betätigung der keine Nummer hinterlegt 22 eine Nummer konfigurieren Taste direkt mit Feh- lerton wieder auf Gerät reagiert nicht 1) Einschaltverzögerung zu hoch...
  • Seite 23 All manuals and user guides at all-guides.com Anleitung Serie 10 Problembehandlung Problem Ursache Maßnahme Der Relaiscode 1) Falscher oder kein Relaiscode 1) Mit dem Konfigurationsschritt 10 aktiviert das Relais programmiert bzw. 11 lassen sich zwei unab- nicht hängige Relaiscodes program- mieren.
  • Seite 24 All manuals and user guides at all-guides.com Anleitung Serie 10 Problembehandlung Problem Ursache Maßnahme Aktivierung des Manuelle Anrufannahme aktiv Anrufen, Taste drücken, Konfigu- Konfigurationsmo- rationsmodus, 03 1 #, Auflegen dus nicht möglich Für Fernkonfiguration verwendetes Eine Fernkonfiguration ist nur Telefon sendet keine MFV-Töne bei Verwendung eines tonwahl- fähigen Telefons (=Telefon, das MFV-Töne senden kann) möglich.
  • Seite 25 All manuals and user guides at all-guides.com Anleitung Serie 10 Problembehandlung Problem Ursache Maßnahme Vorgenommene Ein- Konfigurationsmodus wurde nicht Zuerst Konfigurationsmodus stellungen wurden aktiviert aktivieren und dann Konfigurati- nicht gespeichert onsschritte eingeben. Konfigurationsschritt nicht mit # Die Eingabe fast aller Konfigura- abgeschlossen tionsschritte muss mit # abge- schlossen werden.
  • Seite 26: Bemaßung

    All manuals and user guides at all-guides.com Anleitung Serie 10 Bemaßung bemassung Unter-/Aufputzvariante Frontalansicht Unterputzgehäuse Benötigter Hohlraum: 100 x 200 mm Wandeinbau (ohne Gehäuse) ▸ Tiefe mit Elektronik: ca. 30 mm ▸ Wir empfehlen eine Hohlraumtiefe von 43-53 mm, um genügend Platz für Verkabelung u. Ä. zu haben. ▸...
  • Seite 27: Aufputzgehäuse

    All manuals and user guides at all-guides.com Anleitung Serie 10 Bemaßung Aufputzgehäuse Frontalansicht Rückansicht Wand- Auflage- fläche Ø 16 Deckel Boden www.behnke-online.de...
  • Seite 28: Rechtliche Hinweise

    All manuals and user guides at all-guides.com Anleitung Serie 10 Rechtliche Hinweise rechtliche hinweise Infos zum Produkthaftungsgesetz: 1. Änderungen an unseren Produkten, die dem technischen Fortschritt dienen, behalten wir uns vor. Die abgebildeten Produkte können im 1. Alle Produkte aus dieser Anleitung dürfen Zuge der ständigen Weiterentwicklung auch nur für den angegebenen Zweck verwendet optisch von den ausgelieferten Produkten...
  • Seite 29: Eg-Konformitätserklärung

    All manuals and user guides at all-guides.com Anleitung Serie 10 EG-Konformitätserklärung eg-konformitätserklärung www.behnke-online.de...
  • Seite 30 All manuals and user guides at all-guides.com Anleitung Serie 10 Notizen www.behnke-online.de...
  • Seite 31 All manuals and user guides at all-guides.com instructions Version 3.0 Serie 10 Seite ..3 Series 10 Page ..33 Série 10 Page ..63...
  • Seite 32 For further legal information, please see page 58. contact Information Telecom Behnke GmbH For detailed information on our product, Gewerbepark „An der Autobahn“ projects and services: Robert-Jungk-Straße 3 Tel.: +49 (0) 68 41/81 77-700...
  • Seite 33 All manuals and user guides at all-guides.com Instructions for Series 10 Contents contents 1. Quick instructions 1.1. Installation ........................34 1.2. Set-up ........................... 35 1.3. To make a call to a saved telephone number ..............35 1.4. Open the front door from the inside ................35 2.
  • Seite 34: Quick Instructions

    All manuals and user guides at all-guides.com Instructions for Series 10 Quick instructions Quick instructions 1.1. Installation Control contact Rest contact Operating contact Wire a Tel. Wire b – 15 V= Telephone line, analogue main line or extension of a telephone system Relay, relay switch power: max.
  • Seite 35: Set-Up

    All manuals and user guides at all-guides.com Instructions for Series 10 Quick instructions 1.2. Set-up 1.3. To make a call to a saved telephone number Remotely set up your new device via any telephone with DTMF dialling. 1 ▸ Press the corresponding direct call button, ▸...
  • Seite 36: Introduction

    All manuals and user guides at all-guides.com Instructions for Series 10 Introduction introduction 2.1. General features Behnke Series 10 Intercom stations are high quality hands-free phones that can be used ▸ Full-duplex, hands-free telephone like a standard (analogue) desk telephone with an analogue landline connection or In standard mode, Behnke Series 10 as an analogue extension to a telephone...
  • Seite 37 All manuals and user guides at all-guides.com Instructions for Series 10 Introduction ▸ Answer an incoming call ▸ Control functions: automatic or manual relay activation Answer an incoming call either manually by pressing a button or automatically after the The built-in relay enables a variety of first recognised signal.
  • Seite 38: Technical Specifications

    All manuals and user guides at all-guides.com Instructions for Series 10 Introduction 2.2. Technical Specifications Connection type: analogue telephone line, a/b port Power supply via the a/b port Coil tension: 20-70 VDC Coil current: 20-60 mA Additional power supply: 12 V = potential-free +/- 3 V, max. 1200 mA Behnke power supply unit or any other additional power supply in connection with a Behnke DC-DC converter;...
  • Seite 39: Commissioning

    All manuals and user guides at all-guides.com Instructions for Series 10 Commissioning commissioning 3.1. Connection to the telephone line For commissioning, please connect your Behnke Series 10 Intercom station to an analogue landline or to an analogue extension of a telephone system. To do so, please connect the two-core telephone line to the Behnke Intercom using the designated screw terminals.
  • Seite 40: Wiring Diagram

    All manuals and user guides at all-guides.com Instructions for Series 10 Commissioning 3.2. Wiring diagram Microphone Speaker Buttons Button 1 Button 2 Relay 1 Relay switch power: max. 60 VA/24 W: 0,5 A, 120 V~/1 A, 24 V= Control contact Rest contact Operating contact Earthing...
  • Seite 41: Change Labels

    All manuals and user guides at all-guides.com Instructions for Series 10 Commissioning 3.3. Change labels Use a screwdriver to carefully remove the labelling unit from the intercom station. Labelling template available at www.behnke-online.de/beschriftung Use the provided labelling sheet for your labels.
  • Seite 42: Configuration And Set-Up

    All manuals and user guides at all-guides.com Instructions for Series 10 Configuration and Set-up configuration and set-uP Configuration for your new device may be set The different configuration steps do not need remotely using a telephone with DTMF dialling. to follow a certain order. Entering incorrect To enter set-up mode, please enter the four- information in set-up mode will result in digit security code.
  • Seite 43: Configuration Example Intercom Station

    All manuals and user guides at all-guides.com Instructions for Series 10 Configuration and Set-up 4.1. Configuration example intercom station It has been decided to use a Behnke Series 10 Intercom with two direct call buttons. The Behnke device has been installed and connected to an extension of the telephone system with the relay wired to hold the open door function.
  • Seite 44: Table Of Configuration Step Codes

    All manuals and user guides at all-guides.com Instructions for Series 10 Configuration and Set-up 4.2. Table of configuration step codes Code Parameter Confirmation Reset and return to default settings: * * * * * * * * Performing a reset will format the entire memory and all para- meters will return to their default settings.
  • Seite 45 All manuals and user guides at all-guides.com Instructions for Series 10 Configuration and Set-up Code Parameter Confirmation Additional amplifier Default setting: 2 0 = disabled 1 = low 9 = loud In case the additional 15 V power supply is available, you may activate the additional amplifier, hence voice-controlled two-way-communication and set the desired volume via this configuration step code.
  • Seite 46 All manuals and user guides at all-guides.com Instructions for Series 10 Configuration and Set-up Code Parameter Confirmation Telephone number: Specification: cf. text Telephone number ▸ telephone number 1 (button 1) ▸ Telephone number telephone number 2 (button 2) Telephone numbers contain cyphers only and hold a maximum of 20 digits.
  • Seite 47 All manuals and user guides at all-guides.com Instructions for Series 10 Configuration and Set-up Code Parameter Confirmation voice messages results from the 5 short messages and the set number of long messages, i.e. according to your configuration you will either have 6 (5 short + 1 long) up to a maximum of 9 (5 short + 4 long) voice messages available.
  • Seite 48 All manuals and user guides at all-guides.com Instructions for Series 10 Configuration and Set-up Code Parameter Confirmation 8 = play message no. 8 (long message) 9 = play message no. 9 (long message) Upon entering configuration step code 52 and the corresponding no.
  • Seite 49 All manuals and user guides at all-guides.com Instructions for Series 10 Configuration and Set-up Code Parameter Confirmation Silent connection and call answering: Default setting: 0 0 = enabled 1 = disabled Use this configuration step to determine when the speaker will be activated during calls from the device.
  • Seite 50: Operation

    All manuals and user guides at all-guides.com Instructions for Series 10 Operation oPeration 5.1. Dialling a saved telephone number 5.2. Calling a Behnke Series 10 Inter- after the button has been pressed com station The direct call buttons on Behnke Series To call a Behnke Series 10 Intercom station, 10 Intercom stations can be set to dial simply dial the telephone number of the...
  • Seite 51: Control Options During Voice Calls

    All manuals and user guides at all-guides.com Instructions for Series 10 Operation ▸ Use configuration step code 09 to set the time interval for relay activation, i.e. the amount of time (in seconds) the relay will open the door. ▸ Use Configuration step codes 10 and 11 to set the activation codes for the relay.
  • Seite 52: Trouble-Shooting

    All manuals and user guides at all-guides.com Instructions for Series 10 Trouble-shooting trouble-shooting Problem Cause Action Device hangs up No telephone no. was assigned to Assign a telephone no. via con- immediately after this direct call button. figuration steps 21 or 22 respec- pressing a button tively.
  • Seite 53 All manuals and user guides at all-guides.com Instructions for Series 10 Dimensioning Problem Cause Action The relay activation 1) Wrong code or no code 1) Use configuration steps 10 or code does not acti- recorded 11 to record two individual relay vate the relay activation codes.
  • Seite 54 All manuals and user guides at all-guides.com Instructions for Series 10 Dimensioning Problem Cause Action Unable to enter Set- Manual call answering enabled Call the device, press a button, up mode enter the Set-up mode, enter 03 1 #, hang up. The telephone used for remote You need a telephone with DTMF configuration does not send DTMF...
  • Seite 55 All manuals and user guides at all-guides.com Instructions for Series 10 Dimensioning Problem Cause Action Changed settings Set-up mode was not enabled Enter set-up mode and then enter were not saved the configuration steps Configuration step not terminated Most configuration steps require with the # key to be terminated by entering the # key.
  • Seite 56: Dimensioning

    All manuals and user guides at all-guides.com Instructions for Series 10 Dimensioning dimensioning Flush and on-wall mounting Front view In-wall housing Hollow: 100 x 200 mm Mounting (without housing) ▸ Depth with electronics: ca. 30 mm ▸ We suggest a cavity of 43-53 mm deep (incl. space for wiring) ▸...
  • Seite 57 All manuals and user guides at all-guides.com Instructions for Series 10 Dimensioning On-wall housing Front view Rear view Wall contact surface Ø 16 Cover Bottom www.behnke-online.com...
  • Seite 58: Legal Information

    All manuals and user guides at all-guides.com Instructions for Series 10 Legal Information legal information Information with regard to product liability: 1. We reserve the right to change our pro- ducts, without notice, for technical progress. As a result of continuous development, the 1.
  • Seite 59: Declaration Of Conformity

    All manuals and user guides at all-guides.com Instructions for Series 10 Declaration of Conformity declaration of conformity www.behnke-online.com...
  • Seite 60 All manuals and user guides at all-guides.com Anleitung Serie 10 Notes www.behnke-online.de...
  • Seite 61 All manuals and user guides at all-guides.com notice Version 3.0 Serie 10 Seite ..3 Series 10 Page ..33 Série 10 Page ..63...
  • Seite 62 Vous trouverez des informations légales com- plémentaires sur la page 88. contact Infoligne Telecom Behnke S.à r.l. Pour des informations détaillées 1, Avenue Saint Rémy concernant nos produits, nos projets et F-57600 Forbach nos services : France Tél. : +33 (0)3 87 84 99 50...
  • Seite 63 All manuals and user guides at all-guides.com Instructions série 10 Sommaire sommaire 1. Notice rapide 1.1. Installation ........................64 1.2. Configuration ........................ 65 1.3. Appel d'un numéro enregistré ..................65 1.4. Ouverture de la porte depuis l'intérieur ................ 65 2. Introduction 2.1.
  • Seite 64: Notice Rapide

    All manuals and user guides at all-guides.com Instructions série 10 Notice rapide notice raPide 1.1. Installation Contact de commande Contact repos Contact de travail Fil a Tél. Fil b – 15 V= Ligne téléphonique ; ligne principale analogue ou poste annexe d'une installation téléphonique Relais ;...
  • Seite 65: Configuration

    All manuals and user guides at all-guides.com Instructions série 10 Notice rapide 1.2. Configuration 1.3. Appel d'un numéro enregistré La configuration s'effectue à distance via un 1 ▸ appuyer sur la touche d'appel direct téléphone disposant d'un clavier à tonalité. 2 ▸...
  • Seite 66: Introduction

    All manuals and user guides at all-guides.com Instructions série 10 Introduction introduction 2.1. Caractéristiques générales Le portier téléphonique série 10 de Behnke est un téléphone mains-libres de haute qualité ▸ Téléphone mains libres full-duplex qui peut être utilisé comme un téléphone de bureau (analogique) traditionnel sur une ligne En mode normal, le portier téléphonique téléphonique analogique principale ou un...
  • Seite 67 All manuals and user guides at all-guides.com Instructions série 10 Introduction ▸ Fonctions de commande : commande auto- L'option « reset » permet une remise à zéro matique ou manuelle du relais en restaurant les paramètres d'usine. Le relais intégré peut être utilisé pour diver- ▸...
  • Seite 68: Caractéristiques Techniques

    All manuals and user guides at all-guides.com Instructions série 10 Introduction 2.2. Caractéristiques techniques Type de connexion : réseau téléphonique analogue, interface a/b Alimentation électrique : via l'interface a/b Boucle de tension : 20-70 V DC Courant de ligne : 20-60 mA Alimentation supplémentaire : 12 V= potentiel isolé +/-3 V, max. 1200 mA Bloc d'alimentation Behnke ou toute autre alimentation supplémentaire connectée avec un convertisseur DC/DC Behnke ;...
  • Seite 69: Mise En Service

    All manuals and user guides at all-guides.com Instructions série 10 Mise en service mise en service 3.1. Connexion à la ligne téléphonique Pour la mise en service, le portier télépho- nique série 10 de Behnke doit être raccordé à une prise téléphonique ou à un poste annexe d'une installation téléphonique.
  • Seite 70: Schéma De Connexion

    All manuals and user guides at all-guides.com Instructions série 10 Mise en service 3.2. Schéma de connexion Processeur Microphone Haut-parleur Touche Touche 1 Touche 2 Relais 1 Capacité de coupure du relais : max. 60 VA/24 W : 0,5 A, 120 V~/1 A, 24 V= Contact de commande Contact repos Contact de travail...
  • Seite 71: Changer Le Champ D'inscription

    All manuals and user guides at all-guides.com Instructions série 10 Mise en service 3.3. Changer le champ d'inscription Détacher avec précaution le champ d'inscription à l'aide d'un tournevis. Des modèles d'étiquettes sont disponibles sous www.behnke-online.de/beschriftung Pour les étiquettes, utiliser la feuille jointe. Placer les étiquettes avec les inscriptions dans le champ.
  • Seite 72: Configuration

    All manuals and user guides at all-guides.com Instructions série 10 Configuration configuration La configuration peut s'effectuer à distance L'ordre dans lequel les paramètres de confi- via un téléphone disposant d'un clavier à tona- guration sont entrés importe peu. Lors d'une lité.
  • Seite 73: Exemple De Configuration Du Portier Téléphonique

    All manuals and user guides at all-guides.com Instructions série 10 Configuration 4.1. Exemple de configuration du por- tier téléphonique Un portier téléphonique série 10 de Behnke comportant deux touches avec étiquettes doit être configuré. Le portier téléphonique série 10 de Behnke a été installé et mis en service via un poste annexe de l'installation téléphonique, où...
  • Seite 74: Tableau Du Menu Configuration

    All manuals and user guides at all-guides.com Instructions série 10 Configuration 4.2. Tableau du menu configuration Code Paramètre Actionnement Remettre à zéro et paramètres d'usine : * * * * Lors d'un reset (remise à zéro), la mémoire est effacée dans sa totalité...
  • Seite 75 All manuals and user guides at all-guides.com Instructions série 10 Configuration Code Paramètre Actionne- ment Amplificateur supplémentaire : Réglage prédéterminé : 2 0 = inactif 1 = faible 9 = fort L'amplificateur supplémentaire intégré et le fonctionnement à commande vocale nécessitent une alimentation supplémentaire de 15 V, une activation via ce menu configuration et un réglage du volume comme souhaité.
  • Seite 76 All manuals and user guides at all-guides.com Instructions série 10 Configuration Code Paramètre Actionnement Numéro d'appel : valeur prédéterminée : cf. texte Numéro d'appel ▸ Numéro d'appel 1 (touche 1) ▸ Numéro d'appel Numéro d'appel 2 (touche 2) Les numéros d'appel sont composés de chiffres, 20 chiffres au maximum.
  • Seite 77 All manuals and user guides at all-guides.com Instructions série 10 Configuration Code Paramètre Actionnement en 1 à 4 annonces longues pouvant être programmées dans le menu configuration. Le nombre total d'annonces disponibles est de 5 annonces courtes et du nombre d'annonces longues enregistrées.
  • Seite 78 All manuals and user guides at all-guides.com Instructions série 10 Configuration Code Paramètre Actionnement 6 = écouter l'annonce 6 (annonce longue) 7 = écouter l'annonce 7 (annonce courte) 8 = écouter l'annonce 8 (annonce courte) 9 = écouter l'annonce 9 (annonce courte) Après la saisie du menu configuration 52 et du numéro de l'annonce devant être écoutée, l'annonce commence.
  • Seite 79 All manuals and user guides at all-guides.com Instructions série 10 Configuration Code Paramètre Actionnement Si l'annonce « saisie validée » ne doit pas être diffusée, effectu- er la manipulation suivante : 58 0 [bip] 3 [bip] 9 [bip] # Appel silencieux et attente d'une réponse : Réglage prédéterminé : 0 0 = activé...
  • Seite 80: Utilisation

    All manuals and user guides at all-guides.com Instructions série 10 Utilisation utilisation 5.1. Choix d'un numéro enregistré 5.2. Appeler un portier téléphonique par appui sur la touche série 10 Les touches d'appel direct d'un portier Pour appeler un portier téléphonique série 10 téléphonique série 10 de Behnke peuvent être de Behnke, composer le numéro de téléphone configurées pour appeler un numéro.
  • Seite 81: Actions Possibles Pendant Les Appels

    All manuals and user guides at all-guides.com Instructions série 10 Utilisation fonctionnement précis doit être paramétré, par ex. le mode de fonctionnement 4. ▸ Avec le menu configuration 09, la durée d'activation du relais peut être configurée pour définir pendant combien de secondes la gâche sera activée.
  • Seite 82: Résolution Des Problèmes

    All manuals and user guides at all-guides.com Instructions série 10 Résolution des problèmes résolution des Problèmes Problème Cause Solution L'appareil raccroche Aucun numéro n'a été enregistré Définir un numéro d'appel avec directement avec un pour la touche d'appel direct les menus de configuration 21 bip d'erreur après et 22 avoir actionné...
  • Seite 83 All manuals and user guides at all-guides.com Instructions série 10 Résolution des problèmes Problème Cause Solution Le code relais 1 Aucun code n'est programmé 1) Avec les menus configuration n'active pas le ou le code programmé est erroné 10 et 11, programmer deux codes relais.
  • Seite 84 All manuals and user guides at all-guides.com Instructions série 10 Résolution des problèmes Problème Cause Solution Impossible d'activer Prise manuelle d'appel activée Appeler, appuyer sur la touche, le mode configu- mode configuration, 03,1 #, ration raccrocher Le téléphone utilisé lors d'une Une configuration à...
  • Seite 85 All manuals and user guides at all-guides.com Instructions série 10 Résolution des problèmes Problème Cause Solution Les réglages effec- Le mode configuration n'est pas Activer d'abord le mode confi- tués ne sont pas activé guration et procéder ensuite aux enregistrés réglages.
  • Seite 86: Cotation

    All manuals and user guides at all-guides.com Instructions série 10 Cotation cotation Variantes en surface ou encastrées Vue frontale Boîtier encastrable Découpe: 100 x 200 mm Montage (sans boîtier) ▸ Profondeur avec électronique : 30 mm ▸ Nous conseillons une profondeur de 43-53 mm pour avoir assez de place pour les câbles.
  • Seite 87 All manuals and user guides at all-guides.com Instructions série 10 Cotation Boîtier en saillie Vue avant Vue de dos Surface d'appui murale Ø 16 Couvercle www.behnke-online.fr...
  • Seite 88: Informations Légales

    All manuals and user guides at all-guides.com Instructions série 10 Informations légales informations légales Informations relatives à la loi sur la responsa- 1. Nous nous réservons le droit de modifier bilité du fait des produits: nos produits en vertu des progrès techniques. En raison de l’évolution technique, les produits livrés peuvent avoir une apparence 1.
  • Seite 89: Déclaration De Conformité Ce

    All manuals and user guides at all-guides.com Instructions série 10 Déclaration de conformité CE déclaration de conformité www.behnke-online.fr...
  • Seite 90 All manuals and user guides at all-guides.com Instructions série 10 Notes www.behnke-online.fr...
  • Seite 91 All manuals and user guides at all-guides.com Instructions série 10 Notes www.behnke-online.fr...
  • Seite 92 All manuals and user guides at all-guides.com Version 3.0 Kirkel, Mai 2015 telecom behnke gmbh Telecom Behnke GmbH Info-Hotline: +49 (0) 68 41 / 81 77-700 Gewerbepark „An der Autobahn“ Service-Hotline: +49 (0) 68 41 / 81 77-777 Robert-Jungk-Straße 3...

Inhaltsverzeichnis