
Verwandte Anleitungen für Telecom Behnke 10-ip serie


Inhaltszusammenfassung für Telecom Behnke 10-ip serie
- Seite 1 anleitung Version 1.0 SIP-Innensprechstelle Seite ..3 Instructions SIP in-house remote station Page ..15 Combiné intérieur SIP Page ..27...
-
Seite 2: Service-Hotline
Weitere rechtliche Hinweise finden Sie auf Seite 10. kontakt Info-Hotline Telecom Behnke GmbH Ausführliche Informationen zu Produkten, Gewerbepark „An der Autobahn“ Projekten und unseren Dienstleistungen: Robert-Jungk-Straße 3 Tel.: +49 (0) 68 41 / 81 77-700... -
Seite 3: Inhaltsverzeichnis
Anleitung SIP-Innensprechstelle Inhalt inhalt 1. Einleitung 1.1. Lieferumfang ........................4 1.2. Allgemeines ........................4 ▸ Leistungsmerkmale ......................4 2. Anschlüsse 3. Montage 3.1. Aufputz-Montage ......................6 3.2. Unterputz-Montage ......................6 3.3. Montage der Frontblende ....................6 4. Konfiguration und Inbetriebnahme 5. Bemaßung 6. Rechtliche Hinweise 7. -
Seite 4: Einleitung
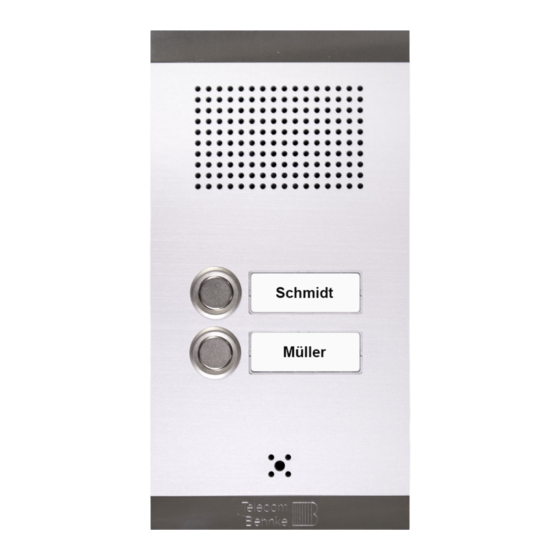
Anleitung SIP-Innensprechstelle Einleitung einleitung 1.1. Lieferumfang ▸ SIP-Innensprechstelle ▸ Diese Anleitung 1.2. Allgemeines Leistungsmerkmale Die SIP-Innensprechstelle ist die Gegenstelle zur Behnke IP-Türstation. Sie ist mit einer Taste zur Gesprächsannahme und mit einer Taste zum Betätigen des Türöffners ausgestattet. Bei Bedarf kann zusätzlich eine Etagentaste ange- schlossen werden. -
Seite 5: Anschlüsse
Anleitung SIP-Innensprechstelle Anschlüsse anschlüsse Der LAN-Anschluss erfolgt über den RJ45- Stecker ( „INPUT“). Alternativ lassen sich die einzelnen Adern aber auch mittels Klemmleiste am Anschlussinterface anbinden ( ): Das Netz- werk wird auf die mit 1 (weiß-grün), 2 (grün), 3 (weiß-orange) und 6 (orange), bezeichneten Klemmen nach EIA / TIA 568 A angeschlos- sen. -
Seite 6: Montage
Anleitung SIP-Innensprechstelle Montage Montage 3.1. Aufputz-Montage Montieren Sie das Gehäuse (43-5101) mit bei- liegendem Schraubenbeipack auf die Wand. Beachten Sie die rückseitige Kabeleinführung. 3.2. Unterputz-Montage Setzen Sie das Gehäuse (43-5101) in den vor- Aluminium-Schild abklipsen bereiteten Hohlraum-Ausschnitt und putzen Sie es ein. -
Seite 7: Konfiguration Und Inbetriebnahme
Anleitung SIP-Innensprechstelle Konfiguration und Inbetriebnahme konfiguration und inbetriebnahMe Vorbereitung Wenn kein DHCP-Server vorhanden ist, so kann ▸ die IP-Adressvergabe auf „statisch“ umgestellt Verbindung der Behnke SIP-Innensprechstelle werden: mit einem 10 / 100 Mbit Ethernet LAN ▸ Stromversorgung via Power over Ethernet (PoE) 4. - Seite 8 Anleitung SIP-Innensprechstelle Konfiguration und Inbetriebnahme Wenn nun der Begrüßungsbildschirm erscheint, Nun erscheint die Statusanzeige der Behnke gelangen Sie durch Klicken auf „Anmelden“ zur SIP-Innensprechstelle. Die Online-Hilfe ist hier Passwortabfrage. Die Standardeinstellungen jeder-zeit über den „Hilfe“-Knopf in der lauten: linken Spalte zu erreichen. Zum Konfigurieren der Behnke SIP-Innensprechstelle den gelb •...
-
Seite 9: Bemaßung
Anleitung SIP-Innensprechstelle Bemaßung beMassung Front Auf- und Unterputzgehäuse Maße des Ø 4 mm Gehäuses: 207 x 107 x 31 mm Frontblende ▸ Einbaumaße Unterputzgehäuse: 100 x 200 x 40 mm www.behnke-online.de... -
Seite 10: Rechtliche Hinweise
Anleitung SIP-Innensprechstelle Rechtliche Hinweise rechtliche hinweise Infos zum Produkthaftungsgesetz: 1. Änderungen an unseren Produkten, die dem technischen Fortschritt dienen, behalten wir uns vor. Die abgebildeten Produkte können im 1. Alle Produkte aus dieser Anleitung dürfen nur Zuge der ständigen Weiterentwicklung auch für den angegebenen Zweck verwendet werden. -
Seite 11: Ce-Erklärung
Anleitung SIP-Innensprechstelle CE-Erklärung ce-erklärung www.behnke-online.de... - Seite 12 Anleitung SIP-Innensprechstelle Notizen www.behnke-online.de...
- Seite 13 instructions Version 1.0 SIP-Innensprechstelle Seite ..3 Instructions SIP Indoor Station Page ..15 Combiné intérieur SIP Page ..27...
- Seite 14 Before carrying out service and maintenance For further legal information, please see page 22. contact Information Telecom Behnke GmbH For detailed information on our product, Gewerbepark „An der Autobahn“ projects and services: Robert-Jungk-Straße 3 Tel.: +49 (0) 68 41/81 77-700...
- Seite 15 Instructions for SIP Indoor Station Contents contents 1. Introduction 1.1. What’s in the box ......................16 1.2. General Information ......................16 ▸ Features ......................... 16 2. Connections 3. Installation 3.1. On-Wall Mounting ......................18 3.2. Flush-Mounting ....................... 18 3.3. Fitting the front panel ...................... 18 4.
-
Seite 16: Introduction
Instructions for SIP Indoor Station Introduction introduction 1.1. What’s in the box ▸ SIP Indoor Station ▸ The present instructions 1.2. General Information Features The SIP Indoor Station serves as the remote station for Behnke's IP door intercom. It comes with a button to accept a call and with a button to release the open door function. -
Seite 17: Connections
Instructions for SIP Indoor Station Connections connections Use an RJ-45 connector to establish a network connection ( "INPUT"). You may also connect the individual cores to the connection interface using a terminal block ( ): The network is con- nected to the terminals marked 1 (white-green), 2 (green), 3 (white-orange) and 6 (orange) according to EIA/TIA specification 568 A. -
Seite 18: Installation
Instructions for SIP Indoor Station Installation installation 3.1. On-Wall Mounting Use the screws provided in the box to mount the housing (43-5101) to the wall. Bear in mind the cable inlet on the back. 3.2. Flush-Mounting Insert the housing (43-5101)into the prepared Remove aluminium panel cavity and plaster the edges. -
Seite 19: Configuration And Set-Up
Instructions for SIP Indoor Station Configuration and set-up configuration and set-up Preparation Where no DHCP server is available, the method ▸ Connect the SIP Indoor Station to a 10/100 to obtain an IP address for your indoor station Mbit Ethernet network can be set to "static": ▸... - Seite 20 Instructions for SIP Indoor Station Configuration and set-up Once you get to the welcome screen, click login Now you will see the status page for your to get to the login page. Standard settings are Behnke SIP Indoor Station. You may access the as follows: online help by clicking the "Help"...
-
Seite 21: Dimensions
Instructions for SIP Indoor Station Dimensions diMensions (Front) On-wall and flush mounting Housing dimen- Ø 4 mm sions: 207 x 107 x 31 mm Front cover ▸ Fitting dimensions for flush mounted housing: 100 x 200 x 40 mm www.behnke-online.com... -
Seite 22: Legal Information
Instructions for SIP Indoor Station Legal Information legal inforMation Information with regard to product liability: 1. We reserve the right to change our products, without notice, for technical progress. As a result of continuous development, the products 1. All products mentioned in these instructions illustrated may look different from the products may only be used for the purpose intended. -
Seite 23: Ce-Declaration
Instructions for SIP Indoor Station CE-Declaration ce-declaration www.behnke-online.com... - Seite 24 Instructions for SIP Indoor Station Notes www.behnke-online.com...
- Seite 25 notice Version 1.0 SIP-Innensprechstelle Seite ..3 Instructions SIP in-house remote station Page ..15 Poste téléphonique intérieur SIP Page ..27...
- Seite 26 Vous trouverez des informations légales com- plémentaires sur la page 34. contact Infoligne Telecom Behnke S.à r.l. Pour des informations détaillées concer- 1, Avenue Saint Rémy nant nos produits, nos projets et nos F-57600 Forbach services : France Tél. : +33 (0)3 87 84 99 50...
- Seite 27 Instructions caméra IP Sommaire soMMaire 1. Introduction 1.1. Étendue de la livraison ......................28 1.2. Généralités ........................28 ▸ Caractéristiques ......................28 2. Raccordements : 3. Montage 3.1. Montage en saillie ......................30 3.2. Montage encastré ......................30 3.3. Montage de la plaque avant .....................30 4. Configuration et mise en service 5.
-
Seite 28: Introduction
Instructions caméra IP Introduction introduction 1.1. Étendue de la livraison ▸ Poste téléphonique intérieur SIP ▸ Cette notice 1.2. Généralités Caractéristiques Le poste intérieur SIP est la station éloignée cor- respondant au portier IP Behnke. Il est équipé d’une touche permettant de prendre l’appel et d’une touche permettant l’activation de la gâche. -
Seite 29: Raccordements
Instructions caméra IP Raccordements raccordeMents La connexion LAN se fait par la prise RJ45 ( « INPUT »). En option, il est également possible de raccorder les fils au moyen d’une borne à vis sur l’interface de raccordement ( ) : Le réseau est connecté sur les bornes marquées avec 3 (vert-blanc), 6 (vert), 1 (orange-blanc) et 2 (orange) selon EIA / TIA 568 A. -
Seite 30: Montage
Instructions caméra IP Montage Montage 3.1. Montage en saillie Montez le boîtier (43-5101) sur le mur avec les vis supplémentaires. Faire attention au passage des câbles par l’arrière. 3.2. Montage encastré Enclencher la plaque d’aluminium Placez le boîtier (43-5101) dans la niche prévue et encastrez-le. -
Seite 31: Configuration Et Mise En Service
Instructions caméra IP Configuration et mise en service configuration et Mise en service Préparation Lorsqu’il n’y a aucun serveur DHCP disponible, ▸ Connexion du poste téléphonique SIP avec un l’attribution d’une adresse IP se fait de manière réseau Ethernet 10/100 Mbit. « statique » : ▸... - Seite 32 Instructions caméra IP Configuration et mise en service Lorsque l’écran d’accueil apparaît, il est Le statut du poste SIP de Behnke s’affiche à possible de passer à l’écran d’enregistrement l’écran. L’aide en ligne est accessible à tout ins- avec demande du mot de passe en cliquant sur tant via la touche «...
-
Seite 33: Dimensions
Instructions caméra IP Dimensions diMensions Avant Boîtier en saillie ou encastré Dimensions Ø 4 mm du boîtier : 207 x 107 x 31 mm Plaque de rue ▸ Cotes d’implantation du boîtier encastrable : 100 x 200 x 40 mm www.behnke-online.fr... -
Seite 34: Informations Légales
Instructions caméra IP Informations légales inforMations légales Informations relatives à la loi sur la responsabi- 1. Nous nous réservons le droit de modifier nos lité du fait des produits: produits en vertu des progrès techniques. En raison de l’évolution technique, les produits livrés peuvent avoir une apparence différente 1. -
Seite 35: Déclaration Ce
Instructions caméra IP Déclaration CE déclaration ce www.behnke-online.fr... - Seite 36 Version 1.0 Kirkel, février 2015 telecoM behnke gMbh Telecom Behnke GmbH Info-Hotline: +49 (0) 68 41 / 81 77-700 Gewerbepark „An der Autobahn“ Service-Hotline: +49 (0) 68 41 / 81 77-777 Robert-Jungk-Straße 3 Telefax: +49 (0) 68 41 / 81 77-750 66459 Kirkel info@behnke-online.de...