Riester ri-scope L Gebrauchsanweisung
Vorschau ausblenden
Andere Handbücher für ri-scope L:
- Gebrauchsanweisung (64 Seiten) ,
- Gebrauchsanweisung (76 Seiten)
Inhaltsverzeichnis
Quicklinks
ri-scope
ri-scope
ri-derma
Gebrauchsanweisung
Diagnostische Instrumente
Instructions
Diagnostic Instruments
Mode d' emploi
Instruments diagnostiques
Instrucciones para el uso
Instrumentos diagnósticos
Инструкция по эксплуатации
Диагностические приборы
Istruzioni per I' uso
Strumenti diagnostici
L
®
L
®
Kapitel
Inhaltsverzeichnis

Verwandte Anleitungen für Riester ri-scope L


Inhaltszusammenfassung für Riester ri-scope L
- Seite 1 ri-scope ® ri-scope ® ri-derma Gebrauchsanweisung Diagnostische Instrumente Instructions Diagnostic Instruments Mode d’ emploi Instruments diagnostiques Instrucciones para el uso Instrumentos diagnósticos Инструкция по эксплуатации Диагностические приборы Istruzioni per I’ uso Strumenti diagnostici...
-
Seite 2: Inhaltsverzeichnis
Inhaltsverzeichnis Wichtige Informationen zur Beachtung vor Inbetriebnahme Sicherheitssymbole Verpackungssymbole Kontraindikation 1.4. Bestimmungsgemäße Patientenpopulation Bestimmungsgemäße Betreiber/Benutzer Erforderliche Fähigkeiten/Schulung der Bediener Umweltbedingungen Warnungen/Achtung Lieferumfang Batteriegriffe Inbetriebnahme (Einlegen und Entnehmen von Batterien und Akkus) Laden der Batteriegriffe mit Akkus: Aufsetzen von Instrumentenköpfen ri-scope® L Otoskope ri-scope®... -
Seite 5: Wichtige Informationen Zur Beachtung Vor Inbetriebnahme
Sie sie gut auf. Sollten Sie Fragen haben, stehen wir, oder der für Sie zuständige Vertreter für Riester Produkte, Ihnen jederzeit gerne zur Verfügung. Unsere Adresse finden Sie auf der letzten Seite dieser Gebrauchsanweisung. Die Adresse unseres Ver- treters erhalten Sie gerne auf Anfrage. -
Seite 6: Sicherheitssymbole
1.1. Sicherheitssymbole Symbol Hinweis Befolgen Sie die Anweisungen in der Bedienungsanleitung. Type B Anwendungsteil Medizinisches Gerät Schutzgeräte der Klasse II Warnung! Das allgemeine Warnzeichen weist auf eine möglicherweise gefährliche Situation hin, die zu schweren Verletzungen führen kann. Achtung! Wichtiger Hinweis in dieser Anleitung. Das Achtungssymbol weist auf eine potenziell gefährliche Si- tuation hin, die zu leichten oder mittelschweren Verletzungen führen kann. -
Seite 7: Verpackungssymbole
Bitte beachten Sie ferner, dass die einwandfreie und sichere Funktion unserer Instrumente nur dann gewährleistet wird, wenn sowohl die Instrumente als auch deren Zubehör ausschließlich aus dem Hause Riester verwendet wer- den. Die Verwendung von anderem Zubehör kann erhöhte Elektromagnetische Störaussendungen oder eine geminderte elektromagnetische Störfestigkeit... -
Seite 8: Warnungen/Achtung
Die perfekte und sichere Funktion der ri-scope L Instrumente ist nur ® garantiert, wenn Originalteile und Zubehör von Riester verwendet werden. Die Entsorgung alter elektronischer Geräte muss im Einklang mit den instituti- onellen Richtlinien für die Entsorgung abgelaufener Geräte stehen. -
Seite 9: Lieferumfang
Fehlfunktionen, die auf unsachgemäße Verwendung, fehlerhafte Wartung, un- sachgemäße Reparatur, Beschädigung oder Änderung durch andere Personen als Riester oder autorisiertes Servicepersonal zurückzuführen sind. Alle im Zusammenhang mit dem Produkt auftretenden schwerwiegenden Vor- fälle sind dem Hersteller und der zuständigen Behörde des Mitgliedstaates, in dem der Anwender und / oder der Patient niedergelassen ist, zu melden. - Seite 10 10573-203 ri-scope L3 LED 3,5V ohne Diebstahlsicherung, ® Maximalausführung 10573-301 ri-scope L3 XL 3,5V mit Diebstahlsicherung, Maximalausführung ® 10596-301 ri-scope L3 LED 3,5V mit Diebstahlsicherung, ® Maximalausführung 3700 ri-scope L Otoskop L1 XL 2,5 V, Griff C für 2 Alkaline-Batterien ®...
- Seite 11 10546 ri-scope L retinoskop Punkt ohne Diebstahlsicherung XL 3,5V ® 10546-301 ri-scope L retinoskop Punkt mit Diebstahlsicherung XL 3,5V ® 3410 ri-scope L retinoskop Strich HL 2,5V im Etui mit Rheotronic ® und 2 Batterien Typ C 3430 ri-scope L retinoskop Punkt HL 2,5V im Etui mit Rheotronic ®...
-
Seite 12: Batteriegriffe
2 h andelsübliche A lkaline B atterien T yp C B aby ( IECNormbezeichnung L R14) o der e inen r i-‐accu® - 1 Akku von Riester mit 3,5 V (Art.Nr. 10691 ri-accu ®... -
Seite 13: Inbetriebnahme (Einlegen Und Entnehmen Von Batterien Und Akkus)
Findet während dem Ladevorgang (Batteriegriff Typ C mit USB Ladetechnik Art. Nr. 10704) eine Untersuchung am Patienten statt, darf nur das Medizinische Netzteil von Riester Art.Nr. 10709 verwendet werden, da dieses ME System nach Norm IEC 60601-1:2005 (Third Edition) + CORR. 1:2006 + CORR. 2:2007 +A1:2012 geprüft wurde und Medizinisch zugelassen ist. -
Seite 14: Laden Der Batteriegriffe Mit Akkus
4.2. Batteriegriff (2.6) Typ C mit rheotronic 3,5 V (für Steckerladegerät). ® - Er kann nur mit dem Steckerladegerät (Art.Nr. 10707) von Riester geladen werden. Dazu wird der kleine runde Stecker am Unterteil des Batteriegriffes durch die Öffnung im Batteriegriffdeckel in den Akku (Art.Nr. 10694 ri-accu L) einge- ®... -
Seite 15: Entsorgung
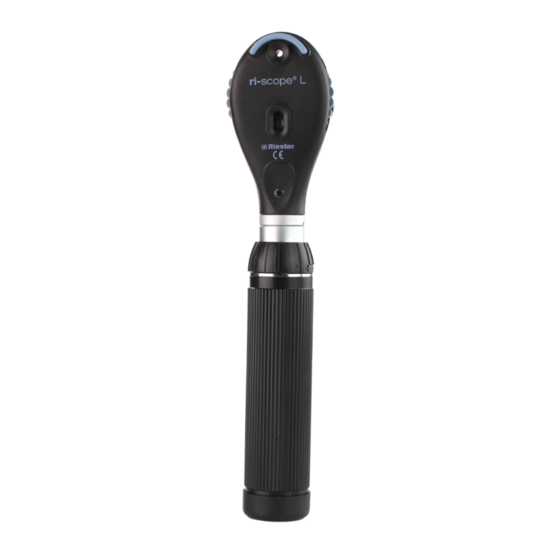
3) Schwenkbare Linse 3 fach Vergrößerung 4) OP Linse 5) Drücker für Ohrtrichter Abwurf (nur L3) 6.1. Zweckbestimmung/Indikation Das in dieser Gebrauchsanweisung beschriebene Riester Otoskop wird zur Be- leuchtung und Untersuchung des Gehörganges in Kombination mit den Riester Ohrtrichtern produziert. -
Seite 16: Pneumatischer Test
6.2. Aufsetzen und Abnehmen von Ohrtrichtern Zur Bestückung des Otoskopkopfes können wahlweise Einmal-Ohtrichter von Riester (in schwarzer Farbe) oder wiederverwendbare Ohrtrichter von Riester (in schwarzer Farbe) gewählt werden. Die Größe des Ohrtrichters ist hinten am Trichter gekennzeichnet. Otoskop L1 und L2 Drehen Sie den Trichter in Richtung Uhrzeigersinn bis ein Widerstand spürbar... - Seite 17 anderen ophthalmologischen Instrument untersucht wurde. Dies trifft insbe- sondere dann zu, wenn das Auge einer Netzhautfotografie ausgesetzt war. Das Licht dieses Instruments ist möglicherweise schädlich. Das Risiko einer Augenschädigung erhöht sich mit der Bestrahlungsdauer. Eine Bestrahlungs- dauer mit diesem Instrument bei maximaler Intensität von länger als >5 min. führt zur einer Überschreitung des Richtwertes für Gefährdungen.
-
Seite 18: Vergrößerungslupe
Lichteinwirkung die Netzhaut beschädigt werden. Das Produkt ist unsteril. Nicht auf verletztem Gewebe verwenden. Verwenden Sie nur Zubehör / Verbrauchsmaterialien aus dem Hause Riester oder von Riester freigegebenes Zubehör / Verbrauchsmaterialien. Reinigungshäufigkeit und -Ablauf müssen den Vorschriften für die Reinigung von unsterilen Produkten in der jeweiligen Einrichtung entsprechen. -
Seite 19: Dermatoskop
Die Instrumentenköpfe und Batteriegriffe dürfen niemals in Flüssigkeiten ge- legt werden. Das Produkt ist unsteril. Nicht auf verletztem Gewebe verwenden. Verwenden Sie nur Zubehör / Verbrauchsmaterialien aus dem Hause Riester oder von Riester freigegebenes Zubehör / Verbrauchsmaterialien. Reinigungshäufigkeit und -Ablauf müssen den Vorschriften für die Reinigung von unsterilen Produkten in der jeweiligen Einrichtung entsprechen. -
Seite 20: Fokussierung
Gemischen oder Gemischen von Pharmazeutika betrieben wird. Die Instrumentenköpfe und Batteriegriffe dürfen niemals in Flüssigkeiten ge- legt werden. Verwenden Sie nur Zubehör / Verbrauchsmaterialien aus dem Hause Riester oder von Riester freigegebenes Zubehör / Verbrauchsmaterialien. Reinigungshäufigkeit und -ablauf müssen den Vorschriften für die Reinigung von unsterilen Produkten in der jeweiligen Einrichtung entsprechen. -
Seite 21: Nasenspekulum
Die Instrumentenköpfe und Batteriegriffe dürfen niemals in Flüssigkeiten ge- legt werden. Verwenden Sie nur Zubehör/Verbrauchsmaterialien aus dem Hause Riester oder von Riester freigegebenes Zubehör/Verbrauchsmaterialien. Reinigungshäufigkeit und -ablauf müssen den Vorschriften für die Reinigung von unsterilen Produkten in der jeweiligen Einrichtung entsprechen. Reinigung /Desinfektionshinweise der Gebrauchsanweisung müssen beachtet werden. -
Seite 22: Zungenspatelhalter
Die Instrumentenköpfe und Batteriegriffe dürfen niemals in Flüssigkeiten ge- legt werden. Verwenden Sie nur Zubehör/Verbrauchsmaterialien aus dem Hause Riester oder von Riester freigegebenes Zubehör/Verbrauchsmaterialien. Reinigungshäufigkeit und -ablauf müssen den Vorschriften für die Reinigung von unsterilen Produkten in der jeweiligen Einrichtung entsprechen. Reinigung /Desinfektionshinweise der Gebrauchsanweisung müssen beachtet werden. -
Seite 23: Technische Daten Zur Lampe Spatelhalter Xl
Ohrtrichter. Die Entsorgung gebrauchter Ohrtrichter hat in Übereinstimmung mit den ak- tuellen medizinischen Praktiken bzw.den lokalen Vorschriften bezüglich der Entsorgung von infektiösem, biologischem medizinischem Abfall zu erfolgen. Verwenden Sie nur Zubehör/Verbrauchsmaterialien aus dem Hause Riester oder von Riester freigegebenes Zubehör/Verbrauchsmaterialien. -
Seite 24: Bestimmungsgemäße Patientenpopulation
3) Lupe 4) Bajonettverschluss 15.1. Zweckbestimmung/Indikation Das in dieser Gebrauchsanweisung beschriebene Riester Operationsotoskop wird zur Beleuchtung und Untersuchung des Gehörganges sowie für das Ein- führen von externen Instrumenten in den Gehörgang produziert. 15.2 Aufsetzen und Abnehmen von Ohrtrichtern für Humanmedizin Setzen Sie den gewünschten Trichter auf die schwarze Halterung am Operati-... -
Seite 25: Auswechseln Der Lampe
16. Auswechseln der Lampe Otoskop L1 Nehmen Sie die Trichteraufnahme vom Otoskop ab. Drehen Sie die Lampe entgegen den Uhrzeigersinn heraus. Drehen Sie die neue Lampe in Richtung Uhrzeigersinn fest und setzen Sie die Trichteraufnahme wieder auf. 16.1. Otoskope L2, L3, ri-derma, Lampenträger, Nasenspekulum und Spa- telhalter Drehen Sie den Instrumentenkopf vom Batteriegriff ab. -
Seite 26: Aufbereitung Von Wiederverwendbaren
Materialverschlechterung nicht mehr wiederverwendet und gemäß dem unter Entsorgung / Garantie beschriebenen Verfahren entsorgt / beansprucht werden 17.3. Aufbereitung von wiederverwendbaren Ohrtrichtern Reinigung: Manuell Ausstattung: mild alkalischer Reiniger (z.B. neodisher Mediclean, Dr. Weigert 404333 wurde validiert) 15°C-50C°, Reinigungsbürste (Interlock 09098 und 09050 wurden validiert), Leitungswasser/Fließwasser 20±2C°... - Seite 27 Pack. à 6 St. Lampen XL 2,5 V, Ophthalmoskop ri-mini/ri-scope® L1, L2, L3, e-scope® u. ri-derma® Art.-Nr.: 10626 LED 2,5 V für ri-scope®L Otoskop L2/L3 Kelvin = 4000, CRI = 92 Art.-Nr.: 10624 LED 2,5 V für ri-scope®L Ophthalmoskop L1/L2/L3 Kelvin = 4000, Art.-Nr.: 10627 LED 3,5V für ri-scope Ophth.
-
Seite 28: Wartung
Die Instrumente und deren Zubehör bedürfen keiner speziellen Wartung. Sollte ein Instrument aus irgendwelchen Gründen überprüft werden müssen, schi- cken Sie es bitte an uns oder an einen autorisierten Riester Fachhändler in Ihrer Nähe, den wir Ihnen auf Anfrage gerne benennen. - Seite 29 Antennen, sollten nicht in einem gerin- geren Abstand als 30 cm (12 Inch) zu den vom Hersteller bezeichneten Teilen und Leitungen der ri-scope L Instrumenten-Köpfe mit Handgriffen verwendet werden. Eine Nichtbeachtung kann zu einer Minderung der Leistungsmerkma- le des Geräts führen.
- Seite 30 Leitlinien und Herstellererklärung – elektromagnetische Immunität Die ri-scope®L Instrumente sind für den Betrieb in einer wie unten ange- gebenen elektromagnetischen Umgebung bestimmt. Der Kunde oder der Anwender des ri-scope®L sollte sicherstellen, dass es in einer solchen Umgebung benutzt wird. Elektromagneti- IEC 60601 Immunitätstest Konformität...
- Seite 31 Leitlinien und Herstellererklärung – elektromagnetische Immunität Die ri-scope®L Instrumente sind für den Betrieb in einer wie unten ange- gebenen elektromagnetischen Umgebung bestimmt. Der Kunde oder der Anwender des ri-scope®L sollte sicherstellen, dass es in einer solchen Umgebung benutzt wird. Kon- Immuni- IEC 60601 Elektromagnetische Umge-...
- Seite 32 HF-Sendern beurteilen zu können, sollte eine elektromagnetische Untersu- chung in Betracht gezogen werden. Wenn die gemessene Feldstärke an dem Ort, an dem das ri-scope L verwendet wird, den oben genannten RF-Überein- stimmungsgrad überschreitet, sollte das ri-scope L beobachtet werden, um den normalen Betrieb zu überprüfen.
-
Seite 33: Verfügung
Überprüfungen oder Reparaturen nach Ablauf der Garantiezeit nehmen wir selbstverständlich gerne gegen Berechnung vor. Unverbindliche Kostenvoran- schläge können Sie ebenfalls gerne kostenlos bei uns einholen. Im Fall einer Garantieleistung oder Reparatur bitten wir Sie, das Riester Pro- dukt mit komplett ausgefüllter Garantiekarte an folgende Adresse zurückzu- senden: Rudolf Riester GmbH Reparaturen Abt. - Seite 34 Table of Contents Important information to note before commissioning Safety symbols Packaging symbols Contraindication 1.4. Intended patient population Intended operators/users Required skills/operator training Environmental conditions Warnings/caution Scope of delivery Battery handles Commissioning (inserting and removing batteries and rechargeable batteries) Charging battery handles with rechargeable batteries Attaching instrument heads ri-scope®...
-
Seite 37: Important Information To Note Before Commissioning
Regulation (EU) 2017/75 for medical devices and subject at all times to the strictest quality controls. The outstanding quality guarantees reliable diagnoses. This user manual describes the use of the Riester battery handles of the ri-scope® or ri-derma instrument heads and their accessories. -
Seite 38: Safety Symbols
1.1.Safety symbols Symbol Note on symbol Follow the instructions in the user manual. Type B applied part Medical device Class II protective devices Warning! The general warning symbol indicates a potentially dangerous situation that can lead to serious injuries. Caution! Important note in this manual. -
Seite 39: Packaging Symbols
Please note that the proper and safe functioning of our instruments is only guaranteed if both the instruments and their accessories are exclusively from Riester. The use of other accessories may result in increased electromagnetic emissions or reduced electromagnetic immunity of the device and may lead to incorrect operation. - Seite 40 Electric shock! The housing of the ri-scope L may only be opened by authorised persons. Damage to the device due to a fall or strong ESD influence! If the device is not functioning, it must be returned to the manufacturer for repair.
-
Seite 41: Scope Of Delivery
L1, XL, 3.5 V, with anti-theft device, direct illumination 10564 ri-scope L2, XL, 2.5 V, without anti-theft device, fibre optics 0580 ri-scope L 2, XL, 3.5 V, without anti-theft device, fibre optics 10565 ri-scope L2 LED, 3.5 V, without anti-theft device, fibre optics 10580-301 ri-scope L2 XL, 3.5 V, with anti-theft device, fibre optics... - Seite 42 10569-203 ri-scope L1 LED, 3.5 V, without anti-theft device, basic model 10569-301 ri-scope L1 XL, 3.5 V, with anti-theft device, basic model 10594-301 ri-scope L1 LED, 3.5 V, with anti-theft device, basic model 10570 ri-scope L2 XL, 2.5 V, without anti-theft device, enhanced basic model 10571 ri-scope L2 XL, 3.5 V, without anti-theft device, enhanced basic model 10571-203...
- Seite 43 or ri-accu® 3723 ri-scope® L ophthalmoscope L2 XL, 2.5 V, handle C for 2 alkaline C batteries or ri-accu® 3716 ri-scope® L F.O. otoscope L2 XL, 2.5 V, handle C for 2 alkaline C batteries or ri-accu® 3701 ri-scope® L F.O. otoscope L3 XL, 2.5 V, handle C for 2 alkaline C batteries or ri-accu®...
- Seite 44 3747 ri-scope® L F.O. otoscope L2/ophthalmoscope L1 XL, 2.5 V, handle for 2 AA alkaline batteries or ri-accu® 3743 ri-scope® L otoscope/ophthalmoscope L1 XL, 2.5 V, handle for 2 alkaline C batteries or ri-accu® 3751 ri-scope® L F.O. otoscope L2/ophthalmoscope L2 XL/XL, 2.5 V for 2 alkaline C batteries or ri-accu®...
- Seite 45 3801-550 Ri-vision with spot retinoscope XL, 3.5 V, in case with rheotronic and ri-accu L 10551 ri-derma dermatoscope head XL, 3.5 V 10551-301 ri-derma dermatoscope head XL, 3.5 V, with anti-theft device 10577 ri-derma dermatoscope head LED, 3.5 V 10577-301 ri-derma dermatoscope head LED, 3.5 V, with anti-theft device 3390 ri-derma dermatoscope XL, 2.5 V, with C handle...
- Seite 46 2. Battery handles and commissioning 2.1.Purpose/indication The Riester battery handles described in this manual are used to power the in- strument heads (the lamps are incorporated into the corresponding instrument heads). They also serve as a holder. Battery handles in conjunction with plug-in charger for ri-accu®...
- Seite 47 dard LR14) alkaline batteries or a ri-accu® 2.5 V. The handle of the Riester Für r i-‐scope®L O toskope, r i-‐scope®L O phthalmoskope, p erfect, H .N.O, p raktikant, d e l uxe®, V et, R etinoskope ...
-
Seite 48: Inserting The Batteries
3. Operation (inserting and removing batteries and rechargeable batteries) CAUTION! Use only the combinations described under 2.3 to 2.8! 3.1. Inserting the batteries: Battery handles (2.3 and 2.7) type C and AA with rheotronic® 2.5 V: - Unscrew the battery handle cover on the lower part of the handle in an anti- clockwise direction. -
Seite 49: Charging Battery Handles With Rechargeable Batteries
4.2. Battery handle (2.6) type C with rheotronic® 3.5 V (for plug-in charger). - It can only be charged with the plug-in charger (art.no. 10707) from Riester. For this purpose, the small round plug at the bottom of the battery handle is plugged into the rechargeable battery at the opening in the battery handle cover (art.no. -
Seite 50: Ri-Scope® L Otoscopes
6.2. Attaching and removing ear specula The otoscope head can take either disposable Riester ear specula (in black) or reusable Riester ear specula (in black). The size of the ear speculum is marked at the back of the speculum. Otoscope L1 and L2 Turn the speculum clockwise until you feel resistance. - Seite 51 7.1. Purpose/indication The Riester ophthalmoscope described in these instructions for use is produced for examination of the eye and fundus. CAUTION! Because prolonged intense exposure to light can damage the retina, the use of the eye exam device should not be unnecessarily prolonged, and the brightness setting should not be set higher than needed for a clear representation of the target structures.
-
Seite 52: Slit And Spot Retinoscopes
The product is non-sterile. Do not use on injured tissue. Only use Riester or Riester-approved accessories/consumables. Cleaning frequency and sequence must comply with the cleaning regulations of non-sterile products in the respective facility. Cleaning/disinfection instructions in the instructions for use must be observed. -
Seite 53: Environmental Conditions
The instrument heads and battery handles must never be placed in liquids. The product is non-sterile. Do not use on injured tissue. Only use Riester or Riester-approved accessories/consumables. Cleaning frequency and sequence must comply with the cleaning regulations of non-sterile products in the respective facility. Cleaning/disinfection instructions in the instructions for use must be observed. -
Seite 54: Lamp Holder
The instrument heads and battery handles must never be placed in liquids. Only use Riester or Riester-approved accessories/consumables. Cleaning frequency and sequence must comply with the cleaning regulations of non-sterile products in the respective facility. Cleaning/disinfection instructions in the instructions for use must be observed. -
Seite 55: Nasal Speculum
The instrument heads and battery handles must never be placed in liquids. Only use Riester or Riester-approved accessories/consumables. Cleaning frequency and sequence must comply with the cleaning regulations of non-sterile products in the respective facility. Cleaning/disinfection instructions in the instructions for use must be observed. -
Seite 56: Tongue Depressor Holder
The instrument heads and battery handles must never be placed in liquids. Only use Riester or Riester-approved accessories/consumables. Cleaning frequency and sequence must comply with the cleaning regulations of non-sterile products in the respective facility. Cleaning/disinfection instructions in the instructions for use must be observed. -
Seite 57: Operating Otoscope For Veterinary Medicine
4) Bayonet mount 14.1. Purpose/indication The Riester operating otoscope described in this user manual is produced exclusively for use on animals or for veterinary medicine and therefore has no CE marking. It can be used for illumination and examination of the auditory canal, as well as for minor operations in the auditory canal. -
Seite 58: Operating Otoscope For Human Medicine
3) Magnifying glass 4) Bayonet mount 15.1. Purpose/indication The Riester operating otoscope described in these operating Instructions is produced for illumination and examination of the auditory canal and for inserti- on of external instruments into the auditory canal. 15.2. Attaching and removing ear specula for human medicine. - Seite 59 The diagnostic instruments together with their handles can be cleaned on the outside using a damp cloth (if necessary, moistened with alcohol) until they are visually clean. Wipe with disinfectant (e.g. disinfectant Bacillol AF from Bode Chemie GmbH (time 30s)) only according to the instructions of use of the res- pective manufacturer of disinfectant.
-
Seite 60: Spare Parts And Accessories
Further information for the user: For information on cleaning and disinfection, refer to the current DIN EN ISO 17664 standard. The homepage of RKI Guideline – KRINKO/BfArM also regularly provides infor- mation about developments regarding cleaning and disinfection for the repro- cessing of medical devices. -
Seite 61: Maintenance
The instruments and their accessories require no special maintenance. If an instrument needs to be tested for any reason, please send it to us or an au- thorised Riester dealer in your area, the details of which we will provide upon request. -
Seite 62: Electromagnetic Compatibility
30 cm (12 inches) to parts and cables of the ri-scope L instrument head specified by the manufacturer. Failure to comply may result in a reduction of the device‘s performance characteristics. - Seite 63 Guidelines and manufacturer's declaration – electromagnetic immunity The ri-scope®L instruments are intended for use in the electromagnetic en- vironment specified below. The customer or user of the ri-scope® L should ensure that it is used in such an environment. Electromagnetic IEC 60601 Immunity testing Compliance...
- Seite 64 Guidelines and manufacturer's declaration – electromagnetic immunity The ri-scope®L instruments are intended for use in the electromagnetic environment specified below. The customer or user of the ri-scope® L should ensure that it is used in such an environment. Immunity IEC 60601 Compli- Electromagnetic en- testing...
- Seite 65 L. The ri-scope® L is intended for use in an electromagnetic environment in which RF emissions are controlled. The customer or user of the ri-scope L can help to avoid electromagnetic interference by observing the minimum...
-
Seite 66: Disposal
We are of course happy to charge for checks or repairs after the expiry of the warranty period. We also offer free, no-obligation quotes. In case of warranty service or repair, we ask you to return the Riester product with the completed warranty card to the following address: Rudolf Riester GmbH Repairs dept. - Seite 68 Table des matières Informations importantes avant la mise en service Symboles de sécurité Symboles de l‘emballage Contre-indication 1.4. Population de patients visée Opérateurs / utilisateurs prévus Compétences requises / formation des opérateurs Conditions environnementales Avertissements / Attention Contenu de la livraison Manches à...
- Seite 71 1.Informations importantes avant la mise en service Vous avez acheté un kit de diagnostic Riester de haute qualité, fabriqué con- formément au règlement (UE) 2017/75 sur les dispositifs médicaux et soumis aux contrôles de qualité les plus stricts tout au long de sa fabrication. Son excellente qualité...
-
Seite 72: Symboles De Sécurité
1.1.Symboles de sécurité Symbole Remarque sur le symbole Suivez les instructions du mode d'emploi. Pièce appliquée de type B Appareil médical Appareil à protection de classe II Avertissement ! Le signe d'avertissement général indique une situation po- tentiellement dangereuse pouvant entraîner des blessures graves. -
Seite 73: Symboles De L'emballage
Veuillez noter qu‘une utilisation normale et en toute sécurité de nos instru- ments n‘est garanti que si les instruments et leurs accessoires sont tous deux exclusivement de la marque Riester. L‘utilisation d‘autres accessoires peut aug- menter les émissions électromagnétiques ou réduire l‘immunité électromagné- tique de l‘appareil et peut entraîner un dysfonctionnement. - Seite 74 Décharge électrique ! Le boîtier du ri-scope L ne peut être ouvert que par des personnes autorisées. Dommage à l‘appareil en raison d‘une chute ou d‘une forte influence électrost- atique ! Si l‘appareil ne fonctionne pas, il doit être renvoyé...
-
Seite 75: Contenu De La Livraison
Riester ou autorisé. Tout incident grave survenu en rapport avec l‘appareil doit être signalé au fa- bricant et à l‘autorité compétente de l‘État membre dans lequel l‘utilisateur et / ou le patient est établi. - Seite 76 3700 Otoscope ri-scope® L L1 XL, 2,5 V, manche C pour 2 piles alcalines C ou ri-accu® 3701 Otoscope F.O. ri-scope® L L3 XL, 2,5 V, manche C pour 2 piles alcalines C ou ri-accu® 3705 Otoscope ri-scope® L L1 XL, 2,5 V, manche AA pour 2 piles alcalines AA ou ri-accu®...
- Seite 77 XL, 3,5 V, manche pour ri-accu® L 3748 Otoscope F.O. L2 / ophtalmoscope L1 ri-scope® L LED / LED, 2,5 V, manche AA pour 2 piles alcalines AA ou ri-accu® 3748-550 Otoscope F.O. L2 / ophtalmoscope L1 ri-scope® L LED / XL 3,5 V, manche AA pour ri-accu®...
- Seite 78 2. Manches à piles et mise en service 2.1. Usage / Indication Les manches à piles Riester décrits dans ce manuel d‘utilisation sont utilisés pour alimenter les têtes d‘instruments (les lampes sont intégrées dans les tê- tes d‘instruments correspondantes). Ils servent également de support. Man- ches à...
-
Seite 79: Mise En Service
Batteriegriff T yp C m it r heotronic® 3 ,5V u nd m it r i-‐accu®USB L adetechnik - 1 batterie rechargeable Riester, 3,5 V (n° d‘art. 10699 ri-accu® USB) enthält: ... -
Seite 80: Chargement Des Manches À Piles Avec Des Batteries Rechargeables
4.1. Manches à piles (2,4 et 2,8) de type C et AA avec rheotronic® 3,5 V (pour le ri-charger® L). - Uniquement rechargeable avec le chargeur ri-charger® L (n° d‘art. 10705, n° d‘art. 10706) de Riester. - Le chargeur ri-charger® L est livré avec un manuel d‘utilisation supplémen- taire contenant des instructions à respecter. -
Seite 81: Mise En Place Des Têtes D'instruments
MISE EN GARDE ! Avant d‘utiliser le manche à prise pour la première fois, celui-ci doit être chargé dans la prise pendant 24 heures maximum. MISE EN GARDE ! Le manche à prise ne doit pas être chargé pendant plus de 24 heures. MISE EN GARDE ! Le manche ne doit jamais être branché... -
Seite 82: Otoscopes Ri-Scope® L
6.2. Montage et démontage du spéculum auriculaire La tête de l‘otoscope peut recevoir des spéculums auriculaires Riester jetables (en noir) ou des spéculums auriculaires Riester réutilisables (en noir). La taille du spéculum auriculaire est indiquée à l‘arrière du spéculum. Otoscopes L1 et L2 Tournez le spéculum dans le sens des aiguilles d‘une montre jusqu‘à... - Seite 83 MISE EN GARDE ! Étant donné qu‘une exposition prolongée à une lumière intense peut endom- mager la rétine, l‘utilisation de l‘appareil pour un examen oculaire ne doit pas être inutilement prolongée, et le réglage de la luminosité ne doit pas être plus élevé...
-
Seite 84: Rétinoscopes À Fente Et À Spot
Le produit n‘est pas stérile. Ne pas utiliser sur des tissus blessés. Utiliser uniquement des accessoires et consommables fabriqués ou approuvés par Riester. La fréquence et les pratiques de nettoyage doivent être compatibles avec la politique institutionnelle de nettoyage des appareils non stériles. Veuillez vous conformer aux instructions de nettoyage et de désinfection du manuel d‘utili-... -
Seite 85: Compétences Requises / Formation Des Opérateurs
Le produit n‘est pas stérile. Ne pas utiliser sur des tissus blessés. Utiliser uniquement des accessoires et consommables fabriqués ou approuvés par Riester. La fréquence et les pratiques de nettoyage doivent être compatibles avec la politique institutionnelle de nettoyage des appareils non stériles. Veuillez vous conformer aux instructions de nettoyage et de désinfection du manuel d‘utili-... -
Seite 86: Opérateurs / Utilisateurs Prévus
Les têtes d‘instruments et les manches à piles ne doivent jamais être plongés dans des liquides. Utiliser uniquement des accessoires et consommables fabriqués ou approuvés par Riester. La fréquence et les pratiques de nettoyage doivent être compatibles avec la politique institutionnelle de nettoyage des appareils non stériles. Veuillez vous conformer aux instructions de nettoyage et de désinfection du manuel d‘utili-... -
Seite 87: Compétences Requises / Formation Des Opérateurs
Les têtes d‘instruments et les manches à piles ne doivent jamais être plongés dans des liquides. Utiliser uniquement des accessoires et consommables fabriqués ou approuvés par Riester. La fréquence et les pratiques de nettoyage doivent être compatibles avec la politique institutionnelle de nettoyage des appareils non stériles. Veuillez vous conformer aux instructions de nettoyage et de désinfection du manuel d‘utili-... -
Seite 88: Support Pour Abaisse-Langue
Les têtes d‘instruments et les manches à piles ne doivent jamais être plongés dans des liquides. Utiliser uniquement des accessoires et consommables fabriqués ou approuvés par Riester. La fréquence et les pratiques de nettoyage doivent être compatibles avec la politique institutionnelle de nettoyage des appareils non stériles. Veuillez vous conformer aux instructions de nettoyage et de désinfection du manuel d‘utili-... -
Seite 89: Miroir Laryngien
4) Monture à baïonnette 14.1. Usage / Indication L‘otoscope opératoire Riester décrit dans ces instructions d‘utilisation est conçu exclusivement pour une utilisation sur les animaux et pour la médeci- ne vétérinaire et ne porte donc pas de marquage CE. Il peut être utilisé pour l‘éclairage et l‘examen du canal auditif, ainsi que pour des opérations mineures... -
Seite 90: Population De Patients Visée
3) Lentille grossissante 4) Monture à baïonnette 15.1. Usage / Indication L‘otoscope opératoire Riester décrit dans ce mode d‘emploi est conçu pour l‘éc- lairage et l‘examen du canal auditif et pour l‘insertion d‘instruments externes dans le canal auditif. 15.2. Mise en place et retrait de spéculums auriculaires à usage médical. -
Seite 91: Remplacement De L'ampoule
16. Remplacement de l‘ampoule Otoscope L1 Retirez le réceptacle à spéculums de l‘otoscope. Dévissez l‘ampoule dans le sens inverse des aiguilles d‘une montre. Serrez la nouvelle ampoule dans le sens des aiguilles d‘une montre et remettez le porte-spéculum en place. 16.1. - Seite 92 17.3. Retraitement des spéculums auriculaires réutilisables Nettoyage : manuel Équipement nécessaire : nettoyant alcalin doux (validation effectuée avec neo- disher Mediclean, Dr. Weigert 404333) 15 °C - 50 °C, brosse de nettoyage (vali- dation effectuée avec Interlock 09098 et 09050), eau du robinet / eau courante à...
-
Seite 93: Pièces De Rechange Et Accessoires
18. Pièces de rechange et accessoires Ampoules N° d‘art. : 10489 pack de 6 ampoules XL 2,5 V pour otoscopes pen-scope, ri-sco- pe® L1, e-scope® N° d‘art. : 10605 pack de 6 ampoules XL 2,5 V, pour ri-mini / ri-scope® L1, L2, L3, Ophtalmoscopes e-scope®... -
Seite 94: Entretien
Les instruments et leurs accessoires ne nécessitent aucun entretien particulier. Si un instrument doit être testé pour une raison quelconque, veuillez nous l‘en- voyer ou le faire parvenir à un revendeur Riester autorisé dans votre région, dont nous vous fournirons les coordonnées sur simple demande. - Seite 95 être utilisés à moins de 30 cm (12 pouces) des parties et des câbles de la tête d‘instrument ri-scope L. Le non-respect de cette consigne peut altérer les performances de l‘appareil.
- Seite 96 Directives et déclaration du fabricant - immunité électromagnétique Les instruments ri-scope® L sont destinés à être utilisés dans l‘environ- nement électromagnétique spécifié ci-dessous. Le client ou l‘utilisateur du ri-scope® L doit s‘assurer que celui-ci est utilisé dans un tel environne- ment.
- Seite 97 Directives et déclaration du fabricant - immunité électromagnétique Les instruments ri-scope® L sont destinés à être utilisés dans l‘environ- nement électromagnétique spécifié ci-dessous. Le client ou l‘utilisateur du ri-scope® L doit s‘assurer que celui-ci est utilisé dans un tel environne- ment.
- Seite 98 Le ri-scope® L est conçu pour être utilisé dans un environnement élec- tromagnétique dans lequel les émissions RF sont contrôlées. Le client ou l‘utilisateur du ri-scope L peut contribuer à prévenir les interférences électromagnétiques en maintenant une distance minimale entre les équipe- ments (émetteurs) de communication RF portables et mobiles et le ri-scope...
-
Seite 99: Recyclage
Nous proposons également des devis gratuits et sans engagement. En cas de demande de garantie ou de réparation, veuillez renvoyer le produit Riester avec la carte de garantie dûment remplie à l‘adresse suivante : Rudolf Riester GmbH Service des réparations RR Bruckstr. - Seite 100 Índice Información importante a tener en cuenta antes de la puesta en marcha Símbolos de seguridad Símbolos del embalaje Contraindicación 1.4. Población prevista de pacientes Operadores/usuarios previstos Habilidades requeridas/formación del operador Condiciones ambientales Advertencias/precaución Alcance de entrega Mangos de batería Puesta en servicio (inserción y extracción de baterías y pilas recargables) Mangos de carga de batería con pilas recargables...
- Seite 103 1.Información importante a tener en cuenta antes de la puesta en marcha Ha comprado un equipo de diagnóstico de alta calidad de Riester, fabricado de acuerdo con el Reglamento (UE) 2017/75 para dispositivos médicos y sujeto en todo momento a los más estrictos controles de calidad. La excelente calidad garantiza diagnósticos fiables.
-
Seite 104: Símbolos De Seguridad
1.1.Símbolos de seguridad Simbolo Nota sul simbolo Seguire le istruzioni riportate nel manuale d'uso. Parte applicata di tipo B Dispositivo medico Dispositivi con classe di protezione II Avvertenza! Il simbolo di avvertenza generale indica una situazione potenzi- almente pericolosa che può causare gravi infortuni. Attenzione! Nota importante in questo manuale. -
Seite 105: Condiciones Ambientales
Tenga en cuenta que el funcionamiento correcto y seguro de nuestros instru- mentos solo está garantizado si tanto los instrumentos como sus accesorios son exclusivamente de Riester. El uso de otros accesorios puede provocar un aumento de las emisiones electromagnéticas o una reducción de la inmunidad electromagnética del dispositivo y puede provocar un funcionamiento incorrec-... - Seite 106 Recomendamos retirar las pilas (recargables) del mango de la batería antes de limpiar o desinfectar. Limpie y desinfecte los dispositivos ri-scope L con cuidado para que no penetre líquido en el interior. ¡Nunca coloque los dispositivos encima de líquidos! Los instrumentos con mangos de batería se suministran sin esterilizar.
- Seite 107 Además, el usuario del dispositivo es el único responsable del mal funciona- miento resultante del uso incorrecto, mantenimiento incorrecto, reparación inadecuada, daños o cambios por personas que no sean empleados de Riester o personal de servicio autorizado. Se debe informar al fabricante y a la autoridad competente del Estado miembro en el que esté...
- Seite 108 10581-301 Ri-scope L3 XL, 3,5 V, con dispositivo antirrobo, fibra óptica 10567-301 Ri-scope L3 LED, 3,5 V, con dispositivo antirrobo, fibra óptica 10568 Ri-scope L1 XL, 2,5 V, sin dispositivo antirrobo, modelo básico 10569 Ri-scope L1 XL, 3,5 V, sin dispositivo antirrobo, modelo básico 10569-203 Ri-scope L1 LED, 3,5 V, sin dispositivo antirrobo, modelo básico 10569-301...
- Seite 109 3723 Oftalmoscopio ri-scope® L L2 XL, 2,5 V, mango C para 2 pilas alcalinas C o ri-accu® 3716 Otoscopio ri-scope® L F.O. L2 XL, 2,5 V, mango C para 2 pilas alcalinas C o ri-accu® 3701 Otoscopio ri-scope® L F.O. L3 XL, 2,5 V, mango C para 2 pilas alcalinas C o ri-accu®...
- Seite 110 alcalinas AA o ri-accu® 3743 Otoscopio/oftalmoscopio ri-scope® L L1 XL, 2,5 V, mango C para 2 pilas alca- linas C o ri-accu 3751 Otoscopio/oftalmoscopio ri-scope® L F.O. L2 L2 XL/XL, 2,5 V para 2 pilas alca- linas C o ri-accu® 3744-550 Otoscopio/oftalmoscopio ri-scope®...
- Seite 111 10551-301 Cabezal de dermatoscopio ri-derma XL, 3,5 V, con dispositivo antirrobo 10577 Cabezal de dermatoscopio ri-derma LED, 3,5 V 10577-301 Cabezal de dermatoscopio ri-derma LED, 3,5 V, con dispositivo antirrobo 3390 Dermatoscopio ri-derma XL, 2,5 V, con mango C 3777 Dermatoscopio ri-derma LED, 2,5 V, con mango C 3777-550 Dermatoscopio ri-derma LED, 3,5 V, con mango C...
- Seite 112 Baby (norma CEI LR14) o un ri-accu® 2,5 V. El mango del ri-accu® de Riester Für r i-‐scope®L O toskope, r i-‐scope®L O phthalmoskope, p erfect, H .N.O, p raktikant, d e l uxe®, V et, R etinoskope ...
-
Seite 113: Insertar Las Pilas:
2.8. Mango de batería tipo AA con rheotronic® 3,5 V (para ri-charger® L) Para usar este mango de batería necesita: - 1 pila recargable de Riester 3,5 V (nº de art.10690 ri-accu® L) - 1 cargador ri-charger® L (nº de art. 10705, nº de art. 10706) 3. - Seite 114 4.2. Mango de batería (2,6) tipo C con rheotronic® 3,5 V (para cargador en- chufable). - Solo se puede cargar con el cargador enchufable (nº de art. 10707) de Riester. Para este propósito, el pequeño enchufe redondo en la parte inferior del man- go de la batería se conecta a la pila recargable en la abertura de la tapa del...
- Seite 115 5) Pulsador para la expulsión del espéculo auricular (solo L3) 6.1. Finalidad/indicación El otoscopio de Riester descrito en estas instrucciones de uso ha sido creado para iluminar y explorar el conducto auditivo acoplado con uno de los espéculos auriculares de Riester .
-
Seite 116: Datos Técnicos De La Lámpara
5) Rueda de filtro 6) Cabezal de bayoneta 7.1. Finalidad/indicación El oftalmoscopio de Riester descrito en estas instrucciones de uso se ha fabri- cado para examinar el ojo y el fondo de ojo. PRECAUCIÓN Debido a que la exposición prolongada a luz intensa puede dañar la retina, el uso del dispositivo para la exploración ocular no debe prolongarse más de lo... - Seite 117 7.3. Aperturas Se pueden seleccionar las siguientes aperturas con la rueda de apertura ma- nual: Oftalmoscopio L1 Apertura semicircular pequeña/mediana/grande, estrella de fijación y hendi- dura. Oftalmoscopio L2 Apertura semicircular pequeña/mediana/grande, estrella de fijación y hendi- dura. Oftalmoscopio L3 Apertura semicircular pequeña/mediana/grande, estrella de fijación y hendi- dura.
-
Seite 118: Puesta En Marcha Y Funcionamiento
El producto no es estéril. No lo utilice sobre tejidos lesionados. Utilice únicamente accesorios/consumibles de Riester o aprobados por Riester. La frecuencia y la secuencia de limpieza deben cumplir con las normas de limpieza de productos no estériles en las instalaciones respectivas. Se deben tener en cuenta las instrucciones de limpieza/desinfección de las instrucciones... - Seite 119 El producto no es estéril. No lo utilice sobre tejidos lesionados. Utilice únicamente accesorios/consumibles de Riester o aprobados por Riester. La frecuencia y la secuencia de limpieza deben cumplir con las normas de limpieza de productos no estériles en las instalaciones respectivas. Se deben tener en cuenta las instrucciones de limpieza/desinfección de las instrucciones...
- Seite 120 Los cabezales de los instrumentos y los mangos de la batería nunca deben colocarse encima de líquidos. Utilice únicamente accesorios/consumibles de Riester o aprobados por Riester. La frecuencia y la secuencia de limpieza deben cumplir con las normas de limpieza de productos no estériles en las instalaciones respectivas. Se deben tener en cuenta las instrucciones de limpieza/desinfección de las instrucciones...
- Seite 121 Utilice únicamente accesorios/consumibles de Riester o aprobados por Riester. La frecuencia y la secuencia de limpieza deben cumplir con las normas de limpieza de productos no estériles en las instalaciones respectivas. Se deben tener en cuenta las instrucciones de limpieza/desinfección de las instrucciones de uso.
-
Seite 122: Puesta En Marcha
Los espejos laríngeos descritos en estas instrucciones de uso están fabricados para reflejar o examinar el área de la boca y la garganta en combinación con un soporte de lámpara de Riester. 13.2. Puesta en marcha Los espejos laríngeos solo se pueden utilizar en combinación con el portalám- paras. - Seite 123 14.1. Finalidad/indicación El otoscopio quirúrgico de Riester descrito en este manual de usuario ha sido fabricado exclusivamente para su uso en animales y para la medicina veterina- ria y, por lo tanto, no cuenta con el marcado CE. Se puede utilizar para la ilu- minación y exploración del canal auditivo, así...
- Seite 124 4) Montura de bayoneta 15.1. Finalidad/indicación El otoscopio quirúrgico de Riester descrito en estas instrucciones de funciona- miento ha sido fabricado para la iluminación y exploración del canal auditivo y para la inserción de instrumentos externos en el canal auditivo.
-
Seite 125: Limpieza Y Desinfección
17.2. Limpieza y desinfección Para evitar una posible contaminación cruzada, los instrumentos de diagnósti- co y sus mangos deben limpiarse y desinfectarse periódicamente. Los instrumentos de diagnóstico junto con sus mangos se pueden limpiar por fuera con un paño húmedo (si es necesario, humedecido con alcohol) hasta que estén visualmente limpios. - Seite 126 bricante (CIDEX OPA es una solución lista para usar; la concentración debe controlarse con tiras reactivas, consulte las instrucciones del fabricante) (CI- DEX OPA ha sido validado). 2. Sumerja completamente los espéculos auriculares en la solución desinfec- tante. 3. Tiempo de exposición de la solución desinfectante según las instrucciones del fabricante para la desinfección de alto nivel (se ha validado CIDEX OPA durante 12 minutos).
- Seite 127 Nº de art.: 10610 pack de 6 bombillas de xenón, 3,5 V, para lámpara de hendi- dura para retinoscopio Nº de art.: 10611 pack de 6 bombillas de xenón, 3,5 V, para lámpara de punto de retinoscopio Espéculos auriculares reutilizables para L1/L2 Nº...
-
Seite 128: Compatibilidad Electromagnética
30 cm (12 pulgadas) de las piezas y cables del cabezal del instrumento ri-scope L especificados por el fabricante. Si no se siguen estas instrucciones, es posible... - Seite 129 Guía y declaración del fabricante: emisiones electromagnéticas Los instrumentos ri-scope® L están diseñados para su uso en el entorno electromagnético especificado a continuación. El cliente o el usuario del ri-scope® L debe asegurarse de que se utiliza en dicho entorno. Entorno electromagnéti- Prueba de emisiones Cumplimiento...
- Seite 130 Guía y declaración del fabricante: inmunidad electromagnética Los instrumentos ri-scope® L están diseñados para su uso en el entorno electromagnético especificado a continuación. El cliente o el usuario del ri-scope® L debe asegurarse de que se utiliza en dicho entorno. Nivel de Entorno elec-...
- Seite 131 Guía y declaración del fabricante: inmunidad electromagnética Los instrumentos ri-scope® L están diseñados para su uso en el entorno electromagnético especificado a continuación. El cliente o el usuario del ri-scope® L debe asegurarse de que se utiliza en dicho entorno. Prueba de Nivel de prueba Entorno electromag-...
- Seite 132 L pueden ayudar a evitar las interferencias electromagnéticas manteniendo una distancia mínima entre los equipos portátiles y móviles de comunicación de RF (transmisores) y el ri-scope L, de acuerdo con la potencia de salida máxima del equipo de comunicaciones.
- Seite 133 También ofrecemos pre- supuestos gratuitos y sin compromiso. En caso de una reclamación de garantía o reparación, devuelva el producto de Riester con la tarjeta de garantía cumplimentada a la siguiente dirección: Rudolf Riester GmbH Repairs dept. RR Bruckstr.
- Seite 134 Sommario Informazioni importanti da tenere in considerazione prima della messa in servizio Simboli di sicurezza Simboli presenti sull‘imballaggio Controindicazioni 1.4. Popolazione di pazienti prevista Operatori/utenti destinatari Competenze/formazione richieste all‘operatore Condizioni ambientali Avvertenze / Attenzione Contenuto della confezione Manicia batteria Messa in servizio (inserimento e rimozione delle batterie e delle batterie ricaricabili) Manici carica batterie con batterie ricaricabili Applicazione delle teste degli strumenti...
-
Seite 137: Informazioni Importanti Da Tenere In Considerazione Prima Della Messa In Servizio
1.Informazioni importanti da tenere in considerazione prima della messa in servizio Avete acquistato un set diagnostico di alta qualità Riester, prodotto in confor- mità con ilRegolamento (UE) 2017/75 relativo ai dispositivi medici e sottoposto continuamente ai più severi controlli di qualità. L‘eccezionale qualità garantisce diagnosi affidabili. -
Seite 138: Simboli Di Sicurezza
1.1.Simboli di sicurezza Símbolo Nota sobre el símbolo Siga las instrucciones del manual de usuario. Componente aplicado de tipo B Dispositivo médico Dispositivos de protección de clase II ¡Advertencia! El símbolo general de advertencia indica una situación potenci- almente peligrosa que podría provocar lesiones graves. ¡Precaución! Nota importante en este manual. -
Seite 139: Controindicazioni
Si prega di notare che il funzionamento corretto e sicuro dei nostri strumenti è garantito solo se sia gli strumenti che i loro accessori provengono esclusiva- mente da Riester. L‘utilizzo di altri accessori può comportare un aumento delle emissioni elettromagnetiche o una riduzione dell‘immunità elettromagnetica del dispositivo e può... -
Seite 140: Avvertenze/Attenzione
Si consiglia di rimuovere le batterie (ricaricabili) dallmanico prima di procedere alla pulizia o disinfezione. Prestare attenzione durante la pulizia e la disinfezione dei dispositivi ri-scope L per far sì che non penetri alcun liquido al suo interno. Non immergere mai i dispositivi in liquidi! Gli strumenti con manici a batteria sono forniti in condizioni non sterili. -
Seite 141: Contenuto Della Confezione
Inoltre, è del solo utente del dispositivo la responsabilità di ogni malfunziona- mento risultante da uso improprio, manutenzione errata, riparazione improp- ria, danneggiamento o alterazione causati da soggetti diversi da Riester o dai suoi addetti all‘assistenza autorizzati. Eventuali incidenti gravi verificatisi in relazione al dispositivo devono essere segnalati al produttore e all‘autorità... - Seite 142 10568 Ri-scope L1 XL, 2,5 V, senza dispositivo antifurto, modello base 10569 Ri-scope L1 XL, 3,5 V, senza dispositivo antifurto, modello base 10569-203 Ri-scope L1 LED, 3,5 V, senza dispositivo antifurto, modello base 10569-301 Ri-scope L1 XL, 3,5 V, con dispositivo antifurto, modello base 10594-301 Ri-scope L1 LED, 3,5 V, con dispositivo antifurto, modello base 10570...
- Seite 143 3709-550 Otoscopio ri-scope® L F.O. L3 LED, 3,5 V, manico AA per ri-accu® L 3722 Oftalmoscopio ri-scope® L L1 XL, 2,5 V, manico C per 2 batterie alcaline tipo C o ri-accu® 3723 Oftalmoscopio ri-scope® L L2 XL, 2,5 V, manico C per 2 batterie alcaline tipo C o ri-accu®...
- Seite 144 3818-203 Otoscopio ri-scope® L F.O. L2/oftalmoscopio L1 LED, 3,5 V, manico AA per ri-accu® L 3747 Otoscopio ri-scope® L F.O. L2/oftalmoscopio L1 XL, 2,5 V, manico per 2 batterie alcaline tipo AA o ri-accu® 3743 Otoscopio ri-scope® L/oftalmoscopio L1 XL, 2,5 V, manico per 2 batterie alca- line tipo C o ri-accu®...
- Seite 145 Ri-vision con retinoscopio a spot HL, 2,5 V, in custodia con rheotronic e 2 bat- terie tipo C 3801-550 Ri-vision con retinoscopio a spot XL, 3,5 V, in custodia con rheotronic e ri-accu L 10551 Testa per dermatoscopio ri-derma XL, 3,5 V 10551-301 Testa per dermatoscopio ri-derma XL, 3,5 V, con dispositivo antifurto 10577...
- Seite 146 2. Manici batteria e messa in servizio 2.1. Scopo/indicazione i manici a batterie Riester descritte in questo sono utilizzati per alimentare le teste degli strumenti (le lampade sono integrate nelle teste degli strumenti cor- rispondenti). Fungono anche da supporto. manici a batteria in combinazione con caricabatterie plug-in perri-accu®...
- Seite 147 2,5 V . D er G riff m it d em r i-‐accu® v on R iester k ann n ur i m L adegerät r i-‐charger® v on R iester - 1 batteria ricaricabile Riester, 3,5 V (cod. art. 10691 ri-accu® L).
-
Seite 148: Inserimento Delle Batterie
4. Manici carica batterie con batterie ricaricabili 4.1. Manici a batteria (2.4 e 2.8) C e AA con ® 3,5 V (per ri-charger® L). - Può essere ricaricato solo nel caricabatterie ri-charger® L (cod. art. 10705, cod. art. 10706) Riester. -
Seite 149: Smaltimento
- Il caricabatterie ri-charger® L viene fornito con un manuale d‘uso aggiuntivo che dev‘essere osservato. 4.2. manico a batteria (2.6) C con ® 3,5 V (per caricabatterie plug-in). - Può essere ricaricata solo con il caricabatterie plug-in (cod. art. 10707) Ries- ter. -
Seite 150: Oftalmoscopi Ri-Scope® L
6.2. Applicazione e rimozione degli specula auricolari La testa dell‘otoscopio può accogliere sia specula Riester monouso (di colore nero) che specula Riester riutilizzabili (di colore nero). La misura dello specu- lum auricolare è indicata sul suo lato posteriore. Otoscopio L1 e L2 Ruotare lo speculum in senso orario fino a quando si avverte resistenza. - Seite 151 ATTENZIONE Dal momento che un‘esposizione prolungata alla luce intensa può danneggiare la retina, l‘uso del dispositivo per l‘esame dell‘occhio non deve essere inutil- mente prolungato e l‘intensità luminosa impostata non deve essere superiore a quella necessaria a una chiara visione delle strutture in esame. La dose di esposizione della retina che costituisce un pericolo fotochimico di- pende dalla radianza e dal tempo di esposizione.
-
Seite 152: Retinoscopi A Fessura E A Spot
Il prodotto non è sterile. Non utilizzare su tessuti lesionati. Usare solo accessori/materiali di consumo Riester o approvati da Riester. Frequenza e metodi di pulizia devono essere conformi ai regolamenti per la pulizia dei dispositivi non sterili vigenti nella struttura interessata. -
Seite 153: Competenze/Formazione Richieste All'operatore
Il prodotto non è sterile. Non utilizzare su tessuti lesionati. Usare solo accessori/materiali di consumo Riester o approvati da Riester. Frequenza e metodi di pulizia devono essere conformi ai regolamenti per la pulizia dei dispositivi non sterili vigenti nella struttura interessata. È necessario attenersi alle istruzioni per la pulizia e la disinfezione specificate nelle istruzioni per l‘uso. -
Seite 154: Condizioni Ambientali
Le teste degli strumenti e i manici a batterie non devono mai essere immerse in liquidi. Usare solo accessori/materiali di consumo Riester o approvati da Riester. Frequenza e metodi di pulizia devono essere conformi ai regolamenti per la pulizia dei dispositivi non sterili vigenti nella struttura interessata. È necessario attenersi alle istruzioni per la pulizia e la disinfezione specificate nelle istruzioni per l‘uso. -
Seite 155: Controindicazioni
Le teste degli strumenti e i manici a batterie non devono mai essere immerse in liquidi. Usare solo accessori/materiali di consumo Riester o approvati da Riester. Frequenza e metodi di pulizia devono essere conformi ai regolamenti per la pulizia dei dispositivi non sterili vigenti nella struttura interessata. È necessario attenersi alle istruzioni per la pulizia e la disinfezione specificate nelle istruzioni per l‘uso. -
Seite 156: Supporto Per Abbassalingua
Le teste degli strumenti e i manici a batterie non devono mai essere immerse in liquidi. Usare solo accessori/materiali di consumo Riester o approvati da Riester. Frequenza e metodi di pulizia devono essere conformi ai regolamenti per la pulizia dei dispositivi non sterili vigenti nella struttura interessata. È necessario attenersi alle istruzioni per la pulizia e la disinfezione specificate nelle istruzioni per l‘uso. -
Seite 157: Specchio Laringeo
3) Lente d‘ingrandimento 4) Attacco a baionetta 14.1. Scopo/indicazione L‘otoscopio operatorio Riester descritto in questo manuale d‘uso è destinato esclusivamente all‘uso su animali o nella pratica della medicina veterinaria; pertanto non dispone di marcatura CE. Può essere utilizzato per l‘illuminazione e l‘esame del canale uditivo, nonché... -
Seite 158: Popolazione Di Pazienti Prevista
3) Lente d‘ingrandimento 4) Attacco a baionetta 15.1. Scopo/indicazione L‘otoscopio operatorio Riester descritto in queste istruzioni per l‘uso è destinato all‘illuminazione e all‘esame del canale uditivo, nonché all‘introduzione di stru- menti esterni nel canale uditivo. 15.2. Applicazione e rimozione degli specula auricolari per uso umano. -
Seite 159: Istruzioni Per La Manutenzione
16.1. Otoscopi L2, L3, ri-derma, lucciola diagnostica, speculum nasale e sup- porto per abbassalingua Svitate la testa dello strumento dall‘manico a batteria. La lampadina si trova alla base della testa dello strumento. Usando il pollice e l‘indice o uno stru- mento adatto, estrarre la lampadina dalla testa dello strumento. -
Seite 160: Ricambi E Accessori
1. La soluzione detergente dev‘essere prodotta secondo le istruzioni del pro- duttore per l‘agente di pulizia (neodisher Mediclean 0,5% è stato convalidato). 2. Immergere completamente i dispositivi medici nella soluzione detergente. 3. Assicurarsi che tutte le superfici siano completamente bagnate dalla solu- zione detergente. - Seite 161 LED 3,5 V per oftalmoscopio ri-scope L1/L2/L3 Kelvin = 4000, CRI = 92 Cod. art.: 10625 LED 3,5 V per otoscopio ri-scope®L L2/L3/EliteVue Kelvin = 4000, CRI = 92 Cod. art.: 10487 confezione da 6 lampadine XL, 3,5 V, otoscopio ri-scope® L1 Cod.
-
Seite 162: Manutenzione
Gli strumenti e i loro accessori non necessitano di manutenzione speciale. Se uno strumento dev‘essere testato per qualsiasi motivo, inviarlo a noi o a un rappresentante autorizzato Riester nella propria zona, del quale forniremo i dettagli a fronte di richiesta. - Seite 163 30 cm (12 pollici) da componenti e cavi della testa dello strumento ri-scope L specificati dal produttore. La mancata osservanza può comportare una riduzione delle prestazioni del dispositivo.
- Seite 164 Linee guida e dichiarazione del fabbricante – immunità elettromagnetica Gli strumenti ri-scope® L sono destinati all‘uso nell‘ambiente elettroma- gnetico di seguito specificato. Il cliente o l‘utente di ri-scope® L devono assicurarsi che sia utilizzato in ambienti corrispondenti. Livello test Ambiente elettro- Test di immunità...
- Seite 165 Linee guida e dichiarazione del fabbricante – immunità elettromagnetica Gli strumenti ri-scope® L sono destinati all‘uso nell‘ambiente elettromag- netico di seguito specificato. Il cliente o l‘utente di ri-scope® L devono assi- curarsi che sia utilizzato in ambienti corrispondenti. Test di Livello test Ambiente elettromagnetico Livello...
- Seite 166 RF portatili e mobili e ri-scope® L. Il dispositivo ri-scope® L è destinato all‘uso in un ambiente elettromagneti- co in cui le emissioni RF sono controllate. Il cliente o l‘utente di ri-scope L possono contribuire a prevenire le interferenze elettromagnetiche osserva- ndo la distanza minima tra le apparecchiature di comunicazione RF portatili e mobili (trasmettitori) e ri-scope L in conformità...
-
Seite 167: Smaltimento
Offriamo anche preventivi gratuiti e senza impegno. In caso di richiesta di assistenza o riparazione in garanzia, si prega di restitu- ire il prodotto Riester insieme alla scheda di garanzia compilata al seguente indirizzo: Rudolf Riester GmbH Repairs dept. - Seite 168 Содержание Важная информация перед вводом в эксплуатацию Предупреждающие символы Упаковочные символы Противопоказания 1.4. Целевая категория пациентов Целевые пользователи Требуемые навыки и обучение оператора Условия окружающей среды Знаки «Осторожно!»/«Внимание!» Объем поставки Рукоятки батареечные и аккумуляторные Ввод в эксплуатацию (установка и извлечение батарей и аккумуляторов) Зарядка...
-
Seite 171: Важная Информация Перед Вводом В Эксплуатацию
храните ее в надежном месте. Если у вас возникнут вопросы, обращайтесь к нам или к вашему представителю Riester в любое время. Наши контактные данные указаны на последней странице настоящего руководства по эксплуатации. По запросу мы с удовольствием предоставим вам адрес нашего представителя. -
Seite 172: Предупреждающие Символы
1.1.Предупреждающие символы Символ Примечание к символу Следуйте инструкциям в руководстве по эксплуатации. Рабочая часть типа B Медицинское устройство Защитные устройства класса II Осторожно! Общий символ «Внимание!» указывает на потенциально опасную ситуацию, которая может привести к серьезным травмам. Осторожно! Важное примечание в этом руководстве. Символ... -
Seite 173: Упаковочные Символы
Предупреждение. Обратите внимание, что правильная и безопасная работа наших инструментов гарантирована только в том случае, если инструменты и комплектующие изготовлены исключительно компанией Riester. Использование других инструментов может привести к усилению электромагнитного излучения или снижению электромагнитной помехоустойчивости устройства и неправильной работе. -
Seite 174: Знаки «Осторожно!»/«Внимание
в соответствующем учреждении. Необходимо соблюдать указания по чистке/дезинфекции, предусмотренные в инструкции по эксплуатации. Перед чисткой или дезинфекцией рекомендуется извлекать (аккумуляторные) батареи из рукояток. Будьте осторожны при чистке и дезинфекции устройств ri-scope L; следите за тем, чтобы внутрь не попала жидкость. -
Seite 175: Объем Поставки
ответственность за любого рода неисправность, возникшую в результате неправильного использования, ненадлежащего технического обслуживания или ремонта, повреждения или изменения, совершенного любым лицом, кроме компании Riester или уполномоченного обслуживающего персонала. Обо всех серьезных инцидентах, произошедших с устройством, следует сообщать изготовителю и в компетентный орган государства-члена ЕС, в... - Seite 176 10580 Ri-scope L2 XL 3,5 В без противосъемного приспособления, фибро- оптическое освещение 10565 Ri-scope L2 LED 3,5 В без противосъемного приспособления, фибро- оптическое освещение 10580-30 Ri-scope L2 XL 3,5 В с противосъемным приспособлением, фибро-оптическое освещение 10565-30 Ri-scope L2 LED 3,5 В с противосъемным приспособлением, фибро- оптическое...
- Seite 177 10573 Ri-scope L3 XL 3,5 В без противосъемного приспособления, максимальная комплектация 10573-203 Ri-scope L3 LED 3,5 В без противосъемного приспособления, максимальная комплектация 10573-301 Ri-scope L3 XL 3,5 В с противосъемным приспособлением, максимальная комплектация 10596-301 Ri-scope L3 LED 3,5 В с противосъемным приспособлением, максимальная комплектация...
- Seite 178 3702-550 Отоскоп ri-scope® L L1 XL 3,5 В с рукояткой типа C для ri-accu® L 3703-550 Фибро-оптический отоскоп ri-scope® LОтоскоп L2 LED 3,5 В с рукояткой типа C для ri-accu® L 3704-550 Фибро-оптический отоскоп ri-scope® L L3 LED 3,5 В с рукояткой типа C для ri-accu®...
- Seite 179 2,5 В с рукояткой для 2 щелочных батарей C или ri-accu® 3746 Фибро-оптический отоскоп ri-scope® L L3/ офтальмоскоп ri-scope® L2 LED/ LED 2,5 В с рукояткой типа C для 2 щелочных батарей C или ri-accu 3746-550 Фибро-оптический отоскоп ri-scope® L L3/ офтальмоскоп ri-scope® L L2 LED/XL 3,5 В...
- Seite 180 10577-301 Головка дерматоскопа ri-derma В, противосъемным приспособлением 3390 Дерматоскоп ri-derma XL 2,5 В с рукояткой типа C 3777 Дерматоскоп ri-derma LED 2,5 В с рукояткой типа C 3777-550 Дерматоскоп ri-derma LED 3,5 В с рукояткой типа C 10560 Операционный отоскоп XL 2,5 В 10561 Операционный...
- Seite 181 2.3. B atteriegriff T yp C m it r heotronic® 2 ,5 V . U m d iese B atteriegriffe z u b etreiben, b enötigen S ie - 1 аккумуляторная батарея Riester 3,5 В (арт. № 10691 ri-accu® L).
-
Seite 182: Установка Батарей
2.8. Рукоятка аккумуляторного типа AA с rheotronic® 3,5 В (дляri-charger® L) Для эксплуатации этой рукоятки вам потребуется: - 1 аккумуляторная батарея Riester 3,5 В (арт. № 10690 ri-accu® L). - 1 зарядное устройство ri-charger® L (арт. № 10705, арт. № 10706). - Seite 183 4.2. Рукоятка аккумуляторного (2.6) типа C с rheotronic® 3,5 В (для сетевого зарядного устройства). - Может заряжаться только от сетевого устройства (арт. № 10707) от Riester. Для этого небольшая круглая заглушка в нижней части рукоятки вставляется в аккумуляторную батарею через отверстие в крышке рукоятки (арт. №...
-
Seite 184: Размещение Головок Инструментов
ОСТОРОЖНО! Перед первым использованием штекерной рукоятки с зарядкой от сети ее следует зарядить от сети в течении не более 24 часов. ОСТОРОЖНО! Аккумулятор в штекерной рукоятке с зарядкой от сети не должен заряжаться более 24 часов. ОСТОРОЖНО! Чтобы заменить батарею, отключите рукоятку от сети! Характеристики: Модели... -
Seite 185: Офтальмоскопы Ri-Scope® L
6.2. Присоединение и отсоединение ушных воронок К головке отоскопа можно прикреплять как одноразовые ушные воронки от Riester (черного цвета), так и многоразовые ушные воронки от Riester (черного цвета). Размер ушных воронок отмечен на их задней части. Отоскоп L1 и L2 Поворачивайте... - Seite 186 7.1. Назначение/показания к применению Офтальмоскоп Riester, описанный в настоящей инструкции по эксплуатации, предназначен для исследования глаза и глазного дна. ОСТОРОЖНО! Поскольку длительное интенсивное воздействие света может повредить сетчатку, не следует слишком долго использовать устройство для проверки зрения; настройку яркости не следует устанавливать выше, чем необходимо...
-
Seite 187: Щелевые И Точечные Ретиноскопы
Звездообразная фиксированная апертура: определение центральной части эксцентрической фиксации. 7.4 Фильтры Следующие фильтры могут быть применены к каждой апертуре с помощью колесика изменения фильтров: Фильтр без красного цвета офтальмоскопа L1. Фильтр без красного цвета, синий фильтр и поляризационный фильтр для офтальмоскопа L2. Фильтр... -
Seite 188: Целевая Категория Пациентов
Используйте исключительно комплектующие и расходные материалы, произведенные или одобренные Riester. Частота и последовательность чистки должны соответствовать правилам чистки нестерильных продуктов в соответствующем учреждении. Необходимо соблюдать указания по чистке/дезинфекции, предусмотренные в инструкции по эксплуатации. Изделие может использоваться только обученным персоналом. 8.1.2. Целевая категория пациентов: - Устройство... -
Seite 189: Противопоказания
препаратов. Головки инструментов и рукоятки никогда не следует погружать в жидкость. Продукт является нестерильным. Не используйте для осмотра поврежденных тканей. Используйте исключительно комплектующие и расходные материалы, произведенные или одобренные Riester. Частота и последовательность чистки должны соответствовать правилам чистки нестерильных продуктов... -
Seite 190: Противопоказания
Присутствует риск воспламенения газов при использовании инструмента рядом с легковоспламеняющимися смесями или смесями фармацевтических препаратов. Головки инструментов и руукоятки никогда не следует погружать в жидкость. Используйте исключительно комплектующие и расходные материалы, произведенные или одобренные Riester. Частота и последовательность чистки должны соответствовать правилам чистки нестерильных продуктов... -
Seite 191: Противопоказания
Присутствует риск воспламенения газов при использовании прибора рядом с легковоспламеняющимися смесями или смесями фармацевтических препаратов. Головки инструментов и рукоятки никогда не следует погружать в жидкость. Используйте исключительно комплектующие и расходные материалы, произведенные или одобренные Riester. Частота и последовательность чистки должны соответствовать правилам чистки нестерильных продуктов... -
Seite 192: Держатель Шпателя
Присутствует риск воспламенения газов при использовании прибора рядом с легковоспламеняющимися смесями или смесями фармацевтических препаратов. Головки инструментов и рукоятки никогда не следует погружать в жидкость. Используйте исключительно комплектующие и расходные материалы, произведенные или одобренные Riester. Частота и последовательность чистки должны соответствовать правилам чистки нестерильных продуктов... -
Seite 193: Гортанное Зеркало
14.Операционный отоскоп для ветеринарной медицины Функциональное назначение устройства: 1) Держатель ушной воронки 2) Лампочка 3) Увеличительное стекло 4) Байонетная оправа 14.1. Назначение/показания к применению Операционный отоскоп Riester, описанный в данной инструкции по эксплуатации, предназначен исключительно для использования в ветеринарной медицине, поэтому не имеет знака соответствия европейским... -
Seite 194: Целевая Категория Пациентов
3) Увеличительное стекло 4) Байонетная оправа 15.1. Назначение/показания к применению Операционный отоскоп от компании Riester, описанный в данной инструкции по эксплуатации, предназначен для освещения и обследования слухового канала, а также для введения в слуховой канал внешних инструментов. 15.2. Установка и удаление ушных расширителей для медицины человека. -
Seite 195: Замена Лампочки
16. Замена лампочки Отоскоп L1 Снимите гнездо для воронки с отоскопа. Выкрутите лампочку против часовой стрелки. Установите новую лампу, закрутив по часовой стрелке, и снова присоедините держатель расширителя. 16.1. Отоскопы L2, L3, ri-derma, ларингеальный осветитель, назальный расширитель и держатель шпателя Снимите... - Seite 196 устройство больше не должно повторно использоваться и подлежит утилизации или необходимо заказать новые материалы в соответствии с процедурой, указанной в разделе «Утилизация» или «Гарантия». 17.3. Обработка многоразовых ушных воронок Чистка: в ручном режиме Необходимое оборудование: мягкий щелочной очиститель (утверждено: neodisher Mediclean, Dr. Weigert 404333), 15–50 °C, чистящая щетка (утверждено: Interlock 09098 и...
-
Seite 197: Запасные Части И Комплектующие
18. Запасные части и комплектующие Лампочки Арт. №: 10489 Упаковка из 6 лампочек XL 2,5 В для отоскопов pen-scope, ri-scope® L1, e-scope® Арт. №: 10605 Упаковка из 6 лампочек XL 2,5 В для офтальмоскопов ri-mini/ri-scope® L1, L2, L3, e-scope® и ri-derma® Арт. -
Seite 198: Техническое Обслуживание
19. Техническое обслуживание Инструменты и комплектующие не требуют специального обслуживания. Если по какой-либо причине инструмент нуждается в тестировании, отправьте его нам или уполномоченному дилеру Riester в вашем регионе, подробности о котором мы предоставим вам по запросу. 20.Инструкции Температура окружающей среды: от 0 ° до + 40 °C Относительная... - Seite 199 Портативное оборудование радиочастотной связи (радиоприемники), включая их комплектующие, такие как антенные кабели и внешние антенны, не должны использоваться в радиусе менее 30 см (12 дюймов) от головки инструмента ri-scope L, как указано производителем. Несоблюдение этого требования может повлиять на производительность устройства.
- Seite 200 колебаний напряжения, Не применимо мерцание IEC 61000-3-3 Руководство и декларация производителя: электромагнитная устойчивость Инструменты ri-scope L предназначены для использования в электромагнитной среде, указанной ниже. Клиент или пользователь ri-scope® L должен обеспечивать его использование в надлежащих условиях. Испытате- Электро- Испытание на...
- Seite 201 Быстрые 5/50 нс, 100 кГц, Не Качество переходные ± 2 кВ применимо напряжения электрические питания должно помехи/вспышки соответствовать стандартным IEC 61000-4-4 параметрам коммерческого помещения или больницы. Импульсное Напряжение Не Качество напряжение ± 0,5 кВ применимо напряжения IEC 61000-4-5 Межфазный питания должно проводник...
- Seite 202 Руководство и декларация производителя: электромагнитная устойчивость Инструменты ri-scope®L предназначены для использования в электромагнитной среде, указанной ниже. Клиент или пользователь ri-scope® L должен обеспечивать его использование в надлежащих условиях. Испытате- Испытание на Уровень льный Электромагнитная помехоус- соотве- уровень по среда: руководство тойчивость...
- Seite 203 среде, в которой радиочастотное излучение находится под контролем. Покупатель или пользователь ri-scope L может предотвратить электромагнитные помехи, соблюдая минимальное расстояние между портативным и мобильным радиочастотным оборудованием связи (передатчиками) и ri-scope L в соответствии с максимальной выходной мощностью оборудования связи. Номинальная Пространственный разнос в зависимости от...
-
Seite 204: Утилизация
истечении срока гарантии за дополнительную плату. Вы также можете бесплатно запросить у нас ценовые предложения без обязательств. В случае необходимости обслуживания или ремонта по гарантии верните изделие Riester с заполненным гарантийным талоном по следующему адресу: Rudolf Riester GmbH Repairs dept. RR Bruckstr. - Seite 208 Rudolf Riester GmbH Bruckstraße 31 | 72417Jungingen | Germany Tel.: (+49) 7477-9270-0 | Fax.: (+49) 7477-9270-70 info@riester.de | www.riester.de...