JB-Lighting VARYSCAN P6 Bedienungsanleitung
Inhaltsverzeichnis
Verfügbare Sprachen
Verfügbare Sprachen
Quicklinks
Inhaltsverzeichnis

Verwandte Anleitungen für JB-Lighting VARYSCAN P6


Inhaltszusammenfassung für JB-Lighting VARYSCAN P6
- Seite 1 Version 1.5...
-
Seite 2: Inhaltsverzeichnis
Deutsch Inhaltsverzeichnis 1.Einleitung..............1.1 Allgemeines..............1.2 Auspacken der Geräte..........1.3 Technische Daten............2. Installation................2.1 Leuchtmittel einsetzen/wechseln......2.2 Netzstecker montieren..........2.3 Montage der Geräte..........2.4 DMX Verkabelung............. 2.5 Netzstrom verkabeln..........3. Bedienfeld................3.1 Menü-Übersicht............3.2 Parameter zurücksetzen........... 3.3 DMX Adressierung............ 3.4 Standalone-Betrieb........... -
Seite 3: Einleitung
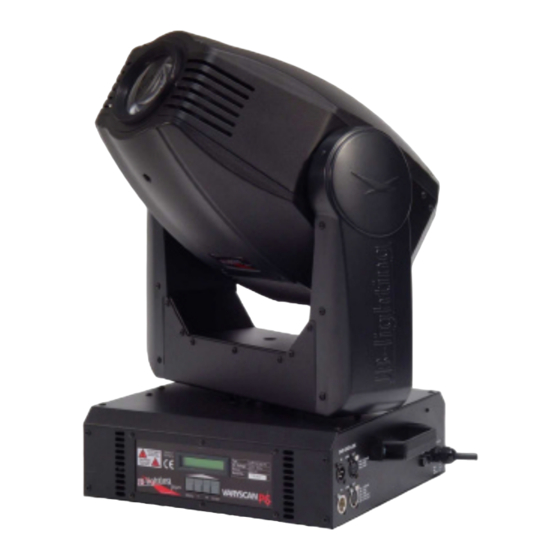
ACHTUNG: Dieses Gerät ist nur für den professionellen Gebrauch geeignet! Der Varyscan P6 575HMI verfügt über 7 Farben plus weiß, ein Farbeffektrad mit Frostfilter, CTO- und CTB-Filter, 1 Goborad mit 5 auswechselbaren Gobos, 1 Gobo- rad mit 4 drehbaren und auswechselbaren Gobos, Irisblende, Focus, Dimmer, Shut- ter und ein drehbares und positionierbares Prisma. -
Seite 4: Installation
2. Installation 2.1 Leuchtmittel einsetzen/wechseln ACHTUNG: Gerät vom Netz trennen und mindestens 30 Minuten abkühlen lassen! Leuchtmittel: OSRAM HMI 575GS Am Aufdruck Nr.1 erkennen Sie die Oberseite des Kopf es (Top) Drehen Sie die 5 Schrauben Nr.2 eine halbe Umdrehung nach links und nehmen die Kunststoffabdeckung ab. -
Seite 5: Montage Der Geräte
ACHTUNG: Mindestens 2m Abstand zu brennbaren Gegenständen! Varyscan immer mit Sicherungsseil zusätzlich sichern! Der Varyscan P6 kann auf den Boden gestellt, oder an den dafür vorgesehenen Cam- loclaschen senkrecht oder waagerecht montiert werden. Bei der Montage mit den Camloclaschen müssen immer zwei Camloclaschen verwendet werden und die Cam- locs müssen richtig eingerastet sein. -
Seite 6: Netzstrom Verkabeln
230V 50Hz 900 VA Am Bedienfeld im Fuß des Gerätes können sämtliche Parameter des Varyscan P6 eingestellt werden (siehe Menü-Übersicht nächste Seite). Durch einmaliges betätigen der Taste "Menu" gelangen Sie in das Menü. Mit den Tasten "-" und "+" können Sie die einzelnen Menüpunkte aufrufen. -
Seite 7: Menü-Übersicht
3.1 Menü-Übersicht Taste Menu Enter Enter Enter FACTORY DEFAULT LOAD DEFAULTS SURE ? ADDRESS +/- DMX ADDRESS PAN/TILT RESOLUTION 16 BIT 8 BIT NORMAL PAN INVERS INVERS TILT INVERS NORMAL INVERS PAN/TILT SWAP NORMAL INVERS DMX/STANDALONE DMX MODE STANDALONE PERSONALITY LAMP ON/OFF DMX LAMP MODE AUTO START... -
Seite 8: Parameter Zurücksetzen
3.2 Parameter zurücksetzen Um den VS P6 auf die Werkseinstellung zurück zu setzen, Drücken Sie die Taste Menu. Im Display erscheint die Meldung: FACTORY DEFAULT. Anschließend Drüc- ken Sie Taste Enter und es erscheint LOAD DEFAULTS . Durch erneutes Drücken der Enter Taste aktivieren Sie die Abfrage SURE . - Seite 9 Zurücksetzen der DMX-Werte in einem Schritt: Sollten Sie die DMX-Werte eine Schrittes zurücksetzen wollen, dann gehen Sie folgendermaßen vor: Drücken Sie zuerst die Taste Menu und anschließend fünf Mal auf die Taste + Im Display sehen Sie die Meldung: STANDALONE STEPS. Bestätigen Sie die Meldung durch Drücken der Taste Enter.
-
Seite 10: Leuchtmittel-Steuerung
Aktivieren des Standalone Betriebs: Unabhängig davon ob die DMX-Werte der einzelnen Schritte manuell eingegeben oder von einem Pult übernommen wurden, wird der Standalone-Betrieb im Menü DMX/STANDALONE eingestellt. Um das Menü aufzurufen drücken Sie zuerst die Taste Menu und anschließend drei Mal die Taste +. -
Seite 11: Kanalbelegung
4. Kanalbelegung Kanal 1 Pan Kanal 12 Goborad 2 Kanal 2 Tilt Kanal 13 Goborotation 2 Kanal 3 Pan fein Kanal 14 Farbrad Kanal 4 Tilt fein Kanal 15 Farbeffektrad Kanal 5 Lampe, Reset Kanal 16 Nicht belegt Kanal 6 Shutter Kanal 17 Prisma Kanal 7 Dimmer Kanal 18 Prismarotation... - Seite 12 Hex. A0-AE Iris fade zu (schnell 0,6sec-langsam 4,8sec) 160-174 Iris auf 176-190 B0-BE Iris fade auf (schnell0,6sec-langsam 4,8sec) Iris zu C0-CE Iris Zufall öffnend (schnell 0,6sec-langsam 4,8sec) 192-206 Iris auf 208-222 D0-DE Iris Zufall schließend(schnell 0,6sec-langsam 4,8sec) Iris zu Iris Zufall fade zu (schnell 0,6sec-langsam 4,8sec) 224-238 E0-EE...
- Seite 13 Hex. 032-035 20-23 Farbe 9 grün 24-27 Farbe 10 grün/orange 036-039 040-043 28-2B Farbe 11 orange 044-047 2C-2F Farbe 12 orange/blau 048-051 30-33 Farbe 13 blau 34-37 Farbe 14 blau/türkis 052-055 056-059 38-3B Farbe 15 türkis 060-063 3C-3F Farbe 16 türkis/weiß 064-191 40-BF Farben stufenlos positionieren...
-
Seite 14: Service
5. Service 5.1 Gobos wechseln ACHTUNG: Gerät vom Netz trennen und mindestens 30 Minuten abkühlen lassen! Am Aufdruck Nr.1 erkennen Sie die Oberseite des Kopfes. Drehen Sie die 5 Schrauben Nr.2 mit einer halben Umdrehung nach links und nehmen die Kunststoffabdeckung ab. Öffnen Sie nun die 2 Rändelschrauben Nr.3 und ziehen den Goboeinschub heraus. -
Seite 15: Leuchtmittel Wechseln
Kugeln der Gobozahnräder. 5.6 Software updaten Der Varyscan P6 lässt sich über einen PC/notebook mit Hilfe eines Upgrade-Dongles (USB/DMX Converter) über den 5 poligen DMX Eingang updaten. Den Upgrade Don- gle mit der dazugehörigen Software erhalten Sie bei unseren Stützpunkt-Händlern. -
Seite 16: Stromlaufplan
5.7 Stromlaufplan Rückansicht der Kopfplatine Rot dünn Grau Grau Grün Grün +32V Gelb Blau Rot dick Braun Braun Blau Weiß Grün Grün Schwarz Gelb Gelb +15V Braun Braun Gelb Shutter Motoren Leer Focus Farbrad 2 Iris Farbrad 1 Diese Anschlüsse befinden sich auf der Rückseite Kopfplatine Leer... -
Seite 17: Konformitätserklärung
Konformitätserklärung im Sinne der Richtlinie 89/336/EWG (Richtlinie 89/336/EWG des Rates vom 03.05.1989 zur Angleichung der Rechtsvorschriften der Mitgliedsstaaten über die elektromagnetische Verträglichkeit) Der Hersteller JB-lighting Lichtanlagentechnik GmbH Sallersteig 15 89134 Blaustein-Wippingen erklärt, dass das Produkt Varyscan P6 den wesentlichen Schutzanforderungen der Richtlinie entspricht. - Seite 18 English...