JB-Lighting VARYSCAN 7 Bedienungsanleitung
Inhaltsverzeichnis
Verfügbare Sprachen
Verfügbare Sprachen
Quicklinks
Inhaltsverzeichnis

Verwandte Anleitungen für JB-Lighting VARYSCAN 7


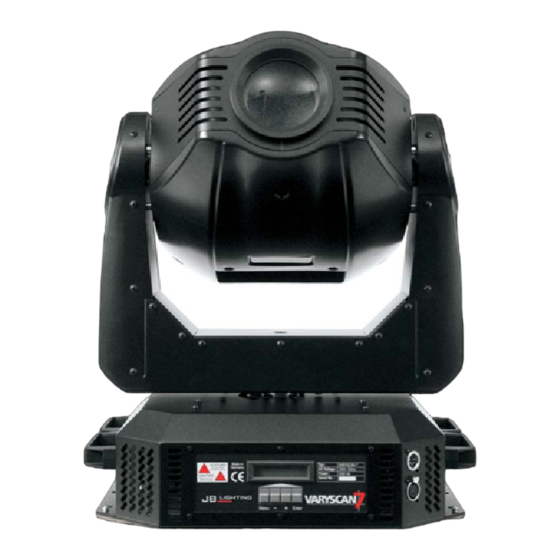
Inhaltszusammenfassung für JB-Lighting VARYSCAN 7
- Seite 1 Version 1.6...
-
Seite 2: Inhaltsverzeichnis
Deutsch Inhaltsverzeichnis 1.Einleitung..............1.1 Allgemeines..............1.2 Auspacken der Geräte..........1.3 Technische Daten............2. Installation................2.1 Leuchtmittel einsetzen/wechseln......2.2 Netzstecker montieren..........2.3 Montage der Geräte..........2.4 DMX Verkabelung............. 2.5 Netzstrom verkabeln..........3. Bedienfeld................3.1 Menü-Übersicht............3.2 Parameter zurücksetzen........... 3.3 DMX Adressierung............ 3.4 Standalone-Betrieb........... -
Seite 3: Einleitung
1. Einleitung 1.1 Allgemeines Der Varyscan 1200HMI verfügt über 7 Farben plus weiß,Farbeffektrad, 2x4 drehbare positionierbare und auswechselbare Gobos, Irisblende, Focus, drehbares und positio nierbares Prisma, Dimmer, Shutter und ein Stufenloser Frostfilter. Die Achsen X und Y(Pan&Tilt) können mit 8Bit oder 16Bit angesteuert werden, abhängig vom eingesetzten Controller. -
Seite 4: Installation
2. Installation 2.1 Leuchtmittel einsetzen/wechseln ACHTUNG: Gerät vom Netz trennen und mindestens 30 Minuten abkühlen lassen ! Leuchtmittel: OSRAM HMI 1200W/S Am Scharnier Nr.1 erkennen Sie wo oben am Kopf ist. Drehen Sie die 5 Schrauben Nr.2 mit einer halben Umdrehung nach links und nehmen die Kunststoffabdeckung ab. -
Seite 5: Montage Der Geräte
ACHTUNG: Mindestens 2m Abstand zu brennbaren Gegenständen ! Varyscan immer mit Sicherungsseil zusätzlich sichern ! Der Varyscan 7 kann auf den Boden gestellt, oder an den dafür vorgesehenen Camloclaschen senkrecht oder waagerecht montiert werden. Bei der Montage mit den Camloclaschen müssen immer zwei Camlochlaschen verwendet werden und die Camlocs müssen richtig eingerastet sein. -
Seite 6: Netzstrom Verkabeln
3. Bedienfeld 1700VA Am Bedienfeld im Fuß des Gerätes können sämtliche Parameter des Varyscan 7 ein- gestellt werden (siehe Menü-Übersicht nächste Seite). Durch einmaliges betätigen der Taste "Menu" gelangen Sie in das Menü. Mit den Tasten "-" und "+" können Sie die ein- zelnen Menüpunkte aufrufen. -
Seite 7: Menü-Übersicht
3.1 Menü-Übersicht Taste Menu Enter Enter Enter FACTORY DEFAULT LOAD DEFAULS SURE ? (Werkseinstellung) ADRESS +/- DMX ADRESS 16 BIT RESOLUTION (Auflösung) 8 BIT NORMAL PAN INVERS PAN/TILT INVERS TILT INVERS NORMAL PAN/TILT SWAP INVERS (tauschen) NORMAL DMX MODE DMX/STANDALONE INVERS STANDALONE LAMP ON/OFF DMX... -
Seite 8: Parameter Zurücksetzen
3.2 Parameter zurücksetzen Um den VS 7 auf die Werkseinstellung zurück zu setzen, drücken Sie die Taste Menu. Im Display erscheint die Meldung: FACTORY DEFAULT. Anschließend drücken Sie Taste Enter und es erscheint LOAD DEFAULTS . Durch erneutes Drücken der Enter Taste akti vieren Sie die Abfrage SURE . - Seite 9 Zurücksetzen der DMX-Werte in einem Schritt: Sollten Sie die DMX-Werte eine Schrittes zurücksetzen wollen, dann gehen Sie folgendermaßen vor: Drücken Sie zuerst die Taste Menu und anschließend fünf Mal auf die Taste + Im Display sehen Sie die Meldung: STANDALONE STEPS Bestätigen Sie die Meldung durch Drücken der Taste Enter.
-
Seite 10: Leuchtmittel-Steuerung
Aktivieren des Standalone Betriebs: Unabhängig davon ob die DMX-Werte der einzelnen Schritte manuell eingegeben oder von einem Pult übernommen wurden, wird der Standalone-Betrieb im Menü DMX/STANDALONE eingestellt. Um das Menü aufzurufen drücken Sie zuerst die Taste Menu und anschließend drei Mal die Taste +. -
Seite 11: Kanalbelegung
4. Kanalbelegung Kanal 5 Lampe, Reset JB MODE Kanal 15 Farbeffektrad Kanal 6 Shutter Kanal 1 Pan Kanal 16 Nicht belegt Kanal 7 Dimmer Kanal 2 Tilt Kanal 17 Prisma Kanal 3 Pan fein Kanal 8 Iris Kanal 18 Prismarotation Kanal 4 Tilt fein Kanal 9 Fokus Kanal 19 Frostfilter... - Seite 12 Iris fade zu (langsam 4,8sec-schnell 0,6sec) DMX 160-174 A0-AE Iris auf DMX 175 DMX 176-190 Iris fade auf (langsam 4,8sec-schnell0,6sec) B0-BE Iris zu DMX 191 Iris Zufall öffnend (langsam 4,8sec-schnell 0,6sec) DMX 192-206 C0-CE Iris auf DMX 207 DMX 208-222 Iris Zufall schließend(langsam 4,8sec-schnell 0,6sec) D0-DE DMX 223...
- Seite 13 DMX 032-035 Farbe 9 grün 20-23 Farbe 10 grün/orange DMX 036-039 24-27 DMX 040-043 Farbe 11 orange 28-2B DMX 044-047 Farbe 12 orange/blau 2C-2F DMX 048-051 Farbe 13 blau 30-33 Farbe 14 blau/türkis DMX 052-055 34-37 DMX 056-059 Farbe 15 türkis 38-3B DMX 060-063 Farbe 16 türkis/weiß...
-
Seite 14: Service
Kanal 22 Keine Funktion DMX 000-095 00-50 Dimmer schließt bei Pan-Tilt DMX 096-127 60-7F Dimmer schließt bei Gobo,Farbe,Prisma DMX 128-159 80-9F Dimmer schließt bei Gobo, Farbe,Prisma, Fokus DMX 160-191 A0-BF Dimmer schließt bei Gobo, Farbe, Prisma,Pan-Tilt DMX 192-223 C0-DF Dimmer schließt bei Gobo,Farbe,Prisma,Fok.,Pan-Tilt DMX 224-255 C0-EF Die Fadezeit beim Dimmer ist einstellbar von langsam 5sec-max... -
Seite 15: Leuchtmittel Wechseln
Öl in die Kugeln von den Gobozahnrädern. 5.6 Software updaten Der Varyscan 7 lässt sich über einen PC/notebook mit Hilfe eines Upgrade-Dongles (USB/DMX Converter) über den 5 poligen DMX Eingang updaten. Den Upgrade Dongle mit der dazugehörigen Software erhalten Sie bei unseren Stützpunkt-Händlern. -
Seite 16: Stromlaufplan
5.7 Stromlaufplan Rückansicht der Kopfplatine Rot dünn Grau Grau Grün Grün +32V Gelb Blau Rot dick Braun Braun Weiß Blau Schwarz Grün Grün Gelb Gelb +15V Braun Braun Gelb Shutter Motoren Flood Motoren Flood Focus Farbrad 2 Iris Farbrad 1 Diese Anschlüsse befinden Diese Anschlüsse befinden sich auf der Rückseite... -
Seite 17: Konformitätserklärung
Der Hersteller JB-lighting Lichtanlagentechnik GmbH Sallersteig 15 89134 Blaustein-Wippingen erklärt, dass das Produkt Varyscan 7 den wesentlichen Schutzanforderungen der Richtlinie entspricht. Es wurden folgende Normen zur Konformitätsbewertung herangezogen: DIN EN 61000-6-2 Elektromagnetische Verträglichkeit (EMV) Teil 6-2: Fachgrundnorm – Störfestigkeit Industriebereich DIN EN 61000-6-4 Elektromagnetische Verträglichkeit (EMV) - Seite 18 English...