Herunterladen Inhalt Inhalt Diese Seite drucken
Inhaltsverzeichnis

Werbung

Verfügbare Sprachen
  • DE

Verfügbare Sprachen

  • DEUTSCH, seite 1
WRX400
Water Rower
DE
EN
ES
FR
IT
NL

Werbung

Inhaltsverzeichnis
loading

Inhaltszusammenfassung für SPORTSTECH WRX400

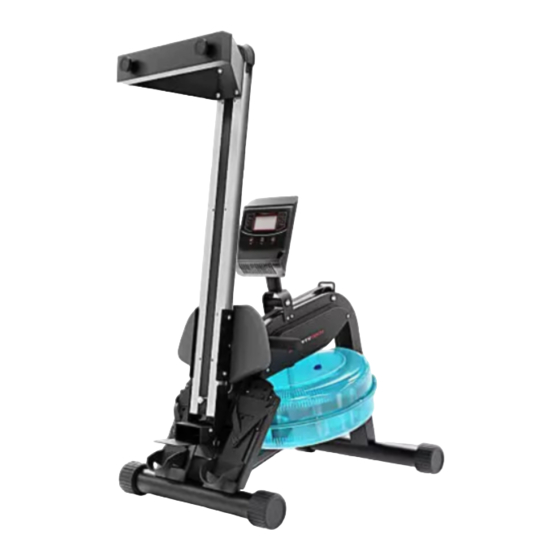
  • Seite 1 WRX400 Water Rower...
  • Seite 3 Sehr geehrter Kunde wir freuen uns, dass Sie sich für ein Gerät aus der SPORTSTECH Produktpalette entschieden haben. SPORTSTECH Sportgeräte bieten Ihnen höchste Qualität und neueste Technologie. Um die Leistungsfähigkeit des Gerätes voll nutzen zu können und viele Jahre Freude an Ihrem Gerät zu haben, lesen Sie bitte vor der Inbetriebnahme und dem Beginn des Trainings dieses Benutzerhandbuch sorgfältig durch und verwenden Sie das Gerät den Anweisungen entsprechend.
  • Seite 4: Video Tutorials

    Aufbau, Benutzung, Abbau. 1. QR-Code scannen 2. Videos anschauen 3. Schnell und sicher starten Link zu den Videos: https://service.innovamaxx.de/wrx400_video Uns gibt es auch auf Social Media! Hol dir die neuesten Produktinfos, Trainingsinhalte uvm. auf unserer: Instagram-Seite Facebook-Seite https://www.instagram.com/sportstech.de https://www.facebook.com/sportstech.de...
  • Seite 5: Inhaltsverzeichnis

    INHALT INHALT 1. WICHTIGE SICHERHEITSHINWEISE ................6 2. DIES KÖNNTE SIE AUCH INTERESSIEREN ..............8 3. EXPLOSIONSZEICHNUNG/ERSATZTEILLISTE .............. 9 4. MONTAGE ......................10 5. LAGERUNG ......................11 6. BEFÜLLEN / ENTLEEREN DES WASSERTANKS ............13 7. FREIE FLÄCHE UND TRAININGSFLÄCHE ..............14 8.
  • Seite 6: Wichtige Sicherheitshinweise

    1. WICHTIGE SICHERHEITSHINWEISE Diese allgemeinen Sicherheitsinformationen müssen unbedingt für die Benutzung dieses Produktes beachtet werden. Lesen Sie alle Hinweise, bevor Sie das Produkt in Benutzung nehmen. • Bitte lesen Sie die ganze Anleitung vor dem Aufbau und der Benutzung des Gerätes sorgfältig durch.
  • Seite 7 • Das Gerät wurde getetest und gemäss Klasse H.C. zertifiziert. Maximales Gewicht des Benutzers: 150kg. Die Bremsfähigkeit ist unabhängig von der Geschwindigkeit. • Das Gerät ist nicht für den therapeutischen Gebrauch geeignet. • Beim Anheben oder Bewegen des Gerätes ist darauf zu achten, dass der Rücken nicht verletzt wird.
  • Seite 8: Dies Könnte Sie Auch Interessieren

    ∙ HOCHWERTIGES MATERIAL: Konstruiert aus dem besten Material, für ein beständiges und beden- kenloses Training. Fitnessmatte ist hoch strapazierfähig und hält enorm viel Gewicht aus. Sie können dieses Produkt in der gewünschten Grösse über folgenden QR-Code oder Link käuflich erwerben. www.sportstech.de/bodenschutzmatte...
  • Seite 9: Explosionszeichnung/Ersatzteilliste

    3. EXPLOSIONSZEICHNUNG/ERSATZTEILLISTE Unter folgendem Link Unter folgendem Link finden Sie die Explosionszeichnung finden Sie die Explosionszeichnung und die Ersatzteile-Liste: und die Ersatzteile-Liste: https://service.innovamaxx.de/wrx400_spareparts https://service.innovamaxx.de/wrx400_spareparts...
  • Seite 10: Montage

    4. MONTAGE Schritt 1 Drehen Sie die Hauptschiene (40) um und befestigen Sie den hinteren Standfuss (55) mit den Schrauben (92), (Abbildung 1). Schieben Sie den Sitz (44) so in die Hauptschiene, wie der Rich- tungspfeil es anzeigt (Abbildung 2). Dann installieren Sie den Schienenverbinder (37) mit der Loch- platte (100) und den vorinstallierten Schrauben (54).
  • Seite 11: Lagerung

    Schritt 3 Verbinden Sie das Computer-Gestell (2) und den Hauptrahmen (28), mit den Schrauben (3). Hierbei verläuft der Antriebsriemen (74) unter dem Roller (6). Stecken Sie die Kabel des Computers (1) in die Kabel der Sensoren vom Hauptrahmen (28). Gehen Sie sicher, dass die Steckverbindung festsitzt (Sie hören beim Verbinden ein Klickgeräusch).
  • Seite 12 Schritt 2 Die Hauptschiene (40) wird vorsichtig über den Hauptrahmen (28) gekippt und wieder mit dem Handgriff (97) und dem Sicherungsstift (98) befestigt. Das Gerät steht nun auf den Füssen des Hauptrahmens (28). NICHT senkrecht aufstellen! Der Hauptrahmen (28) darf nicht senkrecht gekippt werden, da die Gefahr besteht ,dass das Gerät umkippt oder Wasser aus dem Tank tritt.
  • Seite 13: Befüllen / Entleeren Des Wassertanks

    6. BEFÜLLEN / ENTLEEREN DES WASSERTANKS WIDERSTANDS-EINSTELLUNG Der Widerstand des Rudergerätes lässt sich über die Füllmenge des Wassertanks einstellen. Hierzu folgen Sie den nachstehenden Anweisungen: MIN: Die minimale Füllmenge bietet den leichtesten Widerstand. MAX: Die maximale Füllmenge bietet den schwersten Widerstand. BEFÜLLEN 1.
  • Seite 14: Freie Fläche Und Trainingsfläche

    7. FREIE FLÄCHE UND TRAININGSFLÄCHE Der Trainingsbereich (A) sollte mindestens 2,6 m betragen. Der Freiraum (B) sollte mindestens 0,6 m grösser sein als der Trainingsbereich in den Richtungen, aus denen auf das Equipment zugegriffen wird. Der Freiraum muss auch die Fläche für den Notabstieg beinhalten. Wenn zwei Geräte nebenei- nander stehen, kann der freie Bereich geteilt werden.
  • Seite 15: Batterie

    9. BATTERIE BATTERIE Die Batterien sind nicht im Lieferumfang enthalten. 1. Der Monitor verwendet 2 "AA"-Batterie. Sie können die Batterie von der Rückseite des Gerätes her ersetzen. 2. Die Batterie muss korrekt positioniert sein, und bitte stellen Sie sicher, dass die Batteriefeder Kontakt mit der Batterie hat.
  • Seite 16: Konsolen-Bedienungsanleitung

    10. KONSOLEN-BEDIENUNGSANLEITUNG SCAN • Die Reihenfolge der Anzeige: TIME > CAL > RPM > COUNT > DIST > PULSE. • Im SCAN-Modus, MODE-Taste drücken, um andere Funktionen zu wählen. • Automatisch durch jeden Modus scannen mit einer Sequenz von jeweils 6 Sekunden. TIME Zeit •...
  • Seite 17: Rpm Ruderzüge Pro Minute

    RPM Ruderzüge pro Minute Zeigt die aktuelle Rudergeschwindigkeit in Ruderzügen pro Minute an. Dieser Wert wird permanent aktualisiert. COUNT Die Ruderschlagzahl wird fortlaufend ab Trainingsbeginn dargestellt. DIST (DISTANCE) Distanz • Wenn kein Sollwert eingestellt wird, wird die Distanz aufwärts gezählt. •...
  • Seite 18: Lcd-Anzeige

    12. LCD-ANZEIGE Einschalten Eingeschaltet: In der LCD-Anzeige werden alle Segmente, bestätigt durch einen Doppelton, angezeigt wie in Abbildung A dargestellt. Abbildung A Ausschalten Wenn für 4 Minuten lang kein Signal an die Konsole übertragen worden ist, wird diese in den Ruhe- modus gehen.
  • Seite 19: Fehlerbehebung

    13. FEHLERBEHEBUNG • Wenn auf dem Display Abbildung D zu sehe ist, bedeutet dies, dass die Batterien gewechselt werden müssen. • Wenn kein Signal vorhanden ist, während Sie die Pedale treten, überprüfen Sie bitte, ob das Kabel korrekt verbunden ist. •...
  • Seite 20: Anwendungssoftware (App)

    16. ANWENDUNGSSOFTWARE (APP) Sie können die App's über die hier abgebildeten QR-Codes herunterladen oder in Ihrem Store suchen. Voraussetzung für mobiles Gerät: Android 5.0 oder höher mit Bluetooth 4.0, iOS 8.0 oder höher. Testen Sie Kinomap jetzt 7 Tage kostenlos oder wählen Sie die GRATIS Fitness Data-App! Android Kinomap Hinweise zur Nutzung der App:...
  • Seite 21: Dehnungsübungen

    17. DEHNUNGSÜBUNGEN Bevor Sie das Laufband benutzen, ist es am besten, 5 bis 10 Minuten zum Aufwärmen Stretching- Übungen durchzuführen. Dehnen vor dem Training hilft die Flexibilität zu verbessern und das Verletzungsrisiko zu mindern. MIT DEM KOPF ROLLEN Drehen Sie den Kopf nach rechts für eine Sekunde, fühlen Sie die Streckung auf der linken Seite des Nackens, dann drehen Sie den Kopf zurück für eine Sekunde, recken Sie Ihr Kinn nach oben und lassen Ihren Mund geöffnet.
  • Seite 22: Übungsanleitungen

    18. ÜBUNGSANLEITUNGEN Das Training mit Ihrem RUDER-GERÄT wird Ihnen mehrere Vorteile vermitteln. 1. Es wird Ihre körperliche Fitness verbessern, es stärkt das Herz und verbessert die Durchblutung, und es werden alle grossen Muskelgruppen trainiert, sowie der Rücken, die Taille, die Arme, die Schultern, die Hüften und die Beine.
  • Seite 23 ALTERNATIVE RUDER-STILE Ruderübung nur für die Arme Diese Übung wird Muskeln in Armen, Schultern, Rücken und Bauch beanspruchen. Sitzen Sie, wie in Abb. 4 gezeigt, mit den Beinen gerade, nach vorne gelehnt, und erfassen Sie die Griffe. Lehnen Sie sich in einer allmählichen und kontrollierten Bewegung zurück, nur ein wenig über die aufrechte Sitzposition hinaus, und ziehen Sie weiter die Griffe in Richtung Ihrer Brust.
  • Seite 24 MUSKELSTRAFFUNG Um während des Trainierens mit Ihrem RUDER-GERÄT Muskeln zu straffen, müssen Sie den Widerstand ziemlich hoch eingestellt haben. Dies wird Ihre Beinmuskulatur stärker beanspruchen, und möglicherweise können Sie nicht solange trainieren, wie Sie eigentlich möchten. Wenn es Ihnen auch darum geht, Ihre allgemeine Fitness zu verbessern, müssen Sie Ihr Trainingsprogramm ändern.
  • Seite 25: Entsorgung

    ENTSORGUNG Recyclingkreislauf Verpackungsmaterialien können wieder dem Rohstoffkreislauf zugeführt werden. Entsorgen Sie die Verpackung gemäß den aktuellen Bestimmungen. Informationen erhalten Sie bei den Rückgabe- und Sammelsystemen Ihrer Gemeinde. Hinweise zum Elektro- und Elektronikgerätegesetz (ElektroG) Wir weisen Besitzer von Elektro- und Elektronikaltgeräten darauf hin, dass Elektroaltgeräte gemäß den geltenden gesetzlichen Vorschriften, einer vom Siedlungs- abfall getrennten Erfassung zuzuführen sind.
  • Seite 27 Dear customer, We are pleased you chose a device from the SPORTSTECH product range. With sports equipment from SPORTSTECH you get the highest quality and latest technology. In order to fully use the potential of your device and be able to enjoy it for many years, please read this manual carefully before starting up and beginning of training, and use the device according to the instruc- tions.
  • Seite 28 1. Scan the QR code 2. Watch videos 3. Start fast and safely Link to the videos: https://service.innovamaxx.de/wrx400_video We are also on social media! Get the latest product information, training content and much more on our: Instagram-page Facebook-page https://www.instagram.com/sportstech.de https://www.facebook.com/sportstech.de...
  • Seite 29 INDEX INHALT 1. IMPORTANT SAFETY INSTRUCTIONS ................. 30 2. YOU MAY ALSO INTERESTED IN THESE ACCESSOIRES ..........31 3. EXPLODED DRAWING/SPARE PARTS LIST ..............32 4. ASSEMBLY ......................33 5. STORAGE ....................... 34 6. FILLING /DRAINING THE WATER TANK ............... 36 7.
  • Seite 30: Important Safety Instructions

    1. IMPORTANT SAFETY INSTRUCTIONS Basic precautions should always be followed, including the following safety instructions when using the crosstrainer: Read all instructions before using this equipment. • It is important to read this entire manual before assembling and using the equipment. Safe and effective use can only be achieved if the equipment is assembled, maintained and used properly.
  • Seite 31: You May Also Interested In These Accessoires

    The ideal protection. For your home workout. Sportstech has a floor protection mat to prevent your fitness equipment from damaging your floor at home. Of course it is available in different sizes and can also be used for yoga or other exercises. It protects your floor from marks, dirt or scratches.
  • Seite 32: Exploded Drawing/Spare Parts List

    3. EXPLODED DRAWING/SPARE PARTS LIST At the following link At the following link you will find the exploded drawing you will find the exploded drawing and the spare parts list: and the spare parts list: https://service.innovamaxx.de/wrx400_spareparts https://service.innovamaxx.de/wrx400_spareparts...
  • Seite 33: Assembly

    4. ASSEMBLY Step 1 Turn the main rail (40) over and secure the rear stand (55) with the screws (92), (Figure 1). Slide the seat (44) into the main rail as indicated by the direction arrow (Figure 2). Then install the rail connec- tor (37) with the perforated plate (100) and the pre-installed screws (54).
  • Seite 34: Storage

    Step 3 Connect the computer mount (2) and the main frame (28) with the screws (3). The drive belt (74) runs under the roller (6). Plug the cables of the computer (1) into the cables of the sensors of the main frame (28). Ensure that the connector is securely fastened (you will should hear a clicking sound when connecting).
  • Seite 35 Step 2 Carefully tilt the main rail (40) over the main frame (28) and reattach the handle (97) and the safety pin (98). The unit rests on the feet of the main frame (28). DO NOT set up vertically! The main frame (28) must not be tilted vertically, as there is a risk that the unit may tip over or water may leak from the tank.
  • Seite 36: Filling /Draining The Water Tank

    6. FILLING /DRAINING THE WATER TANK SET RESISTANCE The resistance of the rowing machine can be adjusted via the quantity filled into the water tank. To do this, follow the instructions below: MIN: The minimum filling level offers the lightest resistance. MAX: the maximum filling level offers the highest resistance.
  • Seite 37: Free Space And Training Space

    7. FREE SPACE AND TRAINING SPACE The training area (A) should be at least 2.6m. The free space (B) should be at least 0.6 m larger than the training area in the direction in which the equipment is accessed. The free area must also be sufficient to allow for the area needed for an emergency descent.
  • Seite 38: Battery

    9. BATTERY BATTERY Batteries are not included. 1. The monitor uses 2 “AA” battery. You can replace the battery through the back of the unit. 2. Battery must be correctly positioned and make sure the battery spring is properly in contact with battery.
  • Seite 39: Console Manual

    10. CONSOLE MANUAL SCAN • The sequence of display: TIME > CAL > RPM > COUNT > DIST > PULSE. • In SCAN mode, press MODE key to choose other functions. • Automatically scan through each mode in sequence every 6 seconds. TIME •...
  • Seite 40: Button Function

    RPM Rowings per minute Displays the current rowing speed in rowings per minute. This value becomes permanent updated. COUNT The number of rowing strokes is displayed continuously from the start of training. DIST Distance • W/O setting the target value, distance will count up. •...
  • Seite 41: Lcd-Display

    12. LCD-DISPLAY Power on LCD will display all segments with Bi sound as Image A Power off Without any signal been transmitted into the monitor for 4 minutes, and the monitor enter to SLEEP. Operation • When monitor power on (or press MODE, RESET key and hold for 3 seconds), LCD will display all segments with Bi sound for one second and enter to SCAN mode as Drawing B.
  • Seite 42: Trouble Shooting

    13. TROUBLE SHOOTING • When the display show Drawing D, it means the batteries need to be changed. • If there is no signal when you pedal, please check if the cable is well connected. • Battery low display: Image D 14.
  • Seite 43: Application Software (App)

    16. APPLICATION SOFTWARE (APP) You can download the app using the QR codes shown here or search in your store. Minimum compatibility specifications for mobile device; android 5.0 or higher with Bluetooth 4.0, iOS 8.0 or higher. Check out Kinomap for 7 days now for free or choose the FREE Fitness Data app! Android Kinomap Notes on using the App:...
  • Seite 44: Stretch Exercise

    17. STRETCH EXERCISE No matter how you do sports, please do some stretch at first, The warm muscle will extend easily, so warm up yourself with 5-10minutes, Then We suggest the following stretch exercise, five times.10 counts for each time or longer do these exercise again after sports. HEAD ROLLS Rotate your head to the right for one count, feeling the stretch up the left side of your neck, then rotate your head back for one count, stretching your chin to the ceiling and letting your mouth open.
  • Seite 45: Exercise Instructions

    18. EXERCISE INSTRUCTIONS Using your ROWING MACHINE will provide you with several benefits. 1. It will improve your physical fitness, It strengthens the heart and improves circulation as well as exercising all the major muscle groups; the back, waist, arms, shoulders, hips and legs. 2.
  • Seite 46 ALTERNATE ROWING STYLES Arms Only Rowing This exercise will tone muscles in your arms, shoulders, back and stomach. Sit as shown in Fig 4 with your legs straight, lean forward and grasp the handles. In a gradual and controlled manner lean back to just past the upright position continuing to pull the handles towards your chest.
  • Seite 47 MUSCLE TONING To tone muscle while on your ROWING MACHINE you will need to have the resistance set quite high. This will put more strain on our leg muscles and may mean you cannot train for as long as you would like.
  • Seite 48 DISPOSAL Recycling loop Packaging material can be conveyed back to the raw material cycle. Dispose of packaging material in accordance with legal provisions. Information can be retrieved from the return or collections systems of your community. Notes on the Electrical and Electronic Equipment Act (ElektroG) We would like to point out to owners of electrical and electronic equipment that, according to the applicable legal regulations, electrical devices must be disposed of separately from municipal waste.
  • Seite 49 Estimado cliente, Nos complace que haya elegido un dispositivo de la línea de productos SPORTSTECH. Con el equipo deportivo de SPORTSTECH usted obtiene la más alta calidad y la mejor tecnología. Con el fin de usar todo el potencial de su dispositivo y para que pueda disfrutarlo durante muchos años, por favor lea este manual cuidadosamente antes de comenzar a ejercitarse, y use el dispositivo de acuer- do a las instrucciones.
  • Seite 50 Montaje, Utilizar, Desmontaje. 1. Escanear el código QR 2. Ver vídeos 3. Comienza rápido y seguro Enlace a los videos: https://service.innovamaxx.de/wrx400_video ¡También estamos en redes sociales! Obtenga la última información sobre nuestros productos, entrenamientos y mucho más aquí: Instagram Facebook https://www.instagram.com/sportstech.de https://www.facebook.com/sportstech.de...
  • Seite 51 CONTENIDOS INHALT 1. INFORMACIÓN DE SEGURIDAD IMPORTANTE ............. 52 2. TAMBIÉN PODRÍA INTERESARLE ................53 3. DIBUJO DE EXPLSOIÓN/LISTA DE REPUESTOS ............54 4. MONTAJE ....................... 55 5. ALMACENAMIENTO ....................56 6. MANTENIMIENTO DEL TANQUE DE AGUA ..............58 7. ZONA LIBRE Y ZONA DE ENTRENAMIENTO ..............59 8.
  • Seite 52: Información De Seguridad Importante

    1. INFORMACIÓN DE SEGURIDAD IMPORTANTE Al usar la caminadora siempre se deben seguir las precauciones básicas, incluyendo las siguientes instrucciones de seguridad importantes. Lea todas las instrucciones antes de usar este producto. • Es importante leer todo este manual antes de ensamblar y usar el equipo. •...
  • Seite 53: También Podría Interesarle

    Para que el suelo de su casa no sufra daños por parte de su equipo de ejercicios, utilice la alfombril- la protectora de Sportstech. Por supuesto, está disponible en diferentes tamaños y también se pue- de utilizar para yoga u otros ejercicios. Protege su piso de huellas, suciedad o arañazos. Mano de obra de alta calidad y una superficie especial evitan marcas de los dispositivos que se encuentran sobre la alfombrilla.
  • Seite 54: Dibujo De Explsoión/Lista De Repuestos

    3. DIBUJO DE EXPLSOIÓN/LISTA DE REPUESTOS En el siguiente enlace En el siguiente enlace encontrarás el dibujo de explosión encontrarás el dibujo de explosión y la lista de repuestos: y la lista de repuestos: https://service.innovamaxx.de/wrx400_spareparts https://service.innovamaxx.de/wrx400_spareparts...
  • Seite 55: Montaje

    4. MONTAJE Paso 1 Gire el carril principal (40) y fije el soporte trasero (55) con los tornillos (92) (imagen 1). Deslice el asiento (44) por el carril principal como lo indica la flecha de dirección (imagen 2). A continuación, una el conector del carril (37) con la chapa perforada (100) y los tornillos premon- tados (54).
  • Seite 56: Almacenamiento

    Paso 3 Una el hueco del ordenador (2) a la estructura principal (28) con los tornillos (3). Aquí la correa de transmisión (74) pasa por debajo del rodillo (6). Conecte los cables del ordenador (1) a los cables de los sensores de la estructura principal (28). Asegúrese de que el conector esté...
  • Seite 57 Paso 2 El carril principal (40) se pliega cuidadosamente sobre la estructura principal (28) y se vuelve a fijar con la empuñadura (97) y el pasador de seguridad (98). La unidad se apoya ahora sobre la base de la estructura principal (28). No coloque la unidad en posición vertical La estructura principal (28) no debe incli- narse verticalmente, ya que existe el riesgo de que la unidad se vuelque o de que salga agua del depósito.
  • Seite 58: Mantenimiento Del Tanque De Agua

    6. MANTENIMIENTO DEL TANQUE DE AGUA AJUSTE LA RESISTENCIA La resistencia de la máquina de remo se puede ajustar a través de la cantidad de agua del depósito. Para ello, siga las siguientes instrucciones: MIN: La cantidad mínima de agua para ofrecer la resistencia más leve posible. MAX: La cantidad máxima de agua para ofrecer la mayor resistencia posible.
  • Seite 59: Zona Libre Y Zona De Entrenamiento

    7. ZONA LIBRE Y ZONA DE ENTRENAMIENTO La zona en la que se va a entrenar (A) debe ser de al menos 2,6 m. El espacio libre (B) debe ser al menos 0,6 m más grande que el área de entrenamiento en las direcciones desde las que se acce- de al dispositivo.
  • Seite 60: Batería

    9. BATERÍA BATERÍA La batería no está incluida. 1. La pantalla usa baterías 2 “AA”. Puede cambiar las baterías en la parte posterior de la unidad. 2. La batería debe ubicarse correctamente y asegúrese de que el resorte entre en contacto con la batería.
  • Seite 61: Instrucciones De La Consola

    10. INSTRUCCIONES DE LA CONSOLA SCAN • Secuencia de la pantalla: TIME > CAL > RPM > COUNT > DIST > PULSE. • En el modo SCAN, presione la tecla MODE para elegir otras funciones. • Escanee automáticamente mediante cada modo en secuencia cada 6 segundos. TIME •...
  • Seite 62: Funciones De Las Teclas

    RPM Movimientos de remo por minuto Muestra la velocidad actual de remo en movimiento de remo por minuto. Este valor se actualiza permanentemente COUNT El número de movimientos de remo se muestra continuamente desde el comienzo del ejercicio. DIST Distancia •...
  • Seite 63: Pantalla Lcd

    12. PANTALLA LCD Encendido La pantalla LCD mostrará todos los segmentos con un sonido doble Ilustracíon A Apagado Si la pantalla no recibe ninguna señal después de 4 minutos esta se SUSPENDERÁ. Funcionamiento • Al encender la pantalla (o al presionar la tecla MODE, RESET y sostener durante 3 segundos), esta mostrará...
  • Seite 64: Solución De Problemas

    13. SOLUCIÓN DE PROBLEMAS • Cuando la pantalla muestre le Dibujo D, esto significa que las baterías deben cambiarse. • Si no hay ninguna señal al pedalear, por favor revise que el cable esté bien conectado. • Pantalla con batería baja: Ilustracíon D 14.
  • Seite 65: Software (Aplicación)

    16. SOFTWARE (APLICACIÓN) Puede descargar las aplicaciones usando los códigos QR mostrados aquí o buscarlos en la tienda. Requisitos para dispositivos móviles: Android 5.0 o superior con Bluetooth 4.0, iOS 8.0 o superior. ¡Prueba ya Kinomap durante 7 días sin coste alguno o escoge la app Fitness Data GRATIS! Android Kinomap Consejos para el uso de las aplicaciones:...
  • Seite 66: Ejercicios De Estiramiento

    17. EJERCICIOS DE ESTIRAMIENTO No importa cómo se ejercite, siempre haga algo de estiramiento primero. El calentamiento muscular hará que sus músculos se extiendan fácilmente, así que caliente al menos 5-10 minutos. Luego le sugerimos hacer los siguientes ejercicios de estiramiento cinco veces. El estiramiento antes del ejercicio le ayuda a mejorar la flexibilidad y reduce los riesgos de lesiones.
  • Seite 67: Instrucciones De Ejercicio

    18. INSTRUCCIONES DE EJERCICIO Usar su MÁQUINA DE REMO le traerá muchos beneficios. 1. Mejorará su estado físico, fortalecerá el corazón y mejorará la circulación, y al mismo tiempo ejercitará todos los principales grupos musculares de su espalda, cintura, brazos, hombros, cadera y piernas.
  • Seite 68 ESTILOS ALTERNOS DE REMO Remar sólo con los brazos Este ejercicio tonificará los músculos de sus brazos, hombros, espalda y estomago. Siéntese como muestra la figura 4 con sus piernas rectas, inclínese hacia adelante y agarre los mangos. De manera controlada y gradual inclínese hacia tras pasando al posición recta y siga jalando los mangos hacia su pecho.
  • Seite 69 TONIFICACIÓN MUSCULAR Para tonificar sus músculos mientras está en su MÁQUINA DE REMO necesitará tener el set de resistencia bastante alto. Esto pondrá más tensión sobre los músculos de sus piernas y significa que tal vez< deba hacer sesiones más cortas. Si también está intentando mejorar su estado físico necesita cambiar su programa de ejercicios.
  • Seite 70 DESECHO Reciclaje loop El material de empaque puede trasladarse de nuevo al ciclo de materias primas. Deshágase del material de empaque de acuerdo a las normativas legales. Puede encontrar información en los sistemas de recolección de su comunidad. Notas sobre la Ley sobre aparatos eléctricos y electrónicos (ElektroG) Quisiéramos señalar a los propietarios de aparatos eléctricos y electrónicos viejos que éstos deben desecarse por separado de los residuos municipales de con- formidad con las normas legales aplicables.
  • Seite 71 FRANÇAIS Cher client, Nous sommes ravis que vous ayez choisi un appareil de la gamme de produits SPORTSTECH. Avec les équipements sportifs de SPORTSTECH, vous obtenez la plus haute qualité et la meilleure technologie. Afin d'utiliser pleinement le potentiel de votre appareil et de pouvoir l'apprécier pendant de nombreuses années, lisez attentivement ce manuel avant l'utilisation et le début de votre entraînement et utilisez l'ap-...
  • Seite 72 3. Démarrez rapidement et en toute sécurité Lien vers les vidéos: https://service.innovamaxx.de/wrx400_video Vous pouvez aussi nous trouver sur les réseaux sociaux! Retrouve les dernières informations sur les produits, le contenu des entraînements et bien plus encore sur notre: la page Instagram la page Facebook https://www.instagram.com/sportstech.de https://www.facebook.com/sportstech.de...
  • Seite 73 CONTENU INHALT 1. INFORMATIONS DE SÉCURITÉ IMPORTANTES ............74 2. CELA POURRAIT AUSSI VOUS INTÉRESSER ............... 76 3. DESSIN ÉCLATÉ/LISTE DES PIÈCES DE RECHANGE ............ 77 4. ENSEMBLE ......................78 5. STOCKAGE ......................79 6. REMPLISSAGE / VIDANGE DU RÉSERVOIR D'EAU ............81 7.
  • Seite 74: Informations De Sécurité Importantes

    1. INFORMATIONS DE SÉCURITÉ IMPORTANTES Les précautions de base, y compris les consignes de sécurité importantes suivantes doivent toujours être respectées lorsque vous utilisez ce tapis roulant. Lisez toutes les instructions avant d'utiliser cette appareil. • Il est important de lire ce manuel en entier avant d'assembler et d'utiliser l'équipement. Une utilisation sûre et efficace ne peut se produire que si l'équipement est assemblé, entretenu et utilisé...
  • Seite 75 • L'équipement a été testé sous la classe H.C. Poids maximum de l'utilisateur: 150kg. La capacité de freinage est indépendante de la vitesse. • L'équipement n'est pas adapté à un usage thérapeutique. • Il faut faire attention lors du soulevement ou déplacement de l'équipement afin de ne pas faire du mal à...
  • Seite 76: Cela Pourrait Aussi Vous Intéresser

    Afin que votre sol ne soit pas endommagé par votre équipement de fitness, il existe un tapis de protection Sportstech. Il est disponible en différentes tailles et peut également être utilisé pour le yoga ou d'autres exercices. Il protège votre sol contre les traces de pas, la saleté ou les rayures. La fabrication de haute qualité...
  • Seite 77: Dessin Éclaté/Liste Des Pièces De Rechange

    3. DESSIN ÉCLATÉ/LISTE DES PIÈCES DE RECHANGE A l‘adresse suivante A l‘adresse suivante vous trouverez le dessin éclaté vous trouverez le dessin éclaté et la liste des pièces de rechange : et la liste des pièces de rechange : https://service.innovamaxx.de/wrx400_spareparts https://service.innovamaxx.de/wrx400_spareparts...
  • Seite 78: Ensemble

    4. ENSEMBLE Étape 1 Retournez le rail principal (40) et fixez le pied d'appui arrière (55) avec les vis (92) (Figure 1). Glissez le siège (44) dans le rail principal comme c'est indiqué par la flèche directionnelle (Figure 2). Montez ensuite le raccord de rail (37) avec la plaque perforée (100) et les vis pré-montées (54). Fixez les butées (38) avec les écrous M8 (7) et les vis M8x25 (14).
  • Seite 79: Stockage

    Étape 3 Raccordez le support de l'ordinateur (2) et le cadre principal (28) avec les vis (3). À cette occasion, la courroie d'entraînement (74) passe sous le rouleau (6). Branchez les câbles de l'ordinateur (1) aux câbles des capteurs du cadre principal (28). Assu- rez-vous que le connecteur soit bien en place (vous entendrez un clic lors du branchement).
  • Seite 80 Étape 2 Le rail principal (40) est prudemment rabattu par-dessus le cadre principal (28) et fixé à nouveau avec la poignée (97) et la goupille de sécurité (98). L'appareil repose maintenant sur les pieds du cadre principal (28). NE PAS installer verticalement ! Le châssis principal (28) ne doit pas être basculé verticalement, car il y a un risque que l'appareil se renverse ou que de l'eau se déverse du réservoir.
  • Seite 81: Remplissage / Vidange Du Réservoir D'eau

    6. REMPLISSAGE / VIDANGE DU RÉSERVOIR D'EAU RÉGLAGE DE LA RÉSISTANCE La résistance du rameur peut être réglée par la quantité de remplissage du réservoir d'eau. Pour ce faire, suivez les instructions ci-dessous : MIN : le niveau de remplissage minimum offre la résistance la plus légère. MAX : la capacité...
  • Seite 82: Surface Libre Et Surface D'entraînement

    7. SURFACE LIBRE ET SURFACE D‘ENTRAÎNEMENT La zone d‘entraînement (A) doit être d‘au moins 2,6 m. L‘espace libre (B) doit être d‘au moins 0,6 m plus grande que la zone d‘entraînement dans les directions par lesquelles on accède au matériel. L‘espace libre doit également inclure une zone permettant de descendre d‘urgence.
  • Seite 83: Batterie

    9. BATTERIE BATTERIE Les piles ne sont pas incluses dans la livraison. 1. Le moniteur utilise 2 batterie "AA". Vous pouvez remplacer la batterie par l'arrière de l'appareil. 2. La batterie doit être correctement positionnée et assurez-vous que le ressort de la batterie est bien en contact avec la batterie.
  • Seite 84: Notice D'utilisation De La Console

    10. NOTICE D'UTILISATION DE LA CONSOLE SCAN • L'ordre d'affichage : TIME > CAL > RPM > COUNT > DIST > PULSE • En mode SCAN, appuyez sur la touche MODE pour choisir d'autres fonctions. • Numérisez automatiquement chaque mode dans l'ordre toutes les 6 secondes. TIME •...
  • Seite 85: Fonctions Des Boutons

    RPM Mouvements par minute Affiche la vitesse actuelle du rameur en mouvements par minute. Cette valeur est mise à jour en permanence. COUNT Le nombre de mouvements est affiché en continu dès le début de l'entraînement DIST Distance • Si aucune valeur cible n'est définie, le comptage de la distance commencera. •...
  • Seite 86: Ecran Lcd

    12. ECRAN LCD Allumer L'écran LCD affichera tous les segments avec le son Bi comme Illustration A Éteindre Si aucun signal n'est transmis au moniteur pendant 4 minutes, le moniteur passera au mode SLEEP. Opération • Lorsque le moniteur est allumé (ou appuyez sur MODE, touche RESET pendant 3 secondes), l'écran LCD affiche tous les segments avec le son Bi pendant une seconde et passe en mode SCAN comme sur le dessin B.
  • Seite 87: Diagnostic Des Anomalies

    13. DIAGNOSTIC DES ANOMALIES • Lorsque l'écran affiche le dessin D, cela signifie que les piles doivent être changées. • S'il n'y a pas de signal lorsque vous pédalez, veuillez vérifier si le câble est bien connecté. • L'écran affiche batterie faible Illustration D 14.
  • Seite 88: Logiciel D'application (App)

    16. LOGICIEL D’APPLICATION (APP) Pour télécharger l’application, scannez son code QR ou recherchez-la dans votre App Store. Conditions requises : l’appareil mobile doit correspondre à un Android 5.0 ou davantage avec Blue- tooth 4.0 ou un iOS 8.0 ou davantage. Essayez Kinomap dès maintenant et sans frais pendant 7 jours ou choisissez l'application GRATUITE Fitness Data! Android...
  • Seite 89: Excercice D'étirement

    17. EXCERCICE D'ÉTIREMENT Peu importe comment vous pratiquez le sport, Veuillez faire quelques étirements avant de commencer votre entraî-nement, le muscle chaud s’étendra facilement, donc réchauffez vous durant 5-10minutes, nous suggérons l'exercice d'étirement suivant : 5 fois ,10 comptes pour chaque fois ou plus, faire ces exercices à...
  • Seite 90: Instructions D'exercice

    18. INSTRUCTIONS D'EXERCICE L'utilisation de votre RAMEUR a plusieurs avantages. 1. Il permettra d'améliorer votre condition physique, de renforcer votre cœur et d'améliorer la circulation ainsi que l'exercice de tous les groupes musculaires majeurs; Le dos, la taille, les bras, les épaules, les hanches et les jambes.
  • Seite 91 AUTRES ALTERNATIFS Exercices Juste pour les bras Cet exercice tonifiera les muscles dans les bras, les épaules, le dos et l'estomac. Asseyez-vous comme indiqué sur la figure 4 avec vos jambes droites, penchez-vous vers l'avant et saisissez les poignées. De manière graduelle et contrôlée, reculez juste après la position droite vers le haut en continuant à...
  • Seite 92 TONNAGE MUSCULAIRE Pour tonifier le muscle avec votre RAMEUR, il faudra que la résistance soit assez élevée. Cela mettra plus de pression sur nos muscles des jambes et peut signifier que vous ne pouvez pas vous entraîner aussi longtemps que vous le souhaitez. Si vous essayez également d'améliorer votre conditionnement physique, vous devez modifier votre programme de formation.
  • Seite 93: Mise Au Rebut

    MISE AU REBUT Chaîne du recyclage Les matériaux d‘emballage peuvent être transportés vers le cycle des matières premières. La disposition des matériaux d‘emballage, conformément aux dispositions légales. Les informations peuvent être récupérées à partir des systèmes de retour ou de collections. Information relative à...
  • Seite 95 ITALIANO Gentile cliente Siamo lieti che abbiate scelto un dispositivo della gamma SPORTSTECH. Con le attrezzature sportive di SPORSTECH potrete usufruire della più alta qualità e della più recente tecnologia. Per sfruttare a pieno il potenziale del dispositivo e poterlo utilizzare per molti anni, raccomandiamo di leggere attentamente questo manuale prima di iniziare l’allenamento e di utilizzare il dispositivo seguendo...
  • Seite 96 2. Guarda il video 3. Inizia ad allenarti veloce e sicuro Link per il Video: https://service.innovamaxx.de/wrx400_video Ci siamo anche sui social! Scopri le ultime novità sui prodotti, contenuti per l'allenamento e molto altro ancora sul nostro: pagina Instagram pagina Facebook https://www.instagram.com/sportstech.de https://www.facebook.com/sportstech.de...
  • Seite 97 INDICE INHALT 1. INFORMAZIONI IMPORTANTI PER LA SICUREZZA ............98 2. VI POTREBBE ANCHE INTERESSARE ................. 100 3. DISEGNO ESPLOSO/LISTA DEI PEZZI DI RICAMBIO ............. 101 4. MONTAGGIO ......................102 5. STOCCAGGIO ......................103 6. RIEMPIRE / SVUOTARE IL SERBATOIO D'ACQUA ............105 7.
  • Seite 98: Informazioni Importanti Per La Sicurezza

    1. INFORMAZIONI IMPORTANTI PER LA SICUREZZA Precauzioni minime, incluse importanti istruzioni di sicurezza incluse nel presente manual dovrebbero essere sempre seguite durante l’uso del tapisroulant. Leggere tutte le istruzioni prima di utilizzare il dispositivo. • È importante leggere completamente questo manuale prima di assemblare ed utilizzare l’attrezzatura.
  • Seite 99 • L’attrezzatura è stata testata nellla classe H.C. Peso massimo utente: 150kg. La capacità di frenatura è indipendente dalla velocità. • L’attrezzatura non è adatta all’uso terapeutico. • È necessario prestare attenzione durante il sollevamento o lo spostamento dell’attrezzatura per non danneggiare la tua schiena.
  • Seite 100: Potrebbe Anche Interessare

    ∙ MATERIALE PREGIATO: Realizzato con i materiali migliori per un allenamento senza problemi e preoccupazioni. Materasso fitness ideale altamente resistente e dalla tenuta massima. Sopporta un peso elevato. Puoi acquistare questo prodotto nelle dimensioni desiderate tramite il se- guente codice QR o link. www.sportstech.de/bodenschutzmatte...
  • Seite 101: Disegno Esploso/Lista Dei Pezzi Di Ricambio

    3. DISEGNO ESPLOSO/LISTA DEI PEZZI DI RICAMBIO Al seguente link Al seguente link troverete il disegno esploso troverete il disegno esploso e la lista dei pezzi di ricambio: e la lista dei pezzi di ricambio: https://service.innovamaxx.de/wrx400_spareparts https://service.innovamaxx.de/wrx400_spareparts...
  • Seite 102: Montaggio

    4. MONTAGGIO Passo 1 Girare la guida principale (40) e fissare il piede d'appoggio posteriore (55) con le viti (92) (Figura 1). Far scorrere il sedile (44) nella guida principale come indicato dalla freccia (Figura 2). Quindi unire il connettore della guida (37) con la piastra forata (100) e le viti preinstallate (54). Fissare i tappi (38) con i dadi M8 (7) e le viti M8x25 (14).
  • Seite 103: Stoccaggio

    Passo 3 Fissare l'apparecchio computerizzato (2) e il telaio principale (28) con le viti (3). In questo caso, la cinghia di trasmissione (74) deve essere posta sotto il rullo (6). Inserire i cavi del computer (1) nei cavi dei sensori dal telaio principale (28). Assicurarsi che il con- nettore sia inserito correttamente (durante il collegamento si udirà...
  • Seite 104 Passo 2 La guida principale (40) deve essere delicatamente ribaltata sopra il telaio principale (28) e collegata nuovamente con la maniglia (97) e il perno di bloccaggio (98). Il dispositivo è quindi posto sui piedi d'appoggio del telaio principale (28). NON metterlo verticale! Il telaio principale (28) non deve essere inclinato vertical- mente poiché...
  • Seite 105: Riempire / Svuotare Il Serbatoio D'acqua

    6. RIEMPIRE / SVUOTARE IL SERBATOIO D'ACQUA IMPOSTARE LA RESISTENZA La resistenza del vogatore viene impostata a seconda della quantità d'acqua presente nel serbatoio. Si prega di seguire le seguenti istruzioni: MIN: un serbatoio riempito al minimo garantisce una resistenza minima MAX: un serbatoio riempito al massimo garantisce la massima resistenza COME RIEMPIRLO 1.
  • Seite 106: Spazio Libero E Zona D'allenamento

    7. SPAZIO LIBERO E ZONA D’ALLENAMENTO La zona d’allenamento (A) dovrebbe essere di minimo 2,6 m. La spazio libero (b) dovrebbe essere minimo 0,6 m più estesa della zona d’allenamento, dalla direzione in cui si accede all’equipag- giamento. Lo spazio libero deve contenere anche lo spazio per la discesa di emergenza. Se due dispositivi sono uno accanto all’altro, lo spazio libero può...
  • Seite 107: Batteria

    9. BATTERIA BATTERIA Le batterie non sono incluse nel contenuto dell'offerta 1. Il monitor utilizza 2 batteria “AA”. Puoi sostituire la batteria dal retro dell’unità. 2. La batteria deve essere posizionata correttamente e controlla che la molla sia opportunamente a contatto con la batteria.
  • Seite 108: Manuale D'istruzione Della Console

    10. MANUALE D’ISTRUZIONE DELLA CONSOLE SCAN • La sequenza del display: TIME > CAL > RPM > COUNT > DIST > PULSE. • In modalità SCAN, premere il pulsante MODE per scegliere altre funzioni. • Scansione automatica in ogni modalità in sequenza ogni 6 secondi. TIME •...
  • Seite 109: Pulsante Funzione

    RPM Remate per minuto Mostra l'attuale velocità di remata in remate per minuto. Questo valore viene aggiornato permanentemente. COUNT Il numero di remate viene mostrato continuamente dall'inizio dell'allenamento. DIST Distanza • Senza impsotare il valore obiettivo, comincerà il conteggio della distanza. •...
  • Seite 110: Display Lcd

    12. DISPLAY LCD Accensione Il display LCD mostrerà tutti i segmenti con un segnale acustico Illustrazione A Spegnimento Senza nessun segnale trasmesso al monitor per 4 minuti, il monitor entrerà in modalità SLEEP. Operazioni • Quando si accende il monitor (o si tengono premuti i pulsanti MODE, RESET per 3 secondi), il display LCD mosterà...
  • Seite 111: Risoluzione Dei Problemi

    13. RISOLUZIONE DEI PROBLEMI • Quando il display mostra il Disegno D, vuol dire che le battertie devono essere sostituite. • Se non c'è nessun segnale quando pedali, per favore controlla se il cavo è ben connesso • display batterie in esaurimento: Illustrazione D 14.
  • Seite 112: Software Di Utilizzo (App)

    16. SOFTWARE DI UTILIZZO (APP) Puoi scaricare l'app utilizzando i codici QR mostrati qui o cercando direttamente nel negozio. Pre- requisito per il dispositivo mobile: Android 5.0 o versioni successive con Bluetooth 4.0, iOS 8.0 o versioni successive. Provate l'app kinomap gratuitamente per 7 giorni oppure scegliete l'app GRATUITA Fitness Data! Android Kinomap...
  • Seite 113: Esercizi Di Stretching

    17. ESERCIZI DI STRETCHING Non importa la ragione per cui fai sport, fai in modo di fare sempre esercizi di stretching prima di cominciare. Il uscolo riscaldato si allungherà facilmente, quindi scaldati con degli esercizi per 5-10 minuti. Ti suggeriamo di eseguire i seguenti esercizi cinque volte conta fino a dieci ogni volta o anche più a lungo quando ripeti l’esercizio dopo aver praticato sport.
  • Seite 114: Istruzioni Di Allenamento

    18. ISTRUZIONI DI ALLENAMENTO Utilizzando il tuo VOGATORE otterrai diversi benefici. (1) Migliorerà la tua forma fisica, rafforza il cuore e migliora la circolazione così come allena tutti i maggiori gruppi muscolari; schiena, vita, braccia, spalle, fianchi e gambe. (2) Tonifica i tuoi muscoli e, assieme ad una dieta controllata, ti aiuta a perdere peso. Vogare è...
  • Seite 115 STILI DI VOGATA ALTERNATA Vogata solo per Braccia Questo esercizio tonificherà i muscoli nelle tue braccia, spalle, schiena e stomaco. Siediti come mostrato in Fig 4 con le tue gambe dritte, inclinato in avanti e afferra le maniglie. In modo graduale e controllato inclinati all’indietro per raggiungere la posizione esatta continuando a tirare le maniglie verso il tuo petto.
  • Seite 116 TONIFICAZIONE MUSCOLARE Per tonificare i muscoli usando il VOGATORE sarà necessario impostare una resistenza abbastanza elevata. Questo metterà più pressione ai nostri muscoli delle gambe e può significare che non puoi allenarti a lungo come vorresti. Se stai cercando di migliorare anche la tua forma fisica dovresti modificare il tuo programma di allenamento.
  • Seite 117: Smaltimento

    SMALTIMENTO Riciclaggio dei rifiuti Il materiale di imballaggio può essere trasportato di nuovo al ciclo delle materie prime. Smaltire il materiale di imballaggio in conformità alle disposizioni di legge. Le informazioni possono essere recuperate dai sistemi di ritorno o di raccolta della vostra comunità. Avviso sulla legge degli apparecchi elettrici ed elettronici (ElektroG) Desideriamo far notare ai proprietari di vecchie apparecchiature elettriche ed elettroniche che le apparecchiature elettriche devono essere raccolte separatamente dai rifiuti urbani, in conformità...
  • Seite 119 NEDERLANDS Geachte klant, We zijn blij dat je een apparaat uit het SPORTSTECH-assortiment hebt gekozen. De sportuitrusting van SPORTSTECH biedt je de hoogste kwaliteit en de nieuwste technologie. Lees vóór gebruik deze gebruikershandleiding aandachtig door en gebruik het apparaat zoals aangege- ven.
  • Seite 120 1. Scan de QR-code 2. Bekijk video‘s 3. Begin snel en veilig Link naar de video's: https://service.innovamaxx.de/wrx400_video We zijn ook actief op social media! Raadpleeg voor de meest recente productinformatie, trainingen en nog veel meer, onze: Instagram-pagina Facebook-pagina https://www.instagram.com/sportstech.de https://www.facebook.com/sportstech.de...
  • Seite 121 INHOUD INHALT 1. BELANGRIJKE VEILIGHEIDSINSTRUCTIES ..............122 2. DIT KAN OOK INTERESSANT VOOR JE ZIJN ............... 124 3. EXPLOSIETEKENING/ONDERDELENLIJST ..............125 4. MONTAGE ......................126 5. OPSLAG ......................... 127 6. WATERRESERVOIR VULLEN/LEDIGEN ................ 129 7. VRIJE RUIMTE EN TRAININGSRUIMTE ................ 130 8.
  • Seite 122: Belangrijke Veiligheidsinstructies

    1. BELANGRIJKE VEILIGHEIDSINSTRUCTIES Deze algemene veiligheidsinformatie moet strikt worden nageleefd bij het gebruik van dit product. Lees alle instructies voordat je het product gebruikt. • Lees de volledige instructies zorgvuldig door voordat je het toestel instelt en gebruikt. Veilig en effectief gebruik kan alleen worden gegarandeerd als het toestel correct is gemonteerd, onderhouden en gebruikt.
  • Seite 123 • Het toestel is getest en gecertificeerd volgens klasse HC. Maximaal gebruikersgewicht: 150 kg. Het remvermogen is onafhankelijk van de snelheid. • Het toestel is niet geschikt voor therapeutisch gebruik. • Let er bij het tillen of verplaatsen van het toestel op dat de rug niet gekwetst raakt. Gebruik altijd de juiste heftechniek en/of vraag iemand om hulp.
  • Seite 124: Dit Kan Ook Interessant Voor Je Zijn

    2. DIT KAN OOK INTERESSANT VOOR JE ZIJN De ideale bescherming voor je training thuis. Sportstech biedt een vloerbeschermingsmat om ervoor te zorgen dat je vloer thuis niet wordt be- schadigd door je fitnessapparatuur. De mat is natuurlijk in verschillende maten verkrijgbaar en kan ook worden gebruikt voor yoga of andere oefeningen.
  • Seite 125: Explosietekening/Onderdelenlijst

    3. EXPLOSIETEKENING/ONDERDELENLIJST Onder de volgende link Onder de volgende link vind je de explosietekening vind je de explosietekening en de reserveonderdelenlijst: en de reserveonderdelenlijst: https://service.innovamaxx.de/wrx400_spareparts https://service.innovamaxx.de/wrx400_spareparts...
  • Seite 126: Montage

    4. MONTAGE Stap 1 Draai de hoofdrail (40) om en bevestig de achterste standaard (55) met de schroeven (92), (af- beelding 1). Schuif de zitting (44) op de hoofdrail zoals aangegeven door de richting van de pijl (afbeelding 2). Installeer vervolgens de railconnector (37) met de openingenplaat (100) en de vooraf geïnstalleerde schroeven (54).
  • Seite 127: Opslag

    Stap 3 Verbind het computerframe (2) en het hoofdframe (28) met de schroeven (3). Hierbij loopt de aandrijfriem (74) onder de rol (6) door. Sluit de kabels van de computer (1) aan op de kabels van de sensoren van het hoofdframe (28). Zorg ervoor dat de connector goed vastzit (je hoort een klikgeluid bij het aansluiten).
  • Seite 128 Stap 2 De hoofdrail (40) wordt voorzichtig over het hoofdframe (28) gekanteld en opnieuw bevestigd met de handgreep (97) en de borgpen (98). Het apparaat staat nu op de voeten van het hoofdframe (28). NIET verticaal opstellen! Het hoofdframe (28) mag niet verticaal worden gekanteld, omdat het risico bestaat dat het apparaat kantelt of dat er water uit de tank gaat.
  • Seite 129: Waterreservoir Vullen/Ledigen

    6. WATERRESERVOIR VULLEN/LEDIGEN DE WEERSTAND INSTELLEN De weerstand van de roeimachine kan worden aangepast via de capaciteit van het waterreservoir. Volg hiervoor de onderstaande instructies: MIN: De minimale capaciteit biedt de lichtste weerstand. MAX: De maximale capaciteit biedt de grootste weerstand. VULLEN 1.
  • Seite 130: Vrije Ruimte En Trainingsruimte

    7. VRIJE RUIMTE EN TRAININGSRUIMTE Het trainingsgebied (A) moet minimaal 2,6 m zijn. De vrije ruimte (B) moet ten minste 0,6 meter groter zijn dan het trainingsgebied in de richtingen van waaruit de apparatuur wordt betreden. De vrije ruimte moet ook het gebied voor nooddaling omvatten. Als twee apparaten naast elkaar staan, kan het vrije gebied worden verdeeld.
  • Seite 131: Batterij

    9. BATTERIJ BATTERIJ Le batterie non sono incluse nel contenuto dell'offerta 1. Voor de monitor heb je 2 "AA"-batterij nodig. Je kunt de batterij aan de achterkant van het toestel vervangen. 2. De batterij moet correct worden geplaatst en zorg ervoor dat de batterijveer contact maakt met de batterij.
  • Seite 132: Handleiding Console

    10. HANDLEIDING CONSOLE SCAN • De volgorde van het display: TIME > CAL > RPM > COUNT > DIST > PULSE. • Druk in de SCAN-modus op de MODE-knop om andere functies te selecteren. • Scan automatisch door elke modus met een sequentie van 6 seconden. TIME: tijd •...
  • Seite 133: Functies Van De Knoppen

    RPM: roeislagen per minuut Toont de huidige roeisnelheid in roeislagen per minuut. Deze waarde wordt altijd bijgewerkt. COUNT Het aantal roeislagen wordt altijd weergegeven vanaf het begin van de training. DIST (DISTANCE): afstand • Als er geen waarde is ingesteld, wordt de afstand opgeteld. •...
  • Seite 134: Lcd-Display

    12. LCD-DISPLAY Inschakelen Ingeschakeld: Op het LCD-scherm worden alle segmenten door een dubbele piep bevestigd, zoals weergegeven in afbeelding A. Afbeelding A Uitschakelen Als er gedurende 4 minuten geen signaal naar de console wordt doorgegeven, gaat deze in de slaap- stand.
  • Seite 135: Problemen Oplossen

    13. PROBLEMEN OPLOSSEN • Als het display afbeelding D weergeeft, betekent dit dat de batterijen moeten worden vervangen. • Controleer of de kabel goed is aangesloten als er geen signaal is tijdens het trappen. • Batterij-indicator: Afbeelding D 14. OPMERKINGEN 1.
  • Seite 136: Applicatiesoftware (App)

    16. APPLICATIESOFTWARE (APP) Je kunt de app's downloaden met behulp van de hier weergegeven QR-codes of je kunt ze zoeken in de store. Voorwaarde voor mobiel apparaat: Android 5.0 of hoger met Bluetooth 4.0, iOS 8.0 of hoger. Probeer Kinomap nu 7 dagen gratis of kies voor de GRATIS Fitness Data-app! Android Kinomap Opmerkingen over het gebruik van de app:...
  • Seite 137: Stretchoefeningen

    17. STRETCHOEFENINGEN Voor je de loopband gebruikt, kun je het beste 5 tot 10 minuten stretchoefeningen doen voor de opwarming. Stretching voor de training helpt de flexibiliteit te verbeteren en het risico op letsel te verminderen. MET JE HOOFD ROLLEN Draai je hoofd een seconde naar rechts, voel de stretch aan de linkerkant van je nek, draai dan je hoofd een seconde terug, strek je kin omhoog en laat je mond open.
  • Seite 138: Oefeninstructies

    18. OEFENINSTRUCTIES Trainen met je ROEIMACHINE geeft je verschillende voordelen. 1. Het zal je fysieke fitheid verbeteren, het hart versterken en de bloedcirculatie verbeteren en alle belangrijke spiergroepen trainen, maar ook de rug, taille, armen, schouders, heupen en benen. 2. Het versterkt je spieren en in combinatie met een caloriebeperkt dieet helpt het je om gewicht te verliezen.
  • Seite 139 ALTERNATIEVE ROEISTIJLEN Roeioefening alleen voor de armen Bij deze oefening worden spieren in de armen, schouders, rug en buik gebruikt. Ga zitten met je benen recht, voorover leunend zoals getoond in Afb. 4 en pak de stang vast. Leun achterover in een geleidelijke en gecontroleerde beweging net voorbij de rechtop zittende positie en blijf de stang naar je borst trekken.
  • Seite 140 SPIERVERSTEVIGING Om spieren te versterken tijdens het oefenen met je ROEIMACHINE, moet je de weerstand vrij hoog instellen. Dit zal je beenspieren meer belasten en je kunt mogelijk niet zo lang trainen als je wilt. Als je ook je algehele conditie wilt verbeteren, moet je het trainingsprogramma wijzigen. Je moet normaal oefenen tijdens het opwarmen en afkoelen, maar tegen het einde van de trainingsfase moet je de weerstand verhogen zodat de benen harder werken.
  • Seite 141 VERWIJDERING Recyclingcyclus Verpakkingsmaterialen kunnen worden teruggebracht in de grondstoffenkringloop. Voer de verpakking af volgens de geldende voorschriften. Informatie kan worden verkregen uit de retournerings- en ophaalsystemen van je gemeente. Informatie volgens de wet op elektrische en elektronische apparatuur (ElektroG - Duitse norm) We wijzen de eigenaren van elektrische en elektronische apparatuur erop dat oude elektrische apparatuur gescheiden van het gemeentelijk afval moet worden ingezameld volgens de geldende wettelijke voorschriften.
  • Seite 142: Declaration Of Conformity

    19. DECLARATION OF CONFORMITY Unter folgendem Link Unter folgendem Link finden Sie die Konformitätserklärung: finden Sie die Konformitätserklärung: At the following link At the following link you will find the declaration of conformity: you will find the declaration of conformity: https://service.innovamaxx.de/wrx400_conformity https://service.innovamaxx.de/wrx400_conformity...
  • Seite 144 Verkauf durch / Distributed by / Distribuido por / Distribué / Distribuito da / Verkoop via InnovaMaxx GmbH Potsdamer Platz 11 10785 Berlin +49 30 220 663 520 service@innovamaxx.de www.sportstech.de...

Inhaltsverzeichnis