Herunterladen Inhalt Inhalt Diese Seite drucken

Werbung

Verfügbare Sprachen
  • DE

Verfügbare Sprachen

  • DEUTSCH, seite 1
Montage- und Bedienungsanleitung für Bestell-Nr.
Assembly and exercise instructions for Order No.
Notice de montage et d'utilisation du
Montage- en bedieningshandleiding voor
Инструкция по монтажу и эксплуатации
Heimsport-Trainingsgerät
EL 5
D
GB
F
No. de commande
NL
Bestellnummer
RU
№ заказа
98251
- (Schwarz)
98251 A - (Silber)
98253
- (Rot)
1

Werbung

Inhaltsverzeichnis
loading

Inhaltszusammenfassung für Christopeit EL 5 - 98251

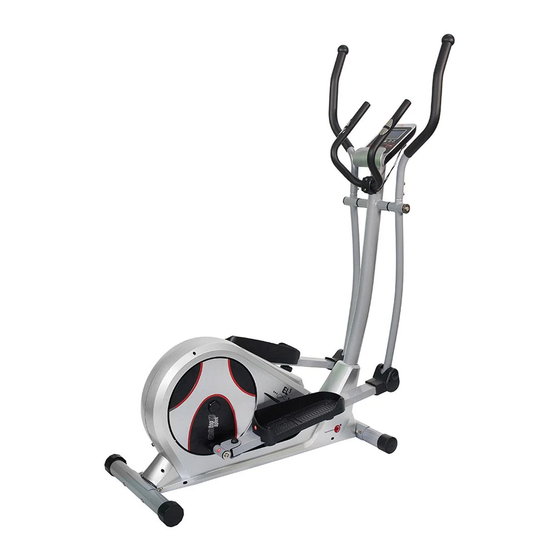
  • Seite 1 Heimsport-Trainingsgerät EL 5 Montage- und Bedienungsanleitung für Bestell-Nr. 98251 - (Schwarz) Assembly and exercise instructions for Order No. 98251 A - (Silber) Notice de montage et d’utilisation du 98253 - (Rot) No. de commande Montage- en bedieningshandleiding voor Bestellnummer Инструкция по монтажу и эксплуатации №...
  • Seite 2: Inhaltsverzeichnis

    Inhaltsübersicht Contents Page 1. Wichtige Empfehlungen und Sicherheitshinweise Seite 2. Einzelteileübersicht Seite 3. Stückliste Seite 4 - 5 4. Montageanleitung mit Explosionsdarstellungen Seite 6 - 8 5. Computeranleitung Seite 9 - 12 Sommaire Page 6. Trainingsanleitung Seite 12 Sehr geehrte Kundin, sehr geehrter Kunde Wir gratulieren Ihnen zum Kauf dieses Heimsport-Trainingsgerätes und Inhoudsopgave Pagina 34...
  • Seite 4: Stückliste

    Bedienungsfreundlicher Computer mit gleichzeitiger Anzeige von: Zeit, Geschwindigkeit, Telefax: +49 (0) 20 51 - 6 06 74 4 Entfernung, ca. Kalorienverbrauch, Körperfett – Analyse, Pedalumdrehung, Watt und Pulsfrequenz. e-mail: info@christopeit-sport.com Eingabe von Grenzwerten wie Zeit, Entfernung und ca. Kalorienverbrauch. www.christopeit-sport.com Überschreitung der Grenzwerte wird angezeigt.
  • Seite 5 Art.-Nr. 98251 - (Schwarz) Art.-Nr. 98251 A - (Silber) Art.-Nr. 98253 - (Rot) Abbildungs- Bezeichnung Abmessung Menge Montiert an ET-Nummer Stück Abbildungs Nr. Selbstsichernde Mutter 39-9918-CR Sicherungsring 36-9825320-BT Schraube M10x40 39-10131 Lager 41+52 36-9825321-BT Distanzstück 10x17x25 36-9825322-BT Netzanschlußbuchse 36-9825323-BT Grundrahmen 33-9825316-SI Schraube 5x10...
  • Seite 6: Montageanleitung Mit Explosionsdarstellungen

    Montageanleitung Bevor Sie mit der Montage beginnen, unbedingt unsere Empfehlungen und Sicherheitshinweise beachten! Schritt 1: Montage des Vorderen Fußrohr (73) und des Hinteren Fußrohr (25) am Grundrahmen (45) mittels der Schloßschrauben (24), der Unterlegscheiben 8//20 (10) und der Hutmuttern M8 (11). 1.
  • Seite 7 Schritt 3: Schritt 5: Montage der Griffrohre (6) an den Verbindungsrohren (12) mittels der M o n t a g e d e r F u ß s c h a l e n a u f n a h m e re c h t s ( 2 8 R ) u n d d e r Schrauben (80) der Unterlegscheiben (10) und der Federring (79).
  • Seite 8 Schritt 6: Montage der rechten Fußschale (17R) an der rechten Fußschalenaufnahme (28R) und der linken Fußschale (17L) an der linken Fußschalenaufnahme (28L) mittels der Schlossschrauben (16), der Unterlegscheiben (31), Federringen (32) und der Sterngriffmutter (33) und Abdeckungen (14+15). 1. Die rechte Fußschale (17R) auf die Fußschalenaufnahme (28R) aufstecken.
  • Seite 9: Computeranleitung

    TRAININGSCOMPUTER sition zurückgesetzt. „E“ : Mit der Eingabe - und Bestätigungstaste (N) wechselt man von einem Eingabefeld zum nächsten. Die jeweils angewählte Funk- tion blinkt. Mit der +/- Taste O + P geben Sie die Werte ein und durch erneutes Drücken der „E“ –Taste werden diese bestätigt. Gleichzeitig springt die Blinkanzeige in das nächste Eingabe feld.
  • Seite 10 PULSOBERGRENZE/BMI/ALTER: Verfügbar in den Programmen 1- 8 angezeigt. Die Veränderung wirkt sich auf die momentane und folgende ( nicht in Programm 10 –12). Sobald Sie Ihr Alter eingeben, errechnet der Zeit-Position aus. Die Höhe der Balken zeigt die Belastung an, nicht ein Computer einen Warn-Pulswert, den Sie keinesfalls überschreiten sollten Geländeprofi...
  • Seite 11 P7 (Intervall) P8 (U1 - U4) P9 (Watt-Drehzahlunabhängig) dieses Programm entspricht den Funktionen eines normalen Heimtrainers. 1. Handpulsmessung: So werden hier die Zeit , die Geschwindigkeit/U/min, die Entfernung, die Im linken und rechten Lenkergriffteil ist je eine Metallkontaktplatte, die Watt/Kjoule, der aktuelle Puls und der Warnpuls permanent im Anzeigefeld Sensoren, eingelassen.
  • Seite 12: Garantiebestimmungen

    Garantiebestimmungen Die Garantie beginnt mit dem Rechnungs- bzw. Auslieferdatum und beträgt 24 Monate. Während der Garantiezeit werden eventuelle Mängel kostenlos beseitigt. Bei Feststellung eines Mangels sind Sie verpfl ichtet diesen unverzüglich dem Hersteller zu melden. Es steht im Ermessen des Herstellers die Garantie durch Ersatzteilversand oder Reparatur zu erfüllen.
  • Seite 13: Important Recommendations And Safety Information

    Contents 1. Summary of Parts Page 2. Important Recommendations and Safety Information Page 13 3. Parts List Page 14 - 15 4. Assembly Instructions With Exploded Diagrams Page 16 - 18 5. Computer instructions Page 19 - 21 6. Training Instructions Page 22 Dear customer, We congratulate you on your purchase of this home training sports unit and...
  • Seite 14: Parts List

    Telefax: +49 (0) 20 51 - 6 06 74 4 Pedal revolutions per minute, Watt and heart rate. Input of limits for time, distance and approx. calories e-mail: info@christopeit-sport.com Announcement of higher limits and Fitness test announcement Max. body weight 150 KG www.christopeit-sport.com...
  • Seite 15 Art.-Nr. 98251 - (black) Art.-Nr. 98251 A - (silver) Art.-Nr. 98253 - (red) Illustration imensions Quantity Attached to ET number signation illustration No. Selfl ocking nut 39-9918-CR Safty clip 36-9825320-BT Screw M10x40 39-10131 Bearing 41+52 36-9825321-BT Spacer 10x17x25 36-9825322-BT Power plug 36-9825323-BT Maine frame 33-9825316-SI...
  • Seite 16: Assembly Instructions With Exploded Diagrams

    Assembly Instructions Before beginning assembly, be sure to observe our recommendations and safety instructions. Step 1: Install of the front footbar (73) and the rear footbar (25) on the main frame (45) with the carriage bolts (24), the washers 8//20 (10) and the cap nuts M8 (11).
  • Seite 17 Step 3: Step 5: Installation of the handgrip bars (6) on the connecting tubes (12) with Installation of the footrest holder (28R) and the left footrest holder (28L) carriage bolt (80), washers (10) and spring washers (79). with the connecting tubes (12) to the pedal crank and the support (81) 1.
  • Seite 18 Step 6: Installation of the right footrest (17R) on the right footrest holder (28R) and the left footrest (17L) on the left footrest holder (28R) with the carriage bolts (16), the washers (31), spring washer (32) and the Handgrip nuts (33) and plastic covers (14+15). 1.
  • Seite 19: Computer Instructions

    TRAININGSCOMPUTER ABOUT DISPLAY A. START: Indicates the program selected has started. B. STOP: Indicates the program selected has stopped and users are free to change the programs and the value of functions applied. C. PROGRAM: Indicates the programs selected from PROGRAM 1 to PROGRAM 13.
  • Seite 20 Operating Ranges Please note that only 1 value of TIME or DISTANCE can be adjusted. Both adjustments do not exist at the same time. For example, the value of DISTANCE is „0.0“ while the value of TIME is adjusted to be any number except „00:00“.
  • Seite 21 E. Body Types: There are 9 body types divided according to the FAT% calculated. Type 1 may suggest a target heart rate to exercise. The suggested heart rate is is from 5% to 9%. Type 2 is from 10% to 14%. Type 3 is from 15% to 19%. 85%(220 –...
  • Seite 22: Training Instructions

    Training instructions You must consider the following factors in determining the amount of training effort required in order to attain tangible physical and health benefi ts: 1. Intensity: The level of physical exertion in training must exceed the level of normal exertion without reaching the point of breathlessness and / or exhaustion.
  • Seite 23 Sommaire 1. Aperçu des pièces Page 2. Recommandations importantes et règles de sécurité Page 3. Nomenclature Page 24 - 25 4. Notice de montage avec écorchés Page 26 - 28 5. Manuel d’utilisation du calculateur électronique Page 29 - 32 6.
  • Seite 24 BMI (index de masse corporelle), le BMR Telefax: +49 (0) 20 51 - 6 06 74 4 (taux de métabolisme basal) et la récupération. e-mail: info@christopeit-sport.com Adapté pour des poids jusqu’environ 150 kg. www.christopeit-sport.com Dimensions approximatives Longueur 140 x Largeur 59 x Hauteur 161 cm Schéma...
  • Seite 25 Art.-Nr. 98251 - (black) Art.-Nr. 98251 A - (silver) Art.-Nr. 98253 - (red) Schéma Désignation Dimensions Quantité Monté sur Numéro ET n° en mm Unités schéma n° Ecrou à freinage interne 39-9918-CR Bague de sécurité 36-9825320-BT M10x40 39-10131 Unité de pédalier 41+52 36-9825321-BT Pièce d’écartement...
  • Seite 26 Instructions de montage Il est strictement conseillé d’observer nos recommandations et consignes de sécurité avant de commencer le montage ! Etape n° 1: Montage du tube du pied avant (73) et du tube du pied arrière (25) sur le cadre de base (45) à l’aide des boulons bruts à tête bombée et collet carré...
  • Seite 27 Etape n°3: Etape n° 5: Montage des manches (6) sur les tubes de communication (12) à Montage du logement de la coque droite (28R) et du logement de la boulon brut à tête bombée et collet carré (80), des rondelles (10) et coque gauche (28L), tubes de jonction (12) y compris, sur la manivelle des couvercles (79).
  • Seite 28 Etape n° 6: Montage de la coque de la pédale droite (17R) sur le logement de la coque de la pédale droite (28R) et de la coque de la pédale gauche (17L) sur le logement de la coque de la pédale gauche (28L) à l’aide des boulons hexagonale à...
  • Seite 29 Guide d’utilisation de l’ordinateur de saisie à la suivante. La fonction sélectionnée clignote. Les touches 0 + P + / - vous permettent d’introduire des valeurs et la touche « E », de les confi rmer. . Simultanément, la zone de donnée suivant clignote. «...
  • Seite 30 LIMITE SUPERIEURE DES PULSATIONS/BMI/ÂGE Disponible dans les A. Règlage des programmes: programmes 1 à 8 (mais pas 10 à 12). Dès que vous avez introduit votre âge, l’ordinateur calcule une valeur de pulsation d’avertissement, que vous ne devez en aucun cas dépasser (for- mule : (220 –...
  • Seite 31: Sélection Du Programme

    A. Sélection du programme: Programme 1 (Manuel) Programme 2 (ascendant - descendant) Programme3 (vallée) Programme 4 (Fitness) Programme 5 (Rampe) Programme 6 (Montagne) Programme 7 (Intervalle) Programme 8 (Utilisateur U 1-U4) Programm 9 (watt-indépendamment du nombre de tours) Programme 10 (60% max. de puls.) Programme 11 (75% max.
  • Seite 32 Mesure des pulsations1. Mesure des pulsations à la poignéeLes poig- nées droite et gauche comportent chacune un capteur (pièces de contact métalliques.) Connectez le câble à la prise 21 de l’ordinateur. Attention, veillez à ce que la paume de vos mains repose simultanément sur les capteurs, avec une pression normale.
  • Seite 33: Recommandations Pour L'entraînement

    Recommandations pour l’entraînement Les facteurs ci-après doivent être pris en compte pour la détermination de l’entraînement indispensable afi n d’améliorer concrètement son physique et sa santé: 1. Intensité: L’entraînement n’aura d’effets positifs que si les efforts déployés dépassent ceux de la vie quotidienne, mais sans être hors d’haleine et/ou se sentir épuisé.
  • Seite 34: Belangrijke Aanbevelingen En Veiligheidsinstructies

    Inhoudsopgave 1. Overzicht van de losse delen pagina 2. Belangrijke aanbevelingen en veiligheidsinstructies pagina 34 3. Stuklijst pagina 35 - 36 4. Montagehandleiding met explosietekeningen pagina 37 - 39 5. Handleiding bij de computer pagina 40 - 43 6. Trainingshandleiding pagina 44 Geachte klant Wij willen u van harte gelukwensen met de aanschaf van uw hometrainer en...
  • Seite 35: Stuklijst

    Telefax: +49 (0) 20 51 - 6 06 74 4 grenswaarden; tijd, afstand, ca. Calorieverbruik. Overschrijding van de grenswaarden worden aangeduid. e-mail: info@christopeit-sport.com Belastbaar met een lichaamsgewicht tot ca. 150 kg Afmeting: ca. L 140x B 59 x H 161 cm www.christopeit-sport.com...
  • Seite 36 Art.-Nr. 98251 - (black) Art.-Nr. 98251 A - (silver) Art.-Nr. 98253 - (red) Afbeeldings- Beschrijving Afmetingen Aantal Gemonteerd aan ET-nummer stuks afbeeldingsnr. Zelfborgende moer 39-9918-CR Vastzetring 36-9825320-BT Schroef M10x40 39-10131 Lager 41+52 36-9825321-BT Afstandsstuk 10x17x25 36-9825322-BT Nettoestel spanningsverzorging 36-9825323-BT Basisframe 33-9825316-SI Schroef 5x10...
  • Seite 37: Montagehandleiding Met Explosietekeningen

    Montagehandleiding Voordat u met de montage begint, absoluut onze adviezen en veiligheidsvoorschriften in acht nemen! Stap 1: Montage van de voorste voetbuis (73) en de achterste voetbuis (25) op het frame (45) door middel van de sluitschroeven (24), de onderlegplaatjes 8//20 (10)en de dopmoeren M8 (11). 1.
  • Seite 38 Stap 3: Stap 5: Montage van de greepbuizen (6) aan de verbindingsbuizen (12)met Montage van de voetschaalbevestiging rechts (28R) en de behulp van de slotschroef (80), onderlegplatje (10) en de veerring voetschaalbevestiging links (28L) incl. de verbindingsbuizen (12) op (79). de pedaalkcrank (22) en de steunbuis (81) met de veerring (62), 1.
  • Seite 39 Stap 6: Montage van de rechter voetschaal (17R) aan de rechter voetschaalbevestiging (28R) en de linker voetschaal (17L) aan de linker voetschaalbevestiging (28L) met behulp van de slotschroef (16), de onderlegplatje (31), veerring (32) en de stergreepmoer (33) en de afdekking (14+15).
  • Seite 40: Handleiding Bij De Computer

    • Toetsen TRAININGSCOMPUTER In totaal 6 toetsen: START/STOP (S), INVOER (E), FUNCTIE (U1 - U4), OM- HOOG (+), OMLAAG (-), en TEST (Test). „S“: start van de training of onderbreking van de training in het gekozen programma. In de modus „STOP“ is het STOP-display J verlicht. De compu- ter begint pas te tellen wanneer voordien de toets „S“...
  • Seite 41 KJOULE/WATT/BMR: door middel van de gemiddelde waarden berekent hogere balken=hogere trapweerstand de computer de Joule, die in KJoule aangegeven worden. Om de bindende lagere balken= lagere trapweerstand maateenheid voor energie „Joule“ in de algemeen gebruikelijke vermelding elk balkensegment houdt 2 waarden in „Calorieën“...
  • Seite 42 A. Programmakeuze: Programma 1 (handmatig) Programma 2 (omhoog - omlaag) Programma 3 (dal) Programma 4 (fi tness) Programma 5 (platform) Programma 6 (berg) Programma 7 (interval) Programma 8 (gebruiker U1 - U4) Programma 9 (watt-toerentalonafhankelijk) Programma 10 (60% max. polsslag) Programma 11 (75% max.
  • Seite 43 POLSSLAGMETING: 1. Handpulsmeting: In het linkse en rechtse stuurgedeelte is telkens een metalen contactplaat, de voelers, voorzien. Verbind de kabel met de aansluiting 3 op de computer. Gelieve erop te letten dat steeds beide handpalmen gelijktijdig met normale kracht op de voelers liggen. Zodra er een polsslag volgt, knippert er een hart naast het polsslagdisplay F.
  • Seite 44: Trainingshandleiding

    Trainingshandleiding De onderstaande factoren moeten in acht worden genomen bij het bepalen van de benodigde training voor het bereiken van een merkbare verbetering van uw fi guur en gezondheid: 1. Intensiteit: De mate van lichamelijke belasting bij de training moet de normale belasting overschrijden, zonder dat u daarbij buiten adem en/of uitgeput raakt.
  • Seite 45: Обзор Содержания

    Обзор содержания Важные рекомендации и указания по безопасности ctp. 2. Обзор отдельных деталей стр. 3. Спецификация стр. 46 - 47 4. Руководство по сборке с отдельными иллюстрациями стр. 48 - 50 5. Руководство по использованию компьютера стр. 51 - 54 6.
  • Seite 46 транспортировочные ролики впереди, Telefax: +49 (0) 20 51 - 6 06 74 4 блок питания, фитнес-тест Компьютер с одновременной индикацией следующих параметров: время, скорость, e-mail: info@christopeit-sport.com дистанция, прибл. расход калорий, процентное содержание жира, частота вращения педалей, нагрузка в ваттах и пульс www.christopeit-sport.com Возможность...
  • Seite 47 Art.-Nr. 98251 - (black) Art.-Nr. 98251 A - (silver) Art.-Nr. 98253 - (red) № Наименование Размеры в мм Кол-во Монтируется на № ЕТ-№ картинки штук Самоконтрящаяся гайка 39-9918-CR Стопорное кольцо 36-9825320-BT Болт M10x40 39-10131 Подшипник 41+52 36-9825321-BT Промежуточное тело 10x17x25 36-9825322-BT Гнездо...
  • Seite 48 Спецификация Прежде чем Вы начнете производить монтаж, следует непременно обратить внимание на наши рекомендации и указания по технике безопасности Шаг 1: Монтаж передней ножной трубы (73) и задней ножной трубы (25) на Основную раму (45) с помощью замкового болта с грибовидной...
  • Seite 49 Шаг 3: Шаг 5: Монтаж рукояток (6) на соединительную трубу (12) с помощью Монтаж правого ножного рычага (28R) и левого ножного болтов (80), подкладных шайб (10) и Пружинная шайба (79). рычага (28L) с соединительной трубой (12) на шатун педали 1. Вставьте рукоятки (6) на соединительные трубы (12) таким (22) и...
  • Seite 50 Шаг 6: Монтаж правого фиксатора стопы (17R) на правый ножной рычаг (28R) и левого фиксатора стопы (17L) на левый ножной рычаг (28L) с помощью замкового болта (16), подкладных шайб (31), пружинных шайб (32), грибковых гаек (33) и обшивки (14+15). 1. Вставьте правый фиксатор стопы (17R) на правый ножной рычаг (28R) таким...
  • Seite 51 TRAININGSCOMPUTER Выключение: Компьютер отключается самостоятельно если более 4 Мин. Аппаратом не пользовались После окончания тренировки необходимо вытащить штекер из гнезда. • Клавиши Всего 6 Клавиш: START(Старт)/STOP(Стоп) (S), EINGABE(Ввод) (E), (U1 - U4), AUF(Вверх) (+), AB(Вниз) (-), and TEST(Тест) (Test). „S“: Старт или остановка тренировки в выбранной программе. В STOPP(Стоп)- модусе...
  • Seite 52 KJOULE/WATT/BMR, КИЛОДЖОУЛЬ/ВАТТ/ BMR : В индикаторе Выше балка = Выше нагрузка указываются только килоджоули. Для пересчета джоулей в калории Низкая балка = Низкая нагрузка и обратно применяйте формулу: 1 джоуль = 0,239 калорий, или Каждый сегмент балки содержит 2-е 1калория = 4,186 дж. Введение величин в джоулях невозможен потому величины...
  • Seite 53 Выбор программ: Программа 1 (уст.вручную) Программа 2 (Вверх - Вниз) Программа3 (Ущелье) Программа 4 (Фитнес) Программа 5 (Рампа) Программа 6 (Г ора) Программа 9 Программа 7 (Интервал) Программа 8 (Ватт-нез.от оборотов (пользователь U1-U4) Программа 10 (60% Макс. пульс) Программа 11 (75% Макс. пульс) Программа 12 (85% Макс. пульс) Программа...
  • Seite 54 ИЗМЕРЕНИЕ ПУЛЬСА: 1. Ручное имерение пульса: В левой и правой части руля находятся сенсоры в виде металлических пластин от которых отходит кабель. Соедените кабель с гнездом 21 на компьютере. Измерение пульса происходит только после одновременного наложения рук на сенсоры. О том что происходит считывание...
  • Seite 55 ИНСТРУКЦИЯ ПО ТРЕНИРОВКЕ Вы должны учитывать следующие факторы, чтобы определить верные параметры тренировок для достижения ощутимых физических результатов и пользы для здоровья. Интенсивность Уровень физических нагрузок при тренировках должен превышать уровень нормальных физических нагрузок, но вы не должны задыхаться и сильно переутомляться. Удобной мерой эффективности тренировки...
  • Seite 56 Bei Reklamationen, notwendigen Ersatzteilbestellungen oder © by Top-Sports Gilles GmbH Reparaturen wenden Sie sich bitte an unsere Service Abteilung. D-42551 Velbert (Germany) Service: Top-Sports Gilles GmbH Tel.: +49 (0)2051/6067-0 Friedrichstrasse 55 info@christopeit-sport.com Fax: +49 (0)2051/6067-44 D - 42551 Velbert http://www.christopeit-sport.com...

Inhaltsverzeichnis