Herunterladen Inhalt Inhalt Diese Seite drucken
Inhaltsverzeichnis

Werbung

Verfügbare Sprachen
  • DE

Verfügbare Sprachen

  • DEUTSCH, seite 131
Pos: 2 /Technische Dokumentation/Pumpendatenblatt/Produktbezeichnung/Pumpendatenblatt DE-EN-FR-NL-IT-ES @ 3\mod_1438673168979_0.docx @ 36851 @ @ 1
DE
EN
FR
NL
IT
ES
=== Ende der Liste für Textmarke Pumpendatenblatt ===
Pos: 4 /Technische Dokumentation/Pumpendatenblatt/Produktbezeichnung/BADU 90 Eco Motion @ 5\mod_1451389537877_0.docx @ 61195 @ @ 1
=== Ende der Liste für Textmarke Produktbezeichnung ===
P
o
s
:
6
/
T
e
c
h
n
i
s
c
h
e
D
o
k
u
m
=
=
=
E
n
d
e
d
P o s :
8
/ T e c h n i s c h e
D o k u m e n t a t i o n / A l l g e m e i n e
M o d u l e / C E - Z e i c h e n
@
2 \ m o d _ 1 4 3 4 5 4 2 1 7 5 8 0 9 _ 0 . d o c x
=
=
=
E
n
d
e
d
e
r
L
i
s
t
e
f
ü
r
T
e
x
t
m
a
r
k
e
C
E
_
Z
05|2016
Pumpendatenblatt
Data sheet
Fiche technique pompe
Pompgegevens
Documentazione pompa
Ficha técnica de la bomba
e
n
t
a
t
i
o
n
/
P
u
m
p
e
n
d
a
t
e
n
b
l
a
t
t
/
T
e
r
L
i
s
t
e
f
ü
@
3 3 2 1 8
@
@
1
e
i
c
h
e
n
=
=
=
i
t
e
l
b
i
l
d
/
D
9
0
.
8
0
.
0
1
6
-
P
@
5
\
m
r
T
e
x
t
m
a
r
k
o
d
_
1
4
5
1
3
8
9
5
7
6
2
3
6
_
0
.
d
o
c
x
@
e
T
i
t
e
l
b
l
a
t
6
1
2
1
2
@
@
1
t
=
=
=

Werbung

Inhaltsverzeichnis

Fehlerbehebung

loading

Inhaltszusammenfassung für BADU 90 Eco Motion

  • Seite 1 Documentazione pompa Ficha técnica de la bomba === Ende der Liste für Textmarke Pumpendatenblatt === Pos: 4 /Technische Dokumentation/Pumpendatenblatt/Produktbezeichnung/BADU 90 Eco Motion @ 5\mod_1451389537877_0.docx @ 61195 @ @ 1 === Ende der Liste für Textmarke Produktbezeichnung === ü P o s :...
  • Seite 2 Pos: 11 /Technische Dokumentation/Allgemeine Module/Firmenadresse BADU @ 2\mod_1435913484644_6.docx @ 33910 @ @ 1 BADU ® ist eine Marke der SPECK Pumpen Verkaufsgesellschaft GmbH Hauptstraße 3 91233 Neunkirchen am Sand, Germany Telefon 09123 949-0 Telefax 09123 949-260 info@speck-pumps.com www.speck-pumps.com === Ende der Liste für Textmarke Firmenadresse === Pos: 13 /Technische Dokumentation/Allgemeine Module/Copyright @ 0\mod_1426071027221_6.docx @ 984 @ @ 1...
  • Seite 3 Pos: 15 /Technische Dokumentation/Pumpendatenblatt/Maßzeichnungen/D90.80.011-P @ 5\mod_1451389658873_0.docx @ 61229 @ @ 1 Pos: 16 /Technische Dokumentation/Allgemeine Module/####halbe Leerzeile #### @ 3\mod_1437024231169_0.docx @ 36330 @ @ 1 Pos: 17 /Technische Dokumentation/Pumpendatenblatt/Kennlinien/KL90.80.007-P @ 5\mod_1451389708528_0.docx @ 61246 @ @ 1 Pos: 18 /Technische Dokumentation/Allgemeine Module/#### Seitenumbruch #### @ 0\mod_1426069111812_0.docx @ 769 @ @ 1 05|2016...
  • Seite 4 Pos: 19 /Technische Dokumentation/Pumpendatenblatt/Technische Daten/TD BADU 90 Eco Motion @ 6\mod_1462187423476_0.docx @ 84557 @ @ 1 TD 50/60 Hz BADU 90 Eco Motion mind. 35 % max. 100 % Sa [mm] Da [mm] d-Saug [mm] d-Druck [mm] max. L 1~/3~ [mm]...
  • Seite 5 Bedien- und Wartungspersonal frei zugänglich sein. === Ende der Liste für Textmarke Mitgeltende_Dokumente === Pos: 4 /Technische Dokumentation/Pumpendatenblatt/Produktbezeichnung/BADU 90 Eco Motion @ 5\mod_1451389537877_0.docx @ 61195 @ @ 1 === Ende der Liste für Textmarke Produktbezeichnung === ü...
  • Seite 6 Pos: 8 /Technische Dokumentation/Pumpendatenblatt/Glossar/Glossar @ 2\mod_1434009603749_6.docx @ 32280 @ @ 1 Glossar Technische Daten Sauganschluss Druckanschluss d-Saug Empfohlener Durchmesser der Saugleitung bei 5 m d-Druck Empfohlener Durchmesser der Druckleitung bei 5 m max. L Maximale Länge der Pumpe Aufgenommene Leistung Abgegebene Leistung Nennstrom Schalldruckpegel in 1 m Entfernung gemessen nach...
  • Seite 7 Pos: 10 /Technische Dokumentation/Pumpendatenblatt/Sonderspannung @ 3\mod_1436964483786_6.docx @ 36248 @ @ 1 Bei Sonderspannung und/oder 60 Hz-Ausführung sind die Leistungsdaten vom Pumpentypenschild zu entnehmen. Bei manchen Sondertypen oder – motoren ist das GS-Zeichen nicht vorhanden – ggfs. GS-Zeichen am Pumpentypenschild. Pos: 11 /Technische Dokumentation/Allgemeine Module/####halbe Leerzeile #### @ 3\mod_1437024231169_0.docx @ 36330 @ @ 1 Pos: 12 /Technische Dokumentation/Allgemeine Module/####halbe Leerzeile #### @ 3\mod_1437024231169_0.docx @ 36330 @ @ 1 Pos: 13 /Technische Dokumentation/Pumpendatenblatt/Motorsteuerung/Eco Motion/Bedienoberfläche @ 2\mod_1434026998901_6.docx @ 32300 @ @ 1 Bedienoberfläche...
  • Seite 8: Menüstruktur

    Pos: 15 /Technische Dokumentation/Pumpendatenblatt/Motorsteuerung/Eco Motion/Menüstruktur @ 2\mod_1434027519103_6.docx @ 32315 @ @ 1 Menüstruktur Pos: 16 /Technische Dokumentation/Allgemeine Module/#### Seitenumbruch #### @ 0\mod_1426069111812_0.docx @ 769 @ @ 1 DE 8 05|2016...
  • Seite 9 Pos: 17 /Technische Dokumentation/Pumpendatenblatt/Motorsteuerung/Eco Motion/Der Info-Screen @ 2\mod_1434027606126_6.docx @ 32347 @ @ 1 Der Info-Screen Der Info-Screen kann die zeitgesteuerte Filterung mit der Taste "F1" ein- und ausgeschaltet werden. Die Filterzeiten werden im Menü unter "Filtern" eingestellt. Im Display rechts oben ist zu sehen, welcher Betriebsmodus gerade aktiv ist.
  • Seite 10 Pos: 19 /Technische Dokumentation/Pumpendatenblatt/Motorsteuerung/Eco Motion/Bewegen im Menü @ 2\mod_1434028934394_6.docx @ 32362 @ @ 1 Bewegen im Menü Mit den auf und ab Cursor-Tasten kann ein Menüpunkt ausgewählt und mit der OK-Taste zum Ändern bestätigt werden. Nach betätigen der OK-Tasten kann der ausgewählte Punkt mit der auf und ab Cursor-Taste geändert werden.
  • Seite 11: Partymodus

    Pos: 23 /Technische Dokumentation/Pumpendatenblatt/Motorsteuerung/Eco Motion/Handbetrieb @ 2\mod_1434030109299_6.docx @ 32392 @ @ 1 Handbetrieb Im Handbetrieb kann eine Drehzahl festgelegt werden, mit welcher die Pumpe dauerhaft und unabhängig von den eingestellten Filterzeitprogrammen läuft. Pos: 24 /Technische Dokumentation/Allgemeine Module/####halbe Leerzeile #### @ 3\mod_1437024231169_0.docx @ 36330 @ @ 1 Pos: 25 /Technische Dokumentation/Pumpendatenblatt/Motorsteuerung/Eco Motion/Rückspülen - Manuell @ 2\mod_1434030218027_6.docx @ 32407 @ @ 1 Rückspülen - Manuell Unter dem Punkt "Rückspülen-Manuell"...
  • Seite 12 Pos: 31 /Technische Dokumentation/Pumpendatenblatt/Motorsteuerung/Eco Motion/Entlüften @ 2\mod_1434030673413_6.docx @ 32452 @ @ 1 Entlüften Mit diesem Programm kann die Rohrleitung entlüftet werden. Einstellbar ist die Laufzeit der maxi- malen Drehzahl und des Pulsbetriebes. Zuerst läuft die Pumpe mit der maximalen Drehzahl an und wechselt anschließend im Pulsbetrieb schnell zwischen der niedrigsten und höchsten Drehzahl.
  • Seite 13 Rückspülen Für das Rückspülen können folgende Einstellungen getätigt werden: Rückspülen Ein/Aus, Drehzahl 35 % - 100 %, Rückspüldauer, Klarspüldauer, Intervall 1 - 21 Tage, Startzeit. Befindet sich die Pumpe aktuell im Rückspülvorgang, wir dies in der Betriebsmodusanzeige durch den Text "Rücksp."...
  • Seite 14: Externe Ansteuerung

    Pos: 42 /Technische Dokumentation/Allgemeine Module/####halbe Leerzeile #### @ 3\mod_1437024231169_0.docx @ 36330 @ @ 1 Pos: 43 /Technische Dokumentation/Pumpendatenblatt/Motorsteuerung/Eco Motion/Externe Ansteuerung I @ 2\mod_1434085643751_6.docx @ 32535 @ @ 1 Externe Ansteuerung Die Pumpe kann zusätzlich zu den eigenen Programmen auch noch von einer externen Steuerung gesteuert werden.
  • Seite 15 Pos: 45 /Technische Dokumentation/Pumpendatenblatt/Motorsteuerung/Eco Motion/Externe Ansteuerung II @ 2\mod_1434085971714_6.docx @ 32550 @ @ 1 Externe Ansteuerung Es gibt 6 Festdrehzahlen zum Einstellen, wobei "N1" die niedrigste und "N6" die höchste Priorität hat. Bei der Ansteuerung mit einem Digitalsignal/Festdrehzahl kann zusätzlich die normale Filtersteuerung genutzt werden.
  • Seite 16: Fehlerspeicher

    Pos: 47 /Technische Dokumentation/Pumpendatenblatt/Motorsteuerung/Eco Motion/Fehlerspeicher @ 2\mod_1434086549904_6.docx @ 32565 @ @ 1 Fehlerspeicher Tritt eine Störung auf, fängt die rote LED auf der Bedienoberfläche an zu blinken. Im Fehlerspeicher wird der entsprechende Fehlercode und Fehlername angezeigt du kann dort mit der OK-Taste quittiert werden.
  • Seite 17 Pos: 53 /Technische Dokumentation/Pumpendatenblatt/Motorsteuerung/Eco Motion/Klemmenbelegung Klemmkasten @ 2\mod_1434087295182_6.docx @ 32610 @ @ 1 Klemmenbelegung Klemmkasten Pos: 54 /Technische Dokumentation/Pumpendatenblatt/Motorsteuerung/Eco Motion/WG27.50.078-P @ 3\mod_1445959178270_0.docx @ 49819 @ @ 1 Pos: 55 /Technische Dokumentation/Allgemeine Module/####halbe Leerzeile #### @ 3\mod_1437024231169_0.docx @ 36330 @ @ 1 Pos: 56 /Technische Dokumentation/Allgemeine Module/####halbe Leerzeile #### @ 3\mod_1437024231169_0.docx @ 36330 @ @ 1 Pos: 57 /Technische Dokumentation/Pumpendatenblatt/Motorsteuerung/Eco Motion/Klemmenbelegung Displaymodus @ 2\mod_1434087330458_6.docx @ 32625 @ @ 1 Klemmenbelegung Displaymodus...
  • Seite 18: Klemmenbeschreibung

    Pos: 60 /Technische Dokumentation/Pumpendatenblatt/Motorsteuerung/Eco Motion/Klemmenbeschreibung @ 2\mod_1434091760661_6.docx @ 32730 @ @ 1 Klemmenbeschreibung Der Netzanschluss darf nur über die Klemmen L und N erfolgen. Der Motor darf nur im 1-Phasennetz betrieben werden. Klemme Klemmenbe- Kabelquersch Kabelquers schreibung nitt starr chnitt flexibel Netz L (230 V)
  • Seite 19 Klemme Klemmenbe- Kabelquer- Kabelquer- schreibung schnitt starr schnitt flexibel Digitalein- 24 V DC 0,5 - 1,5 mm² 0,5 - 1,5 mm² gang Ausgang für Inx, Alnx Aderendhül- se 0,5 - 51-56 Digitaleingang 1,0 mm² 11 - 16 Bezugspotential Aderendhül- Digitaleingang se mit Kunst- Schaltein- Analogeingang...
  • Seite 20: Elektrische Installation

    Pos: 62 /Technische Dokumentation/Pumpendatenblatt/Motorsteuerung/Eco Motion/Elektrische Installation @ 2\mod_1434088359351_6.docx @ 32655 @ @ 1 Elektrische Installation Pos: 63 /Technische Dokumentation/Pumpendatenblatt/Motorsteuerung/Eco Motion/W G27.50.080-P @ 3\mod_1445959287384_6.docx @ 49849 @ @ 1 Pos: 64 /Technische Dokumentation/Allgemeine Module/#### Seitenumbruch #### @ 0\mod_1426069111812_0.docx @ 769 @ @ 1 DE 20 05|2016...
  • Seite 21 Pos: 66 /Technische Dokumentation/Pumpendatenblatt/Motorsteuerung/Eco Motion/WG27.50.081-P @ 3\mod_1445959346958_6.docx @ 49864 @ @ 1 Pos: 67 /Technische Dokumentation/Pumpendatenblatt/Motorsteuerung/Eco Motion/Verwendung BADU 90 Eco Motion mit BADU Tronic @ 2\mod_1434088460166_6.docx @ 32685 @ @ 1 Bei der Verwendung der Pumpe in Verbindung mit dem Rückspülventil BADU Tronic, muss dieses entsprechend...
  • Seite 22 Anschlussbeispiel: Stangenventil Pos: 70 /Technische Dokumentation/Pumpendatenblatt/Motorsteuerung/Eco Motion/WG27.50.082-P @ 3\mod_1445959380882_6.docx @ 49879 @ @ 1 Pos: 71 /Technische Dokumentation/Pumpendatenblatt/Motorsteuerung/Eco Motion/Verwendung BADU 90 Eco Motion mit Stangenventil @ 2\mod_1434088814201_6.docx @ 32715 @ @ 1 Bei der Verwendung der Pumpe in Verbindung mit einem Stangenventil, muss dieses entsprechend dem Installationsbeispiel angeschlossen werden.
  • Seite 23: Fehlercodes

    Fehlercodes Fehlername Fehlerbeschrei- Mögliche bung Ursache/Abhilfe Motor PTC Motor PTC open Motor PTC nicht angeschlossen Motor PTC Motor PTC short Motor PTC kurzgeschlossen Motor PTC Motor Kühlung prüfen Übertemperatur Temperatur Übertemperatur Zu hohe Umge- Power Modul bungstemperatur Kurzschluss/ Motorkurzschluss Last prüfen Überstrom bzw.
  • Seite 24: Deckel/Saugsieb Demontieren Bzw. Montieren

    Pos: 75 /Technische Dokumentation/Pumpendatenblatt/Punkte aus mitgeltende Dokumente @ 3\mod_1437029935278_6.docx @ 36361 @ @ 1 Die folgenden Aufzählungen beziehen sich auf die mitgeltenden Dokumente! Pos: 76 /Technische Dokumentation/Pumpendatenblatt/Deckel/Saugsieb demontieren bzw. montieren @ 3\mod_1437025205014_6.docx @ 36345 @ @ 1 Deckel/Saugsieb demontieren bzw. montieren Pos: 77 /Technische Dokumentation/Pumpendatenblatt/W95.10.026-P @ 3\mod_1437124747248_0.docx @ 36465 @ @ 1 === Ende der Liste für Textmarke Inhalt === DE 24...
  • Seite 25: Data Sheet

    === Ende der Liste für Textmarke Mitgeltende_Dokumente === Pos: 4 /Technische Dokumentation/Pumpendatenblatt/Produktbezeichnung/BADU 90 Eco Motion @ 5\mod_1451389537877_0.docx @ 61197 @ @ 1 === Ende der Liste für Textmarke Produktbezeichnung === ü...
  • Seite 26 Pos: 8 /Technische Dokumentation/Pumpendatenblatt/Glossar/Glossar @ 2\mod_1434009603749_370.docx @ 32282 @ @ 1 Glossary Technical data Inlet connection Outlet connection d-Saug Recommended diameter - inlet connection at 5 m d-Druck Recommended diameter - outlet connection at 5 m max. L Maximum length of the pump Power Input Power Output Rated current...
  • Seite 27 Pos: 10 /Technische Dokumentation/Pumpendatenblatt/Sonderspannung @ 3\mod_1436964483786_370.docx @ 36250 @ @ 1 For special voltages and/or the 60 Hz version, the performance data can be taken from the pump name plate. With some special types or motors there is no GS approval – GS approval on pump name plate where applicable.
  • Seite 28 Pos: 15 /Technische Dokumentation/Pumpendatenblatt/Motorsteuerung/Eco Motion/Menüstruktur @ 2\mod_1434027519103_370.docx @ 32317 @ @ 1 Menu structure Pos: 16 /Technische Dokumentation/Allgemeine Module/#### Seitenumbruch #### @ 0\mod_1426069111812_0.docx @ 891 @ @ 1 EN 28 05|2016...
  • Seite 29 Pos: 17 /Technische Dokumentation/Pumpendatenblatt/Motorsteuerung/Eco Motion/Der Info-Screen @ 2\mod_1434027606126_370.docx @ 32349 @ @ 1 The "Info" screen In the "Info" screen time-controlled filtering can be switched on and off by using the "F1" button. The filter times are set in the menu under "Filter". The operating mode that is currently active is displayed at the top right of the display.
  • Seite 30 Pos: 19 /Technische Dokumentation/Pumpendatenblatt/Motorsteuerung/Eco Motion/Bewegen im Menü @ 2\mod_1434028934394_370.docx @ 32364 @ @ 1 Moving in the menu The up and down cursor buttons can be used to select a menu item and the OK button to confirm the changes. After the OK button has been pressed, the selected item can be changed by using the up and down cursor buttons.
  • Seite 31 Pos: 23 /Technische Dokumentation/Pumpendatenblatt/Motorsteuerung/Eco Motion/Handbetrieb @ 2\mod_1434030109299_370.docx @ 32394 @ @ 1 Manual operation In manual operation a speed can be set with which the pump runs continuously and independently of the set filter times. Pos: 24 /Technische Dokumentation/Allgemeine Module/####halbe Leerzeile #### @ 3\mod_1437024231169_0.docx @ 36332 @ @ 1 Pos: 25 /Technische Dokumentation/Pumpendatenblatt/Motorsteuerung/Eco Motion/Rückspülen - Manuell @ 2\mod_1434030218027_370.docx @ 32409 @ @ 1 Backwash - Manual The backwash process can be started...
  • Seite 32 Pos: 31 /Technische Dokumentation/Pumpendatenblatt/Motorsteuerung/Eco Motion/Entlüften @ 2\mod_1434030673413_370.docx @ 32454 @ @ 1 Purge The pipe can be purged with this programme. The duration of the maximum speed and of the pulse operation can be set. First the pump starts up with the maximum speed and then alternates rapidly between the lowest and the highest speed in pulse operation.
  • Seite 33 Pos: 37 /Technische Dokumentation/Pumpendatenblatt/Motorsteuerung/Eco Motion/Rückspülen @ 2\mod_1434031453728_370.docx @ 32499 @ @ 1 Backwash The following settings can be made for backwashing: Backwash on/off, speed 35 % - 100 %, backwash period, rinse period, interval 1 - 21 days, starting time. If the pump is currently in backwash mode, this is indicated in the operating mode display by the text "Backwash".
  • Seite 34 Pos: 40 /Technische Dokumentation/Pumpendatenblatt/Motorsteuerung/Eco Motion/Ansaugzeit @ 2\mod_1434085382339_370.docx @ 32522 @ @ 1 Priming time The priming time can be switched on and off. It becomes active at every pump start, in as far as it is switched on. If the pump is currently in priming mode, this is indicated in the operation mode display by the text "Priming".
  • Seite 35 Pos: 45 /Technische Dokumentation/Pumpendatenblatt/Motorsteuerung/Eco Motion/Externe Ansteuerung II @ 2\mod_1434085971714_370.docx @ 32552 @ @ 1 External controls 6 fixed speeds can be set. With "N1" having the lowest priority and "N6" the highest. The normal filter control unit can be used in addition to a digital signal/fixed speed control.
  • Seite 36: Basic Settings

    Pos: 47 /Technische Dokumentation/Pumpendatenblatt/Motorsteuerung/Eco Motion/Fehlerspeicher @ 2\mod_1434086549904_370.docx @ 32567 @ @ 1 Fault log If a fault occurs the red LED in the user interface will start to blink. The corresponding fault code and fault name will be shown in the fault log on can be acknowledged by pressing the OK button.
  • Seite 37 Pos: 53 /Technische Dokumentation/Pumpendatenblatt/Motorsteuerung/Eco Motion/Klemmenbelegung Klemmkasten @ 2\mod_1434087295182_370.docx @ 32612 @ @ 1 Terminal assignment in terminal box Pos: 54 /Technische Dokumentation/Pumpendatenblatt/Motorsteuerung/Eco Motion/WG27.50.078-P @ 3\mod_1445959178270_0.docx @ 49821 @ @ 1 Pos: 55 /Technische Dokumentation/Allgemeine Module/####halbe Leerzeile #### @ 3\mod_1437024231169_0.docx @ 36332 @ @ 1 Pos: 56 /Technische Dokumentation/Allgemeine Module/####halbe Leerzeile #### @ 3\mod_1437024231169_0.docx @ 36332 @ @ 1 Pos: 57 /Technische Dokumentation/Pumpendatenblatt/Motorsteuerung/Eco Motion/Klemmenbelegung Displaymodus @ 2\mod_1434087330458_370.docx @ 32627 @ @ 1 Terminal assignment in display module...
  • Seite 38: Terminal Description

    Pos: 60 /Technische Dokumentation/Pumpendatenblatt/Motorsteuerung/Eco Motion/Klemmenbeschreibung @ 2\mod_1434091760661_370.docx @ 32732 @ @ 1 Terminal description The power supply may only be effected through the terminal L and N. The motor may only be operated in single-phase mode. Type Terminal Terminal Cable cross- Cable cross- description section rigid...
  • Seite 39 Type Terminal Terminal Cable cross- Cable cross- description section rigid section flexible Digital 24 V DC 0,5 - 1,5 mm² 0,5 - 1,5 mm² input output for Inx, Alnx Wire end ferrule 0,5 - 51-56 Digital input 1,0 mm² 11 - 16 Reference Wire end potential digital...
  • Seite 40: Electrical Installation

    Pos: 62 /Technische Dokumentation/Pumpendatenblatt/Motorsteuerung/Eco Motion/Elektrische Installation @ 2\mod_1434088359351_370.docx @ 32657 @ @ 1 Electrical installation Pos: 63 /Technische Dokumentation/Pumpendatenblatt/Motorsteuerung/Eco Motion/WG27.50.080-P @ 3\mod_1445959287384_370.docx @ 49851 @ @ 1 Pos: 64 /Technische Dokumentation/Allgemeine Module/#### Seitenumbruch #### @ 0\mod_1426069111812_0.docx @ 891 @ @ 1 EN 40 05|2016...
  • Seite 41 Pos: 66 /Technische Dokumentation/Pumpendatenblatt/Motorsteuerung/Eco Motion/WG27.50.081-P @ 3\mod_1445959346958_370.docx @ 49866 @ @ 1 Pos: 67 /Technische Dokumentation/Pumpendatenblatt/Motorsteuerung/Eco Motion/Verwendung BADU 90 Eco Motion mit BADU Tronic @ 2\mod_1434088460166_370.doc x @ 32687 @ @ 1 When the pump is used in combination with the BADU Tronic backwash valve, this has to be connected in accordance with the installation example.
  • Seite 42 Pos: 70 /Technische Dokumentation/Pumpendatenblatt/Motorsteuerung/Eco Motion/WG27.50.082-P @ 3\mod_1445959380882_370.docx @ 49881 @ @ 1 Pos: 71 /Technische Dokumentation/Pumpendatenblatt/Motorsteuerung/Eco Motion/Verwendung BADU 90 Eco Motion mit Stangenventil @ 2\mod_1434088814201_370.docx @ 32717 @ @ 1 When the pump is used in combination with a bar valve, this has to be connected in accordance with the installation example.
  • Seite 43: Fault Codes

    Pos: 73 /Technische Dokumentation/Pumpendatenblatt/Motorsteuerung/Eco Motion/Fehlercodes @ 2\mod_1434094368813_370.docx @ 32747 @ @ 1 Fault codes Fault name Fault description Possible cause/ remedy Motor PTC Motor PTC open Motor PTC not connected Motor PTC Motor PTC short Motor PTC short- circuited Motor PTC Motor Check the cooling overtemperature...
  • Seite 44 Pos: 75 /Technische Dokumentation/Pumpendatenblatt/Punkte aus mitgeltende Dokumente @ 3\mod_1437029935278_370.docx @ 36363 @ @ 1 The following points refers to the related documentation! Pos: 76 /Technische Dokumentation/Pumpendatenblatt/Deckel/Saugsieb demontieren bzw. montieren @ 3\mod_1437025205014_370.docx @ 36347 @ @ 1 Installing or removing the cover/strainer basket Pos: 77 /Technische Dokumentation/Pumpendatenblatt/W95.10.026-P @ 3\mod_1437124747248_0.docx @ 36467 @ @ 1 === Ende der Liste für Textmarke Inhalt === EN 44...
  • Seite 45 === Ende der Liste für Textmarke Mitgeltende_Dokumente === Pos: 4 /Technische Dokumentation/Pumpendatenblatt/Produktbezeichnung/BADU 90 Eco Motion @ 5\mod_1451389537877_0.docx @ 61198 @ @ 1 === Ende der Liste für Textmarke Produktbezeichnung === ü...
  • Seite 46 Pos: 8 /Technische Dokumentation/Pumpendatenblatt/Glossar/Glossar @ 2\mod_1434009603749_371.docx @ 32283 @ @ 1 Glossaire Données techniques Raccordement aspiration Raccordement refoulement d-Saug Diamètre recommandé conduite d'aspiration à 1 m d-Druck Diamètre recommandé conduite de refoulement à 1 m max. L Longueur maximale de la pompe Puissance électrique Puissance restituée Intensité...
  • Seite 47 Pos: 10 /Technische Dokumentation/Pumpendatenblatt/Sonderspannung @ 3\mod_1436964483786_371.docx @ 36251 @ @ 1 En cas de tension spéciale et/ou de moteur en 60 Hz, relever les indications de la puissance sur la plaquette signalétique de la pompe. Sur certains types ou moteurs spécifiques le sigle GS n’est pas indiqué...
  • Seite 48 Pos: 15 /Technische Dokumentation/Pumpendatenblatt/Motorsteuerung/Eco Motion/Menüstruktur @ 2\mod_1434027519103_371.docx @ 32318 @ @ 1 Structure de menu Pos: 16 /Technische Dokumentation/Allgemeine Module/#### Seitenumbruch #### @ 0\mod_1426069111812_0.docx @ 892 @ @ 1 FR 48 05|2016...
  • Seite 49 Pos: 17 /Technische Dokumentation/Pumpendatenblatt/Motorsteuerung/Eco Motion/Der Info-Screen @ 2\mod_1434027606126_371.docx @ 32350 @ @ 1 L'écran d'information Dans l'écran d'information, on peut activer et désactiver la filtration commandée en fonction du temps avec la touche "F1". Les temps de filtration sont réglés dans le menu sous "Filtrer".
  • Seite 50 Pos: 19 /Technische Dokumentation/Pumpendatenblatt/Motorsteuerung/Eco Motion/Bewegen im Menü @ 2\mod_1434028934394_371.docx @ 32365 @ @ 1 Déplacement dans le menu Avec les touches de curseur haut et bas, on peut sélectionner un élément de menu et le confirmer avec la touche OK pour la modification. Après confirmation avec la touche OK, l'élément sélectionné...
  • Seite 51 Pos: 23 /Technische Dokumentation/Pumpendatenblatt/Motorsteuerung/Eco Motion/Handbetrieb @ 2\mod_1434030109299_371.docx @ 32395 @ @ 1 Mode manuel En mode manuel, on peut définir une vitesse de rotation à laquelle la pompe tourne de manière durable et indépendamment des programmes de temps de filtration. Pos: 24 /Technische Dokumentation/Allgemeine Module/####halbe Leerzeile #### @ 3\mod_1437024231169_0.docx @ 36333 @ @ 1 Pos: 25 /Technische Dokumentation/Pumpendatenblatt/Motorsteuerung/Eco Motion/Rückspülen - Manuell @ 2\mod_1434030218027_371.docx @ 32410 @ @ 1 Contre-lavage - Manuel...
  • Seite 52 Pos: 31 /Technische Dokumentation/Pumpendatenblatt/Motorsteuerung/Eco Motion/Entlüften @ 2\mod_1434030673413_371.docx @ 32455 @ @ 1 Désaération Avec ce programme, on peut désaérer la tuyauterie. On peut régler la durée de fonctionnement de la vitesse de rotation maximale et du mode impulsionnel. D’abord la pompe démarre rapidement à...
  • Seite 53 Pos: 37 /Technische Dokumentation/Pumpendatenblatt/Motorsteuerung/Eco Motion/Rückspülen @ 2\mod_1434031453728_371.docx @ 32500 @ @ 1 Contre-lavage Pour le contre-lavage, on peut actionner les réglages suivants: Contre-lavage marche/arrêt, vitesse de rotation 35 % - 100 %, durée de contre-lavage, durée de rinçage, intervalle 1 - 21 jours, heure de début.
  • Seite 54 Pos: 40 /Technische Dokumentation/Pumpendatenblatt/Motorsteuerung/Eco Motion/Ansaugzeit @ 2\mod_1434085382339_371.docx @ 32523 @ @ 1 Temps d'aspiration Le temps d'aspiration peut être activé et désactivé. Il est actif à chaque démarrage de la pompe, pour autant qu'elle soit enclenchée. Si la pompe se trouve actuellement en mode d'aspiration, ceci est signalé...
  • Seite 55 Pos: 45 /Technische Dokumentation/Pumpendatenblatt/Motorsteuerung/Eco Motion/Externe Ansteuerung II @ 2\mod_1434085971714_371.docx @ 32553 @ @ 1 Commande externe Il y a 6 vitesses fixes à régler, "N1" étant la plus basse et "N6" ayant la plus haute priorité. Pour la commande avec un signal numérique/ vitesse fixe, on peut en outre utiliser la commande de filtre normale.
  • Seite 56 Pos: 47 /Technische Dokumentation/Pumpendatenblatt/Motorsteuerung/Eco Motion/Fehlerspeicher @ 2\mod_1434086549904_371.docx @ 32568 @ @ 1 Mémoire de défauts Lorsqu’une panne survient, la LED rouge sur l’écran commence à clignoter. La mémoire de défauts affiche le code d’erreur et la désignation de l’erreur correspondante, et peut être reconnue en appuyant sur la touche OK.
  • Seite 57 Pos: 53 /Technische Dokumentation/Pumpendatenblatt/Motorsteuerung/Eco Motion/Klemmenbelegung Klemmkasten @ 2\mod_1434087295182_371.docx @ 32613 @ @ 1 Affectation des bornes de la boîte à bornes Pos: 54 /Technische Dokumentation/Pumpendatenblatt/Motorsteuerung/Eco Motion/WG27.50.078-P @ 3\mod_1445959178270_0.docx @ 49822 @ @ 1 Pos: 55 /Technische Dokumentation/Allgemeine Module/####halbe Leerzeile #### @ 3\mod_1437024231169_0.docx @ 36333 @ @ 1 Pos: 56 /Technische Dokumentation/Allgemeine Module/####halbe Leerzeile #### @ 3\mod_1437024231169_0.docx @ 36333 @ @ 1 Pos: 57 /Technische Dokumentation/Pumpendatenblatt/Motorsteuerung/Eco Motion/Klemmenbelegung Displaymodus @ 2\mod_1434087330458_371.docx @ 32628 @ @ 1 Affectation des bornes du module d'affichage...
  • Seite 58: Description Des Bornes

    Pos: 60 /Technische Dokumentation/Pumpendatenblatt/Motorsteuerung/Eco Motion/Klemmenbeschreibung @ 2\mod_1434091760661_371.docx @ 32733 @ @ 1 Description des bornes Le raccordement au réseau peut uniquement se faire via les bornes L et N. Le moteur peut uniquement être exploité dans un réseau monophasé. Type Borne Description des Section du...
  • Seite 59 Type Borne Description des Section du Section du bornes câble rigide câble flexible Entrée Sortie 24 V DC 0,5 - 1,5 mm² 0,5 - 1,5 mm² numérique pour Inx, Alnx Embout 0,5 - 51-56 Entrée 1,0 mm² numérique 11 - Embout avec Potentiel de douille en...
  • Seite 60: Installation Électrique

    Pos: 62 /Technische Dokumentation/Pumpendatenblatt/Motorsteuerung/Eco Motion/Elektrische Installation @ 2\mod_1434088359351_371.docx @ 32658 @ @ 1 Installation électrique Pos: 63 /Technische Dokumentation/Pumpendatenblatt/Motorsteuerung/Eco Motion/WG27.50.080-P @ 3\mod_1445959287384_371.docx @ 49852 @ @ 1 Pos: 64 /Technische Dokumentation/Allgemeine Module/#### Seitenumbruch #### @ 0\mod_1426069111812_0.docx @ 892 @ @ 1 FR 60 05|2016...
  • Seite 61 Pos: 66 /Technische Dokumentation/Pumpendatenblatt/Motorsteuerung/Eco Motion/WG27.50.081-P @ 3\mod_1445959346958_371.docx @ 49867 @ @ 1 Pos: 67 /Technische Dokumentation/Pumpendatenblatt/Motorsteuerung/Eco Motion/Verwendung BADU 90 Eco Motion mit BADU Tronic @ 2\mod_1434088460166_371.docx @ 32688 @ @ 1 Lors de l'utilisation de la pompe en liaison avec la vanne de contre-lavage BADU Tronic, celle-ci doit être...
  • Seite 62 Pos: 70 /Technische Dokumentation/Pumpendatenblatt/Motorsteuerung/Eco Motion/WG27.50.082-P @ 3\mod_1445959380882_371.docx @ 49882 @ @ 1 Pos: 71 /Technische Dokumentation/Pumpendatenblatt/Motorsteuerung/Eco Motion/Verwendung BADU 90 Eco Motion mit Stangenventil @ 2\mod_1434088814201_371.docx @ 32718 @ @ 1 Lors de l'utilisation de la pompe en liaison avec une vanne à...
  • Seite 63 Pos: 73 /Technische Dokumentation/Pumpendatenblatt/Motorsteuerung/Eco Motion/Fehlercodes @ 2\mod_1434094368813_371.docx @ 32748 @ @ 1 Codes de défaut N° Désignation du Description du Cause possible/ défaut défaut remède CTP moteur CTP moteur ouvert CTP moteur non raccordé CTP moteur CTP moteur en CTP moteur en courtcircuit courtcircuit CTP moteur...
  • Seite 64 Pos: 75 /Technische Dokumentation/Pumpendatenblatt/Punkte aus mitgeltende Dokumente @ 3\mod_1437029935278_371.docx @ 36364 @ @ 1 Les énumérations suivantes se rapportent aux documents d'accompagnement! Pos: 76 /Technische Dokumentation/Pumpendatenblatt/Deckel/Saugsieb demontieren bzw. montieren @ 3\mod_1437025205014_371.docx @ 36348 @ @ 1 Monter/démonter le couvercle/le panier filtrant Pos: 77 /Technische Dokumentation/Pumpendatenblatt/W95.10.026-P @ 3\mod_1437124747248_0.docx @ 36468 @ @ 1 === Ende der Liste für Textmarke Inhalt === FR 64...
  • Seite 65 (AK)". Deze moet voor het bedienings- en onderhoudspersoneel te allen tijde beschikbaar zijn. === Ende der Liste für Textmarke Mitgeltende_Dokumente === Pos: 4 /Technische Dokumentation/Pumpendatenblatt/Produktbezeichnung/BADU 90 Eco Motion @ 5\mod_1451389537877_0.docx @ 61199 @ @ 1 === Ende der Liste für Textmarke Produktbezeichnung === ü...
  • Seite 66 Pos: 8 /Technische Dokumentation/Pumpendatenblatt/Glossar/Glossar @ 2\mod_1434009603749_372.docx @ 32284 @ @ 1 Woordenlijst Technische gegevens Zuigaansluiting Persaansluiting d-Saug Aanbevolen diameter van de zuigleiding bij 5 m d-Druck Aanbevolen diameter van de persleiding bij 5 m max. L Maximale lengte van de pomp Opgenomen vermogen Afgegeven vermogen Nominale stroom...
  • Seite 67 Pos: 10 /Technische Dokumentation/Pumpendatenblatt/Sonderspannung @ 3\mod_1436964483786_372.docx @ 36252 @ @ 1 Bij speciale spanning en/of 60 Hz uitvoering zijn de capaciteitsgegevens af te lezen op het typeplaatje. Bij sommige speciale typen of motoren is het GS-teken niet beschikbaar – indien nodig GS-teken op het typeplaatje van de pomp. Pos: 11 /Technische Dokumentation/Allgemeine Module/####halbe Leerzeile #### @ 3\mod_1437024231169_0.docx @ 36334 @ @ 1 Pos: 12 /Technische Dokumentation/Allgemeine Module/####halbe Leerzeile #### @ 3\mod_1437024231169_0.docx @ 36334 @ @ 1 Pos: 13 /Technische Dokumentation/Pumpendatenblatt/Motorsteuerung/Eco Motion/Bedienoberfläche @ 2\mod_1434026998901_372.docx @ 32304 @ @ 1...
  • Seite 68: Menustructuur

    Pos: 15 /Technische Dokumentation/Pumpendatenblatt/Motorsteuerung/Eco Motion/Menüstruktur @ 2\mod_1434027519103_372.docx @ 32319 @ @ 1 Menustructuur Pos: 16 /Technische Dokumentation/Allgemeine Module/#### Seitenumbruch #### @ 0\mod_1426069111812_0.docx @ 893 @ @ 1 NL 68 05|2016...
  • Seite 69 Pos: 17 /Technische Dokumentation/Pumpendatenblatt/Motorsteuerung/Eco Motion/Der Info-Screen @ 2\mod_1434027606126_372.docx @ 32351 @ @ 1 Het info-scherm Op het info-scherm kann de tijdgestuurde filtering met de toets "F1" worden in- en uitgeschakeld. De filtertijden worden ingesteld in het menu onder "Filteren". Op het display rechtsboven is te zien welke bedrijfsstand actief ist.
  • Seite 70 Pos: 19 /Technische Dokumentation/Pumpendatenblatt/Motorsteuerung/Eco Motion/Bewegen im Menü @ 2\mod_1434028934394_372.docx @ 32366 @ @ 1 Navigeren door het menu Met de cursortoetsen omhoog en emlaag kann een menuonderdeel worden geselecteerd en met de toets OK worden bevestigd om deze te wijzigen. Na bediening van de toets OK kann het geselecteerde onderdeel met de cursortoetsen omhoog en omlaag...
  • Seite 71 Pos: 23 /Technische Dokumentation/Pumpendatenblatt/Motorsteuerung/Eco Motion/Handbetrieb @ 2\mod_1434030109299_372.docx @ 32396 @ @ 1 Handbediening In handbediening kann een toerental worden vastgelegd waarmee de pomp continu en onafhankelijk van de ingestelde filterprogramma's loopt. Pos: 24 /Technische Dokumentation/Allgemeine Module/####halbe Leerzeile #### @ 3\mod_1437024231169_0.docx @ 36334 @ @ 1 Pos: 25 /Technische Dokumentation/Pumpendatenblatt/Motorsteuerung/Eco Motion/Rückspülen - Manuell @ 2\mod_1434030218027_372.docx @ 32411 @ @ 1 Terugspoelen - Hand Onder het onderdeel "Terugspoelen -...
  • Seite 72 Pos: 31 /Technische Dokumentation/Pumpendatenblatt/Motorsteuerung/Eco Motion/Entlüften @ 2\mod_1434030673413_372.docx @ 32456 @ @ 1 Ontluchten Met dit programma kan de leiding worden ontlucht. De looptijd van het maximale toerental en van de pulsstand kunnen worden ingesteld. De pomp loopt eerst met het maximale toerental en wisselt vervolgens in de pulsstand snel om tussen het laagste en het hoogste toerental.
  • Seite 73 Pos: 37 /Technische Dokumentation/Pumpendatenblatt/Motorsteuerung/Eco Motion/Rückspülen @ 2\mod_1434031453728_372.docx @ 32501 @ @ 1 Terugspoelen Voor het terugspoelen kunnen de volgende instellingen worden uitgevoerd: terugspoelen aan/uit, toerental 35 % - 100 %, terugspoelduur, schoonspoelduur, interval 1 - 21 dagen, startijd. Wanner de pomp zich in de terugspoelfase bevindt, wordt dat op de bedrijfsstandweergave aangegeven met de tekst "Terugsp.".
  • Seite 74 Pos: 40 /Technische Dokumentation/Pumpendatenblatt/Motorsteuerung/Eco Motion/Ansaugzeit @ 2\mod_1434085382339_372.docx @ 32524 @ @ 1 Aanzuigtijd De aanzuigtijd kan worden in- en uitgeschakeld. Deze wordt elke keer actief wanneer de pomp wordt gestart, voor zover deze is ingeschakeld. Wanneer de pomp zich in de aanzuigstand bevindt, wordt dat op de bedrijfsstandweergave aangegeven met de tekst "aanzuig.".
  • Seite 75 Pos: 45 /Technische Dokumentation/Pumpendatenblatt/Motorsteuerung/Eco Motion/Externe Ansteuerung II @ 2\mod_1434085971714_372.docx @ 32554 @ @ 1 Externe aansturing Er kunnen 6 vaste toerentallen worden ingesteld, waarbij "N1" de laagst en "N6" de hoogste prioriteit heeft. Bij aansturing met een digitaal signaal/ vast toerental kan tevens de normale filteraansturing worden gebruikt.
  • Seite 76 Pos: 47 /Technische Dokumentation/Pumpendatenblatt/Motorsteuerung/Eco Motion/Fehlerspeicher @ 2\mod_1434086549904_372.docx @ 32569 @ @ 1 Storingsgeheugen Als er een storing optreedt, begint een rode LED op de bedieningsinterface te knipperen. In het storingsgeheugen wordt de overeenkomstige storingscode en storing weergegeven en kan daar met de OK-toest bevestigd worden.
  • Seite 77 Pos: 53 /Technische Dokumentation/Pumpendatenblatt/Motorsteuerung/Eco Motion/Klemmenbelegung Klemmkasten @ 2\mod_1434087295182_372.docx @ 32614 @ @ 1 Klemmentoewijzing klemmenkast Pos: 54 /Technische Dokumentation/Pumpendatenblatt/Motorsteuerung/Eco Motion/WG27.50.078-P @ 3\mod_1445959178270_0.docx @ 49823 @ @ 1 Pos: 55 /Technische Dokumentation/Allgemeine Module/####halbe Leerzeile #### @ 3\mod_1437024231169_0.docx @ 36334 @ @ 1 Pos: 56 /Technische Dokumentation/Allgemeine Module/####halbe Leerzeile #### @ 3\mod_1437024231169_0.docx @ 36334 @ @ 1 Pos: 57 /Technische Dokumentation/Pumpendatenblatt/Motorsteuerung/Eco Motion/Klemmenbelegung Displaymodus @ 2\mod_1434087330458_372.docx @ 32629 @ @ 1 Klemmentoewijzing displaymodule...
  • Seite 78 Pos: 60 /Technische Dokumentation/Pumpendatenblatt/Motorsteuerung/Eco Motion/Klemmenbeschreibung @ 2\mod_1434091760661_372.docx @ 32734 @ @ 1 Klemmenbeschrijving De contactdoos mag uitsluitend worden aangesloten op de klemmen L en N. De motor mag uitsluitend in een enkelfasenet worden gebruikt. Type Klem Klemmen- Kabeldoor- Kabeldoor- beschrijving snede snede star...
  • Seite 79 Type Klem Klemmen- Kabeldoor- Kabeldoor- beschrijving snede snede star flexibel Digitale ingang 24 V DC 0,5 - 1,5 mm² 0,5 - 1,5 mm² uitgang voor INx, AINx Adereindhuls 0,5 - 1,0 mm² 51-56 Digitale ingang 11 - 16 Adereindhuls Referentiepot met kunststof entiaal digitale huls 0,5 mm²...
  • Seite 80: Elektrische Installatie

    Pos: 62 /Technische Dokumentation/Pumpendatenblatt/Motorsteuerung/Eco Motion/Elektrische Installation @ 2\mod_1434088359351_372.docx @ 32659 @ @ 1 Elektrische installatie Pos: 63 /Technische Dokumentation/Pumpendatenblatt/Motorsteuerung/Eco Motion/WG27.50.080-P @ 3\mod_1445959287384_372.docx @ 49853 @ @ 1 Pos: 64 /Technische Dokumentation/Allgemeine Module/#### Seitenumbruch #### @ 0\mod_1426069111812_0.docx @ 893 @ @ 1 NL 80 05|2016...
  • Seite 81 Pos: 66 /Technische Dokumentation/Pumpendatenblatt/Motorsteuerung/Eco Motion/WG27.50.081-P @ 3\mod_1445959346958_372.docx @ 49868 @ @ 1 Pos: 67 /Technische Dokumentation/Pumpendatenblatt/Motorsteuerung/Eco Motion/Verwendung BADU 90 Eco Motion mit BADU Tronic @ 2\mod_1434088460166_372.docx @ 32689 @ @ 1 Bij gebruik van de pomp in combinatie met de spoelklep BADU Tronic, moet deze conform het installatievoorbeeld worden aangesloten.
  • Seite 82 Aansluitvoorbeeld: Schuifventiel Pos: 70 /Technische Dokumentation/Pumpendatenblatt/Motorsteuerung/Eco Motion/WG27.50.082-P @ 3\mod_1445959380882_372.docx @ 49883 @ @ 1 Pos: 71 /Technische Dokumentation/Pumpendatenblatt/Motorsteuerung/Eco Motion/Verwendung BADU 90 Eco Motion mit Stangenventil @ 2\mod_1434088814201_372.docx @ 32719 @ @ 1 Bij gebruik van de pomp in combinatie met een zuigerklep, moet deze conform het installatievoorbeeld worden aangesloten.
  • Seite 83 Pos: 73 /Technische Dokumentation/Pumpendatenblatt/Motorsteuerung/Eco Motion/Fehlercodes @ 2\mod_1434094368813_372.docx @ 32749 @ @ 1 Storingscodes Storing Beschrijving van Mogelijke oorzaak/ de storing oplossing Motor-PTC Motor-PTC open Motor-PTC niet aangesloten Motor-PTC Motor-PTC Motor-PTC kortgesloten kortgesloten Motor-PTC Oververhitting motor Koeling controleren Temperatuur Oververhitting Te hoge omgevings- vermogensmodule temperatuur Kortsluiting/...
  • Seite 84: Deksel/Filtermandje Demonteren Respectievelijk Monteren

    Pos: 75 /Technische Dokumentation/Pumpendatenblatt/Punkte aus mitgeltende Dokumente @ 3\mod_1437029935278_372.docx @ 36365 @ @ 1 Onderstaande opsomming heeft betrekking op de overige relevante documenten! Pos: 76 /Technische Dokumentation/Pumpendatenblatt/Deckel/Saugsieb demontieren bzw. montieren @ 3\mod_1437025205014_372.docx @ 36349 @ @ 1 Deksel/filtermandje demonteren respectievelijk monteren Pos: 77 /Technische Dokumentation/Pumpendatenblatt/W95.10.026-P @ 3\mod_1437124747248_0.docx @ 36469 @ @ 1 === Ende der Liste für Textmarke Inhalt ===...
  • Seite 85 === Ende der Liste für Textmarke Mitgeltende_Dokumente === Pos: 4 /Technische Dokumentation/Pumpendatenblatt/Produktbezeichnung/BADU 90 Eco Motion @ 5\mod_1451389537877_0.docx @ 61200 @ @ 1 === Ende der Liste für Textmarke Produktbezeichnung === ü...
  • Seite 86 Pos: 8 /Technische Dokumentation/Pumpendatenblatt/Glossar/Glossar @ 2\mod_1434009603749_373.docx @ 32285 @ @ 1 Glossario Dati tecnici Raccordo aspirazione Raccordo mandata d-Saug Diametro aspirazione consigliato in 5 m d-Druck Diametro mandata consigliato in 5 m max. L Lunghezza massima della pompa Potenza assorbita Potenza resa Corrente nominale Livello di pressione acustica in 1 m di distanza.
  • Seite 87 Pos: 10 /Technische Dokumentation/Pumpendatenblatt/Sonderspannung @ 3\mod_1436964483786_373.docx @ 36253 @ @ 1 Con tensione speciale e/o esecuzione 60 Hz i dati di prestazione sono da prendere dalla targhetta pompa. In alcuni modelli speciali o motori speciali il marchio GS non è presente – eventualmente marchio GS sulla targhetta pompa.
  • Seite 88 Pos: 15 /Technische Dokumentation/Pumpendatenblatt/Motorsteuerung/Eco Motion/Menüstruktur @ 2\mod_1434027519103_373.docx @ 32320 @ @ 1 Struttura del menu Pos: 16 /Technische Dokumentation/Allgemeine Module/#### Seitenumbruch #### @ 0\mod_1426069111812_0.docx @ 894 @ @ 1 IT 88 05|2016...
  • Seite 89 Pos: 17 /Technische Dokumentation/Pumpendatenblatt/Motorsteuerung/Eco Motion/Der Info-Screen @ 2\mod_1434027606126_373.docx @ 32352 @ @ 1 Pagina Info Nella pagina Info si può attivare e disattivare il filtraggio a tempo premendo il tasto F1. I tempi di filtraggio vengono impostati nella voce di menu "Filtraggio". In alto a destra del display compare la modalità...
  • Seite 90 Pos: 19 /Technische Dokumentation/Pumpendatenblatt/Motorsteuerung/Eco Motion/Bewegen im Menü @ 2\mod_1434028934394_373.docx @ 32367 @ @ 1 Navigazione nel menu Con i tasti cursore su e giù si può selezionare la voce di menu desiderata e con il tasto OK si conferma la selezione. Dopo aver premuto il tasto OK, il valore associato alla voce di menu selezionata può...
  • Seite 91 Pos: 23 /Technische Dokumentation/Pumpendatenblatt/Motorsteuerung/Eco Motion/Handbetrieb @ 2\mod_1434030109299_373.docx @ 32397 @ @ 1 Funzionamento manuale Nel funzionamento manuale si può impostare il numero di giri con cui la pompa funziona in modo permanente ed indipendentemente dai programmi dei tempi di filtraggio. Pos: 24 /Technische Dokumentation/Allgemeine Module/####halbe Leerzeile #### @ 3\mod_1437024231169_0.docx @ 36335 @ @ 1 Pos: 25 /Technische Dokumentation/Pumpendatenblatt/Motorsteuerung/Eco Motion/Rückspülen - Manuell @ 2\mod_1434030218027_373.docx @ 32412 @ @ 1 Controlavaggio - Manuale...
  • Seite 92 Pos: 31 /Technische Dokumentation/Pumpendatenblatt/Motorsteuerung/Eco Motion/Entlüften @ 2\mod_1434030673413_373.docx @ 32457 @ @ 1 Sfiato Con questo programma si può sfiatare la tubazione. Si possono impostare la durata di funzionamento a il numero di giri massimo e della modalità a impulsi. La pompa si avvia al numero di giri massimo e poi passa alla modalità...
  • Seite 93 Pos: 37 /Technische Dokumentation/Pumpendatenblatt/Motorsteuerung/Eco Motion/Rückspülen @ 2\mod_1434031453728_373.docx @ 32502 @ @ 1 Controlavaggio Per il controlavaggio si possono effettuare le seguenti impostazioni: Controlavaggio On/Off, numero di giri 35 % - 100 %, durata del controlavaggio, durata del risciacquo, intervallo 1 - 21 giorni, ora di inizio.
  • Seite 94 Pos: 40 /Technische Dokumentation/Pumpendatenblatt/Motorsteuerung/Eco Motion/Ansaugzeit @ 2\mod_1434085382339_373.docx @ 32525 @ @ 1 Tempo di aspirazione Il tempo di aspirazione può essere attivato e disattivato. Se è attivato, inizia in corrispondenza di ogni avviamento della pompa. Se la pompa si trova in modalità di aspirazione, questo stato viene segnalato nella pagina della modalità...
  • Seite 95 Pos: 45 /Technische Dokumentation/Pumpendatenblatt/Motorsteuerung/Eco Motion/Externe Ansteuerung II @ 2\mod_1434085971714_373.docx @ 32555 @ @ 1 Comando esterno Si possono impostare 6 numeri di giri fissi: "N1" ha la priorità minima e "N6" la priorità massima. Nel controllo con segnale digitale/numero di giri fisso si può utilizzare anche il comando normale del filtro.
  • Seite 96 Pos: 47 /Technische Dokumentation/Pumpendatenblatt/Motorsteuerung/Eco Motion/Fehlerspeicher @ 2\mod_1434086549904_373.docx @ 32570 @ @ 1 Memorizzazione guasti Se si presenta un guasto, lampeggia il led roososul pannello di controllo. Nella memorizzazione guasti compare il corrispondente codice guasto e il nome guasto. Premendo il tasto OK si puo’ accettare.
  • Seite 97 Pos: 53 /Technische Dokumentation/Pumpendatenblatt/Motorsteuerung/Eco Motion/Klemmenbelegung Klemmkasten @ 2\mod_1434087295182_373.docx @ 32615 @ @ 1 Allocazione dei morsetti della morsettiera Pos: 54 /Technische Dokumentation/Pumpendatenblatt/Motorsteuerung/Eco Motion/WG27.50.078-P @ 3\mod_1445959178270_0.docx @ 49824 @ @ 1 Pos: 55 /Technische Dokumentation/Allgemeine Module/####halbe Leerzeile #### @ 3\mod_1437024231169_0.docx @ 36335 @ @ 1 Pos: 56 /Technische Dokumentation/Allgemeine Module/####halbe Leerzeile #### @ 3\mod_1437024231169_0.docx @ 36335 @ @ 1 Pos: 57 /Technische Dokumentation/Pumpendatenblatt/Motorsteuerung/Eco Motion/Klemmenbelegung Displaymodus @ 2\mod_1434087330458_373.docx @ 32630 @ @ 1 Allocazione dei morsetti del modulo display...
  • Seite 98: Descrizione Dei Morsetti

    Pos: 60 /Technische Dokumentation/Pumpendatenblatt/Motorsteuerung/Eco Motion/Klemmenbeschreibung @ 2\mod_1434091760661_373.docx @ 32735 @ @ 1 Descrizione dei morsetti La tensione di rete deve essere collegata solo ai morsetti L e N. Il motore deve funzionare solo monofase. Tipo Morsetto Descrizione Sezione Sezione cavo del morsetto cavo rigido flessibile...
  • Seite 99 Tipo Morsetto Descrizione Sezione Sezione cavo del morsetto cavo rigido flessibile Ingresso Uscita a 24 V 0,5 - 1,5 0,5 - 1,5 mm² digitale DC per Inx, mm² AInx Terminale del Conduttore 51-56 Ingresso 0,5 - 1,0 mm² digitale 11 - Terminale del Potenziale di conduttore con...
  • Seite 100: Installazione Elettrica

    Pos: 62 /Technische Dokumentation/Pumpendatenblatt/Motorsteuerung/Eco Motion/Elektrische Installation @ 2\mod_1434088359351_373.docx @ 32660 @ @ 1 Installazione elettrica Pos: 63 /Technische Dokumentation/Pumpendatenblatt/Motorsteuerung/Eco Motion/WG27.50.080-P @ 3\mod_1445959287384_373.docx @ 49854 @ @ 1 Pos: 64 /Technische Dokumentation/Allgemeine Module/#### Seitenumbruch #### @ 0\mod_1426069111812_0.docx @ 894 @ @ 1 IT 100 05|2016...
  • Seite 101 Pos: 66 /Technische Dokumentation/Pumpendatenblatt/Motorsteuerung/Eco Motion/WG27.50.081-P @ 3\mod_1445959346958_373.docx @ 49869 @ @ 1 Pos: 67 /Technische Dokumentation/Pumpendatenblatt/Motorsteuerung/Eco Motion/Verwendung BADU 90 Eco Motion mit BADU Tronic @ 2\mod_1434088460166_373.docx @ 32690 @ @ 1 Utilizzando la pompe in combinazione con la valvola di controlavaggio BADU Tronic, quest'ultima deve essere collegata come illustrato nell'esempio di installazione.
  • Seite 102 Esempio di collegamento: Valvola a automatica Pos: 70 /Technische Dokumentation/Pumpendatenblatt/Motorsteuerung/Eco Motion/WG27.50.082-P @ 3\mod_1445959380882_373.docx @ 49884 @ @ 1 Pos: 71 /Technische Dokumentation/Pumpendatenblatt/Motorsteuerung/Eco Motion/Verwendung BADU 90 Eco Motion mit Stangenventil @ 2\mod_1434088814201_373.docx @ 32720 @ @ 1 Utilizzando la pompe in combinazione con una valvola automatica, quest'ultima deve essere collegata come illustrato nell'esempio di installazione.
  • Seite 103: Codici Di Guasto

    Pos: 73 /Technische Dokumentation/Pumpendatenblatt/Motorsteuerung/Eco Motion/Fehlercodes @ 2\mod_1434094368813_373.docx @ 32750 @ @ 1 Codici di guasto Nome del guasto Descrizione del Possibile causa/ guasto rimedio PTC motore PTC motore aperta PTC motore non collegata PTC motore PTC motore PTC motore cortocircuito cortocircuitata PTC motore Surriscaldamento...
  • Seite 104: Smontaggio E Montaggio Del Coperchio/Cestello

    Pos: 75 /Technische Dokumentation/Pumpendatenblatt/Punkte aus mitgeltende Dokumente @ 3\mod_1437029935278_373.docx @ 36366 @ @ 1 I seguenti elenchi riguardano i documenti di riferimento! Pos: 76 /Technische Dokumentation/Pumpendatenblatt/Deckel/Saugsieb demontieren bzw. montieren @ 3\mod_1437025205014_373.docx @ 36350 @ @ 1 Smontaggio e montaggio del coperchio/cestello Pos: 77 /Technische Dokumentation/Pumpendatenblatt/W95.10.026-P @ 3\mod_1437124747248_0.docx @ 36470 @ @ 1 === Ende der Liste für Textmarke Inhalt === IT 104...
  • Seite 105 (AK)". Usted debe faciliar el libre acceso para el personal de operación y mantenimiento. === Ende der Liste für Textmarke Mitgeltende_Dokumente === Pos: 4 /Technische Dokumentation/Pumpendatenblatt/Produktbezeichnung/BADU 90 Eco Motion @ 5\mod_1451389537877_0.docx @ 61201 @ @ 1 === Ende der Liste für Textmarke Produktbezeichnung === ü...
  • Seite 106 Pos: 8 /Technische Dokumentation/Pumpendatenblatt/Glossar/Glossar @ 2\mod_1434009603749_374.docx @ 32286 @ @ 1 Glosario Datos técnicos Conexión por aspración Conexión por presión d-Saug Diámetro recomendado de la conexión por aspiración a 5 m d-Druck Diámetro recomendado de la conexión por presión a max.
  • Seite 107 Pos: 10 /Technische Dokumentation/Pumpendatenblatt/Sonderspannung @ 3\mod_1436964483786_374.docx @ 36254 @ @ 1 Para tensión especial y/o versión en 60 Hz, el rendimiento se puede encontrar en la placa de la bomba. Para algunos modelos especiales de bombas o motores la norma GS no está disponible –...
  • Seite 108 Pos: 15 /Technische Dokumentation/Pumpendatenblatt/Motorsteuerung/Eco Motion/Menüstruktur @ 2\mod_1434027519103_374.docx @ 32321 @ @ 1 Estructura del menú Pos: 16 /Technische Dokumentation/Allgemeine Module/#### Seitenumbruch #### @ 0\mod_1426069111812_0.docx @ 895 @ @ 1 ES 108 05|2016...
  • Seite 109 Pos: 17 /Technische Dokumentation/Pumpendatenblatt/Motorsteuerung/Eco Motion/Der Info-Screen @ 2\mod_1434027606126_374.docx @ 32353 @ @ 1 La pantalla Info En la pantalla Info se pueden activar y desactivar el filtrado temporizado con la tecla "F1". Los tiempos de filtrado se ajustan en el menú bajo "Filtrar". La parte superior derecha del display es para ver qué...
  • Seite 110 Pos: 19 /Technische Dokumentation/Pumpendatenblatt/Motorsteuerung/Eco Motion/Bewegen im Menü @ 2\mod_1434028934394_374.docx @ 32368 @ @ 1 Moverse en el menú Usar las teclas de cursor arriba y abajo para seleccionar una opción de menú, y confirmar con la tecla OK para cambiar. Después de pulsar la tecla OK, la opción seleccionada se puede cambiar arriba y abajo con la tecla de...
  • Seite 111 Pos: 23 /Technische Dokumentation/Pumpendatenblatt/Motorsteuerung/Eco Motion/Handbetrieb @ 2\mod_1434030109299_374.docx @ 32398 @ @ 1 Modo manual En el modo manual se puede ajustar la velocidad con la que la bomba funciona continuamente y de forma independiente de los programas de tiempo de filtrado ajustados. Pos: 24 /Technische Dokumentation/Allgemeine Module/####halbe Leerzeile #### @ 3\mod_1437024231169_0.docx @ 36336 @ @ 1 Pos: 25 /Technische Dokumentation/Pumpendatenblatt/Motorsteuerung/Eco Motion/Rückspülen - Manuell @ 2\mod_1434030218027_374.docx @ 32413 @ @ 1 Enjuague en el retorno - Manual...
  • Seite 112 Pos: 31 /Technische Dokumentation/Pumpendatenblatt/Motorsteuerung/Eco Motion/Entlüften @ 2\mod_1434030673413_374.docx @ 32458 @ @ 1 Purgar aire Con este programa se puede purgar el aire de la tubería. Se pueden ajustar el tiempo de funcionamiento de la velocidad máxima y el funcionamiento por pulsos. En primer lugar la bomba funciona a velocidad máxima y luego cambia al modo de funcionamiento por pulsos,...
  • Seite 113 Pos: 37 /Technische Dokumentation/Pumpendatenblatt/Motorsteuerung/Eco Motion/Rückspülen @ 2\mod_1434031453728_374.docx @ 32503 @ @ 1 Enjuague en el retorno Para el enjuague en el retorno se pueden realizar los siguientes ajustes: Enjuague en el retorno On/Off, velocidad 35 % - 100 %, duración del enjuague en el retorno, duración del aclarado, intervalo 1 - 21 días, hora inicio.
  • Seite 114 Pos: 40 /Technische Dokumentation/Pumpendatenblatt/Motorsteuerung/Eco Motion/Ansaugzeit @ 2\mod_1434085382339_374.docx @ 32526 @ @ 1 Tiempo de aspiración El tiempo de aspiración se puede activar y desactivar. Se activa con cada arranque de la bomba, si está conectado. Si la bomba está actualmente en el modo Aspiración, en la indicación del modo de funcionamiento aparece el texto "Aspiración".
  • Seite 115 Pos: 45 /Technische Dokumentation/Pumpendatenblatt/Motorsteuerung/Eco Motion/Externe Ansteuerung II @ 2\mod_1434085971714_374.docx @ 32556 @ @ 1 Mando externo Hay 6 velocidades fijas para el ajuste, para lo cual "N1" representa la mínima y "N6" la máxima prioridad. En el mando con una señal digital/velocidad fija, también se puede utilizar el mando del filtro normal.
  • Seite 116: Ajustes Básicos

    Pos: 47 /Technische Dokumentation/Pumpendatenblatt/Motorsteuerung/Eco Motion/Fehlerspeicher @ 2\mod_1434086549904_374.docx @ 32571 @ @ 1 Errer de memoria Si se produce un fallo, el LED en el panel frontal de color rojo comienza a parpadear. En la memoria de errores, el código de error correspondiente se mostrará...
  • Seite 117 Pos: 53 /Technische Dokumentation/Pumpendatenblatt/Motorsteuerung/Eco Motion/Klemmenbelegung Klemmkasten @ 2\mod_1434087295182_374.docx @ 32616 @ @ 1 Conexiones en la caja de bornes Pos: 54 /Technische Dokumentation/Pumpendatenblatt/Motorsteuerung/Eco Motion/WG27.50.078-P @ 3\mod_1445959178270_0.docx @ 49825 @ @ 1 Pos: 55 /Technische Dokumentation/Allgemeine Module/####halbe Leerzeile #### @ 3\mod_1437024231169_0.docx @ 36336 @ @ 1 Pos: 56 /Technische Dokumentation/Allgemeine Module/####halbe Leerzeile #### @ 3\mod_1437024231169_0.docx @ 36336 @ @ 1 Pos: 57 /Technische Dokumentation/Pumpendatenblatt/Motorsteuerung/Eco Motion/Klemmenbelegung Displaymodus @ 2\mod_1434087330458_374.docx @ 32631 @ @ 1 Conexiones en el módulo de display...
  • Seite 118: Descripción De Los Bornes

    Pos: 60 /Technische Dokumentation/Pumpendatenblatt/Motorsteuerung/Eco Motion/Klemmenbeschreibung @ 2\mod_1434091760661_374.docx @ 32736 @ @ 1 Descripción de los bornes La conexión a la red sólo puede realizarse a través de los bornes L y N. El motor sólo debe ser utilizado en la red de 1 fase.
  • Seite 119 Tipo Borne Descripción de Sección de Sección de los bornes cable rígido cable flexible Entrada digital Salida de 24 V 0,5 - 1,5 mm² 0,5 - 1,5 mm² CC para Inx, AInx Manguito terminal 0,5 - 51-56 Entrada digital 1,0 mm² 11 - 16 Potencial de Manguito...
  • Seite 120: Instalación Eléctrica

    Pos: 62 /Technische Dokumentation/Pumpendatenblatt/Motorsteuerung/Eco Motion/Elektrische Installation @ 2\mod_1434088359351_374.docx @ 32661 @ @ 1 Instalación eléctrica Pos: 63 /Technische Dokumentation/Pumpendatenblatt/Motorsteuerung/Eco Motion/WG27.50.080-P @ 3\mod_1445959287384_374.docx @ 49855 @ @ 1 Pos: 64 /Technische Dokumentation/Allgemeine Module/#### Seitenumbruch #### @ 0\mod_1426069111812_0.docx @ 895 @ @ 1 ES 120 05|2016...
  • Seite 121 Pos: 66 /Technische Dokumentation/Pumpendatenblatt/Motorsteuerung/Eco Motion/WG27.50.081-P @ 3\mod_1445959346958_374.docx @ 49870 @ @ 1 Pos: 67 /Technische Dokumentation/Pumpendatenblatt/Motorsteuerung/Eco Motion/Verwendung BADU 90 Eco Motion mit BADU Tronic @ 2\mod_1434088460166_374.docx @ 32691 @ @ 1 Cuando se utiliza el bomba junto con la válvula de enjuague BADU Tronic, este debe ser conectado de acuerdo con el ejemplo de instalación.
  • Seite 122 Pos: 70 /Technische Dokumentation/Pumpendatenblatt/Motorsteuerung/Eco Motion/WG27.50.082-P @ 3\mod_1445959380882_374.docx @ 49885 @ @ 1 Pos: 71 /Technische Dokumentation/Pumpendatenblatt/Motorsteuerung/Eco Motion/Verwendung BADU 90 Eco Motion mit Stangenventil @ 2\mod_1434088814201_374.docx @ 32721 @ @ 1 Cuando se utiliza el bomba junto con una válvula de presión, ésta debe conectarse conforme a este ejemplo...
  • Seite 123: Códigos De Fallo

    Pos: 73 /Technische Dokumentation/Pumpendatenblatt/Motorsteuerung/Eco Motion/Fehlercodes @ 2\mod_1434094368813_374.docx @ 32751 @ @ 1 Códigos de fallo Nro. Nombre del fallo Descripción del Causa posible / fallo Remedio Motor PTC Motor PTC open Motor PTC no conectado Motor PTC Motor PTC short Motor PTC en cortocircuito Motor PTC...
  • Seite 124 Pos: 75 /Technische Dokumentation/Pumpendatenblatt/Punkte aus mitgeltende Dokumente @ 3\mod_1437029935278_374.docx @ 36367 @ @ 1 Las siguientes enumeraciones se refieren a los documentos convalidados! Pos: 76 /Technische Dokumentation/Pumpendatenblatt/Deckel/Saugsieb demontieren bzw. montieren @ 3\mod_1437025205014_374.docx @ 36351 @ @ 1 Tapa/montaje o desmontaje de los prefiltros de aspiración Pos: 77 /Technische Dokumentation/Pumpendatenblatt/W95.10.026-P @ 3\mod_1437124747248_0.docx @ 36471 @ @ 1 === Ende der Liste für Textmarke Inhalt ===...
  • Seite 125 05|2016...
  • Seite 126 Pos: 79.1 /Technische Dokumentation/Konformitätserklärung/EG-Konformitätserklärung DE-EN-FR-NL-IT-ES @ 3\mod_1438753165834_0.docx @ 36981 @ @ 1 05|2016...
  • Seite 127: Eg-Konformitätserklärung

    Baureihe Series | Série | Serie | Serie | Serie Pos: 79.4 /Technische Dokumentation/Konformitätserklärung/Pumpenbezeichnung/BADU 90 Eco Motion @ 6\mod_1462187703913_0.docx @ 84582 @ @ 1 BADU 90 Eco Motion Pos: 79.5 /Technische Dokumentation/Konformitätserklärung/einschlägige Bestimmungen DE-EN-FR-NL-IT-ES @ 3\mod_1438753498509_0.docx @ 37026 @ @ 1 folgenden einschlägigen Bestimmungen entspricht:...
  • Seite 128 Pos: 79.14 /Technische Dokumentation/Konformitätserklärung/Sebastian Watolla / Armin Herger DE-EN-FR-NL-IT-ES @ 3\mod_1438755018627_0.docx @ 37147 @ @ 1 i.V. Sebastian Watolla Armin Herger Technischer Leiter und Dokumentations- Geschäftsführer | Managing Director | bevollmächtigter | Technical director and Gérant | Bedrijfsleider | authorised representative | Directeur technique et Amministratore | Gerente responsable des documentations | Technisch directeur en documentatie gemachtigde | Direttotore...
  • Seite 129 DE Normal- und selbstansaugende Pumpen mit/ohne Kunststofflaternen-Ausführung (AK) EN Non self-priming and self-priming pumps with/without plastic lantern construction (AK) FR Pompes non auto-amorçantes ou auto-amorçantes avec/sans lanterne plastique (exécution AK) NL Normaal en zelfaanzuigende pompen met/zonder uitvoering met kunststof lantaarn Pompe aspirazione normale e autoadescanti con/senza campana in plastica (AK) ES Bombas normales y auto-aspirantescon/sin linternas...
  • Seite 130 Inhaltsverzeichnis DE Originalbetriebsanleitung EN Original operation manual FR Instruction d'utilisation originale NL Oorspronkelijke gebruikershandleiding Manuale d'istruzioni originale ES Instrucciones para el manejo originales...
  • Seite 131 Originalbetriebsanleitung Normal- und selbstansaugende Pumpen mit/ohne Kunststofflaternen-Ausführung (-AK) ü P o s : / T e c h n i s c h e D o k u m e n t a t i o n / A l l g e m e i n e M o d u l e / C E - Z e i c h e n 2 \ m o d _ 1 4 3 4 5 4 2 1 7 5 8 0 9...
  • Seite 132 Pos : 6 /T ec hnis che D okumentati on/Allgemeine M odule/Firmenadresse BADU @ 2\mod_1435913484644_6.doc x @ 33910 @ @ 1 ® BADU ist eine Marke der SPECK Pumpen Verkaufsgesellschaft GmbH Hauptstraße 3 91233 Neunkirchen am Sand, Germany Telefon 09123 949-0 Telefax 09123 949-260 info@speck-pumps.com...
  • Seite 133: Inhaltsverzeichnis

    Inhaltsverzeichnis Pos : 10 /T echnisc he Dokumentation/Allgemei ne Module/Inhalts verzeic hnis @ 2\mod_1435582896243_6.doc x @ 33762 @ @ 1 Inhaltsverzeichnis === Ende der Liste für T extmar ke Ihvz === Zu diesem Dokument ..............5 Umgang mit dieser Anleitung............5 Mitgeltende Dokumente ..............
  • Seite 134 Inhaltsverzeichnis Installation ..................17 Einbauort ................... 17 5.1.1 Aufstellen im Freien .............. 17 5.1.2 Bodenablauf muss vorhanden sein ........17 5.1.3 Be- und Entlüftung ..............17 5.1.4 Körper- und Luftschallübertragung ........17 5.1.5 Platzreserve ................17 5.1.6 Befestigungselemente ............18 Rohrleitungen ................
  • Seite 135: Zu Diesem Dokument

    Zu diesem Dokument Pos : 13.1 /T echnisc he Dokumentation/Betriebsanlei tung/Z u dies em D okument/Z u di esem Dokument @ 0\mod_1427210330941_6.doc x @ 26354 @ 1 @ 1 Zu diesem Dokument Pos : 13.2 /T echnisc he Dokumentation/Betriebsanlei tung/Z u dies em D okument/U mg ang mit di es er Anleitung @ 0\mod_1427286785560_6.doc x @ 26451 @ 2 @ 1 Umgang mit dieser Anleitung Diese Anleitung ist Teil der Pumpe/Anlage.
  • Seite 136 Zu diesem Dokument H IN W E IS Hinweise zur Vermeidung von Sachschäden, zum Verständnis oder zum Optimieren der Arbeitsabläufe. Um die korrekte Bedienung zu verdeutlichen, sind wichtige Informationen und technische Hinweise besonders hervorgehoben. Symbol Bedeutung  Einschrittige Handlungsaufforderung. Mehrschrittige Handlungsaufforderung. ...
  • Seite 137: Sicherheit

    Sicherheit Pos : 15 /T echnisc he Dokumentation/Betriebsanl eitung/Sic herheit/Sic her heit @ 0\mod_1427704077019_6.doc x @ 26500 @ 1 @ 1 Sicherheit Pos : 16 /T echnisc he Dokumentation/Betriebsanl eitung/Sic herheit/Besti mmungsgemäße Ver wendung/Besti mmungsg emäß e Ver wendung @ 0\mod_1427705810414_6.doc x @ 26530 @ 2 @ 1 Bestimmungsgemäße Verwendung Die Pumpe ist zur Umwälzung von Schwimmbadwasser in Verbindung mit einer Schwimmbad-Filteranlage vorgesehen.
  • Seite 138: Sicherheitsvorschriften

    Sicherheit  Sicherstellen, dass folgende Voraussetzungen erfüllt sind: – Das Personal, das die entsprechende Qualifikation noch nicht aufweisen kann, erhält die erforderliche Schulung, bevor es mit anlagentypischen Aufgaben betraut wird. – Die Zuständigkeiten des Personals, zum Beispiel für Arbeiten am Produkt, an der elektrischen Ausrüstung oder den hydraulischen Einrichtungen, sind entsprechend seiner Qualifikation und Arbeitsplatzbeschreibung festgelegt.
  • Seite 139: Schilder

    Sicherheit Schilder  Alle Schilder auf der gesamten Pumpe/Anlage in lesbarem Zustand halten. Pos : 24 /T echnisc he Dokumentation/Betriebsanl eitung/Sic herheit/R estrisi ken/Restrisi ken @ 0\mod_1427723332615_6.doc x @ 26637 @ 2 @ 1 Restrisiken Pos : 25 /T echnisc he Dokumentation/Betriebsanl eitung/Sic herheit/R estrisi ken/Her abfall ende T eile @ 0\mod_1427724889933_6.doc x @ 26652 @ 3 @ 1 2.7.1 Herabfallende Teile Die Tragösen am Motor sind nur für das Gewicht des Motors...
  • Seite 140: Elektrische Energie

    Sicherheit Pos : 28 /T echnisc he Dokumentation/Betriebsanl eitung/Sic herheit/R estrisi ken/El ektrisc he Energie @ 0\mod_1427779167394_6.doc x @ 26690 @ 3 @ 1 2.7.3 Elektrische Energie Bei Arbeiten an der elektrischen Anlage besteht durch die feuchte Umgebung erhöhte Stromschlaggefahr. Ebenso kann eine nicht ordnungsgemäß...
  • Seite 141: Vermeidung Von Sachschäden

    Sicherheit Pos : 34 /T echnisc he Dokumentation/Betriebsanl eitung/Sic herheit/Störungen/F estsi tzende Pumpe @ 0\mod_1427784418208_6.doc x @ 26765 @ @ 1 Festsitzende Pumpe Wird eine festsitzende Pumpe mehrmals hintereinander eingeschaltet, kann der Motor beschädigt werden. Folgende Punkte beachten:  Pumpe/Anlage nicht mehrmals hintereinander einschalten. ...
  • Seite 142: Überhitzen

    Sicherheit  Saugseitige Armatur vollständig öffnen. Pos : 43 /T echnisc he Dokumentation/Betriebsanl eitung/Sic herheit/Ver meidung von Sc häden/Überhitzen @ 0\mod_1427790847604_6.doc x @ 26845 @ 3 @ 1 2.9.4 Überhitzen Folgende Faktoren können zu einer Überhitzung der Pumpe führen: • Zu hoher Druck auf der Druckseite.
  • Seite 143: Sichere Nutzung Des Produktes

    Sicherheit 2.9.9 Sichere Nutzung des Produktes Eine sichere Nutzung des Produktes ist bei folgenden Punkten nicht mehr gewährleistet:  Bei nicht ordnungsgemäßem Zustand des Rohrleitungssystems.  Bei festsitzender Pumpe. Siehe Kapitel 2.8 auf Seite 10.  Bei schadhafter oder fehlender Schutzeinrichtungen, zum Beispiel Berührungsschutz.
  • Seite 144: Beschreibung

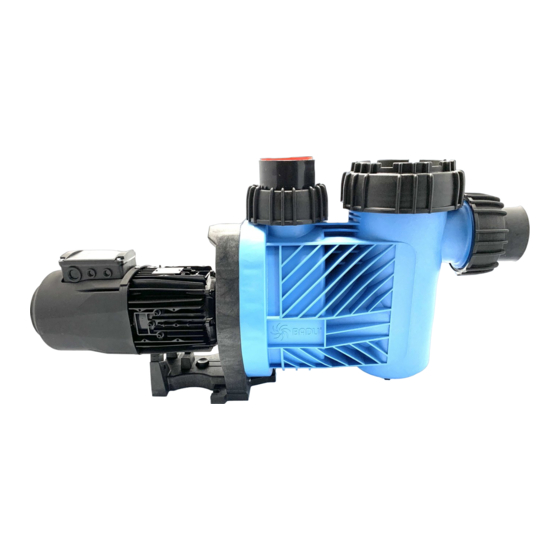
    Beschreibung Pos : 53 /T echnisc he Dokumentation/Betriebsanl eitung/Besc hrei bung/Beschr eibung @ 0\mod_1427795115728_6.doc x @ 26935 @ 1 @ 1 Beschreibung Pos : 54 /T echnisc he Dokumentation/Betriebsanl eitung/Besc hrei bung/W90.04.086- 1-P @ 2\mod_1436517304672_0.doc x @ 34460 @ @ 1 Pos : 55 /T echnisc he Dokumentation/Allgemei ne Module/Abbil dung @ 1\mod_1430211005604_6.doc x @ 29219 @ @ 1 Abb.
  • Seite 145: Transport Und Zwischenlagerung

    Transport und Zwischenlagerung Pos : 59 /T echnisc he Dokumentation/Betriebsanl eitung/Trans por t und Z wisc henl agerung/Tr ans port und Z wis chenl ager ung @ 0\mod_1427801635560_6.doc x @ 27000 @ 1 @ 1 Transport und Zwischenlagerung H IN W E IS Korrosion durch Lagerung in feuchter Luft bei wechselnden Temperaturen! Kondenswasser kann Wicklungen und Metallteile angreifen.
  • Seite 146 Transport und Zwischenlagerung Pos : 62 /T echnisc he Dokumentation/Allgemei ne Module/Abbil dung @ 1\mod_1430211005604_6.doc x @ 29219 @ @ 1 Abb. 2 Pos : 63 /T echnisc he Dokumentation/Allgemei ne Module/#### Sei tenumbruch #### @ 0\mod_1426069111812_0.doc x @ 769 @ @ 1 16 DE 10|2015...
  • Seite 147: Installation

    Installation Pos : 64 /T echnisc he Dokumentation/Betriebsanl eitung/Installation/Ins tallation @ 0\mod_1427869040467_6.doc x @ 27030 @ 1 @ 1 Installation Pos : 65 /T echnisc he Dokumentation/Betriebsanl eitung/Installation/Einbauort/Einbauort @ 0\mod_1427869486488_6.doc x @ 27045 @ 2 @ 1 Einbauort Pos : 66 /T echnisc he Dokumentation/Betriebsanl eitung/Installation/Einbauort/Aufstellen i m Fr eien @ 0\mod_1427869735350_6.doc x @ 27060 @ 3 @ 1 5.1.1 Aufstellen im Freien ...
  • Seite 148: Befestigungselemente

    Installation 5.1.6 Befestigungselemente  Pumpe mit Schrauben befestigen. Pos : 73.1 /T echnisc he Dokumentation/Betriebsanlei tung/Installation/R ohrl eitungen/R ohrleitungen @ 0\mod_1427882317137_6.doc x @ 27150 @ 2 @ 1 Rohrleitungen Pos : 73.2 /T echnisc he Dokumentation/Betriebsanlei tung/Installation/R ohrl eitungen/R ohrleitungen di mensi oni eren @ 0\mod_1427890208768_6.doc x @ 27180 @ 3 @ 1 5.2.1 Rohrleitungen dimensionieren Zu lange Saugleitungen haben erhebliche Nachteile:...
  • Seite 149 Installation  In Saug- und Druckleitung jeweils eine Absperrarmatur einbauen.  Schlagartig schließende Armaturen vermeiden. Gegebenenfalls Druckstoßdämpfer oder Windkessel einbauen. H IN W E IS Bei einer undichten Saugleitung saugt die Pumpe schlecht oder überhaupt nicht.  Dichtigkeit der Saugleitung sicherstellen und gewährleisten, dass der Deckel fest aufgeschraubt ist.
  • Seite 150: Aufstellung

    Installation Pos : 75 /T echnisc he Dokumentation/Betriebsanl eitung/Installation/Aufstellung/allgemeine Anl eitung Aufstellung @ 2\mod_1432017628128_6.doc x @ 31940 @ 2 @ 1 Aufstellung Pos : 76 /T echnisc he Dokumentation/Betriebsanl eitung/Installation/Aufstellung/allgemeine Anl eitung Pumpe aufs tell en - Was ser ni veau @ 2\mod_1432022562944_6.doc x @ 32000 @ @ 1 Die Pumpe kann entweder unterhalb des Wasserniveaus im Zulaufbetrieb oder oberhalb des Wasserniveaus im Saugbetrieb aufgestellt werden.
  • Seite 151: Pumpe Aufstellen Und An Die Rohrleitung Anschließen

    Installation Pos : 82 /T echnisc he Dokumentation/Betriebsanl eitung/Installation/Aufstellung/Pumpe aufstellen und an die Rohrleitung ansc hließ en @ 0\mod_1427897347705_6.doc x @ 27256 @ 3 @ 1 5.3.1 Pumpe aufstellen und an die Rohrleitung anschließen Pumpe horizontal und trocken aufstellen. Dabei die maximalen Abstände zum Wasserniveau, das heißt die geodätische Höhe, beachten.
  • Seite 152: Elektrischer Anschluss

    Installation Elektrischer Anschluss W A R N U N G Stromschlaggefahr durch unsachgemäßen Anschluss!  Elektrische Anschlüsse und Verbindungen müssen immer von autorisiertem Fachpersonal vorgenommen werden.  VDE- und EVU-Vorschriften des Energieversorgungsunternehmens beachten.  Pumpen für Schwimmbecken und deren Schutzbereiche gemäß...
  • Seite 153: Inbetriebnahme

    Inbetriebnahme Pos : 86 /T echnisc he Dokumentation/Betriebsanl eitung/Inbetri ebnahme/Inbetriebnahme @ 0\mod_1427956937430_6.doc x @ 27296 @ 1 @ 1 Inbetriebnahme H IN W E IS Beschädigung der Pumpe/Anlage durch Trockenlauf!  Sicherstellen, dass die Pumpe/Anlage immer mit Wasser gefüllt ist. Dies gilt auch bei der Drehrichtungskontrolle. Pos : 87 /T echnisc he Dokumentation/Betriebsanl eitung/Inbetri ebnahme/Sel bstansaugende Pumpe mit Wass er füllen @ 0\mod_1427959830385_6.doc x @ 27311 @ 2 @ 1 Selbstansaugende Pumpe mit Wasser füllen Deckel abnehmen.
  • Seite 154: Pumpe Einschalten

    Inbetriebnahme Pos : 90 /T echnisc he Dokumentation/Betriebsanl eitung/Inbetri ebnahme/Pumpe ei nsc halten @ 0\mod_1427962694084_6.doc x @ 27341 @ 2 @ 1 Pumpe einschalten Voraussetzungen: • Saugsieb ist eingebaut, falls vorhanden. • Deckel ist dicht montiert. Saugseitige Armatur ganz öffnen. Druckseitige Armatur nur halb öffnen.
  • Seite 155 Störungen Pos : 92 /T echnisc he Dokumentation/Betriebsanl eitung/Stör ung/Störungen @ 0\mod_1427964696943_6.doc x @ 27356 @ 1 @ 1 Störungen H IN W E IS Es ist normal, dass von Zeit zu Zeit einige Tropfen Wasser durch die Gleitringdichtung austreten. Das gilt insbesondere während der Einlaufzeit.
  • Seite 156: Störungen

    Störungen Pos : 94 /T echnisc he Dokumentation/Betriebsanl eitung/Stör ung/Ü bersicht @ 1\mod_1427966108756_6.doc x @ 27371 @ 2 @ 1 Übersicht Störung Mögliche Abhilfe Ursache  Pumpe wird durch Überlastung Pumpe prüfen. Wicklungsschutz- Siehe Kapitel kontakt oder 7.1.1 auf Seite 26. Motorschutz- schalter außer Betrieb gesetzt.
  • Seite 157: Ersatzteillisten

    Störungen Motorwelle leichtgängig: Schraubendreher entfernen. Druckseitige Armatur nur halb öffnen. Spannungsversorgung wieder herstellen. H IN W E IS Wenn die Pumpe festsitzt, kann der Motor durch mehrmaliges Einschalten beschädigt werden.  Sicherstellen, dass die Pumpe/Anlage nur einmal eingeschaltet wird. Warten, bis der Wicklungsschutzkontakt den Motor nach dessen Abkühlen automatisch einschaltet.
  • Seite 158: Wartung/Instandhaltung

    Wartung/Instandhaltung Pos : 100 /Tec hnisc he D okumentati on/Betri ebs anleitung/Wartung/Ins tandhaltung/allgemeine Anl eitung Wartung/Instandhaltung @ 1\mod_1428480782431_6.doc x @ 27441 @ 1 @ 1 Wartung/Instandhaltung H IN W E IS  Vor Instandhaltungsarbeiten alle Absperrarmaturen schließen und Leitungen entleeren. Alle Pumpen Wann? Was?
  • Seite 159: Saugsieb Reinigen

    Wartung/Instandhaltung Pos : 103 /Tec hnisc he D okumentati on/Betri ebs anleitung/Wartung/Ins tandhaltung/allgemeine Anl eitungSaugsieb rei nigen @ 1\mod_1428483476842_6.doc x @ 27471 @ 2 @ 1 Saugsieb reinigen Pumpe ausschalten. Absperrarmaturen schließen. Deckel abnehmen. Saugsieb herausnehmen. Saugsieb mit Wasser abspritzen. Saugsieb einsetzen.
  • Seite 160: Salzkristalle Bei Kunststofflaternen-Ausführung (-Ak) Entfernen

    Wartung/Instandhaltung Pos : 105 /Tec hnisc he D okumentati on/Betri ebs anleitung/Wartung/Ins tandhaltung/allgemeine Anl eitungSalz kristalle bei Kunsts tofflater nen-Aus führung (AK) entfer nen - Ü berschrift @ 1\mod_1428484943782_6.doc x @ 27503 @ 2 @ 1 Salzkristalle bei Kunststofflaternen-Ausführung (-AK) entfernen Pos : 106 /Tec hnisc he D okumentati on/Betri ebs anleitung/Wartung/Ins tandhaltung/allgemeine Anl eitung W90.80.018-P @ 2\mod_1436517922324_0.doc x @ 34521 @ @ 1 Pos : 107 /Tec hnisc he D okumentati on/Allgemeine M odul e/Abbildung @ 1\mod_1430211005604_6.doc x @ 29219 @ @ 1 Abb.
  • Seite 161: Gewährleistung

    Wartung/Instandhaltung Gewährleistung Die Gewährleistung erstreckt sich auf die gelieferten Geräte mit allen Teilen. Ausgenommen sind jedoch natürliche Abnutzung/Verschleiß (DIN 3151/DIN-EN 13306) aller drehenden beziehungsweise dynamisch beanspruchter Bauteile, einschließlich spannungsbelasteter Elektronik-Komponenten. Die Nichtbeachtung der Sicherheitshinweise kann zum Verlust jeglicher Schadensersatzansprüche führen. Pos : 112 /Tec hnisc he D okumentati on/Allgemeine M odul e/#### Seitenumbruc h #### @ 0\mod_1426069111812_0.doc x @ 769 @ @ 1 10|2015 DE 31...
  • Seite 162: Entsorgung

    Entsorgung Pos : 113 /Tec hnisc he D okumentati on/Betri ebs anleitung/Ents orgung/Ents orgung @ 1\mod_1428486567397_6.doc x @ 27534 @ 1 @ 1 Entsorgung  Schädliche Fördermedien auffangen und vorschriftsgemäß entsorgen.  Die Pumpe/Anlage beziehungsweise die Einzelteile müssen nach Lebensdauerende fachgerecht entsorgt werden. Eine Entsorgung im Hausmüll ist nicht zulässig! ...
  • Seite 163: Index

    Index Pos : 115 /Tec hnisc he D okumentati on/Allgemeine M odul e/Index @ 2\mod_1435751775796_6.doc x @ 33848 @ 1 @ 1 Index === Ende der Liste für T extmar ke Index === Aufstellung 20 Mitgeltende Dokumente 5 Außerbetriebnahme 30 Pumpe einschalten 24 Bestimmungsgemäße Verwendung 7 Rohrleitung 11, 18, 21...
  • Seite 165 Translation of original operation manual Non-self-priming and self-priming pumps with/without plastic lantern construction (AK version) ü P o s : / T e c h n i s c h e D o k u m e n t a t i o n / A l l g e m e i n e M o d u l e / C E - Z e i c h e n 2 \ m o d _ 1 4 3 4 5 4 2 1 7 5 8 0 9...
  • Seite 166 Pos : 6 /T ec hnis che D okumentati on/Allgemeine M odule/Firmenadresse BADU @ 2\mod_1435913484644_370.doc x @ 33912 @ @ 1 ® BADU is a trademark of SPECK Pumpen Verkaufsgesellschaft GmbH Hauptstraße 3 91233 Neunkirchen am Sand, Germany Phone +49 9123 949-0 +49 9123 949-260 info@speck-pumps.com...
  • Seite 167 Table of contents Pos : 10 /T echnisc he Dokumentation/Allgemei ne Module/Inhalts verzeic hnis @ 2\mod_1435582896243_370.doc x @ 33764 @ @ 1 Table of contents === Ende der Liste für T extmar ke Ihvz === About this document..............5 Using this manual ............... 5 Other applicable documents ............
  • Seite 168 Table of contents Installation ..................16 Installation site ................16 5.1.1 Outdoor installation ............... 16 5.1.2 There must be ground drainage ..........16 5.1.3 Ventilation and aeration ............16 5.1.4 Structure-borne and airborne noise transmission ....16 5.1.5 Reserve space ..............16 5.1.6 Fasteners ................
  • Seite 169: About This Document

    About this document Pos : 13.1 /T echnisc he Dokumentation/Betriebsanlei tung/Z u dies em D okument/Z u di esem Dokument @ 0\mod_1427210330941_370.doc x @ 26356 @ 1 @ 1 About this document Pos : 13.2 /T echnisc he Dokumentation/Betriebsanlei tung/Z u dies em D okument/U mg ang mit di es er Anleitung @ 0\mod_1427286785560_370.doc x @ 26453 @ 2 @ 1 Using this manual This manual is a component of the pump/unit.
  • Seite 170 About this document Important information and technical notes are specially marked to explain correct operation. Symbol Meaning  Instructions for a one-step action. Directions for a multi-step action.  Observe the order of the steps. Pos : 14 /T echnisc he Dokumentation/Allgemei ne Module/#### Sei tenumbruch #### @ 0\mod_1426069111812_0.doc x @ 891 @ @ 1 6 EN 10|2015...
  • Seite 171: Safety

    Safety Pos : 15 /T echnisc he Dokumentation/Betriebsanl eitung/Sic herheit/Sic her heit @ 0\mod_1427704077019_370.doc x @ 26502 @ 1 @ 1 Safety Pos : 16 /T echnisc he Dokumentation/Betriebsanl eitung/Sic herheit/Besti mmungsgemäße Ver wendung/Besti mmungsg emäß e Ver wendung @ 0\mod_1427705810414_370.doc x @ 26532 @ 2 @ 1 Intended use The pump is intended to circulate swimming pool water in connection with a swimming pool filter system.
  • Seite 172: Safety Regulations

    Safety – The personnels' responsibilities, for example working on the product, electric equipment or hydraulic systems, are set based on their qualifications and the job description. – The personnel have read this manual and understand the necessary working steps. Pos : 19 /T echnisc he Dokumentation/Betriebsanl eitung/Sic herheit/Sic her heits vorsc hriften/Sic herheits vorsc hriften @ 0\mod_1427717298653_370.doc x @ 26578 @ 2 @ 1 Safety regulations The operator of the system is responsible for the adherence to all relevant statutory regulations and guidelines.
  • Seite 173: Residual Risk

    Safety Pos : 24 /T echnisc he Dokumentation/Betriebsanl eitung/Sic herheit/R estrisi ken/Restrisi ken @ 0\mod_1427723332615_370.doc x @ 26639 @ 2 @ 1 Residual risk Pos : 25 /T echnisc he Dokumentation/Betriebsanl eitung/Sic herheit/R estrisi ken/Her abfall ende T eile @ 0\mod_1427724889933_370.doc x @ 26654 @ 3 @ 1 2.7.1 Falling parts The lifting hooks on the motor are designed for the weight of the...
  • Seite 174: Hot Surfaces

    Safety  Before working on the electrical system, take the following measures: – Disconnect system from the power supply. – Attach a warning sign: “Do not switch on! The system is being worked on.” – Ensure that the system is free of voltage. ...
  • Seite 175: Preventing Material Damage

    Safety Pos : 36 /T echnisc he Dokumentation/Betriebsanl eitung/Sic herheit/Ver meidung von Sc häden/Vermei dung von Sac hschäden @ 0\mod_1427787266105_370.doc x @ 26782 @ 2 @ 1 Preventing material damage Pos : 37 /T echnisc he Dokumentation/Betriebsanl eitung/Sic herheit/Ver meidung von Sc häden/Undichtigkeit und Rohrleitungsbr uch @ 0\mod_1427787655353_370.doc x @ 26797 @ 3 @ 1 2.9.1 Leakage and pipe breakage Vibrations and thermal expansion can cause pipes to break.
  • Seite 176: Pressure Surges

    Safety  For pumps with a three-phase motor, install a built-in or external overload switch and set it correctly.  Do not exceed the permitted ambient temperature of 40 °C. Pos : 45 /T echnisc he Dokumentation/Betriebsanl eitung/Sic herheit/Ver meidung von Sc häden/Druc ks töß e @ 0\mod_1427792241712_370.doc x @ 26862 @ 3 @ 1 2.9.5 Pressure surges Valves which close suddenly can cause pressure surges which far...
  • Seite 177: Description

    Description Pos : 53 /T echnisc he Dokumentation/Betriebsanl eitung/Besc hrei bung/Beschr eibung @ 0\mod_1427795115728_370.doc x @ 26937 @ 1 @ 1 Description Pos : 54 /T echnisc he Dokumentation/Betriebsanl eitung/Besc hrei bung/W90.04.086- 1-P @ 2\mod_1436517304672_0.doc x @ 34462 @ @ 1 Pos : 55 /T echnisc he Dokumentation/Allgemei ne Module/Abbil dung @ 1\mod_1430211005604_370.doc x @ 29221 @ @ 1 Fig.
  • Seite 178: Transport And Intermediate Storage

    Transport and intermediate storage Pos : 59 /T echnisc he Dokumentation/Betriebsanl eitung/Trans por t und Z wisc henl agerung/Tr ans port und Z wis chenl ager ung @ 0\mod_1427801635560_370.doc x @ 27002 @ 1 @ 1 Transport and intermediate storage N O T IC E Corrosion is possible due to storage in humid conditions with fluctuating temperatures!
  • Seite 179 Transport and intermediate storage Pos : 62 /T echnisc he Dokumentation/Allgemei ne Module/Abbil dung @ 1\mod_1430211005604_370.doc x @ 29221 @ @ 1 Fig. 2 Pos : 63 /T echnisc he Dokumentation/Allgemei ne Module/#### Sei tenumbruch #### @ 0\mod_1426069111812_0.doc x @ 891 @ @ 1 10|2015 EN 15...
  • Seite 180: Installation

    Installation Pos : 64 /T echnisc he Dokumentation/Betriebsanl eitung/Installation/Ins tallation @ 0\mod_1427869040467_370.doc x @ 27032 @ 1 @ 1 Installation Pos : 65 /T echnisc he Dokumentation/Betriebsanl eitung/Installation/Einbauort/Einbauort @ 0\mod_1427869486488_370.doc x @ 27047 @ 2 @ 1 Installation site Pos : 66 /T echnisc he Dokumentation/Betriebsanl eitung/Installation/Einbauort/Aufstellen i m Fr eien @ 0\mod_1427869735350_370.doc x @ 27062 @ 3 @ 1 5.1.1 Outdoor installation ...
  • Seite 181: Fasteners

    Installation 5.1.6 Fasteners  Fasten pump using screws. Pos : 73.1 /T echnisc he Dokumentation/Betriebsanlei tung/Installation/R ohrl eitungen/R ohrleitungen @ 0\mod_1427882317137_370.doc x @ 27152 @ 2 @ 1 Pipes Pos : 73.2 /T echnisc he Dokumentation/Betriebsanlei tung/Installation/R ohrl eitungen/R ohrleitungen di mensi oni eren @ 0\mod_1427890208768_370.doc x @ 27182 @ 3 @ 1 5.2.1 Pipe sizing Suction lines which are too long have significant disadvantages:...
  • Seite 182: Installation

    Installation N O T IC E If the suction line leaks, the pump will prime poorly or not at all.  Ensure the suction line does not leak and make sure that the cover is screwed on tightly. Pos : 75 /T echnisc he Dokumentation/Betriebsanl eitung/Installation/Aufstellung/allgemeine Anl eitung Aufstellung @ 2\mod_1432017628128_370.doc x @ 31942 @ 2 @ 1 Installation Pos : 76 /T echnisc he Dokumentation/Betriebsanl eitung/Installation/Aufstellung/allgemeine Anl eitung Pumpe aufs tell en - Was ser ni veau @ 2\mod_1432022562944_370.doc x @ 32002 @ @ 1 The pump can either be installed below the water level in intake...
  • Seite 183: Installing The Pump And Connecting It To The Pipe

    Installation Pos : 82 /T echnisc he Dokumentation/Betriebsanl eitung/Installation/Aufstellung/Pumpe aufstellen und an die Rohrleitung ansc hließ en @ 0\mod_1427897347705_370.doc x @ 27258 @ 3 @ 1 5.3.1 Installing the pump and connecting it to the pipe Install the pump in a horizontal and dry position. When doing so, pay attention to the maximum distance to the water level, i.e.
  • Seite 184: Electrical Connection

    Installation Electrical connection W A R N IN G Risk of electric shock due to incorrect connections!  Electrical connections must always be carried out by authorised specialists.  Observe VDE and utility company regulations.  Install swimming pools and their protection according to DIN VDE 0100-702.
  • Seite 185: Start-Up

    Start-up Pos : 86 /T echnisc he Dokumentation/Betriebsanl eitung/Inbetri ebnahme/Inbetriebnahme @ 0\mod_1427956937430_370.doc x @ 27298 @ 1 @ 1 Start-up N O T IC E The pump/unit can be damaged if it runs dry!  Ensure that the pump/unit is always full of water. This also applies to checking the rotation direction.
  • Seite 186: Switching The Pump On

    Start-up Pos : 90 /T echnisc he Dokumentation/Betriebsanl eitung/Inbetri ebnahme/Pumpe ei nsc halten @ 0\mod_1427962694084_370.doc x @ 27343 @ 2 @ 1 Switching the pump on Pre-requisites: • Strainer basket is installed, where applicable. • Lid is fitted securely. Open the valve on the intake side completely. Only open the valve on the delivery side halfway.
  • Seite 187: Defects

    Defects Pos : 92 /T echnisc he Dokumentation/Betriebsanl eitung/Stör ung/Störungen @ 0\mod_1427964696943_370.doc x @ 27358 @ 1 @ 1 Defects N O T IC E It is normal for a few drops of water to escape from the mechanical seal from time to time. This is especially true during the break-in period.
  • Seite 188: Check The Pump After The Overload Switch Has Tripped

    Defects 7.1.1 Check the pump after the overload switch has tripped If the motor has been switched off by the built-in or external overload switch, carry out the following steps: Disconnect the system from the power supply. Turn the motor shaft on the fan side using a screwdriver and check whether it turns easily.
  • Seite 189: Maintenance

    Maintenance Pos : 100 /Tec hnisc he D okumentati on/Betri ebs anleitung/Wartung/Ins tandhaltung/allgemeine Anl eitung Wartung/Instandhaltung @ 1\mod_1428480782431_370.doc x @ 27443 @ 1 @ 1 Maintenance N O T IC E  Before maintenance work, close all shut-off valves and drain all pipes.
  • Seite 190: Cleaning The Strainer Basket

    Maintenance Pos : 103 /Tec hnisc he D okumentati on/Betri ebs anleitung/Wartung/Ins tandhaltung/allgemeine Anl eitungSaugsieb rei nigen @ 1\mod_1428483476842_370.doc x @ 27473 @ 2 @ 1 Cleaning the strainer basket Switch pump off. Close shut-off valves. Remove lid. Remove strainer basket. Hose strainer basket down with water.
  • Seite 191: Removing Salt Crystals For Pumps With Plastic Lanterns (Ak Version)

    Maintenance Pos : 105 /Tec hnisc he D okumentati on/Betri ebs anleitung/Wartung/Ins tandhaltung/allgemeine Anl eitungSalz kristalle bei Kunsts tofflater nen-Aus führung (AK) entfer nen - Ü berschrift @ 1\mod_1428484943782_370.doc x @ 27505 @ 2 @ 1 Removing salt crystals for pumps with plastic lanterns (AK version) Pos : 106 /Tec hnisc he D okumentati on/Betri ebs anleitung/Wartung/Ins tandhaltung/allgemeine Anl eitung W90.80.018-P @ 2\mod_1436517922324_0.doc x @ 34523 @ @ 1 Pos : 107 /Tec hnisc he D okumentati on/Allgemeine M odul e/Abbildung @ 1\mod_1430211005604_370.doc x @ 29221 @ @ 1...
  • Seite 192: Warranty

    Maintenance Warranty The warranty includes the devices delivered and all components. However natural wear and tear (DIN 3151/DIN-EN 13306) on all turning and dynamically loaded components, including electronic components under tension, is not covered under the warranty. Failure to comply with the safety instructions may void the warranty.
  • Seite 193: Disposal

    Disposal Pos : 113 /Tec hnisc he D okumentati on/Betri ebs anleitung/Ents orgung/Ents orgung @ 1\mod_1428486567397_370.doc x @ 27536 @ 1 @ 1 Disposal  Collect harmful media and dispose of it according to the regulations.  At the end of its service life, the pump/unit or individual components must be disposed of correctly.
  • Seite 194: Index

    Index Pos : 115 /Tec hnisc he D okumentati on/Allgemeine M odul e/Index @ 2\mod_1435751775796_370.doc x @ 33850 @ 1 @ 1 Index === Ende der Liste für T extmar ke Index === Decommissioning 27 Other applicable documents 5 Defects 10, 23 Overview 23 Disposal 29 pipe 11, 17, 19...
  • Seite 195 Instruction d'utilisation originale Pompes non auto-amorçantes ou auto- amorçantes avec/sans lanterne plastique (exécution AK) ü P o s : / T e c h n i s c h e D o k u m e n t a t i o n / A l l g e m e i n e M o d u l e / C E - Z e i c h e n 2 \ m o d _ 1 4 3 4 5 4 2 1 7 5 8 0 9...
  • Seite 196 Pos : 6 /T ec hnis che D okumentati on/Allgemeine M odule/Firmenadresse BADU @ 2\mod_1435913484644_371.doc x @ 33913 @ @ 1 ® BADU est une marque de SPECK Pumpen Verkaufsgesellschaft GmbH Hauptstraße 3 91233 Neunkirchen am Sand, Allemagne Téléphone +49 9123 949-0 +49 9123 949-260 info@speck-pumps.com...
  • Seite 197 Sommaire Pos : 10 /T echnisc he Dokumentation/Allgemei ne Module/Inhalts verzeic hnis @ 2\mod_1435582896243_371.doc x @ 33765 @ @ 1 Sommaire === Ende der Liste für T extmar ke Ihvz === A propos de ce document ............. 5 Utilisation de ce manuel .............. 5 Documents applicables ...............
  • Seite 198 Sommaire Installation ..................17 Lieu de montage ............... 17 5.1.1 Installation en plein air ............17 5.1.2 La mise en place d'une bonde d'évacuation de l'eau est obligatoire ..................17 5.1.3 Aération et ventilation ............17 5.1.4 Vibrations structurelles et aériennes ........17 5.1.5 Espace disponible ..............
  • Seite 199: Propos De Ce Document

    A propos de ce document Pos : 13.1 /T echnisc he Dokumentation/Betriebsanlei tung/Z u dies em D okument/Z u di esem Dokument @ 0\mod_1427210330941_371.doc x @ 26357 @ 1 @ 1 A propos de ce document Pos : 13.2 /T echnisc he Dokumentation/Betriebsanlei tung/Z u dies em D okument/U mg ang mit di es er Anleitung @ 0\mod_1427286785560_371.doc x @ 26454 @ 2 @ 1 Utilisation de ce manuel Ce mode d'emploi est inclus dans le colis de la pompe/l'installation.
  • Seite 200 A propos de ce document A T T E N T IO N Dangers pour les personnes. Le non-respect peut entraîner des blessures légères à moyennes. A V IS Recommandations permettant d'éviter les dégâts matériels, d'améliorer la compréhension et d'optimiser les phases de travail. Afin que l´utilisation correcte du produit soit claire, les informations importantes ainsi que les conseils techniques sont présentés de façon spécifique.
  • Seite 201: Sécurité

    Sécurité Pos : 15 /T echnisc he Dokumentation/Betriebsanl eitung/Sic herheit/Sic her heit @ 0\mod_1427704077019_371.doc x @ 26503 @ 1 @ 1 Sécurité Pos : 16 /T echnisc he Dokumentation/Betriebsanl eitung/Sic herheit/Besti mmungsgemäße Ver wendung/Besti mmungsg emäß e Ver wendung @ 0\mod_1427705810414_371.doc x @ 26533 @ 2 @ 1 Utilisation conforme aux dispositions La pompe est destinée à...
  • Seite 202: Consignes De Sécurité

    Sécurité – Pour les travaux sur la partie mécanique, comme le changement des roulements à bille ou de la garniture mécanique : mécanicien qualifié. – Pour les travaux sur le système électrique : électricien qualifié.  Assurez-vous que les conditions préalables suivantes sont remplies: –...
  • Seite 203: Changements Structurels Et Pièces De Rechange

    Sécurité Changements structurels et pièces de rechange Les transformations ou modifications peuvent nuire à la sécurité d'exploitation.  Transformer ou modifier pompe/l'installation uniquement en concertation avec le fabricant.  Utiliser uniquement des pièces de rechange ou accessoires d'origine qui sont autorisés par le fabricant. Pos : 22 /T echnisc he Dokumentation/Betriebsanl eitung/Sic herheit/Sc hilder/Sc hilder @ 0\mod_1427722464221_371.doc x @ 26625 @ 2 @ 1 Plaques signalétiques ...
  • Seite 204: Énergie Électrique

    Sécurité – Ne pas porter de vêtements amples. – Porter un filet de protection sur les cheveux. – Ne pas porter de bijoux. Pos : 28 /T echnisc he Dokumentation/Betriebsanl eitung/Sic herheit/R estrisi ken/El ektrisc he Energie @ 0\mod_1427779167394_371.doc x @ 26693 @ 3 @ 1 2.7.3 Énergie électrique L´environnement humide entraîne un risque élevé...
  • Seite 205: Dérangements

    Sécurité Pos : 33 /T echnisc he Dokumentation/Betriebsanl eitung/Sic herheit/Störungen/Störungen @ 0\mod_1427783778053_371.doc x @ 26753 @ 2 @ 1 Dérangements  En cas d'anomalies constatées, couper et débrancher immédiatement l'installation.  Remédier immédiatement à toute sorte d’anomalie. Pos : 34 /T echnisc he Dokumentation/Betriebsanl eitung/Sic herheit/Störungen/F estsi tzende Pumpe @ 0\mod_1427784418208_371.doc x @ 26768 @ @ 1 Pompe bloquée Lorsqu’une pompe bloquée est démarrée plusieurs fois de suite, cela peut endommager le moteur.
  • Seite 206: Fonctionnement Sans Eau

    Sécurité Pos : 39 /T echnisc he Dokumentation/Betriebsanl eitung/Sic herheit/Ver meidung von Sc häden/Troc kenlauf @ 0\mod_1427789053644_371.doc x @ 26813 @ 3 @ 1 2.9.2 Fonctionnement sans eau En cas de fonctionnement de la pompe sans alimentation en eau, la garniture mécanique et les pièces en matière plastique peuvent être détruites en l'espace de quelques secondes.
  • Seite 207: Coups De Bélier

    Sécurité Pos : 45 /T echnisc he Dokumentation/Betriebsanl eitung/Sic herheit/Ver meidung von Sc häden/Druc ks töß e @ 0\mod_1427792241712_371.doc x @ 26863 @ 3 @ 1 2.9.5 Coups de bélier La fermeture brusque de la robinetterie peut provoquer des coups de bélier, entraînant un dépassement de la pression maximale autorisée à...
  • Seite 208: Description

    Description Pos : 53 /T echnisc he Dokumentation/Betriebsanl eitung/Besc hrei bung/Beschr eibung @ 0\mod_1427795115728_371.doc x @ 26938 @ 1 @ 1 Description Pos : 54 /T echnisc he Dokumentation/Betriebsanl eitung/Besc hrei bung/W90.04.086- 1-P @ 2\mod_1436517304672_0.doc x @ 34463 @ @ 1 Pos : 55 /T echnisc he Dokumentation/Allgemei ne Module/Abbil dung @ 1\mod_1430211005604_371.doc x @ 29222 @ @ 1 Fig.
  • Seite 209: Transport Et Stockage Intermédiaire

    Transport et stockage intermédiaire Pos : 59 /T echnisc he Dokumentation/Betriebsanl eitung/Trans por t und Z wisc henl agerung/Tr ans port und Z wis chenl ager ung @ 0\mod_1427801635560_371.doc x @ 27003 @ 1 @ 1 Transport et stockage intermédiaire A V IS Corrosion due à...
  • Seite 210 Transport et stockage intermédiaire Pos : 62 /T echnisc he Dokumentation/Allgemei ne Module/Abbil dung @ 1\mod_1430211005604_371.doc x @ 29222 @ @ 1 Fig. 2 Pos : 63 /T echnisc he Dokumentation/Allgemei ne Module/#### Sei tenumbruch #### @ 0\mod_1426069111812_0.doc x @ 892 @ @ 1 16 FR 10|2015...
  • Seite 211: Installation

    Installation Pos : 64 /T echnisc he Dokumentation/Betriebsanl eitung/Installation/Ins tallation @ 0\mod_1427869040467_371.doc x @ 27033 @ 1 @ 1 Installation Pos : 65 /T echnisc he Dokumentation/Betriebsanl eitung/Installation/Einbauort/Einbauort @ 0\mod_1427869486488_371.doc x @ 27048 @ 2 @ 1 Lieu de montage Pos : 66 /T echnisc he Dokumentation/Betriebsanl eitung/Installation/Einbauort/Aufstellen i m Fr eien @ 0\mod_1427869735350_371.doc x @ 27063 @ 3 @ 1 5.1.1 Installation en plein air...
  • Seite 212: Espace Disponible

    Installation 5.1.5 Espace disponible  Définir l'espace nécessaire de telle manière à permettre le démontage de l'unité moteur du côté du ventilateur et l'extraction du panier filtrant par le haut. Voir schéma avec dimensions dans la fiche technique de pompe. Pos : 72 /T echnisc he Dokumentation/Betriebsanl eitung/Installation/Einbauort/Befes tigungs elemente @ 0\mod_1427877318034_371.doc x @ 27138 @ 3 @ 1 5.1.6 Éléments de fixation...
  • Seite 213 Installation amorçantes). Ainsi, la conduite d'aspiration ne peut pas se vider lorsque la pompe est à l'arrêt et le temps d'aspiration, par exemple après le nettoyage du filtre, reste bref.  Lorsque le système est obstrué, par exemple avec de la paille ou de l'herbe, ce qui n'est pas à...
  • Seite 214: Mise En Place

    Installation Pos : 75 /T echnisc he Dokumentation/Betriebsanl eitung/Installation/Aufstellung/allgemeine Anl eitung Aufstellung @ 2\mod_1432017628128_371.doc x @ 31943 @ 2 @ 1 Mise en place Pos : 76 /T echnisc he Dokumentation/Betriebsanl eitung/Installation/Aufstellung/allgemeine Anl eitung Pumpe aufs tell en - Was ser ni veau @ 2\mod_1432022562944_371.doc x @ 32003 @ @ 1 La pompe peut être installée soit en dessous du niveau d'eau en fonctionnement d'alimentation ou en dessous du niveau d'eau en fonctionnement d'aspiration.
  • Seite 215: Installer La Pompe Et La Raccorder Aux Tuyauteries

    Installation Pos : 82 /T echnisc he Dokumentation/Betriebsanl eitung/Installation/Aufstellung/Pumpe aufstellen und an die Rohrleitung ansc hließ en @ 0\mod_1427897347705_371.doc x @ 27259 @ 3 @ 1 5.3.1 Installer la pompe et la raccorder aux tuyauteries Installer la pompe horizontalement et au sec. Respecter pour cela les distances maximales par rapport au niveau d’eau ainsi que la hauteur géodésique.
  • Seite 216: Branchement Électrique

    Installation A V E R T IS S E ME N T Fluides à pomper dangereux pour la santé!  Respecter les dispositions légales en matière d'élimination de fluides dangereux pour la santé. Pos : 84 /T echnisc he Dokumentation/Betriebsanl eitung/Installation/Elektrischer Ansc hl uss/allgemei ne Anl eitungEl ektrisc her Ansc hluss @ 2\mod_1435143493499_371.doc x @ 33593 @ 2 @ 1 Branchement électrique A V E R T IS S E ME N T Risque de décharge électrique résultant d’un branchement...
  • Seite 217 Installation  Dans l'éventualité de la survenance de situations dangereuses, installer un interrupteur d'arrêt d'urgence conformément à la norme DIN EN 809. Le constructeur/l'exploitant doit en décider conformément à cette norme.  Raccordement au niveau du bâtiment: – Protection 1 ~ 230 V/3 ~ 400 V fusible 16 A lent ou disjoncteur automatique type K 16 A.
  • Seite 218: Mise En Service

    Mise en service Pos : 86 /T echnisc he Dokumentation/Betriebsanl eitung/Inbetri ebnahme/Inbetriebnahme @ 0\mod_1427956937430_371.doc x @ 27299 @ 1 @ 1 Mise en service A V IS Endommagement de la pompe/l'installation suite à un fonctionnement sans eau!  Assurez-vous que la pompe/l'installation est remplie d'eau. Cette recommandation s’applique également au contrôle du sens de rotation.
  • Seite 219: Démarrer La Pompe

    Mise en service Pos : 90 /T echnisc he Dokumentation/Betriebsanl eitung/Inbetri ebnahme/Pumpe ei nsc halten @ 0\mod_1427962694084_371.doc x @ 27344 @ 2 @ 1 Démarrer la pompe Conditions préalables: • Le panier filtrant est à sa place dans le préfiltre au cas où la pompe en est pourvue.
  • Seite 220 Anomalies Pos : 92 /T echnisc he Dokumentation/Betriebsanl eitung/Stör ung/Störungen @ 0\mod_1427964696943_371.doc x @ 27359 @ 1 @ 1 Anomalies A V IS Il est normal que, de temps en temps, des gouttelettes d'eau suintent de la garniture mécanique. Cela est particulièrement vrai lorsque la pompe est en fonctionnement.
  • Seite 221: Anomalies

    Anomalies Pos : 94 /T echnisc he Dokumentation/Betriebsanl eitung/Stör ung/Ü bersicht @ 1\mod_1427966108756_371.doc x @ 27374 @ 2 @ 1 Aperçu Anomalie Causes Résolution possibles  La pompe est mise Surcharge Vérifier la hors service par le pompe. Voir disjoncteur chapitre 7.1.1, thermique du page 27.
  • Seite 222: Listes De Pièces De Rechange

    Anomalies Contacter le service après-vente/votre installateur et faire tester la pompe. Bon fonctionnement de l'arbre moteur: Enlever le tournevis. Ouvrir à moitié la vanne du côté du refoulement. Rétablir la tension d'alimentation. A V IS Si la pompe est bloquée, le moteur peut être endommagé par des redémarrages successifs.
  • Seite 223: Entretien/Maintenance

    Entretien/Maintenance Pos : 100 /Tec hnisc he D okumentati on/Betri ebs anleitung/Wartung/Ins tandhaltung/allgemeine Anl eitung Wartung/Instandhaltung @ 1\mod_1428480782431_371.doc x @ 27444 @ 1 @ 1 Entretien/Maintenance A V IS  Fermer tous les clapets anti-retour et vider les tuyauteries avant tous travaux de maintenance. Applicable à...
  • Seite 224: Nettoyer Le Panier Filtrant

    Entretien/Maintenance Pos : 103 /Tec hnisc he D okumentati on/Betri ebs anleitung/Wartung/Ins tandhaltung/allgemeine Anl eitungSaugsieb rei nigen @ 1\mod_1428483476842_371.doc x @ 27474 @ 2 @ 1 Nettoyer le panier filtrant Éteindre la pompe. Fermer le clapet anti-retour. Enlever le couvercle. Sortir le panier filtrant.
  • Seite 225: Retirer Les Cristaux De Sel D'une Pompe Avec Lanterne Plastique

    Entretien/Maintenance Pos : 105 /Tec hnisc he D okumentati on/Betri ebs anleitung/Wartung/Ins tandhaltung/allgemeine Anl eitungSalz kristalle bei Kunsts tofflater nen-Aus führung (AK) entfer nen - Ü berschrift @ 1\mod_1428484943782_371.doc x @ 27506 @ 2 @ 1 Retirer les cristaux de sel d'une pompe avec lanterne plastique (-AK) Pos : 106 /Tec hnisc he D okumentati on/Betri ebs anleitung/Wartung/Ins tandhaltung/allgemeine Anl eitung W90.80.018-P @ 2\mod_1436517922324_0.doc x @ 34524 @ @ 1 Pos : 107 /Tec hnisc he D okumentati on/Allgemeine M odul e/Abbildung @ 1\mod_1430211005604_371.doc x @ 29222 @ @ 1...
  • Seite 226: Garantie

    Entretien/Maintenance Garantie La garantie s'étend aux appareils fournis avec toutes leurs pièces. En sont cependant exclues la dégradation/usure naturelle (DIN 3151/DIN-EN 13306) de toutes les pièces rotatives ou à sollicitation dynamique, y compris les composants électroniques sous tension. Le non-respect des consignes de sécurité peut conduire à la perte de toutes les revendications en dommage et intérêts Pos : 112 /Tec hnisc he D okumentati on/Allgemeine M odul e/#### Seitenumbruc h #### @ 0\mod_1426069111812_0.doc x @ 892 @ @ 1 32 FR...
  • Seite 227: Elimination

    Elimination Pos : 113 /Tec hnisc he D okumentati on/Betri ebs anleitung/Ents orgung/Ents orgung @ 1\mod_1428486567397_371.doc x @ 27537 @ 1 @ 1 Elimination  Recueillir et éliminer les fluides à pomper nocifs conformément aux prescriptions  La pompe/installation et les composants individuels doivent être éliminés dans les règles de l'art à...
  • Seite 228: Index

    Index Pos : 115 /Tec hnisc he D okumentati on/Allgemeine M odul e/Index @ 2\mod_1435751775796_371.doc x @ 33851 @ 1 @ 1 Index === Ende der Liste für T extmar ke Index === Anomalies 26 garniture mécanique 26 Aperçu 27 Mise en place 20 Branchement électrique 22 Mise en service 24...
  • Seite 229 Oorspronkelijke gebruikershandleiding Normaal en zelfaanzuigende pompen met/zonder uitvoering met kunststof lantaarn ü P o s : / T e c h n i s c h e D o k u m e n t a t i o n / A l l g e m e i n e M o d u l e / C E - Z e i c h e n 2 \ m o d _ 1 4 3 4 5 4 2 1 7 5 8 0 9...
  • Seite 230 Pos : 6 /T ec hnis che D okumentati on/Allgemeine M odule/Firmenadresse BADU @ 2\mod_1435913484644_372.doc x @ 33914 @ @ 1 ® BADU is een merk van SPECK Pumpen Verkaufsgesellschaft GmbH Hauptstraße 3 91233 Neunkirchen am Sand, Germany Telefoon +49 9123 949-0 Telefax +49 9123 949-260 info@speck-pumps.com...
  • Seite 231 Inhoudsopgave Pos : 10 /T echnisc he Dokumentation/Allgemei ne Module/Inhalts verzeic hnis @ 2\mod_1435582896243_372.doc x @ 33766 @ @ 1 Inhoudsopgave === Ende der Liste für T extmar ke Ihvz === Over dit document ................5 Omgang met deze handleiding ........... 5 Overige relevante documenten...........
  • Seite 232 Inhoudsopgave Installatie ..................17 Inbouwlocatie ................17 5.1.1 Plaatsing in de buitenlucht ............ 17 5.1.2 Bodemafvoer moet aanwezig zijn ......... 17 5.1.3 Be- en ontluchting ..............17 5.1.4 Overdracht van trillingen en geluidsgolven ......17 5.1.5 Benodigde ruimte ..............18 5.1.6 Bevestigingselementen ............
  • Seite 233: Over Dit Document

    Over dit document Pos : 13.1 /T echnisc he Dokumentation/Betriebsanlei tung/Z u dies em D okument/Z u di esem Dokument @ 0\mod_1427210330941_372.doc x @ 26358 @ 1 @ 1 Over dit document Pos : 13.2 /T echnisc he Dokumentation/Betriebsanlei tung/Z u dies em D okument/U mg ang mit di es er Anleitung @ 0\mod_1427286785560_372.doc x @ 26455 @ 2 @ 1 Omgang met deze handleiding Deze handleiding is onderdeel van de pomp/installatie.
  • Seite 234 Over dit document L E T O P Aanwijzingen ter voorkoming van materiële schade, ter nadere toelichting of ter optimalisatie van handelingen. Om de correcte bediening te verduidelijken zijn belangrijke informatie en technische aanwijzingen speciaal opgemaakt. Symbool Betekenis  Uit te voeren handeling bestaande uit één stap. Handelingsinstructie bestaande uit meerdere stappen.
  • Seite 235: Veiligheid

    Veiligheid Pos : 15 /T echnisc he Dokumentation/Betriebsanl eitung/Sic herheit/Sic her heit @ 0\mod_1427704077019_372.doc x @ 26504 @ 1 @ 1 Veiligheid Pos : 16 /T echnisc he Dokumentation/Betriebsanl eitung/Sic herheit/Besti mmungsgemäße Ver wendung/Besti mmungsg emäß e Ver wendung @ 0\mod_1427705810414_372.doc x @ 26534 @ 2 @ 1 Gebruik volgens bestemming De pomp dient voor circulatie van zwembadwater alleen in combinatie met een zwembadfilterinstallatie te worden gebruikt.
  • Seite 236: Veiligheidsvoorschriften

    Veiligheid – Werkzaamheden aan de elektrische installatie: elektricien.  Zorg dat aan onderstaande voorwaarden is voldaan: – Personeel dat de betreffende kwalificaties nog niet kan aantonen, is passend geïnstrueerd voordat het werk- zaamheden aan de installatie uitvoert. – De verantwoordelijkheden van het personeel, bijvoorbeeld voor werkzaamheden aan het product, aan de elektrische uitrusting of de hydraulische voorzieningen, zijn in over- eenstemming met hun kwalificaties en functieomschrijving...
  • Seite 237: Afbeeldingen

    Veiligheid Afbeeldingen  Houd alle afbeeldingen op de complete pomp/installatie in leesbare toestand. Pos : 24 /T echnisc he Dokumentation/Betriebsanl eitung/Sic herheit/R estrisi ken/Restrisi ken @ 0\mod_1427723332615_372.doc x @ 26641 @ 2 @ 1 Overige risico's Pos : 25 /T echnisc he Dokumentation/Betriebsanl eitung/Sic herheit/R estrisi ken/Her abfall ende T eile @ 0\mod_1427724889933_372.doc x @ 26656 @ 3 @ 1 2.7.1 Vallende delen De hijsogen aan de motor zijn alleen geschikt om het gewicht van...
  • Seite 238: Elektrische Energie

    Veiligheid Pos : 28 /T echnisc he Dokumentation/Betriebsanl eitung/Sic herheit/R estrisi ken/El ektrisc he Energie @ 0\mod_1427779167394_372.doc x @ 26694 @ 3 @ 1 2.7.3 Elektrische energie Bij werkzaamheden aan de elektrische installatie bestaat als gevolg van de vochtige omgeving verhoogd gevaar voor een elektrische schok.
  • Seite 239: Voorkomen Van Materiële Schade

    Veiligheid Pos : 34 /T echnisc he Dokumentation/Betriebsanl eitung/Sic herheit/Störungen/F estsi tzende Pumpe @ 0\mod_1427784418208_372.doc x @ 26769 @ @ 1 Vastgelopen pomp Wanneer een vastgelopen pomp meerdere keren na elkaar wordt ingeschakeld, kan de motor beschadigen. Neem onderstaande punten in acht: ...
  • Seite 240: Cavitatie

    Veiligheid Pos : 41 /T echnisc he Dokumentation/Betriebsanl eitung/Sic herheit/Ver meidung von Sc häden/Kavitation @ 0\mod_1427790036391_372.doc x @ 26834 @ 3 @ 1 2.9.3 Cavitatie Te lange leidingen verhogen de weerstand. Daardoor bestaat het gevaar van cavitatie.  Controleer of de zuigleiding dicht is. ...
  • Seite 241: Lekkage-Afvoer

    Veiligheid Pos : 49 /T echnisc he Dokumentation/Betriebsanl eitung/Sic herheit/Ver meidung von Sc häden/Lec kageabfluss @ 0\mod_1427793605277_372.doc x @ 26894 @ 3 @ 1 2.9.7 Lekkage-afvoer Onvoldoende afvoer van lekwater kan de motor beschadigen.  Zorg dat de lekkage-afvoer tussen pomphuis en motor niet is verstopt of afgedicht.
  • Seite 242: Beschrijving

    Beschrijving Pos : 53 /T echnisc he Dokumentation/Betriebsanl eitung/Besc hrei bung/Beschr eibung @ 0\mod_1427795115728_372.doc x @ 26939 @ 1 @ 1 Beschrijving Pos : 54 /T echnisc he Dokumentation/Betriebsanl eitung/Besc hrei bung/W90.04.086- 1-P @ 2\mod_1436517304672_0.doc x @ 34464 @ @ 1 Pos : 55 /T echnisc he Dokumentation/Allgemei ne Module/Abbil dung @ 1\mod_1430211005604_372.doc x @ 29223 @ @ 1 Afb.
  • Seite 243: Transport En Tijdelijke Opslag

    Transport en tijdelijke opslag Pos : 59 /T echnisc he Dokumentation/Betriebsanl eitung/Trans por t und Z wisc henl agerung/Tr ans port und Z wis chenl ager ung @ 0\mod_1427801635560_372.doc x @ 27004 @ 1 @ 1 Transport en tijdelijke opslag L E T O P Corrosie door opslag in een vochtige omgeving bij wisselende temperaturen!
  • Seite 244 Transport en tijdelijke opslag Pos : 62 /T echnisc he Dokumentation/Allgemei ne Module/Abbil dung @ 1\mod_1430211005604_372.doc x @ 29223 @ @ 1 Afb. 2 Pos : 63 /T echnisc he Dokumentation/Allgemei ne Module/#### Sei tenumbruch #### @ 0\mod_1426069111812_0.doc x @ 893 @ @ 1 16 NL 10|2015...
  • Seite 245: Installatie

    Installatie Pos : 64 /T echnisc he Dokumentation/Betriebsanl eitung/Installation/Ins tallation @ 0\mod_1427869040467_372.doc x @ 27034 @ 1 @ 1 Installatie Pos : 65 /T echnisc he Dokumentation/Betriebsanl eitung/Installation/Einbauort/Einbauort @ 0\mod_1427869486488_372.doc x @ 27049 @ 2 @ 1 Inbouwlocatie Pos : 66 /T echnisc he Dokumentation/Betriebsanl eitung/Installation/Einbauort/Aufstellen i m Fr eien @ 0\mod_1427869735350_372.doc x @ 27064 @ 3 @ 1 5.1.1 Plaatsing in de buitenlucht ...
  • Seite 246: Benodigde Ruimte

    Installatie Pos : 71 /T echnisc he Dokumentation/Betriebsanl eitung/Installation/Einbauort/Platzres er ve @ 0\mod_1427876785998_372.doc x @ 27124 @ 3 @ 1 5.1.5 Benodigde ruimte  Houd er bij plaatsing van de pomp rekening mee dat de pomp in de richting van de motorventilator en het filtermandje naar boven kan worden uitgebouwd.
  • Seite 247 Installatie zuigleiding bij stilstand niet leeglopen en blijft de aanzuigtijd kort, bijvoorbeeld na de reiniging van het filtermandje.  Wanneer verstopping, bijvoorbeeld door stro of gras niet uit te sluiten is, een filter bij de toevoer of in de zuigleiding inbouwen.
  • Seite 248: Plaatsing

    Installatie Pos : 75 /T echnisc he Dokumentation/Betriebsanl eitung/Installation/Aufstellung/allgemeine Anl eitung Aufstellung @ 2\mod_1432017628128_372.doc x @ 31944 @ 2 @ 1 Plaatsing Pos : 76 /T echnisc he Dokumentation/Betriebsanl eitung/Installation/Aufstellung/allgemeine Anl eitung Pumpe aufs tell en - Was ser ni veau @ 2\mod_1432022562944_372.doc x @ 32004 @ @ 1 De pomp kan onder het waterniveau worden geplaatst in toeloopbedrijf of boven het waterniveau in aanzuigbedrijf.
  • Seite 249: Pomp Plaatsen En Op De Leiding Aansluiten

    Installatie Pos : 82 /T echnisc he Dokumentation/Betriebsanl eitung/Installation/Aufstellung/Pumpe aufstellen und an die Rohrleitung ansc hließ en @ 0\mod_1427897347705_372.doc x @ 27260 @ 3 @ 1 5.3.1 Pomp plaatsen en op de leiding aansluiten Pomp horizontaal en droog plaatsen. Daarbij de maximale afstanden tot het waterniveau, dat wil zeggen de geodetische hoogte, in acht nemen.
  • Seite 250: Elektrische Aansluiting

    Installatie Elektrische aansluiting W A A R S C H U W IN G Gevaar voor een elektrische schok door ondeskundige aansluiting!  Elektrische aansluitingen en verbindingen moeten altijd door geautoriseerd personeel worden uitgevoerd.  Neem de VDE- en EVU-voorschriften van het energiebedrijf in acht.
  • Seite 251: Inbedrijfstelling

    Inbedrijfstelling Pos : 86 /T echnisc he Dokumentation/Betriebsanl eitung/Inbetri ebnahme/Inbetriebnahme @ 0\mod_1427956937430_372.doc x @ 27300 @ 1 @ 1 Inbedrijfstelling L E T O P Beschadiging van de pomp/installatie door droogloop!  Zorg dat de pomp/installatie altijd met water is gevuld. Dat geldt ook tijdens controle van de draairichting.
  • Seite 252: Pomp Inschakelen

    Inbedrijfstelling Pos : 90 /T echnisc he Dokumentation/Betriebsanl eitung/Inbetri ebnahme/Pumpe ei nsc halten @ 0\mod_1427962694084_372.doc x @ 27345 @ 2 @ 1 Pomp inschakelen Voorwaarden: • Filtermandje is ingebouwd, indien aanwezig. • Deksel is dicht gemonteerd. Afsluiter aan de zuigzijde volledig openen. Afsluiter aan de perszijde uitsluitend half openen.
  • Seite 253 Storingen Pos : 92 /T echnisc he Dokumentation/Betriebsanl eitung/Stör ung/Störungen @ 0\mod_1427964696943_372.doc x @ 27360 @ 1 @ 1 Storingen L E T O P Het is normaal dat er van tijd tot tijd enkele druppels water door de mechanical seal gaat lekken. Dat geldt met name tijdens de inlooptijd.
  • Seite 254: Storingen

    Storingen Pos : 94 /T echnisc he Dokumentation/Betriebsanl eitung/Stör ung/Ü bersicht @ 1\mod_1427966108756_372.doc x @ 27375 @ 2 @ 1 Overzicht Storing Mogelijke Oplossing oorzaak  Pomp wordt door Overbelasting Pomp een thermische controleren. Zie zekering of motor- hoofdstuk 7.1.1 beveiligingsscha- op bladzijde 26.
  • Seite 255: Reserveonderdelenlijsten

    Storingen Neem contact op met de klantenservice/het bedrijf dat het zwembad heeft aangelegd om de pomp te laten controleren. Draait de motoras soepel: Verwijder de schroevendraaier. Afsluiter aan de perszijde uitsluitend half openen. Sluit de pomp weer aan op de netspanning. L E T O P Wanneer de pomp vastzit, kan de motor door meerdere keren inschakelen beschadigen.
  • Seite 256: Onderhoud

    Onderhoud Pos : 100 /Tec hnisc he D okumentati on/Betri ebs anleitung/Wartung/Ins tandhaltung/allgemeine Anl eitung Wartung/Instandhaltung @ 1\mod_1428480782431_372.doc x @ 27445 @ 1 @ 1 Onderhoud L E T O P  Sluit voorafgaand aan onderhoudswerkzaamheden alle afsluiters en maak alle leidingen leeg. Alle pompen Wanneer? Wat?
  • Seite 257: Filtermandje Reinigen

    Onderhoud Pos : 103 /Tec hnisc he D okumentati on/Betri ebs anleitung/Wartung/Ins tandhaltung/allgemeine Anl eitungSaugsieb rei nigen @ 1\mod_1428483476842_372.doc x @ 27475 @ 2 @ 1 Filtermandje reinigen Pomp uitschakelen. Afsluiters sluiten. Deksel losschroeven. Filtermandje verwijderen. Filtermandje met water afspoelen. Filtermandje terugplaatsen.
  • Seite 258: Zoutkristallen Bij Uitvoering Met Kunststof Lantaarn (-Ak) Verwijderen

    Onderhoud Pos : 105 /Tec hnisc he D okumentati on/Betri ebs anleitung/Wartung/Ins tandhaltung/allgemeine Anl eitungSalz kristalle bei Kunsts tofflater nen-Aus führung (AK) entfer nen - Ü berschrift @ 1\mod_1428484943782_372.doc x @ 27507 @ 2 @ 1 Zoutkristallen bij uitvoering met kunststof lantaarn (-AK) verwijderen Pos : 106 /Tec hnisc he D okumentati on/Betri ebs anleitung/Wartung/Ins tandhaltung/allgemeine Anl eitung W90.80.018-P @ 2\mod_1436517922324_0.doc x @ 34525 @ @ 1 Pos : 107 /Tec hnisc he D okumentati on/Allgemeine M odul e/Abbildung @ 1\mod_1430211005604_372.doc x @ 29223 @ @ 1...
  • Seite 259: Garantie

    Onderhoud Garantie De garantie omvat alle geleverde apparaten en onderdelen. Uitgezonderd is echter natuurlijke slijtage (DIN 3151/ DIN-EN 13306) van alle draaiende resp. dynamisch belaste onderdelen, inclusief onder spanning staande elektronische componenten. Het niet naleven van de veiligheidsaanwijzingen kan leiden tot verlies van elke aanspraak op schadevergoeding Pos : 112 /Tec hnisc he D okumentati on/Allgemeine M odul e/#### Seitenumbruc h #### @ 0\mod_1426069111812_0.doc x @ 893 @ @ 1 10|2015...
  • Seite 260: Verwijdering

    Verwijdering Pos : 113 /Tec hnisc he D okumentati on/Betri ebs anleitung/Ents orgung/Ents orgung @ 1\mod_1428486567397_372.doc x @ 27538 @ 1 @ 1 Verwijdering  Vang schadelijke vloeistoffen op en voer deze af conform de voorschriften  De pomp/installatie resp. losse onderdelen moeten aan het einde van hun levensduur correct worden afgevoerd.
  • Seite 261: Index

    Index Pos : 115 /Tec hnisc he D okumentati on/Allgemeine M odul e/Index @ 2\mod_1435751775796_372.doc x @ 33852 @ 1 @ 1 Index === Ende der Liste für T extmar ke Index === Buitenbedrijfstelling 30 Onderhoud 28 onjuist gebruik 7 Overige relevante documenten 5 Elektrische aansluiting 22 Plaatsing 20...
  • Seite 263 Manuale d'istruzioni Pompe aspirazione normale e autoadescanti con/senza campana in plastica (AK) ü P o s : / T e c h n i s c h e D o k u m e n t a t i o n / A l l g e m e i n e M o d u l e / C E - Z e i c h e n 2 \ m o d _ 1 4 3 4 5 4 2 1 7 5 8 0 9...
  • Seite 264 Pos : 6 /T ec hnis che D okumentati on/Allgemeine M odule/Firmenadresse BADU @ 2\mod_1435913484644_373.doc x @ 33915 @ @ 1 ® BADU e' un marchio SPECK Pumpen Verkaufsgesellschaft GmbH Hauptstraße 3 91233 Neunkirchen am Sand, Germany Telefono +49 9123 949-0 +49 9123 949-260 info@speck-pumps.com...
  • Seite 265 Indice Pos : 10 /T echnisc he Dokumentation/Allgemei ne Module/Inhalts verzeic hnis @ 2\mod_1435582896243_373.doc x @ 33767 @ @ 1 Indice === Ende der Liste für T extmar ke Ihvz === Informazioni sul presente documento ......... 5 Utilizzo delle presenti istruzioni ..........5 Altra documentazione valida............
  • Seite 266: Indice

    Indice Installazione .................. 17 Luogo di montaggio ..............17 5.1.1 Installazione all'aperto ............17 5.1.2 Scarico di fondo deve essere presente ........ 17 5.1.3 Ventilazione e scarico dell'aria ..........17 5.1.4 Trasmissione di vibrazioni sonore intrinseche e propagantesi attraverso l'aria .................. 17 5.1.5 Riserva di spazio ..............
  • Seite 267: Informazioni Sul Presente Documento

    Informazioni sul presente documento Pos : 13.1 /T echnisc he Dokumentation/Betriebsanlei tung/Z u dies em D okument/Z u di esem Dokument @ 0\mod_1427210330941_373.doc x @ 26359 @ 1 @ 1 Informazioni sul presente documento Pos : 13.2 /T echnisc he Dokumentation/Betriebsanlei tung/Z u dies em D okument/U mg ang mit di es er Anleitung @ 0\mod_1427286785560_373.doc x @ 26456 @ 2 @ 1 Utilizzo delle presenti istruzioni Queste istruzioni sono parte pompa/impianto.
  • Seite 268 Informazioni sul presente documento A V V IS O Avvertenze per evitare danni materiali, per migliorare la comprensione o per ottimizzare i processi di lavoro. Per illustrare e chiarire l'uso corretto, informazioni importanti ed avvertenze tecniche sono evidenziate in modo particolare. Simbolo Significato ...
  • Seite 269: Sicurezza

    Sicurezza Pos : 15 /T echnisc he Dokumentation/Betriebsanl eitung/Sic herheit/Sic her heit @ 0\mod_1427704077019_373.doc x @ 26505 @ 1 @ 1 Sicurezza Pos : 16 /T echnisc he Dokumentation/Betriebsanl eitung/Sic herheit/Besti mmungsgemäße Ver wendung/Besti mmungsg emäß e Ver wendung @ 0\mod_1427705810414_373.doc x @ 26535 @ 2 @ 1 Uso conforme La pompa è...
  • Seite 270: Disposizioni Di Sicurezza

    Sicurezza – Lavori sul sistema meccanico, ad esempio cambio cuscinetti oppure cambio tenuta meccanica: meccanico qualificato. – Lavori sull'impianto elettrico: elettricista qualificato.  Assicurare che siano soddisfatte le seguenti condizioni: – Il personale non ancora in possesso della qualifica necessaria viene debitamente addestrato prima di essere incaricato di svolgere compiti tipici dell'impianto.
  • Seite 271: Segnali - Etichette

    Sicurezza  Utilizzare solo parti di ricambio originali o accessori originali approvati dal costruttore. Pos : 22 /T echnisc he Dokumentation/Betriebsanl eitung/Sic herheit/Sc hilder/Sc hilder @ 0\mod_1427722464221_373.doc x @ 26627 @ 2 @ 1 Segnali - etichette  Tutti i segnali e le etichette presenti sull'intero pompa/ impianto devono essere mantenute chiaramente leggibili.
  • Seite 272: Energia Elettrica

    Sicurezza Pos : 28 /T echnisc he Dokumentation/Betriebsanl eitung/Sic herheit/R estrisi ken/El ektrisc he Energie @ 0\mod_1427779167394_373.doc x @ 26695 @ 3 @ 1 2.7.3 Energia elettrica Nei lavori sull'impianto elettrico, il pericolo di folgorazione aumenta a causa dell'ambiente umido. Anche un'installazione dei conduttori di protezione non eseguita correttamente può...
  • Seite 273: Evitare Danni Materiali

    Sicurezza Pos : 34 /T echnisc he Dokumentation/Betriebsanl eitung/Sic herheit/Störungen/F estsi tzende Pumpe @ 0\mod_1427784418208_373.doc x @ 26770 @ @ 1 Pompa bloccata Se si tenta di accendere ripetutamente una pompa bloccata, il motore può subire danni. Attenersi alle seguenti regole: ...
  • Seite 274: Cavitazione

    Sicurezza Pos : 41 /T echnisc he Dokumentation/Betriebsanl eitung/Sic herheit/Ver meidung von Sc häden/Kavitation @ 0\mod_1427790036391_373.doc x @ 26835 @ 3 @ 1 2.9.3 Cavitazione Delle tubazioni eccessivamente lunghe aumentano la resistenza. Ciò dà luogo al rischio di cavitazione.  Verificare che il tubo di aspirazione sia ermetico.
  • Seite 275: Scarico Delle Perdite

    Sicurezza 2.9.7 Scarico delle perdite Un insufficiente scarico delle perdite può danneggiare il motore.  Non ostruire e non tappare lo scarico delle perdite tra il corpo della pompa ed il motore. Pos : 50 /T echnisc he Dokumentation/Betriebsanl eitung/Sic herheit/Ver meidung von Sc häden/Frostg efahr @ 0\mod_1427794294738_373.doc x @ 26910 @ 3 @ 1 2.9.8 Pericolo di gelo ...
  • Seite 276: Descrizione

    Descrizione Pos : 53 /T echnisc he Dokumentation/Betriebsanl eitung/Besc hrei bung/Beschr eibung @ 0\mod_1427795115728_373.doc x @ 26940 @ 1 @ 1 Descrizione Pos : 54 /T echnisc he Dokumentation/Betriebsanl eitung/Besc hrei bung/W90.04.086- 1-P @ 2\mod_1436517304672_0.doc x @ 34465 @ @ 1 Pos : 55 /T echnisc he Dokumentation/Allgemei ne Module/Abbil dung @ 1\mod_1430211005604_373.doc x @ 29224 @ @ 1 Fig.
  • Seite 277: Trasporto Ed Immagazzinamento Temporaneo

    Trasporto ed immagazzinamento temporaneo Pos : 59 /T echnisc he Dokumentation/Betriebsanl eitung/Trans por t und Z wisc henl agerung/Tr ans port und Z wis chenl ager ung @ 0\mod_1427801635560_373.doc x @ 27005 @ 1 @ 1 Trasporto ed immagazzinamento temporaneo A V V IS O Corrosione a causa dell'immagazzinamento in aria umida e soggetta a sbalzi termici!
  • Seite 278 Trasporto ed immagazzinamento temporaneo Pos : 62 /T echnisc he Dokumentation/Allgemei ne Module/Abbil dung @ 1\mod_1430211005604_373.doc x @ 29224 @ @ 1 Fig. 2 Pos : 63 /T echnisc he Dokumentation/Allgemei ne Module/#### Sei tenumbruch #### @ 0\mod_1426069111812_0.doc x @ 894 @ @ 1 16 IT 10|2015...
  • Seite 279: Installazione

    Installazione Pos : 64 /T echnisc he Dokumentation/Betriebsanl eitung/Installation/Ins tallation @ 0\mod_1427869040467_373.doc x @ 27035 @ 1 @ 1 Installazione Pos : 65 /T echnisc he Dokumentation/Betriebsanl eitung/Installation/Einbauort/Einbauort @ 0\mod_1427869486488_373.doc x @ 27050 @ 2 @ 1 Luogo di montaggio Pos : 66 /T echnisc he Dokumentation/Betriebsanl eitung/Installation/Einbauort/Aufstellen i m Fr eien @ 0\mod_1427869735350_373.doc x @ 27065 @ 3 @ 1 5.1.1 Installazione all'aperto...
  • Seite 280: Riserva Di Spazio

    Installazione 5.1.5 Riserva di spazio  Dimensionare lo spazio libero di riserva in materia tale che l'unità del motore possa essere smontata in direzione della ventola del motore e il cestello possa essere smontato verso l'alto. Vedere il disegno quotato nella scheda tecnica della pompa.
  • Seite 281 Installazione tubo di aspirazione non si svuoterà e il tempo di aspirazione, ad esempio successivamente alla pulizia del cestello, resterà contenuto.  Nel caso in cui non sia possibile escludere un'ostruzione ad esempio da paglia o da erba, inserire un cestello - filtro nella mandata o nell'aspirazione.
  • Seite 282: Installazione

    Installazione Pos : 75 /T echnisc he Dokumentation/Betriebsanl eitung/Installation/Aufstellung/allgemeine Anl eitung Aufstellung @ 2\mod_1432017628128_373.doc x @ 31945 @ 2 @ 1 Installazione Pos : 76 /T echnisc he Dokumentation/Betriebsanl eitung/Installation/Aufstellung/allgemeine Anl eitung Pumpe aufs tell en - Was ser ni veau @ 2\mod_1432022562944_373.doc x @ 32005 @ @ 1 La pompa potrà...
  • Seite 283: Montaggio Della Pompa E Collegamento Alla Tubazione

    Installazione Pos : 82 /T echnisc he Dokumentation/Betriebsanl eitung/Installation/Aufstellung/Pumpe aufstellen und an die Rohrleitung ansc hließ en @ 0\mod_1427897347705_373.doc x @ 27261 @ 3 @ 1 5.3.1 Montaggio della pompa e collegamento alla tubazione Montare la pompa orizzontalmente e all’asciutto. Durante tale operazione rispettare le distanze massime rispetto al livello dell'acqua, significa l'altezza geodetica.
  • Seite 284: Collegamento Elettrico

    Installazione Collegamento elettrico A V V E R T E N Z A Pericolo di folgorazione a causa di un collegamento improprio!  Gli allacciamenti e i collegamenti elettrici devono essere eseguiti da personale specializzato e autorizzato.  Osservare le disposizioni VDE e dell'azienda elettrica locale. ...
  • Seite 285: Messa In Servizio

    Messa in servizio Pos : 86 /T echnisc he Dokumentation/Betriebsanl eitung/Inbetri ebnahme/Inbetriebnahme @ 0\mod_1427956937430_373.doc x @ 27301 @ 1 @ 1 Messa in servizio A V V IS O Danneggiamento della pompa/impianto dovuto al funzionamento a secco!  Assicurare che la pompa/impianto sia sempre piena d'acqua. Ciò...
  • Seite 286: Accensione Della Pompa

    Messa in servizio Pos : 90 /T echnisc he Dokumentation/Betriebsanl eitung/Inbetri ebnahme/Pumpe ei nsc halten @ 0\mod_1427962694084_373.doc x @ 27346 @ 2 @ 1 Accensione della pompa Premesse: • Se disponibile, il cestello è montato. • Il coperchio è montato a tenuta. Aprire completamente la valvola dal lato dell'aspirazione.
  • Seite 287: Guasti

    Guasti Pos : 92 /T echnisc he Dokumentation/Betriebsanl eitung/Stör ung/Störungen @ 0\mod_1427964696943_373.doc x @ 27361 @ 1 @ 1 Guasti A V V IS O Di tanto in tanto è normale che qualche goccia d'acqua fuoriesca dalla tenuta meccanica. Ciò si verifica specialmente durante il periodo di rodaggio.
  • Seite 288: Panoramica

    Guasti Pos : 94 /T echnisc he Dokumentation/Betriebsanl eitung/Stör ung/Ü bersicht @ 1\mod_1427966108756_373.doc x @ 27376 @ 2 @ 1 Panoramica Guasto Possibile causa Rimedio  La pompa viene Sovraccarico Controllare la messa fuori uso pompa. Vedere dalla protezione/ capitolo 7.1.1 a salvamotore.
  • Seite 289: Liste Dei Pezzi Di Ricambio

    Guasti L'albero del motore è scorrevole: Togliere il cacciavite. Aprire solo a metà la valvola lato mandata. Ricollegare al l'alimentazione elettrica. A V V IS O Se la pompa è bloccata, il motore può subire danni se viene acceso ripetutamente. ...
  • Seite 290: Manutenzione/Controllo

    Manutenzione/controllo Pos : 100 /Tec hnisc he D okumentati on/Betri ebs anleitung/Wartung/Ins tandhaltung/allgemeine Anl eitung Wartung/Instandhaltung @ 1\mod_1428480782431_373.doc x @ 27446 @ 1 @ 1 Manutenzione/controllo A V V IS O  Prima di qualsiasi intervento di manutenzione, chiudere tutte le saracinesche e svuotare le tubazioni.
  • Seite 291: Pulire Il Cestello

    Manutenzione/controllo Pos : 103 /Tec hnisc he D okumentati on/Betri ebs anleitung/Wartung/Ins tandhaltung/allgemeine Anl eitungSaugsieb rei nigen @ 1\mod_1428483476842_373.doc x @ 27476 @ 2 @ 1 Pulire il cestello Spegnere la pompa. Chiudere le saracinesche. Togliere il coperchio. Estrarre il cestello. Lavare il cestello con acqua.
  • Seite 292: Eliminare I Cristalli Di Sale Sulla Pompa Con Campana In Plastica

    Manutenzione/controllo Pos : 105 /Tec hnisc he D okumentati on/Betri ebs anleitung/Wartung/Ins tandhaltung/allgemeine Anl eitungSalz kristalle bei Kunsts tofflater nen-Aus führung (AK) entfer nen - Ü berschrift @ 1\mod_1428484943782_373.doc x @ 27508 @ 2 @ 1 Eliminare i cristalli di sale sulla pompa con campana in plastica (-AK) Pos : 106 /Tec hnisc he D okumentati on/Betri ebs anleitung/Wartung/Ins tandhaltung/allgemeine Anl eitung W90.80.018-P @ 2\mod_1436517922324_0.doc x @ 34526 @ @ 1 Pos : 107 /Tec hnisc he D okumentati on/Allgemeine M odul e/Abbildung @ 1\mod_1430211005604_373.doc x @ 29224 @ @ 1...
  • Seite 293: Garanzia

    Manutenzione/controllo Garanzia La garanzia è estesa ai dispositivi forniti con tutti i componenti. Si esclude tuttavia la naturale usura/il deterioramento (DIN 3151/DIN-EN 13306) di tutti i componenti rotanti o sottoposti a dinamica, compresi i componenti elettronici sottoposti a tensione. La mancata osservanza delle norme di sicurezza può portare alla perdita di qualsiasi diritto di risarcimento dei danni.
  • Seite 294: Smaltimento

    Smaltimento Pos : 113 /Tec hnisc he D okumentati on/Betri ebs anleitung/Ents orgung/Ents orgung @ 1\mod_1428486567397_373.doc x @ 27539 @ 1 @ 1 Smaltimento  Raccogliere i fluidi nocivi e smaltirli nel rispetto delle disposizioni in materia.  Al termine della loro durata utile, la pompa/l'impianto o i suoi singoli componenti devono essere smaltiti correttamente.
  • Seite 295: Indice

    Indice Pos : 115 /Tec hnisc he D okumentati on/Allgemeine M odul e/Index @ 2\mod_1435751775796_373.doc x @ 33853 @ 1 @ 1 Indice === Ende der Liste für T extmar ke Index === Messa in servizio 23 Accensione della pompa 24 Altra documentazione valida 5 parti di ricambio 8 Collegamento elettrico 22...
  • Seite 297 Instrucciones para el manejo originales Bombas normales y auto-aspirantes con/sin linternas de plástico-diseño (AK) ü P o s : / T e c h n i s c h e D o k u m e n t a t i o n / A l l g e m e i n e M o d u l e / C E - Z e i c h e n 2 \ m o d _ 1 4 3 4 5 4 2 1 7 5 8 0 9...
  • Seite 298 Pos : 6 /T ec hnis che D okumentati on/Allgemeine M odule/Firmenadresse BADU @ 2\mod_1435913484644_374.doc x @ 33916 @ @ 1 ® BADU es una marca de SPECK Pumpen Verkaufsgesellschaft GmbH Hauptstraße 3 91233 Neunkirchen am Sand, Germany Teléfono +49 9123 949-0 +49 9123 949-260 info@speck-pumps.com...
  • Seite 299 Índice de contenidos Pos : 10 /T echnisc he Dokumentation/Allgemei ne Module/Inhalts verzeic hnis @ 2\mod_1435582896243_374.doc x @ 33768 @ @ 1 Índice de contenidos === Ende der Liste für T extmar ke Ihvz === Acerca de este documento ............5 Uso de estas instrucciones ............
  • Seite 300 Índice de contenidos Instalación ..................17 Lugar de instalación ..............17 5.1.1 Instalación al aire libre ............17 5.1.2 Drenaje de fondo debe estar disponible ....... 17 5.1.3 Ventilación y purga de aire ........... 17 5.1.4 Transmisión de sonido del cuerpo y del aire ......17 5.1.5 Reserva de espacio ..............
  • Seite 301: Acerca De Este Documento

    Acerca de este documento Pos : 13.1 /T echnisc he Dokumentation/Betriebsanlei tung/Z u dies em D okument/Z u di esem Dokument @ 0\mod_1427210330941_374.doc x @ 26360 @ 1 @ 1 Acerca de este documento Pos : 13.2 /T echnisc he Dokumentation/Betriebsanlei tung/Z u dies em D okument/U mg ang mit di es er Anleitung @ 0\mod_1427286785560_374.doc x @ 26457 @ 2 @ 1 Uso de estas instrucciones Estas instrucciones forman parte de la bomba/unidad.
  • Seite 302 Acerca de este documento A V IS O Indicaciones para la prevención de daños materiales, para la comprensión o para la optimización de los procesos del trabajo. A fin de obtener un correcto manejo, las informaciones y las indicaciones técnicas importantes están especialmente realzadas. Símbolo Significado ...
  • Seite 303: Seguridad

    Seguridad Pos : 15 /T echnisc he Dokumentation/Betriebsanl eitung/Sic herheit/Sic her heit @ 0\mod_1427704077019_374.doc x @ 26506 @ 1 @ 1 Seguridad Pos : 16 /T echnisc he Dokumentation/Betriebsanl eitung/Sic herheit/Besti mmungsgemäße Ver wendung/Besti mmungsg emäß e Ver wendung @ 0\mod_1427705810414_374.doc x @ 26536 @ 2 @ 1 Utilización según prescripción La bomba se ha previsto para la recirculación del agua del baño en conexión con una instalación de filtros en piscinas.
  • Seite 304: Prescripciones De Seguridad

    Seguridad  Asegurarse de que se cumplen los siguientes requisitos: – El personal que no esté todavía en condiciones de acreditar la cualificación necesaria, deberá recibir la capacitación necesaria antes de ser encargado de las tareas típicas del dispositivo. – Las responsabilidades del personal, p.ej. para trabajos en el producto, en el equipamiento eléctrico o los dispositivos hidráulicos se determinan en función de su cualificación y la descripción del puesto de trabajo.
  • Seite 305: Rótulos

    Seguridad Rótulos  Mantener en estado legible todos los rótulos pertenecientes a toda la bomba/unidad. Pos : 24 /T echnisc he Dokumentation/Betriebsanl eitung/Sic herheit/R estrisi ken/Restrisi ken @ 0\mod_1427723332615_374.doc x @ 26643 @ 2 @ 1 Resto de riesgos Pos : 25 /T echnisc he Dokumentation/Betriebsanl eitung/Sic herheit/R estrisi ken/Her abfall ende T eile @ 0\mod_1427724889933_374.doc x @ 26658 @ 3 @ 1 2.7.1 Desprendimiento de piezas Los soportes en el motor están diseñados para soportar el peso...
  • Seite 306: Energía Eléctrica

    Seguridad Pos : 28 /T echnisc he Dokumentation/Betriebsanl eitung/Sic herheit/R estrisi ken/El ektrisc he Energie @ 0\mod_1427779167394_374.doc x @ 26696 @ 3 @ 1 2.7.3 Energía eléctrica Al trabajar en la instalación eléctrica existe gran peligro de descarga de corriente debido al entorno húmedo. Del mismo modo, una instalación mal realizada de los conductores protectores puede causar una descarga de corriente, p.ej.
  • Seite 307: Averías

    Seguridad Pos : 33 /T echnisc he Dokumentation/Betriebsanl eitung/Sic herheit/Störungen/Störungen @ 0\mod_1427783778053_374.doc x @ 26756 @ 2 @ 1 Averías  En caso de averías cerrar y apagar inmediatamente el dispositivo.  Disponer la reparación inmediata de todas las averías. Pos : 34 /T echnisc he Dokumentation/Betriebsanl eitung/Sic herheit/Störungen/F estsi tzende Pumpe @ 0\mod_1427784418208_374.doc x @ 26771 @ @ 1 Bomba agarrotada Si una bomba agarrotada se enciende varias veces seguidas, el...
  • Seite 308: Cavitación

    Seguridad Pos : 41 /T echnisc he Dokumentation/Betriebsanl eitung/Sic herheit/Ver meidung von Sc häden/Kavitation @ 0\mod_1427790036391_374.doc x @ 26836 @ 3 @ 1 2.9.3 Cavitación Conductos demasiado largos elevan la resistencia. De tal manera que existe peligro de cavitación.  Asegurarse de que la tubería de aspiración es hermética.
  • Seite 309: Flujo De Escape

    Seguridad 2.9.7 Flujo de escape El flujo de escape insuficiente puede dañar el motor.  No obstruir o estanqueizar el flujo de escape entre la carcasa de bomba y el motor. Pos : 50 /T echnisc he Dokumentation/Betriebsanl eitung/Sic herheit/Ver meidung von Sc häden/Frostg efahr @ 0\mod_1427794294738_374.doc x @ 26911 @ 3 @ 1 2.9.8 Peligro de heladas ...
  • Seite 310: Descripción

    Descripción Pos : 53 /T echnisc he Dokumentation/Betriebsanl eitung/Besc hrei bung/Beschr eibung @ 0\mod_1427795115728_374.doc x @ 26941 @ 1 @ 1 Descripción Pos : 54 /T echnisc he Dokumentation/Betriebsanl eitung/Besc hrei bung/W90.04.086- 1-P @ 2\mod_1436517304672_0.doc x @ 34466 @ @ 1 Pos : 55 /T echnisc he Dokumentation/Allgemei ne Module/Abbil dung @ 1\mod_1430211005604_374.doc x @ 29225 @ @ 1 Fig.
  • Seite 311: Transporte Y Almacenamiento Intermedio

    Transporte y almacenamiento intermedio Pos : 59 /T echnisc he Dokumentation/Betriebsanl eitung/Trans por t und Z wisc henl agerung/Tr ans port und Z wis chenl ager ung @ 0\mod_1427801635560_374.doc x @ 27006 @ 1 @ 1 Transporte y almacenamiento intermedio A V IS O ¡Corrosión mediante almacenamiento en aire húmedo a diferentes temperaturas!
  • Seite 312 Transporte y almacenamiento intermedio Pos : 62 /T echnisc he Dokumentation/Allgemei ne Module/Abbil dung @ 1\mod_1430211005604_374.doc x @ 29225 @ @ 1 Fig. 2 Pos : 63 /T echnisc he Dokumentation/Allgemei ne Module/#### Sei tenumbruch #### @ 0\mod_1426069111812_0.doc x @ 895 @ @ 1 16 ES 10|2015...
  • Seite 313: Instalación

    Instalación Pos : 64 /T echnisc he Dokumentation/Betriebsanl eitung/Installation/Ins tallation @ 0\mod_1427869040467_374.doc x @ 27036 @ 1 @ 1 Instalación Pos : 65 /T echnisc he Dokumentation/Betriebsanl eitung/Installation/Einbauort/Einbauort @ 0\mod_1427869486488_374.doc x @ 27051 @ 2 @ 1 Lugar de instalación Pos : 66 /T echnisc he Dokumentation/Betriebsanl eitung/Installation/Einbauort/Aufstellen i m Fr eien @ 0\mod_1427869735350_374.doc x @ 27066 @ 3 @ 1 5.1.1 Instalación al aire libre...
  • Seite 314: Reserva De Espacio

    Instalación Pos : 71 /T echnisc he Dokumentation/Betriebsanl eitung/Installation/Einbauort/Platzres er ve @ 0\mod_1427876785998_374.doc x @ 27126 @ 3 @ 1 5.1.5 Reserva de espacio  Calcular el sitio de tal manera que se pueda desmontar la unidad del motor en dirección al ventilador del motor y el filtro de succión hacia arriba.
  • Seite 315 Instalación reposo y el tiempo de aspiración ha de ser breve, por ej. después de la limpieza del filtro.  Si se atasca, por ej.de paja o hierba no se han de desechar, montar un filtro en una afluencia o en la tubería de aspiración.
  • Seite 316: Instalación

    Instalación Pos : 75 /T echnisc he Dokumentation/Betriebsanl eitung/Installation/Aufstellung/allgemeine Anl eitung Aufstellung @ 2\mod_1432017628128_374.doc x @ 31946 @ 2 @ 1 Instalación Pos : 76 /T echnisc he Dokumentation/Betriebsanl eitung/Installation/Aufstellung/allgemeine Anl eitung Pumpe aufs tell en - Was ser ni veau @ 2\mod_1432022562944_374.doc x @ 32006 @ @ 1 La bomba se puede disponer por debajo debajo del nivel del agua en el funcionamiento en carga o por encima del nivel del agua en el funcionamiento de aspiración.
  • Seite 317: Montar La Bomba Y Conectar Los Conductos

    Instalación Pos : 82 /T echnisc he Dokumentation/Betriebsanl eitung/Installation/Aufstellung/Pumpe aufstellen und an die Rohrleitung ansc hließ en @ 0\mod_1427897347705_374.doc x @ 27262 @ 3 @ 1 5.3.1 Montar la bomba y conectar los conductos Montar y centrifugar la bomba de forma horizontal. Así se mantiene la máxima distancia al nivel del agua, nivel geodésico.
  • Seite 318: Conexión Eléctrica

    Instalación Conexión eléctrica A D V E R T E N C I A ¡Peligro de descarga de corriente por conexión inadecuada!  Las conexiones eléctricas y las uniones siempre deben ser realizadas por personal técnico autorizado.  Tener en cuenta los reglamentos VDE y EVU de las compañías eléctricas distribuidoras.
  • Seite 319: Puesta En Servicio

    Puesta en servicio Pos : 86 /T echnisc he Dokumentation/Betriebsanl eitung/Inbetri ebnahme/Inbetriebnahme @ 0\mod_1427956937430_374.doc x @ 27302 @ 1 @ 1 Puesta en servicio A V IS O ¡Desperfecto de la bomba/unidad mediante funcionamiento en seco!  Asegurarse de que la bomba/unidad está siempre llena de agua.
  • Seite 320: Conexión De La Bomba

    Puesta en servicio Pos : 90 /T echnisc he Dokumentation/Betriebsanl eitung/Inbetri ebnahme/Pumpe ei nsc halten @ 0\mod_1427962694084_374.doc x @ 27347 @ 2 @ 1 Conexión de la bomba Requisitos: • Se ha instalado el cesto del prefiltro, si está disponible. •...
  • Seite 321: Averías

    Averías Pos : 92 /T echnisc he Dokumentation/Betriebsanl eitung/Stör ung/Störungen @ 0\mod_1427964696943_374.doc x @ 27362 @ 1 @ 1 Averías A V IS O Es normal que de vez en cuando algunas gotas de agua salgan a través del retén frontal. Esto sucede especialmente durante el tiempo de marcha inicial.
  • Seite 322: Resumen

    Averías Pos : 94 /T echnisc he Dokumentation/Betriebsanl eitung/Stör ung/Ü bersicht @ 1\mod_1427966108756_374.doc x @ 27377 @ 2 @ 1 Resumen Avería Posibles causas Solución  La bomba se activa Sobrecarga Compruebe la por tierra o la bomba. Ver conexión de capítulo 7.1.1, protección del página 26.
  • Seite 323: Listas De Piezas De Recambio

    Averías Marcha fácil del eje del motor: Quitar el destornillador. Lado de aspiración del cuerpo de la bomba abrir sólo la mitad. Restaurar la alimentación eléctrica. A V IS O Cuando la bomba está atascada, el motor puede ser dañado si se enciende varias veces.
  • Seite 324: Mantenimiento

    Mantenimiento Pos : 100 /Tec hnisc he D okumentati on/Betri ebs anleitung/Wartung/Ins tandhaltung/allgemeine Anl eitung Wartung/Instandhaltung @ 1\mod_1428480782431_374.doc x @ 27447 @ 1 @ 1 Mantenimiento A V IS O  Antes de cualquier trabajo de mantenimiento cerrar cuerpo de la bomba y vaciar conductos. Todas las bombas ¿Cuándo? ¿Qué?
  • Seite 325: Limpie El Filtro

    Mantenimiento Pos : 103 /Tec hnisc he D okumentati on/Betri ebs anleitung/Wartung/Ins tandhaltung/allgemeine Anl eitungSaugsieb rei nigen @ 1\mod_1428483476842_374.doc x @ 27477 @ 2 @ 1 Limpie el filtro Apague la bomba. Cerrar cuerpo de la bomba. Retire la tapa. Retire el cesto del prefiltro.
  • Seite 326: Retirar Los Cristales De Sal En La Versión Linternas De Plástico

    Mantenimiento Pos : 105 /Tec hnisc he D okumentati on/Betri ebs anleitung/Wartung/Ins tandhaltung/allgemeine Anl eitungSalz kristalle bei Kunsts tofflater nen-Aus führung (AK) entfer nen - Ü berschrift @ 1\mod_1428484943782_374.doc x @ 27509 @ 2 @ 1 Retirar los cristales de sal en la versión linternas de plástico (-AK) Pos : 106 /Tec hnisc he D okumentati on/Betri ebs anleitung/Wartung/Ins tandhaltung/allgemeine Anl eitung W90.80.018-P @ 2\mod_1436517922324_0.doc x @ 34527 @ @ 1 Pos : 107 /Tec hnisc he D okumentati on/Allgemeine M odul e/Abbildung @ 1\mod_1430211005604_374.doc x @ 29225 @ @ 1...
  • Seite 327: Garantía

    Mantenimiento Garantía La garantía cubre los equipos suministrados con todas las partes. Con excepción del deterioro/desgaste natural (DIN 3151/DIN-EN 13306) de todos los componentes rotativos o dinámicamente cargados, incluidos los componentes electrónicos con carga de tensión. La no observancia de las indicaciones de seguridad puede llevar a la pérdida de cualquier reclamo por daños y perjuicios Pos : 112 /Tec hnisc he D okumentati on/Allgemeine M odul e/#### Seitenumbruc h #### @ 0\mod_1426069111812_0.doc x @ 895 @ @ 1 10|2015...
  • Seite 328: Eliminación De Desechos

    Eliminación de desechos Pos : 113 /Tec hnisc he D okumentati on/Betri ebs anleitung/Ents orgung/Ents orgung @ 1\mod_1428486567397_374.doc x @ 27540 @ 1 @ 1 Eliminación de desechos  Recoger los fluidos de bombeo nocivos y disponer su eliminación de acuerdo con los reglamentos ...
  • Seite 329: Índice

    Índice Pos : 115 /Tec hnisc he D okumentati on/Allgemeine M odul e/Index @ 2\mod_1435751775796_374.doc x @ 33854 @ 1 @ 1 Índice === Ende der Liste für T extmar ke Index === Averías 25 mal uso 7 Resumen 26 Mantenimiento 28 conductos 21 piezas de recambio 8...
  • Seite 332: Hauptstraße

    Pos: 6 /Technische Dokumentation/Allgemeine Module/Firmenadresse @ 2\mod_1435913484644_6.docx @ 33910 @ @ 1 BADU ist eine Marke der ® SPECK Pumpen Verkaufsgesellschaft GmbH Hauptstraße 3 91233 Neunkirchen am Sand, Germany Telefon 09123 949-0 Telefax 09123 949-260 info@speck-pumps.com www.speck-pumps.com 10/2015 VG 766.2000.055 100‘ DC/BA...

Inhaltsverzeichnis