Seite 1
Additional Information for MammoDuo Model Zusätzliche Informationen zum MammoDuo-Modell Informations supplémentaires pour le modèle MammoDuo Дополнительная информация о модели MammoDuo MammoDuo 机型的其他信息 MammoDuo 機型的其他資訊 MammoDuo 仕様をお買い上げのお客様へ...
Package Contents The following items are supplied together with the product. Check that all of them are contained in the package. If any of these are missing, contact your dealer or local EIZO representative. RX560 • Monitor • USB cable: UU300 x 2 (Monitor unit x 2, stand) •...
Controls and Functions For information about the part names and functions of the monitor unit, refer to "Controls and Functions" in the Instructions for Use. Rear view Top view 1. Mount unit Connects the monitor unit to the stand. 2. Handle This handle is used for transportation.
• To set up a daisy-chain connection, it is necessary to set the DisplayPort version to “1.2”. For details on how to perform setup, refer to the Installation Manual (on the CD-ROM). • Visit the EIZO website for information about monitors and graphic boards that can be used for the daisy- chain connection: http://www.eizoglobal.com •...
Seite 6
3. Connect the USB cable when using RadiCS / RadiCS LE. Connect to monitor Connect to PC Attention • In order to perform monitor quality control for the GX560, connect a PC with RadiCS / RadiCS LE installed . Refer to “2-2. Connecting Cables” in the Instructions for Use on how to connect cables. 4.
Seite 7
● Adjusting the Screen Height and Angle Holding both monitors together as in the following figure, adjust the screen height and vertical angle. Attention • The tilt lock is locked before shipment. Adjust the vertical angle of the screens after releasing the lock. : Locked, : Released •...
Seite 8
● Mounting the Monitor Mount the monitor unit on the stand. : Locked Attention • Check that the mount lock indicator is in the locked position. Mechanical Specifications (RX560 and GX560) Dimensions (W x H x D) 709.0 mm x 476.0 mm - 566.0 mm x 225.0 mm (Tilt: 0°, swivel (each monitor unit) : 0°) 696.5 mm x 476.0 mm - 566.0 mm x 237.1 mm (Tilt: 0°, swivel (each monitor unit) : 15°)
Verpackung enthalten sind. Wenn Elemente fehlen, wenden Sie sich an Ihren Fachhändler oder Ihren EIZO-Handelsvertreter. RX560 • Monitor • USB-Kabel: UU300 x 2 (Monitor x 2, Standfuß) • EIZO LCD Utility Disk (CD-ROM) • Netzkabel x 2 • Gebrauchsanweisung • Digitales Signalkabel: PP300 x 2 • Zusätzliche Informationen zum MammoDuo-Modell DisplayPort - DisplayPort (dieses Dokument) •...
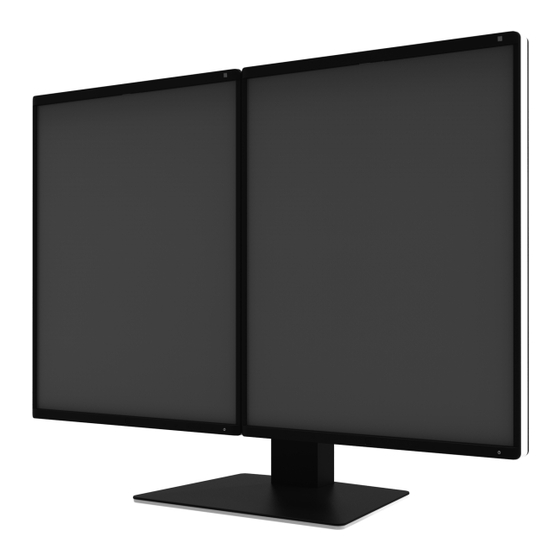
Bedienelemente und Funktionen Für Informationen zu den Teilebezeichnungen und Funktionen des Monitors siehe „Bedienelemente und Funktionen“ in der Gebrauchsanweisung. Ansicht von hinten Ansicht von oben 1. Montageeinheit Verbindet den Monitor mit dem Standfuß. 2. Griff Dieser Griff wird zum Transport des Monitors genutzt. 3.
Informationen zum Setup finden Sie im Installationshandbuch (auf der CD-ROM). • Informationen über Monitore und Grafikkarten, die für die Durchschleifverbindung verwendet werden können, finden Sie auf der EIZO-Website: http://www.eizoglobal.com • Entfernen Sie vor der Verwendung einer Durchschleifverbindung die Kappe vom Ausgangsanschluss des Monitors, der Signale ausgibt.
Seite 12
3. Schließen Sie das USB-Kabel an, wenn Sie RadiCS / RadiCS LE verwenden. Verbinden mit dem Monitor Verbinden mit dem PC Achtung • Um die Monitor-Qualitätskontrolle für den GX560 durchzuführen, verbinden Sie einen PC mit installiertem RadiCS / RadiCS LE mit .
Seite 13
2. Stellen Sie die Rotation ein. Der Abstand zwischen den Monitoren kann durch Drehen der Rotationsschraube beseitigt werden. Passen Sie nach Bedarf an. Achtung • Führen Sie die Rotation nicht durch Bewegen der Monitore per Hand aus. Hinweis • Verwenden Sie einen (#2) Kreuzschlitzschraubenzieher für die Drehverschlussschraube und die Rotationsschraube.
Seite 14
Referenz ● Entfernen des Monitors Wenn Sie, zum Beispiel, die optionale RadiLight-Einheit am Monitor montieren möchten, entfernen Sie den Monitor vom Standfuß. Achtung • Wenn nur ein Monitor vom Standfuß entfernt wird, ist das Produkt extrem instabil. Wenn Sie mit dem Produkt in einem instabilen Zustand arbeiten, kann es umfallen und zu Verletzungen oder Schäden am Gerät führen.
Contenu de l’emballage Les articles suivants sont fournis avec le produit. Vérifiez qu’ils sont tous inclus dans l’emballage. Si le moindre de ces articles manque, contactez votre revendeur ou votre représentant EIZO local. RX560 • Moniteur •...
Commandes et fonctions Pour obtenir des informations sur les noms des pièces et les fonctions du moniteur, reportez-vous à « Commandes et fonctions » dans la Notice d’instruction. Vue arrière Vue du dessus 1. Support Relie le moniteur au pied. 2.
Seite 17
Manuel d’installation (sur le CD-ROM). • Consultez le site Web EIZO pour de plus amples informations sur les moniteurs et les cartes graphiques pouvant être utilisés pour la connexion en guirlande : http://www.eizoglobal.com •...
Seite 18
3. Connectez le câble USB si vous utilisez RadiCS / RadiCS LE. Raccordez au moniteur Raccordez au PC Attention • Pour effectuer le contrôle de la qualité du moniteur du GX560, connectez un PC équipé de RadiCS / RadiCS LE à .
Seite 19
● Régler la hauteur et l'angle de l'écran Tenez les deux moniteurs ensemble comme indiqué sur l’illustration suivante pour régler la hauteur et l’angle vertical de l’écran. Attention • Le verrou d’inclinaison est enclenché avant l’expédition. Ajustez l'angle vertical des écrans après avoir desserré...
Seite 20
● Montage du moniteur Montez le moniteur sur le pied. : verrouillé Attention • Vérifiez que l'indicateur de verrouillage du support est en position verrouillée. Spécifications mécaniques (RX560 et GX560) Dimensions (L x H x P) 709 mm x 476 mm - 566 mm x 225 mm (Inclinaison : 0°, pivotement (chaque moniteur) : 0°) 696,5 mm x 476 mm - 566 mm x 237,1 mm (Inclinaison : 0°, pivotement (chaque moniteur) : 15°)
RX560 • Монитор • Кабель USB: UU300 x 2 (отдельный монитор x 2, стойка) • EIZO LCD Utility Disk (CD-ROM) • Шнур питания x 2 • Инструкцию по эксплуатации • Цифровой сигнальный кабель: PP300 x 2 • Дополнительная информация о модели...
Seite 22
Средства управления и их функции Информация о названиях деталей отдельного монитора и его функциях приведена в разделе «Средства управления и их функции» Инструкцию по эксплуатации. Вид сзади Вид сверху 1. Крепежное Служит для крепления отдельного монитора к стойке. устройство 2. Ручка Эта...
За подробной информацией о настройке обратитесь к Руководство по установке (на CD-ROM). • Сведения о том, какие мониторы и графические адаптеры можно использовать для последовательного подключения, см. на веб-сайте компании EIZO: http://www.eizoglobal.com • Перед использованием последовательного подключения снимите защитный колпачок с...
Seite 24
3. При использовании программного обеспечения RadiCS / RadiCS LE подключите кабель USB. Подключить к монитору Подключить к ПК Внимание • Для выполнения контроля качества монитора подключайте ПК с установленным RadiCS / RadiCS LE к порту . За информацией о подключении кабелей обратитесь к разделу «2-2. Подключение кабелей»...
● Регулировка высоты и угла наклона экрана Удерживая оба монитора вместе, как показано на следующем рисунке, отрегулируйте высоту и вертикальный угол экрана. Внимание • Перед поставкой фиксатор наклона закрывается. Перед регулировкой вертикального угла экрана откройте фиксатор. : закрыт, : открыт •...
Seite 26
● Установка монитора Установите монитор на стойке. : закрыт Внимание • Убедитесь, что указатель замка крепления находится в закрытом положении. Конструкционные характеристики (RX560 и GX560) Размеры (Ш x В x Г) 709,0 мм x 476,0 мм – 566,0 мм x 225,0 мм (наклон: 0°, поворот...
Seite 27
本产品随附以下物品。 请检查包装盒中是否包含所有物品。 如有缺失, 请与经销商或当地EIZO代 表联系。 RX560 • 显示器 • USB电缆:UU300 x 2 (显示器装置 x 2,底座) • EIZO LCD Utility Disk (CD-ROM) • 电源线 x 2 • 使用说明书 • 数字信号线:PP300 x 2 • MammoDuo 机型的其他信息(本文档) DisplayPort - DisplayPort • 数字信号线:PP100 x 1 DisplayPort - DisplayPort •...
Seite 32
● 安装显示器 将显示器装置安装在底座上。 :锁定 注意 • 确认固定锁指示器在锁定位置。 机械规格(RX560与GX560) 尺寸(宽度×高度×深度) 709.0 mm × 476.0 mm - 566.0 mm × 225.0 mm (倾斜 :0° , 摆动(各显示器装置) :0°) 696.5 mm × 476.0 mm - 566.0 mm × 237.1 mm (倾斜 :0° , 摆动(各显示器装置) : 15°) 净重...
Seite 33
造成人員受傷或設備受損。 包裝內容 本產品隨附下列物品。請檢查包裝中是否包含所有物品。如有缺失 ,請與經銷商或當地 EIZO 代表聯絡。 RX560 • 顯示器 • USB 纜線:UU300 x 2 • EIZO LCD Utility Disk (CD-ROM) (顯示器裝置 x 2 ,支架) • 電源線 x 2 • 使用說明 • 數位訊號線:PP300 x 2 • MammoDuo 機型的其他資訊(本文件) DisplayPort - DisplayPort •...
Seite 38
● 安裝顯示器 將顯示器裝置安裝在支架上 。 :鎖定 注意 • 確定固定鎖指示器在鎖定位置。 機械規格(RX560 與 GX560) 尺寸(寬 × 高 × 深) 709.0 mm × 476.0 mm - 566.0 mm × 225.0 mm (傾斜度:0° ,轉角(各顯示器裝置) :0°) 696.5 mm × 476.0 mm - 566.0 mm × 237.1 mm (傾斜度:0°...