Herunterladen Inhalt Inhalt Diese Seite drucken
Crivit IAN 282677 Gebrauchsanweisung

Crivit IAN 282677 Gebrauchsanweisung

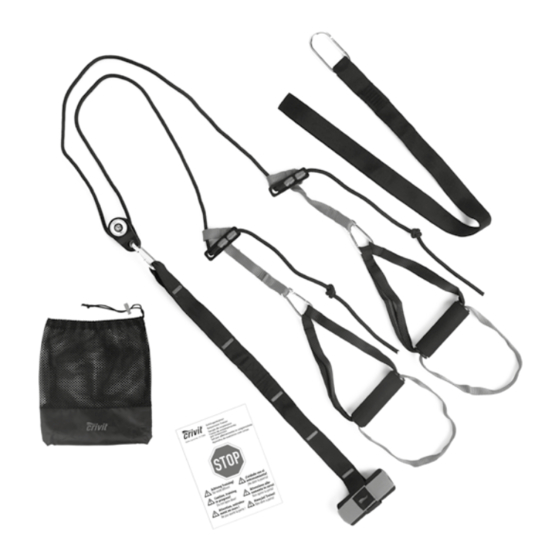
Schlingentrainer mit umlenkrolle
Vorschau ausblenden Andere Handbücher für IAN 282677:
Inhaltsverzeichnis

Werbung

Verfügbare Sprachen

Verfügbare Sprachen

SCHLINGENTRAINER MIT UMLENKROLLE
SCHLINGENTRAINER MIT
UMLENKROLLE
Gebrauchsanweisung
SET PER ALLENAMENTO IN
SOSPENSIONE
Istruzioni d'uso
IAN 282677
SANGLE DE MUSCULATION
AVEC POULIE
Mode d'emploi
RESISTANCE BANDS WITH PULLEY
Instructions for use
http://qr.lidl.com/lese0jaC

Werbung

Inhaltsverzeichnis
loading

Inhaltszusammenfassung für Crivit IAN 282677

  • Seite 1 SCHLINGENTRAINER MIT UMLENKROLLE SCHLINGENTRAINER MIT SANGLE DE MUSCULATION UMLENKROLLE AVEC POULIE Gebrauchsanweisung Mode d‘emploi SET PER ALLENAMENTO IN RESISTANCE BANDS WITH PULLEY SOSPENSIONE Instructions for use Istruzioni d‘uso IAN 282677...
  • Seite 2 Sangle de suspension Slingtrainer Schlingentrainer Delta-Sport-Nr.: STOP Attention, entraînement en cours ! Ne pas ouvrir la porte ! Let op training! Deur niet openen! Achtung Training! Tür nicht ö nen!
  • Seite 7: Inhaltsverzeichnis

    Inhaltsverzeichnis / Table des matieres / Indice / Contents Lieferumfang / Teilebezeichnung ...... 8 Contenu de la livraison / Technische Daten ..........8 Désignation des pièces ........16 Bestimmungsgemäße Verwendung ....8 Données techniques .......... 16 Sicherheitshinweise .........8 - 9 Utilisation conforme ...........
  • Seite 8: Lieferumfang / Teilebezeichnung

    Der Artikel wurde sowohl für den Gebrauch im Herzlichen Glückwunsch! Innenraum als auch im Außenbereich konzipiert Mit Ihrem Kauf haben Sie sich für einen hoch- und darf ausschließlich an Türen mit dem mit- wertigen Artikel entschieden. Machen Sie sich gelieferten Tür-Anker befestigt werden als auch vor der ersten Verwendung mit dem Artikel an Stangen, Baumästen, Haken u.ä.
  • Seite 9: Aufbauhinweise/Montage

    Achten Sie darauf, den Artikel erst nach voll- Gefahren durch Verschleiß ständiger Montage zu verwenden. • Der Artikel darf nur in einwandfreiem Zustand • Trainieren Sie nicht, wenn Sie müde oder un- verwendet werden. Prüfen Sie den Artikel konzentriert sind. Trainieren sie nicht unmittel- vor jedem Gebrauch auf Beschädigungen bar nach Mahlzeiten.
  • Seite 10: Schlingentrainer Verkürzen Und Verlängern

    1. Öffnen Sie dazu den Klettverschluss (2a) des • Achtung! Verletzungsgefahr! Tür-Ankers (2) und entnehmen Sie den Anker Schließen Sie die Tür immer ab! aus dem Gurtband (1) (Abb. G). • Nutzen Sie immer das mitgelieferte 2. Positionieren Sie ihn in einer der unteren Tür-Hinweisschild (10)! Schlaufen und sichern Sie den Tür-Anker an- •...
  • Seite 11: Umlenkrolle Anbringen

    5. Fädeln Sie die Schlaufe durch die letzte Nackenmuskulatur Ankerschlaufe des Gurtbandes (1). 1. Drehen Sie Ihren Kopf langsam nach links und 6. Ziehen Sie die Schlaufe über das gesamte nach rechts. Wiederholen Sie diese Gurtband und ziehen Sie die Schlaufe fest, Bewegung vier- bis fünfmal.
  • Seite 12: Radfahren Im Liegestütz (Abb. M)

    Endposition: Endposition: 3. Spannen Sie die Bauchmuskulatur an. 3. Spannen Sie den Rumpf an. 4. Ziehen Sie die Fersen zum Becken. 4. Heben Sie das Becken vom Boden an, indem 5. Gehen Sie langsam wieder in die Ausgangs- Sie die Fersen in die Fußschlaufen drücken. position zurück.
  • Seite 13: Einseitiger Liegestütz (Abb. N)

    Endposition: Kraftzug (Abb. O) 4. Spannen Sie die Arm-, Bauch- und Länge Schlingentrainer: Mittlere Länge Gesäßmuskulatur an. Mit Umlenkrolle 5. Führen Sie kreisende Bewegungen aus, indem Ausgangsposition: Sie abwechselnd ein Bein zur Brust ziehen 1. Stellen Sie sich aufrecht hin, Sie blicken vom und das andere gerade nach hinten Befestigungspunkt weg.
  • Seite 14: Qr-Code Verwenden

    4. Verlagern Sie ihr Gewicht nach hinten bis Sie 2. Führen Sie den rechten Arm hinter den Kopf, sich in einem angemessenen bis die rechte Hand zwischen den Schulter- Widerstandswinkel befinden. Nur die Fersen blättern liegt. berühren den Boden, die Zehenspitzen zeigen 3.
  • Seite 15 Unsere Servicemitarbeiter werden das weitere Vorgehen schnellstmöglich mit Ihnen abstimmen. Wir werden Sie in jedem Fall persönlich beraten. Die Garantiezeit wird durch etwaige Repa- raturen aufgrund der Garantie, gesetzlicher Gewährleistung oder Kulanz nicht verlängert. Dies gilt auch für ersetzte und reparierte Teile. Nach Ablauf der Garantie anfallende Repara- turen sind kostenpflichtig.
  • Seite 16: Contenu De La Livraison / Désignation Des Pièces

    Consignes de sécurité Félicitations ! Vous avez acquéri un produit de haute qualité. Risque de blessure ! Apprenez à connaître le produit avant sa premi- • Veuillez consulter votre médecin avant ère utilisation. de commencer l‘entraînement. Assurez-vous Lisez pour cela attentivement le mode que votre état de santé...
  • Seite 17: Soyez Particulièrement Prudent : Risque De Blessure Pour Les Enfants

    • Ne vous entraînez pas si vous êtes fatigué Risque causé par l‘usure ou si vous n‘êtes pas concentré. Ne vous • Cet article ne doit être utilisé que s‘il est en entraînez pas immédiatement après les repas. parfait état. Vérifiez d‘éventuels dommages Attendez environ 2 heures avant de commen- ou usures sur l‘article avant chaque utilisation.
  • Seite 18: Raccourcir Et Rallonger Le Système D'entraînement Par Suspension

    Déplacer le point d‘ancrage • Attention ! Risque de blessure ! Si l‘élastique pour musculation est vraiment trop Fermez toujours la porte à clé ! long, vous pouvez déplacer le point d‘ancrage. • Utilisez toujours le panonceau de 1. Pour cela, ouvrez la fermeture autoagrippante porte fourni (10) ! (2a) de l‘ancre de porte (2) et sortez l‘ancre •...
  • Seite 19: Retirer La Poulie

    Retirer la poulie Échauffement Vous pouvez retirer la poulie (4) de l‘élastique Prenez suffisamment le temps de vous échauffer pour musculation et fixer le câble (5) directe- avant chaque entraînement. Pour cela, nous vous ment à la bande (1) (fig. E). présentons ci-dessous quelques exercices simples 1.
  • Seite 20 Indication : pour que les pieds soient plus 2. Les bras sont près du corps, les paumes à plat confortablement positionnés, poussez les sur le sol. poignées en plastique vers le haut. Position finale : 2. Les bras sont à plat près du corps. 3.
  • Seite 21 Position finale : Force de traction (fig. O) 4. Contractez les muscles des bras, abdominaux Longueur de l‘élastique pour musculation : et des fessiers. longueur moyenne 5. Faites des mouvements circulaires en tirant Avec poulie à tour de rôle une jambe vers le thorax et en Position de départ : tendant l‘autre droit vers l‘arrière.
  • Seite 22: Utiliser Le Code Qr

    4. Déplacez le poids de votre corps vers l‘arrière 3. Avec la main gauche, attrapez le coude droit jusqu‘à trouver un angle de résistance adapté. et tirez-le vers l‘arrière. Seuls les talons touchent le sol, la pointe des 4. Changez de côté et répétez cet exercice. pieds est tournée vers le haut.
  • Seite 23 Nos employés du service client vous indiqueront • correspondre à la description donnée par le la marche à suivre le plus rapidement possible. vendeur et posséder les qualités que celui-ci a Nous vous renseignerons personnellement présentées à l‘acheteur sous forme dans tous les cas.
  • Seite 24: Contenuto Della Confezione / Denominazione Dei Pezzi

    Avvertenze di sicurezza Congratulazioni! Con il vostro acquisto avete scelto un prodotto altamente qualitativo. Pericolo di ferirsi! Familiarizzate con il prodotto prima di prenderlo • Consultare il proprio medico prima di iniziare in funzione. il training. Assicurarsi di essere nelle condizio- Leggete attentamente le seguenti istru- ni di salute adatte per il training.
  • Seite 25: Indicazioni Per Il Montaggio

    • Non avvolgere mai l‘articolo attorno alla La sicurezza dello strumento per il training in testa, al collo o al petto. Pericolo di strangola- sospensione può essere garantita solo se si mento! verifica regolarmente che esso non presenti • Non utilizzare l‘articolo ad altri scopi (ad es. danni o segni di usura.
  • Seite 26: Accorciare E Allungare L'attrezzo Per L'allenamento In Sospensione

    • Assicurarsi che la porta alla quale si fissa 2. Posizionarlo in uno dei cappi più in basso, l‘ancoraggio (2) sia stabile e robusta, che e fissare quindi l‘ancoraggio per la porta al sorregga il proprio peso corporeo e che cappio con la chiusura a strappo (imm.
  • Seite 27: Applicare La Carrucola Di Deviazione

    1. Staccare il moschettone (3) dalla cintura (1). • Fare attenzione ad una corretta postura 2. Sganciare il moschettone dalla carrucola (4). corporea quando si svolgono gli esercizi. 3. Togliere la corda (5) dalla carrucola. Riscaldarsi 4. Mettere la corda doppia, in modo che si venga a creare un cappio.
  • Seite 28 Piegamenti sulle ginocchia (imm. I) La maggior parte degli esercizi con flessioni sulle braccia è più facile Lunghezza dello strumento per l’allenamento in da svolgere se ci si appoggia sugli sospensione: all‘altezza delle ginocchia avambracci. Con o senza carrucola di deviazione Se ci si appoggia sulle mani con le Posizione di partenza: 1.
  • Seite 29 4. Sollevare il bacino nella posizione delle Posizione di partenza: flessioni sulle braccia e mantenere la 1. Mettersi in piedi, con lo sguardo rivolto in posizione per 10 secondi. direzione opposta al punto di fissaggio. 5. Tornare alla posizione di partenza. 2.
  • Seite 30: Utilizzare Il Codice Qr

    Utilizzare il codice QR 6. Ruotare il busto verso sinistra e staccare il braccio sinistro dal corpo per distenderlo Tramite il codice QR avete all‘indietro. Lo sguardo è rivolto verso la l‘opportunità di vedere in un video mano sinistra, le braccia sono molto aperte. gli esercizi qui descritti.
  • Seite 31: Avvertenze Sullo Smaltimento

    Avvertenze sullo smaltimento Smaltire l‘articolo e tutti i relativi componenti tramite un‘azienda di smaltimento autorizza- ta oppure rivolgendosi all‘amministrazione comunale competente. Osservare le disposizioni attualmente in vigore. In caso di dubbi richie- dere informazioni presso la struttura comunale competente su come smaltire il prodotto nel rispetto dell‘ambiente.
  • Seite 32: Scope Of Delivery / Part Names

    Safety notes Congratulations! With your purchase you have decided on a Risk of injury! high-quality product. Get to know the product • Consult with your doctor before you begin before you start to use it. training. Make sure that you are in suitable Carefully read the following instructions health for the training.
  • Seite 33: Risks From Wear

    • Do not use the article for other purposes (e.g. • Inspect the article regularly for damage and as a tow or pulling rope or similar). wear. Cease use of the product if damage is • Caution! Only attach the suspension found.
  • Seite 34: Shortening And Lengthening The Sling Trainer

    Shortening and lengthening Length of sling trainer: long Pull the bands on the sling trainer out fully so that the sling trainer the handles are approximately 7cm above the Note! Before adjustment always ensure floor. that the rope (5) is not twisted! Removing the pulley Shortening You can remove the pulley (4) from the suspen-...
  • Seite 35: Warming Up

    Warming up End position: 3. Tense your stomach muscles. Take sufficient time before each training session 4. Pull your heels up to your pelvis. to warm up. The following includes descriptions 5. Slowly return to the starting position. of some simple exercises for this purpose. Repeat 6.
  • Seite 36: Cycling In A Press-Up Position (Figure M)

    Important: Make sure you keep your To reduce the difficulty of the exercise body tensed and retain good posture. you can support yourself on the floor Most floor exercises become more on your lower arms. This exercise difficult the further away you are from strengthens your stomach and buttock the attachment point (and vice versa).
  • Seite 37: Use The Qr-Code

    6. Turn your upper body to the left and move 1. Start the QR-code scanning app. your left arm past your body in order to 2. Hold your phone or tablet and use it to scan extend it out backwards. Look at your left the QR-code provided.
  • Seite 38: 3-Year Warranty

    3-year warranty The product was produced with great care and under constant supervision. You receive a three- year warranty for this product from the date of purchase. Please retain your receipt. The warranty applies only to material and workmanship and does not apply to misuse or improper handling.
  • Seite 40 DELTA-SPORT HANDELSKONTOR GMBH Wragekamp 6 • D-22397 Hamburg Version: 02/2017 Delta-Sport-Nr.: ST-2985 IAN 282677...

Inhaltsverzeichnis