Herunterladen Inhalt Inhalt Diese Seite drucken
Videotec VERSO Bedienungsanweisung

Videotec VERSO Bedienungsanweisung

Kameragehäuse und zubehör
Vorschau ausblenden Andere Handbücher für VERSO:
Inhaltsverzeichnis

Werbung

Verfügbare Sprachen

Verfügbare Sprachen

Custodia per telecamera ed accessori
Camera housing and accessories
Caisson pour camera video et accessoires
Kameragehäuse und Zubehör
Manuale istruzioni
Operating instructions
Manuel d'instruction
Bedienungsanweisung

Werbung

Inhaltsverzeichnis
loading

Inhaltszusammenfassung für Videotec VERSO

  • Seite 1 Custodia per telecamera ed accessori Camera housing and accessories Caisson pour camera video et accessoires Kameragehäuse und Zubehör Manuale istruzioni Operating instructions Manuel d’instruction Bedienungsanweisung...
  • Seite 2: Inhaltsverzeichnis

    Custodia per telecamera ed accessori Camera housing and accessories ITALIANO ENGLISH I N D I C E I N D E X DESCRIZIONE DESCRIPTION Prodotti ed accessori Products and accessories Pulizia del vetro e delle parti in plastica (PC) Window and plastic cover cleaning (PC) INSTALLAZIONE INSTALLATION Apertura della custodia...
  • Seite 3: Descrizione

    ITALIANO Custodia per telecamera ed accessori DESCRIZIONE - Kit di alimentazione* - Circuito di appoggio con interruttore anti- Custodia stagna moderna ed innovativa, apertura, solo per versione in 420mm (Fig. 8) interamente costruita con il più nuovo e resistente tecnopolimero. La sua apertura laterale facilita * Non applicabile nelle custodie munite di sistema ampiamente l’accessibilità...
  • Seite 4: Installazione Del Riscaldamento

    ITALIANO Custodia per telecamera ed accessori Installazione dell’alimentatore utilizzare i distanziali in dotazione per per telecamera collocare nel modo corretto telecamera e ottica. 5. Riposizionare la slitta interna fissando le viti Non applicabile nelle custodie precedentemente allentate. m u n i t e s i s t e m a p e r 6.
  • Seite 5: Installazione Del Sistema Di Raffreddamento

    ITALIANO Custodia per telecamera ed accessori essere fornito in tre configurazioni differenti staffetta angolare di supporto, all’interno a seconda della tensione di alimentazione del corpo custodia utilizzando le apposite disponibile. viti in dotazione. Nella versione in 420mm (6) é possibile una sola regolazione e due Tensione di alimentazione custodia 100- nella versione in 360mm (7).
  • Seite 6 ITALIANO Custodia per telecamera ed accessori dell’acqua in caso di pioggia. 1. Aprire la custodia come da istruzioni precedenti. 2. E f f e t t u a r e l e c o n n e s s i o n i e l e t t r i c h e p e r i l f u n z i o n a m e n t o d e l s i s t e m a d i raffreddamento sul morsetto indicato con J8 FAN (Fig.
  • Seite 7: Specifiche Tecniche

    ITALIANO Custodia per telecamera ed accessori SPECIFICHE TECNICHE Custodia Alimentatore per telecamera -Dimensioni esterne: 156x100x422mm (42) (Fig. 6) 134x94x357mm (36) -Ingombro: 75.5x50x32.3mm -Area utile interna: 70x70x270mm (42) -Tensione di ingresso: 100-240V AC 63x63x210mm (36) -Tensione di uscita: 12V DC -Peso: 1.2kg (42) -Corrente fornita: 0.7kg (36)
  • Seite 8: How To Open The Housing

    ENGLISH Camera housing and accessories DESCRIPTION - Power supply kit* - Suppor t circuit with tamper switch, only Moder n, innovative, waterproof housing, for 420mm version (Fig. 8) c o m p l e t e l y m a d e o f t h e l a t e s t , s t r o n g e s t technopolymer.
  • Seite 9: How To Install The Heater

    ENGLISH Camera housing and accessories H o w t o i n s t a l l t h e c a m e r a of the slide (3). If necessar y, use the power supply supplied spacers to correctly position the camera and optics.
  • Seite 10 ENGLISH Camera housing and accessories depending on the power supply voltage. of the cable into the correspondent one identified by J6 (FAN) on the suppor t 100-240V AC power supply: circuit (Fig. 9 and 10). 1. Open the housing as described before. 4.
  • Seite 11 ENGLISH Camera housing and accessories heating system can be taken from the ter minal marked J3 HEATER (Fig. 11); r e f e r t o t h e s e c t i o n o n h e a t i n g installation.
  • Seite 12: Technical Specifications

    ENGLISH Camera housing and accessories TECHNICAL SPECIFICATIONS Housing Camera power supply -External dimensions: 156x100x422mm / 6.14x4x16.6in (42) (Fig. 6) 134x94x357mm / 5.2x3.7x14in (36) -Size: 75.5x50x32.3mm / 3x2x1.3in -Internal dimensions: 70x70x270mm / 2.7x2.7x10.6in (42) -Input voltage: 100-240V AC 63x63x210mm / 2.5x2.5x8.3in (36) -Output voltage: 12V DC -Weight:...
  • Seite 13: Caisson De Protection Pour Camera Video Et Accessoires

    FRANCAIS Caisson pour camera video et accessoires DESCRIPTION - Kit de chauffage - Kit de ventilation* Caisson étanche moderne et innovateur, - Kit d’alimentation* entièrement construit avec le plus nouveau et - Circuit d’appui avec interrupteur anti-ouverture, le plus résistant polymère thermoplastique. seulement pour version en 420mm (Fig.
  • Seite 14: Installation Du Chauffage

    FRANCAIS Caisson pour camera video et accessoires Installation de l’alimentateur éventuellement l’entretoise isolante entre la pour caméra caméra et la partie supérieure de la glissière (3). Si nécessaire, utiliser les entretoises fournies pour placer de façon correcte la Non applicable pour les caissons caméra et l’optique.
  • Seite 15 FRANCAIS Caisson pour camera video et accessoires Alimentation 100-240V AC: J6 (FAN) sur le circuit d’appui (Fig. 9 et 10). 1. Ouvrir le caisson en suivant les instructions 4. Dans ce cas, un connecteur muni des décrites précédemment. branchements nécessaires est fourni avec le 2.
  • Seite 16 FRANCAIS Caisson pour camera video et accessoires section “Installation du chauffage”. 4. Fermer le caisson en procédant selon les indications précédentes mais en sens contraire. En cas d’alimentation du circuit au moyen d’une source externe, attention au type de tension utilisée. Les versions de caisson équipées de ce dispositif peuvent exclusivement être alimentées avec des tensions de 12V DC...
  • Seite 17: Spécifications Techniques

    FRANCAIS Caisson pour camera video et accessoires SPÉCIFICATIONS TECHNIQUES Caisson Alimentateur pour camera -Surface extérieure: 156x100x422mm (42) (Fig. 6) 134x94x357mm (36) -Encombrement: 75.5x50x32.3mm -Surface intérieure: 70x70x270mm 42) -Tension d’entrée: 100-240V AC 63x63x210mm (36) -Tension de sortie: 12V DC -Poids: 1.2kg (42) -Courant de sortie: 0.7kg (32) -Poids:...
  • Seite 18: Kameragehäuse Und Zubehör

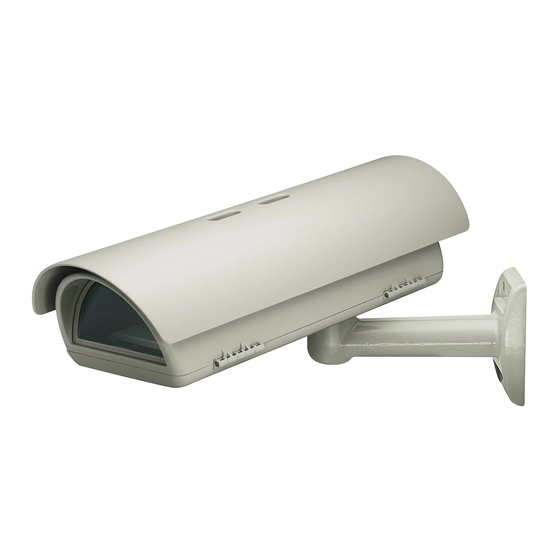
    DEUTSCH Kameragehäuse und zubehör BESCHREIBUNG ausgestattet werden mit: Dicht schließendes modernes und innovatives - Sonnenschutzdach Gehäuse, vollständig bestehend aus einem - Heizungs-Kit n e u a r t i g e n , e x t r e m w i d e r s t a n d s f ä h i g e n - Lüfter-Kit* technischen Kunststoff.
  • Seite 19: Installation Der Heizung

    DEUTSCH Kameragehäuse und zubehör Befestigungsschrauben teilweise löst (1). Die Schaltung bietet daneben die 3. N u n d e n S c h l i t t e n s o w e i t g l e i t e n Möglichkeit, die Stromversorgung lassen, bis seine Bohrungen mit den für eine Kamera abzugreifen.
  • Seite 20: Installation Des Lüfters

    DEUTSCH Kameragehäuse und zubehör Installation des Lüfters 5. Dieser Stecker muß an der vorgesehenen, mit J5 bezeichneten Stelle auf dem beiliegenden N i c h t a n w e n d b a r Schaltkreis eingefügt werden. G e h ä u s e n m i t i n s t a l l i e r t e m 6.
  • Seite 21 DEUTSCH Kameragehäuse und zubehör bereits je nach gewünschtem Modell komplett m i t a l l e n e r f o r d e r l i c h e n Te i l e n g e l i e f e r t werden.
  • Seite 22: Technische Daten

    DEUTSCH Kameragehäuse und zubehör TECHNISCHE DATEN Gehäuse Netzteil für Kamera -Ausmaße: 156x100x422mm (42) (Fig. 6) 134x94x357mm (36) -Ausmaße: 75.5x50x32.3mm -Innenmaß: 70x70x270mm (42) -Eingangsspannung: 100-240V AC 63x63x210mm (36) -Ausgangsspannung: 12V DC -Gewicht: 1.2kg (42) -Augangsstrom: 0.7kg (36) -Gewicht: 0.12kg -Material: Wiederstandfähiges Technopolymer, (Fig.
  • Seite 23 Fig. 1 Fig. 2 Fig. 3...
  • Seite 24 Fig. 4 Fig. 5 Fig. 6 Fig. 7...
  • Seite 25 Fig. 8 SWITCHING HEATER PLUG BLOWER CAMERA OUT POWER SUPPLY IN Fig. 9 CAMERA HEATER SWITCHING PLUG CAMERA OUT BLOWER POWER CAMERA Fig. 10 SUPPLY IN HEATER SWITCHING PLUG CAMERA OUT POWER CAMERA Fig. 11 SUPPLY IN BLOWER...
  • Seite 26 Fig. 12 MASSIMA ROTAZIONE SULL'ASSE TRASVERSALE: 0˚ MAXIMAL ROTATION ON THE TRANSVERSAL AXIS: 0˚ ROTATION MAXI SUR L’AXE TRANSVERSAL: 0˚ MAXIMALE DREHUNG AUF DER QUERACHSE: 0˚ MASSIMA INCLINAZIONE SULL'ASSE LONGITUDINALE: +/- 45˚ MAXIMAL INCLINATION ON THE LONGITUDINAL AXIS: +/- 45˚ INCLINATION MAXI SUL L’AXE LONGITUDINAL: +/- 45˚...
  • Seite 27 Fig. 14 Fig. 15 Fig. 16 Fig. 17 Fig. 18...
  • Seite 28 USEFUL USEFUL AREA AREA 99.5 USEFUL USEFUL AREA AREA 14.5...
  • Seite 31 Il produttore declina ogni responsabilità per eventuali danni derivanti da un uso improprio delle apparecchiature menzionate in questo manuale. Si riserva inoltre il diritto di modificarne il contenuto senza preavviso. Ogni cura é stata posta nella raccolta e nella verifica della documentazione contenuta in questo manuale, tuttavia il produttore non può...

Diese Anleitung auch für:

Verso compact

Inhaltsverzeichnis