Herunterladen Inhalt Inhalt Diese Seite drucken
Videotec HEK Bedienungsanleitung

Videotec HEK Bedienungsanleitung

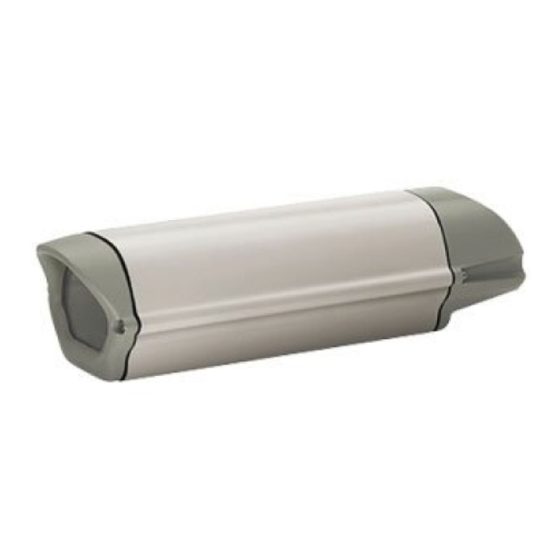
Gehäuse aus aluminium und thermoplastischem material
Inhaltsverzeichnis

Werbung

Verfügbare Sprachen
  • DE

Verfügbare Sprachen

  • DEUTSCH, seite 41
English - Instructions manual
EN
Italiano - Manuale di istruzioni
IT
Français - Manuel d'instructions
FR
Deutsch - Bedienungslanleitung
DE
Русский - Руководство по эксплуатации
RU
Aluminium and thermoplastic housing
HEK

Werbung

Inhaltsverzeichnis
loading

Inhaltszusammenfassung für Videotec HEK

  • Seite 1 Aluminium and thermoplastic housing English - Instructions manual Italiano - Manuale di istruzioni Français - Manuel d’instructions Deutsch - Bedienungslanleitung Русский - Руководство по эксплуатации...
  • Seite 3 Aluminium and thermoplastic housing English - Instructions manual...
  • Seite 5: Inhaltsverzeichnis

    Contents ENGLISH 1 About this manual ......................5 1.1 Typographical conventions ..........................5 2 Notes on copyright and information on trademarks..........5 3 Safety rules ........................5 4 Identification ........................ 6 4.1 Product description and type designation ....................6 4.2 Product markings ..............................6 5 Preparing the product for use ..................
  • Seite 7: About This Manual

    1 About this manual 3 Safety rules Before installing and using this unit, The manufacturer declines all responsibility please read this manual carefully. Be sure for any damage caused by an improper use to keep it handy for later reference. of the appliances mentioned in this manual.
  • Seite 8: Identification

    CCD cameras equipped with fixed If there are obvious signs of damage, lenses. Sturdy construction at a light weight, HEK contact the supplier immediately. has two mounting options at the same time: regular (WBMA) or feed-through (WBOVA2) bracket.
  • Seite 9: Installing And Assembling

    6 Installing and assembling 6.1.2 How to install the camera This chapter describes how to install the camera Only specialised personnel should be into the housing. We wish to remind our customers allowed to install and assemble the device. that power supply can be drawn from the power supply or heating circuit, if available, after 6.1 Installation checking that the right supply voltage is used.
  • Seite 10: How To Install The Blower

    Rotate the internal slide in order to IN 115/230Vac allow access to its lower part. Fix the PTC element (01), by means of the relevant plate (02), on the lowest part of the internal slide. Run the wires along the channel provided and through the hole (03).
  • Seite 11: 12Vdc Power Supply

    6.1.4.1 12Vdc power supply 6.1.5 How to install the Remove the body as described in camera power supply paragraph How to open the housing. This chapter describes how to install the camera Fix the blower kit on the rear cover (01) using the power supply option into the housing.
  • Seite 12: Maintaining And Cleaning

    9.2 Mechanical 7 Maintaining and cleaning 3 cable glands 7.1 Window and plastic PMMA window (BxH): Ø 72mm (2.8in) cover cleaning (PC) Internal usable area (BxH): 82x62mm (3.2x2.4in) Internal usable length without accessories Surface dirt should be rinsed away with water and HEK26 260mm (10.2in) then the window cleaned with a neutral soap diluted...
  • Seite 13: Technical Drawings

    10 Technical drawings The values are in millimeters. 260 / 300 73.7 77.7 124.6 403 / 443 Fig. 15...
  • Seite 14 VIDEOTEC S.p.A. www.videotec.com Printed in Italy MNVCHEKB_1511_EN...
  • Seite 15 Custodia in alluminio e materiale termoplastico Italiano - Manuale di istruzioni...
  • Seite 17 Sommario ITALIANO 1 Informazioni sul presente manuale ................5 1.1 Convenzioni tipografiche ............................ 5 2 Note sul copyright e informazioni sui marchi commerciali ........5 3 Norme di sicurezza ....................... 5 4 Identificazione ......................6 4.1 Descrizione e designazione del prodotto ..................... 6 4.2 Marcatura del prodotto ............................
  • Seite 19: Informazioni Sul Presente Manuale

    1 Informazioni sul 3 Norme di sicurezza presente manuale Il produttore declina ogni responsabilità per eventuali danni derivanti da un Prima di installare e utilizzare questa unità, leggere uso improprio delle apparecchiature attentamente questo manuale. Conservare questo menzionate in questo manuale. Si manuale a portata di mano come riferimento futuro.
  • Seite 20: Identificazione

    CCD dotate di ottiche a focale fissa. In caso di evidenti segni di danno all'imballo Di peso leggero ma di costruzione robusta, HEK contattare immediatamente il fornitore. ha due varianti di montaggio: normale (WBMA) Conservare l'imballo nel caso sia necessario o con passaggio interno dei cavi (WBOVA2).
  • Seite 21: Installazione E Assemblaggio

    6 Installazione e 6.1.2 Installazione della telecamera Questa sezione descrive come installare la assemblaggio telecamera all’interno della custodia. Si ricorda che può essere prelevata l’alimentazione dal circuito L'installazione e l'assemblaggio vanno di riscaldamento o di alimentazione, ove presenti, eseguiti solo da personale specializzato. verificando preventivamente che sia quella corretta.
  • Seite 22: Installazione Del Ventilatore

    Far ruotare la slitta interna in modo da IN 115/230Vac permettere l’accesso alla sua parte inferiore. Fissare il PTC (01), tramite la relativa piastrina (02), sulla parte inferiore estrema della slitta interna. Passare il filo nella sede predisposta (03). Camera OUT Heater OUT Fig.
  • Seite 23: Alimentazione 12Vdc

    6.1.4.1 Alimentazione 12Vdc 6.1.5 Installazione dell’alimentatore Rimuovere il corpo come descritto nel per telecamera paragrafo Apertura della custodia. Questa sezione descrive come installare l’opzione Fissare il ventilatore sul fondo (01) tramite le apposite alimentatore all’interno della custodia. viti (02) in dotazione, con il flusso dell'aria rivolto L’alimentatore ha una tensione di ingresso di 100- verso l'interno.
  • Seite 24: Manutenzione E Pulizia

    9.2 Meccanica 7 Manutenzione e pulizia 3 pressacavi 7.1 Pulizia del vetro e delle Finestra in PMMA (BxH): Ø 72mm parti in plastica (PC) Dimensioni utili interne (BxH): 82x62mm Lunghezza utile interna senza accessori Si consigliano saponi neutri diluiti con acqua o HEK26 260mm prodotti specifici per la pulizia delle lenti degli...
  • Seite 25: Disegni Tecnici

    10 Disegni tecnici I valori espressi sono in millimetri. 260 / 300 73.7 77.7 124.6 403 / 443 Fig. 15...
  • Seite 26 VIDEOTEC S.p.A. www.videotec.com Printed in Italy MNVCHEKB_1511_IT...
  • Seite 27 Caisson en aluminium et matériel thermoplastique Français - Manuel d'instructions...
  • Seite 29 Sommaire FRANÇAIS 1 À propos de ce mode d’emploi ..................5 1.1 Conventions typographiques ..........................5 2 Notes sur le copyright et informations sur les marques de commerce ....5 3 Normes de securité ....................... 5 4 Identification ........................ 6 4.1 Description et désignation du produit ......................
  • Seite 31: Propos De Ce Mode D'emploi

    1 À propos de ce 3 Normes de securité mode d’emploi Le producteur décline toute responsabilité pour les dommages éventuels dus à une Avant d’installer et d’utiliser cet appareil, utilisation non appropriée des appareils veuillez lire attentivement ce mode d’emploi. mentionnés dans ce manuel.
  • Seite 32: Identification

    Construits en profilé d’aluminium et matériel l’annulation de la garantie. plastique, les caissons HEK sont dotés d’un système d’ouverture, permettant un accès facile à la caméra 5.1 Contenu et déballage par simple glissement et accrochage vers l’avant du corps du caisson.
  • Seite 33: Installation Et Assemblage

    6 Installation et 6.1.2 Installation de la camera Cette section explique comment installer la assemblage caméra à l’intérieur du caisson. A noter que l’alimentation peut être prélevée du circuit de L’installation et l’assemblage chauffage ou d’alimentation, s’ils sont présents, doivent exclusivement être effectués en vérifiant préalablement qu’elle est correcte.
  • Seite 34: Installation Du Ventilateur

    Faites tourner le chariot interne afin de rendre IN 115/230Vac possible l’accès à sa partie inférieure. Fixez le PTC (01), au moyen de la plaquette fournie (02), sur l’extrémité inférieure du chariot interne. Faites passer les fils dans les coulisses (03). Camera OUT Heater OUT Fig.
  • Seite 35: Alimentation 12Vdc

    6.1.4.1 Alimentation 12Vdc 6.1.5 Installation de Enlevez le corps comme décrit dans le l’alimentation pour camera paragraphe Ouverture du caisson. Cette section explique comment installer Fixer le ventilateur sur le fond (01) au moyen l’alimentation optionnelle à l’intérieur du caisson. des vis fournies (02) avec l’écoulement d’air L’alimentation a une tension d’entrée de 100- vers l’intérieur.
  • Seite 36: Entretien Et Nettoyage

    9.2 Mécanique 7 Entretien et nettoyage 3 presse-étoupes 7.1 Entretiens de la vitre et Fenêtre en PMMA (BxH): Ø 72mm des parties en plastique (PC) Surface intérieure utile (BxH): 82x62mm Longueur intérieure utile sans accessoires Nous conseillons l’emploi, avec un chiffon HEK26 260mm souple, de savons neutres dilués avec de...
  • Seite 37: Dessins Techniques

    10 Dessins techniques Les valeurs sont entendues en millimètres. 260 / 300 73.7 77.7 124.6 403 / 443 Fig. 15...
  • Seite 38 MNVCHEKB_1511_FR HEADQUARTERS ITALY FRANCE UK / IRELAND U.S.A. / CANADA ASIA PACIFIC VIDEOTEC S.p.A. VIDEOTEC FRANCE S.A.R.L. VIDEOTEC UK SALES VIDEOTEC SECURITY, Inc. VIDEOTEC (HK) Ltd Tel. +39 0445 697411 Tel. +33 2 32094900 Tel. +44 0113 815 0047 Tel. +1 973 5950788 Tel.
  • Seite 39 Gehäuse aus Aluminium und thermoplastischem Material Deutsch - Bedienungslanleitung...
  • Seite 41 Inhaltsverzeichnis DEUTSCH 1 Allgemeines ........................5 1.1 Schreibweisen ................................. 5 2 Anmerkungen zum Copyright und Informationen zu den Handelsmarken .... 5 3 Sichereitsnormen ......................5 4 Identifizierung ......................6 4.1 Beschreibung und Bezeichnung des Produktes ..................6 4.2 Kennzeichnung des Produkts ..........................6 5 Vorbereitung des Produktes auf den Gebrauch ............
  • Seite 43: Allgemeines

    1 Allgemeines 3 Sichereitsnormen Lesen Sie bitte vor dem Installieren und Der Hersteller lehnt jede Haftung für dem Verwenden dieses Gerätes die eventuelle Schäden ab, die aufgrund Bedienungsanleitung sorgfältig durch. Bewahren unsachgemäßer Anwendung der in diesem Sie sie zum späteren Nachschlagen auf. Handbuch erwähnten Geräte entstanden ist.
  • Seite 44: Identifizierung

    Verpackung intakt ist oder offensichtliche geeignet, deren Optik eine feste Brennweite hat. Anzeichen von Stürzen oder Abrieb aufweist. Für das leicht, doch robust gebaute Gehäuse HEK Bei offensichtlichen Schadensspuren an der Verpackung gibt es zwei Montagevarianten: normal (WBMA) muss umgehend der Lieferant verständigt werden.
  • Seite 45: Installation Und Zusammenbau

    6 Installation und 6.1.2 Installation der Kamera In diesem Abschnitt wird beschrieben, wie Zusammenbau die Kamera im Inneren des Schutzgehäuses installiert wird. Es wird daran erinnert, daß die Installation und Zusammenbau Stromversorgung dem Heizungs- oder dem sind Fachleuten vorbehalten. Versorgungsstromkreis entnommen werden kann, wo diese vorhanden sind.
  • Seite 46: Installation Des Lüfters

    Den Innenschlitten drehen, so daß der IN 115/230Vac Zugang zum unteren Teil möglich wird. Mit Hilfe des dazugehörigen Plättchens (02) den PTC (01) am äußersten unteren Teil des Innenschlittens befestigen. Führen Sie den Heizungsdraht durch die vorgesehene Halterung ein (03). Camera OUT Heater OUT 115/230Vac...
  • Seite 47: Betriebsspannung 12Vdc

    6.1.4.1 Betriebsspannung 12Vdc: 6.1.5 Installation der Der Körper herausziehen wie im Paragraph Netzteil für Kamera Öffnung des Schutzgehäuses beschrieben ist. Dieser Abschnitt befaßt sich mit der Installation Den Lüfter mit den mitgelieferten Schrauben des Zusatzspeisegerätes im Innern des Gehäuses. (02) mit nach innen gerichtetem Luftfluß am Die Netzteil weist eine Eingangsspannung von 100- Boden befestigen (01).
  • Seite 48: Wartung Und Reinigung

    9.2 Mechanik 7 Wartung und Reinigung 3 Kabelschellen 7.1 Reinigung des Glases Fenster aus PMMA (BxH): Ø 72mm und der Kunststoffteile (PC) Innere Nutzabmessungen (BxH): 82x62mm Innere Nutzlänge ohne Zubehör Es werden empfohlen verwässerte neutrale Seifen HEK26 260mm oder spezifische Produkte zur Reinigung der Brillenlinsen zusammen mit einem weichen Tuch.
  • Seite 49: Technische Zeichnungen

    10 Technische Zeichnungen Maßangabe in Millimeter. 260 / 300 73.7 77.7 124.6 403 / 443 Fig. 15...
  • Seite 50 VIDEOTEC S.p.A. www.videotec.com Printed in Italy MNVCHEKB_1511_DE...
  • Seite 51 Гермокожух из алюминия и термопластика Русский - Учебник инструкции...
  • Seite 53 Индекс РУССКИЙ 1 Информация о данном руководстве ............... 5 1.1 Условные обозначения шрифтами ....................... 5 2 Примечания об авторских правах и информация о торговых марках ..... 5 3 Правила техники безопасности ................5 4 Идентификация ......................6 4.1 Описание и назначение изделия ........................6 4.2 Маркировка...
  • Seite 55: Информация О Данном Руководстве

    1 Информация о 3 Правила техники данном руководстве безопасности Перед установкой и использованием данного Производитель снимает с себя устройства необходимо внимательно всякую ответственность за ущерб, прочитать настоящее руководство. причиненный в результате Хранить данное руководство под рукой для использования оборудования не возможности...
  • Seite 56: Идентификация

    для установки телекамер CCD, оснащенных В случае видимых повреждений упаковки оптиками с неподвижным фокусом. немедленно свяжитесь с поставщиком. Легкий но крепкий кожух HEK имеет два Храните упаковку на случай, если необходимо варианта монтажа: обычный (WBMA) или с отправка изделия для ремонта.
  • Seite 57: Установка И Сборка

    6 Установка и сборка 6.1.2 Установка видеокамеры В данном разделе описывается, как установить Установка и сборка оборудования видеокамеру внутри предохранительного кожуха. должны выполняться только Напоминаем, что питание можно обеспечить квалифицированным персоналом. за счет контура подогрева или питания, если присутствуют, предварительно проверив, 6.1 Установка...
  • Seite 58: Установка Вентилятора

    Повернуть внутренний полоз так, чтобы ВХОД 115/24Vac IN 115/230Vac получить доступ к его нижней части. Закрепить PTC (01), с помощью соответствующей пластинки (02), на нижней внешней части внутреннего полоза. Протянуть провод в предназначенное гнездо (03). Камера ВЫХОД Нагреватель ВЫХОД Camera OUT Heater OUT 115/230Vac 115/230Vac...
  • Seite 59: Питание 12 В Пост. Т

    6.1.4.1 Питание 12 В пост. т. 6.1.5 Установка блока Снять корпус, как описано в питания для телекамеры параграфе Открытие кожуха. В данном разделе описывается, как Закрепить вентилятор на стенке (01) установить возможный блок питания специальными винтами (02) из комплекта, внутрь предохранительного кожуха. направляя...
  • Seite 60: Техническое Обслуживание И Очистка

    9.2 Механическая часть 7 Техническое обслуживание и очистка 3 кабельные муфты Стекло PMMA (ШхВ): Ø 72 мм 7.1 Очистка стекла Полезные внутренние размеры (ШхВ): 82x62 мм Полезная внутренняя длина без комплектующих и пластмассовых HEK26 260 мм компонентов (ПК) HEK30 300 мм Рекомендуем...
  • Seite 61: Технические Чертежи

    10 Технические чертежи Значения выражены в миллиметрах. 260 / 300 73.7 77.7 124.6 403 / 443 Рис. 15...
  • Seite 62 VIDEOTEC S.p.A. www.videotec.com Напечатано в Италии MNVCHEKB_1511_RU...
  • Seite 64 Email: info@videotec.com Tel. +33 1 60491816 - Fax +33 1 69284736 Email: info.fr@videotec.com Asia Pacific Videotec (HK) Ltd Americas Videotec Security, Inc. Flat 8, 19/F. On Dak Industrial Building, No. 2-6 Wah Sing Street Gateway Industrial Park, 35 Gateway Drive, Suite 100 Kwai Chung, New Territories - Hong Kong Plattsburgh, NY 12901 - U.S.A.

Inhaltsverzeichnis