OMAS T 210 Bedienungsanleitung
Knochensägen

Inhaltszusammenfassung für OMAS T 210
- Seite 1 T 210 T 250 MANUALE D'USO SEGAOSSI INSTRUCTION MANUAL BANDSAWS BEDIENUNGSANLEITUNG KNOCHENSÄGEN MANUEL D’USAGE SCIES A OS MANUAL DE USO SERRADORAS PARA HUESOS Filename: COP_T210.PM6 6/06/97...
- Seite 2 Sehr geehrter Kunde Cher Client, Las serradoras OMAS y sus Die Knochensägen OMAS und ihr Les scies à os OMAS avec leurs accesorios han sido construidos Sonderzubehör werden nach der accessoires ont été fabriqués selon les según las normas 98/37 CEE EWG 98/37 Maschinenrichtlinie, CEE 98/37 Directives des machines.
- Seite 3 PART 1 PARTE 1 Gentile Cliente Dear Customer, I segaossi OMAS e i loro accessori sono The OMAS bandsaw machines and their stati progettati secondo la accessories are manufactured in Direttive Macchine 98/37 CEE accordance with the EEC 98/37 rispondono ai requisiti richiesti dalla Machinery Directive they meet al legislazione alla data di costruzione.
- Seite 4 Parte 2 Teil 2 Partie 2 INHALTSVERZEICHNIS TABLES DES MATIERES INDICE BESCHREIBUNG DESCRIPTION DESCRIPCION Teil 1 Partie 1 Parte 1 Teil 2 Partie 2 Parte 2 Inhaltsverzeichnis Table des matieres Indice Teil 3 Partie 3 Parte 3 Allgemeine Liefernormen Notes générales à la livraison Notas generales de entrega Lieferungsbedingungen Conditions de livraison...
-
Seite 5: Inhaltsverzeichnis
Part 2 Parte 2 INDICE CONTENTS DESCRIZIONE DESCRIPTION Parte 1 Part 1 Parte 2 Part 2 Indice Index Parte 3 Part 3 3/1-3 Note generali alla consegna General delivery conditions Condizioni di fornitura Delivery conditions Identificazione della macchina Machine identification Elenco optional List of optional Parte 4... - Seite 6 Para cualquier información Firma OMAS bitte erwähnen addressez-vous au fabricant dirigirse al constructor OMAS, Sie immer die Registriernummer. OMAS et indiquez toujours le citando siempre el número de numéro de matricule indiqué sur matrícula colocada en la placa les plaques d’identification.
- Seite 7 7 Schema elettrico 7 Wiring diagram Identificazione della Machine identification macchina Per qualsiasi informazione, ri- In any comunication with OMAS volgersi al costruttore OMAS, the serial number indicated on citando sempre il numero di the identification label must be matricola riportato sulla quoted.
- Seite 8 Teil 3 Partie 3 Parte 3 Liste der Sonderzubehörteile Liste des Options Lista de Opcionales ° Bez. Beschreibung Ref. Description Descripciòn ° Ref. 33 Die regelbare Sägeblat- 33 Le guide lame réglable est 33 El guía-cuchilla regulable tführung dient dazu, das utile pour maintenir rigide la sirve para mantener rígida la Sägeblatt unter jeder...
- Seite 9 Parte 3 Part 3 Elenco Optionals List of Optional ° ° Descrizione Description Rif. Rif. 33 Guidalama regolabile con 33 Adjustable blade guide is for keeping the blade stiff spingimerce, utile per man- in ay cutting condition, tenere rigida la lama in leaving exposed only the qualsiasi condizione di ta- part necessary for cutting.
- Seite 10 Teil 3 Partie 3 Parte 3 ° Bez. Beschreibung Ref. Description Descripciòn ° Rif. Typ Sägeblätter Types de lame Tipos de cuchilla 40 Typ A Sägeblatt aus 40 Lame en acier inox Cuchilla en acero inox rostfreiem Stahl mit type A avec griffe façon- tipo A con diente en profíliertem Zahn für einen née pour un coupe douce...
- Seite 11 Parte 3 Part 3 ° ° Descrizione Description Rif. Rif. Tipi di Lame Blades types 40 Lama acciaio inox tipo A 40 Stainless steel Blade con dente sagomato per un type A, shaped teeth for a taglio morbido senza soft cut without residue, residui, ideale per cotolette.
-
Seite 12: Beschreibung
Teil 4 Partie 4 Parte 4 Beschreibung Description Descripcion Unterverschluß der Schutztür Fermature inferiéure porte Cierre inferior puerta und Anlaßschalter de protection et dispositif de protección y interruptor de de commande encendido Sägeblattspannunglshebel Levie tension lame Tensor cuchilla Sägeblatt Lame dentée Cuchilla dentada Schneidguthalter Porte-produit... -
Seite 13: Definizione Componenti
Part 4 Parte 4 Definizione componenti Definitions Optional Chiusura inferiore Puleggia superiore Lower blade Bottom wheel porta protezione guard lock Interruttore ON/OFF Puleggia inferiore ON/OFF switch Top wheel Blade tensioning Portionning Dispositivo Dispositivo di tendilama regolazione device plate spessore taglio Lama dentata Saw blade Pulsante ripristino... -
Seite 14: Technische Eingenschaften
TEIL 5 PARTIE 5 PARTE 5 Características Technische Caractéristíques tecnicas Eingenschaften techniques Außenmaße (mm) Dimensionement (mm) Espacio máximo necesario (mm) Gewicht Kg Poids Kg Peso Kg Avec pieds sans emballage Mit Füßchen ohne Verpackung Con pies sin embalaje Avec pieds avec emballage Mit Füßchen mit Verpackung Con pies con embalaje Avec base sans emballage... -
Seite 15: Caratteristiche Tecniche
PARTE 5 PART 5 Caratteristiche tecniche Technical data Dimensioni (mm) Dimensions (mm) Peso Kg T 210 T 250 Weight Kg Con piedini senza imballo With feet without packaging Con piedini con imballo With feet with packaging Con base senza imballo... - Seite 16 Teil 6 Partie 6 Parte 6 Prescriptions de Prescripciones de Sicherheits- sécuritè seguridad vorschriften Pour toutes éventualités ou avant Para cualquier eventualidad o an- Für jede Eventualität oder vor der le netoyage et l'entretien, éteindre tes de la limpieza y manutención Reinigung und der Wartung schal- la scie à...
-
Seite 17: Prescrizioni Di Sicurezza
Part 6 Parte 6 Prescrizioni Safety di sicurezza rules Prima della pulizia e manuten- Before cleaning and main- zione spegnere il segaossi e tenance, turn off the bandsaw isolarlo dalle fonti di energia. and disconnect the plug. In qualsiasi caso quando il Whenever the bandsaw segaossi non é... - Seite 18 Teil 6 Partie 6 Parte 6 Les personnes préposées Las spersonas cercanas a la Verwenden Sie immer àl'emploi ne doivent pas porter máquina no tienen que llevar Schutzhandschuhe bevor Sie des vêtements flottants ou des ropa vaporosa o mangas die Sageblätter montieren oder manches ouvertes.
- Seite 19 Parte 6 Part 6 Le persone esposte non devo- Any person in the vicinity of the no avere indumenti svolazzanti machine should not wear loose o maniche aperte. clothes or opened sleeves. No other persons may be near Durante il lavoro non ci devono the bandsaw machine during its essere persone estranee in vi- working.
- Seite 20 Teil 7 Partie 7 Parte 7 Installation Instalación Installation IMPORTANT IMPORTANTE WICHTIG La machine doit être installèe La máquina debe ser instalada Die maschine muß in der Nähe près d'une prise de courant. cerca de un enchufe de corriente. einer Steckdose installiert werden.
- Seite 21 Part 7 Parte 7 Installazione Installation IMPORTANTE IMPORTANT La macchina deve essere The machine must be installed installata vicino ad una presa near to a mains socket. di corrente. Tipi di fornitura Supply types Il segaossi può essere fornito The bandsaws can be supplied in tre differenti versioni: with three versions: Piedini di appoggio...
- Seite 22 Teil 7 Partie 7 Parte 7 Montage falls C Instalation cas C Instalación caso C 1 Mit der niedergelegten 1 Fixer les 2 pieds avec la 1 con la máquna echada fijar las Machine verschrauben Sie machine étendue, la plaque 2 patas, la chapa taladrada y la die 2 Beinstütze, die loch- perforée et la scie à...
- Seite 23 Parte 7 Part 7 Installazione caso C Installation case C 1 Sdraiare la macchina, 1 Lay down the machine, fissare le due gambe e la fix the two legs and the piastra forata al segaossi drilled plate and the band- utilizzando le quattro viti e le saw using the supplied four quattro rondelle in dotazione.
- Seite 24 Teil 7 Partie 7 Parte 7 4 Sägeblatt entfernen 4 Enlever la lame dentée 4 Quitar la cuchilla dentada VORSICHT ATTENTION ATTENCIÓN Sägeblatt in einem sicheren Ranger la lame dentée dans Guardar la cuchilla dentada en Platz aufbewahren un lieu sûr un puesto seguro.
-
Seite 25: Pulizia Preliminare
Parte 7 Part 7 4 Rimuovere la lama dentata 4 Remove the saw blade ATTENZIONE ATTENTION Riporre la lama dentata in Position the saw blade in a un luogo sicuro. safety place. Pulizia preliminare Preliminary cleaning La macchina e tutti i compo- Before assembling, clean off nenti devono essere puliti the protective oil from the... - Seite 26 Teil 7 Partie 7 Parte 7 Sägeblatt Lame dentée Cuchilla dentada 7 Sich mit schutzhandschuhen 7 Se munir de gants de 7 Proveerse de guantes versehen protection de proteccion 8 Den Sägeblatthebel drehen, 8 Tourner le levier de tension 8 Girar el tensor de la cuchilla so daß...
- Seite 27 Parte Part 7 Lama dentata Saw blade 7 Munirsi di guanti protettivi 7 Wear protectives gloves 8 Ruotare la leva del 8 Turn the blade tensioning dispsositivo tendilama device lever so that the in modo che la puleg- top wheel is raised. gia inferiore si sollevi.
- Seite 28 Teil 7 Partie 7 Parte 7 12Die Scheibe manuell drehen, 12Tournez la poulie superieur 12Girar la polea superior manual- so daß sich das Sägeblatt manualment de sorte que la mente de manera que la cinta richtig stellt. lame se place correctement. se coloque correctamente 13Sich versichern, daß...
- Seite 29 Parte 7 Part 7 12Ruotare manualmente la 12Rotate manually rotate the puleggia superiore per bottom wheel in order to posizionare correttamente position the saw blade la lama dentata. correctly. 13Controllare che i denti di 13Make sure that the teeth taglio sporgano completa- protrude from the positioning mente dalla puleggia bottom wheel for their whole...
-
Seite 30: Connexion Électrique
Teil 7 Partie 7 Parte 7 Anschluß Connexion Connexión électrique eléctrica Vor Anschlu3 der maschine an Vérifiez si la tension de la ligne Controlar que el voltaje das strommetz ist zu prüfen,ob correspond aux données corresponde a los datos que die elktriscen. -
Seite 31: Allacciamento Elettrico
Parte 7 Part 7 Allacciamento Electrical Eletrrico supply Controllare che la tensione di Check that the electrical supply linea corrisponda ai dati di corresponds to the data on the targa e che sia corredata di label and that it is supplied with messa a terra. -
Seite 32: Descripción Máquina
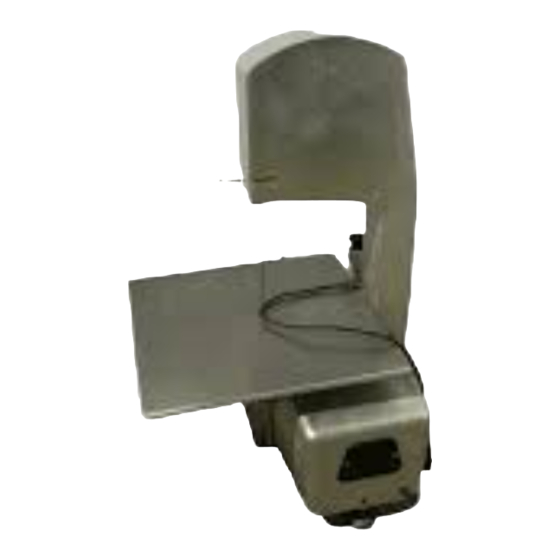
Teil 8 Partie 8 Parte 8 Beschreibung der Description de la Descripción máquina Maschine machine Die Knochensägen sind Les scies a os répresentent la Las serradoras representan la heutzutage die beste Lösung, um plus haute evolution, jusqu’au- maxima evolución, hasta hoy einen schnellen und perfekten jourd’hui obtenue, pour avoir une alcanzada, para obtener un corte... -
Seite 33: Descrizione Macchina
Part 8 Parte 8 Descrizione macchina Machine description I segaossi rappresentano la Bandsaw machines represent massima evoluzione , fino ad the state-of-the art in fast, oggi raggiunta, per ottenere un perfect cuting for any food-stuff. taglio veloce e perfetto di qual- siasi prodotto alimentare. - Seite 34 Teil 8 Partie 8 Parte 8 Die Sägeblattführung- und Le groupe guide lame-racle Los grupos guía cintalimpia- Sageblattabschaber Gruppen lame obtenu par des résultats dores sintesis logradas de solu- Sind das Ergebnis von erfolgrei- techniques très avancés, est con- ciones técnicas, compuestos de chen technischen Lösungen.
- Seite 35 Parte 8 Part 8 Guidalama-raschialama: Blade guide- Blade-scraper: dispositivi sintesi di riuscite devices resulting from technical soluzioni tecniche costituiti da research, consist of a nylon un corpo in nylon con fibra di body with glass fibre, suppor- vetro, supportano due alberi in ting two stainless steel shafs acciaio inossidabile che a loro that guide a wheel in tough...
- Seite 36 Teil 8 Partie 8 Parte 8 Durch die Innenantihaftver- Le revêtement interieur anti- El revestimiento interno anti- kleidung kann man viel adhérent permet d’economiser haderente permite ahorrar Reinigungszeit ersparen. Durch une quantité appréciable de mucho tiempo para limpiarla. einen Wasserstrahl oder mit temps pour le nettoyage.
- Seite 37 Parte 8 Part 8 Rivestimento interno Internal non-stick covering: antiaderente: permette di thanks its it is possible to save risparniare tempo nella pulizia. time cleaning. Con un getto d'acqua o con With a water jet or with a wet uno straccio bagnato potrete cloth you can wash and clean lavare e pulire il vostro your bandsaw, it is completely...
- Seite 38 Teil 9 Partie 9 Parte 9 Funktionieren der Fonctionnement de la Funcionamiento de la Knochensäge scie à os serradora para huesos Verarbeitung der Travail des produits Elaboración dos Produkte productos Die Knochensäge ist zum Schnei- La scie à os est indiquée pour La serradora para huesos es den von frischem bzw gefrorenem couper la viande fraîche et...
-
Seite 39: Bandsaw Functioning And Use
Part 9 Parte 9 Funzionamento ed Bandsaw functioning uso del segaossi and use Tipi di prodotto da Types of product to lavorare worke Il segaossi permette di With the bandsaw is possible soddisfare ogni esigenza di to satisfy any cutting needs, taglio, dalla carne con o senza from meat with or without bone osso a quella congelata, al... - Seite 40 Teil 9 Partie 9 Parte 9 GEFAHR DANGER PELIGRO 6 Mit der rechten hand weit 6 Avec le main droite, loin 6 Con la mano derecha von dem Sägeblatt lehnen de la lame, mettre le produit alejada de la cinta apoyar el sie das zu Sägenden a trancher sur le plan género que hay que cortar...
- Seite 41 Parte 9 Part 9 PERICOLO DANGER 6 Con la mano destra lonta- 6 With your right hand away na dalla lama dentata, from the saw blade, put appoggiare il prodotto da the product to be cut on tagliare al dispositivo di the portioning plate.
- Seite 42 Teil 10 Partie 10 Parte 10 Dispositif thermique Thermische Dispositivo de seguridad de sécurité Sicherheitsvorrichtung termica ATTENTION VORSICHT ATENCION Le moteur de cette machine Diese Maschine ist mit Esta máquina está dotada de est douée de protection Motorsicherheits vorrichtung protección térmica en el thermique.
-
Seite 43: Thermic Safety Device
Part 10 Parte 10 Dispositivo di Thermic safety sicurezza termico device ATTENZIONE WARNING Questa macchina é dotata This machine is fitted with di protezione termica al motor thermic safety device. motore. Se durante un uso If the motor stops after a particolarmente intenso il long use wait 10-20 minutes motore si arresta attendere... -
Seite 44: Motorschutzschalter (Maschine Mit Einphasigem Motor)
Teil 10 Partie 10 Parte 10 Motorschutzschalter Dispositif protege- Salvamotor (maquina (Maschine mit moteur (machine avec con motor monofase) einphasigem Motor) moteur monophase) Die Maschine mit einem La machine est douée d'un La máquina está provista de un Motorschutzschalter versehen, dispositif protège-moteur qui a la salvamotor cuya función es de der den Motor im... -
Seite 45: Single Phase Motor)
Parte 10 Part 10 Salvamotore Overload switch (macchina con (machine with motore monofase) single-phase motor) La macchina é provvista di un The machine is provided with salvamotore la cui funzione é an overload switch fitted di proteggere il motore in caso underneath that protects the di uno sforzo meccanico motor in the event of any undue... -
Seite 46: Reinigung
Teil 11 Partie 11 Parte 11 Reinigung Nettoyage Limpieza WICHTIG IMPORTANT IMPORTANTE Wenn die Reinigung der Si l'operateur ne nettoie pas La serradora debe este Knochensäge nicht häufig souvent la machine, les limpiada con frequencia los erfolgt, die Produktresten residus de produit se residuos se descomponen y zersetzen sich und decomposent et ils sont la... -
Seite 47: Cleaning
Part 11 Parte 11 Pulizia Cleaning IMPORTANTE IMPORTANT Il segaossi deve essere The bandsaw must be pulito frequentemente in frequently cleaned, any quanto i residui dei prodotto product residue will putrefy lavorati si decompongono e and will cause pollution and sono causa di inquinamento infection of products that will e infezione per i prodotti che... - Seite 48 Teil 11 Partie 11 Parte 11 6 Nehmen Sie den 6 Enlever la poulie superieur 6 Quitar la polea superior oberen Riemen ab WICHTIG IMPORTANT IMPORTANTE Dem Untere Riemen, kann La poulie inferieur peut être La polea inferior puede ser einfach von der Welle abgezogen facilment enlevée de l'arbre extraída con facilidad del árbol...
- Seite 49 Parte 11 Part 11 6 Sollevare e sfilare la 6 Lift up and take off puleggia superiore the bottom wheel IMPORTANTE IMPORTANT La puleggia inferiore, può The top wheel, wich can be essere facilmente sfilata easily taked off to the motor dall'albero motore.
- Seite 50 Teil Partie 11 Parte 11 9 Waschen Sie die 9 Laver les parties détachées 9 Lavar las partes extraídas herausgenommenen teile mit avec eau courante. con agua corriente. fließendem Wasser. 10Waschen Sie den größten 10Nettoyer les parties plus 10Limpiar por encima con un Schmutz mit einer grandes avec un petit balai à...
- Seite 51 Parte 11 Part 11 9 Lavare le parti asportate 9 Wash the parts removed con acqua corrente. with running water. 10Pulire i residui di prodotto 10Clean the residuals of con uno scovolino a setole product with a small brush morbide e uno straccio. with soft bristles and a cloth.
-
Seite 52: Wartung
Teil 11 Partie 11 Parte 11 14Die Riemen in umgekehrter 14Remonter les deux poullies 14Volver a montar las dos poleas Reihenfolge montieren selon les instructiones inverses. según el procedimiento pero und bemerken Sie, daß die Mais attention que la poulie a la inversa. -
Seite 53: Lubrificazione
Parte 11 Part 11 14Rimontare le puleggie 14Reassemble the wheels secondo la procedura following the reverse proce- inversa. dure. Fare attenzione che la Making sure thet the top puleggia inferiore sia wheel is perfectly central centrata nella spina a fondo on the shaft and that corsa, che la molla di fermo retaining spring is correctly... - Seite 54 Für jede Störung immer den En cas d'un fonctionnement Para cualquier OMAS Kundendienst anrufen. irrégulier quelconque, funcionamiento anormal, consultez l'Assistence OMAS. consultar el Servicio de Asistencia OMAS. 12/1...
- Seite 55 Part 12 Parte 12 ANOMALIA PROBLEM MOTORE MONOFASE, SE THE SINGLE-PHASE MO- DURANTE L'USO SI FERMA TORS STOPS DURING USE Soluzione Corrective action Premere il pulsante di ripristino Push the motor reset switch. motore. Riavviare la macchina Restart the machine following secondo la procedura standard the standard procedure (Parte 10).
- Seite 56 à la requiere el servicio. charge de celui qui demande le service. OMAS lehnt jede mögliche La OMAS est relevée de toute OMAS está excluida de toda Verantwortung für responsabilité et engagement responsabilidad y obligación Personenschäden ab.
-
Seite 57: Warranty
La OMAS si impegna a OMAS wil replace or repair in sostituire e riparare presso il its factory any part that, in its proprio stabilimento, qualsiasi judgement, turns out to be parte che risulti anche a suo defective.