Herunterladen Inhalt Inhalt Diese Seite drucken
Metz mecablitz 64 AF-1 digital Bedienungsanleitung

Metz mecablitz 64 AF-1 digital Bedienungsanleitung

Für nikon-digitalkameras incl. cls-system
Vorschau ausblenden Andere Handbücher für mecablitz 64 AF-1 digital:
Inhaltsverzeichnis

Werbung

Verfügbare Sprachen
  • DE

Verfügbare Sprachen

  • DEUTSCH, seite 1
mecablitz 64 AF-1 digital
für / for Nikon-Digitalkameras incl. CLS-System
Bedienungsanleitung, Mode d'emploi, Gebruiksaanwijzing,
Operating instruction, Manuale istruzioni, Manual de instrucciones
www.metz.de

Werbung

Inhaltsverzeichnis
loading

Inhaltszusammenfassung für Metz mecablitz 64 AF-1 digital

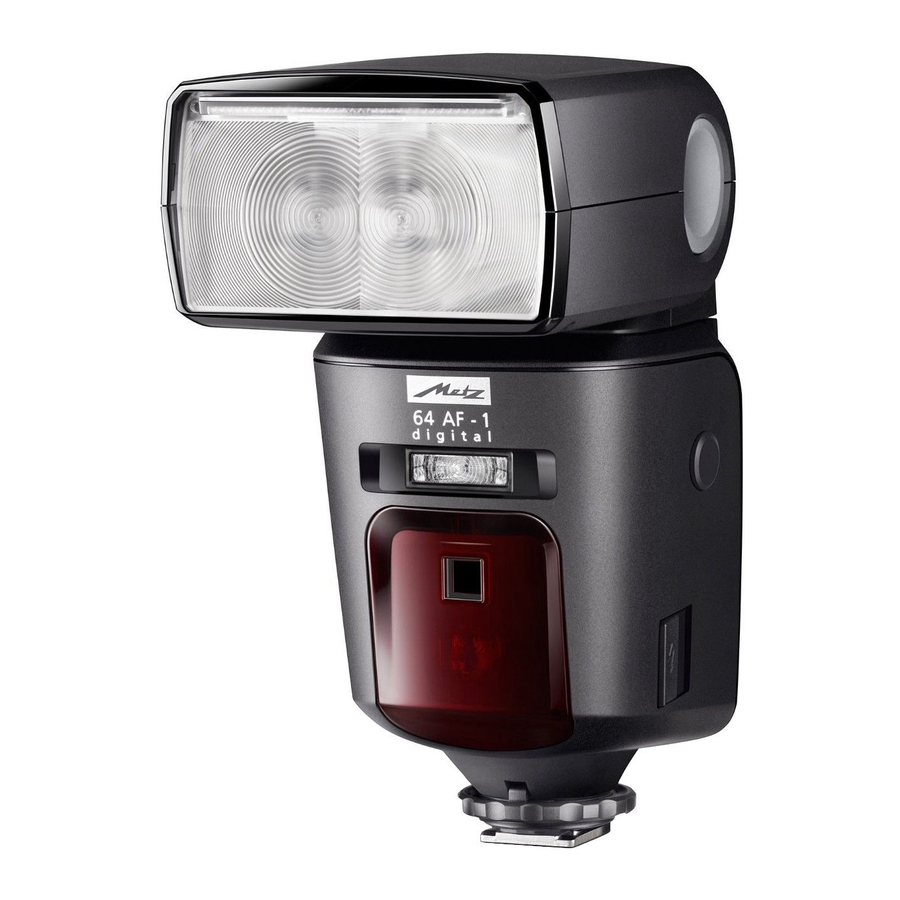
  • Seite 1 64 AF-1 digital für / for Nikon-Digitalkameras incl. CLS-System Bedienungsanleitung, Mode d’emploi, Gebruiksaanwijzing, Operating instruction, Manuale istruzioni, Manual de instrucciones www.metz.de...
  • Seite 2: Inhaltsverzeichnis

    Vorwort ..........3 10.1.1 Remote-Master-Betrieb einstellen .
  • Seite 3: Vorwort

    11.6 AF-Hilfslicht (AF-BEAM) ....... 39 Vielen Dank, dass Sie sich für ein Metz Produkt entschieden haben.
  • Seite 4: Sicherheitshinweise

    1 Sicherheitshinweise • Das Blitzgerät ist ausschließlich zur Verwendung im fotografischen Bereich vor- In Umgebung von entflammbaren Gasen gesehen und zugelassen! oder Flüssigkeiten (Benzin, • Nur die in der Bedienungsanleitung Lösungsmittel etc.) darf das Blitzgerät bezeichneten und zugelassenen Strom- keinesfalls ausgelöst werden! quellen verwenden! EXPLOSIONSGEFAHR! •...
  • Seite 5: Dedicated-Blitzfunktionen

    • Beim Auslösen eines Blitzes darf sich kein 2 Dedicated-Blitzfunktionen lichtundurchlässiges Material unmittelbar Die Dedicated-Blitzfunktionen sind speziell vor oder direkt auf der Reflektorscheibe auf das Kamerasystem abgestimmte befinden. Die Reflektorscheibe darf nicht Blitzfunktionen. In Abhängigkeit vom verunreinigt sein. Bei Nichtbeachtung kann Kameratyp werden dabei verschiedene es, durch die hohe Energie des Blitzlichtes, Blitzfunktionen unterstützt.
  • Seite 6: Blitzgerät Vorbereiten

    • Vorblitzfunktion zur Reduzierung des 3 Blitzgerät vorbereiten Rote-Augen-Effektes 3.1 Montage des Blitzgerätes • Drahtloser Remote-Blitzbetrieb (Nikon Advanced Wireless Lighting) Blitzgerät auf die Kamera montieren • Servo-Blitzbetrieb Kamera und Blitzgerät vor der Montage oder • Spot-Zoom-Betrieb Demontage ausschalten. • Wake-Up-Funktion für das Blitzgerät •...
  • Seite 7: Stromversorgung

    3.2 Stromversorgung Batterien austauschen Batterien- bzw. Akkuauswahl Die Akkus/Batterien sind leer bzw. ver- braucht, wenn die Blitzfolgezeit (Zeit vom Das Blitzgerät kann wahlweise betrieben Auslösen eines Blitzes mit voller Lichtlei- werden mit hochwertigen: stung, z.B. bei M, bis zum erneuten •...
  • Seite 8: Ein- Und Ausschalten Des Blitzgerätes

    3.3 Ein- und Ausschalten des PARAMETER Nach Drücken der Taste können PARAMETER die Blitzparameter eingestellt werden. Blitzgerätes • Blitzgerät mit der Taste einschalten. PARAMETER O Der Startbildschirm erscheint. P (Teillichtleistung), Kap. 7.3; 10.1.3.1 und Das Blitzgerät schaltet danach immer mit P / EV 10.4.3 der zuletzt verwendeten Betriebsart...
  • Seite 9: Info

    OPTION 3.5 INFO Nach Drücken der Taste können die OPTION Optionen eingestellt werden. Die aktuellen Einstellungen des Blitzgerätes können während des Betriebs angezeigt OPTION RAPID (schnelle Blitzfolgezeiten), Kap. 11.1 werden. SUB-REFL. (Zweitreflektor), Kap. 11.2 RAPID • Auf dem Touch-Display auf die Sensortaste ZOOM SIZE (Aufnahmeformat-Anpassung), SUB-REFL.
  • Seite 10 um Energie zu sparen und die Stromquellen Automatische Geräteabschaltung einstellen vor unbeabsichtigtem Entladen zu schützen. • Blitzgerät mit der Taste einschalten. Die aktive automatische Geräteabschaltung Der Startbildschirm erscheint. wird im INFO-Display mit angezeigt. Die Das Blitzgerät schaltet danach immer mit Blitzbereitschaftsanzeige und die der zuletzt verwendeten Betriebsart...
  • Seite 11: Led-Anzeigen Am Blitzgerät

    4 LED-Anzeigen am Blitzgerät - an der Kamera einen höheren ISO-Wert ein- stellen. 4.1 Blitzbereitschaftsanzeige Beachten Sie die Reichweitenanzeige im Bei aufgeladenem Blitzkondensator leuchtet Display des Blitzgerätes (siehe 5.2). am Blitzgerät die Taste grün auf und zeigt damit die Blitzbereitschaft an. 5 Anzeigen im Display Das bedeutet, dass für die nächste Die meisten Kameras übertragen die Werte...
  • Seite 12: Anzeige Der Blitzbetriebsart

    5.1 Anzeige der Blitzbetriebsart Reichweitenanzeige in den i TTL-/ i TTL BL-Blitzbetriebsarten Im Display wird die eingestellte Blitzbetriebs- art angezeigt. Dabei sind je nach Kameratyp TTL BL In den Blitzbetriebsarten verschiedene Anzeigen für die jeweils unter- TTL FP ; (siehe 7) wird im 0.6- 7.2 m stützte Blitzbetriebsart (z.B.
  • Seite 13 Reichweitenanzeige im manuellen Wird in diesen Kamerabetriebsarten die manuelle Blitzbetriebsart M eingestellt, so Blitzbetrieb M wird im Display zur Warnung „FEE“ angezeigt Im manuellen Blitzbetrieb wird im Display der und die Auslösung der Kamera verriegelt. Entfernungswert angezeigt, der für eine kor- 7.2 m Überprüfen Sie in diesem Fall die Kamera- rekte Blitzbelichtung des Motivs einzuhalten...
  • Seite 14: Anzeigen Im Kamerasucher

    6 Anzeigen im Kamerasucher 7 Blitzbetriebsarten Beispiele für Anzeigen im Kamerasucher: Je nach Kameratyp stehen folgende Blitzbetriebsarten zur Verfügung: Blitzsymbol blinkt • i TTL ( ), Kap. 7.1 Aufforderung zur Verwendung, bzw. zum TTL BL • i TTL BL ( ), Kap.
  • Seite 15: I-Ttl-Bl -Blitzbetrieb

    Blitzbelichtung von der Kamera an die 7.2 i-TTL-BL -Blitzbetrieb ( TTL BL Aufnahmesituation angepasst (näheres siehe Diese digitale Blitzbetriebsart wird nur von Kamerabedienungsanleitung). Kameras unterstützt, wenn Objektive verwen- Bei einer korrekt belichteten Aufnahme det werden, die Entfernungsdaten an die leuchtet für ca. 3s die Belichtungskontroll- Kamera übertragen (z.B.“D-AF-Nikkor- anzeige (siehe 4.2).
  • Seite 16: Manueller Blitzbetrieb

    dabei automatisch gelöscht bzw. lässt sich MODE nicht aktivieren. Es wird dann der normale -Blitzbetrieb • Auf dem Touch-Display die Sensortasten ausgeführt. drücken und auswählen. 7.3 Manueller Blitzbetrieb • Auf dem Touch-Display die Sensortaste Im manuellen Blitzbetrieb wird vom drücken. Blitzgerät ungeregelt die volle Energie abge- strahlt, sofern keine Teillichtleistung einge- stellt ist.
  • Seite 17: Automatische Kurzzeitsynchronisation Fp

    Manuelle Teillichtleistungen 7.4 Automatische Kurzzeitsynchronisation (FP) Im manuellen Blitzbetrieb kann eine Teillichtleistung eingestellt werden. Verschiedene Kameras unterstützen die Automatische Kurzzeitsynchronisation FP Einstellvorgang 7.2 m bzw.HSS (siehe Kamerabedienungsanlei- • Auf dem Touch-Display so oft die tung). Mit dieser Blitzbetriebsart ist es mög- Sensortaste für die Teillichtleistung Zoom lich, auch bei kürzeren Verschlusszeiten als...
  • Seite 18: Manueller Blitzbetrieb Mit Entfernungsvorgabe (Gn)

    Die Einstellung für die Automatische Betriebsart einstellen Kurzzeitsynchronisation erfolgt an der • Blitzgerät mit der Taste einschalten. Kamera (siehe Kamerabedienungsanleitung)! Der Startbildschirm erscheint. Im Display des Blitzgerätes wird dann zusätz- Das Blitzgerät schaltet danach immer mit TTL FP lich „FP“ ( ) angezeigt.
  • Seite 19: Automatik-Blitzbetrieb

    7.6 Automatik-Blitzbetrieb 7.7 Stroboskop-Blitzbetrieb Im Automatik-Blitzbetrieb misst der Der Stroboskop-Betrieb ist eine manuelle Fotosensor des Blitzgerätes das vom Blitzbetriebsart. Dabei können mehrere Motiv reflektierte Licht. Der Fotosensor Blitzbelichtungen auf einem Bild gemacht einen Messwinkel von ca. 25° und misst nur werden.
  • Seite 20 Stroboskop-Blitzfrequenz (f) STROBO Im Stroboskop-Blitzbetrieb kann die • An der Kamera eine entsprechende Blitzfrequenz (f) eingestellt werden. Die Betriebsart, z.B. einstellen. 2,5m Blitzfrequenz gibt die Anzahl der Blitze pro Zoom Sekunde an. Die Blitzfrequenz lässt sich von f(Hz) • Kameraauslöser antippen, damit ein 1 bis 100 einstellen.
  • Seite 21: Manuelle Blitzbelichtungskorrektur

    Blitzfrequenz (f(Hz))einstellen 8 Manuelle Blitzbelichtungs- STROBO • Auf dem Touch-Display die Sensortaste für korrektur f (Hz) die Blitzfrequenz drücken. 2,5m Die Blitzbelichtungsautomatik der meisten Zoom Kameras ist auf einen Reflexionsgrad von f(Hz) 25% (durchschnittlicher Reflexionsgrad von Blitzmotiven) abgestimmt. 1/16 Ein dunkler Hintergrund, der viel Licht absor- biert oder ein heller Hintergrund, der stark f (Hz) O •...
  • Seite 22: Sonderfunktionen

    dem Korrekturwert angepasst werden Achtung: Stark reflektierende Gegenstände (abhängig von Kameratyp)! im Bild des Motivs können die Belichtungs- automatik der Kamera stören. Die Aufnahme Einstellvorgang wird dann unterbelichtet. Reflektierende • Auf dem Touch-Display so oft die Gegenstände entfernen oder einen positiven 0.6- 7.2 m Sensortaste drücken, bis die Auswahl...
  • Seite 23 Automatische Zoomsteuerung Einstellvorgang Wenn das Blitzgerät mit einer Kamera betrie- • Taste so oft drücken, bis das ben wird, die Daten der Objektivbrennweite Auswahlmenü erscheint. überträgt, passt sich die Zoom-Position des • Auf dem Touch-Display die Sensortaste Reflektors automatisch der Objektivbrenn- PARAMETER drücken.
  • Seite 24 Beispiel: Weitwinkelstreuscheibe Sie benutzen ein Zoomobjektiv mit einem Mit der integrierten Weitwinkelstreuscheibe Brennweitenbereich von 35 mm bis 105 mm. können Brennweiten ab 12 mm ausge- In diesem Beispiel stellen Sie die Position leuchtet werden (Kleinbild-Format). des Reflektors des Blitzgerätes auf 35 mm. Weitwinkelstreuscheibe aus dem Reflektor Rückstellen auf Auto-Zoom...
  • Seite 25: Der Drahtlose Remote-Betrieb

    10 Der drahtlose Remote-Betrieb Damit sich mehrere Remote-Systeme im glei- chen Raum nicht gegenseitig stören stehen Das Blitzgerät unterstützt das drahtlose vier unabhängige Remote-Kanäle zur Nikon-Remote-System und ist kompatibel Verfügung. Master- und Slave-Blitzgeräte die zum Nikon-System „Advanced Wireless zum gleichen Remote-System gehören müs- Lighting“.
  • Seite 26: Remote-Master Betrieb

    10.1 Remote-Master Betrieb 10.1.2 Blitzbetriebsart am Master-Blitzgerät einstellen Die Slave-Gruppen A ist werkseitig aktiviert. Das Master-Blitzgerät und die Slave-Gruppen REMOTE A, B und C können aktiviert oder deaktiviert MASTER • Auf dem Touch-Display so oft die werden! — Sensortaste drücken, bis die Bei deaktiviertem Master-Blitzgerät über- —...
  • Seite 27: Belichtungskorrektur (Ev) Im Ttl-Betrieb

    10.1.2.1 Belichtungskorrektur (EV) im 10.1.2.2 Teillichtleistung im M-Betrieb am TTL-Betrieb am Master-Blitzgerät Master-Blitzgerät einstellen REMOTE einstellen Die Betriebsart wie unter 10.1.2 beschrieben MASTER REMOTE einstellen • Auf dem Touch-Display so oft die MASTER Sensortaste für die • Auf dem Touch-Display so oft die —...
  • Seite 28: Blitzbetriebsart Für Das Slave-Blitzgerät Am Master Einstellen

    10.1.3 Blitzbetriebsart für das 10.1.3.1 Belichtungskorrektur (EV) bzw. REMOTE REMOTE Slave-Blitzgerät am Master einstellen Teillichtleistung für das 1/16 MASTER MASTER 1/16 Slave-Blitzgerät am Master • Auf dem Touch-Display so oft die — einstellen A I B I C Sensortaste drücken, bis die —...
  • Seite 29: Remote-Kanal Einstellen

    10.1.4 Remote-Kanal einstellen 10.2 Remote-Slave-Blitzbetrieb Das Blitzgerät unterstützt das drahtlose Damit sich mehrere Remote-Systeme im glei- Nikon-Remote-System im Slave-Blitzbetrieb chen Raum nicht gegenseitig stören stehen und ist kompatibel zum „Advanced Wireless vier unabhängige Remote-Kanäle zur Lighting” System von Nikon. Dabei können Verfügung.
  • Seite 30: Remote-Slave-Blitzbetrieb Einstellen

    10.2.1 Remote-Slave-Blitzbetrieb einstellen 10.2.2 Slave-Kanal einstellen REMOTE • Blitzgerät mit der Taste einschalten. SLAVE Der Startbildschirm erscheint. • Auf dem Touch-Display die Sensortaste für Das Blitzgerät schaltet danach immer mit Gr A I Ch1 die Kanal-Gruppe (z.B. der zuletzt verwendeten Betriebsart drücken.
  • Seite 31: Slave-Gruppe Einstellen

    10.2.3 Slave-Gruppe einstellen 10.3 Prüfen des Remote-Blitzbetriebes REMOTE • Slave-Blitzgeräte so positionieren, wie für SLAVE die spätere Aufnahme gewünscht. • Auf dem Touch-Display die Sensortaste für Verwenden Sie zum Aufstellen des Slave- A I CH2 die Kanal-Gruppe (z.B. ) drücken. Blitzgerätes einen Blitzgeräte-Standfuß...
  • Seite 32: Servo-Betrieb

    10.4 SERVO-Betrieb 10.4.2 Vorblitzunterdrückung bzw. Synchronisation einstellen Der SERVO-Betrieb ist ein einfacher SYNC M-Servo Slave-Betrieb ohne bzw. mit Vorblitzunter- • Stellen Sie an der Kamera eine Betriebsart drückung, bei dem das Slave-Blitzgerät TTL ein. immer einen Blitz abgibt, sobald es einen •...
  • Seite 33: Servo-Betrieb Teillichtleistung Einstellen

    10.4.3 Servo-Betrieb Teillichtleistung ein- 10.4.4 Lernfunktion SYNC M-Servo stellen Die „Lernfunktion“ ermöglicht die indivi- duelle automatische Anpassung des • Auf dem Touch-Display so oft die Slave-Blitzgerätes an die Blitztechnik des Sensortaste für die Teillichtleistung Zoom 35 Kamerablitzgerätes. drücken, bis die Auswahl für die Teillichtleistung erscheint.
  • Seite 34: Servo-Blitzbetrieb Ausschalten

    Einstellvorgang für die Lernfunktion 10.4.5 SERVO-Blitzbetrieb ausschalten SYNC SYNC M-Servo Die AF-Vorblitzfunktion der Kamera muss • Auf dem Touch-Display so oft die ange- M-Servo ausgeschaltet sein. zeigte Betriebsart drücken, bis die Anzeige zur Auswahl der Betriebsart erscheint. Zoom 35 Zoom 35 •...
  • Seite 35: Option-Menü

    11 OPTION-Menü 11.2 Zweitreflektor (SUB-REFL.) Der Zweitreflektor dient zur Frontalaufhellung 11.1 RAPID Betrieb beim indirekten Blitzen, wenn der In den Blitzbetriebsarten A und TTL hängen Haupreflektor seitlich oder nach oben abge- die Blitzfolgezeiten davon ab, wieviel Licht schwenkt ist. Wenn die Lichtmenge des Zweitreflektors zu groß...
  • Seite 36: Einstelllicht (Mod.light)

    11.3 Einstelllicht (MOD.LIGHT) 11.4 Zoom Betrieb (ZOOM MODE) Beim Einstelllicht (MOD. LIGHT) handelt es 11.4.1 Extended-Zoom-Betrieb sich um ein Stroboskop-Blitzlicht mit hoher Beim Extended-Zoom-Betrieb wird die Frequenz. Bei einer Dauer von ca. 3 Sek. ent- Position des Reflektors um eine Stufe gegen- steht der Eindruck eines Quasi-Dauerlichtes.
  • Seite 37: Spot-Zoom-Betrieb

    Systembedingt wird der Extended-Zoom- Einstellvorgang Betrieb für Objektivbrennweiten ab 28 mm • Taste so oft drücken, bis das (Kleinbild-Format) unterstützt. Die Kamera Auswahlmenü erscheint. muss mit einem CPU-Objektiv ausgerüstet • Auf dem Touch-Display die Sensortaste OPTION sein und die Daten für die Objektivbrenn- OPTION drücken.
  • Seite 38: Standard-Zoom-Betrieb

    11.4.3 Standard-Zoom-Betrieb 11.5 Aufnahmeformat-Anpassung (ZOOM-SIZE) Beim Standard-Zoom-Betrieb wird die Zoom- Position des Reflektors an die Bei einigen Typen von Digitalkameras kann Objektivbrennweite der Kamera angepasst. die Anzeige für die Position des Reflektors dem Chip-Format (Abmessungen des Einstellvorgang Bildaufnahmebausteines) mit der •...
  • Seite 39: Af-Hilfslicht (Af-Beam)

    11.6 AF-Hilfslicht (AF-BEAM) Einstellvorgang Wenn das AF-Meßsystem einer digitalen • Taste so oft drücken, bis das AF-Spiegelreflexkamera wegen mangelnder Auswahlmenü erscheint. Umgebungshelligkeit nicht scharf stellen kann, so wird von der Kamera das im • Auf dem Touch-Display die Sensortaste Blitzgerät eingebaute AF-Hilfslicht akti- OPTION OPTION...
  • Seite 40: Reichweitenanzeigen In M Oder Ft

    11.7 Reichweitenanzeigen in m oder ft 11.8 Blitzbelichtungsreihen (FB) Die Reichweitenanzeige im Display kann in In den Blitzbetriebsarten i-TTL und A kann Meter (m) oder Feet (ft) angezeigt werden. eine Blitzbelichtungsreihe (Flash-Bracketing FB) durchgeführt werden. Eine Einstellvorgang Blitzbelichtungsreihe besteht aus drei auf- •...
  • Seite 41: Beep-Funktion (Akustisches Signal)

    • Die erste Aufnahme wird ohne 11.9 Beep-Funktion Korrekturwert ausgeführt. Im Display wird (Akustisches Signal) zusätzlich „FBI“ angezeigt. Mit der Beep-Funktion kann sich der • Die zweite Aufnahme erfolgt mit Minus- Benutzer einige Gerätefunktionen des Korrektur. Im Display wird zusätzlich „FBII“ Blitzgerätes akustisch mitteilen lassen.
  • Seite 42: Verriegelung / Entriegeln

    Akustische Meldung nach dem Einschalten 11.10 Verriegelung / Entriegeln des Blitzgerätes: Die Einstellung am Blitzgerät kann gegen • Ein kurzes (ca. 2s) ununterbrochenes Beep- unbeabsichtigtes Verstellen verriegelt Signal nach dem Einschalten zeigt die werden. Blitzbereitschaft des Blitzgerätes an. Zum Verriegeln bzw. zum Entriegeln die Taste ca.
  • Seite 43: Favoritenprogramme

    Einstellvorgang 12 Favoritenprogramme • Taste so oft drücken, bis das In der Blitzlichtfotographie gibt es immer Auswahlmenü erscheint. wiederkehrende Standardsituationen (z. B. Geburtstagsfeiern im eigenen Wohnzimmer o.ä.). Der mecablitz bietet die Möglichkeit, OPTION • Auf dem Touch-Display die Sensortaste die Einstellungen des Blitzgerätes für solche OPTION drücken.
  • Seite 44: Blitztechniken

    Einstellvorgang für das Laden eines 13 Blitztechniken Favoritenprogrammes 13.1 Indirektes Blitzen • Taste so oft drücken, bis das Durch indirektes Blitzen wird das Motiv wei- Auswahlmenü erscheint. cher ausgeleuchtet und eine ausgeprägte Schattenbildung verringert. Zusätzlich wird • Auf dem Touch-Display die Sensortaste der physikalisch bedingte Lichtabfall vom drücken.
  • Seite 45: Indirektes Blitzen Mit Reflektorkarte

    13.2 Indirektes Blitzen mit 13.4 Blitzbelichtungs-Messwertspeicher Reflektorkarte Einige Kameras verfügen über einen Blitzbelichtungs-Messwertspeicher Durch indirektes Blitzen mit der integrierten (Flash-Exposure). Dieser wird vom Blitzgerät Reflektorkarte können bei Personen im i TTL-Blitzbetrieb unterstützt. Spitzlichter in den Augen erzeugt werden: Damit kann vor der eigentlichen Aufnahme •...
  • Seite 46: Blitzsynchronisation

    Im grünen Vollautomatik-Programm und in rung. Dadurch kann mit allen Verschluss- den Vari- bzw. Motivprogrammen wird der zeiten geblitzt werden. Sollten Sie die volle Blitzbelichtungs-Messwertspeicher nicht Lichtleistung des Blitzgerätes benötigen, so unterstützt! Nähere Hinweise zur Einstellung sollten Sie keine kürzeren Verschlusszeiten und Handhabung entnehmen Sie der als 1/125s wählen.
  • Seite 47: Synchronisation Auf Den 2.Verschlussvorhang (Rear)

    eingestellt werden (siehe Kamerabedie- dann nicht anwählen, bzw. wird automatisch nungsanleitung). Am Blitzgerät erfolgt keine gelöscht oder nicht ausgeführt (siehe Einstellung bzw. Anzeige für diesen Betrieb. Kamerabedienungsanleitung). Die Einstellung für die Langzeitsynchroni- Der REAR-Betrieb wird an der Kamera einge- sation SLOW erfolgt an der Kamera (siehe stellt (siehe Kamerabedienungsanleitung).
  • Seite 48: Touch-Display Einstellungen

    15 Touch-Display Einstellungen 15.2 Rotation (ROTATION) Beim Schwenken des Blitzgerätes in die 15.1 Helligkeit (BRIGHTNESS) Horizontale kann die Bildschirmanzeige Die Bildschirm-Helligkeit kann in fünf Stufen ebenfalls geschwenkt werden. verändert werden. Einstellvorgang Einstellvorgang • Taste so oft drücken, bis das • Taste so oft drücken, bis das Auswahlmenü...
  • Seite 49: Wartung Und Pflege

    RESET drücken. ger Kameras angepasst werden. ROTATION Nähere Informationen finden Sie im Internet • Auf dem Touch-Display die Sensortaste auf der Metz-Homepage: www.metz.de RESET drücken. Die Einstellung wird sofort übernommen und das Blitzgerät wird in den RESET Auslieferungszustand zurück gesetzt.
  • Seite 50: Hilfe Bei Störungen

    17 Hilfe bei Störungen Die Zoom-Position des Reflektors wird nicht automatisch der aktuellen Zoom-Position des Objektivs angepasst Sollte es einmal vorkommen dass z.B. im Display des Blitzgerätes unsinnige Anzeigen erscheinen oder das Blitzgerät funktioniert • Die Kamera überträgt keine Daten an das Blitzgerät. nicht so wie es soll, so schalten Sie das Blitzgerät für ca.
  • Seite 51 Die Einstellung für die manuelle TTL-Blitzbelichtungskorrektur wird nicht wirksam • Die Kamera unterstützt die manuelle TTL-Blitzbelichtungskorrektur am Blitzgerät nicht. Es findet keine automatische Umschaltung auf die Blitzsynchronzeit statt • Die Kamera hat einen Zentralverschluss (die meisten Kompaktkameras). Die Umschaltung auf Synchronzeit ist daher nicht erforderlich. •...
  • Seite 52: Technische Daten

    Im Meter-System: 64 Im Feet-System: 210 • 0,1/4,2 mit Lithium-Batterien (1,5V) Blitzbetriebsarten: • 0,1/1,6 mit externer Energieversorgung mit Metz Power Pack P76 i TTL-, i TTL BL-, i TTL FP-Blitzbetrieb, Manuelle Blitzbetrieb mit Ausleuchtung des Motorzoom-Reflektors: Entfernungsvorgabe, Automatik-Blitzbetrieb, Ab 24 mm (Kleinbild-Format 24 x 36)
  • Seite 53: Sonderzubehör

    Abmessungen: 40 × 40 cm Gewährleistung übernommen! Inklusive Front- und Hintergrund Diffusor, Tragetasche und Bowens- • mecabounce Diffuser MBM-03 kompatibler Adapter zum Anschluss an Metz Studioblitzgeräte TL (Bestellnr. 000003902) oder BL Mit diesem Diffusor erreichen Sie auf einfachste Weise eine weiche •...
  • Seite 54 • Mini Octagon Softbox SB 15-15 Batterie-Entsorgung (Bestellnr. 009021516) Batterien/Akkus gehören nicht in den Hausmüll! Bitte bedienen Sie sich bei der Farbe: weiß, Abmessungen: Ø 15 cm Rückgabe verbrauchter Batterien/Akkus • Spot Reflexschirm SD 30-26 W eines vorhandenen Rücknahme systems. (Bestellnr.
  • Seite 55: Garantiebestimmungen

    Blitzröhre, fest eingebaute Akkus, Kontakte, unter den gleichen Bedingungen auch an die autorisierten Verbindungskabel. Kundendienststellen der Firma Metz-Werke GmbH & Co KG einge- 9. Durch diese Garantiebestimmungen werden die sandt werden. Hin- und Rücksendung erfolgen auf Gefahr des Gewährleistungsansprüche des Käufers gegenüber dem Käufers.
  • Seite 56 Préambule..........57 10 Mode multi-flash sans fil .
  • Seite 57: Préambule

    11.5 Adaptation du format de prise de vue (ZOOM-SIZE) ..92 Nous vous remercions d’avoir choisi un produit Metz et sommes 11.6 AF-BEAM (lumière auxiliaire AF) ......93 heureux de vous saluer au sein de la grande famille de nos clients.
  • Seite 58: Consignes De Sécurité

    1 Consignes de sécurité • Le flash est conçu et agréé pour l’emploi exclusif en photographie! Ne déclenchez en aucun cas un éclair à • Utilisez exclusivement les sources d’éner- proximité de gaz ou de liquides inflamm- gie autorisées mentionnées dans le mode ables (essence, diluants, etc.)! d’emploi! RISQUE D’EXPLOSION!
  • Seite 59: Fonctions Flash Dédiées

    • Au moment de déclencher un éclair, il ne 2 Fonctions flash dédiées doit pas y avoir de matière opaque directe- Les fonctions flash dédiées sont des fonc- ment devant ni sur la glace du réflecteur. tions de flash adaptées spécialement à un La glace du réflecteur ne doit pas non plus système d’appareil photo.
  • Seite 60: Préparation Du Flash

    • Flash auto programmé 3 Préparation du flash • Pré-éclairs réducteurs d’yeux rouges 3.1 Montage du flash • Modo flash Remote sans fil Fixation du flash sur l’appareil (Nikon Advanced Wireless Lighting) • Modo Servo Éteindre l’appareil photo et le flash avant le •...
  • Seite 61: Alimentation

    3.2 Alimentation Remplacement des piles Choix des piles ou accus Les piles/accus sont vides ou usagés lorsque le temps de recyclage (durée entre le déclen- Le flash peut fonctionner sur: chement du flash à pleine puissance lumi- • 4 accus au nickel-hydrure métallique de neuse, p.
  • Seite 62: Mise En Marche Et Coupure Du Flash

    3.3 Mise en marche et coupure du flash Les paramètres du flash peuvent être réglés PARAMETER PARAMETER en appuyant sur la touche • Mettre le flash en service en appuyant sur la touche PARAMETER O L’écran d‘accueil apparaît. P (puissance partielle), Le flash passe ensuite toujours au dernier P / EV chap.
  • Seite 63: Info

    Les options peuvent être paramétrées après 3.5 INFO OPTION OPTION avoir appuyé sur la touche Les réglages actuels du flash peuvent être affichés pendant le fonctionnement. OPTION • Appuyer sur la touche de l’écran RAPID (temps de recyclage courts), chap. 11.1 RAPID tactile.
  • Seite 64 toute décharge involontaire des sources Régler l’arrêt automatique de l'appareil d’alimentation. L’activation de l’arrêt auto- • Mettre le flash en service en appuyant sur matique de l’appareil est indiquée sur l’écran la touche INFO. Le témoin de disponibilité du flash L’écran d’accueil apparaît.
  • Seite 65: Del De Signalisation Sur Le Flash

    4 DEL de signalisation sur le flash - vous rapprocher du sujet ou de la surface éfléchissante (p. ex. pour les flashes indi- 4.1 Affichage de disponibilité du flash rects) ou Lorsque le condensateur du flash est chargé, - régler une valeur ISO plus élevée sur la la touche clignote en vert sur le flash et caméra.
  • Seite 66: Affichage Du Mode Flash

    5.1 Affichage du mode flash Indication de la portée en mode flash i TTL-/ i TTL BL L’écran affiche le mode flash choisi. A cet égard, différents affichages sont possibles TTL BL En modes flash pour le mode flash TTL pris en charge (p.ex. TTL FP ;...
  • Seite 67 Indication de la portée en mode flash Lorsque le mode flash manuel M est réglé dans ces modes de fonctionnement de l’ap- manuel M pareil photo, l’écran affiche «FEE» en guise En mode flash manuel l’écran indique la d’avertissement et le déclenchement de l’ap- valeur de la distance à...
  • Seite 68: Signalisations Dans Le Viseur

    6 Signalisations dans le viseur 7 Modes de fonctionnement du flash Exemples de signalisations dans le viseur: Les modes de fonctionnement suivants sont disponibles selon le type d’appareil photo: Symbole éclair clignote • Mode flash i TTL ( ), chap. 7.1 Demande d'utilisation ou de mise en marche TTL BL •...
  • Seite 69: Mode Flash I-Ttl-Bl

    mode d'emploi de l'appareil photo) en fonc- 7.2 Mode flash i-TTL-BL ( TTL BL tion de cette évaluation. Ce mode flash numérique est uniquement Lors d'une prise de vue correctement expo- pris en charge par les appareils photo si les sée, le témoin de bonne exposition s'allume objectifs utilisés transmettent les données pendant environ 3 secondes (voir 4.2).
  • Seite 70: Mode Flash Manuel

    Le contrôle du flash s'effectue alors en mode • Appuyer sur les touches MODE standard sélectionner 7.3 Mode flash manuel • Appuyer sur la touche de l’écran tactile. En mode flash manuel M , le flash émet un éclair non dosé avec sa pleine puissance si aucune puissance partielle n’est réglée.
  • Seite 71: Synchronisation Automatique Haute Vitesse (Fp)

    Puissances partielles manuelles 7.4 Synchronisation automatique haute vitesse (FP) Dans le mode manuel , il est également possible de régler une puissance de lumière Plusieurs appareils photo prennent en partielle. charge la synchronisation automatique haute 7.2 m vitesse (voir mode d’emploi de l’appareil Procédure de réglage photo).
  • Seite 72: Mode Flash Manuel Avec Prédéfinition De L'éloignement (Gn)

    Le réglage de la synchronisation automati- Réglage du mode que haute vitesse se fait au niveau de l'appa- • Mettre le flash en service en appuyant sur reil photo (voir mode d'emploi de l'appareil la touche photo) ! L'indication supplémentaire « FP » L’écran d’accueil apparaît.
  • Seite 73: Mode Flash Automatique

    7.6 Mode flash automatique 7.7 Mode flash stroboscope En mode flash automatique le capteur Le mode stroboscope est un mode flash photographique du flash mesure la manuel. Il est possible d’effectuer plusieurs lumière réfléchie par le sujet. Le capteur expositions au flash sur une prise de vue. photographique a un angle de mesure de Cela est particulièrement intéressant en cas...
  • Seite 74 Fréquence des éclairs (f) en mode stroboscope • Choisir un mode correspondant sur STROBO l’appareil photo, p. ex. Il est possible de régler la fréquence des éclairs (f) en mode flash stroboscope. 2,5m La fréquence des éclairs indique le nombre Zoom •...
  • Seite 75: Correction Manuelle D'exposition Au Flash

    Réglage de la fréquence des éclairs (f(Hz)) 8 Correction manuelle d’exposi- STROBO • Appuyer sur la touche de l’écran tactile tion au flash f (Hz) pour régler la fréquence des éclairs 2,5m L’automatisme d’exposition au flash de la Zoom plupart des appareils photo est calibré pour f(Hz) une réflectance du sujet de 25 % (réflectance moyenne des sujets photographiés au flash).
  • Seite 76: Fonctions Spéciales

    sur l’écran peut changer et être adapté à la Attention: Les objets fortement réfléchis- valeur de correction (en fonction du modèle sants situés sur la photo du sujet peuvent d’appareil photo)! gêner l’automatisme d’exposition de l’appa- reil photo. La prise de vue est alors sous- Procédure de réglage exposée.
  • Seite 77 Zoom automatique Procédure de réglage En cas d’utilisation du flash avec un appareil • Appuyer autant de fois sur la touche photo qui transmet des données concernant jusqu’à ce que le menu de sélection la distance focale de l’objectif, la position du s‘affiche.
  • Seite 78 Exemple: Diffuseur grand-angle Vous utilisez un objectif zoom avec une Le diffuseur grand-angle intégré permet distance focale comprise entre 35 et 105 de couvrir des focales d’objectifs à partir de mm. Dans ce cas, vous réglez la tête zoom 12 mm (film de petit format). du flash sur 35 mm.
  • Seite 79: Mode Multi-Flash Sans Fil

    10 Mode multi-flash sans fil Pour éviter que plusieurs systèmes remote n’interfèrent mutuellement dans le même Le flash prend en charge le système remote espace, il existe quatre canaux remote auto- sans fil de Nikon en mode flash slave et est nomes.
  • Seite 80: Mode Remote Maître

    10.1 Mode remote maître 10.1.2 Régler le mode de flash sur le flash maître Le groupe d'esclave A est activé en usine. Le flash maître et les groupes d’esclaves A, B REMOTE et C peuvent être activés et désactivés! MASTER •...
  • Seite 81: Régler La Valeur De Correction D'exposition (Ev) En Mode Ttl Sur Le Flash Maître

    10.1.2.1 Régler la valeur de correction 10.1.2.2 Régler la puissance partielle en d'exposition (EV) en mode TTL sur mode M sur le flash maître REMOTE le flash maître Sélectionner le mode sur comme décrit MASTER REMOTE au point 10.1.2 • Appuyer sur la touche de l’écran MASTER tactile pour le mode Maître jusqu’à...
  • Seite 82: Régler Le Mode Flash Pour Le Flash Esclave Sur Le Maître

    10.1.3 Régler le mode flash pour le flash 10.1.3.1 Régler la valeur de correction REMOTE REMOTE esclave sur le maître d’exposition (EV) ou la puissance 1/16 MASTER MASTER 1/16 partielle pour le flash esclave sur le A I B I C •...
  • Seite 83: Régler Le Mode Remote Canal

    10.1.4 Régler le mode remote canal 10.2 Mode flash remote slave Le flash prend en charge le système remote Pour éviter que plusieurs systèmes remote sans fil de Nikon en mode flash slave et est n’interfèrent mutuellement dans le même compatible avec le système Nikon espace, il existe quatre canaux remote auto- «Advanced Wireless Lighting».
  • Seite 84: Régler Le Mode Flash Remote Esclave

    10.2.1 Régler le mode flash remote esclave 10.2.2 Régler le canal esclave REMOTE • Mettre le flash en service en appuyant sur SLAVE la touche • Appuyer sur la touche de l’écran tactile L’écran d’accueil apparaît. pour sélectionner le groupe de canaux Le flash passe ensuite toujours au dernier Gr A I Ch1 (p.
  • Seite 85: Régler Le Groupe Esclave

    Le type de mode flash est transmis automati- REMOTE quement par le flash maître. SLAVE Lorsque le flash fonctionne comme un flash maître dans le système remote sans fil Metz, Le réglage prend effet immédiatement. «B» le déclenchement de la lumière pilote Zoom 35 s'affiche à l'écran.
  • Seite 86: Modo Flash Servo

    10.4 Modo flash SERVO 10.4.2 Régler le pré-éclair ou la synchronisation Le mode SERVO est un mode esclave simple SYNC M-Servo avec ou sans suppression du pré-éclairage • Sélectionner le mode TTL sur l’appareil lors duquel un flash est toujours généré à photo.
  • Seite 87: Réglage Du Mode Servo Puissance Partielle

    10.4.3 Réglage du mode servo puissance 10.4.4 Fonction d’apprentissage SYNC M-Servo partielle La «Fonction d’apprentissage» permet une adaptation individuelle du flash esclave à la • Appuyer autant de fois sur la touche technique de photographie au flash du flash pour la puissance partielle sur l’écran Zoom 35 de l’appareil photo.
  • Seite 88: Désactiver Le Mode Flash Servo

    Processus de réglage de la fonction 10.4.5 Désactiver le mode flash SERVO SYNC d’apprentissage SYNC M-Servo • Appuyer autant de fois sur le mode affiché M-Servo sur l’écran tactile jusqu’à ce que l’affichage La fonction pré-éclaire AF de l’appareil photo de sélection de mode apparaisse.
  • Seite 89: Option Menú

    11 OPTION menú 11.2 Réflecteur secondaire (SUB-REFL.) Le réflecteur secondaire permet l'éclairage 11.1 Mode RAPID frontal pour des éclairages au flash indirects Dans les modes A et TTL, les temps de recy- lorsque le réflecteur principal est orienté vers clage dépendent de la lumière nécessaire le côté...
  • Seite 90: Lumière Pilote

    11.3 Lumière pilote 11.4 Mode zoom La lumière pilote (ML = Modelling Light) est 11.4.1 Mode zoom étendu une séquence d’éclairs stroboscopiques à Dans le mode zoom étendu, la position du haute fréquence. Avec une durée de 3 secon- zoom du réflecteur est réduite d’un cran par des environ, elle donne l’impression d’une rapport à...
  • Seite 91: Mode Spot Zoom

    Pour des raisons inhérentes au système, le Procédure de réglage mode zoom étendu n'est pris en charge que • Appuyer autant de fois sur la touche par les focales d'objectifs d'au moins 28 mm jusqu’à ce que le menu de sélection (film de petit format).
  • Seite 92: Mode Zoom Standard

    11.4.3 Mode zoom STANDARD 11.5 Adaptation du format de prise de vue (ZOOM-SIZE) En mode zoom standard, la position du zoom du réflecteur est adaptée à la focale réglée Sur certains modèles d’appareils photo sur l'objectif de l'appareil photo. numériques, l’affichage de la position du réflecteur peut être adaptée au format de la Procédure de réglage puce (dimensions du composant de prise de...
  • Seite 93: Af-Beam (Lumière Auxiliaire Af)

    11.6 AF-BEAM (lumière auxiliaire AF) Plusieurs modèles d'appareil photo prennent en charge la lumière auxiliaire AF du flash Lorsque le système de mesure AF d’un appa- seulement avec le capteur AF central. La reil photo reflex numérique AF ne peut pas lumière auxiliaire AF du flash n'est pas effectuer la mise au point faute d’une lumi-...
  • Seite 94: Affichage Des Portées En Mètres Ou Pieds

    11.7 Affichage des portées en mètres ou 11.8 Séries d’expositions au flash (FB) pieds Dans les modes flash i-TTL et automatique , il est possible d’effectuer une série d’exposi- La portée peut être indiquée sur l'afficheur tions au flash (FB - Flash-Bracketing). Une en mètres (m) ou en pieds (ft).
  • Seite 95: Fonction Bip(Akustisches Signal)

    • La première photo est prise sans valeur de 11.9 Fonction bip correction. „FBI“ apparaît également sur (Akustisches Signal) l’écran. L’utilisateur peut souhaiter que certaines • La deuxième photo est prise avec une fonctions de l’appareil du flash soit signa- valeur de correction négative.
  • Seite 96: Verrouillage / Déverrouillage

    Message sonore après la mise en marche 11.10 Verrouillage / déverrouillage du flash: Le réglage sur le flash peut être verrouillé • Un bref bip (env. 2 s) et continu émis après afin d’éviter une modification involontaire. la mise en marche du flash signale que le Appuyer sur la touche pendant env.
  • Seite 97: Programme Favori

    Procédure de réglage 12 Programme favori • Appuyer autant de fois sur la touche En photographie au flash, on retrouve jusqu’à ce que le menu de sélection souvent les mêmes situations (par ex. fêtes s‘affiche. de famille dans le salon, etc.). Pour ne pas avoir à...
  • Seite 98: Techniques De Photographie Au Flash

    Marche à suivre pour charger un programme 13 Techniques de photographie favori au flash • Appuyer autant de fois sur la touche 13.1 Éclairage indirect au flash jusqu’à ce que le menu de sélection s‘affiche. Avec l’éclairage indirect, le sujet est éclairé en douceur et les ombres portées sont moins nombreuses.
  • Seite 99: Éclairage Indirect Au Flash Avec Carte-Réflecteur

    13.2 Éclairage indirect au flash avec 13.4 Mémoire des mesures d’exposition carte-réflecteur au flash FE L’éclairage indirect au flash avec carte-réflec- Certains appareils photo disposent d’une teur intégrée permet de générer des mémoire des mesures d’exposition au flash reflets de lumière dans les yeux des (FE ;...
  • Seite 100: Synchronisation Du Flash

    Dans le programme vert entièrement auto- Sur les appareils photo qui disposent d’un obturateur focal et en cas de synchronisation matisé et dans les programmes Vari ou pro- haute vitesse (voir 7.4), il ne se produit pas grammes-résultats, la mémoire des mesures de commutation automatique sur la vitesse d’exposition au flash FE n’est pas prise en de synchro-flash.
  • Seite 101: Synchronisation Sur Le 2E Rideau (Rear)

    ration plus lentes que la vitesse de synchro- la vitesse de synchro-flash sont cependant flash (par exemple des temps de pose jus- réglées selon le mode de fonctionnement de qu’à 30 s). Sur certains modèles d’appareil l’appareil photo. photo, la synchronisation en vitesse lente est Sur quelques appareils photos, le mode activée automatiquement dans certains REAR n’est pas disponible dans certains...
  • Seite 102: Réglages De L'écran Tactile

    15 Réglages de l’écran tactile 15.2 Rotation (ROTATION) En effectuant une rotation du flash vers 15.1 Luminosité (BRIGHTNESS) l’horizontale, l’affichage peut également La luminosité de l’écran peut être réglée sur effectuer une rotation. cinquième niveaux différents. Procédure de réglage Procédure de réglage •...
  • Seite 103: Maintenance Et Entretien

    • Appuyer sur la touche de l’écran ROTATION Vous trouverez de plus amples informations tactile. RESET à ce sujet sur Internet, sur le site Metz à l’adresse: www.metz.de • Appuyer sur la touche de l’écran tactile. RESET Le réglage prend effet immédiatement et le flash est réinitialisé...
  • Seite 104: Remède En Cas De Mauvais Fonctionnement

    17 Remède en cas de mauvais fonctionnement Il est impossible de régler automatiquement la position du réflec- teur à la position actuelle du zoom de l’objectif S’il devait arriver que l’écran de contrôle ACL du flash affiche des valeurs aberrantes ou que le flash ne fonctionne pas comme il le •...
  • Seite 105 Le réglage de la correction manuelle d’exposition au flash en mode Il est impossible de modifier les paramètres du flash pour l’ouver- TTL ne prend pas effet ture du diaphragme F • L’appareil photo ne prend pas en charge la correction manuelle •...
  • Seite 106: Caractéristiques Techniques

    Flash con difusor de gran angular integrado, manual de instruc- • 290 pour un fonctionnement avec piles au lithium (1,5V) ciones, Pied de flash S60, Etui ceinture T64. • 360 pour un fonctionnement avec alimentation externe avec Metz Power Pack P76...
  • Seite 107: Accessoires En Option

    Les limites de portée sont réduites dans le rapport de la perte de Hauteur du sabot du flash réglable lumière, soit environ de moitié. enfichable sur trépieds de lampe Metz LS-247 et LS-200 • Ecran réfléchissant 58-23 • Mini Softbox SB 30-20 (ref.
  • Seite 108 • Mini Octagon Softbox SB 15-15 (Référence 009021516) Coloris: blanc, dimensions: Ø 15 cm • Ecran reflex Spot SD 30-26 W (Référence 009043021) Coloris : blanc pour lumière neutre / Dimensions: 30 × 26 cm • Ecran reflex Spot SD 30-26 S (Référence 00904303A) Coloris : argent pour lumière froide / Dimensions: 30 ×...
  • Seite 109 Elimination des batteries Ne pas jeter les batteries dans les ordures ménagères. Veuillez rendre vos batteries usées là où elles sont éventuellement reprises dans votre pays. Veillez à ne rendre que des batteries/accus déchargés. En règle générale, les batteries/accus sont déchargés lorsque l’appareil qu’elles alimentaient : —...
  • Seite 110 Voorwoord ..........111 10.1.1 Remote-masterfunctie instellen .
  • Seite 111: Voorwoord

    11.5 Aanpassing aan het opname-formaat (ZOOM-SIZE) ..146 Wij bedanken u voor uw beslissing een Metz-product aan te 11.6 AF-hulplicht (AF-BEAM)......147 schaffen.
  • Seite 112: Veiligheidsinstructies

    1 Veiligheidsinstructies • De flitser is alleen bedoeld en toegelaten voor gebruik in de fotografie! In de omgeving van ontvlambare gassen • Gebruik uitsluitend de in de handleiding of vloei stoffen (benzine, oplosmiddelen aangegeven en toegelaten stroombronnen! enz.) mag de flitser in geen geval worden ontstoken! •...
  • Seite 113: Dedicated Flitsfuncties

    • Bij het ontsteken van een flits mag er zich 2 Dedicated flitsfuncties geen materiaal dat geen licht doorlaat Dedicated flitsfuncties zijn speciaal op het direct op of vlak voor het venster van de camerasysteem ingestelde flitsfuncties. reflector bevinden. Het venster van de Afhankelijk van het type camera worden reflector mag niet vuil zijn.
  • Seite 114: Flitser Gereedmaken

    • Sturing van de AF-meetflits 3 Flitser gereedmaken • Automatische aanduiding van de flitsreik- 3.1 Het aanbrengen van de flitser wijdte Flitser op de camera monteren • Automatisch geprogrammeerd flitsen • Functie van flits vooraf ter vermindering van Camera en flitser vóór het aanbrengen of het 'rode ogeneffect' afnemen uitschakelen.
  • Seite 115: Voeding

    3.2 Voeding Het vervangen van de batterijen Batterij-, c.q. accukeuze De accu's batterijen zijn leeg, c.q. verbruikt, als de flitsvolgtijd (= tijd tussen het ontste- De flitser kan naar keuze worden gevoed uit: ken van een flits met volle energie, bijv. bij •...
  • Seite 116: In- En Uitschakelen Van De Flitser

    3.3 In- en uitschakelen van de flitser PARAMETER Na drukken op de toets kunnen PARAMETER de flitsparameters worden ingesteld. • Schakel de flitser via de starttoets Het opstartscherm verschijnt. PARAMETER O De flitser schakelt daarna altijd in met de P (deelenergie), hoofdstuk 7.3, 10.1.3.1 en het laatste gebruikte functie (bijv.
  • Seite 117: Info

    OPTION 3.5 INFO Nadat u op de toets hebt gedrukt OPTION kunnen de opties worden ingesteld. De actuele instellingen van de flitser kunnen tijdens het gebruik aangegeven worden. OPTION RAPID (korte flitsvolgtijden), hoofdstuk 11.1 • Druk op het aanraakscherm op de sensor- SUB-REFL.
  • Seite 118 in om energie te besparen en de stroom- Het instellen van de automatische bronnen tegen onbedoeld ontladen te uitschakeling beschermen. De geactiveerde automatische • Schakel de flitser via de toets uitschakeling wordt in het INFO-display aan- Het opstartscherm verschijnt. gegeven. De flitsparaatheidsaanduiding De flitser schakelt daarna altijd in met de en de aanduidingen op het LC-display doven.
  • Seite 119: Led-Aanduidingen Op De Flitser

    4 LED-aanduidingen op de flitser - de afstand tot het onderwerp, c.q. het reflecterend vlak (bijv. bij indirect flitsen) 4.1 Flitsparaatheids aanduiding verkleinen of Zodra de flitscondensator is opgeladen licht - de camera een hogere ISO-waarde instellen. op de flitser de toets groep op en geeft Let in het display van het flitsapparaat op de daarmee aan dat de flitser gereed is om te...
  • Seite 120: Aanduiding Van De Flitsfunctie

    5.1 Aanduiding van de flitsfunctie Aanduidingen van de reikwijdte in de i TTL-/ i TTL BL flitsfuncties In het display wordt ingestelde flitsfunctie aangegeven. Daarbij zijn, afhankelijk van het TTL BL In de TTL-flitsfuncties type camera verschillende voor de telkens TTL FP ;...
  • Seite 121 Aanduiding van de reikwijdte in de functie wordt door sommige camera’s in de camera- functie program P en de vari-, c.q. onder- van met de hand in te stellen flitser M werpsprogramma’s niet ondersteund. In de functie van de met de hand in te stellen Als u in deze camerafuncties de manual (manual) flitser M wordt in het display de 7.2 m...
  • Seite 122: Aanduidingen In De Zoeker Van De Camerar

    6 Aanduidingen in de zoeker van 7 Flitsfuncties de camerar Afhankelijk van het type camera staan u de volgende flitsfuncties ter beschikking: Voorbeelden van aanduidingen in de zoeker • i TTL-flitsfunctie ( ), hoofdstuk 7.1 van de camera: TTL BL •...
  • Seite 123: I-Ttl-Bl-Flitsfunctie

    Het gereflecteerde licht van die meetflitsen 7.2 i-TTL-BL-flitsfunctie ( TTL BL wordt door de camera geëvalueerd. Deze digitale flitsfunctie wordt alleen door Overeenkomstig deze evaluatie wordt de dan camera's ondersteund als deze zijn voorzien volgende flitsbelichting door de camera van een objectief dat de afstandsgegevens afgestemd op de opnamesituatie (zie voor aan de camera doorgeeft (bijv.
  • Seite 124: Manual Flitsfunctie

    In dat geval wordt dan de normale TTL-flits- • Druk in het aanraakscherm op de sensor- MODE functie -uitgevoerd. toetsen en kies uit. 7.3 Manual flitsfunctie • Druk in het aanraakscherm op de sensor- In de manual flitsfunctie M wordt door de toets flitser altijd het volle vermogen afgegeven, als er geen deelvermogen is ingesteld.
  • Seite 125: Automatische Synchronisatie Bijkorte Belichtingstijden (Fp)

    Met de hand in te stellen deelvermogens 7.4 Automatische synchronisatie bij korte belichtingstijden (FP) In de met de hand uit te voeren instelling van de flitsfunctie kan een deel van het flits- Verschillende camera’s ondersteunen de vermogen worden ingesteld. automatische synchronisatie bij korte belich- 7.2 m tingstijden (zie de gebruiksaanwijzing van de Het instellen...
  • Seite 126: Flitsen Met Handinstelling En Afstandsberekening (Gn)

    De instelling voor de automatische synchro- Het instellen van de functie nisatie bij korte belichtingstijden vindt plaats • Schakel de flitser met de toets op de camera (zie de gebruiksaanwijzing van Het opstartscherm verschijnt. uw camera)! In het display van de flitser De flitser schakelt altijd in met de het laatst TTL FP wordt dan bovendien (...
  • Seite 127: Automatisch Flitsenfunctie

    7.6 Automatisch flitsenfunctie 7.7 Stroboscopisch flitsen Schakel de flitser met de toets , meet de De functie stroboscopisch flitsen is een flits- fotosensor van de flitser het door het functie met handinstelling (manual). Hierbij onderwerp gereflecteerde licht. De fotosen- kunnen meerdere flitsbelichtingen op één heeft een meethoek van ong.
  • Seite 128 Flitsfrequentie (f) bij stroboscopisch flitsen • Stel op de camera een overeenkomende STROBO functie in, bijv. enz. In deze functie kan de flitsfrequentie (f) wor- den ingesteld. De flitsfrequentie geeft het 2,5m aantal flitsen per seconde aan. De flitsfre- Zoom •...
  • Seite 129: Met De Hand In Te Stellen Correctie Op De Flitsbelichting

    Flitsfrequentie (f(Hz)) instellen 8 Met de hand in te stellen cor- STROBO • Druk in het aanraakscherm op de sensor- rectie op de flitsbelichting f (Hz) toets voor de flitsfrequentie 2,5m De automatiek van de flitsbelichting is in de Zoom meeste camera’s gebaseerd op een reflectie- f(Hz) graad van 25% (gemiddelde reflectiegraad...
  • Seite 130: Bijzondere Functies

    en aan de correctiewaarde worden aange- Opgelet: Sterk reflecterende onderwerpen in past (hangt af van het type camera)! het onderwerp kunnen de belichtingsauto- matiek van de camera storen. De opname Het instellen wordt dan onderbelicht. Verwijder sterk • Druk zo vaak op de sensortoets , dat reflecterende objecten uit het onderwerp of 0.6- 7.2 m...
  • Seite 131 Autozoom Het instellen Als de flitser gebruikt wordt op een camera • Druk zo vaak op de toets , dat het die de gegevens van de brandpuntsafstand keuzemenu verschijnt. van het objectief doorgeeft past de zoom- • Druk in het aanraakscherm op de sensor- stand van de reflector zich automatisch daa- PARAMETER toets...
  • Seite 132 Voorbeeld: Groothoekdiffusor U gebruikt een zoomobjectief met een bereik Met de ingebouwde groothoekdiffusor aan brandpuntsafstanden van 35 tot 105 de verlichtingshoek aan objectieven met een mm. In dit voorbeeld stelt u de stand van de brandpuntsafstand vanaf 12 mm worden zoomreflector van de flitser in op 35 mm.
  • Seite 133: Flitsen Met Bediening Op Afstand

    10 Flitsen met bediening op Opdat meerdere remote-systemen in een- zelfde ruimte elkaar niet storen, staan u vier afstand onafhankelijke remote-kanalen ter beschik- De flitser ondersteunt het draadloze Nikon- king. Master en slaafflitsers die tot hetzelfde Remote-systeem in de slaafflitsfunctie en is remote-systeem behoren moeten op compatibel met het Nikon-systeem hetz-elfde remote-kanaal worden ingesteld.
  • Seite 134: Remote Master-Functie

    10.1 Remote master-functie 10.1.2 Flitsfunctie op de masterflitser instellen Slaafgroep A is af fabriek geactiveerd. De master-flitser en de slaafgroepen A, B REMOTE en C kunnen geactiveerd of gedeactiveerd MASTER • Druk in het aanraakscherm zo vaak op de worden! —...
  • Seite 135: Op De Flitser In Te Stellen Correctie Op De Flitsbelichting (Ev) In De Ttl-Functie

    10.1.2.1 Op de flitser in te stellen correctie 10.1.2.2 Deelvermogen in de M-functie op op de flitsbelichting (EV) in de de masterflitser instellen REMOTE TTL-functie Stel de flitsfunctie in op zoals onder MASTER REMOTE 10.1.2 beschreven. • Druk in het aanraakscherm zo vaak op de MASTER sensortoets voor de functie van...
  • Seite 136: Flitsfunctie Voor De Slaafflitser Instellen

    10.1.3 Flitsfunctie voor de slaafflitser 10.1.3.1 Op de master-flitser een correctie REMOTE REMOTE instellen op de master-flitser op de flitsbelichting (EV) , c.q. een 1/16 MASTER MASTER 1/16 deelvermogen voor de slaafflitser • Druk in het aanraakscherm zo vaak op de —...
  • Seite 137: Remote-Kanaal Instellen

    10.1.4 Remote-kanaal instellen 10.2 Remote-slaafflitsfunctie De flitser ondersteunt het draadloze Nikon- Opdat meerdere remote-systemen in dezelfde Remote-systeem in de slaafflitsfunctie en is ruimte elkaar niet storen, staan u vier onaf- compatibel met het Nikon-systeem hankelijke remote-kanalen ter beschikking. 'Advanced Wireless Lighting'. Hierbij kunnen Master- en slaafflitsers die bij eenzelfde een of meerdere slaafflitsers door een master remote-systeem horen moeten op...
  • Seite 138: Slaafkanaal Instellen

    10.2.1 Slaafkanaal instellen 10.2.2 Slaafgroep instellen REMOTE • Schakel de flitser in met de toets SLAVE Het opstartscherm verschijnt. • Druk in het aanraakscherm op de sensor- De flitser schakelt dan altijd in met de het Gr A I Ch1 toets voor de kanaalgroep (bijv.
  • Seite 139: Slaafkanaal Instellen

    10.2.3 Slaafkanaal instellen 10.3 He testen van de remote flits- REMOTE functie SLAVE • Zet de slaafflitsers net zo neer als u ze voor • Druk in het aanraakscherm op de sensor- de latere opname wilt gebruiken. Gebruik A I CH2 toets boor de kanaalgroep (bijv.
  • Seite 140: Servo-Functie

    10.4 SERVO-functie 10.4.2 Onderdrukking van de flits vooraf, c.q. het instellen van de synchronisatie De SERVO-functie is een eenvoudige slaaf- SYNC M-Servo functie zonder, c.q. met onderdrukking van • Stel op de camera een TTL functie in. een flits vooraf, waarbij de slaafflitser altijd een flits ontsteekt zodra deze een lichtim- •...
  • Seite 141: Deelvermogen In De Servo-Functie

    10.4.3 Deelvermogen in de SERVO-functie 10.4.4 Leerfunctie SYNC M-Servo De 'leerfunctie' maakt het mogelijk, de indi- viduele, automatische aanpassing van de • Druk in het aanraakscherm zo vaak op de slaafflitser op de flitstechniek van de came- sensortoets voor het deelvermogen, Zoom 35 raflitser aan te passen.
  • Seite 142: Het Uitschakelen Van De Servo-Flitsfunctie

    Het instellen van de leerfunctie 10.4.5 Het uitschakelen van de SERVO-flits- SYNC functie SYNC M-Servo De AF-meetflits vooraf van de camera moet M-Servo worden uitgeschakeld. • Druk in het aanraakscherm zo vaak op de aangegeven functie, dat het keuzemenu voor de flitsfuncties verschijnt. Zoom 35 Zoom 35 •...
  • Seite 143: Option-Menu

    11 OPTION-Menu 11.2 Hulpreflector (SUB-REFL.) De hulpreflector dient voor het frontaal 11.1 RAPID-functie ophelderen bij indirect flitsen, als de hoof- In de flitsfuncties A en TTL hangen de flits- dreflector naar de zijkant gedraaid of naar volgtijden af van hoeveel licht er voor de boven gericht is.
  • Seite 144: Instellicht (Mod. Light)

    11.3 Instellicht (MOD. LIGHT) 11.4 Zoom functie (ZOOM MODE) Bij het instellicht (ML = Modelling Light) gaat 11.4.1 Extended-zoomfunctie het om stroboscopisch flitslicht met een Bij de extended-zoomfunctie wordt de zoom- hoge frequentie. Bij een duur van ong. stand van de reflector een stap lager inge- 3 seconden ontstaat de indruk van een quasi steld dan de brandpuntsafstand van het continulicht.
  • Seite 145: Spot-Zoomfunctie

    Bepaald door het systeem wordt de exten- Het instellen ded-zoomfunctie voor objectieven met een • Druk zo vaak op de toets , dat het brandpuntsafstand vanaf 28 mm (kleinbeeld- keuzemenu verschijnt. formaat) ondersteund. De camera moet • Druk in het aanraakscherm op de sensor- OPTION met een CPU-objectief zijn uitgerust en de OPTION...
  • Seite 146: Standaard-Zoomfunctie

    11.4.3 Standaard-zoomfunctie 11.5 Aanpassing aan het opname- formaat (ZOOM-SIZE) In de standaard-zoomfunctie wordt de zoom- stand van de reflector aangepast aan de Bij sommige typen digitale camera's kan de brandpuntsafstand van het objectief op de aanduiding voor de stand van de reflector camera.
  • Seite 147: Af-Hulplicht (Af-Beam)

    11.6 AF-hulplicht (AF-BEAM) dan wordt het AF-hulplicht in de flitser niet geactiveerd! Wanneer het AF-meetsysteem van een digi- tale AF-spiegelreflexcamera vanwege te lage Het instellen omgevingshelderheid niet kan scherpstellen, • Druk zo vaak op de toets , dat het wordt door de camera het in de flitser inge- keuzemenu verschijnt.
  • Seite 148: Reikwijdte Aanduidden In M Of Ft

    11.7 Reikwijdte aanduidden in m of ft 11.8 Flitsbelichtingstrapje (FLASH BRACK.) De aanduiding van de reikwijdte van het flits- licht in het display kan in meter (m) of in voet In de flitsfuncties i-TTL en automatisch kan (ft) worden aangegeven. een flitsbelichtingstrapje (Flash-Bracketing FB) worden uitgevoerd.
  • Seite 149: Beep-Functie (Beep)

    De instelling treedt onmiddellijk in werking. 11.9 Beep-functie (BEEP) Met de Beep-functie kan de gebruiker zich • De eerste opname wordt zonder correctie verschillende functies van het apparaat uitgevoerd. In het display verschijnt boven- akoestisch laten melden. Daardoor kan de dien 'FB I'.
  • Seite 150: Vergrendeling / Ontgrendeling

    Akoestische melding na het inschakelen van 11.10 Vergrendeling / ontgrendeling de flitser: De instellingen op de flitser kunnen tegen • Een kort (ong. 2 s.) ononderbroken piepje onbedoeld verstellen worden vergrendeld. na het inschakelen geeft de flitsparaatheid Druk voor het vergrendelen, c.q. het ontgren- aan.
  • Seite 151: Favoriete Programma

    Het instellen 12 Favoriete programma • Druk zo vaak op de toets , dat het Bij flitsfotografie zijn er steeds terugkerende keuzemenu verschijnt. standaardsituaties (b.v. een verjaardag vieren in een woonkamer). De mecablitz biedt de mogelijkheid de instellingen voor OPTION •...
  • Seite 152: Flitstechnieken

    Het instellen voor het laden van een favoriet 13 Flitstechnieken programma 13.1 Indirect flitsen • Druk zo vaak op de toets , dat het Door indirect te flitsen wordt het onderwerp keuzemenu verschijnt. zachter verlicht en een anders nadrukkelijke schaduw gemilderd. Bovendien wordt natu- •...
  • Seite 153: Indirect Flitsen Met Een Reflectiekaart

    13.2 Indirect flitsen met een reflectie- 13.4 Geheugen van de meetwaarde FE kaart Sommige camera's beschikken over een geheugen vooreen flitsbelichtingsmeting Door indirect te flitsen met de ingebouwde (FE= Flash exposure). Dit wordt door de reflectiekaart kunnen bij personen spits- flitser in de flitsfunctie i TTL ondersteund.
  • Seite 154: Flitssynchronisatie

    In het groene, volautomatische programma chronisatie op korte belichtingstijden en in de vari-, c.q. onderwerpsprogramma's (zie 7.4) wordt niet automatisch naar de wordt het geheugen voor de flitsbelichting flitssynchronisatietijd omgeschakeld. In die niet ondersteund! Zie voor nadere aanwijzin- gevallen kan met alle belichtingstijden gen betreffende het instellen en het hanteren worden geflitst.
  • Seite 155: Synchronisatie Bij Het Dichtgaan Van De Sluiter (Rear)

    flitssynchronisatietijd zijn (bijv. belichting- opnamesituatie verkregen! stijden tot aan 30 seconden). Bij enkele Afhankelijk van de er op ingestelde functie cameramodellen wordt de synchronisatie bij stelt de camera langere belichtingstijden in lange belichtingstijden in bepaalde onder- dan de flitssynchronisatietijd. werpsprogramma’s (bijv. het nachtopname- Bij sommige camera’s is in bepaalde functies programma enz.) automatisch geactiveerd, (bijv.
  • Seite 156: Touch-Display Instellingen

    15 Touch-display instellingen 15.2 Rotatie (ROTATION) Bij het zwenken van de flitskop in horizontale 15.1 Helderheid (BRIGHTNESS) richting kan de beeldschermweergave eve- De helderheid van het aanraakscherm kan in neens gezwenkt worden. vijf stappen worden ingesteld. Het instellen Het instellen •...
  • Seite 157: Onderhoud En Verzorging

    Nadere informaties vindt u in het internet op Firmware-updates van de flitser gelden hier- de Metz–homepage: www.metz.de bij niet! 16.2 Het formeren van de flitsconden- sator De in de flitser ingebouwde flitscondensator...
  • Seite 158: Troubleshooting

    17 Troubleshooting De stand van de zoomreflector wordt niet automatisch aangepast aan de actuele zoomstand van het objectief Zou het ooit voorkomen, dat bijv. in het display van de flitser onzinnige aanduidingen verschijnen of dat de flitser niet func- • De camera geeft geen gegevens door naar de flitser. tioneert zoals hij op grond van zijn instellingen zou behoren te •...
  • Seite 159 De instelling voor met de hand in te stellen correcties op de TTL-flitsbelichting werkt niet • De camera ondersteunt de met de hand in te stellen correctiesop de TTL–flitsbelichting op de flitser niet. De automatische omschakeling naar de flitssynchronisatietijd vindt niet plaats •...
  • Seite 160: Technische Gegevens

    • 190 voor werking met Nikkel-metaal-hydride accu’s De levering omvat: (1,2V / 2100 mAh) Flitser met ingebouwde groothoekdiffusor, gebruiksaanwijzing, • 290 voor werking met Lithiumbatterijen (1,5V) Voetie voor flitsers S60, Belt zakje T64. • 360 voor werking met externe voeding met Metz Power Pack P76...
  • Seite 161: Bijzondere Toebehoren

    Afmetingen: 40 × 40 cm niet aansprakelijk! Inclusief voor- en achtergronddiffusor, draagtas en met Bowens • mecabounce Diffuser MBM-03 compatibele adapter voor het aansluiten aan Metz-studioflitsers TL (Bestelnr. 000003902) of BL Met deze diffusor verkrijgt u op de eenvoudigste manier een zachte •...
  • Seite 162 • Mini Octagon Softbox SB 15-15 (Bestelnr. 009021516) Kleur: wit, afmetingen: Ø 15 cm • Spot-reflectiescherm SD 30-26 W (Bestelnr. 009043021) Kleur: wit voor neutraal licht / afmetingen: 30 × 26 cm • Spot-reflectiescherm SD 30-26 S (Bestelnr. 00904303A) Kleur: zilver voor koel licht / afmetingen: 30 × 26 cm •...
  • Seite 163 Om kortsluiting te voorkomen, moeten de batterijpolen met plakband worden afge- plakt. Uw Metz-product is ontworpen voor en gebouwd uit hoogwaardige materialen en componenten die gerecycled kunnen worden en dus geschikt zijn voor hergebruik. Dit symbool betekent, dat elektrische en...
  • Seite 164 Introduction ......... . . 165 10.1.1 Remote master mode settings .
  • Seite 165: Introduction

    11.6 AF auxiliary light (AF-BEAM) ......201 Thank you for choosing a Metz product. We are delighted to welco- 11.7 Range display in m or ft .
  • Seite 166: Safety Instructions

    1 Safety instructions • The flash unit is exclusively designed and authorised for use in photographic appli- The flash unit may in no event be activat- cations! ed in the vicinity of inflammable gases or • Only use the power sources designated and liquids (petroleum, solvents etc.)! autho-rised in the operating manual! RISK OF EXPLOSIONS!
  • Seite 167: Dedicated Flash Functions

    • When you activate the flash, there should 2 Dedicated flash functions be no opaque material directly in front of or Dedicated flash functions are flash functions on the reflector cover (flash window). The that have been specially adapted to a given intense energy emissions can otherwise camera system.
  • Seite 168: Preparing The Flash Unit For Use

    • Wireless remote flash mode 3 Preparing the flash unit for use (Advanced Wireless Remote Flash Mode Lighting) 3.1 Mounting the flash unit • Servo mode Mounting the flash unit on the camera • Spot zoom mode Turn off the camera and flash before moun- •...
  • Seite 169: Power Supply

    3.2 Power supply Replacing batteries Suitable batteries/rechargeable batteries The disposable/rechargeable batteries are empty or used up if the recycling time (time The flash unit can be operated with any of from the triggering of a full-power flash, the following batteries: e.g.
  • Seite 170: Switching The Flash Unit On And Off

    3.3 Switching the flash unit on and off The flash parameters can be set after PARAMETER PARAMETER pressing the button. • Switch on the flash unit with the button. The start screen appears. The flash PARAMETER O unit always switches on afterwards with the P (partial light output), chap..
  • Seite 171: Info

    The options can be set after pressing the 3.5 INFO OPTION OPTION button. The current settings of the flash unit can be displayed during operation. OPTION • Press the sensor button on the touch RAPID (fast recycling times), chap. 11.1 RAPID display.
  • Seite 172 automatic unit switch-off is shown in the Setting the automatic unit switch-off INFO display. The flash ready indicator • Switch on the flash unit with the button. the indicators on the LC display disappear. The start screen appears. button flashes red in stand-by The flash unit always switches on after- mode.
  • Seite 173: Led Displays On The Flash Unit

    4 LED displays on the flash unit 5 Information in Display The cameras transmit the settings for ISO, 4.1 Flash readiness indication lens focal length (mm) and aperture to the When the flash capacitor on the flash unit is flash unit. charged, the button lights up in green, It calculates the maximum flash range from...
  • Seite 174: Display Of The Flash Mode

    5.1 Display of the flash mode Range display in i TTL-/ i TTL BL- flash modes The current flash mode is shown in the display. Depending on the type of camera, TTL BL In the TTL flash modes different displays are available for the selec- TTL FP ;...
  • Seite 175 Range display in manual flash mode M If this occurs, check the settings on the camera and/or the lens settings (see the In manual flash mode , the distance that camera’s operating instructions). must be maintained from the subject for cor- rect flash exposure is indicated.
  • Seite 176: Displays In The Camera Viewfinder

    6 Displays in the camera 7 Flash modes viewfinder Depending on the camera model, the follo- wing flash modes are available: Examples for the camera viewfinder display: • i-TTL flash mode ( ), chap. 7.1 Flash symbol flashes TTL BL •...
  • Seite 177: I-Ttl-Bl Flash Mode

    If the shot was exposed correctly, the correct 7.2 i-TTL-BL flash mode ( TTL BL exposure indication will illuminate for about This digital flash mode is only supported by 3 seconds (see 4.2). cameras if lenses are used that transmit Setting the mode of operation distance data to the camera (for example, "D-AF Nikkor lens").
  • Seite 178: Manual Flash Mode

    In these cases, the normal TTL flash mode • Press the sensor buttons on the MODE -will be set. touch display and select 7.3 Manual flash mode • Press the sensor button on the touch In the manual flash mode M , the flash unit display.
  • Seite 179: Automatic High-Speed Synchronisation (Fp)

    Manual partial light output levels 7.4 Automatic high-speed synchronisation (FP) Partial light output can be set in manual flash mode Various cameras support automatic high- speed synchronisation (see the camera’s Setting procedure 7.2 m operating instructions). This flash mode • Press the sensor button for partial light makes it possible to use a flash unit even output on the touch display as many times Zoom...
  • Seite 180: Manual Flash Mode With Distance Guideline (Gn)

    The setting for automatic high-speed Setting the mode of operation synchronisation occurs on the camera • Switch on the flash unit with the (see camera operating instructions)! button. The display of the flash unit then in addition The start screen appears. TTL FP shows "FP"...
  • Seite 181: Automatic Flash Mode

    7.6 Automatic flash mode 7.7 Strobe flash mode In the automatic flash mode , the flash The strobe flash mode is a manual flash unit sensor measures the light that mode. It allows several flash exposures to reflects back from the subject. The sensor be made on a single photo, which can be has a coverage of about 25°, and only especially interesting for movement studies...
  • Seite 182 Strobe flash frequency (f) • Set a suitable mode of operation on the STROBO camera, e.g. Strobe mode allows you to select the flash frequency (f), which indicates the number of 2,5m flashes per second. The number of flashes Zoom •...
  • Seite 183: Manual Flash Exposure Correction

    Setting the flash frequency (f(Hz)) 8 Manual flash exposure STROBO • Press the sensor button on the touch correction f (Hz) display for the flash frequency 2,5m The auto flash exposure mode of most Zoom cameras is adjusted to a reflection factor of f(Hz) 25% (the average reflection factor of flash subjects).
  • Seite 184: Special Functions

    and be adjusted to the correction factor Strongly reflecting objects in the motif can (depending on the camera model)! have a negative impact on the camera’s automatic exposure. The photograph will be Setting procedure underexposed. Remove reflecting objects or • Press the sensor buttons on the touch set a positive correction value.
  • Seite 185 Auto zoom Setting procedure The zoom position of the reflector is automa- • Press the button as often as it takes tically adjusted to the lens focal length when for the selection menu to appear. the flash unit is used with a camera that PARAMETER •...
  • Seite 186 Example: Wide-angle diffuser You use a zoom lens with a focal length range With the wide angle diffuser , focal lengths of 35 mm to 105 mm. In this case, you set of 12 mm or more can be illuminated (35 mm the position of the reflector of the flash unit format).
  • Seite 187: Cordless Flash Mode

    10 Cordless flash mode There are four independent remote channels to use so that multiple remote systems in the The flash unit supports the wireless Nikon same room do not interfere with one another. remote system in slave flash mode and is Master and Slave flash units belonging to the compatible with the Nikon system „Advanced same remote system must be set to the same...
  • Seite 188: Remote Master Mode Settings

    10.1 Remote master mode settings 10.1.2 Setting the flash mode on the master flash unit The slave group A is activated at the factory. The master flash unit and slave groups A, B REMOTE and C can be activated or deactivated! MASTER •...
  • Seite 189: Setting The Exposure Correction (Ev) In Ttl Mode

    10.1.2.1 Setting the exposure correction 10.1.2.2 Partial light output in M-mode (EV) in TTL mode on the master settings on the master flash unit REMOTE flash unit Set the mode to as described in 10.1.2. MASTER REMOTE • Press the sensor button on the •...
  • Seite 190: Setting The Flash Mode For The Slave Flash Unit On The Master

    10.1.3 Setting the flash mode for the slave 10.1.3.1 Set exposure correction (EV) or par- REMOTE REMOTE flash unit on the master tial light output for the slave flash 1/16 MASTER MASTER 1/16 unit on the master A I B I C •...
  • Seite 191: Remote Channel Settings

    10.1.4 Remote channel settings 10.2 Remote slave flash mode The flash unit supports the wireless Nikon There are four independent remote channels remote system in slave flash mode and is to use so that multiple remote systems in the compatible with the Nikon system „Advanced same room do not interfere with one another.
  • Seite 192: Remote Slave Flash Mode Settings

    10.2.1 Remote slave flash mode settings 10.2.2 Setting the slave channel REMOTE • Switch on the flash unit with the SLAVE button. • Press the sensor button on the touch The start screen appears. display for the channel group (e.g. Thereafter, the flash unit always switches Gr A I Ch1 ).
  • Seite 193: Setting The Slave Group

    10.2.3 Setting the slave group 10.3 Testing remote flash mode REMOTE • Place the slave flash units in the desired SLAVE positions for the shot. Use flash unit • Press the sensor button on the touch mounting foot S60 (optional accessories) display for the channel group to set up the slave flash unit.
  • Seite 194: Servo Mode

    10.4 SERVO mode 10.4.2 Pre-flash suppression or synchronisation settings SERVO mode is a simple slave mode without SYNC M-Servo or with complete pre-flash suppression in • Set the camera to TTL mode. which the slave flash unit always triggers a flash as soon as the camera flash unit SYNC •...
  • Seite 195: Servo Mode Partial Light Output Settings

    10.4.3 Servo mode partial light output 10.4.4 Learn function SYNC M-Servo settings The “Learn function” enables individual automatic adjustment of the slave flash unit • Press the sensor button for partial light to the flash technology of the camera’s flash output on the touch display as many times Zoom 35 unit.
  • Seite 196: Switching-Off Servo Flash Mode

    Setting procedure for the learn function 10.4.5 Switching-off SERVO flash mode SYNC SYNC M-Servo The AF pre-flash function of the camera must • Press the displayed mode of operation on M-Servo be switched off. the touch display as many times as it takes for the display for selecting the mode of operation to appear.
  • Seite 197: Option Menu

    11 OPTION menu 11.2 Secondary reflector (SUB-REFL.) The secondary reflector is used for frontal 11.1 RAPID mode brightening when using a bounce flash if the In flash modes A and TTL, the recycling times main reflector is tilted sideways or upwards. depend on how much light is needed for the If the light from the secondary reflector is too large, it can be reduced by half.
  • Seite 198: Modelling Light (Mod. Light)

    11.3 Modelling light (MOD. LIGHT) 11.4 Zoom Mode (ZOOM MODE) The modelling light is a high-frequency 11.4.1 Extended Zoom Mode stroboscopic flash. It creates the impression In extended zoom mode the zoom position of a semi-permanent light for a duration of of the reflector is reduced to one level below about 3 seconds.
  • Seite 199: Spot Zoom Mode

    Depending on the system, the extended Setting procedure zoom mode is supported for lens focal • Press the button as often as it takes lengths of 28 mm or more (35-mm format). for the selection menu to appear. The camera must be equipped with a CPU OPTION •...
  • Seite 200: Standard Zoom Mode

    11.4.3 STANDARD zoom mode 11.5 Shooting format adjustment ZOOM-SIZE In standard zoom mode, the zoom position of the reflector is adjusted to the focal length of Certain types of digital cameras allow the the camera lens. display for the position of the reflector to be adjusted to chip-format (dimensions of the Setting procedure recording module) using the Zoom Size...
  • Seite 201: Af Auxiliary Light (Af-Beam)

    11.6 AF auxiliary light (AF-BEAM) Setting procedure If the AF metering system of a digital AF reflex • Press the button as often as it takes camera is unable to focus due to insufficient for the selection menu to appear. ambient lighting, the camera activates the AF auxiliary light built into the flash unit.
  • Seite 202: Range Display In M Or Ft

    11.7 Range display in m or ft 11.8 Flash Bracketing Series (FLASH BRACK.) The range indication in the display can either be shown in metres (m) or feet (ft). A series of flash exposures (flash-bracketing FB) can be carried out in the i-TTL and auto- Setting procedure matic flash modes.
  • Seite 203: Beep Function (Beep)

    • The first shot is taken without a correction 11.9 Beep function (BEEP) value. „FB I“ will also appear on the The beep function allows the user to receive display. an acoustic signal for certain functions of the • The second shot is taken with minus correc- flash unit.
  • Seite 204: Locking / Unlocking

    Acoustic signals after the flash unit has been 11.10 Locking / unlocking turned on: The setting on the flash unit can be locked • A short (about two seconds) uninterrupted against unintended changes. beep signal after turning the flash on indi- To lock or unlock, hold down the button cates that the flash unit is ready.
  • Seite 205: Favorite Programme

    Setting procedure 12 Favorite programme • Press the button as often as it takes In flash photography there are always recur- for the selection menu to appear. ring standard situations (e.g. birthday cele- brations at home, etc.). The ecablitz permits the settings for such standard situations to OPTION OPTION...
  • Seite 206: Flash Techniques

    Procedure for loading a favourite programme 13 Flash techniques 13.1 Bounce flash • Press the button as often as it takes Bounce flash illuminates the subject more for the selection menu to appear. softly and reduces dense shadows. It also reduces the drop in light from foreground to •...
  • Seite 207: Bounce Flash With A Reflector Card

    13.2 Bounce flash with a reflector card sure level for the subsequent shot before the shot is actually taken. This can be useful The use of bounce flash with the integrated when, for example, the flash exposure has to reflector card can bring out highlights in be adjusted to specific details that may not the eyes of human subjects:...
  • Seite 208: Flash Synchronisation

    14 Flash synchronisation 14.2 Normal synchronisation In normal synchronisation the flash unit is 14.1 Automatic flash sync speed control triggered at the beginning of the shutter time Depending on the camera model and camera (first curtain synchronisation). Normal mode, the shutter speed is switched to flash synchronisation is the standard mode on all cameras.
  • Seite 209: Second Curtain Synchronisation (Rear)

    14.4 Second curtain synchronisation 14.5 Synch socket (REAR) The flash can be triggered in automatic flash mode , in manual flash mode Some cameras offer the option of second- strobe flash mode via the sync socket. curtain synchronisation (REAR), in which the flash unit is not triggered until the end of the A mecablitz 64AF-1 on the camera can trigger exposure time.
  • Seite 210: Touch Display Settings

    15 Touch display settings 15.2 Rotation (ROTATION) When the flash unit is rotated in the 15.1 Brightness (BRIGHTNESS) horizontal direction, the screen display can The screen brightness can be changed in five also be rotated. levels. Setting procedure Setting procedure •...
  • Seite 211: Care And Maintenance

    Firmware-updates van de flitser gelden (Firmware Update). hierbij niet! For more information, visit the Metz home- page at: www.metz.de 16.2 Conditioning the flash capacitor The flash capacitor built into the flash unit undergoes a physical change when the device has not been used for a long time.
  • Seite 212: Troubleshooting

    17 Troubleshooting The reflector position is not automatically adjusted to the current zoom position of the lens Should the flash unit fail to function properly or meaningless con- tent appear on the flash unit display panel, switch the flash unit off •...
  • Seite 213 The setting for manual TTL flash exposure correction has no effect • The camera does not support manual TTL flash exposure correction on the flash uni. Automatic switching to the flash sync speed fails to occur • The camera has a between-the-lens shutter (as do most compact cameras), Switching to sync speed is therefore unnecessary.
  • Seite 214: Technical Data

    • 0,1/4,2 with lithium batteries (1,5V) Flash modes: • 0,1/1,6 with external power supply with Metz Power Pack P76 i TTL-, i TTL BL-, i TTL FP flash mode, manual flash mode with distance guideline, automatic A, strobe flash mode, matrix-control- Light coverage: led TTL fill-in flash, manual M.
  • Seite 215: Optional Accessories

    • mecabounce Diffuser MBM-03 Including front and background diffusers, carrying case and (Order No. 000003902) Bowens-compatible adapter to connect to a Metz TL or BL studio flash device With this diffuser, soft lighting can be achieved in a very simple manner.
  • Seite 216 • Mini Octagon Softbox SB 15-15 (Order No. 009021516) Colour: white, Dimensions: Ø 15 cm • Spot bounce diffuser SD 30-26 W (Order No. 009043021) Colour: white for neutral light / Dimensions: 30 × 26 cm • Spot bounce diffuser SD 30-26 S (Order No.
  • Seite 217 Disposal of batteries Do not dispose of spent batteries with domestic rubbish. Please return spent batteries to collecting points should they exist in your country! Please return only fully discharged batteries. Normally, batteries are fully discharged if: - the device they powered switches itself off and indicates "Spent Batteries".
  • Seite 218 1 Avvertenze per la sicurezza ......220 10.1.2 Impostare la modalità sul flash master ....242 2 Funzioni flash dedicate .
  • Seite 219: Premessa

    11.7 Indicazione del campo d’utilizzo in m o ft ....256 Grazie per aver scelto un prodotto Metz. E’ un piacere per noi acco- 11.8 Serie di esposizioni flash(FLASH BRACK.) ....256 gliervi tra i nostri clienti.
  • Seite 220: Avvertenze Per La Sicurezza

    1 Avvertenze per la sicurezza • L’utilizzo del flash è previsto e autorizzato solamente nell’ambito della fotografia! Non attivare il flash in presenza di gas • Utilizzare solo le fonti di alimentazione o liquidi in fiammabili elettrica con-sentite e descritte nelle istru- (benzina, solventi ecc.)! zioni per l’uso! PERICOLO DI ESPLOSIONI!
  • Seite 221: Funzioni Flash Dedicate

    • Quando il flash viene attivato, non porre 2 Funzioni flash dedicate materiali impermeabili alla luce davanti Le funzioni flash dedicate sono funzioni mes- alla parabola (finestra flash) o a diretto se a punto specificatamente per i diversi contatto con essa. A causa dell’elevata sistemi di camera.
  • Seite 222: Preparazione Del Flash

    • Indicazione automatica del campo 3 Preparazione del flash d'utilizzo del flash 3.1 Montaggio del flash • Automatismo flash di programma Montaggio del flash sulla camera • Pre-lampo per la riduzione dell’effetto „occhi rossi“ Spegnete la camera e il flash con l’interrutto- •...
  • Seite 223: Alimentazione

    3.2 Alimentazione Sostituzione delle batterie Scelta delle pile o delle batterie Le batterie/batterie ricaricabili sono scariche o consumate se l'intervallo di ricarica (tempo Il flash può essere alimentato a scelta con: fra lo scatto di un flash a piena potenza, •...
  • Seite 224: Accensione E Spegnimento Del Flash

    3.3 Accensione e spegnimento del flash PARAMETER Una volta premuto il tasto è possi- PARAMETER bile impostare i parametri del flash. • Accendere il flash con il tasto Appare la schermata di avvio. PARAMETER O Il flash si accende sempre nell’ultima P (potenza luminosa ridotta), cap.
  • Seite 225: Info

    OPTION 3.5 INFO Una volta premuto il tasto è possibile OPTION impostare le opzioni. Le impostazioni attuali del flash possono essere visualizzate durante l’uso. OPTION • Premere il tasto con sensore RAPID RAPID (tempi rapidi di ricarica), cap. 11.1 display touch. Appare la scheda informa- SUB-REFL.
  • Seite 226 risparmiare energia ed evitare che le sorgenti Impostare lo spegnimento automatico d'alimentazione si scarichino inutilmente. dell’apparecchio La presenza dello spegnimento automatico • Accendere il flash con il tasto dell’apparecchio è visualizzata sul display Appare la schermata di avvio. INFO. L'indicazione dello stato di carica del Il flash si accende sempre nell’ultima flash f e le indicazioni sul display LCD si modalità...
  • Seite 227: Indicazioni Sul Flash

    4 Indicazioni sul flash superficie riflettente (per es. in caso di flash indiretti), oppurer 4.1 Indicazione flash pronto - impostare sulla fotocamera un valore ISO Quando il condensatore flash è carico, sul superiore. flash si accende la spia di carica del flash Fate attenzione all'indicazione del campo , per indicare che il flash è...
  • Seite 228: Indicazione Della Modalità Del Flash

    5.1 Indicazione della modalità del flash Indicazione campo di utilizzo in modalità flash i TTL-/i TTL BL Sul display verrà visualizzata la modalità del flash impostata. A tal proposito sono possi- TTL BL In tali modalità bili diverse indicazioni relative alla modalità TTL FP ;...
  • Seite 229 Indicazione del campo di utilizzo del flash Se viene impostata la modalità flash manuale M in tali tipi di fotocamere, sul nel modo flash manuale M display apparirà l’indicazione „FEE“ e lo Nel modo flash manuale M il display indica il scatto della foto verrà...
  • Seite 230: Indicazioni Sul Mirino Della Camera

    6 Indicazioni sul mirino della 7 Modalità flash camera A seconda del tipo di fotocamera sono dispo- nibili le seguenti modalità flash: Esempi di indicazioni sul mirino: • Modalità i TTL ( ), cap. 7.1 Il simbolo flash lampeggia TTL BL •...
  • Seite 231: I-Modalità I-Ttl-Bl

    La luce riflessa dei pre-lampi viene valutata 7.2 i-Modalità i-TTL-BL ( TTL BL dalla fotocamera. In base a questa valuta- Questa modalità digitale del flash è suppor- zione la fotocamera adatta in modo ottimale tata dalle fotocamere solo se si utilizzano la successiva esposizione alla situazione di obiettivi che trasmettono alla fotocamera i ripresa (vedi le istruzioni d'uso della foto-...
  • Seite 232: Modo Flash Manuale

    Viene quindi utilizzato il normale funziona- • Premere il tasto con sensore MODE mento del flash display touch e selezionare 7.3 Modo flash manuale • Premere il tasto con sensore sul display Con il modo flash manuale M il flash emette touch.
  • Seite 233: Sincronizzazione Automatica Con Tempi Corti (Fp)

    Potenza ridotta manuale 7.4 Sincronizzazione automatica con tempi corti (FP) In modalità flash manuale è possibile impostare la potenza ridotta. La sincronizzazione automatica con tempi corti viene supportata da diverse fotocamere Procedura per l'impostazione 7.2 m vedi il manuale di istruzioni della foto- •...
  • Seite 234: Modalità Manuale Con Impostazione Della Distanza (Gn)

    L'impostazione per la sincronizzazione Impostare la modalità automatica con tempi corti avviene sulla • Accendere il flash con il tasto fotocamera (vedi il manuale di istruzioni Appare la schermata di avvio. della fotocamera)! Sul display del flash verrà Il flash si accende sempre nell’ultima TTL FP pertanto visualizzato anche "FP"...
  • Seite 235: Modo Flash Automatico

    7.6 Modo flash Automatico 7.7 Modo flash Stroboscopico Con il modo flash Automatico il fotosen- Il modo flash Stroboscopico è un modo sore del lampeggiatore misura la luce manuale. Con questa funzione è possibile riflessa dal soggetto. Il fotosensore ha un fare diverse esposizioni su una foto unica.
  • Seite 236 Frequenza lampi stroboscopio (f) • Impostare sulla fotocamera una modalità STROBO corrispondente, per es. Con il modo flash Stroboscopico è possibile impostare la frequenza dei lampi (f). Tale 2,5m parametro indica il numero dei lampi per Zoom • Premere leggermente il pulsante di scatto secondo.
  • Seite 237: Correzione Manuale D'esposizione Flash

    Impostare la frequenza dei flash (f(Hz)) 8 Correzione manuale d’esposi- STROBO • Premere il tasto con sensore sul display zione flash f (Hz) touch per la frequenza dei flash 2,5m Il sistema di esposizione automatica del Zoom flash della maggior parte delle fotocamere è f(Hz) regolata su un fattore di riflessione pari al 25% (fattore medio di riflessione per soggetti...
  • Seite 238: Funzioni Speciali

    di correzione è possibile che cambi l’indica- Attenzione: Oggetti fortemente riflettenti zione del campo d’utilizzo sul display e che nell’immagine del soggetto possono distur- venga adeguato ad esso (in funzione del tipo bare l’esposizione automatica della foto- camera. La ripresa sarà quindi sottoesposta. di fotocamera)! Spostate gli oggetti riflettenti o impostate un Procedura per l’impostazione...
  • Seite 239 Zoom automatico. Procedura per l’impostazione Quando si utilizza il flash con una foto- • Continuare a premere il tasto finché camera che trasmette i dati relativi alla non compare il menu di selezione. distanza focale dell’obiettivo, la posizione PARAMETER • Premere il tasto con sensore zoom della parabola principale si regola display touch.
  • Seite 240 Esempio : Diffusore grandangolare State utilizzando un obiettivo zoom con un Grazie al diffusore grandangolare integra- intervallo di focali da 35 mm a 105 mm. to è possibile illuminare distanze focali a In questo caso posizionate la parabola partire da 12 mm (formato piccolo). principale del flash su 35 mm.
  • Seite 241: Controllo A Distanza Wi-Fi

    10 Controllo a distanza wi-fi Per fare in modo che più sistemi a distanza nella stessa area non si disturbino a vicenda, Il flash supporta il sistema remote Nikon sono disponibili quattro canali remoti indi- senza cavo in modo asservito ed è compati- pendenti.
  • Seite 242: Funzionamento Master Remoto

    10.1 Funzionamento master remoto 10.1.2 Impostare la modalità sul flash master Il gruppo slave A è attivato come imposta- zione di fabbrica. Il flash master e i gruppi REMOTE slave A, B e C possono essere attivati o MASTER • Premere il tasto con sensore disattivati! —...
  • Seite 243: Impostare La Correzione Dell'esposizione (Ev) In Modalità Ttl Nel Flash Master

    10.1.2.1 Impostare la correzione dell’esposi- 10.1.2.2 Impostare la potenza ridotta in zione (EV) in modalità TTL nel flash modalità M sul flash master REMOTE master Impostare la modalità su come descritto MASTER REMOTE al punto 10.1.2. • Premere sul display touch il tasto con MASTER sensore per la modalità...
  • Seite 244: Impostare Sul Master La Modalità Per Il Flash Slave

    10.1.3 Impostare sul master la modalità per 10.1.3.1 Impostare sul master la correzione REMOTE REMOTE il flash slave dell’esposizione (EV) o la potenza 1/16 MASTER MASTER 1/16 ridotta per il flash slave A I B I C • Premere il tasto con sensore —...
  • Seite 245: Impostare Il Canale Remoto

    10.1.4 Impostare il canale remoto 10.2 Modo con controllo a distanza Il flash supporta il sistema remote Nikon Per fare in modo che più sistemi a distanza senza cavo in modo asservito ed è compa- nella stessa area non si disturbino a vicenda, tibile con il sistema Nikon „Advanced sono disponibili quattro canali remoti Wireless Lighting“.
  • Seite 246: Impostare La Modalità Slave Remota

    10.2.1 Impostare la modalità slave remota 10.2.2 Impostare il canale slave REMOTE • Accendere il flash con il tasto SLAVE Appare la schermata di avvio. • Premere il tasto con sensore sul display Il flash si accende sempre nell’ultima touch per il gruppo del canale modalità...
  • Seite 247: Impostare Il Gruppo Slave

    10.2.3 Impostare il gruppo slave 10.3 Verifica del modo con controllo a REMOTE distanza SLAVE • Posizionate il flash slave nel modo deside- • Premere il tasto con sensore sul display rato per la foto successiva. touch per il gruppo del canale Utilizzate un piedistallo per flash slave S60 A I CH2 Zoom 35...
  • Seite 248: Modo Servo

    10.4 Modo SERVO 10.4.2 Impostare la soppressione pre-lampo e la sincronizzazione La modalità SERVO è una semplice modalità SYNC M-Servo slave con o senza soppressione pre-lampo in • Impostate per la fotocamera la modalità cui il flash slave emette sempre un flash non TTL.
  • Seite 249: Impostare La Potenza Ridotta In Modalità Servo

    10.4.3 Impostare la potenza ridotta in 10.4.4 Funzione di apprendimento SYNC M-Servo modalità servo La “Funzione di apprendimento” consente di adeguare automaticamente, in maniera • Premere sul display touch il tasto con personalizzata, il flash slave al flash sensore per la potenza ridotta, finché Zoom 35 integrato nella fotocamera.
  • Seite 250: Disattivare La Modalità Flash Servo

    Procedura per l’impostazione della funzione 10.4.5 Disattivare la modalità flash SERVO SYNC di apprendimento SYNC M-Servo • Premere sul display touch la modalità M-Servo visualizzata finché non appare quella La funzione pre-lampo AF della fotocamera desiderata. deve essere spenta. Zoom 35 Zoom 35 •...
  • Seite 251: Option-Menu

    11 OPTION-Menu 11.2 Parabola ausiliaria (SUB-REFL.) La parabola ausiliaria serve a rischiarare 11.1 Modalità RAPID frontalmente con flash indiretto, quando la Nella modalità flash A e TTL i tempi di ricarica parabola principale è spostata lateralmente dipendono da quanta luce occorre per lo o verso l’alto.
  • Seite 252: Luce Pilota (Mod. Light)

    11.3 Luce pilota (MOD. LIGHT) 11.4 Modo zoom (ZOOM MODE) La luce pilota (ML = Modelling Light) è un 11.4.1 Modo zoom esteso flash stroboscopico ad alta frequenza. La sua Nel modo zoom esteso la posizione zoom durata è di ca. 3 secondi, si ha pertanto della parabola viene ridotta di un grado l’impressione di una luce quasi permanente.
  • Seite 253: Modalità Zoom Spot

    Per motivi di sistema la modalità zoom Procedura per l’impostazione esteso è supportata per focali d'obiettivo a • Continuare a premere il tasto finché partire da 28 mm (formato piccolo). non compare il menu di selezione. La fotocamera deve essere dotata di OPTION •...
  • Seite 254: Modalità Zoom Standard

    11.4.3 Modalità zoom STANDARD 11.5 Adattamento formato foto (ZOOM-SIZE) Nella modalità zoom standard la posizione di zoom della parabola viene adeguata alla In alcuni tipi di camere digitali l’indicazione distanza focale della fotocamera. relativa alla posizione della parabola può essere adattata con la funzione Zoom Size Procedura per l’impostazione al formato chip (dimensioni dell’unità...
  • Seite 255: Illuminatore Ausiliario Af (Af-Beam)

    11.6 Illuminatore ausiliario AF (AF-BEAM) Alcuni tipi di fotocamere supportano l'illumi- natore ausiliario AF incorporato nel flash solo Se il sistema di misurazione AF di una foto- con il sensore AF centrale. Se viene sele- camera reflex digitale AF non riesce a mettere zionato un sensore AF decentrato, l’illumi- a fuoco a causa della scarsa luminosità...
  • Seite 256: Indicazione Del Campo D'utilizzo In M O Ft

    11.7 Indicazione del campo d’utilizzo in 11.8 Serie di esposizioni flash m o ft (FLASH BRACK.) Il campo di utilizzo può essere visualizzato Nei modi flash i-TTL e automatico è possibile sul display in metri (m) o in feet (ft). effettuare una serie di esposizioni flash (Flash-Bracketing FB).
  • Seite 257: Funzione Bip (Beep)

    • La prima ripresa viene effettuata senza 11.9 Funzione bip (BEEP) valore di correzione. Sul display si visualiz- Con la funzione bip l’utente può ottenere dal zerà in aggiunta „FBI“. flash segnali acustici per alcune funzioni • La seconda ripresa viene effettuata con cor- dell’apparecchio.
  • Seite 258: Blocco / Sblocco

    Segnale acustico dopo l’accensione del 11.10 Blocco / sblocco flash: È possibile bloccare l’impostazione sul flash • Un breve segnale acustico continuo (bip di contro le regolazioni involontarie. circa 2 secondi) dopo l’accensione indica Per bloccare e sbloccare, tenere premuto il lo stato di lampo pronto dell’apparecchio.
  • Seite 259: Programma Favorito

    Procedura per l’impostazione 12 Programma favorito • Continuare a premere il tasto finché Quando si fanno fotografie con il flash ci si non compare il menu di selezione. trova spesso di fronte alle stesse situazioni di ripresa (ad es. feste di ompleanno nella propria stanza ecc.).
  • Seite 260: Tecniche Lampo

    Procedura per l’impostazione del caricamen- 13 Tecniche lampo to di un programma preferito 13.1 Lampo riflesso • Continuare a premere il tasto finché Utilizzando il lampo riflesso la luce sul non compare il menu di selezione. soggetto risulta più morbida e le ombre sono meno dure.
  • Seite 261: Lampo Riflesso Con Pannello Riflettente

    13.2 Lampo riflesso con pannello 13.4 Memoria misurazioni dell’esposi- zione FE riflettente Alcune fotocamere dispongono di una Utilizzando il lampo riflesso con pannello memoria misurazioni dell’esposizione (FE; riflettente integrato, possono crearsi Flash-Exposure). Tale memoria viene suppor- picchi di luce negli occhi delle persone: tata dal flash in modo flash i TTL.
  • Seite 262: Sincronizzazione Del Lampo

    La memoria misurazioni dell’esposizione FE tempo di sincronizzazione. In questo modo è non viene supportata nel programma auto- possibile lavorare con tutti i tempi di posa. matico verde e nei programmi Vari o Scene! Se doveste aver bisogno della potenza piena Per maggiori informazioni sull’impostazione del flash, non selezionate tempi di posa più...
  • Seite 263: Sincronizzazione Sulla Seconda Tendina (Rear)

    grammi riprese notturne, ecc.) o può essere permettono la funzione REAR (ad es. determi- impostata sulla fotocamera (vedi il manuale nati programmi „Vari“ o „Scene“ o funzione di istruzioni della fotocamera). Sul flash non pre-lampo per eliminare l’“effetto occhi vi è alcuna impostazione o visualizzazione rossi“).
  • Seite 264: Impostazioni Del Display Touch

    15 Impostazioni del display touch 15.2 Rotazione (ROTATION) Quando si orienta il flash in orizzontale è 15.1 Luminosità (BRIGHTNESS) possibile orientare anche le indicazioni sullo La luminosità dello schermo può essere schermo. cambiato in cinque posizioni. Procedura per l’impostazione Procedura per l’impostazione •...
  • Seite 265: Cura E Manutenzione

    (aggiornamento software). Questo non riguarda gli aggiornamenti del software del flash! Per maggiori informazioni consultate il sito internet Metz: www.metz.de ö 16.2 Formazione del condensatore flash Il condensatore incorporato nel flash tende a deformarsi quando il lampeggiatore resta inutilizzato per lungo tempo.
  • Seite 266: In Caso Di Anomalie Di Funzionamento

    17 In caso di anomalie di funzionamento La posizione della parabola non viene adeguata automaticamente alla posizione zoom dell’obiettivo Nel caso in cui il display del flash dovesse per esempio fornire indicazioni senza senso o il flash non funzionasse come dovrebbe, •...
  • Seite 267 L’impostazione per la compensazione manuale dell’esposizione TTL non è possibile • La fotocamera non supporta la compensazione manuale dell’esposizione TTL sul flash. Non ha luogo la commutazione automatica sul tempo sincro • La fotocamera ha un otturatore centrale (la maggior parte delle fotocamere compatte).
  • Seite 268: Dati Tecnici

    • 0,1/4,2 per il funzionamento con batterie al litio (1,5V) Modalità i TTL, i TTL BL, i TTL FP, modalità manuale con impostazione • 0,1/1,6 per il funzionamento con alimentazione esterna con Metz della distanza, modo flash Automatico, modo flash Stroboscopico,...
  • Seite 269: Accessori Opzionali

    Inclusi diffusore frontale e per sfondi, apposita borsa e adattatore • mecabounce Diffuser MBM-03 compatibile con Bowens per il collegamento a flash da studio Metz (art. no. 000003902) TL o BL Questo diffusore permette di realizzare con estrema semplicità...
  • Seite 270 • Mini Octagon Softbox SB 15-15 (art. no. 009021516) Colore: bianco, dimensioni: Ø 15 cm • Schermo riflettente spot SD 30-26 W (art. no. 009043021) Colore: bianco per luce neutra / Dimensioni: 30 × 26 cm • Schermo riflettente spot SD 30-26 S (art.
  • Seite 271 Smaltimento delle batterie Le batterie non vanno gettate insieme ai rifiuti domestici. Si prega di utilizzare un sistema di smalti- mento adeguato, p. es. portandole al negozio dove le si è acquistate o ad un centro di raccolta apposito. Si prega di effettuare lo smaltimento soltanto di batterie scariche.
  • Seite 272 Introducción ......... . . 273 10.1.1 Ajustar modo maestro remoto .
  • Seite 273: Introducción

    11.6 Luz auxiliar AF (AF-BEAM) ......309 Le agradecemos que se haya decidido por un producto Metz y nos 11.7 Indicaciones de alcance en m o ft .
  • Seite 274: Indicaciones De Seguridad

    1 Indicaciones de seguridad • ¡El flash está previsto y autorizado para su uso exclusivo en el ámbito fotográfico! ¡No disparar el flash en las proximidades • ¡Emplear solamente las fuentes de energ’a de gases o l’quidos inflamables recomendadas y admitidas en el modo de (gasolina, disolventes, etc.)! empleo! ¡PELIGRO DE EXPLOSION!
  • Seite 275: Funciones Dedicadas Del Flash

    • ¡Al disparar un destello, no debe encont- 2 Funciones dedicadas del flash rarse ningún material opaco inmediata- Las funciones dedicadas del flash son las mente delante o directamente sobre el que se adecuan de manera especial al siste- reflector (ventanilla). Caso contrario, ma de la cámara.
  • Seite 276: Preparación Del Flash

    • Control automático de destellos de 3 Preparación del flash medición AF 3.1 Montaje del flash • Indicación automática de alcance del flash Colocar el flash en la cámara • Automatismo programado para flash • Función de predestellos para reducir el Desconectar la cámara y el flash antes de efecto de los ojos rojos montarlos o desmontarlos.
  • Seite 277: Alimentación De Energía

    3.2 Alimentación de energía Cambiar pilas Selección de pilas o baterías Las pilas o pilas recargables están vacías o gastadas si el intervalo entre destellos El flash funciona con cualquiera de estas (tiempo desde que se realiza un disparo con opciones: plena potencia luminosa, p.
  • Seite 278: Conexión Y Desconexión Del Flash

    3.3 Conexión y desconexión del flash PARAMETER Tras pulsar la tecla , se pueden PARAMETER configurar los parámetros del flash. • Encender el flash con la tecla Aparece la pantalla inicial. PARAMETER O El flash se enciende después siempre con P (potencial parcial de luz), consultar 7.3;...
  • Seite 279: Info

    OPTION 3.5 INFO Tras pulsar la tecla , se pueden OPTION configurar las opciones. La configuración actual del flash se puede mostrar durante el funcionamiento. OPTION • En la pantalla táctil, pulsar la tecla de RAPID RAPID (intervalos rápidos entre destellos), sensor .
  • Seite 280 para ahorrar energía y evitar que las fuentes Ajustar desconexión automática del aparato de alimentación se descarguen de modo no • Encender el flash con la tecla deseado. La desconexión automática del Aparece la pantalla inicial. aparato aparecerá indicada en la pantalla El flash se enciende después siempre con INFO.
  • Seite 281: Indicadores Led En El Flash

    4 Indicadores LED en el flash ficie de reflexión (p. ej. con destellos indirectos); o 4.1 Indicación de disponibilidad del flash - ajustar un valor ISO superior en la cámara. Cuando el condensador del flash está Observe el indicador de alcance en la cargado, se enciende en el flash la tecla pantalla del flash (consultar 5.2).
  • Seite 282: Indicación Del Modo De Funcionamiento De Flash

    5.1 Indicación del modo de funciona- Indicación de alcance en modos de funciona- miento i TTL-/i TTL BL miento de flash En los modos TTL de funcionamiento del En la pantalla se indica el modo de funciona- TTL BL TTL FP flash miento que se ha configurado.
  • Seite 283 Indicación de alcance en modo manual Cuando en estos modos de cámara se ha ajustado el modo de flash manual M, se indi- En el modo manual M de funcionamiento del cará en la pantalla „FEE“ como advertencia, flash se indicará en la pantalla el valor de quedando bloqueado el disparo de la distancia que debe respetarse para una 7.2 m...
  • Seite 284: Indicaciones En El Visor De La Cámara

    6 Indicaciones en el visor de la 7 Modos de funcionamiento del flash cámara Según el tipo de cámara, están disponibles los siguientes modos de funcionamiento de Ejemplos de indicaciones en el visor de la flash: cámara: • Modo de flash i TTL ( ), consultar 7.1 El símbolo de flash parpadea TTL BL...
  • Seite 285: Modo De Flash I-Ttl-Bl

    los de medición casi imperceptibles. 7.2 Modo de flash i-TTL-BL ( TTL BL La luz reflejada de los predestellos de medi- Este modo de funcionamiento digital del ción es evaluada por la cámara, que, a conti- flash es admitido solamente por la cámara si nuación, adapta la exposición posterior del se emplean objetivos que transmitan los flash a la situación de la toma (para más...
  • Seite 286: Modo De Flash Manual

    flash "BL" se borra de forma automática o no MODE se puede activar. • En la pantalla táctil, pulsar las teclas de Entonces, se ejecuta el funcionamiento sensor y seleccionar normal • En la pantalla táctil, pulsar la tecla de 7.3 Modo de flash manual sensor.
  • Seite 287: Sincronización Rápida Automática (Fp)

    Potencias parciales manuales 7.4 Sincronización rápida automática (FP) En el modo de flash manual , se puede ajustar una potencia parcial de luz. Algunas cámaras son compatibles con la sincronización rápida automática (consultar Configuración 7.2 m manual de instrucciones de la cámara). Con •...
  • Seite 288: Funcionamiento De Flash Manual Con Indicación De La Distancia (Gn)

    La configuración para la sincronización Ajustar modo de funcionamiento rápida automática se realiza en la cámara • Encender el flash con la tecla (consultar manual de instrucciones de la Aparece la pantalla inicial. misma)! En la pantalla del flash aparece, El flash se enciende después siempre con TTL FP además, “FP”...
  • Seite 289: Modo Automático

    7.6 Modo automático 7.7 Modo estroboscópico En el modo automático , el fotosensor El modo estroboscópico es un modo de del flash mide la luz reflejada por el motivo. funcionamiento del flash manual. Con este El fotosensor tiene un ángulo de medición modo se disparan varios destellos durante de aprox.
  • Seite 290 Frecuencia de destellos estroboscópicos (f) • En la cámara, ajustar el modo de funciona- STROBO miento pertinente, p. ej. En el modo estroboscópico del flash la frecu- encia de destellos (f) puede ajustarse. Esta 2,5m frecuencia determina la cantidad de destel- Zoom •...
  • Seite 291: Corrección Manual De La Exposición Del Flash

    Ajustar frecuencia de destellos (f(Hz)) 8 Corrección manual de la STROBO • En la pantalla táctil, pulsar la tecla de sen- exposición del flash f (Hz) sor para la frecuencia de destellos 2,5m El sistema automático de flash de la mayoría Zoom de las cámaras está...
  • Seite 292: Funciones Especiales

    ción del alcance en la pantalla puede variar Atención: Los objetos muy reflectantes en adaptándose al valor de corrección (depen- la imagen del motivo pueden perturbarel diendo del modelo de cámara)! sistema de exposición automática de la cámara. En ese caso, la toma quedará subex- Configuración puesta.
  • Seite 293 Auto-Zoom Configuración Cuando se emplea el flash con una cámara • Pulsar la tecla hasta que aparezca el que transmite datos de la distancia focal de menú de selección. objetivo, la posición del zoom del reflector se • En la pantalla táctil, pulsar la tecla de ajusta automáticamente a la distancia focal PARAMETER sensor...
  • Seite 294 Por ejemplo: Difusor de gran angular Se utiliza un objetivo zoom con una gama de Con el difusor de gran angular integrado distancias focales de 35 mm a 105 mm. se pueden iluminar distancias focales a En este ejemplo, se ajusta a 35 mm la partir de 12 mm (pequeño formato).
  • Seite 295: El Funcionamiento Remoto

    10 El funcionamiento Remoto Con el fin de que no interfieran recípro- camente en una misma estancia varios El flash es compatible con el sistema remoto sistemas remotos, hay disponibles cuatro inalámbrico Nikon en modo de flash esclavo, canales remotos independientes. e igualmente con el sistema Nikon Es necesario sintonizar en el mismo canal „Advanced Wireless Lighting“.
  • Seite 296: Funcionamiento Maestro Remoto

    10.1 Funcionamiento maestro remoto 10.1.2 Ajustar modo en flash maestro El grupo esclavo A está activado de fábrica. El flash maestro y los grupos esclavos A, B y REMOTE • En la pantalla táctil, pulsar la tecla de C se pueden activar o desactivar! MASTER sensor hasta que aparezca la...
  • Seite 297: Ajustar Compensación De Exposi-Ción (Ev)

    10.1.2.1 Ajustar compensación de exposi- 10.1.2.2 Ajustar potencia parcial de luz en el ción (EV) en modo TTL en flash modo M del flash maestro REMOTE maestro Ajustar el modo de funcionamiento a MASTER REMOTE descrito en 10.1.2. • En la pantalla táctil, pulsar la tecla de sen- MASTER para el modo de funcionamiento •...
  • Seite 298: En Flash Maes

    10.1.3 Ajustar modo de funcionamiento para 10.1.3.1 Ajustar compensación de exposi- REMOTE REMOTE el flash esclavo en flash maes ción (EV) o potencia luminosa 1/16 MASTER MASTER 1/16 parcial para el flash esclavo en • En la pantalla táctil, pulsar la tecla de —...
  • Seite 299: Ajustar Canal Remoto

    10.1.4 Ajustar canal remoto 10.2 Modo remoto esclavo El flash es compatible con el sistema remoto Con el fin de que no interfieran recíproca- inalámbrico Nikon en modo de flash esclavo, mente en una misma estancia varios e igualmente con el sistema Nikon sistemas remotos, hay disponibles cuatro „Advanced Wireless Lighting“.
  • Seite 300: Ajustar Modo De Flash Esclavo Remoto

    10.2.1 Ajustar modo de flash esclavo remoto 10.2.2 Ajustar canal esclavo REMOTE • Encender el flash con la tecla SLAVE Aparece la pantalla inicial. • En la pantalla táctil, pulsar la tecla de El flash se enciende después siempre con sensor para el grupo de canales (p.
  • Seite 301: Ajustar Grupo Esclavo

    10.2.3 Ajustar grupo esclavo 10.3 Comprobación del modo remoto REMOTE • Colocar los flashes esclavos para la toma. SLAVE Para colocar el flash esclavo, emplear un • En la pantalla táctil, pulsar la tecla de pie de apoyo S60 (accesorios especiales) sensor para el grupo de canales para flashes.
  • Seite 302: Modo Servo

    10.4 Modo SERVO 10.4.2 Ajustar anulación de predestello y sincronización El modo SERVO es un modo esclavo simple SYNC M-Servo sin o con anulación de predestello en el que • Ajustar en la cámara un modo de funcio- el flash esclavo emite siempre un disparo tan namiento TTL.
  • Seite 303: Ajustar Potencia Parcial De Luz En Modo Servo

    10.4.3 Ajustar potencia parcial de luz en 10.4.4 Función de aprendizaje SYNC M-Servo modo Servo La „función de aprendizaje“ hace posible que un flash esclavo concreto se adapte • En la pantalla táctil, pulsar la tecla de automáticamente a la técnica de iluminación sensor de la potencia parcial de luz Zoom 35...
  • Seite 304: Desactivar Modo De Flash Servo

    Proceso de ajuste para la función de 10.4.5 Desactivar modo de flash SERVO SYNC aprendizaje SYNC M-Servo • En la pantalla táctil, pulsar el modo de M-Servo funcionamiento mostrado hasta que La función de predestello AF de la cámara aparezca la selección del modo de funcio- debe estar apagada.
  • Seite 305: Option-Menu

    11 OPTION-Menu 11.2 Reflector adicional (SUB-REFL.) El reflector adicional sirve para iluminar fron- 11.1 Modo RAPID talmente con destellos indirectos cuando el En los modos de funcionamiento de flash A y reflector principal está abatido hacia arriba TTL, los intervalos entre destellos dependen o hacia un lado.
  • Seite 306: Luz De Modelado (Mod. Light)

    11.3 Luz de modelado (MOD. LIGHT) 11.4 Modo Zoom (ZOOM MODE) La luz de modelado (ML = Modelling Light) es 11.4.1 Modo de zoom extendido una secuencia de destellos estroboscópicos Con el modo Extended-Zoom se reduce un a alta frecuencia. Con una duración de aprox. nivel la posición de zoom del reflector con 3 segundos, produce la impresión de una respecto a la distancia focal del objetivo de...
  • Seite 307: Modo De Zoom Spot

    Según el sistema, el funcionamiento de zoom Configuración extendido se puede utilizar con distancias • Pulsar la tecla hasta que aparezca el focales de objetivo a partir de 28 mm menú de selección. (formato pequeño). La cámara debe tener un •...
  • Seite 308: Modo De Zoom Standard

    11.4.3 Modo de zoom STANDARD 11.5 Adaptación del formato de toma (ZOOM-SIZE) En el modo de zoom estándar, se ajusta la posición del zoom del reflector a la distancia En algunos modelos de cámaras digitales, la focal del objetivo de la cámara. indicación relativa a la posición del reflector puede ser adaptada al formato de chip Configuración...
  • Seite 309: Luz Auxiliar Af (Af-Beam)

    11.6 Luz auxiliar AF (AF-BEAM) Configuración Cuando el sistema de medición AF de una • Pulsar la tecla hasta que aparezca el cámara réflex AF digital no puede enfocar con menú de selección. nitidez debido a una luminosidad ambiente insuficiente, la cámara activa la luz auxiliar •...
  • Seite 310: Indicaciones De Alcance En M O Ft

    11.7 Indicaciones de alcance en m o ft 11.8 Horquillado de flash (FLASH BRACK.) La indicación de alcance en la pantalla puede efectuarse o bien en metros (m) o en pies (ft). En el modo i-TTL y automático se puede reali- zar un horquillado de flash (Flash Bracketing, Configuración FB).
  • Seite 311: Función Beep (Beep)

    • La primera toma se realiza sin valor de 11.9 Función Beep (BEEP) corrección. En la pantalla aparece „FBI“. Gracias a la función Beep el usuario recibe • La segunda toma se realiza con la correcci- una señal acústica con determinadas ón negativa.
  • Seite 312: Bloqueo/Desbloqueo

    Aviso acústico al encender el flash: 11.10 Bloqueo/Desbloqueo • Al encender el flash, un breve pitido conti- La configuración del flash se puede bloquear nuado (aprox. 2 seg.) indica que el flash para evitar cambios por descuido. está preparado. Para bloquear y desbloquear la configura- ción, mantener pulsada la tecla unos Set Pitido al ajustar el modo de flash...
  • Seite 313: Programa Favorito

    Configuración 12 Programa favorito • Pulsar la tecla hasta que aparezca el En la fotografía con flash existen situaciones menú de selección. de tomas que se repiten de vez en cuando (p.e. fiestas de cumpleaños, etc.). El meca- blitz ofrece la opción de memorizar los OPTION •...
  • Seite 314: Técnicas De Destello

    Proceso de ajuste para cargar un programa 13 Técnicas de destello favorito 13.1 Destellos indirectos • Pulsar la tecla hasta que aparezca el Mediante los destellos indirectos, el motivo menú de selección. recibe una iluminación más suave y se ate- núa la formación pronunciada de sombras.
  • Seite 315: Destellos Indirectos Con Tarjeta Reflectante

    13.2 Destellos indirectos con tarjeta 13.4 Memoria FE de valores de medición reflectante del flash Mediante la iluminación indirecta con el Algunas cámaras disponen de una memoria flash y una tarjeta reflectante integradase para los valores de medición del flash pueden conseguir luces angulares en los (FE: flash exposure), que puede operar con el ojos de las personas:...
  • Seite 316: Sincronización Del Flash

    La memoria FE de valores de medición del funcionamiento de la cámara y de la sincroni- flash no es compatible con el programa zación del flash seleccionada. completamente automático ni con los En cámaras con obturador central y con programas Vari o de escenas. En el manual sincronización rápida (consultar 7.4) no se de instrucciones de la cámara puede encon- encuentra el origen de la referencia.) no se...
  • Seite 317: Sincronización Con La Segunda Cortinilla (Rear)

    la imagen. Esto se consigue mediante veloci- en la sincronización con la primera cortinilla. dades de obturación en la cámara adaptadas De este modo, al fotografiar fuentes de luz en a la luz ambiente. Para ello, la cámara utiliza movimiento se consigue una reproducción automáticamente velocidades de obturación „más natural“...
  • Seite 318: Configuración De Pantalla Táctil

    15 Configuración de pantalla táctil 15.2 Rotatión (ROTATION) Al girar el flash en posición horizontal, 15.1 Brillo (BRIGHTNESS) la indicación de la pantalla también se El brillo de la pantalla se puede cambiar en puede girar. cinco niveles. Configuración Configuración •...
  • Seite 319: Mantenimiento Y Cuidadoss

    (actualización del firmware). flash pasa al estado de fábrica. Consultar más información en la página web Las actualizaciones del firmware no se ven de Metz: www.metz.de afectadas por esta acción! 16.2 Formación del condensador de destellos El condensador de destellos incorporado en el flash se deforma físicamente si el aparato...
  • Seite 320: Ayuda En Caso De Problemas

    17 Ayuda en caso de problemas La posición del reflector no se ajusta automáticamente a la posición real de zoom del objetivo Si alguna vez aparecen en la pantalla, por ejemplo, indicaciones sin sentido o el flash no funciona como es debido, debe apagarse •...
  • Seite 321 La configuración de la corrección manual de la exposición del flash TTL no tiene ningún efecto • La cámara no es compatible con la corrección manual de la exposición del flash TTL. No tiene lugar una conmutación automática a la velocidad de sincronización del flash •...
  • Seite 322: Características Técnicas

    TTL-, i TTL BL-, i TTL FP-Modo, Funcionamiento de flash manual con • 0,1/1,6 para el funcionamiento con fuente de alimentación indicación de la distancia, Modo automático, Modo estroboscópico, externa con Metz Power Pack P76 Modo de relleno TTL por control matricial, Modo manual, Modo remoto esclavo, Modo Servo.
  • Seite 323: Accesorios Especiales

    Altura ajustable de la zapata Los alcances límite se reducen aprox. a la mitad según la pérdida Encajable en trípodes para iluminación LS-247 y LS-200 de Metz de luz. • Mini Softbox SB 30-20 • Paraguas de reflexión 58-23 (Nº...
  • Seite 324 • Mini Octagon Softbox SB 15-15 (Nº ref. 009021516) Color: blanco, dimensiones: Ø 15 cm • Spot Reflexschirm SD 30-26 W (Nº ref. 009043021) Color: blanco para luz neutral / dimensiones: 30 × 26 cm • Spot Reflexschirm SD 30-26 S (Nº...
  • Seite 325 Eliminación de las baterías No se deben tirar las baterías a la basura casera. Para la devolución de sus baterías gastadas, sírvase utilizar uno de los sistemas de reci- claje existente eventualmente en su país. Sírvase devolver unicamente baterías descar- gadas.
  • Seite 326 Zoom 105 135 180 200 6/9° 8/10° 10/11° 12/12° 16/13° 20/14° 25/15° 32/16° 40/17° 50/18° 64/19° 80/20° 100/21° 125/22° 24 160/23° 26 200/24° 30 250/25° 33 320/26° 37 107 109 110 114 Tabelle 1: 400/27° 42 104 120 122 124 128 Leitzahlen bei maximaler Lichtleistung (P 1/1) 500/28°...
  • Seite 327 Teillichtleistung Blitzleuchtzeit (s) Blitzleuchtzeit (s) Niveaux de puissance Durée d’éclair (s) Durée d’éclair (s) Deelvermogensstappen Flitsdur (s) Flitsdur (s) Partial light output Flash duration Flash duration Livello di potenza Durata del lampo Durata del lampo Potencia parcial Duración de destello Duración de destello (P=Flash Power) t0,5 in 1/s t0,1 in 1/s...
  • Seite 328 ZOOM Tabelle 3: Maximale Leitzahlen im HSS-Betrieb Tableau 3: Nombres-guides en mode HSS Tabel 3: Max. Richtgetallen bij de HSS functie Table 3: Maximum guide numbers at HSS-Mode Tabella 3: Potenza piena a numeri guida per il modo HSS Tabla 3: Números-guía max.
  • Seite 329 ö...
  • Seite 330 This will help to protect the environment in which we all ten. live. Votre produit Metz a été conçu et fabriqué avec des maté- Il vostro prodotto Metz è stato progettato e realizzato con mate- riaux et composants de haute qualité, susceptibles d'être riali e componenti pregiati che possono essere recyclés et réutilisés.
  • Seite 331 ö Hinweis: Opmerking: Avvertenza: Im Rahmen des CE-Zeichens wurde bei In het kader de CE-markering werd bij de Nell’ambito delle prove EMV per il segno der EMV-Prüfung die korrekte Belichtung EMV-test de correcte be-lichting CE è stata valutata la corretta esposizio- ausgewertet.
  • Seite 332 Anzeige und Auswahl der Blitzbetriebsart Affichage et de sélection le mode flash Aanduiding en selectie van de flitsfunctie Display and select the flash mode Selezione del display e di modalità flash Visualización y selección de modo de flash Belichtungs o.k. Anzeige, Auswahlmenü aufrufen, im Menü ein Schritt zurück, Verriegelung Exposition o.k., menu de sélection, menu est un pas en arrière, Verrouilage Hauptschalter Belichting o.k.-aanduiding, Keuzemenu oproepen, het menu is een stap terug, Vergrendeling...
  • Seite 333 Reflektorkarte 90° 75° Carte-réflecteur Reflecterende kaart 60° Reflector card Pannello riflettente Riflettente integrato 45° PRESS Weitwinkelstreuscheibe Diffuseur grand angle Groothoekdiffusorschijf Wide-angle diffuser Diffusore grandangolare 0° Difusor gran angular -7° Zweitreflektor Entriegelungsknopf Hauptreflektor Réflecteur secondaire Fotosensor Bouton de déverrouillage pour réflecteur Senseur Hulpreflector Ontgrendelingsknop Hoofdreflector...
  • Seite 334 Metz-Werke GmbH & Co KG • Postfach 1267 • 90506 Zirndorf/Germany Technische Hotline:+49 (0) 911 – 97 06 172 • www.metz.de • info@metz.de Consumer electronics Photoelectronics Plastics technology 713 47 0038.A2 j l x k ö c Metz - always first class.

Inhaltsverzeichnis