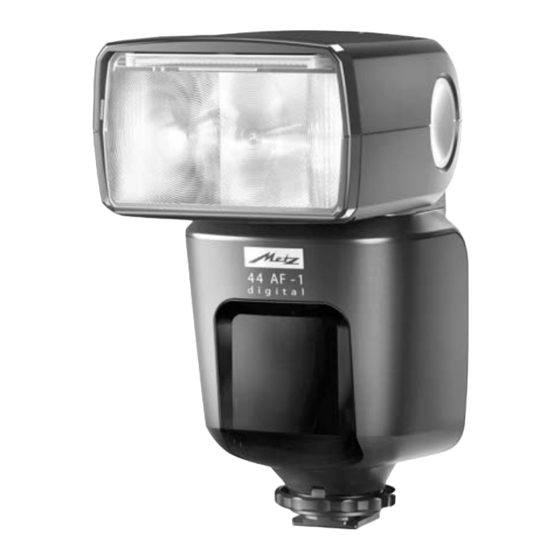
Metz MECABLITZ 44 AF-1 digital Bedienungsanleitung
Für olympus-, panasonic-, leica-digitalkameras mit fourthird-standard
Vorschau ausblenden
Andere Handbücher für MECABLITZ 44 AF-1 digital:
- Bedienungsanleitung (166 Seiten)

Verwandte Anleitungen für Metz MECABLITZ 44 AF-1 digital


Inhaltszusammenfassung für Metz MECABLITZ 44 AF-1 digital
- Seite 1 MECABLITZ 44 AF-1 digital für/for Olympus-, Panasonic-, Leica-Digitalkameras mit/with FourThird-Standard Bedienungsanleitung Mode d’emploi Gebruiksaanwijzing Operating instruction Manuale istruzioni Manual de instrucciones...
-
Seite 2: Inhaltsverzeichnis
1 Sicherheitshinweise ..... . . 3 10 Blitzsynchronisation..... 16 2 Dedicated-Blitzfunktionen . -
Seite 3: Sicherheitshinweise
Vorwort 1 Sicherheitshinweise Vielen Dank, dass Sie sich für ein Metz • Das Blitzgerät ist ausschließlich zur Produkt entschieden haben. Verwendung im fotografischen Bereich Wir freuen uns, Sie als Kunde begrüßen vorgesehen und zugelassen! zu dürfen. • In Umgebung von entflammbaren Natürlich können Sie es kaum erwarten,... - Seite 4 • Verbrauchte Batterien / Akkus nicht • Blitzgerät nicht zerlegen! HOCHSPAN- ins Feuer werfen! NUNG ! Im Geräteinneren befinden sich keine Bauteile, die von einem • Aus verbrauchten Batterien kann Lauge austre- Laien repariert werden können. ten, was zur Beschädigung der Kontakte führt. Verbrauchte Batterien deshalb immer aus dem •...
-
Seite 5: Dedicated-Blitzfunktionen
2 Dedicated-Blitzfunktionen Im Rahmen dieser Bedienungsanleitung ist es nicht möglich, alle Kameratypen Die Dedicated-Blitzfunktionen sind spe- mit den einzelnen Blitzfunktionen ziell auf das Kamerasystem abgestimmte detailliert zu beschreiben. Beachten Sie Blitzfunktionen. In Abhängigkeit vom deshalb die Hinweise zum Blitzbetrieb Kameratyp werden dabei verschiedene in der Bedienungsanleitung Ihrer Blitzfunktionen unterstützt. -
Seite 6: Blitzgerät Vorbereiten
3 Blitzgerät vorbereiten Blitzgerät von der Kamera abnehmen Kamera und Blitzgerät vor der Montage 3.1 Montage des Blitzgerätes oder Demontage ausschalten. Blitzgerät auf die Kamera montieren • Rändelmutter bis zum Anschlag gegen das Blitzgerät drehen. Kamera und Blitzgerät vor der Montage oder Demontage ausschalten. -
Seite 7: Ein- Und Ausschalten Des Blitzgerätes
• 4 NC-Akkus 1,2 V, Typ IEC KR6 (AA / des Gerätes führen! Explosionsgefahr Mignon), sie bieten sehr kurze bei unsachgemäßem Betrieb der Blitzfolgezeiten und sparsamen Batterien. Betrieb, da sie wiederaufladbar sind. Ersetzen Sie immer alle Batterien durch gleiche, hochwertige Batterien eines Wenn Sie das Blitzgerät längere Zeit Herstellertyps mit gleicher Kapazität! nicht benutzen, entfernen Sie bitte die... -
Seite 8: Automatische Geräteabschal-Tung / Auto - Off
3.4 Automatische Geräteabschal- Wenn das Blitzgerät längere Zeit nicht benötigt wird, sollte das Gerät grund- tung / Auto - OFF sätzlich immer mit der Taste ausge- Das Blitzgerät ist so eingestellt, dass es schaltet werden! ca. 3 Minuten - • nach dem Einschalten, 4 LED-Anzeigen am Blitzgerät •... -
Seite 9: Belichtungskontrollanzeige
4.2 Belichtungskontrollanzeige 5 Blitzbetriebsarten Bei einer richtigen Belichtung leuchtet die 5.1 TTL - Blitzbetrieb mit Taste für ca. 3 Sekunden rot auf, wenn die Aufnahme in den Messvorblitz TTL–Blitzbetriebs-arten richtig belichtet Der TTL - Blitzbetrieb mit Messvorblitz ist wurde! eine Weiterentwicklung des Standard Erfolgt keine Belichtungskontrollanzeige TTL-Blitzbetriebes analoger Kameras. -
Seite 10: Automatischer Ttl-Aufhellblitzbetrieb
Einstellvorgang tung zwischen Motiv und Bildhintergrund erreichen. Ein computergesteuertes • Blitzgerät mit der Taste einschal- Meßsystem der Kamera sorgt für die ten. geeignete Kombination von • Am Blitzgerät die Taste „TTL“ drü- Verschlusszeit, Arbeitsblende und cken um die Betriebsart TTL einzustel- Blitzleistung. -
Seite 11: Manuelle Blitzbelichtungskorrektur Im Ttl-Blitzbetrieb
5.1.2 Manuelle Blitzbelichtungs- Eine Belichtungskorrektur durch korrektur im TTL-Blitzbetrieb Verändern der Objektivblende ist nicht möglich, da die Belichtungsautomatik der Diese Funktion muss an der Kamera Kamera die geänderte Blende wiederum eingestellt werden, siehe Kamera- als normale Arbeitsblende betrachtet. bedienungsanleitung. Eine manuelle Blitzbelichtungskorrektur Die Blitzbelichtungsautomatik der mei- in den TTL-Blitzbetriebsarten kann nur sten Kameras ist auf einen Reflexions-... -
Seite 12: Motorzoom-Hauptreflektor
Blendeneinstellung an der Kamera oder 6 Motorzoom-Hauptreflektor durch Auswahl einer geeigneten Der Motorzoom-Hauptreflektor des manuellen Teillichtleistung erfolgen. Blitzgerätes kann Objektivbrennweiten Der Einstellbereich erstreckt sich von ab 24 mm (Kleinbild-Format) ausleuch- P 1/1; 1/2; 1/8 bis P1/64. ten. Einstellvorgang Durch Einsatz der integrierten Weitwinkelstreuscheibe erweitert sich •... -
Seite 13: Weitwinkelstreuscheibe
6.1 Weitwinkelstreuscheibe 6.2 Mecabounce 52-90 Mit der integrierten Weitwinkelstreu- Wenn der Mecabounce (Sonderzubehör; scheibe können Brennweiten ab siehe 16) am Hauptreflektor des 12 mm ausgeleuchtet werden (Kleinbild- Blitzgerätes montiert ist, wird der Format). Hauptreflektor automatisch in die erfor- derliche Position gesteuert. Weitwinkelstreuscheibe aus dem Hauptreflektor nach vorne bis zum... -
Seite 14: Remote-Slave-Blitzbetrieb „Sl
7 Remote-Slave-Blitzbetrieb „SL“ Einstellvorgang für den Remote–Slave–Blitzbetrieb Das Blitzgerät ist als Slave-Blitzgerät kompa- • Blitzgerät mit der Taste einschalten. tibel mit dem drahtlosen Olympus RC- Blitzsystem (RC = Remote-Control bzw. • Am Blitzgerät die Taste „SL“ drük- Remote-Betrieb) ken um die Remote–Slave–Betriebsart SL einzustellen. -
Seite 15: Einstelllicht („Ml")
8 Einstelllicht („ML“) 9 Blitztechniken Das Einstelllicht kann nur dann ausge- 9.1 Indirektes Blitzen löst werden, wenn die Kamera diese Durch indirektes Blitzen wird das Motiv Funktion bietet. weicher ausgeleuchtet und eine ausge- prägte Schattenbildung verringert. Beim Einstelllicht (ML = Modelling Light) Zusätzlich wird der physikalisch beding- handelt es sich um ein Stroboskop–Blitz- te Lichtabfall vom Vordergrund zum... -
Seite 16: Indirektes Blitzen Mit Reflektorkarte
9.2 Indirektes Blitzen mit Verschiedene Kameras verfügen über einen Synchronzeitbereich, z.B. 1/60s Reflektorkarte bis 1/250s (siehe Kamerabedienungs- Durch indirektes Blitzen mit der integrierten anleitung). Welche Synchronzeit die Reflektorkarte können bei Personen Kamera einsteuert, ist dann von der Spitzlichter in den Augen erzeugt werden: Kamerabetriebsart, vom Umgebungslicht •... -
Seite 17: Normalsynchronisation
10.2 Normalsynchronisation einen Lichtschweif hinter sich herziehen, anstatt ihn - wie beim Synchronisieren Bei der Normalsynchronisation wird das auf den 1.Verschlussvorhang - vor sich Blitzgerät zum Beginn der Verschlusszeit aufzubauen. Dadurch wird bei beweg- ausgelöst (Synchronisation auf den ten Lichtquellen eine „natürlichere“ 1.Verschlussvorhang). -
Seite 18: Langzeitsynchronisation (Slow)
10.4 Langzeitsynchronisation 10.5 Vorblitzfunktion gegen (SLOW) „Rote-Augen-Effekt“ Mit der Langzeitbelichtung SLOW wird Der „Rote-Augen-Effekt“ tritt auf, wenn der Bildhintergrund bei geringer die zu fotografierende Person mehr oder Umgebungshelligkeit stärker zur Geltung weniger voll in die Kamera blickt, die gebracht. Umgebung dunkel ist und das Blitzgerät sich nah an der Kamera befindet. -
Seite 19: Automatischer Af-Messblitz
11 Automatischer Zoomobjektive mit geringer Anfangsblendenöffnung schränken die AF-Messblitz Reichweite des AF-Messblitzes zum Teil Sobald die Umlichtverhältnisse für eine erheblich ein! automatische Fokussierung nicht mehr Verschiedene Kameratypen unterstützen ausreichen, wird von der Kamera auto- nur mit dem zentralen AF–Sensor der matisch der AF-Messblitz Kamera den AF–Messblitz Blitzgerät aktiviert. -
Seite 20: Wartung Und Pflege
1/1 1/2 1/8 1/64 Die Anzahl der Blinkimpulse zeigt die Softwareversion an, z.B. 1/1 LED blinkt 1 mal und die 1/64 LED blinkt 3 mal so ist die Softwareversion 1.3 installiert. Nähere Informationen finden Sie im Internet auf der Metz-Homepage: www.metz.de... -
Seite 21: Hilfe Bei Störungen
14 Hilfe bei Störungen Der AF-Meßblitz des Blitzgerätes wird nicht aktiviert. Sollte es einmal vorkommen, dass das • Das Blitzgerät ist nicht blitzbereit. Blitzgerät nicht so funktioniert wie es • Die Kamera arbeitet nicht in der soll, so schalten Sie das Blitzgerät für Betriebsart „Single-AF (S-AF)“. - Seite 22 • Die Weitwinkelstreuscheibe ist vor dem Die Aufnahmen sind zu dunkel. Hauptreflektor geklappt. • Das Motiv liegt außerhalb der • Vor dem Hauptreflektor ist ein Reichweite des Blitzgerätes. Mecabounce montiert. Beachten Sie: Beim indirekten Blitzen verringert sich Es findet keine automatische Umschaltung die Reichweite des Blitzgerätes.
-
Seite 23: Technische Daten
15 Technische Daten Ausleuchtung des Motorzoom- Hauptreflektors: Maximale Leitzahl bei ISO 100; Ab 24 mm (Kleinbild-Format 24 x 36). Zoom 105 mm: Ab 12 mm mit integrierter Weitwinkel- Im Meter-System: 44 streuscheibe (Kleinbild-Format 24 x 36). Im Feet-System: Blitzbetriebsarten: Schwenkbereiche und Raststellungen des Reflektorkopfes: TTL (mit Vorblitz), Manuell M, Remote–Slave–Betrieb... -
Seite 24: Sonderzubehör
16 Sonderzubehör Batterie-Entsorgung Batterien/Akkus gehören nicht in den Für Fehlfunktionen und Schäden am Hausmüll! Bitte bedienen Sie sich bei der Blitzgerät, verursacht durch die Rückgabe verbrauchter Batterien/Akkus Verwendung von Zubehör anderer eines vorhandenen Rücknahmesystems. Hersteller, wird keine Gewährleistung Bitte geben Sie nur entladene Batterien/ übernommen! Akkus ab. -
Seite 25: Garantiebestimmungen
Gebrauchsanleitung, mechanische Beschädigung, ausge- Kaufbeleg entweder über den Fachhändler oder direkt laufene Batterien oder durch höhere Gewalt, Wasser, an die Firma Metz-Werke GmbH & Co KG - Zentral- Blitz etc. entstanden sind. Ferner sind Verschleiß, kundendienst - Ohmstrasse 55, 90513 Zirndorf, trans- Verbrauch sowie übermäßige Nutzung von der Garantie... -
Seite 149: Tableau 1: Nombres-Guides Pour La Puissance Maximale (P 1)
Zoom 6/9° 8/10° 10/11° 12/12° 16/13° 20/14° 25/15° 32/16° 40/17° 50/18° 64/19° 80/20° 100/21° 125/22° 160/23° 200/24° 250/25° 320/26° 400/27° 500/28° 650/29° 800/30° Tabelle 1: Leitzahlen bei maximaler Lichtleistung (P 1/1) 1000/31° 54 Tableau 1: Nombres-guides pour la puissance maximale (P 1/1) 1250/32°... -
Seite 150: Niveaux De Puissance
Teillichtleistung Blitzleuchtzeit (s) Leitzahl Leitzahl Niveaux de puissance Durée d’éclair (s) Nombre-guide Nombre-guide Deelvermogensstappen Flitsdur (s) Richtgetal Richtgetal Partial light output Flash duration Guide number Guide number Livello di potenza Durata del lampo Numero guida Numero guida Potencia parcial Duración de destello Número-guía Número-guía (P=Flash Power) ISO 100/50 mm... -
Seite 151: Batterietypen
Batterietyp Blitzfolgezeiten Blitzanzahl Type de pile/accu Temps de recyclage Nombre díéclairs Type voeding Flitsvolgtijden Aantal flitsen Battery type Recycling times Number of flashes Tipo batterie Tempi di ricarica Numero ampi Tipo de pila Tiempo de secuencia de dest. Número de destellos min. - Seite 152 Ihr Metz-Produkt wurde mit hochwerti- Votre produit Metz a été conçu et fabri- gen Materialien und Komponenten ent- qué avec des matériaux et composants worfen und hergestellt, die recycelbar de haute qualité, susceptibles d'être sind und wieder verwendet werden kön- recyclés et...
- Seite 155 Hinweis: Opmerking: Avvertenza: In het kader de CE-markering werd Nell’ambito delle prove EMV per il Im Rahmen des CE-Zeichens wurde bei bij de EMV-test de correcte be-lich- segno CE è stata valutata la corretta der EMV-Prüfung die korrekte ting bepaald. esposizione.
- Seite 156 Teillichtleistung Puissances partielles Deelvermogen Partial light output Taste für manuellen Blitzbetrieb Potenza ridotta Touche de mode flash manuel Potencias parciales Toets voor manual flitsfunctie Button for manual flash mode Taste für Remote-Slave-Betrieb Tasto per modo flash manuale Touche de mode multi-flash sans fill Toets voor Remote-slaafflitsfunctie Tecla para modo flash manual Button for Remote slave flash mode...
- Seite 157 Reflektorkarte Carte-réflecteur Reflecterende kaart Reflector card Pannello riflettente Riflettente integrato Weitwinkelstreuscheibe Diffuseur grand angle Groothoekdiffusorschijf Wide-angle diffuser Diffusore grandangolare Difusor gran angular AF-Messblitz Firmwareupdate-Buchse Illuminateur AF Mise à jour du micrologiciel AF-meetflits Updaten van de firmware AF measuring beam Firmware updates Illuminatore di assist.
- Seite 158 Metz - Werke GmbH & Co KG • Postfach 1267 • D-90506 Zirndorf • info@metz.de • www.metz.de 709 47 0307.A1 Metz - always first class.