Calpeda MPC 1 Originalbetriebsanleitung
Selbstansaugende schwimmbadpumpen
Inhaltsverzeichnis
Verfügbare Sprachen
Verfügbare Sprachen
Quicklinks
Pompe autoadescanti per piscine
Self-priming swimming pool pumps
Selbstansaugende Schwimmbadpumpen
Pompes autoamorçantes pour piscines
Bombas autoaspirantes para piscinas
Själv-evakuerande poolpumpar
Zelfaanzuigende zwembadpompen
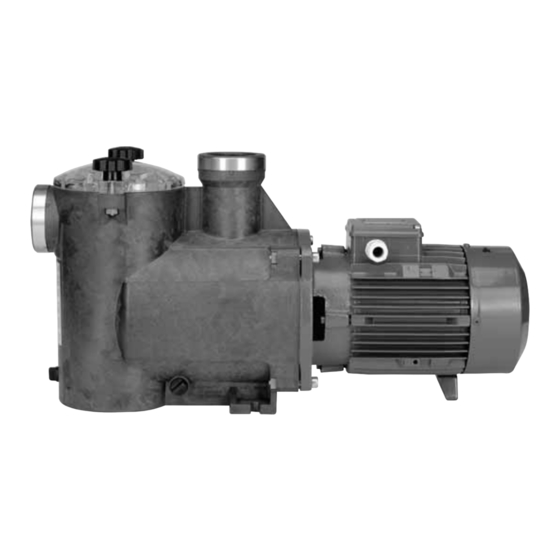
MPC
Compact Pool
ISTRUZIONI ORIGINALI PER L'USO
ORIGINAL OPERATING INSTRUCTIONS
ORIGINAL BETRIEBSANLEITUNG
INSTRUCTIONS ORIGINALES POUR L'UTILISATION
INSTRUCCIONES ORIGINALES DE USO
ORIGINAL DRIFT/INSTALLATIONSANVISNINGAR
ORIGINEEL BEDIENINGSVOORSCHRIFTEN
Pagina
4
Italiano
Page
8
English
Seite
12
Deutsch
Page
16
Français
Página 20
Español
Sidan
24
Svenska
Pagina 28
Nederlands
.
32
Inhaltsverzeichnis

Verwandte Anleitungen für Calpeda MPC 1


Inhaltszusammenfassung für Calpeda MPC 1
- Seite 1 Pompe autoadescanti per piscine Self-priming swimming pool pumps Selbstansaugende Schwimmbadpumpen Pompes autoamorçantes pour piscines Bombas autoaspirantes para piscinas Själv-evakuerande poolpumpar Zelfaanzuigende zwembadpompen Compact Pool ISTRUZIONI ORIGINALI PER L’USO Pagina Italiano ORIGINAL OPERATING INSTRUCTIONS Page English ORIGINAL BETRIEBSANLEITUNG Seite Deutsch INSTRUCTIONS ORIGINALES POUR L’UTILISATION Page Français INSTRUCCIONES ORIGINALES DE USO...
-
Seite 2: Inhaltsverzeichnis
Indice Italiano Inhaltsverzeichnis Deutsch Argomento Pagina Gegenstand Seite Condizioni d’impiego ....4 Anwendungsbereich ....12 Installazione . -
Seite 12: Anwendungsbereich
Selbstansaugende Schwimmbadpumpen Entnahme des Motordemontage Saugsiebes mit eingebautem Vorfilter Auffüllung Kontrolle der Wellenumdrehung Compact Pool BETRIEBSANLEITUNG Motorlüftung Entleerung 1. Anwendungsbereich Standardausführung Abb. 1 Mindestraumbedarf für Wartung (mm) - Für Wasserumwälzung Schwimmbad- Filteranlagen. Keinesfalls Rohrweiten kleiner als die der Pum- - Für reines oder leicht verschmutzes Wasser mit penstutzen wählen. -
Seite 13: Saugleitung
3.2. Saugleitung Bei Dreiphasen-Drehstrommotoren ist ein Motor- schutzschalter gemäß der Stromaufnahme laut Die Saugleitung muß unbedingt dicht sein. Typenschild vorzusehen. Die Einphasen-Wechselstrompumpen MPCM Bei Aufstellung der Pumpe unter dem Wasser- Compact Pool werden mit angeschlossenem An- spiegel (Zulaufbetrieb) (Kapitel 10., Abb. 7) ist laufkondensator im Klemmenkasten und (bei in der Zulauf-leitung sowie in der Druckleitung ein 220-240 V - 50 Hz) mit eingebautem Thermo-... -
Seite 14: Selbstansaugung
Nach der Inbetriebnahme, Pumpenenddruck und Vorsicht bei Absenkung des Wasserstandes im Stromaufnahme mit den Werten laut Typenschild Schwimmbecken! Wenn der Wasserstand unter vergleichen; ggf. Absperrschieber in der Drucklei- die Skimmer oder andere Saugöffnungen (bei tung einstellen. Beckenentleerung) absinkt, ist nur der Schieber Die Pumpe darf nicht für längere Zeit mit ge- des Bodenablaufrohres geöffnet zu lassen. -
Seite 15: Demontage
8. Zusammenbau Lufteintritt Falls die Gleitringdichtung (36.00) zu ersetzen ist, den rotierenden Gleitring auf der Laufradnabe montieren und die Feder bis zur Stirnschulter drü- cken, damit ein korrekter Sitz gewährleistet ist. Gleitringdichtung mit Wasser befeuchten. ACHTUNG! Um bei den dreiphasigen Pumpen ein Lösen des Laufrads (und demzufolge den Bruch) bei Pumpenanlauf in falscher Drehrich- tung zu vermeiden, ist das Wellen-ende am... - Seite 32 Compact Pool • • 60 °C. • : 2,5 • : 40 °C. • : 10 • : < 70 ( ). 7: 72 ( ). 10%. MPC Compact Pool 3.1. Compact Pool , Loctite 5331). . 1).
- Seite 33 3.2. MPCM Compact Pool 220-240 10., 5.1. 5, 6, 7 8.). 11., 5.3). 5.2. . 2). H07 RN-F. ≤ 30...
- Seite 34 5.3. (2900 25 °C • 1,5-2 . 3). • • • • • • 5.2). . 4).
- Seite 35 (36.00) (28.00), Loctite 243. . 5 ). (14.20) 10.). (14.00) (27.00), . 6. 12.). (32.00) 14.00 14.20 32.00 (14.00) (14.24), (14.28) 4.93.149 (14.29) (28.00) 27.00 14.00 (78.00). 1, 2, 3, 4 5, 6, 7 27.00 . 5 ). (14.00) (27.00) (14.24) (14.28) (14.24) - 7 Nm.
-
Seite 36: Pompa Sotto Il Livello Dell'acqua
10. Pompa sotto il livello dell’acqua Pump located below the water level Pumpe unter dem Wasserspiegel Pompe installée sous le niveau de l’eau Bomba por debajo del nivel del agua Pump under vätskenivån Pomp onder het waterniveau 3.93.235 Fig. 7... - Seite 37 Italiano Español ATTENZIONE: questa pompa non è som- ATENCIÒN: Esta bomba no es sumergible. mergibile. Con la bomba por debajo del nivel de Con la pompa sotto il livello dell’acqua, agua, antes de desmontar la tapa del filtro, prima dello smontaggio del coperchio filtro cerrar las válvulas de compuerta de la aspira- chiudere le saracinesche in aspirazione e ción y de la impulsión.
-
Seite 38: Pompa Sopra Il Livello Dell'acqua
11. Pompa sopra il livello dell’acqua Pump located above the water level Pumpe über dem Wasserspiegel Pompe au dessus du niveau de l’eau Bomba sobre el nivel del agua Pump placerad ovanför vätskenivån Pomp boven het waterniveau Fig. 8a Fig. 8b (1) Collettore Soluzione da preferire Manifold... - Seite 39 Italiano Español Con più tubi aspiranti (per skimmers, scarico Con más tubos de aspiración (para skimers, di fondo, attacco per pulitore del fondo), per vaciado del fondo, conexión limpia fondos), quanto possibile disporre i tubi ed il collettore para cuando es posible disponer los tubos y sotto il livello dell’acqua e raggiungere la pom- el colector debajo el nivel del agua, añadir a pa con un solo tubo verticale (figura 8b).
-
Seite 40: Doorsnede Tekening - Onderdelen Benaming
12. Disegni in sezione Cross section drawings Schnittzeichnungen Dessins en coupe Planos de sección Sprängskiss Onderdelentekening 15.00 15.12 27.00 70.00 76.54 76.00 98.00 98.04 90.04 15.04 15.16 15.50 14.20 98.08 76.04 94.00 82.00 90.00 94.02 4.94.011.1 3.93.104 28.12 MPC 11 14.14 14.00 27.04... - Seite 41 MPC 11, 21, 31, 41 90.00 92.00 90.00 90.04 82.00 98.04 90.04 15.12 90.00 98.00 76.54 15.00 98.08 94.02 94.00 76.54 15.04 15.50 88.00 92.00 82.00 82.04 76.04 76.00 76.16 81.00 78.00 73.00 15.16 14.24 70.00 73.08 27.00 14.20 36.00 28.12 MPC 11 28.00 27.04...
- Seite 42 Italiano English Deutsch Français Part designation Teile-Benennung Description des pièces Denominazione 14.00 Corpo pompa 14.00 Pump casing 14.00 Pumpengehäuse 14.00 Corps de pompe 14.14 Plug 14.14 Verschlußschraube 14.14 Tappo 14.14 Bouchon 14.15 O-ring 14.15 O-ring 14.15 Runddichtring 14.15 Joint torique 14.20 O-ring 14.20 Runddichtring 14.20 Joint torique...
- Seite 43 DECLARATION OF CONFORMITY We CALPEDA S.p.A. declare that our Pumps MPC, MPCM, with pump type and serial number as shown on the name plate, are constructed in accordance with Directives 2004/108/EC, 2006/42/EC, 2006/95/EC and assume full respon- sability for conformity with the standards laid down therein.