Herunterladen Inhalt Inhalt Diese Seite drucken
Inhaltsverzeichnis

Werbung

Verfügbare Sprachen
  • DE

Verfügbare Sprachen

  • DEUTSCH, seite 1
MECABLITZ 15 MS-1 digital
Bedienungsanleitung
Gebruiksaanwijzing
Manuale istruzioni
Mode d'emploi
Operating instruction
Manual de instrucciones

Werbung

Inhaltsverzeichnis
loading

Inhaltszusammenfassung für Metz MECABLITZ 15 MS-1 digital

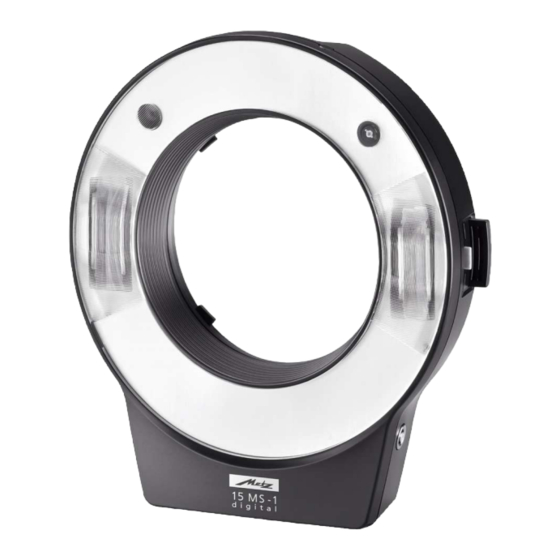
  • Seite 1 MECABLITZ 15 MS-1 digital Bedienungsanleitung Mode d’emploi Gebruiksaanwijzing Operating instruction Manuale istruzioni Manual de instrucciones...
  • Seite 2: Inhaltsverzeichnis

    ....13 Betrieb mit einem Synchronkabel ..15 Vielen Dank, dass Sie sich für ein Metz Produkt entschieden haben.
  • Seite 3: Sicherheitshinweise

    • Batterien keinesfalls hohen 1 Sicherheitshinweise Temperaturen wie intensiver • Das Blitzgerät ist ausschließlich zur Sonneneinstrahlung, Feuer oder Verwendung im fotografischen dergleichen aussetzen! Bereich vorgesehen und zugelassen. • Verbrauchte Batterien sofort aus • Nicht aus kurzer Entfernung direkt dem Gerät entnehmen! Aus ver- in die Augen blitzen! Direktes brauchten Batterien können Blitzen in die Augen von Personen...
  • Seite 4: Vorbereiten

    2 Vorbereiten • Wenn Sie den Blitz auslösen, darf kein lichtundurchlässiges Material 2.1 Stromversorgung unmittelbar vor- oder direkt auf der Reflektorscheibe (Blitzfenster) sein. Das Blitzgerät kann wahlweise betrie- Es kann sonst wegen des hohen ben werden mit: Energieausstoßes zu • 2 Alkali-Mangan-Trockenbatterien Verbrennungen oder Typ IEC LR03 (AAA / Micro), war- Fleckenbildungen des Materials...
  • Seite 5: Einlegen Und Auswechseln Der Batterien

    • Batteriefachdeckel schließen und 2.2 Einlegen und Auswechseln gegen das Gehäuse schieben. der Batterien • Schalten Sie das Blitzgerät mit dem 2.3 Montage / Demontage Hauptschalter aus. Einen Adapterring der entsprechen- • Batteriefachdeckel zur Unterseite den Größe in das Filtergewinde des des Blitzgerätes verschieben und Objektivs vorsichtig einschrauben.
  • Seite 6: Demontage

    2.5 Die Infrarot-Klammer zum Transportieren nicht am Blitzgerät halten, sondern prinzipiell Das kameraeigene Blitzgerät sollte bei immer an der Kamera. Makroaufnahmen und der Verwendung Das Blitzgerät kann auf dem des mecablitz 15MS-1 digital nichts zur Belichtung beitragen, um nicht eventuell Adapterring verdreht (rotiert) werden.
  • Seite 7: Erste Inbetriebnahme

    3 Erste Inbetriebnahme ein zusätzliches Blitzgerät (z.B. Metz mecablitz 58AF-1) montiert ist wel- Wenn das Blitzgerät zum ersten mal ches den Remote-Betrieb unterstützt. eingeschaltet wird oder wenn ein „RESET“ durchgeführt wurde (siehe 4.1 Allgemeine Informationen Kap. 14.2) erscheint nach dem...
  • Seite 8 • Infrarot-Klammer über das im gleichen Raum nicht gegenseitig kameraeigene Blitzgerät stülpen, stören stehen vier unabhängige wenn es als Controller-Blitzgerät Remote-Kanäle (Channel 1-4) zur arbeiten soll. Externes Blitzgerät so Verfügung. Die Einstellung „Channel schwenken, dass es nicht zur ALL“ steuert alle Slave-Blitzgeräte. Belichtung beitragen kann.
  • Seite 9 „CAN REMOTE“ (Canon) bzw. In den Betriebsarten „CAN REMOTE“ SYSTEM „NIK REMOTE“ (Nikon) bzw. bzw. „NIK REMOTE“ bzw. OLY REMOTE „OLY REMOTE“ (Olympus) bzw. „OLY REMOTE“ können bei Ch ALL Gr A „PEN REMOTE“ (Pentax) bzw. S E L Verwendung mehrerer „SAM REMOTE“...
  • Seite 10: Remote-Kanal Und Remote-Gruppe Einstellen

    grundsätzlich durch Drücken der Taste bestimmten Gruppe anzusteuern. „AEL“ an der Kamera geprüft werden. Die Einstellung von Gruppen (GROUP Das Slave-Blitzgerät muss mit einem zeit- A, B, C) ist nur im Canon–, Nikon– verzögerten Blitz antworten. und Olympus–Remote Betrieb mög- lich.
  • Seite 11: Manueller Drahtloser Slave-Betrieb

    sich an der Kamera üblicherweise • Taste S E L drücken, der gewählte GROUP A nicht deaktivieren. Remote–Kanal ist eingestellt. In der S E L Anzeige erscheint: Bei der Erstinbetriebnahme oder einem Kamarawechsel oder einem • Taste drücken und die RESET wählen Sie die „Lernfunktion“...
  • Seite 12 SYSTEM dingt kein Lernbetrieb möglich. • Am Blitzgerät die Taste S E L NIK REMOTE Verwenden Sie, wenn möglich, eine drücken. In der Anzeige erscheint die Ch ALL Gr A andere Kamerabetriebsart oder stel- S E L zuletzt verwendete Einstellung, z.B.: len auf manuelle Fokusierung um.
  • Seite 13: Slave-Betrieb

    „LEARN OK“ und Wenn die „Lernfunktion“ einmal L E A R N die AF-/SELECT-Taste leuchtet durchgeführt wurde, bleiben diese kurzzeitig rot zur Bestätigung. Einstellungen bis zum nächsten Lernen erhalten. Der mecablitz 15MS-1 digital hat Wenn die Einstellung zur das Blitzlicht des Kamerablitzes Verringerung des „Rote-Augen- gelernt.
  • Seite 14 Power • Blitzgerät mit dem Hauptschalter • Wenn eine Teillichtleistung einge- einschalten. stellt werden soll, dann drücken Sie 15MS-1 P / R V 1 . 0 die Taste P / R . Folgende Anzeige • Am Blitzgerät die Taste erscheint: S E L E C T „AF/SELECT“...
  • Seite 15: Betrieb Mit Einem Synchronkabel

    6 Betrieb mit einem • Die Taste so oft drücken, bis in SYSTEM SYNC-CORD der Anzeige „SYNC-CORD“ Synchronkabel erscheint. Das Blitzgerät kann mit einem Synchronkabel 15-50 betrieben wer- • Taste drücken und der SYNC atio den. Verbinden Sie dazu die „SYNC–CORD“...
  • Seite 16: Aufstellen Des Blitzgerätes Losgelöst Von Der Kamera

    7 Aufstellen des Blitzgerätes Wurde das Motiv nicht ausreichend belichtet, so leuchtet die rote Taste losgelöst von der Kamera „AF/SELECT“ nicht. Das Blitzgerät kann losgelöst von der Verändern Sie die ISO-Einstellung Kamera auf der Standfläche aufge- oder die Blende und versuchen die stellt oder über das Stativgewinde Belichtung erneut.
  • Seite 17: Bouncerscheibe

    geschwenkt werden um eine mittenbe- Bouncerscheibe nicht an der tonte oder eine ausgewogene Markiernungslasche anheben und Belichtung zu erzielen. abziehen. 9.1 Bouncerscheibe 10 Das AF-Hilfslicht Die Bouncerscheibe ist für eine Das Blitzgerät verfügt über ein Ausleuchtung im Nahbereich unter AF–Hilfslicht , welches das Motiv in ca.
  • Seite 18: Synchronisation Auf Den 1. Oder

    Modelling-Light aktivieren Verhältniss der Reflektoren (Ratio) abgegeben. • Blitzgerät mit dem Hauptschalter Modelling-Light deaktivieren einschalten. 15MS-1 V 1 . 0 • Am Blitzgerät die Taste • Am Blitzgerät die Taste „SELECT“ „AF/SELECT“ so lange gedrückt so lange drücken, bis in der S E L E C T S E L E C T halten, bis in der Anzeige folgende...
  • Seite 19: Langzeitsynchronisation (Slow)

    Verschlusszeiten (> 1/30s) und 13 Langzeitsynchronisation bewegten Motiven mit eigener (SLOW) Lichtquelle von Vorteil, weil bewegte Mit der Langzeitbelichtung SLOW Lichtquellen dann einen Lichtschweif wird der Bildhintergrund bei geringer hinter sich herziehen, anstatt ihn - wie Umgebungshelligkeit stärker zur beim Synchronisieren auf den Geltung gebracht.
  • Seite 20: Verwendung Eines Stativs

    13.1 Verwendung eines Stativs Nähere Informationen finden Sie im Internet auf der Metz-Homepage: Das Stativgewinde des Blitzgerätes www.metz.de darf nur dazu verwendet werden, das Blitzgerät als Slave-Gerät ohne 14.2 Reset Kamera aufzustellen. Das Blitzgerät kann auf die Wenn die Kamera mit dem daran Werkseinstellung zurück gestellt wer-...
  • Seite 21: Formieren Des Blitzkondensators

    • Wenn das Blitzgerät auf den 15 Hilfe bei Störungen S E L E C T Auslieferungszustand zurückgestellt S E L Sollte es einmal vorkommen dass wurde, erscheint als Bestätigung in z.B. im Display des Blitzgerätes der Anzeige: unsinnige Anzeigen erscheinen oder Firmware-Updates des Blitzgerätes das Blitzgerät funktioniert nicht so sind dabei nicht betroffen!
  • Seite 22: Technische Daten

    16 Technische Daten Farbtemperatur: Ca. 5.600 K Maximale Leitzahl bei ISO 100; 50 mm Synchronisation: Im Meter-System: 15 Niederspannungs – IGBT – Zündung Im Feet-System: Blitzanzahlen: Manuelle-Blitzbetriebsarten: Mit NiCd-Akkus (250 mAh) ca. 50 Manuell-Blitzbetrieb über Mit Hochleistungs-Alkali-Mangan- Synchronbuchse Batterien ca. 140 Mit NiMH-Akkus (1000 mAh) ca.
  • Seite 23 Adapterring 55mm, Hg = Batterie enthält Quecksilber Adapterring 58mm, Li = Batterie enthält Lithium Gürteltasche, Bedienungsanleitung. Ihr Metz-Produkt wurde mit hochwerti- Sonderzubehör: gen Materialien und Komponenten • Adapterring 15-62 entworfen und hergestellt, die recy- (Bestellnr.: 000015622) celbar sind und wieder verwendet Adapterrrring M62x0,75mm werden können.
  • Seite 24 5.2 Mode esclave ..... .35 Nous vous remercions d’avoir porté votre choix sur un produit Metz et Fonctionnement avec un câble de synchronisation .
  • Seite 25: Consignes De Sécurité

    1. Consignes de sécurité • N’exposez pas les piles ou accus à une trop grande chaleur, par ex. au • Le flash est conçu et agréé pour soleil, aux flammes ou autre ! l’emploi exclusif en photographie. • Sortez toujours les piles usées du •...
  • Seite 26: Préparation

    opaque directement devant ni sur la 2 Préparation glace du réflecteur. En cas de non- 2.1 Alimentation respect de cette consigne de sécuri- té, l’énergie de l’éclair peut provo- Le flash peut fonctionner au choix avec: quer des brûlures et des taches sur •...
  • Seite 27: Mise En Place Et Remplacement Des Piles

    neuse dépasse les 60 sec. Si le flash • Fermer le couvercle du comparti- ment des piles et pousser contre reste inutilisé sur une période prolon- le boîtier. gée, retirer les piles de l’appareil. 2.2 Mise en place et remplace- 2.3 Montage / démontage ment des piles Visser prudemment un adaptateur de...
  • Seite 28: Mise En Route Et Arrêt Du Flash

    naison flash/appareil photo côté 2.5 Pince infrarouge flash durant le transport mais côté Le flash de l’appareil photo ne doit appareil photo. pas contribuer à l’exposition lors de Le flash peut être tourné (rotation) sur macrophotographie et en cas d’utili- l’adaptateur.
  • Seite 29: Première Mise En Service

    Remote Lorsque le flash est mis en route pour est monté sur l’appareil (ex : Metz la première fois ou si une réinitialisa- mecablitz 58AF-1). tion («RESET») est effectuée (cf. chapi- tre 14.2), l’affichage suivant apparaît...
  • Seite 30 canaux Remote autonomes (canaux 1 • Retourner la pince infrarouge au- à 4). Le réglage «Channel ALL» com- dessus du flash de l’appareil photo mande tous les flashs esclaves. Les si ce dernier fonctionne comme flashs esclaves qui font partie d’un flash contrôleur.
  • Seite 31 „CAN REMOTE“ (Canon) ou En modes «CAN REMOTE», „NIK REMOTE“ (Nikon) ou «NIK REMOTE» ou «OLY REMOTE», „OLY REMOTE“ (Olympus) ou. en cas d’utilisation de plusieurs SYSTEM „PEN REMOTE“ (Pentax) ou flashs esclaves, plusieurs canaux OLY REMOTE „SAM REMOTE“ (Samsung) ou Ch ALL Gr A esclaves et groupes esclaves peuvent S E L...
  • Seite 32: Régler Le Canal Remote Et Le Groupe Remote

    4.2 Régler le canal Remote et le Réglage du canal (CHANNEL) et d’un groupe Remote groupe (GROUP) dans le système Remote de l’appareil photo Pour éviter que plusieurs systèmes Remote n’interfèrent mutuellement • Sur le flash, maintenir la touche dans le même espace, il existe quatre S E L E C T «AF/SELECT»...
  • Seite 33: Mode Esclave Manuel Sans Fil

    SYSTEM Si la «fonction d’apprentissage» a • Appuyer sur la touche S E L ; le CAN REMOTE déjà été exécutée et que vous utilisez groupe souhaité est réglé. Ch 3 Gr B le même appareil photo, sélectionnez S E L •...
  • Seite 34 Adaptation du flash • Appuyer sur la touche jusqu’à ce SYSTEM S L AV E que «SYSTEM SLAVE» apparaisse. S E L • Activer le flash de l’appareil photo. S E L • Appuyer sur la touche Si besoin, activer la fonction de pré- L E A R N L’affichage suivant apparaît: éclair sur l’appareil photo pour...
  • Seite 35: Mode Esclave

    Ratio pareil photo. L’affichage suivant 5.2 Mode esclave apparaît: Le «Mode esclave» concerne le régla- P / R ge appris dans le cadre de la • Si un rapport inégal (Ratio) des Ratio «Fonction d’apprentissage». Cette deux réflecteurs doit être réglé, fonction est conservée jusqu’à...
  • Seite 36: Fonctionnement Avec Un Câble De Synchronisation

    Le réglage effectué est enregistré • Appuyer sur la touche S E L SYSTEM NIK REMOTE automatiquement. flash. Le dernier réglage utilisé Ch ALL Gr A apparaît dans l’affichage, par ex.: S E L Le flash esclave doit pouvoir détecter correctement la lumière du flash de •...
  • Seite 37: Mise En Place Du Flash Séparée De L'appareil Photo

    Adaptation du flash • Si un rapport inégal (Ratio) des deux réflecteurs doit être réglé, appuyer sur les touche . Le • Choisir un mode manuel sur l’ap- SYNC atio pareil photo. rapport peut être ajusté progressive- ment. L’affichage suivant apparaît P / R •...
  • Seite 38: Exposition Correcte En Mode Remote-Ttl

    ler à ce que les capteurs puissent cap- 9 Basculement des ter la lumière du flash de l’appareil réflecteurs photo pour le mode Remote Les deux réflecteurs peuvent être basculés de 10° voire 20°. Pour 8 Exposition correcte en basculer les réflecteurs, pousser pro- mode Remote-TTL gressivement vers l’avant le levier de basculement du réflecteur...
  • Seite 39: Ecran De Diffuseur Circulaire

    9.1 Ecran de diffuseur circulaire Ne pas soulever et retirer l’écran de diffuseur circulaire sur la languette L’écran de diffuseur circulaire de marquage nécessaire pour un éclairage en plan rapproché inférieur à 10 cm env. avec le sujet. 10 Lumière auxiliaire AF Le flash dispose d’une lumière auxili- Montage de l’écran de diffuseur cir- aire AF...
  • Seite 40: Synchronisation Sur Le 1Er Ou Le 2Ème Rideau (Rear)

    Activer la Modelling-Light Désactiver la Modelling-Light • Allumer le flash à l’aide de l’inter- • Sur le flash, maintenir la touche S E L E C T rupteur général «SELECT» enfoncée jusqu’à ce que 15MS-1 V 1 . 0 ⊃ le message suivant apparaisse: S E L •...
  • Seite 41: Synchronisation En Vitesse Lente (Slow)

    neuse mobile laisse alors derrière elle 13 Synchronisation en une traînée, contrairement à ce qui se vitesse lente (SLOW) passe avec la synchronisation sur le La synchronisation en vitesse lente 1er rideau où la « traînée » précède SLOW permet une meilleure mise en la source lumineuse.
  • Seite 42: Utilisation D'un Trépied

    • Une fois cela effectué, le message De plus amples informations sont suivant apparaît en guise de confir- disponibles sur le site Internet de mation: Metz : www.metz.de Cette réinitialisation n’affecte pas les mises à jour du micrologiciel du flash!
  • Seite 43: Activation Du Condensateur Du Flash

    14.3 Activation du condensateur vous adresser à votre revendeur spéci- du flash alisé. Le condensateur intégré au flash subit 16 Caractéristiques une modification physique si l’appar- eil n’est pas mis en route durant une techniques période prolongée. Nombre-guide maximal pour ISO Pour cette raison, il est donc nécessai- 100 et 50 mm re de l’allumer pendant env.
  • Seite 44 Puissances lumineuses partielles Orientations et positions d’enclenche- manuelles: ment des réflecteurs: P1/1 à P1/64 A l’horizontal: 0° 10° 20° Température de couleur: Dimensions en mm (L x h x p): Env . 5.600 K env. 133 x 144 x 38 Synchronisation: Poids: Amorçage à...
  • Seite 45 Elimination des piles Votre produit Metz a été conçu et fabriqué avec des matériaux et com- Allemagne : En tant que consomma- posants de haute qualité, susceptibles teur, vous êtes de par la loi contraint d'être recyclés et réutilisés. de restituer les piles usagées.
  • Seite 46 Voorwoord slaaffunctie ......54 Wij danken u ervoor, dat u een Metz product heeft 5.1 Leerfunctie ....55 uitgekozen.
  • Seite 47: Veiligheidsinstructies

    1. Veiligheidsinstructies zonnestraling, vuur of dergelijke! • Haal lege batterijen onmiddellijk uit • De flitser is alleen bedoeld en toege- het apparaat! Uit verbruikte batteri- laten voor gebruik in de fotografie. jen kunnen chemicaliën lekken (het • Flits nooit vanaf korte afstand recht- zogenaamde uitlopen) die tot streeks in de ogen! Rechtstreeks in beschadiging van het apparaat lei-...
  • Seite 48: Veiligheidsaanwijzingen

    te kunnen verbranden of er zouden • 2 NC-accuës, type IEC KR03 vlekken op het materiaal of het (AAA / Micro); reflectorvenster kunnen ontstaan. • 2 Nickel-metaalhydride accuís, type • Demonteer de flitser niet! IEC HR03 (AAA / Micro), duidelijk HOOGSPANNING! Reparaties kun- grotere capaciteit en milieuvriende- nen uitsluitend door een geautorise-...
  • Seite 49: Aanbrengen / Demontage

    en klap het open. Aanbeveling: gebruik alleen objectie- ven waarvan de scherpstelling in het • Leg de batterijen overeenkomstig de objectief zelf plaatsvindt! symbolen aan de binnenzijde van Opgelet, bij andere objectieven moet het deksel in. u met de hand scherpstellen. Door Let bij het inzetten van de batterijen, het gewicht van de flitser kan een c.q.
  • Seite 50: In En Uitschakelen Van De Flitser

    Demontage Door de infraroodklem kan het flits- licht van de in de camera ingebouwde Druk op de flitser beide ontgrendel- flitser afgedekt worden. De infrarood- nokken in, houd ze ingedrukt en klem laat weliswaar de stuurimpulsen neem tegelijkertijd de flitser voorzich- door, maar houdt het flitslicht dat bij- tig van de adapterring af.
  • Seite 51: Remote-Functie

    (Channel 1-4) ter een extra flitser (bijv. de Metz meca- beschikking „Channel ALL“ stuurt alle blitz 58AF-1) is aangebracht, die de slaafflitsers die tot een zelfde remote- remote-functie ondersteunt.
  • Seite 52 het licht van de controllerflitser kunnen • Met de toets de functie ontvangen. „MODELLING LIGHT“ inschakelen (ON) of uitschakelen (OFF). Het aanpassen van de flitser • Druk op de toets S E L op de flitser. SYSTEM NIK REMOTE • Stel de in de camera ingebouwde In het display verschijnt de laatst Ch ALL Gr A flitser of de externe flitser in op de...
  • Seite 53: Remote-Kanaal En Remote-Groep Instellen

    • Als er een andere verhouding (Ratio) op de camera op de toets ´AEL´te voor beide reflectoren moet worden drukken. Der slaaflitser moet dan ingesteld, druk dan op de toets met een in tijd vertraagde flits ant- om de verhouding tussen bei- woorden.
  • Seite 54: Met De Hand In Te Stellen, Draadloze Slaaffunctie

    B en C) is alleen in de Canon, Nikon • Druk op de toets en kies de GROUP A en Olympus remote-functie mogelijk. gewenste groep (GROUP A, S E L GROUP B, GROUP C). Instellen van een kanaal (CHANNEL) en een groep (GROUP) in het •...
  • Seite 55: Leerfunctie

    Als u de „leerfunctie“ al een keer hebt Aanpassen van de flitser uitgevoerd en u blijft verder dezelfde camera gebruiken, kies dan de „slaaf- • Zet de flitser van de camera aan. functie“(zie 5.2) Indien nodig schakelt u de flits voo- raf ter vermindering van het „rode 5.1 Leerfunctie ogen-effect“...
  • Seite 56 De mecablitz 15MS-1 digital heeft • Druk zo vaak op de toets dat in Ratio SYSTEM het flitslicht leren kennen. In het het display de aanduiding „SYSTEM S L AV E display verschijnt: P / R SLAVE“ verschijnt. S E L L E A R N •...
  • Seite 57: Slaaffunctie

    5.2 Slaaffunctie • Druk op de flitser op de toets S E L SYSTEM NIK REMOTE In het display verschijnt de laatst De slaaffunctie weerspiegelt de instel- Ch ALL Gr A gebruikte instelling, bijv.: ling zoals die in de „leerfunctie“ werd S E L geleerd.
  • Seite 58: Werken Met Een Flitskabel

    De gedane instelling treedt automa- Aanpassen van de flitser tisch in werking. • Kies op de camera een manual De slaafflitser moet voor de remote- functie. functie met zijn ingebouwde sen- soren het licht van de cameraflitser • Schakel de flitser via zijn hoofd- zonder verhindering kunnen ontvan- schakelaar 15MS-1...
  • Seite 59: Het Los Van De Camera Opstellen Van De Flitser

    • Als u een ongelijke verhouding 8 Belichting o.k. in de (Ratio) voor beide reflectoren wilt remote-TTL-functie instellen, druk dan op de toetsen In de cameraspecifieke . De verhouding kan staps- SYNC atio remote-TTL-functie dient de toets gewijs worden versteld. In het „AF/SELECT“...
  • Seite 60: Reflectoren Zwenken

    9 Reflectoren zwenken Aanbrengen van de bounce-ring Plaats de bounce-ring asymme- Beide reflectoren kunnen 10, c.q. trisch zo over de flitser, dat de reflec- 20 graden worden gezwenkt. toren en het AF-hulplicht wor- Druk, om de reflectoren te zwenken, den afgedekt. Druk de bounce-ring de reflectorhendel stapsgewijs naar tegen het huis van de flitser tot hij...
  • Seite 61: Instellicht (Modelling Light Ml)

    Het AF-hulplicht wordt met de toets • Druk op de flitser op de knop S E L M O D E L L I N G L I G H T ingeschakeld en licht gedurende In het display verschijnt: O F F S E L ongeveer 10 seconden op.
  • Seite 62: Synchronisatie Bij Het Open- Of Dichtgaan Van De Sluiter (Rear)

    lijker“ weergave van de opnamesitua- • Druk op de flitser op de toets S E L S E L E C T tie bewerkstelligd. Afhankelijk van de In het display verschijnt: ⊃ S E L erop ingestelde functie stuurt de •...
  • Seite 63: Het Gebruik Van Een Statief

    (Firmware update). sonscherpte te vermijden! Nadere informaties vindt u in het 13.1 Het gebruik van een statief internet op de Metz–homepage De statiefaansluiting van de flitser www.metz.de kan alleen worden gebruikt om de flitser als slaafflitser zonder camera...
  • Seite 64: Reset

    14.2 Reset 14.3 Het formeren van de flits- condensator De flitser kan naar de fabrieksinstellin- gen worden teruggezet. De in de flitser ingebouwde flitscon- densator is onderhevig aan een Flitser terugzetten naar de fabriek- natuurkundige verandering, als het sinstellingen (RESET) apparaat gedurende een langere tijd niet wordt ingeschakeld.
  • Seite 65: Technische Gegevens

    De flitser zou nu na het inschakelen Met de hand in te stellen weer „normaal“ moeten functioneren. deelvermogens: Is dat niet het geval, wend u zich dan P 1/1 tot P1/64 tot uw fotohandelaar. Kleurtemperatuur: Ong. 5600 K 16 Technische gegevens Synchronisatie: Maximaal richtgetal bij Laagspannings –...
  • Seite 66 Afmetingen in mm (B x H x D): Ong. 133 x 144 x 38 Gewicht: Ong. 190 g zonder stroombronnen Leveringsomvang: Flitser, Bounce-ring, Infraroodklem, Adapterring 52 mm, Adapterring 55 mm, Adapterring 58 mm, Tas, Gebruiksaanwijzing Optionele accessoires: • Adapterring 15-62 (bestelnr.: 000015622) adapterring M 62 x 0,75 mm •...
  • Seite 67 Batterijen inleveren Uw Metz-product is ontworpen voor en gebouwd uit hoogwaardige mate- In Nederland: als verbruiker bent u rialen en componenten die gerecycled verplicht gebruikte batterijen in te kunnen worden en dus geschikt zijn leveren bij de daartoe bestemde ver- voor hergebruik.
  • Seite 68 Thank you for choosing a Metz product. Operation of flash unit detached We are delighted that you have become a Metz from camera ..... . .81 customer.
  • Seite 69: Safety Instructions

    1 Safety instructions light, fire or similar! • Remove the used batteries immedia- • The flash unit is exclusively designed tely from the device! Chemicals can and authorised for use in photogra- escape from used batteries (so-cal- phic applications. led “leaks”) resulting in damage to •...
  • Seite 70: Preparation

    Repairs should only be performed 2 Preparation by authorised service personnel. 2.1 Power supply • Do not touch the electrical contacts of the flash unit. The flash unit can optionally be ope- rated with: • If the housing has been damaged in such a way that internal compo- •...
  • Seite 71: Insertion And Replacement Of Batteries

    above 60 seconds. If you do not use • Close battery compartment cover and slide against the housing. the flash unit for a prolonged period, you should remove the batteries from 2.3 Installation /Deinstallation the unit. Carefully screw an adapter ring of the 2.2 Insertion and replacement of appropriate size into the filter thread batteries...
  • Seite 72: Switching The Flash Unit On And Off

    The flash unit can be rotated (turned) 2.5 The infrared clamp on the adapter ring. The camera’s own flash unit and the use of mecablitz 15MS-1 digital Removal should not contribute to the lighting of Press both the release buttons macropictures, so that no shadows the flash unit, keep them pressed, and are caused by the housing of meca-...
  • Seite 73: Starting Up For The First Time

    (e.g. Metz meca- 15MS-1 V 1 . 0 blitz 58AF-1) which supports remote • Press the button...
  • Seite 74 only with Canon, Nikon, Olympus). • Slide the infrared clamp over the Each group can in turn consists of one camera’s own flash unit if it is to be or more slave flash units. used as controller flash unit. Swivel the external flash unit so that it can- Four independent remote channels not contribute to lighting.
  • Seite 75: Setting Remote Channel And Remote Group

    „PEN REMOTE“ (Pentax) or channels can be set when several „SAM REMOTE“ (Samsung) or slave flash units are used (see „SON REMOTE“ (Sony) Chapter 4.2 and operating manual of the camera). The flash unit sup- • Press the button, thus the selected ports the wireless Sony remote remote mode is set, in the example system in the “CTRL”...
  • Seite 76: Manual Wireless Slave Mode

    set if a fixed channel is not used in • Press the button S E L on the flash CHANNEL ALL the remote system. unit. In the display appears: S E L In the case of “CHANNEL ALL”, all • Press button and select the set channels are activated.
  • Seite 77: Learn Function

    Several digital cameras fire one or If the camera’s own flash device pro- more measuring pre-flashes and/or vides for automatic focussing flashes for a fraction of a second AF measuring flashes, then due to before the picture is taken in order to the system characteristics no learn reduce the „red-eye effect“.
  • Seite 78 SYSTEM The mecablitz 15MS-1 digital has • Press the button S E L on the flash NIK REMOTE now learnt to recognise the flash unit. The most recently used setting Ratio Ch ALL Gr A light of the camera flash unit. In the S E L appears in the display, e.g.: P / R...
  • Seite 79: Slave Mode

    5.2 Slave mode • Press the button S E L on the flash SYSTEM NIK REMOTE unit. The most recently used setting “Slave mode” reflects the setting that Ch ALL Gr A appears in the display, e.g.: S E L has been learnt in the “Learn func- tion”.
  • Seite 80: Operation With Synchronous Cable

    For Remote Control mode , the Adjustment of the flash unit slave flash unit must be able to regi- ster the light from the camera flash • Select a manual operating mode on unit immediately and without restric- the camera. tion so that it is fired! The operating •...
  • Seite 81: Operation Of Flash Unit Detached From Camera

    • If both the reflectors should be set at 8 Lighting OK in an unequal ratio (Ratio) then press remote TTL mode the buttons to change the In camera-specific remote–TTL mode, ratio. The ratio can be adjusted in SYNC atio the button “AF/SELECT”...
  • Seite 82: Bounce Diffuser

    inwards by 10°, at the second posi- audibly snaps into place. tion by 20°. Turn the bounce diffuser so that the notch of the marking tab aligns The working distance is the distance with the marking point on the flash between the object and the front unit housing.
  • Seite 83: Modelling Light (Ml)

    11 Modelling Light (ML) • As a confirmation that the “Modelling Light” is switched on, The modelling light (setting light) is a the manual release button blinks. high frequency, stroboscopic flash light. The effect of a quasi continuous Triggering modelling light light is created for a duration of Press the manual release button approx.
  • Seite 84: Synchronisation On The 1St Or 2Nd Shutter Curtain (Rear)

    12 Synchronisation on the ly deleted or not performed (see Camera user manual). The REAR ope- 1st or 2nd shutter rating mode is set on the camera (see curtain (REAR) Camera user manual). No settings are Some cameras support synchronisa- necessary on the flash unit, nor is the- tion with the 2nd shutter curtain re any display for this mode.
  • Seite 85: Using A Tripod

    Slow synchronisation SLOW is set on You can find out more by visiting the the camera (see camera’s operating Metz homepage: www.metz.de instructions)! Use a tripod when 14.2 Reset shooting with slow shutter speeds to The flash unit can be reset to factory avoid blurred images! settings.
  • Seite 86: Conditioning The Flash Capacitor

    This will not affect firmware updates normally when switched on. If this is not the case, then contact your dealer. for the flash unit! 14.3 Conditioning the 16 Technical data flash capacitor The flash capacitor built into the flash Maximum guide number for ISO unit undergoes a physical change 100;...
  • Seite 87 Manual partial lighting: Swivel ranges and indexed positions of the reflectors: P1/1 to P1/64 Horizontal: 0° 10° 20° Colour temperature: Dimensions in mm (W x H x D): Approx. 5.600 K Approx.. 133 x 144 x 38 Synchronisation: Weight: Low voltage – IGBT – ignition Approx.
  • Seite 88 Battery disposal Your Metz product was developed and manufactured with high-quality Germany: As a consumer, you are materials and components which can legally obliged to return used batte- be recycled and/or re-used. ries. This symbol indicates that electrical You will find this symbol on batteries...
  • Seite 90 5.1 Funzione di apprendimento ... .99 Grazie per avere acquistato un prodotto Metz. 5.2 Modalità slave ....101 Siamo lieti di avervi tra i nostri clienti.
  • Seite 91: Avvertenze Per La Sicurezza

    1 Avvertenze per la • Non esporre le batterie a tempera- ture elevate, ai raggi diretti del sole, sicurezza al fuoco o a fonti di calore simili! • L’utilizzo del flash è previsto e auto- • Estrarre subito dall’apparecchio le rizzato solamente nell’ambito della batterie usate! Dalle batterie usate fotografia.
  • Seite 92: Preparazione

    flash) o a diretto contatto con essa. 2 Preparazione A causa dell’elevata emissione di 2.1 Alimentazione elettrica energia potrebbero verificarsi feno- meni di combustione oppure Il flash può essere alimentato a scelta potrebbero formarsi macchie sul con: materiale o sulla parabola. •...
  • Seite 93: Inserimento E Sostituzione Delle Batterie

    Le batterie/batterie ricaricabili sono Non gettate le pile/batterie esaurite scariche se il tempo di ricarica, in nei rifiuti domestici! Contribuite alla caso di utilizzo del flash a piena tutela dell’ambiente e portatele nei potenza, supera i 60 secondi. Se il contenitori appositi per il riciclaggio! flash resta inutilizzato per un peri- •...
  • Seite 94: Attivazione E Disattivazione Del Flash

    Il flash deve essere fissato stabilmen- 2.5 Filtro infrarossi te all’anello adattatore. Per il tra- Per le riprese macro e l’utilizzo di sporto della fotocamera con il flash mecablitz 15MS-1 digital il flash inte- inserito, non afferrare il flash, bensì grato nella fotocamera non dovrebbe tenere la fotocamera impugnandola contribuire all’esposizione per evitare...
  • Seite 95: Prima Messa In Funzione

    Si montato un flash supplementare che visualizza la seguente scritta: S E L supporta il funzionamento a distanza (ad es. Metz mecablitz 58AF-1). • Impostare ora la modalità desi- derata: 4.1 Informazioni generali per il - Funzionamento a distanza specifico funzionamento a distanza per fotocamera (si veda il cap.
  • Seite 96 Il flash slave può essere associato ad modalità che supporti il funziona- uno dei tre possibili gruppi (A, B, o C mento a distanza. solo Canon, Nikon, Olympus). • Inserire il filtro infrarossi sul flash Ciascun gruppo, a sua volta, può integrato nella fotocamera se questo essere composto da uno o più...
  • Seite 97 Nelle modalità “CAN REMOTE” o • Premere ripetutamente il tasto “NIK REMOTE” oppure finché sul display non verrà visua- “OLY REMOTE” è possibile impostare lizzata la versione desiderata per il più canali slave e diversi gruppi sla- tipo di fotocamera utilizzata: ve per l’utilizzo di più...
  • Seite 98: Impostazione Del Canale Remoto E Del Gruppo Remoto

    4.2 Impostazione del canale Impostazione di un canale (CHAN- remoto e del gruppo remoto NEL) e di un gruppo (GROUP) nel sistema di comando a distanza spe- Per fare in modo che più sistemi a cifico per la fotocamera distanza nella stessa area non interfe- riscano tra loro, sono disponibili quat- •...
  • Seite 99: Modalità Slave Manuale Senza Cavo

    “Funzione di apprendimento” (si veda • Premere il tasto e selezionare il GROUP A il capitolo 5.1). gruppo desiderato (GROUP A , S E L GROUP B , GROUP C). Se la “Funzione di apprendimento” è già stata eseguita una volta e si utiliz- SYSTEM •...
  • Seite 100 Adeguamento del flash • Premere ripetutamente il tasto SYSTEM finché non comparirà la scritta S L AV E • Attivare il flash della fotocamera. In S E L “SYSTEM SLAVE”. caso di necessità attivare la funzio- L E A R N •...
  • Seite 101: Modalità Slave

    Il mecablitz 15MS-1 digital ha 5.2 Modalità slave appreso il lampeggiamento del Ratio La “modalità slave” riflette l’imposta- flash della fotocamera. Sul display zione appresa nella “Funzione di P / R si visualizza la seguente scritta: apprendimento”. Tale funzione rima- ne in memoria fino all’esecuzione di •...
  • Seite 102: Funzionamento Con Un Cavo Sincro

    Il flash slave deve essere in grado di • Premere il tasto S E L sul flash. Sul SYSTEM NIK REMOTE catturare, mediante i sensori integra- display compare l’ultima imposta- Ch ALL Gr A ti per il funzionamento a distanza zione utilizzata, ad es.
  • Seite 103: Posizionamento Del Flash Se Scollegato Dalla Fotocamera

    Power • Attivare il flash con l’interruttore • Per impostare un livello di potenza principale ridotta premere il tasto P / R 15MS-1 P / R V 1 . 0 Compare la seguente scritta: • Tenere premuto il tasto “AF/SELECT” sul flash finché...
  • Seite 104: Esposizione O.k Im Modalità Ttl A Distanza

    8 Esposizione o.k im moda- posizione corrisponde ad una rotazio- ne di 10° della parabola, la seconda lità TTL a distanza corrisponde ad una rotazione di 20°. Nella modalità di funzionamentoTTL a distanza il tasto“AF/SELECT” serve La distanza operativa corrisponde anche per indicare lo stato di esposi- alla distanza tra il soggetto e il bor- zione o.k.
  • Seite 105: Illuminatore Ausiliario Af

    modo tale da coprire le parabole con il tasto e si illumina per l’illuminatore ausiliario AF 10 secondi. Dopo la ripresa fotografi- Premere il diffusore bounce contro ca, l’illuminatore ausiliario viene il corpo del flash finché non sarà udi- immediatamente disattivato e non bile uno scatto.
  • Seite 106: Sincronizzazione Sulla Prima O Sulla Seconda Tendina (Rear)

    M O D E L L I N G • Con il tasto attivare la funzione • Premere il tasto per disattivare L I G H T O F F “MODELLING LIGHT” (ON). la funzione della luce pilota. S E L •...
  • Seite 107: Sincronizzazione Lenta (Slow)

    Su alcune fotocamere la funzione alcune fotocamere la sincronizzazione REAR non è possibile in determinate lunga viene attivata in determinati pro- modalità (per es. alcuni programmi o grammi della fotocamera ( ad es. pro- con la funzione pre-lampo per elimi- grammi riprese notturne, ecc.) o può...
  • Seite 108: Cura E Manutenzione

    • Dopo il ripristino delle impostazioni Ulteriori informazioni sono disponibi- S E L E C T iniziali sul display compare la con- li nel sito Internet di Metz: S E L ferma: www.metz.de Questo non riguarda gli aggiorna- 14.2 Reset...
  • Seite 109: In Caso Di Anomalie

    una volta ogni tre mesi. 16 Dati tecnici L’alimentazione energetica deve esse- re sufficiente a far accendere la spia Numero guida a potenza piena per di carica al più tardi 1 minuto dopo ISO 100; 50 mm l’attivazione del flash. In metri: 15 In piedi: 49 15 In caso di anomalie...
  • Seite 110 Temperatura del colore: Dimensioni in mm (L x A x P): Ca. 5.600 K Ca. 133 x 144 x 38 Sincronizzazione: Gewicht : Scarica IGBT a basso voltaggio Circa 190 g. senza fonti di alimenta- zione Numero di lampi: In dotazione: Con batterie ricaricabili NiCd (250 mAh) circa 50 Flash, diffusore bouncer,...
  • Seite 111 Smaltimento delle batterie Il vostro prodotto Metz è stato proget- tato e realizzato con materiali e com- Germania: Il consumatore ha l’obbli- ponenti pregiati che possono essere go di legge di restituire le batterie riciclati e riutilizzati. usate. Questo simbolo significa che gli...
  • Seite 112 5.2 Funcionamiento esclavo ....123 Le agradecemos que se haya decidido por un pro- ducto Metz. Estamos encantados de saludarle como Funcionamiento a través de cable síncrono .124 cliente nuestro.
  • Seite 113: Indicaciones De Seguridad

    1 Indicaciones de seguridad del sol, fuego o similares! • ¡Retirar inmediatamente las pilas • ¡El flash está previsto y autorizado gastadas del aparato. Las pilas para su uso exclusivo en el ámbito gastadas pueden soltar ácido (vaci- fotográfico! ado) lo que podría dañar el apara- •...
  • Seite 114: Preparativos

    vocar quemaduras o manchas en el para exigencias de rendimiento material o en el reflector. moderadas. • ¡No desmontar el flash! • 2 pilas recargables NC ¡ALTA TENSION! Las reparaciones tipo IEC KR03 (AAA / micro). solamente pueden ser efectuadas •...
  • Seite 115: Introducción Y Cambio De Las Pilas

    2.2 Introducción y cambio de las 2.3 Montaje / Desmontaje pilas Atornillar con precaución en la rosca • Mediante el interruptor principal de filtro del objetivo un anillo adapta- desconecte el flash. dor del tamaño que corresponda. • Desplace la tapa del comparti- Recomendación: ¡Emplee únicamente mento de pilas en dirección a la...
  • Seite 116: Conectar Y Desconectar El Flash

    El flash puede girar (rotación) sobre pues en otro caso podrían surgir som- el anillo adaptador. bras debido a la carcasa del meca- blitz 15MS-1 digital. Desmontaje La pinza de infrarrojos permite neu- Pulsar en el flash los dos botones de tralizar la luz del flash instalado en la desbloqueo ;...
  • Seite 117: Funcionamiento Remoto Específico De La Cámara

    Con el fin de que no interfieran recí- esté montado en la cámara un flash procamente en una misma estancia adicional (p.ej. Metz mecablitz varios sistemas remotos, están a 58AF-1) compatible con funciona- disposición cuatro canales remotos miento remoto.
  • Seite 118 elige el ajuste „Channel ALL“, se con- • Poner en funcionamiento el flash trolará todos los flashes esclavos. Es mediante el interruptor principal 15MS-1 necesario sintonizar en el mismo V 1 . 0 • Mantener pulsada en el flash la canal remoto los flashes esclavos que tecla „AF/SELECT“...
  • Seite 119: Ajustar Canal Remoto Y Grupo Remoto

    cuando se esté empleando varios flas- • Pulsar la tecla y quedará aju- hes esclavos (véase capítulo 4.2 y stado el modo remoto seleccionado, manual de la cámara). El flash soporta en el ejemplo „OLY REMOTE“ el sistema inalámbrico Sony Remote en (Olympus).
  • Seite 120: Funcionamiento Esclavo Inalámbrico Manual

    un canal permanente. • Pulsar en el flash la tecla S E L CHANNEL ALL Con „CHANNEL ALL“ activado, las En la indicación aparecerá: S E L órdenes se envían por principio a • Pulsar la tecla y seleccionar el todos los canales conectados.
  • Seite 121: Función De Aprendizaje

    Existen cámaras digitales que, una Cuando el flash instalado en la fracción de segundo antes de la toma, cámara emita predestellos AF de liberan uno o varios predestellos de medición para el enfoque automáti- medición y/o disparos de flash para co, el sistema impide la función de reducir el „efecto de ojos rojos“.
  • Seite 122 M O D E L L I N G Si el mecablitz 15MS-1 digital ha • Pulsar en el flash la tecla S E L L I G H T L E A R N O F F captado el impulso lumínico, la bar- En la indicación aparecerá: S E L ra de estado detendrá...
  • Seite 123: Funcionamiento Esclavo

    Cuando la „función de aprendizaje“ • Mantener pulsada en el flash la tecla „AF/SELECT“ hasta el haya sido operada ya alguna vez, S E L E C T momento en que aparezca en la los ajustes resultantes se mantendrán ⊃ hasta el próximo aprendizaje.
  • Seite 124: Funcionamiento A Través De Cable Síncrono

    • Si se desea ajustar una potencia 6 Funcionamiento a través luminosa parcial, entonces debe Power de cable síncrono pulsarse la tecla P / R . Aparecerá Puede manejarse el flash mediante un P / R la indicación siguiente: cable síncrono 15-50. Para ello, conecte la clavija síncrona de la •...
  • Seite 125: Instalación Del Flash Sin Conexión Directa Con La Cámara

    7 Instalación del flash sin • Pulsar la tecla hasta que en la SYSTEM SYNC-CORD indicación aparezca conexión directa con la „SYNC-CORD“. cámara Sin conexión directa con la cámara, • Pulsar la tecla y el funciona- el flash puede instalarse sobre la miento „SYNC–CORD“...
  • Seite 126: Girar Reflectores

    unos 3 segundos. res, y colocarles delante el disco oscilante (véase 9.1). Modifique el ajuste de ISO o el dia- fragme, e intente una nueva exposici- Para distancias superiores a 10 cm, ón. se pueden girar más o menos los reflectores para conseguir una exposi- Cuando el motivo no haya recibido ción con realce central o bien una...
  • Seite 127: La Luz Auxiliar Af

    Desmontaje del disco oscilante 11 Luz de modelado (ML) Doblar ligeramente hacia arriba una La función Modelling Light (luz de de las lengüetas de encaje existen- modelado) es una secuencia de tes en el disco oscilante y desencla- destellos estroboscópicos de alta fre- var.
  • Seite 128: Sincronización A La 1ª O 2ª Cortinillas (Rear)

    • Pulsar la tecla , y la función • Mediante la tecla , desactivar M O D E L L I N G L I G H T „Modelling Light“ habrá quedado (OFF) la función „MODELLING O F F S E L activada dentro del modo de funcio- LIGHT“.
  • Seite 129: Sincronización De Velocidad Lenta (Slow)

    de obturación más rápidas que la consigue mediante velocidades de velocidad de sincronización del flash. obturación en la cámara adaptadas a la luz ambiente. Para ello, la cámara Con algunas cámaras y determinados utiliza automáticamente velocidades modos de funcionamiento (p. ej. de obturación más lentas que la velo- determinados programas Vari o de cidad de sincronización del flash (p.
  • Seite 130: Empleo De Trípode

    (actualización de firmware). en la indicación esta confirmación: S E L Podrá encontrar información más Las actualizaciones del firmware no detallada al respecto en la página se ven afectadas por esta acción. web de Metz: www.metz.de...
  • Seite 131: Reactivación Periódica Del Condensador Del Flash

    14.3 Reactivación periódica del Después de conectarlo, el flash debe- condensador del flash ría volver a funcionar „normalmente“. Si no es el caso, póngase en contacto Cuando pasa cierto tiempo sin acti- con su proveedor. varse el aparato, el condensador inte- grado en el flash sufre una transfor- mación de sus propiedades físicas.
  • Seite 132 Modos de funcionamiento de flash Iluminación plena esclavos: 50 mm (formato pequeño) • funcionamiento esclavo con anulaci- Margen giratorio y posiciones de ón de preflash por función de encaje de los reflectores: aprendizaje. Horizontal: 0° 10° 20° Potencias luminosas parciales manuales: Dimensiones en mm (ancho x alto x De P1/1 hasta P1/64 fondo)
  • Seite 133 • Anillo adaptador 15-72 Su producto Metz ha sido concebido (nº pedido: 000015673) y fabricado con materiales y compo- Anillo adaptador M72x0,75mm nentes de alta calidad, que pueden ser reciclados y reutilizados. • Cable síncrono 15-50 (nº pedido: 000015501 Este símbolo significa que los apara- tos eléctricos y electrónicos, al final de...
  • Seite 134: Diagramme

    Diagramm: SYSTEM CANON- Start S E L E C T SYSTEM NIKON- SELECT ⊃ S E L 3 Sek. SYSTEM OLYMPUS- zurück zur letzten Anwendung Retour à la dernière utilisation ⊃ -REMOTE Terug naar de laatste toepassing Return to last application oder zuletzt eingestellte Anwendung Indietro all’ultimo utilizzo ou dernière utilisation configurée...
  • Seite 135 Diagramm: SYSTEM PENTAX- Start S E L E C T SYSTEM SAMSUNG- SELECT ⊃ S E L 3 Sek. SYSTEM SONY- zurück zur letzten Anwendung Retour à la dernière utilisation -REMOTE ⊃ Terug naar de laatste toepassing Return to last application oder zuletzt eingestellte Anwendung Indietro all’ultimo utilizzo ou dernière utilisation configurée...
  • Seite 136 Diagramm: SYSTEM SLAVE + LEARN Start S E L E C T SELECT ⊃ S E L 3 Sek. zurück zur letzten Anwendung Retour à la dernière utilisation ⊃ Terug naar de laatste toepassing Return to last application Indietro all’ultimo utilizzo volver al último uso M O D E L L I N G L I G H T...
  • Seite 137 Diagramm: SYSTEM SYNC-CORD Start S E L E C T SELECT ⊃ S E L 3 Sek. zurück zur letzten Anwendung Retour à la dernière utilisation ⊃ Terug naar de laatste toepassing Return to last application Indietro all’ultimo utilizzo volver al último uso M O D E L L I N G L I G H T O F F...
  • Seite 138: Garantiebestimmungen

    Batterien oder durch höhere Gewalt, Wasser, Kaufbeleg entweder über den Fachhändler oder direkt Blitz etc. entstanden sind. Ferner sind Verschleiß, an die Firma Metz-Werke GmbH & Co KG - Verbrauch sowie übermäßige Nutzung von der Garantie Zentralkundendienst - Ohmstrasse 55, 90513 Zirndorf, ausgenommen.
  • Seite 139 Hinweis: Opmerking: Avvertenza: Im Rahmen des CE-Zeichens wurde In het kader de CE-markering werd Nell’ambito delle prove EMV per il bei der EMV-Prüfung die korrekte bij de EMV-test de correcte belich- segno CE è stata valutata la corret- Belichtung ausgewertet ting bepaald.
  • Seite 140 Metz - Werke GmbH & Co KG • Postfach 1267 • D-90506 Zirndorf • info@metz.de • www.metz.de Consumer electronics Photoelectronics Plastics technology 708 47 0018.A3 Metz - always first class.

Inhaltsverzeichnis