Herunterladen Inhalt Inhalt Diese Seite drucken
Lenze 9300 vector Montageanleitung
Vorschau ausblenden Andere Handbücher für 9300 vector:
Inhaltsverzeichnis

Werbung

Verfügbare Sprachen

Verfügbare Sprachen

EDKVF9333V
.MH!
Global Drive
9300 vector
EVF9321 ... EVF9333
Frequenzumrichter
Frequency Inverter
Convertisseur de fréquence
Montageanleitung
Mounting Instructions
Instructions de montage
0.37 ... 90 kW
l

Werbung

Inhaltsverzeichnis
loading

Inhaltszusammenfassung für Lenze 9300 vector

  • Seite 1 EDKVF9333V Global Drive .MH! Montageanleitung Mounting Instructions Instructions de montage 9300 vector 0.37 ... 90 kW EVF9321 ... EVF9333 Frequenzumrichter Frequency Inverter Convertisseur de fréquence...
  • Seite 2 9300 vector. Read these Instructions before you start working! Observe the safety instructions given therein! More detailed information can be found in the System Manual for the 9300 vector frequency inverter. Veuillez lire attentivement cette documentation avant toute action ! Les consignes de sécurité...
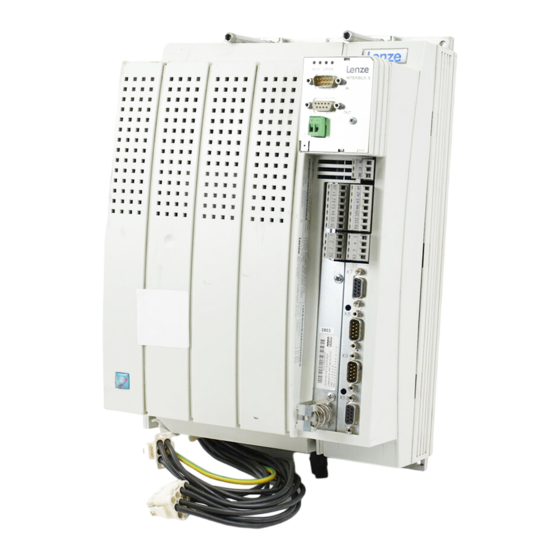
  • Seite 3 EVF9321 ... EVF9326 9300vec154 Position Beschreibung Antriebsregler Befestigungsschienen für Standardmontage Abdeckung für den Motoranschluss Halterung Schirmauflage mit Befestigungsschrauben (2 Stück) 1 Halterung für das Schirmblech für die Versorgungsanschlüsse 1 Halterung für das Schirmblech für die Motorleitung EMV−Schirmblech mit Befestigungsschrauben (2 Stück) 1 Schirmblech für die Versorgungsanschlüsse 1 Schirmblech für die Motorleitung und Zuleitung Motortemperatur−Überwachung mit Kaltleiter (PTC) oder Thermokontakt (Öffner)
  • Seite 4 EVF9327 ... EVF9329 9300vec155 Position Beschreibung Antriebsregler Befestigungswinkel für Standardmontage EMV−Schirmblech mit Befestigungsschrauben für geschirmte Steuerleitungen Haube mit Befestigungsschrauben EMV−Schirmblech für die Motorleitung und für die Zuleitung Motortemperatur−Überwachung mit Kaltleiter (PTC) oder Thermokontakt (Öffner) EDKVF9333V DE/EN/FR 7.2...
  • Seite 5 EVF9330, EVF9331 9300vec156 Position Beschreibung Antriebsregler Befestigungswinkel für Standardmontage EMV−Schirmblech mit Befestigungsschrauben für geschirmte Steuerleitungen Haube mit Befestigungsschrauben Schirmschelle und Zugentlastung für die Motorleitung Zugentlastung für die PE−Leitung Motor und die Zuleitung Motortemperatur−Überwachung mit Kaltleiter (PTC) oder Thermokontakt (Öffner) EDKVF9333V DE/EN/FR 7.2...
  • Seite 6 EVF9332, EVF9333 9300vec165 Position Beschreibung Antriebsregler Befestigungswinkel für Standardmontage EMV−Schirmblech mit Befestigungsschrauben für geschirmte Steuerleitungen Haube mit Befestigungsschrauben Schirmschelle und Zugentlastung für die Motorleitung Zugentlastung für die PE−Leitung Motor und die Zuleitung Motortemperatur−Überwachung mit Kaltleiter (PTC) oder Thermokontakt (Öffner) EDKVF9333V DE/EN/FR 7.2...
  • Seite 7: Lieferumfang

    Lieferumfang Beschreibung EVF9321 ... EVF9327 ... EVF9330 EVF9332 EVF9326 EVF9329 EVF9331 EVF9333 Frequenzumrichter 9300 vector Montageanleitung ^ 36 ^ 41 ^ 46 ^ 54 Montagematerial Standardmontage ^ 38 "Cold Plate"−Technik ˘ ˘ ˘ ^ 60 ^ 71 ^ 80 ^ 88 Installationsmaterial Leistungsanschlüsse...
  • Seite 8: Inhaltsverzeichnis

    ............Allgemeine Sicherheits− und Anwendungshinweise für Lenze−Antriebsregler .
  • Seite 9 Inhalt Grundgeräte im Leistungsbereich 55 kW ....... . . 4.4.1 Wichtige Hinweise .
  • Seite 10 Inhalt Steueranschlüsse ........... . . 5.8.1 Wichtige Hinweise .
  • Seite 11: Über Diese Dokumentation

    ˘ 12/2004 TD23 Dokumentation nur für die interne Verwendung Tipp! Informationen und Hilfsmittel rund um die Lenze−Produkte finden Sie im Download−Bereich unter www.lenze.com Zielgruppe Diese Dokumentation richtet sich an qualifiziertes Fachpersonal nach IEC 60364. Qualifiziertes Fachpersonal sind Personen, die für die auszuführenden Tätigkeiten bei der Aufstellung, Montage, Inbetriebsetzung und dem Betrieb des Produkts über entspre-...
  • Seite 12: Informationen Zur Gültigkeit

    Über diese Dokumentation Informationen zur Gültigkeit Informationen zur Gültigkeit Diese Dokumentation ist gültig für Frequenzumrichter 9300 vector ab dem Gerätestand  ‚ ƒ Typenschild 93xx ˘ Vxxx Produktreihe Frequenzumrichter Typ Nr. / Leistung 400 V 480 V 9321 0,37 kW...
  • Seite 13: Verwendete Konventionen

    Über diese Dokumentation Verwendete Konventionen Verwendete Konventionen Diese Dokumentation verwendet folgende Konventionen zur Unterscheidung verschiede- ner Arten von Information: Informationsart Auszeichnung Beispiele/Hinweise Zahlenschreibweise Dezimaltrennzeichen sprachabhängig Als Dezimaltrennung werden die für die jeweilige Zielsprache üblichen Zeichen ver- wendet. Zum Beispiel: 1234.56 oder 1234,56 Warnhinweise UL−Warnhinweise Werden in englischer und französischer...
  • Seite 14: Verwendete Hinweise

    Über diese Dokumentation Verwendete Hinweise Verwendete Hinweise Um auf Gefahren und wichtige Informationen hinzuweisen, werden in dieser Dokumenta- tion folgende Piktogramme und Signalwörter verwendet: Sicherheitshinweise Aufbau der Sicherheitshinweise: Gefahr! (kennzeichnet die Art und die Schwere der Gefahr) Hinweistext (beschreibt die Gefahr und gibt Hinweise, wie sie vermieden werden kann) Piktogramm und Signalwort Bedeutung Gefahr von Personenschäden durch gefährliche elektrische...
  • Seite 15: Sicherheitshinweise

    – Die in dieser Dokumentation dargestellten verfahrenstechnischen Hinweise und Schaltungsausschnitte sind Vorschläge, deren Übertragbarkeit auf die jeweilige Anwendung überprüft werden muss. Für die Eignung der angegebenen Verfahren und Schaltungsvorschläge übernimmt Lenze Automation GmbH keine Gewähr. Lenze−Antriebsregler (Frequenzumrichter, Servo−Umrichter, Stromrichter) und ƒ...
  • Seite 16 Sicherheitshinweise Allgemeine Sicherheits− und Anwendungshinweise für Lenze−Antriebsregler Bestimmungsgemäße Verwendung Antriebsregler sind Komponenten, die zum Einbau in elektrische Anlagen oder Maschinen bestimmt sind. Sie sind keine Haushaltsgeräte, sondern als Komponenten ausschließlich für die Verwendung zur gewerblichen Nutzung bzw. professionellen Nutzung im Sinne der EN 61000−3−2 bestimmt.
  • Seite 17 Gehäuse verbunden sind. Öffnungen oder Durchbrüche durch das Gehäuse auf ein Minimum reduzieren. Lenze−Antriebsregler können einen Gleichstrom im Schutzleiter verursachen. Wird für den Schutz bei einer direkten oder indirekten Berührung an einem 3−phasig versorgten An- triebsregler ein Differenzstromgerät (RCD) verwendet, ist auf der Stromversorgungsseite des Antriebsreglers nur ein Differenzstromgerät (RCD) vom Typ B zulässig.
  • Seite 18 Sicherheitshinweise Allgemeine Sicherheits− und Anwendungshinweise für Lenze−Antriebsregler Wartung und Instandhaltung Die Antriebsregler sind wartungsfrei, wenn die vorgeschriebenen Einsatzbedingungen eingehalten werden. Entsorgung Metalle und Kunststoffe zur Wiederverwertung geben. Bestückte Leiterplatten fachge- recht entsorgen. Beachten Sie unbedingt die produktspezifischen Sicherheits− und Anwendungshinweise in dieser Anleitung! EDKVF9333V DE/EN/FR 7.2...
  • Seite 19: Motor Thermisch Überwachen

    Sicherheitshinweise Motor thermisch überwachen Motor thermisch überwachen Hinweis! Ab Softwarestand 8.1 verfügen die Antriebsregler 9300 vector über eine xt−Funktion, um den angeschlossenen Motor sensorlos thermisch zu überwachen. Die I xt−Überwachung basiert auf einem mathematischen Modell, das aus ƒ den erfassten Motorströmen eine thermische Motorauslastung berechnet.
  • Seite 20: Motor Thermisch Überwachen Fremdbelüftete Oder Selbstgekühlte Motoren

    Schwellenwert in C0120 (OC6) oder C0127 Start (OC8). Auslösezeit im Diagramm ablesen Diagramm zur Ermittlung der Auslösezeiten bei einem Motor mit einer thermischen Mo- tor−Zeitkonstante von 5 Minuten (Lenze−Einstellung C0128): L [%] = 3 × I = 2 × I = 1.5 × I = 1 ×...
  • Seite 21: Eigenbelüftete Motoren

    Zur Einhaltung der UL 508C Norm müssen Sie über die Codestelle C0129/x die drehzahlabhängige Bewertung des zulässigen Drehmomentes einstellen. Parametrieren Zur I x t−Überwachung können Sie folgende Codestellen einstellen: Codestelle Bedeutung Wertebereich Lenze−Einstellung C0066 Anzeige der I x t−Belastung des Motors 0 ... 250 % − C0120 Schwelle: Auslösung Fehler "OC6"...
  • Seite 22: Motor Thermisch Überwachen Eigenbelüftete Motoren

    Sicherheitshinweise Motor thermisch überwachen Eigenbelüftete Motoren Auslösezeit und I x t−Belastung berechnen Berechnen Sie die Auslösezeit und I x t−Belastung des Motors unter Berücksichtigung der Werte in C0129/1 und C0129/2 (Bewertungskoeffizient "y"). Formeln zur Auslösezeit Information Auslösezeit der I x t−Überwachung Thermische Motor−Zeitkonstante (C0128) z ) 1 T + * ( t )
  • Seite 23: Restgefahren

    Sicherheitshinweise Restgefahren Restgefahren Personenschutz Überprüfen Sie vor Arbeiten am Antriebsregler, ob alle Leistungsklemmen ƒ spannungslos sind: – Nach dem Netzabschalten führen die Leistungsklemmen U, V, W, +U und −U noch mindestens 3 Minuten gefährliche Spannung. – Bei gestopptem Motor führen die Leistungsklemmen L1, L2, L3; U, V, W, +U −U gefährliche Spannung.
  • Seite 24 Sicherheitshinweise Restgefahren Schutz der Maschine/Anlage Antriebe können gefährliche Überdrehzahlen erreichen (z. B. Einstellung hoher ƒ Ausgangsfrequenzen bei dafür ungeeigneten Motoren und Maschinen): – Die Antriebsregler bieten keinen Schutz gegen solche Betriebsbedingungen. Setzen Sie dafür zusätzliche Komponenten ein. EDKVF9333V DE/EN/FR 7.2...
  • Seite 25: Sicherheitshinweise Für Die Installation Nach Ul

    Sicherheitshinweise Sicherheitshinweise für die Installation nach UL Sicherheitshinweise für die Installation nach UL Warnings! Motor Overload Protection ƒ – For information on the protection level of the internal overload protection for a motor load, see the corresponding manuals or software helps. –...
  • Seite 26: Technische Daten

    Technische Daten Allgemeine Daten und Einsatzbedingungen Technische Daten Allgemeine Daten und Einsatzbedingungen Allgemeine Daten Konformität und Approbation Konformität 2006/95/EG Niederspannungsrichtlinie 2004/108/EG EMV−Richtlinie TP TC 020/2011 Elektromagnetische Ver- Eurasische Konformität träglichkeit von techni- (TR ZU 020/2011) TR ZU: Technische Regulierung schen Erzeugnissen der Zollunion TP TC 004/2011 Über die Sicherheit von...
  • Seite 27: Einsatzbedingungen

    Technische Daten Allgemeine Daten und Einsatzbedingungen Einsatzbedingungen Umgebungsbedingungen Klimatisch Lagerung IEC/EN 60721−3−1 1K3 (−25 ... +55 °C) < 6 Monate 1K3 (−25 ... +40 °C) > 6 Monate > 2 Jahre: Zwischenkreis−Kon- densatoren formieren Transport IEC/EN 60721−3−2 2K3 (−25 ... +70 °C) Betrieb EVF9321 ...
  • Seite 28: Sicherheitsrelais Ksr

    Technische Daten Sicherheitsrelais KSR Montagebedingungen Einbauort Im Schaltschrank Einbaulage Vertikal ^ 35 Einbaufreiräume Abmessungen Gewichte Sicherheitsrelais K Klemme Beschreibung Bereich Werte X11/K32 Sicherheitsrelais K Spulenspannung bei +20 °C DC 24 V (20 ... 30 V) X11/K31 1. Abschaltpfad 823 W ±10 % Spulenwiderstand bei +20 °C X11/33 Bemessungsleistung der Spule...
  • Seite 29: Betrieb Mit Bemessungsleistung (Normalbetrieb)

    Technische Daten Betrieb mit Bemessungsleistung (Normalbetrieb) Bemessungsdaten für Netzspannung 400 V Betrieb mit Bemessungsleistung (Normalbetrieb) Hinweis! Die Antriebsregler EVF9324, EVF9326 und EVF9328 … EVF9333 dürfen nur mit den vorgeschriebenen Netzdrosseln oder Netzfiltern betrieben werden. 3.3.1 Bemessungsdaten für Netzspannung 400 V Grundlage der Daten Spannung Frequenz...
  • Seite 30: Betrieb Mit Bemessungsleistung (Normalbetrieb) Bemessungsdaten Für Netzspannung

    87,0 EVF9333−xV 63,0 94,0 Fettdruck = Lenze−Einstellung Die Ströme gelten für ein periodisches Lastwechselspiel mit maximal 1 Minute Überstromdauer und 2 Minuten Grundlastdauer mit maximal 75 % I Leistungsoptimierter Betrieb mit automatischer Schaltfrequenzabsenkung. Bei Überschreiten des max. zulässigen Ausgangsstroms wird die Schaltfrequenz auf 2 kHz abgesenkt.
  • Seite 31: Bemessungsdaten Für Netzspannung 480 V

    Technische Daten Betrieb mit Bemessungsleistung (Normalbetrieb) Bemessungsdaten für Netzspannung 480 V 3.3.2 Bemessungsdaten für Netzspannung 480 V Grundlage der Daten Spannung Frequenz Netzanschluss AC−Netz 3/PE AC 384 V − 0 % ... 528 V + 0 % 45 Hz − 0 % ... 65 Hz + 0 % Netzanschluss DC−Netz DC 540 V −...
  • Seite 32 EVF9333−xV 94,0 59,0 89,0 Fettdruck = Lenze−Einstellung Die Ströme gelten für ein periodisches Lastwechselspiel mit maximal 1 Minute Überstromdauer und 2 Minuten Grundlastdauer mit maximal 75 % I Leistungsoptimierter Betrieb mit automatischer Schaltfrequenzabsenkung. Bei Überschreiten des max. zulässigen Ausgangsstroms wird die Schaltfrequenz auf 2 kHz abgesenkt.
  • Seite 33: Betrieb Mit Erhöhter Bemessungsleistung

    Technische Daten Betrieb mit erhöhter Bemessungsleistung Bemessungsdaten für Netzspannung 400 V Betrieb mit erhöhter Bemessungsleistung Hinweis! Der Betrieb mit erhöhter Bemessungsleistung ist nicht UL−zertifiziert. ƒ Der Betrieb mit erhöhter Bemessungsleistung ist nur erlaubt: ƒ – Im genannten Netzspannungsbereich – Mit den genannten Schaltfrequenzen –...
  • Seite 34 EVF9330−xV EVF9331−xV EVF9332−xV EVF9333−xV Fettdruck = Lenze−Einstellung Die Ströme gelten für ein periodisches Lastwechselspiel mit maximal 1 Minute Überstromdauer und 2 Minuten Grundlastdauer mit maximal 75 % I Leistungsoptimierter Betrieb mit automatischer Schaltfrequenzabsenkung. Bei Betrieb mit erhöhter Bemessungsleistung wird die Schaltfrequenz auf 2 kHz abgesenkt.
  • Seite 35: Mechanische Installation

    Mechanische Installation Grundgeräte im Leistungsbereich 0,37 ... 11 kW Wichtige Hinweise Mechanische Installation Grundgeräte im Leistungsbereich 0,37 ... 11 kW 4.1.1 Wichtige Hinweise Masse der Geräte 9300 Standardgerät "Cold Plate"−Gerät EVF93xx−EV EVF93xx−CV [kg] [kg] EVF9321−xV EVF9322−xV EVF9323−xV EVF9324−xV EVF9325−xV EVF9326−xV EDKVF9333V DE/EN/FR 7.2...
  • Seite 36: Grundgeräte Im Leistungsbereich 0,37 ... 11 Kw Montage Mit Befestigungsschienen (Standard)

    EVF9324−EV EVF9326−EV Befestigungsschienen Befestigung Antriebsregler Abmessungen ³ 100mm ³ 100mm 9300vec114 Abb. 4−1 Standardmontage mit Befestigungsschienen 0,37 ... 11 kW Antriebsregler können ohne Abstand angereiht werden 9300 vector Maße [mm] EVF9321−EV − ˘ EVF9322−EV EVF9323−EV 48,5 − ˘ EVF9324−EV EVF9325−EV 21,5 ˘...
  • Seite 37: Grundgeräte Im Leistungsbereich 0,37 ... 11 Kw Montage Thermisch Separiert (Durchstoßtechnik)

    Zusätzlich benötigen Sie den Montagesatz für Durchstoßtechnik: Montagesatz Montagesatz EVF9321−EV, EVF9322−EV EJ0036 EVF9323−EV, EVF9324−EV EJ0037 EVF9325−EV, EVF9326−EV EJ0038 Abmessungen 9300vec115 Abb. 4−2 Abmessungen Montage thermisch separiert 0,37 ... 11 kW 9300 vector Maße [mm] EVF9321−EV 112,5 385,5 95,5 365,5 105,5 EVF9322−EV EVF9323−EV 131,5 385,5 114,5...
  • Seite 38: Montage In "Cold Plate"−Technik

    Mechanische Installation Grundgeräte im Leistungsbereich 0,37 ... 11 kW Montage in "Cold Plate"−Technik 4.1.4 Montage in "Cold Plate"−Technik Sie können die Antriebsregler in ˜ Cold Plate˜−Technik z. B. auf Summenkühlern montie- ren. Dafür müssen Sie die Antriebsregler Typ EVF93xx−CV verwenden. Benötigtes Montagematerial aus dem Lieferumfang: Beschreibung Verwendung...
  • Seite 39 Mechanische Installation Grundgeräte im Leistungsbereich 0,37 ... 11 kW Montage in "Cold Plate"−Technik Abmessungen 9300vec120 Abb. 4−3 Abmessungen Montage in "Cold Plate"−Technik 0,37 ... 11 kW 9300 vector Maße [mm] EVF9321−CVV003 ˘ EVF9322−CVV003 EVF9323−CVV003 ˘ EVF9324−CVV003 EVF9325−CVV003 EVF9326−CVV003 Bei aufgestecktem Feldbusmodul an X1 Montagefreiraum für Anschlusskabel berücksichtigen Montage Tragen Sie vor dem Verschrauben von Kühler und Kühlplatte des Antriebsreglers Wärme-...
  • Seite 40: Grundgeräte Im Leistungsbereich 15

    Mechanische Installation Grundgeräte im Leistungsbereich 15 ... 30 kW Wichtige Hinweise Grundgeräte im Leistungsbereich 15 ... 30 kW 4.2.1 Wichtige Hinweise Der Beipack liegt im Innenraum des Antriebsreglers. Haube des Antriebsreglers abnehmen 1. Schrauben 0 lösen 2. Haube 1 nach oben klappen und aushängen 9300vec113 Masse der Geräte 9300...
  • Seite 41: Grundgeräte Im Leistungsbereich 15 ... 30 Kw Montage Mit Befestigungswinkeln (Standard)

    Abmessungen ³ 100mm ³ 100mm 9300vec111 Abb. 4−4 Standardmontage mit Befestigungswinkeln 15 ... 30 kW Antriebsregler können ohne Abstand angereiht werden 9300 vector Maße [mm] EVF9327−EV EVF9328−EV EVF9329−EV Bei aufgestecktem Feldbusmodul an X1 Montagefreiraum für Anschlusskabel berücksichtigen Montage Befestigungswinkel an das Kühlkörperblech des Antriebsreglers montieren.
  • Seite 42: Grundgeräte Im Leistungsbereich 15 ... 30 Kw Montage Thermisch Separiert (Durchstoßtechnik)

    Für die Montage in Durchstoßtechnik müssen Sie den Antriebsregler Typ EVF93xx−EV ver- wenden. Zusätzlich benötigen Sie den Montagesatz für Durchstoßtechnik EJ0011. Abmessungen 9300vec116 Abb. 4−5 Abmessungen Montage thermisch separiert 15 ... 30 kW 9300 vector Maße [mm] EVF9327−EV EVF9328−EV 279,5 379,5...
  • Seite 43: Umgebungsbedingungen

    Mechanische Installation Grundgeräte im Leistungsbereich 15 ... 30 kW Montage in "Cold Plate"−Technik 4.2.4 Montage in "Cold Plate"−Technik Sie können die Antriebsregler in ˜ Cold Plate˜−Technik z. B. auf Summenkühlern montie- ren. Dafür müssen Sie die Antriebsregler Typ EVF93xx−CV verwenden. Anforderungen an den Summenkühler Für den sicheren Betrieb der Antriebsregler sind folgende Punkte wichtig: Gute thermische Anbindung an den Kühler...
  • Seite 44 Grundgeräte im Leistungsbereich 15 ... 30 kW Montage in "Cold Plate"−Technik Abmessungen 9300vec119 Abb. 4−6 Abmessungen Montage in "Cold Plate"−Technik 15 ... 22 kW 9300 vector Maße [mm] EVF9327−CVV003 EVF9328−CVV003 Bei aufgestecktem Feldbusmodul an X1 Montagefreiraum für Anschlusskabel berücksichtigen Montage Tragen Sie vor dem Verschrauben von Kühler und Kühlplatte des Antriebsreglers Wärme-...
  • Seite 45: Grundgeräte Mit Der Leistung 45 Kw

    Mechanische Installation Grundgeräte mit der Leistung 45 kW Wichtige Hinweise Grundgeräte mit der Leistung 45 kW 4.3.1 Wichtige Hinweise Der Beipack liegt im Innenraum des Antriebsreglers. Haube des Antriebsreglers abnehmen 1. Schrauben 0 lösen 2. Haube 1 nach oben klappen und aushängen 9300vec113 Masse der Geräte 9300...
  • Seite 46: Grundgeräte Mit Der Leistung 45 Kw Montage Mit Befestigungswinkeln (Standard)

    ³ 50mm ³ 100mm 9300vec133 Abb. 4−7 Standardmontage mit Befestigungswinkeln 45 kW Antriebsregler mit Abstand anreihen, um die Ringschrauben demontieren zu können 9300 vector Maße [mm] EVF9330−EV 28,5 Bei aufgestecktem Feldbusmodul an X1 Montagefreiraum für Anschlusskabel berücksichtigen Montage Befestigungswinkel an das Kühlkörperblech des Antriebsreglers montieren.
  • Seite 47: Montage Thermisch Separiert (Durchstoßtechnik)

    Für die Montage in Durchstoßtechnik müssen Sie den Antriebsregler Typ EVF93xx−EV ver- wenden. Zusätzlich benötigen Sie den Montagesatz für Durchstoßtechnik EJ0010. Abmessungen 9300vec117 Abb. 4−8 Abmessungen Montage thermisch separiert 45 kW 9300 vector Maße [mm] EVF9330−EV 137,5 217,5 163,5 Bei aufgestecktem Feldbusmodul an X1 Montagefreiraum für Anschlusskabel berücksichtigen...
  • Seite 48: Grundgeräte Im Leistungsbereich 55 Kw

    Mechanische Installation Grundgeräte im Leistungsbereich 55 kW Wichtige Hinweise Grundgeräte im Leistungsbereich 55 kW 4.4.1 Wichtige Hinweise Der Beipack liegt im Innenraum des Antriebsreglers. Haube des Antriebsreglers abnehmen 1. Schrauben 0 lösen 2. Haube 1 nach oben klappen und aushängen 9300vec113 Masse der Geräte 9300...
  • Seite 49: Montage Mit Befestigungswinkeln (Standard)

    ³ 50 mm ³ 100mm 9300vec175 Abb. 4−9 Standardmontage mit Befestigungswinkeln 55 kW Antriebsregler mit Abstand anreihen, um die Ringschrauben demontieren zu können 9300 vector Maße [mm] EVF9331−EV 28,5 Bei aufgestecktem Feldbusmodul an X1 Montagefreiraum für Anschlusskabel berücksichtigen Montage Befestigungswinkel an das Kühlkörperblech des Antriebsreglers montieren.
  • Seite 50: Grundgeräte Im Leistungsbereich 55 Kw Montage Thermisch Separiert (Durchstoßtechnik)

    Bei thermisch separierter Montage müssen Sie die Lüfterbaugruppe umbauen. ƒ (¶ 51) Abmessungen 9300vec174 Abb. 4−10 Abmessungen Montage thermisch separiert 55 kW 9300 vector Maße [mm] EVF9331−EV 137,5 217,5 163,5 Bei aufgestecktem Feldbusmodul an X1 Montagefreiraum für Anschlusskabel berücksichtigen Montageausschnitt im Schaltschrank 9300 vector Maße [mm]...
  • Seite 51: Umbau Der Lüfterbaugruppe Bei Durchstoßtechnik

    Mechanische Installation Grundgeräte im Leistungsbereich 55 kW Umbau der Lüfterbaugruppe bei Durchstoßtechnik 4.4.4 Umbau der Lüfterbaugruppe bei Durchstoßtechnik Bei thermisch separierter Montage muss die Lüfterbaugruppe um 180° gedreht werden, damit der Antriebsregler in den Montageausschnitt passt. Lüfterbaugruppe abnehmen 9300vec170 Abb. 4−11 Lüfterbaugruppe vom Antriebsregler abnehmen 1.
  • Seite 52 Mechanische Installation Grundgeräte im Leistungsbereich 55 kW Umbau der Lüfterbaugruppe bei Durchstoßtechnik Lüfter−Anschlussleitung an der Lüfterbaugruppe umstecken 9300vec173 Abb. 4−13 Lüfter−Anschlussleitung für die Spannungsversorgung umstecken 1. Kabelschuhe der beiden roten Anschlussleitungen abziehen und auf der diagonal gegenüberliegenden Seite wieder aufstecken. 2.
  • Seite 53: Grundgeräte Im Leistungsbereich 75

    Mechanische Installation Grundgeräte im Leistungsbereich 75 ... 90 kW Wichtige Hinweise Grundgeräte im Leistungsbereich 75 ... 90 kW 4.5.1 Wichtige Hinweise Der Beipack liegt im Innenraum des Antriebsreglers. Haube des Antriebsreglers abnehmen 1. Schrauben 0 lösen 2. Haube 1 nach oben klappen und aushängen 9300vec113 Masse der Geräte 9300...
  • Seite 54: Grundgeräte Im Leistungsbereich 75 ... 90 Kw Montage Mit Befestigungswinkeln (Standard)

    ³ 50mm ³ 100mm 9300vec134 Abb. 4−15 Standardmontage mit Befestigungswinkeln 75 ... 90 kW Antriebsregler mit Abstand anreihen, um die Ringschrauben demontieren zu können 9300 vector Maße [mm] EVF9332−EV 28,5 EVF9333−EV Bei aufgestecktem Feldbusmodul an X1 Montagefreiraum für Anschlusskabel berücksichtigen Montage Befestigungswinkel an das Kühlkörperblech des Antriebsreglers montieren.
  • Seite 55: Grundgeräte Im Leistungsbereich 75 ... 90 Kw Montage Thermisch Separiert (Durchstoßtechnik)

    Für die Montage in Durchstoßtechnik müssen Sie den Antriebsregler Typ EVF93xx−EV ver- wenden. Zusätzlich benötigen Sie den Montagesatz für Durchstoßtechnik EJ0009. Abmessungen 9300vec118 Abb. 4−16 Abmessungen Montage thermisch separiert 75 ... 90 kW 9300 vector Maße [mm] EVF9332−EV 488 450 172,5 295,5...
  • Seite 56: Elektrische Installation

    Elektrische Installation Wichtige Hinweise Elektrische Installation Wichtige Hinweise Stop! Der Antriebsregler enthält elektrostatisch gefährdete Bauelemente. Vor Arbeiten im Bereich der Anschlüsse muss sich das Personal von elektrostatischen Aufladungen befreien. Hinweis! Ein Fehlerstrom−Schutzschalter zwischen speisendem Netz und Antriebsregler kann fälschlicherweise auslösen ... durch kapazitive Ausgleichsströme der Leitungsschirme während des ƒ...
  • Seite 57 Elektrische Installation EMV−gerechte Installation (Aufbau des CE−typischen Antriebssystems) Steuerleitungen Ab 200 mm Länge nur geschirmte Leitungen für die analogen und digitalen ƒ Eingänge und Ausgänge verwenden. Unter 200 mm Länge können ungeschirmte, aber verdrillte Leitungen verwendet werden. Schirm richtig auflegen: ƒ...
  • Seite 58 Elektrische Installation EMV−gerechte Installation (Aufbau des CE−typischen Antriebssystems) F1 … F3 PE L1 L2 L3 EVF9321 … EVF9333 DC 24 V – T1 T2 PE U X8/8 X8/5 J> 9352 9300VEC108 Abb. 5−1 Beispiel für eine EMV−gerechte Verdrahtung F1 ... F3 Absicherung Netzschütz Speicherprogrammierbare Steuerung (SPS)
  • Seite 59: Einsatz An It−Netzen

    Anlage bleibt gewährleistet. Stop! Die Antriebsregler nur mit den zugeordneten Netzdrosseln betreiben. Der Betrieb mit Netzfiltern oder Funk−Entstörfiltern von Lenze ist nicht erlaubt, da diese Komponenten Bauelemente enthalten, die gegen PE verschaltet sind. Dadurch würde das Schutzkonzept des IT−Netzes aufgehoben. Die Komponenten werden bei Erdschluss zerstört.
  • Seite 60: Wichtige Hinweise

    Elektrische Installation Grundgeräte im Leistungsbereich 0,37 ... 11 kW Wichtige Hinweise Grundgeräte im Leistungsbereich 0,37 ... 11 kW 5.4.1 Wichtige Hinweise Um Zugang zu den Leistungsanschlüssen zu erhalten, entfernen Sie die Abdeckungen: Abdeckung für den Netzanschluss durch leichten Druck von vorn ausklinken und ƒ...
  • Seite 61: Netzanschluss, Dc−Einspeisung

    Elektrische Installation Grundgeräte im Leistungsbereich 0,37 ... 11 kW Netzanschluss, DC−Einspeisung 5.4.2 Netzanschluss, DC−Einspeisung Hinweis! Bei Einsatz eines Netzfilters oder Funkentstörfilters die Leitung zwischen ƒ Netzfilter oder Funkentstörfilter und Antriebsregler geschirmt verlegen, wenn sie länger als 300 mm ist. Bei DC−Verbundbetrieb oder DC−Einspeisung empfehlen wir, abgeschirmte ƒ...
  • Seite 62: Grundgeräte Im Leistungsbereich 0,37 ... 11 Kw Netzanschluss: Sicherungen Und Leitungsquerschnitte

    Elektrische Installation Grundgeräte im Leistungsbereich 0,37 ... 11 kW Netzanschluss: Sicherungen und Leitungsquerschnitte Netzanschluss, DC−Einspeisung L3 +UG -UG L1, L2, L3 0.5...0.6 Nm +U , -U 4.4...5.3 lb-in 9300std033 Abb. 5−3 Netzanschluss, DC−Einspeisung bei Antriebsreglern 0,37 ... 11 kW Netzleitung Schirmblech Schirm der Netzleitung mit den Laschen festklemmen Anschluss Netz und DC−Zwischenkreis...
  • Seite 63 Elektrische Installation Grundgeräte im Leistungsbereich 0,37 ... 11 kW Netzanschluss: Sicherungen und Leitungsquerschnitte Betrieb mit Bemessungsleistung 9300 Sicherungs−Bemessungsstrom Leitungsquerschnitt Schmelzsicherung Leitungsschutzschal- Verlegeart L1, L2, L3, PE [mA] Betrieb ohne Netzdrossel/Netzfilter EVF9321−xV C6, B6 EVF9322−xV C6, B6 EVF9323−xV EVF9325−xV Betrieb mit Netzdrossel/Netzfilter EVF9321−xV C6, B6 EVF9322−xV...
  • Seite 64 Elektrische Installation Grundgeräte im Leistungsbereich 0,37 ... 11 kW Netzanschluss: Sicherungen und Leitungsquerschnitte Installation nach UL Anschlussbedingungen Bereich Beschreibung Sicherungen Nur nach UL 248 Netz−Kurzschlussstrom bis 5000 A : Alle Klassen zulässig Netz−Kurzschlussstrom bis 50000 A : Nur Klasse "CC", "J", "T" oder "R" zulässig Leitungen Nur nach UL Die nachfolgend genannten Leitungsquerschnitte gelten unter folgenden Bedingungen:...
  • Seite 65: Zuordnung Netzdrossel/Filter

    Elektrische Installation Grundgeräte im Leistungsbereich 0,37 ... 11 kW Zuordnung Netzdrossel/Filter 5.4.4 Zuordnung Netzdrossel/Filter Betrieb mit Bemessungsleistung 9300 Netzdrossel Störspannungskategorie nach EN 61800−3 und Motorleitungslänge Komponente Komponente max. [m] max. [m] EVF9321−xV EZN3A2400H002 EZN3A2400H002 EZN3B2400H002 EVF9322−xV EZN3A1500H003 EZN3A1500H003 EZN3B1500H003 EVF9323−xV EZN3A0900H004 EZN3A0900H004 EZN3B0900H004...
  • Seite 66: Grundgeräte Im Leistungsbereich 0,37 ... 11 Kw Motoranschluss

    Elektrische Installation Grundgeräte im Leistungsbereich 0,37 ... 11 kW Motoranschluss 5.4.5 Motoranschluss Hinweis! Eine Absicherung der Motorleitung ist nicht erforderlich. ƒ Der Antriebsregler hat 2 Anschlüsse für die ƒ Motortemperatur−Überwachung: – Klemmen T1, T2 zum Anschluss eines Kaltleiters (PTC) oder Thermokontakts (Öffner).
  • Seite 67: Motor Mit Kaltleiter (Ptc) Oder Thermokontakt (Öffner)

    Fest (abhängig vom PTC/Thermokontakt) > PTC: R 1600  Konfigurierbar als Warnung oder Fehler (TRIP) Bemerkungen Die Überwachung ist in der Lenze−Einstellung nicht aktiv. Wenn Sie keinen Lenze−Motor einsetzen, empfehlen wir als Kaltleiter einen PTC bis 150 °C. EDKVF9333V DE/EN/FR 7.2...
  • Seite 68 9300std011 Abb. 5−6 Motoranschluss mit Kaltleiter (PTC) oder Thermokontakt (Öffner)  0 Anschluss Motor mit Lenze Systemleitung mit integrierter Steuerleitung für die Motortemperatur−Überwachung Schirmblech Gesamtschirm und Schirm der Steuerleitung für die Motortemperatur−Überwachung mit den Laschen festklemmen. Ggf. mit Kabelbinder fixieren.
  • Seite 69: Motor Mit Temperatursensor Kty

    Elektrische Installation Grundgeräte im Leistungsbereich 0,37 ... 11 kW Motoranschluss Motor mit Temperatursensor KTY Hinweis! Wir empfehlen, für die Verdrahtung Lenze−Systemleitungen zu verwenden. ƒ Bei selbstkonfektionierten Leitungen nur Leitungen mit paarweise ƒ verdrillten und abgeschirmten Adern verwenden. X8/8 X8/5 T1 T2...
  • Seite 70 Elektrische Installation Grundgeräte im Leistungsbereich 0,37 ... 11 kW Motoranschluss U, V, W 0.5...0.6 Nm T1T2 T1, T2 4.4...5.3 lb-in U V W 9300vec122 Abb. 5−8 Motoranschluss mit Temperatursensor KTY Motorleitung Schirmblech Schirm der Motorleitung mit den Laschen festklemmen. Ggf. mit Kabelbinder fixieren. U, V, W Anschluss Motorleitung Auf richtige Polung achten.
  • Seite 71: Grundgeräte Im Leistungsbereich 15

    Elektrische Installation Grundgeräte im Leistungsbereich 15 ... 30 kW Wichtige Hinweise Grundgeräte im Leistungsbereich 15 ... 30 kW 5.5.1 Wichtige Hinweise Um Zugang zu den Leistungsanschlüssen zu erhalten, entfernen Sie die Haube: Haube des Antriebsreglers abnehmen 1. Schrauben 0 lösen 2.
  • Seite 72: Grundgeräte Im Leistungsbereich 15 ... 30 Kw Netzanschluss, Dc−Einspeisung

    Elektrische Installation Grundgeräte im Leistungsbereich 15 ... 30 kW Netzanschluss, DC−Einspeisung 5.5.2 Netzanschluss, DC−Einspeisung Hinweis! Bei Einsatz eines Netzfilters oder Funkentstörfilters die Leitung zwischen ƒ Netzfilter oder Funkentstörfilter und Antriebsregler geschirmt verlegen, wenn sie länger als 300 mm ist. Bei DC−Verbundbetrieb oder DC−Einspeisung empfehlen wir, abgeschirmte ƒ...
  • Seite 73: Grundgeräte Im Leistungsbereich 15 ... 30 Kw Netzanschluss: Sicherungen Und Leitungsquerschnitte

    Elektrische Installation Grundgeräte im Leistungsbereich 15 ... 30 kW Netzanschluss: Sicherungen und Leitungsquerschnitte 5.5.3 Netzanschluss: Sicherungen und Leitungsquerschnitte Installation nach EN 60204−1 Anschlussbedingungen Bereich Beschreibung Sicherungen Betriebsklasse: Nur gG/gL oder gRL Leitungen Verlegeart B2 und C: Verwendung von PVC−isolierten Kupferleitungen, Leitertemperatur < 70 °C, Umgebungstemperatur <...
  • Seite 74: Zuordnung Netzdrossel/Filter

    Elektrische Installation Grundgeräte im Leistungsbereich 15 ... 30 kW Zuordnung Netzdrossel/Filter Installation nach UL Anschlussbedingungen Bereich Beschreibung Sicherungen Nur nach UL 248 Netz−Kurzschlussstrom bis 5000 A : Alle Klassen zulässig Netz−Kurzschlussstrom bis 50000 A : Nur Klasse "J", "T" oder "R" zulässig Leitungen Nur nach UL Die nachfolgend genannten Leitungsquerschnitte gelten unter folgenden Bedingungen:...
  • Seite 75 Elektrische Installation Grundgeräte im Leistungsbereich 15 ... 30 kW Motoranschluss 5.5.5 Motoranschluss Hinweis! Eine Absicherung der Motorleitung ist nicht erforderlich. ƒ Der Antriebsregler hat 2 Anschlüsse für die ƒ Motortemperatur−Überwachung: – Klemmen T1, T2 zum Anschluss eines Kaltleiters (PTC) oder Thermokontakts (Öffner).
  • Seite 76: Grundgeräte Im Leistungsbereich 15 ... 30 Kw Motoranschluss

    Fest (abhängig vom PTC/Thermokontakt) > PTC: R 1600  Konfigurierbar als Warnung oder Fehler (TRIP) Bemerkungen Die Überwachung ist in der Lenze−Einstellung nicht aktiv. Wenn Sie keinen Lenze−Motor einsetzen, empfehlen wir als Kaltleiter einen PTC bis 150 °C. EDKVF9333V DE/EN/FR 7.2...
  • Seite 77 9300std030 Abb. 5−12 Motoranschluss mit Kaltleiter (PTC) oder Thermokontakt (Öffner)  0 Anschluss Motor mit Lenze Systemleitung mit integrierter Steuerleitung für die Motortemperatur−Überwachung Schirmblech Gesamtschirm und Schirm der Steuerleitung für die Motortemperatur−Überwachung mit den Laschen festklemmen. Ggf. mit Kabelbinder fixieren.
  • Seite 78 Elektrische Installation Grundgeräte im Leistungsbereich 15 ... 30 kW Motoranschluss Motor mit Temperatursensor KTY Hinweis! Wir empfehlen, für die Verdrahtung Lenze−Systemleitungen zu verwenden. ƒ Bei selbstkonfektionierten Leitungen nur Leitungen mit paarweise ƒ verdrillten und abgeschirmten Adern verwenden. X8/8 X8/5 T1 T2...
  • Seite 79 Elektrische Installation Grundgeräte im Leistungsbereich 15 ... 30 kW Motoranschluss U, V, W, 5 Nm 44 lb-in 9300vec123 Abb. 5−14 Motoranschluss mit Temperatursensor KTY Motorleitung Schirmauflage Schirm der Motorleitung mit den Laschen festklemmen. Ggf. mit Kabelbinder fixieren. PE−Gewindebolzen Anschluss PE−Leitung mit Ringkabelschuh U, V, W Anschluss Motorleitung Auf richtige Polung achten.
  • Seite 80: Grundgeräte Im Leistungsbereich 55 Kw

    Elektrische Installation Grundgeräte im Leistungsbereich 55 kW Wichtige Hinweise Grundgeräte im Leistungsbereich 55 kW 5.6.1 Wichtige Hinweise Um Zugang zu den Leistungsanschlüssen zu erhalten, entfernen Sie die Haube: Haube des Antriebsreglers abnehmen 1. Schrauben 0 lösen 2. Haube 1 nach oben klappen und aushängen 9300vec113 Benötigtes Installationsmaterial aus dem Lieferumfang: Beschreibung...
  • Seite 81: Netzanschluss, Dc−Einspeisung

    Elektrische Installation Grundgeräte im Leistungsbereich 55 kW Netzanschluss, DC−Einspeisung 5.6.2 Netzanschluss, DC−Einspeisung Hinweis! Bei Einsatz eines Netzfilters oder Funkentstörfilters die Leitung zwischen ƒ Netzfilter oder Funkentstörfilter und Antriebsregler geschirmt verlegen, wenn sie länger als 300 mm ist. Bei DC−Verbundbetrieb oder DC−Einspeisung empfehlen wir, abgeschirmte ƒ...
  • Seite 82: Grundgeräte Im Leistungsbereich 55 Kw Netzanschluss: Sicherungen Und Leitungsquerschnitte

    Elektrische Installation Grundgeräte im Leistungsbereich 55 kW Netzanschluss: Sicherungen und Leitungsquerschnitte 5.6.3 Netzanschluss: Sicherungen und Leitungsquerschnitte Installation nach EN 60204−1 Anschlussbedingungen Bereich Beschreibung Sicherungen Betriebsklasse: Nur gG/gL oder gRL Leitungen Verlegeart B2 und C: Verwendung von PVC−isolierten Kupferleitungen, Leitertemperatur < 70 °C, Umgebungstemperatur <...
  • Seite 83: Zuordnung Netzdrossel/Filter

    Elektrische Installation Grundgeräte im Leistungsbereich 55 kW Zuordnung Netzdrossel/Filter Installation nach UL Anschlussbedingungen Bereich Beschreibung Sicherungen Nur nach UL 248 Netz−Kurzschlussstrom bis 10000 A : Alle Klassen zulässig Netz−Kurzschlussstrom bis 50000 A : Nur Klasse "J", "T" oder "R" zulässig Leitungen Nur nach UL Die nachfolgend genannten Leitungsquerschnitte gelten unter folgenden Bedingungen:...
  • Seite 84 Elektrische Installation Grundgeräte im Leistungsbereich 55 kW Motoranschluss 5.6.5 Motoranschluss Hinweis! Eine Absicherung der Motorleitung ist nicht erforderlich. ƒ Der Antriebsregler hat 2 Anschlüsse für die ƒ Motortemperatur−Überwachung: – Klemmen T1, T2 zum Anschluss eines Kaltleiters (PTC) oder Thermokontakts (Öffner). –...
  • Seite 85: Grundgeräte Im Leistungsbereich 55 Kw Motoranschluss

    1600  Konfigurierbar als Warnung oder Fehler (TRIP) Bemerkungen Die Überwachung ist in der Lenze−Einstellung nicht aktiv. Wenn Sie keinen Lenze−Motor einsetzen, empfehlen wir als Kaltleiter einen PTC bis 150 °C. U, V, W, 15 Nm 132 lb-in 2.5 Nm 22.1 lb-in...
  • Seite 86 Elektrische Installation Grundgeräte im Leistungsbereich 55 kW Motoranschluss Motor mit Temperatursensor KTY Hinweis! Wir empfehlen, für die Verdrahtung Lenze−Systemleitungen zu verwenden. ƒ Bei selbstkonfektionierten Leitungen nur Leitungen mit paarweise ƒ verdrillten und abgeschirmten Adern verwenden. X8/8 X8/5 T1 T2 PE U...
  • Seite 87 Elektrische Installation Grundgeräte im Leistungsbereich 55 kW Motoranschluss U, V, W, 15 Nm 132 lb-in M5 x 12 3 Nm (26.5 lb-in) 9300vec124 Abb. 5−19 Motoranschluss mit Temperatursensor KTY PE−Gewindebolzen Anschluss PE−Leitung mit Ringkabelschuh U, V, W Anschluss Motorleitung Auf richtige Polung achten. Max. Länge der Motorleitung beachten. Max.
  • Seite 88: Grundgeräte Im Leistungsbereich 75

    Elektrische Installation Grundgeräte im Leistungsbereich 75 ... 90 kW Wichtige Hinweise Grundgeräte im Leistungsbereich 75 ... 90 kW 5.7.1 Wichtige Hinweise Um Zugang zu den Leistungsanschlüssen zu erhalten, entfernen Sie die Haube: Haube des Antriebsreglers abnehmen 1. Schrauben 0 lösen 2.
  • Seite 89: Grundgeräte Im Leistungsbereich 75 ... 90 Kw Netzanschluss, Dc−Einspeisung

    Elektrische Installation Grundgeräte im Leistungsbereich 75 ... 90 kW Netzanschluss, DC−Einspeisung 5.7.2 Netzanschluss, DC−Einspeisung Hinweis! Bei Einsatz eines Netzfilters oder Funkentstörfilters die Leitung zwischen ƒ Netzfilter oder Funkentstörfilter und Antriebsregler geschirmt verlegen, wenn sie länger als 300 mm ist. Bei DC−Verbundbetrieb oder DC−Einspeisung empfehlen wir, abgeschirmte ƒ...
  • Seite 90: Grundgeräte Im Leistungsbereich 75 ... 90 Kw Netzanschluss: Sicherungen Und Leitungsquerschnitte

    Elektrische Installation Grundgeräte im Leistungsbereich 75 ... 90 kW Netzanschluss: Sicherungen und Leitungsquerschnitte 5.7.3 Netzanschluss: Sicherungen und Leitungsquerschnitte Installation nach EN 60204−1 Anschlussbedingungen Bereich Beschreibung Sicherungen Betriebsklasse: Nur gG/gL oder gRL Leitungen Verlegeart B2 und C: Verwendung von PVC−isolierten Kupferleitungen, Leitertemperatur < 70 °C, Umgebungstemperatur <...
  • Seite 91: Zuordnung Netzdrossel/Filter

    Elektrische Installation Grundgeräte im Leistungsbereich 75 ... 90 kW Zuordnung Netzdrossel/Filter Installation nach UL Anschlussbedingungen Bereich Beschreibung Sicherungen Nur nach UL 248 Netz−Kurzschlussstrom bis 10000 A : Alle Klassen zulässig Netz−Kurzschlussstrom bis 50000 A : Nur Klasse "J", "T" oder "R" zulässig Leitungen Nur nach UL Die nachfolgend genannten Leitungsquerschnitte gelten unter folgenden Bedingungen:...
  • Seite 92: Motoranschluss

    Elektrische Installation Grundgeräte im Leistungsbereich 75 ... 90 kW Motoranschluss 5.7.5 Motoranschluss Hinweis! Eine Absicherung der Motorleitung ist nicht erforderlich. ƒ Der Antriebsregler hat 2 Anschlüsse für die ƒ Motortemperatur−Überwachung: – Klemmen T1, T2 zum Anschluss eines Kaltleiters (PTC) oder Thermokontakts (Öffner).
  • Seite 93: Grundgeräte Im Leistungsbereich 75 ... 90 Kw Motoranschluss

    1600  Konfigurierbar als Warnung oder Fehler (TRIP) Bemerkungen Die Überwachung ist in der Lenze−Einstellung nicht aktiv. Wenn Sie keinen Lenze−Motor einsetzen, empfehlen wir als Kaltleiter einen PTC bis 150 °C. U, V, W, 30 Nm 264 lb-in 2.5 Nm 22.1 lb-in...
  • Seite 94 Elektrische Installation Grundgeräte im Leistungsbereich 75 ... 90 kW Motoranschluss Motor mit Temperatursensor KTY Hinweis! Wir empfehlen, für die Verdrahtung Lenze−Systemleitungen zu verwenden. ƒ Bei selbstkonfektionierten Leitungen nur Leitungen mit paarweise ƒ verdrillten und abgeschirmten Adern verwenden. X8/8 X8/5 T1 T2...
  • Seite 95 Elektrische Installation Grundgeräte im Leistungsbereich 75 ... 90 kW Motoranschluss U, V, W, 30 Nm 264 lb-in M4 x 12: 2.5 Nm (22.1 lb-in) M5 x 12: 3 Nm (26.5 lb-in) 9300vec125 Abb. 5−24 Motoranschluss mit Temperatursensor KTY PE−Gewindebolzen Anschluss PE−Leitung mit Ringkabelschuh U, V, W Anschluss Motorleitung Auf richtige Polung achten.
  • Seite 96: Steueranschlüsse

    Elektrische Installation Steueranschlüsse Wichtige Hinweise Steueranschlüsse 5.8.1 Wichtige Hinweise Stop! Die Steuerkarte wird zerstört, wenn die Spannung zwischen X5/39 und PE oder X6/7 und PE größer 50 V ist, ƒ bei Versorgung über eine externe Spannungsquelle die Spannung zwischen ƒ Spannungsquelle und X6/7 größer 10 V (Gleichtakt) ist.
  • Seite 97: Steueranschlüsse Wichtige Hinweise

    Elektrische Installation Steueranschlüsse Wichtige Hinweise Schirm auflegen 9300vec129 Abb. 5−25 Anbindung des Leitungsschirms am Schirmblech Schirmblech Schirmblech mit Schraube M4 × 10 mm an der Steuerkarte unten festschrauben Leitungsschirm mit Laschen festklemmen Daten der Anschlussklemmen Stop! Klemmenleisten nur bei vom Netz getrenntem Antriebsregler aufstecken ƒ...
  • Seite 98: Gerätevariante Ohne Funktion "Sicher Abgeschaltetes Moment

    AOUTx 9300vec201 Abb. 5−26 Verdrahtung digitale und analoge Eingänge/Ausgänge bei interner Spannungsquelle Antriebsregler freigeben Schließer oder Öffner Verbraucher Für den Betrieb notwendige Mindestverdrahtung Klemmenbelegung in der Lenze−Einstellung: ^ 102 Versorgung über externe Spannungsquelle GND2 +24V GND1 GND1 242R 3.3nF X5 28 E1 E2 E3 E4...
  • Seite 99: Gerätevariante Mit Funktion "Sicher Abgeschaltetes Moment

    Elektrische Installation Steueranschlüsse Gerätevariante mit Funktion "Sicher abgeschaltetes Moment" 5.8.3 Gerätevariante mit Funktion "Sicher abgeschaltetes Moment" Sicherheitshinweise für die Installation der Funktion "Sicher abgeschaltetes Moment" Nur qualifiziertes Personal darf die Funktion Sicher abgeschaltetes Moment" ƒ installieren und in Betrieb nehmen. Alle sicherheitsrelevanten Leitungen (z.
  • Seite 100: Versorgung Über Interne Spannungsquelle

    Speicherprogrammierbare Steuerung (SPS) Die SPS übernimmt die Überwachung der Funktion ˜Sicher abgeschaltetes Moment˜ X5/A4 Rückmeldung über einen digitalen Ausgang (z. B. DIGOUT4) Schließer oder Öffner Verbraucher Für den Betrieb notwendige Mindestverdrahtung Klemmenbelegung in der Lenze−Einstellung: ^ 102 EDKVF9333V DE/EN/FR 7.2...
  • Seite 101 Speicherprogrammierbare Steuerung (SPS) Die SPS übernimmt die Überwachung der Funktion ˜Sicher abgeschaltetes Moment˜ X5/A4 Rückmeldung über einen digitalen Ausgang (z. B. DIGOUT4) Schließer oder Öffner Verbraucher Für den Betrieb notwendige Mindestverdrahtung Klemmenbelegung in der Lenze−Einstellung: ^ 102 EDKVF9333V DE/EN/FR 7.2...
  • Seite 102: Klemmenbelegung

    Elektrische Installation Steueranschlüsse Klemmenbelegung 5.8.4 Klemmenbelegung Klemme Funktion Pegel / Zustand Technische Daten Fettdruck = Lenze−Einstellung X11/K32 Sicherheits- Rückmeldung Impulssperre Siehe Kapitel "Techni- Kontakt geöffnet: Impuls- relais K sche Daten" sperre aufgehoben (Betrieb) X11/K31 1. Abschaltpfad Kontakt geschlossen: Impuls- sperre aktiv X11/33 –...
  • Seite 103: Verdrahtung

    Elektrische Installation Systembus (CAN) verdrahten Systembus (CAN) verdrahten Benötigtes Installationsmaterial aus dem Lieferumfang: Beschreibung Verwendung Anzahl Klemmenleiste 3−polig Anschluss Systembus (CAN) an X4 Verdrahtung 93XX 93XX 93XX 9300VEC054 Abb. 5−30 Prinzipielle Verdrahtung des Systembus (CAN) Busteilnehmer 1 (Antriebsregler) Busteilnehmer 2 (Antriebsregler) Busteilnehmer 3 (Antriebsregler) Busteilnehmer n (z.
  • Seite 104: Rückführsystem Verdrahten

    – Inkrementalgeber mit HTL−Pegel schließen Sie an X9 an. Das Inkrementalgebersignal kann am Leitfrequenzausgang X10 für Folgeantriebe ƒ ausgegeben werden. Hinweis! Wir empfehlen, für die Verdrahtung Lenze−Systemleitungen zu verwenden. ƒ Bei selbstkonfektionierten Leitungen nur Leitungen mit paarweise ƒ verdrillten und abgeschirmten Adern verwenden.
  • Seite 105: Inkrementalgeber Mit Ttl−Pegel An X8

    Elektrische Installation Rückführsystem verdrahten Inkrementalgeber mit TTL−Pegel an X8 5.10.2 Inkrementalgeber mit TTL−Pegel an X8 Technische Daten Bereich Werte Anschluss am Antriebsregler Steckverbinder: Stift, 9−polig, Sub−D Anschließbare Inkrementalgeber Inkrementalgeber mit TTL−Pegel Geber mit zwei um 90° elektrisch versetzten 5 V−Komplementärsigna- Anschluss der Nullspur möglich (optional) Eingangsfrequenz 0 ...
  • Seite 106: Inkrementalgeber Mit Htl−Pegel An X9

    Elektrische Installation Rückführsystem verdrahten Inkrementalgeber mit HTL−Pegel an X9 5.10.3 Inkrementalgeber mit HTL−Pegel an X9 Technische Daten Bereich Werte Anschluss am Antriebsregler Steckverbinder: Stift, 9−polig, Sub−D Anschließbare Inkrementalgeber Inkrementalgeber mit HTL−Pegel Zweispurig mit inversen Signalen und Nullspur Zweispurig ohne inverse Signale und Nullspur Eingangsfrequenz 0 ...
  • Seite 107: Leitfrequenzeingang / Leitfrequenzausgang Verdrahten

    Elektrische Installation Leitfrequenzeingang / Leitfrequenzausgang verdrahten 5.11 Leitfrequenzeingang / Leitfrequenzausgang verdrahten Benötigtes Installationsmaterial aus dem Lieferumfang: Beschreibung Verwendung Anzahl Schutzabdeckung Schutz für nicht verwendete Sub−D−Anschlüsse Technische Daten Bereich Leitfrequenzausgang X10 Anschluss am Antriebsregler Steckverbinder: Buchse, 9−polig, Sub−D Pinbelegung Abhängig von der gewählten Grundkonfiguration Ausgangsfrequenz 0 ...
  • Seite 108 Elektrische Installation Leitfrequenzeingang / Leitfrequenzausgang verdrahten Verdrahtung Hinweis! Wir empfehlen, für die Verdrahtung Lenze−Systemleitungen zu verwenden. ƒ Bei selbstkonfektionierten Leitungen nur Leitungen mit paarweise ƒ verdrillten und abgeschirmten Adern verwenden. < 50 m  Lamp Enable (EN) control (LC) 9300VEC019 Abb.
  • Seite 109: Abschließende Arbeiten

    Abschließende Arbeiten Installation überprüfen Abschließende Arbeiten Installation überprüfen Stop! Zerstörung der digitalen Ausgänge (X5/A1 … X5/A4). Die digitalen Ausgänge sind nicht gegen Fremdspannung geschützt. Mögliche Folgen: Beim Anlegen einer Fremdspannung an X5/A1 … X5/A4 können die digitalen ƒ Ausgänge beschädigt werden. Die Steuerkarte funktioniert nicht mehr fehlerfrei.
  • Seite 110: Inbetriebnahme Vorbereiten

    Für die Inbetriebnahme mit Keypad benötigen Sie: Ein Keypad EMZ9371BC ƒ Für die Inbetriebnahme mit PC benötigen Sie: Einen Computer mit Windows®−Betriebssystem XP ƒ Die Lenze PC−Software »Global Drive Control (GDC)« ƒ Eine Verbindung mit dem Antriebsregler über eine Schnittstelle: ƒ Antriebsregler Verbindung Schnittstelle PC−Adapter...
  • Seite 111 EVF9321 ... EVF9326 9300vec154 Position Description Controller Fixing rails for standard mounting Cover for the motor connection Shield connection support with fixing screws (2 items) 1 support for the shield sheet for the supply connections 1 support for the shield sheet for the motor cable EMC shield sheet with fixing screws (2 items) 1 shield sheet for the supply connections 1 shield sheet for the motor cable and the feed cable for the motor temperature monitoring with PTC thermistor...
  • Seite 112 EVF9327 ... EVF9329 9300vec155 Position Description Controller Fixing bracket for standard mounting EMC shield sheet with fixing screws for shielded control cables Cover with fixing screws EMC shield sheet for the motor cable and the feed cable for the motor temperature monitoring with PTC thermistor or thermal contact (NC contact) EDKVF9333V DE/EN/FR 7.2...
  • Seite 113 EVF9330, EVF9331 9300vec156 Position Description Controller Fixing bracket for standard mounting EMC shield sheet with fixing screws for shielded control cables Cover with fixing screws Shield clamp and strain relief for the motor cable Strain relief for the PE motor cable and the feed cable for the motor temperature monitoring with PTC thermistor or thermal contact (NC contact) EDKVF9333V DE/EN/FR 7.2...
  • Seite 114 EVF9332, EVF9333 9300vec165 Position Description Controller Fixing bracket for standard mounting EMC shield sheet with fixing screws for shielded control cables Cover with fixing screws Shield clamp and strain relief for the motor cable Strain relief for the PE motor cable and the feed cable for the motor temperature monitoring with PTC thermistor or thermal contact (NC contact) EDKVF9333V DE/EN/FR 7.2...
  • Seite 115: Scope Of Supply

    Scope of supply Description EVF9321 ... EVF9327 ... EVF9330 EVF9332 EVF9326 EVF9329 EVF9331 EVF9333 9300 vector frequency inverter Mounting Instructions ^ 144 ^ 149 ^ 154 ^ 162 Mounting material Standard mounting ^ 146 Cold plate technique ˘ ˘ ˘...
  • Seite 116 ............General safety and application notes for Lenze controllers .
  • Seite 117 Contents Standard devices in the power range of 55 kW ......4.4.1 Important notes .
  • Seite 118 Contents Control terminals ........... . . 5.8.1 Important notes .
  • Seite 119: About This Documentation

    ˘ 12/2004 TD23 Documentation for internal use only Tip! Information and tools concerning the Lenze products can be found in the download area under www.lenze.com Target group This documentation is directed at qualified skilled personnel according to IEC 60364. Qualified skilled personnel are persons who have the required qualifications to carry out all activities involved in installing, mounting, commissioning, and operating the product.
  • Seite 120: Validity Information

    About this documentation Validity information Validity information This documentation applies to 9300 frequency inverters as of version:  ‚ ƒ Nameplate 93xx ˘ Vxxx Product range Frequency inverter Type no. / power 400 V 480 V 9321 0.37 kW 0.37 kW 9322 0.75 kW 0.75 kW 9323 1.5 kW...
  • Seite 121: Conventions Used

    About this documentation Conventions used Conventions used This documentation uses the following conventions to distinguish between different types of information: Type of information Identification Examples/notes Spelling of numbers Decimal separator language−dependen In each case, the signs typical for the target language are used as decimal separators.
  • Seite 122: Notes Used

    About this documentation Notes used Notes used The following pictographs and signal words are used in this documentation to indicate dangers and important information: Safety instructions Structure of safety instructions: Danger! (characterises the type and severity of danger) Note (describes the danger and gives information about how to prevent dangerous situations) Pictograph and signal word Meaning...
  • Seite 123: Safety Instructions

    Lenze Automation GmbH does not accept any liability for the suitability of the procedures and circuit proposals described. Depending on their degree of protection, some parts of the Lenze controllers ƒ (frequency inverters, servo inverters, DC speed controllers) and their accessory components can be live, moving and rotating during operation.
  • Seite 124 Safety instructions General safety and application notes for Lenze controllers Application as directed Controllers are components which are designed for installation in electrical systems or machines. They are not to be used as domestic appliances, but only for industrial purposes according to EN 61000−3−2.
  • Seite 125 Reduce housing openings and cutouts to a minimum. Lenze controllers may cause a DC current in the PE conductor. If a residual current device (RCD) is used for protection against direct or indirect contact for a controller with three−phase supply, only a residual current device (RCD) of type B is permissible on the...
  • Seite 126 Safety instructions General safety and application notes for Lenze controllers Disposal Recycle metal and plastic materials. Ensure professional disposal of assembled PCBs. The product−specific safety and application notes given in these instructions must be observed! EDKVF9333V DE/EN/FR 7.2...
  • Seite 127: Thermal Motor Monitoring

    179 s in the event of a motor with a thermal motor time constant of 5 minutes (Lenze setting C0128), a motor current of 1.5 x I and a trigger threshold of 100 %.
  • Seite 128: Forced Ventilated Or Naturally Ventilated Motors

    C0120 (OC6) or C0127 (OC8). Read release time in the diagram Diagram for detecting the release times for a motor with a thermal motor time constant of 5 minutes (Lenze setting C0128): L [%] = 1 × I = 3 ×...
  • Seite 129: Self−Ventilated Motors

    C0129/x. Parameter setting The following codes can be set for I x t monitoring: Code Meaning Value range Lenze setting C0066 Display of the I x t load of the motor 0 ... 250 % − C0120 Threshold: Triggering of error "OC6"...
  • Seite 130 Safety instructions Thermal motor monitoring Self−ventilated motors Calculate release time and I x t load Calculate the release time and the I x t load of the motor considering the values in C0129/1 and C0129/2(evaluation coefficient "y"). Formulae for release time Information Release time of the I x t monitoring...
  • Seite 131: Residual Hazards

    Safety instructions Residual hazards Residual hazards Protection of persons Before working on the controller, check that no voltage is applied to the power ƒ terminals: – Because the power terminals V, W, +U and −U remain live for at least 3 minutes after disconnecting from mains.
  • Seite 132 Safety instructions Residual hazards Protection of the machine/system Drives can reach dangerous overspeeds (e. g. setting of high output frequencies in ƒ connection with motors and machines not suitable for this purpose): – The drive controllers do not provide protection against such operating conditions. For this purpose, use additional components.
  • Seite 133: Safety Instructions For The Installation According To Ul

    Safety instructions Safety instructions for the installation according to UL Safety instructions for the installation according to UL Warnings! Motor Overload Protection ƒ – For information on the protection level of the internal overload protection for a motor load, see the corresponding manuals or software helps. –...
  • Seite 134: Technical Data

    Technical data General data and operating conditions Technical data General data and operating conditions General data Conformity and approval Conformity 2006/95/EC Low−Voltage Directive 2004/108/EG EMC Directive TP TC 020/2011 Electromagnetic Eurasian Conformity compatibility of technical (TR CU 020/2011) TR CU: Technical Regulation of means Customs Union TP TC 004/2011...
  • Seite 135: Operating Conditions

    Technical data General data and operating conditions Operating conditions Ambient conditions Climatic Storage IEC/EN 60721−3−1 1K3 (−25 ... +55 °C) < 6 months 1K3 (−25 ... +40 °C) > 6 months > 2 years: form DC bus capacitors Transport IEC/EN 60721−3−2 2K3 (−25 ...
  • Seite 136: Safety Relay Ksr

    Technical data Safety relay K Mounting conditions Mounting place In the control cabinet Mounting position Vertical ^ 143 Free spaces Dimensions Weights Safety relay K Terminal Description Field Values X11/K32 Safety relay K Coil voltage at +20 °C DC 24 V (20 ... 30 V) X11/K31 1st disconnecting path 823 W ±10 %...
  • Seite 137: Operation With Rated Power (Normal Operation)

    Technical data Operation with rated power (normal operation) Rated data for 400 V mains voltage Operation with rated power (normal operation) Note! The controllers EVF9324, EVF9326 and EVF9328 … EVF9333 may only be operated with the prescribed mains chokes and mains filters. 3.3.1 Rated data for 400 V mains voltage Basis of the data...
  • Seite 138 87.0 EVF9333−xV 63.0 94.0 Bold print = Lenze setting The currents apply to a periodic load change with an overcurrent time of maximally 1 minute and a base load time of 2 minutes with maximally 75 % I rated Power−optimised operation with automatic switching frequency reduction. When the max. permissible output current is exceeded, the switching frequency is reduced to 2 kHz.
  • Seite 139: Rated Data For 480 V Mains Voltage

    Technical data Operation with rated power (normal operation) Rated data for 480 V mains voltage 3.3.2 Rated data for 480 V mains voltage Basis of the data Voltage Frequency AC mains connection 3/PE AC 384 V − 0 % ... 528 V + 0 % 45 Hz −...
  • Seite 140 EVF9333−xV 94.0 59.0 89.0 Bold print = Lenze setting The currents apply to a periodic load change with an overcurrent time of maximally 1 minute and a base load time of 2 minutes with maximally 75 % I rated Power−optimised operation with automatic switching frequency reduction. When the max. permissible output current is exceeded, the switching frequency is reduced to 2 kHz.
  • Seite 141: Operation With Increased Rated Power

    Technical data Operation with increased rated power Rated data for 400 V mains voltage Operation with increased rated power Note! The operation with increased rated power is not UL−certified. ƒ Operation with increased rated power is only allowed: ƒ – In the listed mains voltage range –...
  • Seite 142 EVF9330−xV EVF9331−xV EVF9332−xV EVF9333−xV Bold print = Lenze setting The currents apply to a periodic load change with an overcurrent time of maximally 1 minute and a base load time of 2 minutes with maximally 75 % I rated Power−optimised operation with automatic switching frequency reduction. During operation with increased rated power, the switching frequency is reduced to 2 kHz.
  • Seite 143: Mechanical Installation

    Mechanical installation Standard devices in the power range 0.37 ... 11 kW Important notes Mechanical installation Standard devices in the power range 0.37 ... 11 kW 4.1.1 Important notes Mass of the devices 9300 Standard device "Cold plate" device Type EVF93xx−EV EVF93xx−CV [kg]...
  • Seite 144: Standard Devices In The Power Range 0.37 ... 11 Kw Mounting With Fixing Rails (Standard)

    Drive controller fixing Dimensions ³ 100mm ³ 100mm 9300vec114 Fig. 4−1 Standard mounting with fixing rails 0.37 ... 11 kW Drive controllers can be mounted side by side without spacing 9300 vector Dimensions [mm] Type EVF9321−EV − ˘ EVF9322−EV EVF9323−EV 48.5...
  • Seite 145: Thermally Separated Mounting (Push−Through Technique)

    Type Mounting set EVF9321−EV, EVF9322−EV EJ0036 EVF9323−EV, EVF9324−EV EJ0037 EVF9325−EV, EVF9326−EV EJ0038 Dimensions 9300vec115 Fig. 4−2 Dimensions for thermally separated mounting 0.37 ... 11 kW 9300 vector Dimensions [mm] Type EVF9321−EV 112.5 385.5 95.5 365.5 105.5 EVF9322−EV EVF9323−EV 131.5 385.5 114.5...
  • Seite 146: Mounting In "Cold Plate" Technique

    Mechanical installation Standard devices in the power range 0.37 ... 11 kW Mounting in "cold plate" technique 4.1.4 Mounting in "cold plate" technique The drive controllers can be mounted in ˜cold plate˜ technique, e.g. on collective coolers. For this purpose, the drive controllers of type EVF93xx−CV must be used. Required mounting material from the scope of supply: Description EVF9321...
  • Seite 147 Mechanical installation Standard devices in the power range 0.37 ... 11 kW Mounting in "cold plate" technique Dimensions 9300vec120 Fig. 4−3 Dimensions for mounting in "cold plate" technique 0.37 ... 11 kW 9300 vector Dimensions [mm] Type EVF9321−CVV003 ˘ EVF9322−CVV003 EVF9323−CVV003 ˘...
  • Seite 148: Standard Devices In The Power Range 15

    Mechanical installation Standard devices in the power range 15 ... 30 kW Important notes Standard devices in the power range 15 ... 30 kW 4.2.1 Important notes The accessory kit is located inside the controller. Remove the cover of the drive controller 1.
  • Seite 149: Mounting With Fixing Brackets (Standard)

    ³ 100mm ³ 100mm 9300vec111 Fig. 4−4 Standard mounting with fixing brackets 15 ... 30 kW Drive controllers can be mounted side by side without spacing 9300 vector Dimensions [mm] Type EVF9327−EV EVF9328−EV EVF9329−EV For a fieldbus module plugged onto X1, consider mounting space for connecting cables Mounting Attach the fixing brackets to the heatsink plate of the drive controller.
  • Seite 150: Standard Devices In The Power Range 15 ... 30 Kw Thermally Separated Mounting (Push−Through Technique)

    For mounting in push−through technique, the drive controller of type EVF93xx−EV must be used. In addition, the mounting set EJ0011 for push−through technique is required. Dimensions 9300vec116 Fig. 4−5 Dimensions for thermally separated mounting 15 ... 30 kW 9300 vector Dimensions [mm] Type EVF9327−EV EVF9328−EV 279.5 379.5...
  • Seite 151: Mounting In "Cold Plate" Technique

    Mechanical installation Standard devices in the power range 15 ... 30 kW Mounting in "cold plate" technique 4.2.4 Mounting in "cold plate" technique The drive controllers can be mounted in ˜cold plate˜ technique, e.g. on collective coolers. For this purpose, the drive controllers of type EVF93xx−CV must be used. Requirements for collective coolers The following points are important for safe and reliable operation of the controller: Good thermal connection to the cooler...
  • Seite 152: Standard Devices In The Power Range 15 ... 30 Kw Mounting In "Cold Plate" Technique

    Mounting in "cold plate" technique Dimensions 9300vec119 Fig. 4−6 Dimensions for mounting in "cold plate" technique 15 ... 22 kW 9300 vector Dimensions [mm] Type EVF9327−CVV003 EVF9328−CVV003 For a fieldbus module plugged onto X1, consider mounting space for connecting cables...
  • Seite 153: Standard Devices With A Power Of 45 Kw

    Mechanical installation Standard devices with a power of 45 kW Important notes Standard devices with a power of 45 kW 4.3.1 Important notes The accessory kit is located inside the controller. Remove the cover of the drive controller 1. Remove the screws 0 2.
  • Seite 154: Mounting With Fixing Brackets (Standard)

    ³ 100mm 9300vec133 Fig. 4−7 Standard mounting with fixing brackets 45 kW Arrange drive controllers in a row with spacing to be able to remove eye bolts 9300 vector Dimensions [mm] Type EVF9330−EV 28.5 For a fieldbus module plugged onto X1, consider mounting space for connecting cables Mounting Attach the fixing brackets to the heatsink plate of the drive controller.
  • Seite 155: Thermally Separated Mounting (Push−Through Technique)

    For mounting in push−through technique, the drive controller of type EVF93xx−EV must be used. In addition, the mounting set EJ0010 for push−through technique is required. Dimensions 9300vec117 Fig. 4−8 Dimensions for thermally separated mounting 45 kW 9300 vector Dimensions [mm] Type EVF9330−EV 137.5 217.5 163.5...
  • Seite 156: Standard Devices In The Power Range Of 55 Kw

    Mechanical installation Standard devices in the power range of 55 kW Important notes Standard devices in the power range of 55 kW 4.4.1 Important notes The accessory kit is located inside the controller. Remove the cover of the drive controller 1.
  • Seite 157: Standard Devices In The Power Range Of 55 Kw Mounting With Fixing Brackets (Standard)

    ³ 100mm 9300vec175 Fig. 4−9 Standard mounting with fixing brackets 55 kW Arrange drive controllers in a row with spacing to be able to remove eye bolts 9300 vector Dimensions [mm] Type EVF9331−EV 28.5 For a fieldbus module plugged onto X1, consider mounting space for connecting cables Mounting Attach the fixing brackets to the heatsink plate of the drive controller.
  • Seite 158: Standard Devices In The Power Range Of 55 Kw Thermally Separated Mounting (Push−Through Technique)

    In addition, the mounting set EJ0010 for push−through technique is required. For thermally separated mounting you have to modify the fan module. (¶ 159) ƒ Dimensions 9300vec174 Fig. 4−10 Dimensions for thermally separated mounting 55 kW 9300 vector Dimensions [mm] Type EVF9331−EV 137.5 217.5 163.5...
  • Seite 159: Modification Of The Fan Module For Push−Through Technique

    Mechanical installation Standard devices in the power range of 55 kW Modification of the fan module for push−through technique 4.4.4 Modification of the fan module for push−through technique For thermally separated mounting the fan module has to be rotated by 180° so that the controller fits into the mounting cutout.
  • Seite 160 Mechanical installation Standard devices in the power range of 55 kW Modification of the fan module for push−through technique Plugging the fan connecting cable to another terminal on the fan module 9300vec173 Fig. 4−13 Plugging the fan connecting cable for the voltage supply to another terminal 1.
  • Seite 161: Standard Devices In The Power Range 75

    Mechanical installation Standard devices in the power range 75 ... 90 kW Important notes Standard devices in the power range 75 ... 90 kW 4.5.1 Important notes The accessory kit is located inside the controller. Remove the cover of the drive controller 1.
  • Seite 162: Standard Devices In The Power Range 75 ... 90 Kw Mounting With Fixing Brackets (Standard)

    ³ 50mm ³ 100mm 9300vec134 Fig. 4−15 Standard mounting with fixing brackets 75 ... 90 kW Arrange drive controllers in a row with spacing to be able to remove eye bolts 9300 vector Dimensions [mm] Type EVF9332−EV 28.5 EVF9333−EV For a fieldbus module plugged onto X1, consider mounting space for connecting cables Mounting Attach the fixing brackets to the heatsink plate of the drive controller.
  • Seite 163: Thermally Separated Mounting (Push−Through Technique)

    For mounting in push−through technique, the drive controller of type EVF93xx−EV must be used. In addition, the mounting set EJ0009 for push−through technique is required. Dimensions 9300vec118 Fig. 4−16 Dimensions for thermally separated mounting 75 ... 90 kW 9300 vector Dimensions [mm] Type EVF9332−EV 488 450 172.5 295.5...
  • Seite 164: Electrical Installation

    Electrical installation Important notes Electrical installation Important notes Stop! The drive controller contains electrostatically sensitive components. The personnel must be free of electrostatic charge when carrying out assembly and service operations. Note! An earth−leakage circuit breaker between the supplying mains and the controller can be activated by mistake ...
  • Seite 165 Electrical installation Installation according to EMC (installation of a CE−typical drive system) Control cables For lengths of 200 mm and more, use only shielded cables for analog and digital ƒ inputs and outputs. Under 200 mm, unshielded but twisted cables may be used. Connect the shield correctly: ƒ...
  • Seite 166 Electrical installation Installation according to EMC (installation of a CE−typical drive system) F1 … F3 PE L1 L2 L3 EVF9321 … EVF9333 DC 24 V – T1 T2 PE U X8/8 X8/5 J> 9352 9300VEC108 Fig. 5−1 Example for wiring in accordance with EMC regulations F1 ...
  • Seite 167: Use On It Systems

    Stop! Only operate the controllers with the mains chokes assigned. Operation with mains filters or RFI filters by Lenze is not permitted, as these modules contain components that are interconnected against PE. By this the protective design of the IT system would be cancelled out. The components are destroyed in the case of an earth fault.
  • Seite 168: Standard Devices In The Power Range 0.37

    Electrical installation Standard devices in the power range 0.37 ... 11 kW Important notes Standard devices in the power range 0.37 ... 11 kW 5.4.1 Important notes To gain access to the power connections, remove the covers: Release the cover for the mains connection with slight pressure on the front and pull ƒ...
  • Seite 169: Mains Connection, Dc Supply

    Electrical installation Standard devices in the power range 0.37 ... 11 kW Mains connection, DC supply 5.4.2 Mains connection, DC supply Note! If a mains filter or RFI filter is used and the cable length between mains/RFI ƒ filter and drive controller exceeds 300 mm, install a shielded cable. For DC−bus operation or DC supply, we recommend using shielded DC ƒ...
  • Seite 170: Mains Connection: Fuses And Cable Cross−Sections

    Electrical installation Standard devices in the power range 0.37 ... 11 kW Mains connection: Fuses and cable cross−sections Mains connection, DC supply L3 +UG -UG L1, L2, L3 0.5...0.6 Nm +U , -U 4.4...5.3 lb-in 9300std033 Fig. 5−3 Mains connection, DC supply for drive controllers 0.37 ... 11 kW Mains cable Shield sheet Securely clamp mains cable with the lugs...
  • Seite 171 Electrical installation Standard devices in the power range 0.37 ... 11 kW Mains connection: Fuses and cable cross−sections Operation at rated power 9300 Rated fuse current Cable cross−section Fuse Circuit−breaker Laying system L1, L2, L3, PE Type [mA] Operation without mains choke/mains filter EVF9321−xV C6, B6 EVF9322−xV...
  • Seite 172 Electrical installation Standard devices in the power range 0.37 ... 11 kW Mains connection: Fuses and cable cross−sections Installation to UL Supply conditions Range Description Fuses Only in accordance with UL 248 System short−circuit current up to 5000 A : All classes are permissible System short−circuit current up to 50000 A : Only classes "CC", "J", "T"...
  • Seite 173: Mains Choke/Mains Filter Assignment

    Electrical installation Standard devices in the power range 0.37 ... 11 kW Mains choke/mains filter assignment 5.4.4 Mains choke/mains filter assignment Operation at rated power 9300 Mains choke Interference voltage category according to EN 61800−3 and motor cable length Component Component Type max.
  • Seite 174: Standard Devices In The Power Range 0.37 ... 11 Kw Motor Connection

    Electrical installation Standard devices in the power range 0.37 ... 11 kW Motor connection 5.4.5 Motor connection Note! Fusing the motor cable is not required. ƒ The drive controller features 2 connections for motor temperature ƒ monitoring: – Terminals T1, T2 for connecting a PTC thermistor or thermal contact (NC contact).
  • Seite 175 PTC: R 1600  Configurable as warning or error (TRIP) Notes Monitoring is not active in the Lenze setting. If you do not use a Lenze motor, we recommend the use of a PTC thermistor up to 150°C. EDKVF9333V DE/EN/FR 7.2...
  • Seite 176 Fig. 5−6 Motor connection with PTC thermistor or thermal contact (NC contact)  0 Motor connection with Lenze system cable with integrated control cable for the motor temperature monitoring Shield sheet Clamp entire shield and shield of the control cable for the motor temperature monitoring with the straps.
  • Seite 177 Standard devices in the power range 0.37 ... 11 kW Motor connection Motor with KTY thermal sensor Note! We recommend to use Lenze system cables for wiring. ƒ For self−made cables only use cables with shielded cores twisted in pairs. ƒ...
  • Seite 178 Electrical installation Standard devices in the power range 0.37 ... 11 kW Motor connection U, V, W 0.5...0.6 Nm T1T2 T1, T2 4.4...5.3 lb-in U V W 9300vec122 Fig. 5−8 Motor connection with KTY thermal sensor Motor cable Shield sheet Clamp the motor cable shield with the straps.
  • Seite 179: Standard Devices In The Power Range 15

    Electrical installation Standard devices in the power range 15 ... 30 kW Important notes Standard devices in the power range 15 ... 30 kW 5.5.1 Important notes To gain access to the power connections, remove the cover: Remove the cover of the drive controller 1.
  • Seite 180: Standard Devices In The Power Range 15 ... 30 Kw Mains Connection, Dc Supply

    Electrical installation Standard devices in the power range 15 ... 30 kW Mains connection, DC supply 5.5.2 Mains connection, DC supply Note! If a mains filter or RFI filter is used and the cable length between mains/RFI ƒ filter and drive controller exceeds 300 mm, install a shielded cable. For DC−bus operation or DC supply, we recommend using shielded DC ƒ...
  • Seite 181: Mains Connection: Fuses And Cable Cross−Sections

    Electrical installation Standard devices in the power range 15 ... 30 kW Mains connection: Fuses and cable cross−sections 5.5.3 Mains connection: Fuses and cable cross−sections Installation in accordance with EN 60204−1 Supply conditions Range Description Fuses Utilisation category: only gG/gL or gRL Cables Laying systems B2 and C: Use of PVC−insulated copper cables, conductor temperature <...
  • Seite 182: Mains Choke/Mains Filter Assignment

    Electrical installation Standard devices in the power range 15 ... 30 kW Mains choke/mains filter assignment Installation to UL Supply conditions Range Description Fuses Only according to UL 248 Mains short−circuit current up to 5000 A : All classes permissible Mains short−circuit current up to 50000 A : Only classes "J", "T"...
  • Seite 183: Standard Devices In The Power Range 15 ... 30 Kw Motor Connection

    Electrical installation Standard devices in the power range 15 ... 30 kW Motor connection 5.5.5 Motor connection Note! Fusing the motor cable is not required. ƒ The drive controller features 2 connections for motor temperature ƒ monitoring: – Terminals T1, T2 for connecting a PTC thermistor or thermal contact (NC contact).
  • Seite 184 PTC: R 1600  Configurable as warning or error (TRIP) Notes Monitoring is not active in the Lenze setting. If you do not use a Lenze motor, we recommend the use of a PTC thermistor up to 150°C. EDKVF9333V DE/EN/FR 7.2...
  • Seite 185 Fig. 5−12 Motor connection with PTC thermistor or thermal contact (NC contact)  0 Motor connection with Lenze system cable with integrated control cable for the motor temperature monitoring Shield sheet Clamp entire shield and shield of the control cable for the motor temperature monitoring with the straps.
  • Seite 186 Standard devices in the power range 15 ... 30 kW Motor connection Motor with KTY thermal sensor Note! We recommend to use Lenze system cables for wiring. ƒ For self−made cables only use cables with shielded cores twisted in pairs. ƒ...
  • Seite 187 Electrical installation Standard devices in the power range 15 ... 30 kW Motor connection U, V, W, 5 Nm 44 lb-in 9300vec123 Fig. 5−14 Motor connection with KTY thermal sensor Motor cable Shield connection Clamp the motor cable shield with the straps. If required, fix by means of cable tie. PE stud PE cable connection with ring cable lug U, V, W...
  • Seite 188: Standard Devices In The Power Range Of 55 Kw

    Electrical installation Standard devices in the power range of 55 kW Important notes Standard devices in the power range of 55 kW 5.6.1 Important notes To gain access to the power connections, remove the cover: Remove the cover of the drive controller 1.
  • Seite 189: Mains Connection, Dc Supply

    Electrical installation Standard devices in the power range of 55 kW Mains connection, DC supply 5.6.2 Mains connection, DC supply Note! If a mains filter or RFI filter is used and the cable length between mains/RFI ƒ filter and drive controller exceeds 300 mm, install a shielded cable. For DC−bus operation or DC supply, we recommend using shielded DC ƒ...
  • Seite 190: Mains Connection: Fuses And Cable Cross−Sections

    Electrical installation Standard devices in the power range of 55 kW Mains connection: Fuses and cable cross−sections 5.6.3 Mains connection: Fuses and cable cross−sections Installation in accordance with EN 60204−1 Supply conditions Range Description Fuses Utilisation category: only gG/gL or gRL Cables Laying systems B2 and C: Use of PVC−insulated copper cables, conductor temperature <...
  • Seite 191: Mains Choke/Mains Filter Assignment

    Electrical installation Standard devices in the power range of 55 kW Mains choke/mains filter assignment Installation to UL Supply conditions Range Description Fuses Only according to UL 248 Mains short−circuit current up to 10000 A : All classes permissible Mains short−circuit current up to 50000 A : Only classes "J", "T"...
  • Seite 192: Motor Connection

    Electrical installation Standard devices in the power range of 55 kW Motor connection 5.6.5 Motor connection Note! Fusing the motor cable is not required. ƒ The drive controller features 2 connections for motor temperature ƒ monitoring: – Terminals T1, T2 for connecting a PTC thermistor or thermal contact (NC contact).
  • Seite 193: Standard Devices In The Power Range Of 55 Kw Motor Connection

     Configurable as warning or error (TRIP) Notes Monitoring is not active in the Lenze setting. If you do not use a Lenze motor, we recommend the use of a PTC thermistor up to 150°C. U, V, W, 15 Nm 132 lb-in 2.5 Nm...
  • Seite 194 Standard devices in the power range of 55 kW Motor connection Motor with KTY thermal sensor Note! We recommend to use Lenze system cables for wiring. ƒ For self−made cables only use cables with shielded cores twisted in pairs. ƒ...
  • Seite 195 Electrical installation Standard devices in the power range of 55 kW Motor connection U, V, W, 15 Nm 132 lb-in M5 x 12 3 Nm (26.5 lb-in) 9300vec124 Fig. 5−19 Motor connection with KTY thermal sensor PE stud PE cable connection with ring cable lug U, V, W Motor cable connection Check the correct polarity.
  • Seite 196: Standard Devices In The Power Range 75

    Electrical installation Standard devices in the power range 75 ... 90 kW Important notes Standard devices in the power range 75 ... 90 kW 5.7.1 Important notes To gain access to the power connections, remove the cover: Remove the cover of the drive controller 1.
  • Seite 197: Mains Connection, Dc Supply

    Electrical installation Standard devices in the power range 75 ... 90 kW Mains connection, DC supply 5.7.2 Mains connection, DC supply Note! If a mains filter or RFI filter is used and the cable length between mains/RFI ƒ filter and drive controller exceeds 300 mm, install a shielded cable. For DC−bus operation or DC supply, we recommend using shielded DC ƒ...
  • Seite 198: Mains Connection: Fuses And Cable Cross−Sections

    Electrical installation Standard devices in the power range 75 ... 90 kW Mains connection: Fuses and cable cross−sections 5.7.3 Mains connection: Fuses and cable cross−sections Installation in accordance with EN 60204−1 Supply conditions Range Description Fuses Utilisation category: only gG/gL or gRL Cables Laying systems B2 and C: Use of PVC−insulated copper cables, conductor temperature <...
  • Seite 199: Mains Choke/Mains Filter Assignment

    Electrical installation Standard devices in the power range 75 ... 90 kW Mains choke/mains filter assignment Installation to UL Supply conditions Range Description Fuses Only according to UL 248 Mains short−circuit current up to 10000 A : All classes permissible Mains short−circuit current up to 50000 A : Only classes "J", "T"...
  • Seite 200: Motor Connection

    Electrical installation Standard devices in the power range 75 ... 90 kW Motor connection 5.7.5 Motor connection Note! Fusing the motor cable is not required. ƒ The drive controller features 2 connections for motor temperature ƒ monitoring: – Terminals T1, T2 for connecting a PTC thermistor or thermal contact (NC contact).
  • Seite 201: Standard Devices In The Power Range 75 ... 90 Kw Motor Connection

     Configurable as warning or error (TRIP) Notes Monitoring is not active in the Lenze setting. If you do not use a Lenze motor, we recommend the use of a PTC thermistor up to 150°C. U, V, W, 30 Nm 264 lb-in 2.5 Nm...
  • Seite 202 Standard devices in the power range 75 ... 90 kW Motor connection Motor with KTY thermal sensor Note! We recommend to use Lenze system cables for wiring. ƒ For self−made cables only use cables with shielded cores twisted in pairs. ƒ...
  • Seite 203 Electrical installation Standard devices in the power range 75 ... 90 kW Motor connection U, V, W, 30 Nm 264 lb-in M4 x 12: 2.5 Nm (22.1 lb-in) M5 x 12: 3 Nm (26.5 lb-in) 9300vec125 Fig. 5−24 Motor connection with KTY thermal sensor PE stud PE cable connection with ring cable lug U, V, W...
  • Seite 204: Control Terminals

    Electrical installation Control terminals Important notes Control terminals 5.8.1 Important notes Stop! The control card will be damaged if the voltage between X5/39 and PE or X6/7 and PE is greater than 50 V, ƒ the voltage between voltage source and X6/7 exceeds 10 V (common mode) ƒ...
  • Seite 205 Electrical installation Control terminals Important notes Terminal data Stop! Connect or disconnect the terminal strips only if the controller is ƒ disconnected from the mains! Wire the terminal strips before connecting them! ƒ Unused terminal strips must also be plugged on to protect the contacts. ƒ...
  • Seite 206: Device Variant Without "Safe Torque Off" Function

    Wiring of digital and analog inputs/outputs for internal voltage source Controller enable NO contact or NC contact Load Minimum wiring required for operation Terminal assignment in the Lenze setting: ^ 210 Supply via external voltage source GND2 +24V GND1 GND1 242R 3.3nF...
  • Seite 207: Device Variant With "Safe Torque Off" Function

    Electrical installation Control terminals Device variant with "Safe torque off" function 5.8.3 Device variant with "Safe torque off" function Safety instructions for the installation of the "Safe torque off" function The installation and commissioning of the Safe torque off" function must be ƒ...
  • Seite 208 Programmable logic controller (PLC) The PLC monitors the ˜Safe torque off˜ function X5/A4 Feedback via a digital output (e. g. DIGOUT4) NO contact or NC contact Load Minimum wiring required for operation Terminal assignment in the Lenze setting: ^ 210 EDKVF9333V DE/EN/FR 7.2...
  • Seite 209 Programmable logic controller (PLC) The PLC monitors the ˜Safe torque off˜ function X5/A4 Feedback via a digital output (e. g. DIGOUT4) NO contact or NC contact Load Minimum wiring required for operation Terminal assignment in the Lenze setting: ^ 210 EDKVF9333V DE/EN/FR 7.2...
  • Seite 210: Terminal Assignment

    Electrical installation Control terminals Terminal assignment 5.8.4 Terminal assignment Terminal Function Level / state Technical data Bold print = Lenze setting X11/K32 Safety relay K Feedback − pulse inhibit See chapter "Technical Open contact: Pulse inhibit is data" inactive (operation) X11/K31...
  • Seite 211: Wiring Of The System Bus (Can)

    Electrical installation Wiring of the system bus (CAN) Wiring of the system bus (CAN) Installation material required from the scope of supply: Description Quantity Terminal strip, 3−pole Connection of system bus (CAN) at X4 Wiring 93XX 93XX 93XX 9300VEC054 Fig. 5−30 System bus (CAN) wiring Bus device 1 (controller) Bus device 2 (controller)
  • Seite 212: Wiring Of The Feedback System

    The incremental encoder signal can be output for slave drives at the digital ƒ frequency output X10. Note! We recommend to use Lenze system cables for wiring. ƒ For self−made cables only use cables with shielded cores twisted in pairs. ƒ...
  • Seite 213: Incremental Encoder With Ttl Level At X8

    Electrical installation Wiring of the feedback system Incremental encoder with TTL level at X8 5.10.2 Incremental encoder with TTL level at X8 Technical data Field Values Connection at drive controller Connector: Pin, 9−pole, Sub−D Connectable incremental encoder Incremental encoder with TTL level Encoder with two 5 V complementary signals electrically offset by 90°...
  • Seite 214: Incremental Encoder With Htl Level At X9

    Electrical installation Wiring of the feedback system Incremental encoder with HTL level at X9 5.10.3 Incremental encoder with HTL level at X9 Technical data Field Values Connection at drive controller Connector: Pin, 9−pole, Sub−D Connectable incremental encoder Incremental encoder with HTL−level Two−track with inverse signals and zero track Two−track without inverse signals and zero track Input frequency...
  • Seite 215: Wiring Of Digital Frequency Input / Digital Frequency Output

    Electrical installation Wiring of digital frequency input / digital frequency output 5.11 Wiring of digital frequency input / digital frequency output Installation material required from the scope of supply: Description Quantity Protective cover Protection for unused Sub−D connections Technical data Field Digital frequency output X10 Connection at drive controller...
  • Seite 216 Electrical installation Wiring of digital frequency input / digital frequency output Wiring Note! We recommend to use Lenze system cables for wiring. ƒ For self−made cables only use cables with shielded cores twisted in pairs. ƒ < 50 m ...
  • Seite 217: Final Works

    Final works Installation check Final works Installation check Stop! Destruction of the digital outputs (X5/A1 … X5/A4). The digital outputs are not protected against external voltage. Possible consequences: Applying an external voltage to X5/A1 … X5/A4 can damage the digital ƒ...
  • Seite 218: Preparing The Commissioning Procedure

    For commissioning with a keypad you require: An EMZ9371BCkeypad ƒ For commissioning with a PC you require: A computer with a Windows® XP operating system ƒ The Lenze PC software »Global Drive Control (GDC)« ƒ A connection to the controller via an interface: ƒ Controller Connection...
  • Seite 219 EVF9321 ... EVF9326 9300vec154 Position Description Variateur de vitesse Profilés de fixation pour le montage standard Capot du raccordement moteur Fixation : reprise du blindage avec vis de fixation (2 pièces) 1 fixation pour la tôle de blindage pour les raccords d’alimentation 1 fixation pour la tôle de blindage pour le câble moteur Tôle de blindage CEM avec vis de fixation (2 pièces) 1 tôle de blindage pour les raccords d’alimentation...
  • Seite 220 EVF9327 ... EVF9329 9300vec155 Position Description Variateur de vitesse Equerre de fixation pour le montage standard Tôle de blindage CEM avec vis de fixation pour des câbles de commande blindés Couvercle avec vis de fixation Tôle de blindage CEM pour le câble moteur et le câble de la surveillance de température moteur avec thermistor PTC ou contact thermique à...
  • Seite 221 EVF9330, EVF9331 9300vec156 Position Description Variateur de vitesse Equerre de fixation pour le montage standard Tôle de blindage CEM avec vis de fixation pour des câbles de commande blindés Couvercle avec vis de fixation Collier de blindage et support de charge pour le câble moteur Support de charge pour le câble PE moteur et le câble de la surveillance de température moteur avec thermistor PTC ou contact thermique à...
  • Seite 222 EVF9332, EVF9333 9300vec165 Position Description Variateur de vitesse Equerre de fixation pour le montage standard Tôle de blindage CEM avec vis de fixation pour des câbles de commande blindés Couvercle avec vis de fixation Collier de blindage et support de charge pour le câble moteur Support de charge pour le câble PE moteur et le câble de la surveillance de température moteur avec thermistor PTC ou contact thermique à...
  • Seite 223: Equipement Livré

    Equipement livré Description EVF9321 ... EVF9327 ... EVF9330 EVF9332 EVF9326 EVF9329 EVF9331 EVF9333 Convertisseur de fréquence 9300 vector Instructions de montage ^ 253 ^ 258 ^ 263 ^ 271 Matériel de montage Montage standard ^ 255 Montage sur semelle de ˘...
  • Seite 224 ............Consignes générales de sécurité et d’utilisation relatives aux variateurs Lenze Surveillance de la température du moteur...
  • Seite 225 Sommaire Appareils de base pour une puissance de 55 kW ......4.4.1 Remarques importantes .
  • Seite 226 Sommaire Partie commande ........... . . 5.8.1 Remarques importantes .
  • Seite 227: Présentation Du Document

    12/2004 TD23 Documentation à usage interne exclusivement Conseil ! Toutes les informations relatives aux produits Lenze peuvent être téléchargées sur notre site à l’adresse suivante : www.Lenze.com Public visé Cette documentation s’adresse à un personnel qualifié et habilité conformément à la norme CEI 60364.
  • Seite 228: Validité

    Présentation du document Validité Validité Le présent document s’applique aux convertisseurs de fréquence 9300 vector à partir des versions suivantes :  ‚ ƒ Plaque signalétique 93xx ˘ Vxxx Série d’appareils Convertisseur de fréquence N° type/puissance 400 V 480 V...
  • Seite 229: Conventions Utilisées

    Présentation du document Conventions utilisées Conventions utilisées Pour distinguer les différents types d’information, cette documentation utilise les conventions suivantes : Type d’information Aperçu Exemples/remarques Représentation des chiffres Séparateur décimal Selon la langue Le séparateur décimal est celui habituellement utilisé dans la langue cible. Exemple : 1234.56 ou 1234,56 Consignes préventives Consignes préventives UL...
  • Seite 230: Consignes Utilisées

    Présentation du document Consignes utilisées Consignes utilisées Pour indiquer des risques et des informations importantes, la présente documentation utilise les mots et pictogrammes suivants : Consignes de sécurité Présentation des consignes de sécurité Danger ! (Le pictogramme indique le type de risque.) Explication (L’explication décrit le risque et les moyens de l’éviter.) Pictogramme et mot associé...
  • Seite 231: Consignes De Sécurité

    La société Lenze Automation GmbH n’assumera aucune responsabilité pour les dommages liés à un problème d’adéquation des procédures et plans de raccordements indiqués. Selon leur indice de protection, les variateurs de vitesse Lenze (convertisseurs de ƒ fréquence, servovariateurs, variateurs CC) et leurs composants peuvent comporter, pendant leur fonctionnement, des parties accessibles sous tension, éventuellement...
  • Seite 232 Consignes de sécurité Consignes générales de sécurité et d’utilisation relatives aux variateurs Lenze Des énergies élevées circulent dans le variateur. Par conséquent, il convient de ƒ toujours porter un équipement de protection personnel lors des interventions sur le variateur (protection corporelle, protection de la tête, protection des yeux, protection auditive, protection des mains).
  • Seite 233 électrique sont reliées au boîtier par une surface entièrement métallique. Réduire au minimum les ouvertures dans le boîtier. Les variateurs de vitesse Lenze peuvent provoquer un courant continu dans le conducteur de protection. Si un disjoncteur différentiel (RCD) est utilisé pour la protection contre les contacts directs ou indirects, seul un disjoncteur différentiel de type B est autorisé...
  • Seite 234 Consignes de sécurité Consignes générales de sécurité et d’utilisation relatives aux variateurs Lenze Entretien et maintenance Si les conditions d’utilisation prescrites sont respectées, les variateurs ne nécessitent aucun entretien. Traitement des déchets Confier les métaux et les plastiques à des sociétés de recyclage. Éliminer les cartes imprimées de manière appropriée.
  • Seite 235: Surveillance De La Température Du Moteur

    La fonction de surveillance I x est conçue de façon à ce que pour un moteur avec une constante de temps thermique de 5 min (réglage Lenze en C0128), un courant moteur de 1.5 x I et un seuil de déclenchement de 100 %, la surveillance soit activée après 179 s.
  • Seite 236 Consignes de sécurité Surveillance de la température du moteur Caractéristiques de la fonction de surveillance I Condition préalable La surveillance I x t sera désactivée. Avec le réglage C0120 = 0 % et C0127 = 0 %, activer le blocage variateur. Activation de C0066 = 0 % et de MCTRL−LOAD−I2XT = 0.00 %.
  • Seite 237: Moteurs Avec Motoventilation Ou Refroidissement Naturel

    (OC8). Lecture du temps de déclenchement sur le graphique Graphique permettant de déterminer les temps de déclenchement pour un moteur avec une constante de temps thermique de 5 min (réglage Lenze en C0128) : L [%] = 1 × I = 3 ×...
  • Seite 238: Moteurs Avec Autoventilation

    C0129/x. Paramétrage Réglages possibles pour la surveillance I x t : Code Description Plage de valeurs Réglage Lenze C0066 Affichage de la charge I x t du moteur 0 ... 250 % − C0120 Seuil : activation de l’erreur "OC6"...
  • Seite 239 Consignes de sécurité Surveillance de la température du moteur Moteurs avec autoventilation Calcul du temps de déclenchement et de la charge I Le temps de déclenchement et la charge I x t du moteur doivent être calculés en tenant compte des réglages effectués en C0129/1 et C0129/2 (coefficient de traitement "y"). Formules de calcul du temps de Information déclenchement...
  • Seite 240: Dangers Résiduels

    Consignes de sécurité Dangers résiduels Dangers résiduels Protection des personnes Avant de procéder à une intervention sur le variateur, vérifier si toutes les bornes de ƒ puissance sont hors tension : – Une fois l’alimentation coupée, les bornes de puissance U, V, W, +U et −U restent encore sous tension pendant au moins 3 minutes.
  • Seite 241 Consignes de sécurité Dangers résiduels Protection de la machine/de l’installation Les entraînements peuvent atteindre des survitesses dangereuses (exemple : ƒ réglage de fréquences de sortie élevées en utilisant des moteurs et machines non adaptés). – Les variateurs de vitesse ne sont pas protégés contre de telles conditions de fonctionnement.
  • Seite 242: Consignes De Sécurité Pour L'installation Selon Ul

    Consignes de sécurité Consignes de sécurité pour l’installation selon UL Consignes de sécurité pour l’installation selon UL Avertissement ! Protection du moteur contre les surcharges ƒ – Pour obtenir des informations sur le niveau de protection offert par la protection intégrée contre les surcharges du moteur, se reporter aux manuels correspondants ou aux systèmes d’aide logiciels.
  • Seite 243: Spécifications Techniques

    Spécifications techniques Caractéristiques générales et conditions d’utilisation Spécifications techniques Caractéristiques générales et conditions d’utilisation Caractéristiques générales Conformité et homologation Conformité 2006/95/CE Directive Basse Tension 2004/108/CE Directive CEM TP TC 020/2011 Compatibilité Conformité eurasienne électromagnétique des (RT UD 020/2011) RT UD : Règlement technique de équipements l’Union Douanière TP TC 004/2011...
  • Seite 244 Spécifications techniques Caractéristiques générales et conditions d’utilisation Conditions ambiantes Classe 1K3 (−25 ... +40 °C) > 6 mois > 2 ans : activer les condensateurs du bus CC Transport CEI/EN 60721−3−2 Classe 2K3 (−25 ... +70 °C) Fonctionnement CEI/EN 60721−3−3 EVF9321 ...
  • Seite 245: Relais De Sécurité Ksr

    Spécifications techniques Relais de sécurité KSR Conditions de montage Emplacement de En armoire électrique montage Position de montage Verticale ^ 252 Espaces de montage Cotes Poids Relais de sécurité K Borne Description Domaine Données X11/K32 Relais de sécurité K Tension bobine à +20 °C 24 V CC (20 ...
  • Seite 246: Fonctionnement Avec Puissance Assignée (Fonctionnement Standard)

    Spécifications techniques Fonctionnement avec puissance assignée (fonctionnement standard) Caractéristiques nominales avec tension réseau de 400 V Fonctionnement avec puissance assignée (fonctionnement standard) Remarque importante ! Les variateurs EVF9324, EVF9326 et EVF9328 … EVF9333 ne doivent être utilisés qu’avec les selfs réseau ou les filtres réseau prescrits. 3.3.1 Caractéristiques nominales avec tension réseau de 400 V Données de base...
  • Seite 247 EVF9333−xV 63,0 94,0 Gras = réglage Lenze Les courants indiqués s’entendent pour des cycles avec charge alternée, une durée de surintensité maximale d’1 minute et 2 minutes de charge de base à 75 % max. de I Fonctionnement optimisé avec abaissement automatique de la fréquence de découpage. En cas de dépassement du courant de sortie max.
  • Seite 248: Caractéristiques Nominales Avec Tension D'alimentation 480 V

    Spécifications techniques Fonctionnement avec puissance assignée (fonctionnement standard) Caractéristiques nominales avec tension d’alimentation 480 V 3.3.2 Caractéristiques nominales avec tension d’alimentation 480 V Données de base Tension Fréquence Raccordement sur réseau CA 3/PE 384 V CA − 0 % ... 528 V + 0 % 45 Hz −...
  • Seite 249 94,0 59,0 89,0 Gras = réglage Lenze Les courants indiqués s’entendent pour des cycles avec charge alternée, une durée de surintensité maximale d’1 minute et 2 minutes de charge de base à 75 % max. de I Fonctionnement optimisé avec abaissement automatique de la fréquence de découpage. En cas de dépassement du courant de sortie max.
  • Seite 250: Fonctionnement Avec Puissance Assignée Accrue

    Spécifications techniques Fonctionnement avec puissance assignée accrue Caractéristiques nominales avec tension réseau de 400 V Fonctionnement avec puissance assignée accrue Remarque importante ! Le fonctionnement avec puissance assignée accrue n’est pas homologué UL. ƒ Le fonctionnement avec puissance assignée accrue est uniquement autorisé ƒ...
  • Seite 251 EVF9331−xV EVF9332−xV EVF9333−xV Gras = réglage Lenze Les courants indiqués s’entendent pour des cycles avec charge alternée, une durée de surintensité maximale d’1 minute et 2 minutes de charge de base à 75 % max. de I Fonctionnement optimisé avec abaissement automatique de la fréquence de découpage. Dans le cas d’un fonctionnement avec puissance assignée accrue, la fréquence de découpage est abaissée à...
  • Seite 252: Installation Mécanique

    Installation mécanique Appareils de base pour la plage de puissance de 0,37 ... 11 kW Remarques importantes Installation mécanique Appareils de base pour la plage de puissance de 0,37 ... 11 kW 4.1.1 Remarques importantes Poids des appareils 9300 Appareil standard Appareil en montage sur semelle de refroidissement Type...
  • Seite 253: Montage Avec Profilés De Fixation (Montage Standard)

    Fixation du variateur de vitesse Encombrements ³ 100mm ³ 100mm 9300vec114 Fig.4−1 Montage standard avec profilés de fixation 0,37 ... 11 kW Les variateurs de vitesse peuvent être juxtaposés (espace nul). 9300 vector Encombrements [mm] Type EVF9321−EV − ˘ EVF9322−EV EVF9323−EV 48,5 −...
  • Seite 254: Montage Avec Séparation Thermique (Montage Traversant)

    Kit de montage EVF9321−EV, EVF9322−EV EJ0036 EVF9323−EV, EVF9324−EV EJ0037 EVF9325−EV, EVF9326−EV EJ0038 Cotes 9300vec115 Fig.4−2 Encombrements pour montage avec séparation thermique (montage traversant) 0,37 ... 11 kW 9300 vector Encombrements [mm] Type EVF9321−EV 112,5 385,5 95,5 365,5 105,5 EVF9322−EV EVF9323−EV...
  • Seite 255: Conditions Ambiantes

    Installation mécanique Appareils de base pour la plage de puissance de 0,37 ... 11 kW Montage sur semelle de refroidissement 4.1.4 Montage sur semelle de refroidissement Vous pouvez monter les variateurs de vitesse sur des radiateurs communs à l’aide de la technique du ˜montage sur semelle de refroidissement˜.
  • Seite 256 Appareils de base pour la plage de puissance de 0,37 ... 11 kW Montage sur semelle de refroidissement Cotes 9300vec120 Fig.4−3 Encombrements pour montage sur semelle de refroidissement 0,37 ... 11 kW 9300 vector Encombrements [mm] Type EVF9321−CVV003 ˘ EVF9322−CVV003 EVF9323−CVV003...
  • Seite 257: Appareils De Base Pour La Plage De Puissance De 15

    Installation mécanique Appareils de base pour la plage de puissance de 15 ... 30 kW Remarques importantes Appareils de base pour la plage de puissance de 15 ... 30 kW 4.2.1 Remarques importantes Le kit de montage se trouve à l’intérieur du variateur de vitesse. Retirer le couvercle du variateur 1.
  • Seite 258: Montage Avec Équerres De Fixation (Standard)

    ³ 100mm ³ 100mm 9300vec111 Fig.4−4 Montage standard avec équerres de fixation 15 ... 30 kW Les variateurs de vitesse peuvent être juxtaposés (espace nul). 9300 vector Encombrements [mm] Type EVF9327−EV EVF9328−EV EVF9329−EV Si un module bus de terrain est enfiché sur X1, prévoir un espace de montage supplémentaire pour le câble de raccordement.
  • Seite 259: Montage Avec Séparation Thermique (Montage Traversant)

    Pour le montage traversant, utiliser impérativement le variateur de vitesse EVF93xx−EV. Se munir également du kit pour montage traversant EJ0011. Cotes 9300vec116 Fig.4−5 Encombrements Montage avec séparation thermique (montage traversant) 15 ... 30 kW 9300 vector Encombrements [mm] Type EVF9327−EV EVF9328−EV 279,5...
  • Seite 260: Montage Sur Semelle De Refroidissement

    Installation mécanique Appareils de base pour la plage de puissance de 15 ... 30 kW Montage sur semelle de refroidissement 4.2.4 Montage sur semelle de refroidissement Vous pouvez monter les variateurs de vitesse sur des radiateurs communs à l’aide de la technique du ˜montage sur semelle de refroidissement˜.
  • Seite 261 Montage sur semelle de refroidissement Cotes 9300vec119 Fig.4−6 Encombrements pour montage sur semelle de refroidissement 15 ... 22 kW 9300 vector Encombrements [mm] Type EVF9327−CVV003 EVF9328−CVV003 Si un module bus de terrain est enfiché sur X1, prévoir un espace de montage supplémentaire pour le câble de raccordement.
  • Seite 262: Appareils De Base D'une Puissance De 45 Kw

    Installation mécanique Appareils de base d’une puissance de 45 kW Remarques importantes Appareils de base d’une puissance de 45 kW 4.3.1 Remarques importantes Le kit de montage se trouve à l’intérieur du variateur de vitesse. Retirer le couvercle du variateur 1.
  • Seite 263: Montage Avec Équerres De Fixation (Standard)

    9300vec133 Fig.4−7 Montage standard avec équerres de fixation 45 kW Lors de la juxtaposition des appareils, prévoir un espace afin de pouvoir démonter les boulons à oeillet. 9300 vector Encombrements [mm] Type EVF9330−EV 28,5 Si un module bus de terrain est enfiché sur X1, prévoir un espace de montage supplémentaire pour le câble de raccordement.
  • Seite 264: Montage Avec Séparation Thermique (Montage Traversant)

    Pour le montage traversant, utiliser impérativement le variateur de vitesse EVF93xx−EV. Se munir également du kit pour montage traversant EJ0010. Cotes 9300vec117 Fig.4−8 Encombrements : montage avec séparation thermique (montage traversant) 45 kW 9300 vector Encombrements [mm] Type EVF9330−EV 137,5 217,5 163,5 Si un module bus de terrain est enfiché...
  • Seite 265: Appareils De Base Pour Une Puissance De 55 Kw

    Installation mécanique Appareils de base pour une puissance de 55 kW Remarques importantes Appareils de base pour une puissance de 55 kW 4.4.1 Remarques importantes Le kit de montage se trouve à l’intérieur du variateur de vitesse. Retirer le couvercle du variateur 1.
  • Seite 266: Montage Avec Équerres De Fixation (Standard)

    9300vec175 Fig.4−9 Montage standard avec équerres de fixation 55 kW Lors de la juxtaposition des appareils, prévoir un espace afin de pouvoir démonter les boulons à oeillet. 9300 vector Encombrements [mm] Type EVF9331−EV 28,5 Si un module bus de terrain est enfiché sur X1, prévoir un espace de montage supplémentaire pour le câble de raccordement.
  • Seite 267: Montage Avec Séparation Thermique (Montage Traversant)

    Dans le cas d’un montage avec séparation thermique (montage traversant), le ƒ module ventilateur doit être repositionné. (¶ 268) Cotes 9300vec174 Fig.4−10 Encombrements : montage avec séparation thermique (montage traversant) 55 kW 9300 vector Encombrements [mm] Type EVF9331−EV 137,5 217,5 163,5 Si un module bus de terrain est enfiché...
  • Seite 268: Repositionnement Du Module Ventilateur Dans Le Cas D'un Montage Traversant

    Installation mécanique Appareils de base pour une puissance de 55 kW Repositionnement du module ventilateur dans le cas d’un montage traversant 4.4.4 Repositionnement du module ventilateur dans le cas d’un montage traversant Dans le cas d’un montage avec séparation thermique (montage traversant), le module ventilateur doit être tourné...
  • Seite 269 Installation mécanique Appareils de base pour une puissance de 55 kW Repositionnement du module ventilateur dans le cas d’un montage traversant Repositionnement du câble de raccordement sur le module ventilateur 9300vec173 Fig.4−13 Repositionnement du câble de raccordement du ventilateur pour l’alimentation 1.
  • Seite 270: Appareils De Base Pour La Plage De Puissance De 75

    Installation mécanique Appareils de base pour la plage de puissance de 75 ... 90 kW Remarques importantes Appareils de base pour la plage de puissance de 75 ... 90 kW 4.5.1 Remarques importantes Le kit de montage se trouve à l’intérieur du variateur de vitesse. Retirer le couvercle du variateur 1.
  • Seite 271: Montage Avec Équerres De Fixation (Standard)

    ³ 100mm 9300vec134 Fig.4−15 Montage standard avec équerres de fixation 75 ... 90 kW Lors de la juxtaposition des appareils, prévoir un espace afin de pouvoir démonter les boulons à oeillet. 9300 vector Encombrements [mm] Type EVF9332−EV 28,5 EVF9333−EV Si un module bus de terrain est enfiché sur X1, prévoir un espace de montage supplémentaire pour le câble de raccordement.
  • Seite 272: Montage Avec Séparation Thermique (Montage Traversant)

    Pour le montage traversant, utiliser impérativement le variateur de vitesse EVF93xx−EV. Se munir également du kit pour montage traversant EJ0009. Cotes 9300vec118 Fig.4−16 Encombrements Montage avec séparation thermique (montage traversant) 75 ... 90 kW 9300 vector Encombrements [mm] Type EVF9332−EV 488 450 172,5...
  • Seite 273: Installation Électrique

    Installation électrique Remarques importantes Installation électrique Remarques importantes Stop ! Le variateur contient des composants sensibles aux décharges électrostatiques. Toute personne effectuant des travaux de raccordement doit au préalable se libérer des décharges électrostatiques. Remarque importante ! Un disjoncteur différentiel entre le réseau d’alimentation et le variateur de vitesse peut se déclencher de manière injustifiée dans les cas suivants ...
  • Seite 274: Câblage Conforme Cem (Installation D'un Système D'entraînement Ce)

    Installation électrique Câblage conforme CEM (installation d’un système d’entraînement CE) Câblage conforme CEM (installation d’un système d’entraînement CE) Relier tous les composants (variateurs de vitesse, selfs, filtres) à un point central de ƒ mise à la terre (barre PE). Raccordement au réseau, alimentation CC En cas d’utilisation d’un filtre réseau ou d’un filtre antiparasite, blinder le câble entre ƒ...
  • Seite 275 Installation électrique Câblage conforme CEM (installation d’un système d’entraînement CE) F1 … F3 PE L1 L2 L3 EVF9321 … EVF9333 DC 24 V – T1 T2 PE U X8/8 X8/5 J> 9352 9300VEC108 Fig.5−1 Exemple d’un câblage conforme CEM F1 ... F3 Fusible Contacteur réseau Entraînement automate (API)
  • Seite 276: Fonctionnement Sur Des Réseaux It

    Stop ! Utiliser uniquement le variateur avec les selfs réseau appropriées. Le fonctionnement avec des filtres réseau ou des filtres antiparasites de Lenze n’est pas autorisé, car ces composants intègrent des éléments raccordés à la terre. Ceux−ci risqueraient d’annuler le principe de protection du réseau IT. En cas de mise à...
  • Seite 277: Appareils De Base Pour La Plage De Puissance De 0,37

    Installation électrique Appareils de base pour la plage de puissance de 0,37 ... 11 kW Remarques importantes Appareils de base pour la plage de puissance de 0,37 ... 11 kW 5.4.1 Remarques importantes Pour accéder aux raccordements de puissance, retirer les capots. Décliqueter le capot du raccordement réseau en exerçant une légère pression et le ƒ...
  • Seite 278: Raccordement Au Réseau, Alimentation Cc

    Installation électrique Appareils de base pour la plage de puissance de 0,37 ... 11 kW Raccordement au réseau, alimentation CC 5.4.2 Raccordement au réseau, alimentation CC Remarque importante ! En cas d’utilisation d’un filtre réseau ou d’un filtre antiparasite, blinder le ƒ...
  • Seite 279: Raccordement Sur Réseau : Fusibles Et Sections De Câble

    Installation électrique Appareils de base pour la plage de puissance de 0,37 ... 11 kW Raccordement sur réseau : fusibles et sections de câble Raccordement au réseau, alimentation CC L3 +UG -UG L1, L2, L3 0.5...0.6 Nm +U , -U 4.4...5.3 lb-in 9300std033 Fig.5−3...
  • Seite 280 Installation électrique Appareils de base pour la plage de puissance de 0,37 ... 11 kW Raccordement sur réseau : fusibles et sections de câble Fonctionnement avec puissance assignée 9300 Courant assigné fusibles Section de câble Fusible Disjoncteur Mode de pose L1, L2, L3, PE automatique Type [mA]...
  • Seite 281 Installation électrique Appareils de base pour la plage de puissance de 0,37 ... 11 kW Raccordement sur réseau : fusibles et sections de câble Installation selon UL Conditions électriques Plage Description Fusibles Uniquement selon UL 248 Courant de court−circuit réseau jusqu’à 5000 A : toutes les classes sont admissibles Courant de court−circuit réseau jusqu’à...
  • Seite 282: Selfs Et Filtres Réseau Adaptés

    Installation électrique Appareils de base pour la plage de puissance de 0,37 ... 11 kW Selfs et filtres réseau adaptés 5.4.4 Selfs et filtres réseau adaptés Fonctionnement avec puissance assignée 9300 Self réseau Catégorie de tension parasite selon EN 61800−3 et longueur du câble moteur Composant Composant Type...
  • Seite 283: Raccordement Du Moteur

    Installation électrique Appareils de base pour la plage de puissance de 0,37 ... 11 kW Raccordement du moteur 5.4.5 Raccordement du moteur Remarque importante ! Une protection par fusibles du câble moteur n’est pas nécessaire. ƒ Le variateur de vitesse possède 2 raccordements pour la surveillance de la ƒ...
  • Seite 284 PTC : R 1600  Configurable comme avertissement ou erreur (TRIP) Remarques Par le réglage Lenze, la surveillance n’est pas activée. Si vous n’utilisez pas de moteur Lenze, nous vous recommandons de choisir un thermistor PTC jusqu’à 150 °C. EDKVF9333V DE/EN/FR 7.2...
  • Seite 285 Fig.5−6 Raccordement du moteur avec thermistor PTC ou contact thermique à ouverture  0 Raccordement pour moteur avec câble système Lenze avec câble de commande intégré pour la surveillance de la température du moteur Tôle de blindage Fixer le blindage global et celui du câble de commande pour la surveillance de la température du moteur à...
  • Seite 286 Seuil de déclenchement Avertissement : réglable Défaut (TRIP) : fixe à 150 °C Remarques Dans le réglage Lenze, la surveillance n’est pas activée. La sonde thermique KTY est surveillée pour prévenir en cas de coupure ou de court−circuit. EDKVF9333V DE/EN/FR 7.2...
  • Seite 287 Installation électrique Appareils de base pour la plage de puissance de 0,37 ... 11 kW Raccordement du moteur U, V, W 0.5...0.6 Nm T1T2 T1, T2 4.4...5.3 lb-in U V W 9300vec122 Fig.5−8 Raccordement du moteur avec sonde thermique KTY Câble moteur Tôle de blindage Immobiliser le blindage du câble moteur à...
  • Seite 288: Appareils De Base Pour La Plage De Puissance De 15

    Installation électrique Appareils de base pour la plage de puissance de 15 ... 30 kW Remarques importantes Appareils de base pour la plage de puissance de 15 ... 30 kW 5.5.1 Remarques importantes Pour accéder aux raccordements de puissance, retirer le capot : Retirer le couvercle du variateur 1.
  • Seite 289: Raccordement Au Réseau, Alimentation Cc

    Installation électrique Appareils de base pour la plage de puissance de 15 ... 30 kW Raccordement au réseau, alimentation CC 5.5.2 Raccordement au réseau, alimentation CC Remarque importante ! En cas d’utilisation d’un filtre réseau ou d’un filtre antiparasite, blinder le ƒ...
  • Seite 290: Raccordement Sur Réseau : Fusibles Et Sections De Câble

    Installation électrique Appareils de base pour la plage de puissance de 15 ... 30 kW Raccordement sur réseau : fusibles et sections de câble 5.5.3 Raccordement sur réseau : fusibles et sections de câble Installation selon EN 60204−1 Conditions électriques Plage Description Fusibles...
  • Seite 291: Selfs Et Filtres Réseau Adaptés

    Installation électrique Appareils de base pour la plage de puissance de 15 ... 30 kW Selfs et filtres réseau adaptés Installation selon UL Conditions électriques Plage Description Fusibles Uniquement selon UL 248 Courant de court−circuit réseau jusqu’à 5000 A : toutes les classes sont admissibles Courant de court−circuit réseau jusqu’à...
  • Seite 292: Raccordement Du Moteur

    Installation électrique Appareils de base pour la plage de puissance de 15 ... 30 kW Raccordement du moteur 5.5.5 Raccordement du moteur Remarque importante ! Une protection par fusibles du câble moteur n’est pas nécessaire. ƒ Le variateur de vitesse possède 2 raccordements pour la surveillance de la ƒ...
  • Seite 293 PTC : R 1600  Configurable comme avertissement ou erreur (TRIP) Remarques Par le réglage Lenze, la surveillance n’est pas activée. Si vous n’utilisez pas de moteur Lenze, nous vous recommandons de choisir un thermistor PTC jusqu’à 150 °C. EDKVF9333V DE/EN/FR 7.2...
  • Seite 294 Fig.5−12 Raccordement du moteur avec thermistor PTC ou contact thermique à ouverture  0 Raccordement pour moteur avec câble système Lenze avec câble de commande intégré pour la surveillance de la température du moteur Tôle de blindage Fixer le blindage global et le blindage du câble de commande pour la surveillance de la température du moteur à...
  • Seite 295 Seuil de déclenchement Avertissement : réglable Défaut (TRIP) : fixe à 150 °C Remarques Dans le réglage Lenze, la surveillance n’est pas activée. La sonde thermique KTY est surveillée pour prévenir en cas de coupure ou de court−circuit. EDKVF9333V DE/EN/FR 7.2...
  • Seite 296 Installation électrique Appareils de base pour la plage de puissance de 15 ... 30 kW Raccordement du moteur U, V, W, 5 Nm 44 lb-in 9300vec123 Fig.5−14 Raccordement du moteur avec sonde thermique KTY Câble moteur Reprise de blindage Immobiliser le blindage du câble moteur à l’aide des griffes de serrage ou le fixer avec un serre−câbles.
  • Seite 297: Appareils De Base Pour Une Puissance De 55 Kw

    Installation électrique Appareils de base pour une puissance de 55 kW Remarques importantes Appareils de base pour une puissance de 55 kW 5.6.1 Remarques importantes Pour accéder aux raccordements de puissance, retirer le capot : Retirer le couvercle du variateur 1.
  • Seite 298: Raccordement Au Réseau, Alimentation Cc

    Installation électrique Appareils de base pour une puissance de 55 kW Raccordement au réseau, alimentation CC 5.6.2 Raccordement au réseau, alimentation CC Remarque importante ! En cas d’utilisation d’un filtre réseau ou d’un filtre antiparasite, blinder le ƒ câble entre le filtre et le variateur de vitesse s’il mesure plus de 300 mm de long.
  • Seite 299: Raccordement Sur Réseau : Fusibles Et Sections De Câble

    Installation électrique Appareils de base pour une puissance de 55 kW Raccordement sur réseau : fusibles et sections de câble 5.6.3 Raccordement sur réseau : fusibles et sections de câble Installation selon EN 60204−1 Conditions électriques Plage Description Fusibles Classe de fonctionnement : uniquement gG/gL ou gRL Câbles Modes de pose B2 et C : utilisation de câbles en cuivre avec gaine en PVC, température du conducteur <...
  • Seite 300: Selfs Et Filtres Réseau Adaptés

    Installation électrique Appareils de base pour une puissance de 55 kW Selfs et filtres réseau adaptés Installation selon UL Conditions électriques Plage Description Fusibles Uniquement selon UL 248 Courant de court−circuit réseau jusqu’à 10 000 A : toutes les classes sont admissibles Courant de court−circuit réseau jusqu’à...
  • Seite 301: Raccordement Du Moteur

    Installation électrique Appareils de base pour une puissance de 55 kW Raccordement du moteur 5.6.5 Raccordement du moteur Remarque importante ! Une protection par fusibles du câble moteur n’est pas nécessaire. ƒ Le variateur de vitesse possède 2 raccordements pour la surveillance de la ƒ...
  • Seite 302  Configurable comme avertissement ou erreur (TRIP) Remarques Par le réglage Lenze, la surveillance n’est pas activée. Si vous n’utilisez pas de moteur Lenze, nous vous recommandons de choisir un thermistor PTC jusqu’à 150 °C. U, V, W, 15 Nm 132 lb-in 2.5 Nm...
  • Seite 303 Seuil de déclenchement Avertissement : réglable Défaut (TRIP) : fixe à 150 °C Remarques Dans le réglage Lenze, la surveillance n’est pas activée. La sonde thermique KTY est surveillée pour prévenir en cas de coupure ou de court−circuit. EDKVF9333V DE/EN/FR 7.2...
  • Seite 304 Installation électrique Appareils de base pour une puissance de 55 kW Raccordement du moteur U, V, W, 15 Nm 132 lb-in M5 x 12 3 Nm (26.5 lb-in) 9300vec124 Fig.5−19 Raccordement du moteur avec sonde thermique KTY Boulon fileté PE Raccordement pour câble PE avec cosse à...
  • Seite 305: Appareils De Base Pour La Plage De Puissance De 75

    Installation électrique Appareils de base pour la plage de puissance de 75 ... 90 kW Remarques importantes Appareils de base pour la plage de puissance de 75 ... 90 kW 5.7.1 Remarques importantes Pour accéder aux raccordements de puissance, retirer le capot : Retirer le couvercle du variateur 1.
  • Seite 306: Raccordement Au Réseau, Alimentation Cc

    Installation électrique Appareils de base pour la plage de puissance de 75 ... 90 kW Raccordement au réseau, alimentation CC 5.7.2 Raccordement au réseau, alimentation CC Remarque importante ! En cas d’utilisation d’un filtre réseau ou d’un filtre antiparasite, blinder le ƒ...
  • Seite 307: Raccordement Sur Réseau : Fusibles Et Sections De Câble

    Installation électrique Appareils de base pour la plage de puissance de 75 ... 90 kW Raccordement sur réseau : fusibles et sections de câble 5.7.3 Raccordement sur réseau : fusibles et sections de câble Installation selon EN 60204−1 Conditions électriques Plage Description Fusibles...
  • Seite 308: Selfs Et Filtres Réseau Adaptés

    Installation électrique Appareils de base pour la plage de puissance de 75 ... 90 kW Selfs et filtres réseau adaptés Installation selon UL Conditions électriques Plage Description Fusibles Uniquement selon UL 248 Courant de court−circuit réseau jusqu’à 10 000 A : toutes les classes sont admissibles Courant de court−circuit réseau jusqu’à...
  • Seite 309: Raccordement Du Moteur

    Installation électrique Appareils de base pour la plage de puissance de 75 ... 90 kW Raccordement du moteur 5.7.5 Raccordement du moteur Remarque importante ! Une protection par fusibles du câble moteur n’est pas nécessaire. ƒ Le variateur de vitesse possède 2 raccordements pour la surveillance de la ƒ...
  • Seite 310  Configurable comme avertissement ou erreur (TRIP) Remarques Par le réglage Lenze, la surveillance n’est pas activée. Si vous n’utilisez pas de moteur Lenze, nous vous recommandons de choisir un thermistor PTC jusqu’à 150 °C. U, V, W, 30 Nm 264 lb-in 2.5 Nm...
  • Seite 311 Seuil de déclenchement Avertissement : réglable Défaut (TRIP) : fixe à 150 °C Remarques Dans le réglage Lenze, la surveillance n’est pas activée. La sonde thermique KTY est surveillée pour prévenir en cas de coupure ou de court−circuit. EDKVF9333V DE/EN/FR 7.2...
  • Seite 312 Installation électrique Appareils de base pour la plage de puissance de 75 ... 90 kW Raccordement du moteur U, V, W, 30 Nm 264 lb-in M4 x 12: 2.5 Nm (22.1 lb-in) M5 x 12: 3 Nm (26.5 lb-in) 9300vec125 Fig.5−24 Raccordement du moteur avec sonde thermique KTY Boulon fileté...
  • Seite 313: Partie Commande

    Installation électrique Partie commande Remarques importantes Partie commande 5.8.1 Remarques importantes Stop ! La carte de commande est détruite si la tension entre X5/39 et PE ou entre X6/7 et PE est supérieure à 50 V ; ƒ en cas d’alimentation via une source de tension externe, si la tension entre ƒ...
  • Seite 314: Application Du Blindage

    Installation électrique Partie commande Remarques importantes Application du blindage 9300vec129 Fig.5−25 Raccordement du blindage de câble à la tôle de blindage Tôle de blindage Fixer la tôle de blindage en dessous de la carte de commande à l’aide d’une vis M4 × 10 mm. Fixer le blindage du câble à...
  • Seite 315: Variante D'appareil Sans Fonction "Absence Sûre De Couple

    Câblage des entrées/sorties numériques et analogiques avec source de tension interne Déblocage du variateur Contact à fermeture ou contact à ouverture Récepteur Câblage minimum requis Affectation des bornes par le réglage Lenze : ^ 318 Alimentation via source de tension externe GND2 +24V GND1...
  • Seite 316: Variante D'appareil Avec Fonction "Absence Sûre De Couple

    Installation électrique Partie commande Variante d’appareil avec fonction "absence sûre de couple" 5.8.3 Variante d’appareil avec fonction "absence sûre de couple" Consignes de sécurité pour l’installation de la fonction "absence sûre de couple" Seul le personnel qualifié est autorisé à installer et à mettre en service la fonction ƒ...
  • Seite 317 L’API prend en charge la surveillance de la fonction ˜absence sûre de couple˜. X5/A4 Bouclage via une sortie numérique (par exemple, DIGOUT4) Contact à fermeture ou à ouverture Récepteur Câblage minimum requis Affectation des bornes selon le réglage Lenze : ^ 318 EDKVF9333V DE/EN/FR 7.2...
  • Seite 318: Affectation Des Bornes

    L’API prend en charge la surveillance de la fonction ˜absence sûre de couple˜. X5/A4 Bouclage via une sortie numérique (par exemple, DIGOUT4) Contact à fermeture ou à ouverture Récepteur Câblage minimum requis Affectation des bornes selon le réglage Lenze : ^ 318 5.8.4 Affectation des bornes Borne Fonction Niveau / Etat Spécifications...
  • Seite 319 Installation électrique Partie commande Affectation des bornes Borne Fonction Niveau / Etat Spécifications techniques gras = réglage Lenze moyenne) X5/ST1 Entrée numérique supplémentaire (E6) HAUT X5/ST2 Sorties BAS : 0 ... +3 V X5/A1 Message de défaut numériques HAUT : +12 ... +30 V...
  • Seite 320: Raccordement Du Bus Système Can

    Installation électrique Raccordement du Bus Système CAN Raccordement du Bus Système CAN Matériel d’installation requis (compris dans l’équipement livré) : Description Fonction Quantité Bornier à 3 bornes Raccordement du Bus Système CAN sur X4 Câblage 93XX 93XX 93XX 9300VEC054 Fig.5−30 Câblage de principe du Bus Système CAN Participant au bus 1 (variateur) Participant au bus 2 (variateur)
  • Seite 321: Câblage Du Système De Bouclage

    Remarque importante ! Nous vous recommandons de réaliser le câblage à l’aide de câbles système ƒ Lenze. Lorsque les câbles sont réalisés par vos soins, prévoir impérativement des ƒ câbles blindés, avec brins torsadés par paire. Matériel d’installation requis (compris dans l’équipement livré) :...
  • Seite 322: Codeur Incrémental Avec Niveau Ttl À L'entrée X8

    Installation électrique Câblage du système de bouclage Codeur incrémental avec niveau TTL à l’entrée X8 5.10.2 Codeur incrémental avec niveau TTL à l’entrée X8 Spécifications techniques Domaine Données Raccordement au variateur de Connecteur mâle Sub−D à 9 broches vitesse Codeurs incrémentaux raccordables Codeurs incrémentaux avec niveau TTL Codeurs avec deux signaux complémentés 5 V décalés de 90°...
  • Seite 323: Codeur Incrémental Avec Niveau Htl À L'entrée X9

    Installation électrique Câblage du système de bouclage Codeur incrémental avec niveau HTL à l’entrée X9 5.10.3 Codeur incrémental avec niveau HTL à l’entrée X9 Spécifications techniques Domaine Valeurs Raccordement au variateur de Connecteur Sub−D mâle à 9 broches vitesse Codeurs incrémentaux raccordables Codeurs incrémentaux avec niveau HTL A deux voies avec signaux inversés et top zéro A deux voies sans signaux inversés ni top zéro...
  • Seite 324: Raccordement De L'entrée Fréquence Maître/De La Sortie Fréquence Maître

    Installation électrique Raccordement de l’entrée fréquence maître/de la sortie fréquence maître 5.11 Raccordement de l’entrée fréquence maître/de la sortie fréquence maître Matériel d’installation requis (compris dans l’équipement livré) : Description Fonction Quantité Capot de protection Protection pour les prises connecteurs Sub−D Spécifications techniques Domaine Sortie fréquence maître X10...
  • Seite 325 Câblage Remarque importante ! Nous vous recommandons de réaliser le câblage à l’aide de câbles système ƒ Lenze. Lorsque les câbles sont réalisés par vos soins, prévoir impérativement des ƒ câbles blindés, avec brins torsadés par paire. < 50 m ...
  • Seite 326: Fin Du Montage

    Fin du montage Vérification de l’installation Fin du montage Vérification de l’installation Stop ! Destruction des sorties numériques (X5/A1 … X5/A4) Les sorties numériques ne sont pas protégées contre une tension perturbatrice. Risques encourus En cas d’application d’une tension perturbatrice à X5/A1 … X5/A4, les sorties ƒ...
  • Seite 327: Préparatifs À La Mise En Service

    ƒ Equipement nécessaire pour la mise en service à l’aide d’un PC : Un ordinateur doté de Windows® XP ƒ Le logiciel PC de Lenze »Global Drive Control (GDC)« ƒ Une connexion au variateur via une interface : ƒ Variateur de vitesse...
  • Seite 328 Fin du montage Préparatifs à la mise en service EDKVF9333V DE/EN/FR 7.2...
  • Seite 330 ã C Q © 01/2015 Lenze Automation GmbH Service Lenze Service GmbH Postfach 10 13 52, D−31763 Hameln Breslauer Straße 3, D−32699 Extertal Hans−Lenze−Str. 1, D−31855 Aerzen Germany Germany +49 5154 82−0 008000 2446877 (24 h helpline) Ê Ê +49 5154 82−2800 +49 5154 82−1112...

Inhaltsverzeichnis