Herunterladen Inhalt Inhalt Diese Seite drucken
Inhaltsverzeichnis

Werbung

Verfügbare Sprachen
  • DE

Verfügbare Sprachen

  • DEUTSCH, seite 54
`
Thanks for buying a TEAC.
Read this manual carefully to get the best performance from
this unit.
Nous vous remercions pour l'achat d'un appareil TEAC.
Lire ce manuel avec attention pour obtenir les meilleures
perfor-mances possibles de cet appareil.
Vielen Dank für den Kauf dieses TEAC-Geräts.
Bitte lesen Sie diese Anleitung sorgfältig durch, um die
Leistungs-fähigkeit dieses Geräts optimal nutzen zu können.
Grazie per aver acquistato un prodotto TEAC.
Leggere attentamente questo manuale per ottenere le
migliori prestazioni da questo apparecchio.
Enhorabuena por la adquisición de un TEAC.
Lea detenidamente este manual a fin de obtener el mejor
rendimiento de esta unidad.
Ü
The lightning flash with arrowhead symbol, within an equilateral triangle, is intended to alert
ÿ
the user to the presence of uninsulated "dangerous voltage" within the product's enclosure
that may be of sufficient magnitude to constitute a risk of electric shock to persons.
The exclamation point within an equilateral triangle is intended to alert the user to the pres-
Ÿ
ence of important operating and maintenance (servicing) instructions in the literature
accompanying the appliance.
This appliance has a serial number located
on the rear panel. Please record the model
number and serial number and retain them
for your records.
Model number
Serial number
ag-d9100
Audio/Video Surround Receiver
CAUTION: TO REDUCE THE RISK OF ELECTRIC SHOCK, DO NOT
REMOVE COVER (OR BACK). NO USER-SERVICEABLE PARTS INSIDE.
REFER SERVICING TO QUALIFIED SERVICE PERSONNEL.
WARNING: TO PREVENT FIRE OR SHOCK
HAZARD, DO NOT EXPOSE THIS
APPLIANCE TO RAIN OR MOISTURE.
OWNER'S MANUAL........................................... 2
MANUEL DUPROPRIETAIRE ......................... 28
BEDIENUNGSANLEITUNG .............................. 54
MANUALE DI ISTRUZIONI.............................. 80
MANUAL DEL USUARIO............................... 106
9A06788300

Werbung

Inhaltsverzeichnis
loading

Inhaltszusammenfassung für Teac AG-D9100

  • Seite 1 Thanks for buying a TEAC. Read this manual carefully to get the best performance from this unit. Nous vous remercions pour l’achat d’un appareil TEAC. Lire ce manuel avec attention pour obtenir les meilleures perfor-mances possibles de cet appareil. Vielen Dank für den Kauf dieses TEAC-Geräts.
  • Seite 2: Inhaltsverzeichnis

    If this product is not provided with a mains plug, or Buttons for the Operation of Other one has to be fitted, then follow the instructions TEAC Components ............25 given below: TROUBLESHOOTING ............26 IMPORTANT. DO NOT make any connection to the SPECIFICATIONS .............
  • Seite 3: Connections

    CONNECTIONS CAUTION: Connecting Audio Equipment Do not plug the power cord of any component into AC outlets and do not turn their POWER switches on until all connections have been performed. AUDIO signal jacks The cable connectors should be fully inserted into the PHONO jacks jacks.
  • Seite 4: Connecting Video Equipment

    CONNECTIONS Notes: Connecting Video Equipment … When both the analog AUDIO IN (VIDEO 1/2) and DIGITAL IN (VIDEO 1/2) of the receiver are connected, signals input to the DIGITAL IN jack (VIDEO 1/2) have AUDIO signal jacks priority. … Connect the video deck (VCR) LINE output (AUDIO …...
  • Seite 5: Connecting The Pre Out Jacks

    Notes: Connecting the PRE OUT jacks … If a speaker is connected directly to the PRE OUT jack without an amplifier connected, no sound comes from the speaker. By connecting an external power amplifier, you can increase the number of available outputs and the output …...
  • Seite 6: Connecting The Video 3 Input Jacks

    CONNECTIONS Connecting the VIDEO 3 INPUT Jacks FM Outdoor Antenna In an area where FM signals are weak, it will be necessary to use a 75-ohm unbalanced-type outdoor FM antenna using the optional matching transformer, as shown. Generally, a 3-element antenna will be sufficient;...
  • Seite 7: Connecting Speaker Systems

    Connecting Speaker Systems AM (MW) Antenna AM Indoor Loop Antenna Caution: To avoid damaging the speakers by inputting a A high-performance AM loop antenna provided with the sudden high-level signal, be sure to switch the power receiver is sufficient for good reception in most areas. off before connecting the speakers.
  • Seite 8: Controls And Indicators

    CONTROLS AND INDICATORS Front Panel 7 8 9 0 e r t 2 o p Example: Example: – 8 –...
  • Seite 9 Remote Control Unit 1 Main POWER Switch and STANDBY/ON Button 2 FUNCTION (Source) Selector 3 SURROUND MODE Buttons 4 REMOTE SENSOR Window 5 Multi-Function Display 6 Numeric Keys 7 BAND Selector Button 8 FM MODE Button 9 TUNING /PRESET Buttons 0 BALANCE Control q MASTER VOLUME Control w LOUDNESS Button...
  • Seite 10: Audio Operations

    AUDIO OPERATIONS Note: Basic Operations The following points apply throughout the "AUDIO and VIDEO OPERATIONS" sections unless otherwise noted. To simplify explanations, instructions refer to names of buttons and controls on the front panel, making no mention of the use of remote control unit. To listen to a source other than TAPE 2 (tape deck), press the TAPE 2 MONITOR button to the OFF posi- tion (the TAPE...
  • Seite 11: Audio Adjustments

    Audio Adjustments Radio Reception Auto Tuning SOURCE DIRECT Source Indicators FUNCTION (Source) Selector FM MODE SPEAKERS BALANCE POWER BASS/TREBLE LOUDNESS STANDBY/ON Tone Controls POWER ON Main POWER switch and STANDBY/ON Button 1. Select the TUNER function. When the main POWER switch is ON: 2.
  • Seite 12 AUDIO OPERATIONS Direct Tuning Manual Tuning Using this method, the required frequency is input directly, using the numeric keys. FM MODE POWER ON Manual Tuning is generally used to tune to stations broadcasting a signal that is too weak to be received by Auto Tuning.
  • Seite 13: Preset Tuning

    Preset Tuning Manual Memory Presetting This facility is used to store FM, AM broadcasting from Channel 1 to 30 respectively. Automatic Memory Presetting 3 4,6 POWER ON 1. Select the TUNER function. 2. Select the AM or FM by pressing the BAND selector POWER ON button.
  • Seite 14: Rds (Radio Data System)

    AUDIO OPERATIONS (2) CT mode RDS (Radio Data System) When you select CT with the RDS MODE button, "CT" will blink for about 4 seconds. After 4 seconds, RDS is a broadcasting service which allows stations to the clock time will be displayed. send additional information along with the regular If there is no CT data among received broadcastings, radio program signal RDS services can be received...
  • Seite 15 CHILDREN children’s programs How to Search For Your Desired Program Using PTY Search SOCIAL-A social affairs RELIGION religious programs POWER ON PHONE-IN program in which the public expresses its view by phone travel reports TRAVEL programs concerning recreational activities HOBBIES jazz music JAZZ COUNTRY country music...
  • Seite 16 AUDIO OPERATIONS Playing TAPE 2 Deck Listening to Records and Compact Discs PHONO or CD TAPE Indicator Lit Indicator Lit POWER ON Turntable POWER ON Tape Deck 2 CD Player 1. Set the TAPE 2 MONITOR button to ON; the TAPE monitor indicator will appear in the display.
  • Seite 17: Recording A Source

    Recording a Source Dubbing from TAPE 2 to MD/TAPE 1 Recording program source You can record a program source such as a record or TAPE Indicator Lit Compact Disc onto a cassette deck connected to the TAPE 2 REC jacks. TAPE 2 MONITOR OFF Source Indicators Lit...
  • Seite 18: Video Operations

    VIDEO OPERATIONS Playing Video Sources Recording with a Video Deck Note: Tape Dubbing (from VIDEO 1, VIDEO 2 or For playing video software using a certain Surround VIDEO 3 to VIDEO 4) Effect function, refer to the SURROUND EFFECTS section. TAPE 2 MONITOR OFF : Video signals : Audio signals...
  • Seite 19: Surround Effects

    SURROUND EFFECTS When you use the surround function, the sound creates The main feature of DOLBY PRO LOGIC SURROUND is a “live” atmosphere such as that experienced in movie that the separation between the various channels is theaters, disco, stadium and concert halls. significantly improved from the 3 dB of previous systems to 26-40 dB.
  • Seite 20: Center Speaker

    SURROUND EFFECTS Speaker Positioning Speaker Configuration The installation positions of speakers differ according to the size, and acoustics of the listening room. While actually listening to a program source, try various speaker positions to determine which layout provides the best surround effect. Speaker layout example when using SURROUND MODE POWER ON...
  • Seite 21 Delay Time/Effect Channel Level 1, 2 POWER ON POWER ON 1. The delay time can be simultaneously set for the Test tones are automatically emitted from the different DOLBY DIGITAL/DOLBY PRO LOGIC modes using the speakers. Listen to the test tone and adjust the volume DELAY TIME (¶/§) buttons.
  • Seite 22: Playing Surround Sound

    BACK-UP SYSTEM SURROUND EFFECTS Playing Surround Sound Back-up Memory Function This is the function which preserves the preset memory and most-recent memory functions. In the NIGHT MODE event of a power failure, or if the power cord of this unit is disconnected from the electric outlet, the back- up memory will preserve the preset memory and most-recent memory functions for as long as approximately 3 days.
  • Seite 23: Remote Control Unit

    Using the Remote Control Unit Battery Installation By using the provided remote control unit, the receiver and some other TEAC components used with it can be controlled from your listening position. To use the remote control unit, point it at the REMOTE SENSOR window of the receiver (or other TEAC component).
  • Seite 24: Teac System Remote-Controlled Operation

    Remote Control Unit Remote Control Unit Remote Control Unit Provided with Receiver As shown, if the other TEAC components have REMOTE SENSOR windows, the provided Remote Control Unit can remotely control the operations of these other components directly, in addition to the remote control of the receiver.
  • Seite 25: Buttons For The Operation Of Other Teac Components

    1 CD SYNC button Buttons for the Operation of Other TEAC When this receiver is used in a system with a TEAC Components CD Player and a TEAC cassette deck (with full-logic control), it is possible to synchronize the operations...
  • Seite 26: Troubleshooting

    TROUBLESHOOTING To determine any problem with your receiver, always check the most obvious possible causes first. If any problem still remains after you have checked the items below, consult your nearest TEAC dealer. Problem Probable Cause Remedy Amplifier When listening to the music in stereo, Speakers are connected wrongly.
  • Seite 27: Specifications

    SPECIFICATIONS Amplifier Section AM Tuner Section Output Power (Front): Tuning Range: RMS Power (40 Hz – 20 kHz): 522 kHz – 1,620 kHz (9 kHz steps) 130 watts/8 ohms, 0.09% Usable Sensitivity: 55 dB/m Surround Output Power (0.5 % THD, 1 kHz, 8 ohms): Total Harmonic Distortion: 0.8% at 85 dB/m 100 + 100 watts (Front) Signal-to-Noise Ratio: 45 dB at 85 dB/m...
  • Seite 28: Avant Utilisation

    TÉLÉCOMMANDE .............49 Utilisation de la télécommande ........49 Mise en place des piles ..........49 FONCTIONNEMENT TÉLÉCOMMANDÉ D'UNE CHAÎNE TEAC ............50 En utilisant un lecteur CD ou une platine à cassette avec une fenêtre REMOTE SENSOR............50 Touches pour le fonctionnement d'autres appareils TEAC ..........
  • Seite 29: Raccordements

    RACCORDEMENTS Attention: Raccordement de matériel audio … Ne pas brancher le cordon d'alimentation de l'un des composants sur les sorties CA et ne pas mettre leurs interrupteurs POWER sur marche tant que tous les Prises de signal AUDIO raccordements n'ont pas été effectués. Prises PHONO …...
  • Seite 30: Raccordements De Matériel Vidéo

    RACCORDEMENTS Remarques: Raccordement de matériel vidéo … Quand à la fois AUDIO IN analogique (VIDEO 1/2) et DIGITAL IN (VIDEO 1/2) du récepteur sont raccordés, les signaux entrant par la prise DIGITAL IN (VIDEO 1/2) Prises de signal AUDIO ont priorité. …...
  • Seite 31: Raccordement Des Prises Pre Out

    Remarques: Raccordement des prises PRE OUT … Si un haut-parleur est raccordé directement à la prise PRE OUT sans amplificateur, aucun son ne sort du haut-parleur. En raccordant un amplificateur de puissance externe, vous pouvez augmenter le nombre de sorties …...
  • Seite 32: Raccordement Des Prises Video 3 Input

    RACCORDEMENTS Antenne FM extérieure Raccordement des prises VIDEO 3 INPUT Dans une région où les signaux FM sont faibles, il sera nécessaire d’utiliser une antenne FM extérieure asymétrique 75 ohms en utilisant le transformateur d’adaptation en option, comme montré. En général, une antenne à...
  • Seite 33: Raccordement D'enceintes Acoustiques

    Raccordement d'enceintes acoustiques Antenna AM (MW) Antenne-cadre intérieure AM Attention: Pour éviter des dommages potentiels des haut-parleurs L'antenne cadre AM haute performance, fournie avec le causés par une entrée soudaine d'un signal de niveau récepteur permet une très bonne réception dans la plu- élevé, bien couper l'alimentation avant de raccorder les part des régions.
  • Seite 34: Commandes Et Indicateurs

    COMMANDES ET INDICATEURS Panneau avant 7 8 9 0 e r t 2 o p Exemple: Exemple: – 34 –...
  • Seite 35: Boîtier De Télécommande

    Boîtier de télécommande 1 Interrupteur d'alimentation secteur (POWER) et touche d'attente/mise en marche (STANDBY/ON) 2 Sélecteur de source (FUNCTION) 3 Touches SURROUND MODE 4 Fenêtre de détection de télécommande (REMOTE SENSOR) 5 Affichage à fonctions multiples 6 Touches numériques 7 Touche de sélection de gamme (BAND) 8 Touche de mode FM (FM MODE) 9 Touches de syntonisation/préréglage (TUNING/PRESET)
  • Seite 36: Fonctionnement Audio

    FONCTIONNEMENT AUDIO Remarque: Fonctionnement de base Les points suivants s'appliquent à toutes les sections "FONCTIONNEMENT AUDIO et VIDEO" sauf indications contraires. Pour simplifier les explications, les instructions utilisent les noms des touches et commandes sur le panneau avant, sans mentionner l'utilisation de la télécommande.
  • Seite 37: Réception De La Radio

    Réglages audio Réception de la radio Syntonisation automatique SOURCE DIRECT Indicateurs de source FUNCTION Sélecteur de source FM MODE SPEAKERS BALANCE POWER BASS/TREBLE STANDBY/ON LOUDNESS POWER ON Commandes de tonalité Interrupteur d'alimentation secteur (POWER) et 1. Sélectionner la fonction TUNER. touche d'attente/mise en marche (STANDBY/ON) 2.
  • Seite 38 FONCTIONNEMENT AUDIO Syntonisation directe Syntonisation manuelle Avec cette méthode, la fréquence voulue est entrée directement en utilisant les touches numériques. FM MODE POWER ON La syntonisation manuelle est généralement utilisée pour syntoniser des stations diffusant un signal trop faible pour être reçues par la syntonisation automa- tique.
  • Seite 39: Syntonisation Préréglée

    Syntonisation préréglée Préréglage manuel de la mémoire Cette fonction est utilisée pour ranger des émissions FM, AM respectivement du canal 1 à 30. Préréglage automatique de la mémoire 3 4,6 POWER ON 1. Sélectionner la fonction TUNER. 2. Sélectionner AM ou FM en appuyant sur la touche POWER ON de sélection BAND.
  • Seite 40: Rds (Radio Data System)

    FONCTIONNEMENT AUDIO (2) Mode CT RDS (Radio Data System) Lorsque vous sélectionnez le mode CT à l’aide de la touche RDS MODE, l’indication "CT" clignote pen- Le RDS est un service de diffusion qui permet aux sta- dant environ 4 secondes. Au bout de 4 secondes, tions d'envoyer des informations complémentaires avec l‘heure sera affichée.
  • Seite 41 WEATHER Rapports, prévisions météo Comment chercher votre programme voulu en utilisant la recherche PTY Rapports financiers, commerce, affaires FINANCE CHILDREN Programmes pour les enfants POWER ON Affaires sociales SOCIAL-A Programmes religieux RELIGION PHONE-IN Programme dans lequel le public exprime ses opinions par téléphone. Rapports de voyage TRAVEL Programmes concernant des activités de...
  • Seite 42 FONCTIONNEMENT AUDIO Ecoute de disques ou de disques audio- Lecture de platine TAPE 2 numériques TAPE L'indicateur est allumé PHONO L'indicateur est allumé POWER ON Platine tourne-disque POWER ON Platine à cassette 2 Lecteur de disque audionumérique 1. Placer la touche TAPE 2 MONITOR sur ON; l'indica- teur de moniteur TAPE apparaîtra dans l'af- 1.
  • Seite 43: Enregistrement D'une Source

    Enregistrement d'une source Copie de TAPE 2 vers MD/TAPE 1 Enregistrement d'une source de programme Vous pouvez enregistrer une source de programme tel TAPE L'indicateur est allumé un disque ou un CD sur une platine à cassette branchée aux prises TAPE 2 REC. TAPE 2 MONITOR OFF Source L'indicateur...
  • Seite 44: Fonctionnement Vidéo

    FONCTIONNEMENT VIDÉO Lecture de sources vidéo Enregistrement avec un magnétoscope Remarque: Copie de bande (de VIDEO 1, VIDEO 2 ou Pour lire des programmes vidéo utilisant une certaine VIDEO 3 vers VIDEO 4) fonction d'effet Surround, se reporter à la section EFFETS SURROUND.
  • Seite 45: Effets Surround

    EFFETS SURROUND Lorsque vous utilisez la fonction surround, le son crée La principale caractéristique du surround DOLBY PRO une atmosphère "vivante" comme celle obtenue dans LOGIC est que la séparation entre les différents canaux les salles de cinéma ou les salles de concert. est améliorée de façon significative des 3 dB des systèmes précédents à...
  • Seite 46: Rear Speakers

    EFFETS SURROUND Disposition des enceintes acoustiques Configuration de haut-parleurs Les positions d'installation des enceintes diffèrent en fonction de la taille et de l'acoustique de la pièce d'écoute. Tout en écoutant réellement une source de programme, essayer différentes positions d'enceinte pour déterminer la disposition offrant le meilleur effet surround.
  • Seite 47 Durée de retard/effet Niveau de canal 1, 2 POWER ON POWER ON 1. La durée de retard peut être réglée simultanément Des tonalités test sont émises automatiquement des pour les modes DOLBY DIGITAL et DOLBY PRO différents haut-parleurs. Écouter la tonalité test et LOGIC en utilisant la touche DELAY TIME (¶/§).
  • Seite 48: Lecture De Son Surround

    SYSTÈME DE SOUTIEN EFFETS SURROUND Lecture de son Surround Fonction de mémoire de soutien C'est la fonction qui retient la mémoire des préréglages et les fonctions mémoire les plus récentes. Dans le cas NIGHT MODE d'une panne de courant, ou si le cordon d'alimentation de cet appareil est débranché...
  • Seite 49: Télécommande

    Utilisation de la télécommande Mise en place des piles En utilisant la télécommande fournie, l'amplificateur et certains autres appareils TEAC utilisés avec lui peuvent être commandés à partir de votre position d'écoute. Pour utiliser la télécommande, la pointer vers la fenêtre REMOTE SENSOR du récepteur (ou d'un autre appareil...
  • Seite 50: Fonctionnement Télécommandé D'une Chaîne Teac

    CD fourni avec le récepteur la platine à cassette Comme montré, si d'autres appareils TEAC ont des fenêtres REMOTE SENSOR, le boîtier de télécommande fourni peut télécommander directement le fonction- nement de ces autres appareils, en plus de la télécommande du récepteur.
  • Seite 51: Touches Pour Le Fonctionnement D'autres Appareils Teac

    Touches pour le fonctionnement d'autres Lorsque ce récepteur est utilisé dans une chaîne avec appareils TEAC un lecteur CD TEAC et une platine à cassette TEAC (avec des commandes entièrement logiques), il est possible de synchroniser les opérations du lecteur CD et de la platine à...
  • Seite 52: En Cas De Difficultés

    EN CAS DE DIFFICULTÉS Pour déterminer tout problème avec votre récepteur, toujours vérifier les causes les plus probables en premier. Si le problème persiste même après avoir vérifier les items suivants, consulter votre revendeur TEAC le plus proche. Problème Cause Probable Reméde...
  • Seite 53: Caractéristiques Techniques

    CARACTÉRISTIQUES TECHNIQUES Section amplificateur Section syntoniseur AM Puissance de sortie (Avant): Plage de syntonisation: Puissance RMS (40 Hz à 20 kHz): 522 kHz à 1.620 kHz (paliers de 9 kHz) 130 watts/8 Ω, 0,09% Sensibilité utilisable: 55 dB/m Puissance de sortie Surround Distorsion harmonique totale: 0,8% à...
  • Seite 54: Vor Inbetriebnahme

    FERNBEDIENUNGSEINHEIT ........... 75 Verwendung der mitgelieferten Fernbedienungseinheit..........75 Einlegen der Batterien..........75 BETRIEB MIT DER TEAC SYSTEM- FERNBEDIENUNG ............76 Verwendung eines CD-Players und eines Cassettendecks mit Infrarot-Sensor ......76 Tasten zur Steuerung weiterer TEAC Komponenten ........... 77 HILFE BEI DER FEHLERSUCHE........
  • Seite 55: Anschlüsse

    ANSCHLÜSSE VORSICHT: Anschluß von Audio-Komponenten Verbinden Sie das Gerät erst dann mit dem Stromnetz, bzw. schalten Sie es erst ein, wenn Sie AUDIO-Buchsen alle erforderlichen Anschlüsse vorgenommen haben. Phono-Eingang (PHONO) Alle Kabelstecker müssen vollständig bis zum Die Ausgangsbuchsen eines Schallplattenspielers mit Anschlag an den zugehörigen Buchsen den PHONO IN-Buchsen verbinden.
  • Seite 56: Anschluß Von Video-Komponenten

    ANSCHLÜSSE Hinweise: Anschluß von Video-Komponenten … Sind sowhol analoge (AUDIO IN (VIDEO 1/2)) als auch digitale (DIGITAL IN (VIDEO 1/2)) Eingänge des AUDIO-Buchsen Receivers belegt, hat der DIGITAL IN (VIDEO 1/2)- Eingang Vorrang. … Den Line-Ausgang des Videogeräts (LINE AUDIO …...
  • Seite 57: Vorverstärker-Ausgang (Pre Out)

    Hinweise: Vorverstärker-Ausgang (PRE OUT) … Wird ein Lautsprecher direkt an den PRE OUT- Buchsen angeschlossen (wenn kein externer Verstärker angeschlossen ist), werden keine Durch Anschluß eines externen Verstärkers können die Lautsprechersignale abgegeben. Anzahl der Ausgänge sowie die Ausgangsleistung erhöht werden. Bei Verwendung eines externen …...
  • Seite 58: Belegung Des Video 3-Eingangs (Video 3 Input)

    ANSCHLÜSSE Belegung des Video 3-Eingangs UKW-Außenantenne (VIDEO 3 INPUT) In einer Empfangslage mit schwacher UKW- Signalfeldstärke ist der Anschluß an eine 75-Ohm-UKW- Außenantenne unter Verwendung des optionalen Anpaßübertragers erforderlich. Im Normalfall ist eine Antenne mit 3 Elementen ausreichend. In einer Empfangslage mit besonders schwachem Empfang kann eine Antenne mit 5 oder mehr Elementen erforder- lich sein.
  • Seite 59: Am Außen-Antenne

    Lautsprecheranschluß (MW) AM Antenne AM Rahmen-Antenne Vorsicht: Vor dem Anschluß der Lautsprecherkabel unbedingt das Im Lieferumfang des Receivers befindet sich eine Gerät ausschalten. Andernfalls können die Lautsprecher Hochleistungs-Mittelwellen-Innenantenne, die in fast durch Kontaktgeräusche etc. beschädigt werden. allen Empfangssituationen ausreichend sein sollte. Verbinden Sie die Anschlüsse der Antenne mit den Die Lautsprecherkabel jeweils wie erforderlich an der Klemmbuchsen am Gerät (siehe Abbildung).
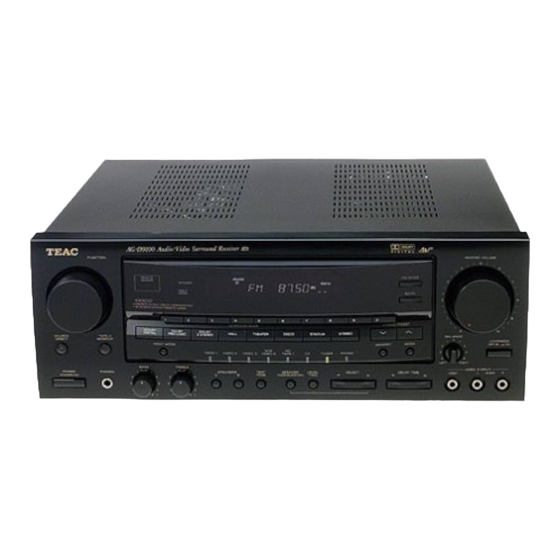
  • Seite 60: Anzeige-Und Bedienungselemente

    ANZEIGE-UND BEDIENUNGSELEMENTE Geräte-Vorderseite 7 8 9 0 e r t 2 o p Beispiel: Beispiel: – 60 –...
  • Seite 61 Fernbedienung 1 Bereitschafts-/Betriebstaste (POWER STANDBY/ON) 2 Programmquellen-Wähler (FUNCTION) 3 SURROUND MODUS-Tasten 4 Fernbediensignalsensor (REMOTE SENSOR) 5 Mehrfachanzeige-Displayfeld 6 Numerische Tasten 7 Taste zur Wahl des Empfangsbereichs (BAND) 8 UKW-Betriebsart-Taste (FM MODE) 9 Abstimm-/Preset-Tasten (TUNING/PRESET) 0 BALANCE-Taste q Lautstärkeregler (MASTER VOLUME) w LOUDNESS-Taste e Programmquellen-Direktschaltungstaste (SOURCE DIRECT)
  • Seite 62: Audio-Betriebsarten

    AUDIO-BETRIEBSARTEN Hinweis: Grundfunktionen Folgendes gilt, sofern nicht ausdrücklich anders beschrieben, in den Beschreibungen der AUDIO- und VIDEO-BETRIEBSARTEN: Zur Vereinfachung von Anweisungen und Erklärungen werden die Bezeichnungen der Bedienungselemente des Receivers verwendet, ohne auf die korrespondierenden Tasten der Fernbedienung näher einzugehen. Soll eine andere Signalquelle als TAPE 2 (Cassettendeck) gehört werden, die TAPE 2 MONITOR-Taste drücken (OFF), so daß...
  • Seite 63: Hörfunk-Empfang

    Allgemeine Audio-Einstellungen Hörfunk-Empfang Auto-Tuning SOURCE DIRECT Programmquellenanzeigen FUNCTION Programmquellenwähler FM MODE SPEAKERS BALANCE POWER BASS/TREBLE LOUDNESS Bereitschaft/Ein Klangregler GERÄT IST EINGESCHALTET Netzschalter (POWER) und Betriebstaste (STANDBY/ON) 1. Die TUNER-Programmquelle anwählen. Nach Einschaltung (ON) mit Taste POWER: 2. Mit der BAND-Taste den Empfangsbereich (AM oder Mit Taste STANDBY/ON die Betriebsspannung FM) einstellen.
  • Seite 64: Manuelle Senderabstimmung

    AUDIO-BETRIEBSARTEN Direkt-Tuning Manuelle Senderabstimmung Bei dieser Methode der Senderabstimmung wird die gewünschte Empfangsfrequenz direkt, mittels der FM MODE numerischen Tastatur, eingegeben. GERÄT IST EINGESCHALTET Generell kommt das manuelle Abstimmen dann zum Einsatz, wenn die Sendeleistung des betreffenden Senders für die Auto-Tuning-Funktion nicht ausrei- chend ist.
  • Seite 65: Preset-Tuning

    Preset-Tuning Manuelle Preset-Abspeicherung UKW- und MW-Sender können auf den Speicherplätzen 1 bis 30 abgespeichert werden. Automatische Preset-Abspeicherung 3 4, 6 GERÄT IST EINGESCHALTET 1. Die TUNER-Programmquelle anwählen. 2. Mit der BAND-Taste auf UKW- oder MW-Empfang GERÄT IST schalten. EINGESCHALTET 3. Mit der MODE-Taste auf den TUNING-Modus schal- ten.
  • Seite 66: Rds (Radio Data System)

    AUDIO-BETRIEBSARTEN (2) CT Modus RDS (Radio Data System) Nachden Sie mittels der RDS-MODE Taste die Betriebsart CT angewählt haben, blinkt "CT" ca. 4 RDS ist ein Sendeservice, mit dem Sender Sekunden im Display. Nach 4 Sekunden wird die programmbegleitende Signaldaten ausstrahlen. Das Uhrzeit angezeigt.
  • Seite 67: Senderwahl Mit Dem Pty-Suchlauf

    Soziale Themen SOCIAL-A Senderwahl mit dem PTY-Suchlauf Religiöse Sendungen RELIGION GERÄT IST PHONE-IN Telefonumfragen EINGESCHALTET Reisereportagen TRAVEL Freizeitprogramme HOBBIES Jazz JAZZ Country-Musik COUNTRY NATION-M Einheimische Musik Oldies-Hitparaden etc. OLDIES 1. Die TUNER-Programmquelle anwählen. Volksmusik FOLK-M 2. Mit Taste BAND auf UKW-Empfang schalten. Dokumentationen DOCUMENT 3.
  • Seite 68 AUDIO-BETRIEBSARTEN Wiedergabe von Schallplatten und CD's Wiedergabe vom Cassettendeck 2 (TAPE 2) PHONO- oder TAPE Anzeige leuchtet Anzeige leuchtet GERÄT IST Plattenspieler GERÄT IST EINGESCHALTET EINGESCHALTET oder Cassetten- deck 2 CD-Player 1. Die TAPE 2 MONITOR-Taste drücken (ON). Die TAPE 1.
  • Seite 69: Aufnahme Einer Programmquelle

    Aufnahme einer Programmquelle Überspielen von TAPE 2 auf MD/TAPE 1 Aufnahme einer Programmquelle TAPE Eine Programmquelle wie Schallplatte oder CD kann Anzeige leuchtet auf einem an den TAPE 2 REC-Buchsen angeschlosse- nen Cassettendeck aufgenommen werden. TAPE 2 MONITOR ausgeschaltet Leuchtende Programmquellenanzeige GERÄT IST EINGESCHALTET Aufnahme...
  • Seite 70: Video-Betriebsarten

    VIDEO-BETRIEBSARTEN PRE- Wiedergabe von Videoaufzeichnungen Aufnahmen mit einem Videorecorder Hinweis: Überspielbetrieb (von VIDEO 1, VIDEO 2 Nähere Erläuterungen zur Verwendung eines Surround oder VIDEO 3 auf VCR/VIDEO 4) Effektes, bei der Wiedergabe von Videoaufzeichnungen oder anderer Video-Komponenten, finden Sie im TAPE 2 MONITOR : Videosignale Abschnitt bezüglich SURROUND EFFEKTE.
  • Seite 71: Surround Effekte

    SURROUND EFFEKTE Mit dem Surround Sound-System kann ein besonders Modus liefert ein besonders intensives Klangerlebnis im dynamisches und plastisches Klangbild, wie in einem DOLBY PRO LOGIC SURROUND-Modus, der ein dreidi- Kino, einer Disco, einem Stadion oder in einer mensionales Klangfeld erzeugt. Konzerthalle, erzielt werden.
  • Seite 72: Center-Lautsprecher

    SURROUND EFFEKTE Lautsprecher-Plazierung Lautsprecherkonfiguration Die korrekte Plazierung der Lautsprecher hängt von der Größe des Raumes und von dessen akustischen Eigenschaften ab. Probieren Sie verschiedene Aufstellpositionen aus und spielen Sie dabei eine Surround Sound-Programmquelle ab, um die best- geeignete Aufstellung zu erzielen. Beispiel für Lautsprecher-Plazierung bei Betrieb im Surround-Modus GERÄT IST...
  • Seite 73: Speaker Configuration

    Vorsicht 2. Im allgemeinen Surround-Modus (HALL, THEATER, DISCO, STADIUM) kann die EFFEKT-Einstellung Erfolgt innerhalb von 5 Sekunden nach Drücken der beliebig vorgenommen werden. EFFEKT verweist hier SPEAKER CONFIGURATION-Taste kein Bedienschritt, auf Klangstärke und räumliche Weite des Klangfeldes. schaltet das Gerät erneut auf die Programmquelle Der EFFEKT-Bereich reicht von “1 —...
  • Seite 74: Wiedergabe Mit Surround Sound

    GANGRESERVE-SYSTEM SURROUND EFFEKTE Wiedergabe mit Surround Sound Gangreserve-Speicher NIGHT MODE Die Preset-Abspeicherungen und die weiteren jeweils NACHT MODUS aktuellen abgespeicherten Einstellungen werden vor Löschung geschützt, falls ein Stromausfall auftritt oder das Netzkabel abgezogen wird. Dieser Gangreserve- speicher arbeitet für bis zu ca. 3 Tage. Vermeidung der Speicherdatenlöschung Falls für mehr mindestens 3 Tage keine Spannungsversorgung am Gerät anliegt, werden alle...
  • Seite 75: Fernbedienungseinheit

    FERNBEDIENUNGSEINHEIT Verwendung der mitgelieferten Einlegen der Batterien Fernbedienungseinheit Die mitgelieferte Fernbedienungseinheit ist zur Fernbedienung des Verstärkers und weiterer TEAC- Komponenten geeignet. Bei Verwendung die Fernbedienungseinheit stets auf das REMOTE SENSOR-Fenster des Receivers bzw. der zusätzlichen TEAC-Komponente ausrichten. REMOTE SENSOR-Fenster am Receiver oder einer zusätzlichen TEAC-...
  • Seite 76: Betrieb Mit Der Teac System-Fernbedienung

    Fernbedienung Fernbedienung Cassettendecks des CD-Players (zum Receiver mitgeliefert) Da alle hier dargestellten TEAC-Geräte REMOTE SENSORen besitzen, kann die mitgelieferte Fernbedienung zur Steuerung des Receivers und der anderen Komponenten benutzt werden. Wenn Sie zur Steuerung weiterer Geräte, zusätzliche, nicht von der Fernbedieneinheit des Receivers zur Verfügung gestellte...
  • Seite 77: Tasten Zur Steuerung Weiterer Teac Komponenten

    Tasten zur Steuerung weiterer TEAC Wird in Ihrem System, zusätzlich zum Receiver, ein Komponenten TEAC CD-Player und ein TEAC Cassettendeck (mit kompletter Logik Steuerung) eingesetzt, dann ist es möglich diese beiden Geräte so zu synchronisieren, damit sie bei der Überspielung einer CD exakt gle- ichzeitig starten.
  • Seite 78: Hilfe Bei Der Fehlersuche

    Sollten Sie einmal eine Fehlfunktion an Ihrem Receiver feststellen, überprüfen Sie bitte zunächst die naheliegenste Ursache. Sollte das Problem nach einer Überprüfung, anhand der folgenden Aufstellung, nach wie vor auftreten, wen- den Sie sich bitte an Ihren TEAC-Händler. Problem Mögliche Ursache Abhilfe Verstärker...
  • Seite 79: Technische Daten

    TECHNISCHE DATEN Verstärkerteil MW-Empfangsteil Ausgangsleistung (vordere Lautsprecher): Empfangsbereich: Eff. Leistung (40 Hz bis 20 kHz): 522 kHz – 1620 kHz (9-kHz-Schritte) 130 Watt/8 Ohm, 0,09 % Nutzbare Empfindlichkeit: 55 dB/m Surround Sound-Ausgangsleistung (0,5 % Klirrfaktor, Klirrfaktor: 0,8 % an 85 dB/m 1 kHz, 8 Ohm): Signal/Rausch-Abstand: 45 dB an 85 dB/m 100 + 100 Watt (vorne)
  • Seite 80: Prima Dell'uso

    Installazione batterie..........101 AZIONAMEMTO TELECOMANDATO CON SISTEMA TEAC............. 102 Utilizzo di un lettore di CD e di un registratore con finestra REMOTE SENSOR..............102 Tasti per azionare altri apparecchi TEAC....103 RICERCA GUASTI ............104 DATI TECNICI ..............105 – 80 –...
  • Seite 81: Collegamento Di Altri Apparecchi Audio

    COLLEGAMENTI ATTENZIONE: Collegamento di altri apparecchi audio … Non inserire il cavo di alimentazione di qualsiasi ele- mento del sistema in una presa di rete AC e non atti- Prese dei segnali audio (AUDIO) vare l'interruttore POWER fino a quando siano stati Prese di ingresso per il giradischi (PHONO) effettuati tutti i collegamenti.
  • Seite 82: Digital In (Video 1, Video 2)

    COLLEGAMENTI Note: Collegamento di apparecchi video … Nel caso in cui siano stati effettuati i collegamenti alle prese sia analogiche (AUDIO IN (VIDEO 1/2)) sia digi- tali (DIGITAL IN (VIDEO 1/2)) del sintoamplificatore, i Prese per i segnali audio (AUDIO) segnali in ingresso alla presa digitale DIGITAL IN …...
  • Seite 83 Note: Collegamento delle prese PRE OUT … Nel caso in cui un altoparlante si trovi collegato alla presa PRE OUT senza essere stato collegato ad un Collegando un amplificatore esterno, si può aumentare amplificatore, da quell’altoparlante non proviene il numero di uscite disponibili ed i livelli di uscita. Se si alcun suono.
  • Seite 84 COLLEGAMENTI Collegamento delle prese di ingresso video Antenna FM esterna VIDEO 3 INPUT In un'area con segnali FM deboli, sarà necessario utiliz- zare un'antenna FM esterna non bilanciata da 75 ohm tramite un trasformatore opzionale di adattamento come indicato. Generalmente, un'antenna a 3 elementi sarà...
  • Seite 85 Antenna AM (MW) Collegamento dei sistemi di altoparlanti Antenna AM interna a telaio Attenzione Per evitare di danneggiare i diffusori con segnale di liv- L'antenna AM a telaio di elevate prestazioni, in ello eccessivo, prima di collegarli spegnere il sistema. dotazione al Sintonizzatore, è...
  • Seite 86: Controlli E Indicatori

    CONTROLLI E INDICATORI Pannello frontale 7 8 9 0 e r t 2 o p Esempio: Esempio: – 86 –...
  • Seite 87 Unità de telecomando 1 Interruttore principale di alimentazione (POWER) e tasto di attesa e attivazione (STANDBY/ON) 2 Selettore della sorgente (FUNCTION) 3 Tasti suono ambientale (SURROUND MODE) 4 Sensore dei segnali del telecomando (REMOTE SENSOR) 5 Quadrante a visualizzazioni multiple 6 Tasti numerici 7 Selettore di gamma (BAND) 8 Tasto FM (FM MODE)
  • Seite 88 AZIONAMENTI AUDIO Nota: Azionamenti di base Quanto affermato nei due punti che seguono vale per i paragrafi completi degli "AZIONAMENTI AUDIO e VIDEO", salvo diversamente indicato. Per semplificare la descrizione, le istruzioni fanno riferimento al nome del tasti e dei controlli sul pan- nello anteriore, senza alcun accenno all'utilizzo del telecomando.
  • Seite 89 Regolazioni audio Ricezione radio SOURCE DIRECT Sintonia automatica FUNCTION Selettore della sorgente Indicazioni della (FUNCTION) sorgente FM MODE SPEAKERS BALANCE POWER STANDBY/ON BASS/TREBLE LOUDNESS (Interruttore di Comandi della tonalità POWER ON accensione) Interruttore principale di alimentazione (POWER) 1. Selezionare la funzione del sintonizzatore. e tasto di attesa e attivazione (STANDBY/ON) 2.
  • Seite 90 AZIONAMENTI AUDIO Sintonia diretta Sintonia manuale Con questo sistema, la frequenza richiesta viene impostata direttamente, tramite i tasti numerici. FM MODE POWER ON Si utilizza di solito la sintonia manuale per localizzare le emittenti che inviano un segnale troppo debole per essere captato dalla sintonia automatica.
  • Seite 91 Sintonizzazione a predisposizione Predisposizione manuale della memoria Questa funzione è usata per la memorizzazione delle stazioni FM o AM nei canali da 1 a 30. Predisposizione automatica della memoria 3 4,6 POWER ON 1. Selezionare la funzione del sintonizzatore. 2. Agire sul tasto di selezione BAND e selezionare AM POWER ON o FM.
  • Seite 92 AZIONAMENTI AUDIO Dopo 4 secondi, verrà visualizzato PS oppure il nome RDS (Radio Data System) dell'emittente. Il sistema RDS è un sistema di trasmissione che con- (2) Modo CT sente alle stazioni di trasmettere anche altre infor- Quando si seleziona questa funzione con il tasto RDS mazioni addizionali insieme al normale programma MODE, lampeggerà...
  • Seite 93 informazioni di carattere finanziario e com- FINANCE Come ricercare il programma desiderato merciale per mezzo della riceraca PTY CHILDREN programmi per bambini affari sociali SOCIAL-A POWER ON programmi religiosi RELIGION PHONE-IN programmi in cui il pubblico esprime le pro- prie opinioni per telefono informazioni su viaggi TRAVEL programmi relative ad attività...
  • Seite 94 AZIONAMENTI AUDIO Ascolto di dischi e CD Riproduzione del deck TAPE 2 PHONO o Indicazione TAPE Indicazione illuminata illuminata POWER ON POWER ON Giradischi Registratore 2 Lettore di CD Disporre il tasto TAPE 2 MONITOR su ON. Sul quad- rante compare l’indicazione TAPE 1.
  • Seite 95: Registrazione Di Una Sorgente

    Registrazione di una sorgente Duplicazione da TAPE 2 a MD/TAPE 1 Sorgente del programma da registrare Su un deck a cassette eventualmente collegato alle TAPE Indicazione prese TAPE 2 REC, si può procedere alla registrazione illuminata di un sorgente sonora quale un disco, o un compact disc, o altro.
  • Seite 96 AZIONAMENTI VIDEO Riproduzione da sorgenti video Registrazione tramite VIDEO Nota: Duplicazione di un nastro (da VIDEO 1, Per riprodurre software video utilizzando una determi- VIDEO 2 o VIDEO 3 a VIDEO 4) nata funzione con effetto Surround, riferirsi al para- grafo "EFFETTI SURROUND".
  • Seite 97 EFFETTI SURROUND Utilizzando la funzione di suono avvolgente, il suono Suono avvolgente DOLBY PRO LOGIC riprodotto crea una atmosfera "dal vivo", quale quella ottenuta nelle sale cinematografiche, nelle discoteche, Usare questa modalità quando si riproducono film o negli stadi o nelle sale da concerto. video con musica, che riportino il contrassegno ∂...
  • Seite 98 EFFETTI SURROUND Per ottenere i migliori risultati, installaregli Suono avvolgente tipo stadio (STADIUM) altoparlanti posteriori ad un livello più alto rispetto alle orecchie dell’ascoltatore, e La riverberazione di questa modalità produce un non troppo ritratti rispetto alla posizione campo sonoro che ricrea il suono di uno stadio. di ascolto.
  • Seite 99: Livello Del Canale

    Uscita del subwoofer assorbimento o riflessione del suono da parte delle pareti, dei mobili e di altre suppellettili. Si consiglia di SUB-ON: Da selezionare quando si fa uso di un provare vari valori di ritardo del suono, sino ad individ- subwoofer con amplificatore separato.
  • Seite 100: Night Mode

    SISTEMA DI APPOGGIO EFFETTI SURROUND Note: Funzione di appoggio della memoria Nel caso in cui non si utilizzino certi altoparlanti (ad esempio, l’altoparlante centrale), il sequenziatore del Questa funzione consente di conservare le predispo- rumore provvede a saltare automaticamente quel canale.
  • Seite 101 UNITÀ DI TELECOMANDO Uso dell'unità di telecomando Installazione batterie L'amplificatore ed altri componenti TEAC possono essere comandati dalla posizione di ascolto per mezzo dell'unità di telecomando. Per utilizzare l'unità di telecomando, puntarla verso la finestrella REMOTE SENSOR dell'amplificatore (o di un altro componente TEAC).
  • Seite 102 Telecomando lettore CD fornito con il sintonizzatore registratore Come risulta dalla figura, se altri apparecchi TEAC sono muniti di finestra REMOTE SENSOR, il telecomando in dotazione può controllarli a distanza direttamente, in aggiunta al controllo del sintonizzatore. Se questi apparecchi necessitano di altre funzioni, oltre a quelle di base comandate dal telecomando "UR", utilizzare le...
  • Seite 103 1 Tasto CD SYNC Tasti per azionare altri apparecchi TEAC Quando questo sintonizzatore viene utilizzato in combinazione con un lettore di CD TEAC e un regis- tratore TEAC (con controllo full logic) è possibile sin- cronizzare il funzionamento di questi due apparecchi in modo che possano partire esattamente allo stesso istante per copiare un CD su nastro.
  • Seite 104: Ricerca Guasti

    RICERCA GUASTI Per risolvere qualsiasi problema su questo apparecchio, in primo luogo verificare sempre le cause più ovvie. Se il problema non rientra nei casi qui elencati, rivolgersi al rappresentante TEAC. Problema Causa probabile Rimedio Amplificator Ascoltando musica stereo, il suono...
  • Seite 105: Dati Tecnici

    DATI TECNICI Sezione dell'amplificatore Sezione del sintonizzatore AM Potenza in uscita (anteriore): Gamma di sintonizzazione: Potenza RMS (da 40 Hz a 20 kHz): Da 522 kHz a 1.620 kHz (a scatti di 9 kHz) 130 watt ad 8 ohm, distors. arm. tot. dello 0,09% Sensibilità...
  • Seite 106: Previo Al Empleo

    OPERACION POR CONTROL REMOTO SISTEMA TEAC.............. 128 Empleando un reproductor de CD y una platina de cassette con ventanilla REMOTE SENSOR............. 128 Botones para la operación de otros componentes TEAC ..........129 LOCALIZACION DE AVERIAS ........130 ESPECIFICACIONES ............131 – 106 –...
  • Seite 107: Conexión Del Equipo De Audio

    CONEXIONES AVISO: Conexión del equipo de audio No enchufe el cable de corriente de ningún compo- nente en una toma de alimentación y no lo enchufe hasta que todas las conexiones hayan sido realizadas. Jacks de señal AUDIO Los cables conectores deben estar completamente Jacks PHONO insertados en los jacks.
  • Seite 108: Jacks Ac-3/Pcm Digital In (Video 1, Video 2)

    CONEXIONES Notas: Conexión del equipo de video … Cuando ambas entradas, la analógica AUDIO IN (VIDEO 1/2) y la DIGITAL IN (VIDEO 1/2) del receptor Jacks de señal AUDIO están conectadas, las señales que ingresan al jack DIGITAL IN (VIDEO 1/2) tienen prioridad. …...
  • Seite 109 Notas: Conexión de los jacks PRE OUT … Si un altavoz está conectado directamente al jack PRE OUT sin un amplificador conectado, el altavoz no emitirá ningún sonido. Conectando un amplificador de potencia externa, usted puede incrementar el número de salidas disponibles y …...
  • Seite 110: Conexión De Antenas

    CONEXIONES Antena externa de FM Conexión de los jacks VIDEO 3 INPUT En áreas con señales de FM débiles, es necesario uti- lizar una antena de FM al aire libre de tipo asimétrica de 75 ohmios, utilizando el transformador de adaptación opcional como se musestra.
  • Seite 111 Conexión de sistemas de altavoces Antena AM (MW) Antena AM de cuadro Precaución: Evite dañar los altavoces con la entrada súbita de una La antena de cuadro de AM de altas prestaciones sum- señal de alto nivel, asegúrese de desconectar la ali- inistrada con el receptor es suficiente para una buena mentación antes de conectar los altavoces.
  • Seite 112: Mandos E Indicadores

    MANDOS E INDICADORES Panel frontal 7 8 9 0 e r t 2 o p Ejemplo: Ejemplo: – 112 –...
  • Seite 113 Control remoto 1 Conmutador principal POWER y botón STANDBY/ON 2 Selector FUNCTION (Fuente) 3 Botones SURROUND MODE 4 Ventanilla REMOTE SENSOR 5 Indicación multifuncional 6 Teclas numéricas 7 Botón selector BAND 8 Botón FM MODE 9 Botones TUNING/PRESET 0 Mando BALANCE q Mando MASTER VOLUME w Botón LOUDNESS e Botón SOURCE DIRECT...
  • Seite 114 OPERACIONES DE AUDIO Nota: Funcionamiento básico Los siguientes puntos se aplican a las secciones de "OPERACIONES DE AUDIO y VIDEO" a menos que se indique lo contrario. Para simplificar las explicaciones e instrucciones, refiérase a los nombres de los botones y mandos en el panel frontal, sin preocuparse por el control remo- Para escuchar una fuente que no sea TAPE 2 (platina de cinta), presione el botón TAPE 2 MONITOR a la...
  • Seite 115 Ajustes de audio Recepción de radio Sintonización automática SOURCE DIRECT SOURCE Indicadores FUNCTION de fuente Selector (Fuente) FM MODE SPEAKERS BALANCE ALIMENTACION BASS/TREBLE LOUDNESS STANDBY/ON Controles de tono (En espera/Activado) POWER ON Conmutador principal POWER y botón STAND- BY/ON 1. Seleccione la función de sintonizador. Cuando el conmutador principal POWER está...
  • Seite 116 OPERACIONES DE AUDIO Sintonización directa Sintonización manual Con este método es necesario ingresar la frecuencia deseada directamente con las teclas numéricas. FM MODE POWER ON La sintonización manual es generalmente empleada para sintonizar radiodifusoras con una señal demasiado débil para ser recibida por la sintonización automática. 1.
  • Seite 117 Sintonización preajustada Preajuste manual de memoria Esta función es empleada para almacenar radiodifuso- ras de FM y AM en el canal 1 a 30 respectivamente. Preajuste de memoria automática 3 4,6 POWER ON 1. Seleccione la función de sintonizador. 2. Seleccione AM o FM presionando el botón selector BAND.
  • Seite 118 OPERACIONES DE AUDIO (2) Modo CT Cuando selecciona CT con el botón RDS MODE, "CT" parpadeará durante 4 segundos aprox. Después de 4 El servicio de radiodifusión con radiodifusoras que segundos la hora del reloj será indicada. envían información adicional conjuntamente con los Si no hay datos CT en las radiodifusiones recibidas, servicios RDS de señales de programas normales aparecerá...
  • Seite 119 CHILDREN programas infantiles Método para buscar el programa deseado utilizando la búsqueda PTY asuntos sociales SOCIAL-A programas religiosos RELIGION POWER ON PHONE-IN programa de opinión pública por teléfono informes de viaje TRAVEL programas acerca de actividades recreativas HOBBIES música de jazz JAZZ música "country"...
  • Seite 120 OPERACIONES DE AUDIO Para escuchar discos o discos compactos Platina de reproducción TAPE 2 PHONO Indicador TAPE Indicador iluminado iluminado POWER ON Tocadiscos POWER ON Platina de cinta 2 Reproductor de CD 1. Ajuste el botón TAPE 2 MONITOR en ON; el indi- 1.
  • Seite 121 Grabación de una fuente Copia de TAPE 2 a MD/TAPE 1 Grabación de una fuente de programa TAPE Indicador Usted puede grabar una fuente de programa tal como iluminado un disco o disco compacto en la platina de cassette conectada a los jacks TAPE 2 REC. TAPE 2 MONITOR OFF Monitor desactivado de la cinta 2 SOURCE...
  • Seite 122 OPERACIONES DE VIDEO Reproducción de fuentes de video Grabación con una platina de video Nota: Copia de cinta (de VIDEO 1, VIDEO 2 ó Para reproducir software de video empleando ciertas VIDEO 3 a VIDEO 4) funciones de difusión de sonido, refiérase a la sección DIFUSION DE SONIDO.
  • Seite 123 DIFUSION DE SONIDO Cuando emplea la función de difusión de sonido, el Difusión de sonido DOLBY PRO LOGIC sonido crea una atmósfera "viva" tal como la de salas de cine, discotecas, estadios y salas de conciertos. Emplee este modo cuando reproduce una película o software de video musical que tenga la marca ∂...
  • Seite 124 DIFUSION DE SONIDO Para mejores resultados, no Difusión de sonido STADIUM instale los altavoces traseros demasiado atrás de la posición La reverberación de este modo produce un campo de de escucha y coloquélos sobre el sonido que recrea el sonido de un estadio. nivel de los oídos del oyente.
  • Seite 125: Dolby Digital

    Salida SUBWOOFER Se recomienda intentar diferentes tiempos de retardo SUB-ON: Para emplear un altavoz auxiliar de para obtener el mejor efecto. El retardo es sintetizado graves potentes. digitalmente para la mayor calidad de sonido con inter- SUB-OFF: Los graves del canal LFE y de los canales ferencia y distorsión mínimas.
  • Seite 126: Video Source

    SISTEMA DE MEMORIA DE APOYO DIFUSION DE SONIDO Reproducción con difusión de sonido Función de memoria de apoyo Esta función mantiene la memoria preajustada y la NIGHT MODE memoria de funciones más recientes. En caso de un corte de energía eléctrica, o si desconecta el cable de alimentación de esta unidad del tomacorriente, la memoria de apoyo conservará...
  • Seite 127: Control Remoto

    Instalación de las baterías Utilizando la unidad de control remoto suministrada, el amplificador y algunos de los otros componentes TEAC utilizados con la misma pueden ser controlados desde su posición de escucha. Para utilizar la unidad de control remoto, apúntela a la ventanilla REMOTE SENSOR del amplificador (o de otros componentes TEAC).
  • Seite 128 Control remoto suministrado reproductor de CD con el receptor platina de cassette Tal como se muestra, si otros componentes TEAC tienen ventanillas REMOTE SENSOR, el control remoto suministrado puede controlar a distancia las opera- ciones de estos componentes además del control remo- to del receptor.
  • Seite 129 Botones para la operación de otros compo- Cuando este receptor es empleado en un sistema nentes TEAC con reproductor de CD TEAC y una platina de cas- sette TEAC (con control totalmente lógico), es posi- ble sincronizar las operaciones del reproductor de...
  • Seite 130: Localizacion De Averias

    LOCALIZACION DE AVERIAS Para determinar cualquier problema en su receptor, inspeccione las causas más obvias primero. Si el problema per- siste después de haber inspeccionado los ítemes abajo, consulte con su agente TEAC más cercano. Problema Causa probable Remedio Amplificador Cuando se escucha música en estereo-...
  • Seite 131 ESPECIFICACIONES Sección del amplificador Sección del sintonizador de AM Potencia de salida (frontal): Límites de sintonización: Potencia RMS (40 Hz - 20 kHz): 522 kHz – 1.620 kHz (pasos de 9 kHz) 130 vatios / 8 ohmios, 0,09% Sensibilidad utilizable: 55 dB/m Potencia de salida de difusión de sonido (0,5% THD, Distorsión armónica total: 0,8% a 85 dB/m 1 kHz, 8 ohmios):...

Inhaltsverzeichnis