Herunterladen Inhalt Inhalt Diese Seite drucken
Inhaltsverzeichnis

Werbung

Verfügbare Sprachen
  • DE

Verfügbare Sprachen

  • DEUTSCH, seite 69
5707-04735-053-0S
Z
AG - 980
DUAL ZONE AM/FM STEREO RECEIVER
OWNER'S MANUAL
MANUEL DU PROPRIÉTAIRE
MANUAL DEL USUARIO
BEDIENUNGSANLEITUNG
MANUALE DI ISTRUZIONI
GEBRUIKSAANWIJZING

Werbung

Inhaltsverzeichnis
loading

Inhaltszusammenfassung für Teac AG-980

  • Seite 1 5707-04735-053-0S AG - 980 DUAL ZONE AM/FM STEREO RECEIVER OWNER’S MANUAL MANUEL DU PROPRIÉTAIRE MANUAL DEL USUARIO BEDIENUNGSANLEITUNG MANUALE DI ISTRUZIONI GEBRUIKSAANWIJZING...
  • Seite 2: Important Safety Instructions

    14) Refer all servicing to qualified service personnel. Servicing is required when the apparatus has been damaged in any way, such as power-supply cord or plug is damaged, liquid has been spilled or objects have fallen into the apparatus, the apparatus has been exposed to rain or moisture, does not operate normally, or has been dropped.
  • Seite 3: Inhaltsverzeichnis

    CONTENTS CONTENTS................................. System Connections ..............................Front Panel & Remote Controls ..........................• REMOTE CONTROL OPERATION RANGE ..........................9 • LOADING BATTERIES ................................9 Operations ................................10 • LISTENING TO A PROGRAM SOURCE ..........................10 • LISTENING TO RADIO BROADCASTS ..........................14 •...
  • Seite 4: System Connections

    System Connections • Do not plug the AC input cord into the wall AC outlet until all connections are completed. • Be sure to connect the white RCA pin cords to the L (left) and the red RCA pin cords to the R (right) jacks when making audio connections.
  • Seite 5: Connecting Audio Components

    CONNECTING PHONO ∑Note • Do not connect the turntable with MC type cartridge directly. If so, use a separate head amplifier or step-up transformer. CONNECTING AUDIO COMPONENTS • The AUX jacks may also be connected to an additional component. • The DVD jacks may be connected to AUDIO OUT jacks of video components such as DVD player, TV, etc. •...
  • Seite 6: Connecting Speakers

    CONNECTING SPEAKERS • You can connect up to four pairs of speakers to this receiv- er and select the various combinations of speakers accord- ing to your tastes. • The speakers C and D can be installed in the main room as the speakers A and B can or in the another room (SUB ZONE) for SUB ZONE playback.
  • Seite 7: Front Panel & Remote Controls

    Front Panel & Remote Controls ∑ FRONT PANEL 28 22 16 17 23 12 19 20 ∑ FLUORESCENT DISPLAY ∑ REMOTE CONTROLS...
  • Seite 8 • Each time this button is pressed, the tone mode is changed to bass or treble. 26. TEAC TAPE DECK (I / II) OPERATION BUTTONS 13. BALANCE BUTTON 27. TEAC CD PLAYER OPERATION BUTTONS When adjusting the sound volume balance, press this but- ton to enter the balance mode.
  • Seite 9: Remote Control Operation Range

    REMOTE CONTROL OPERATION RANGE • Use the remote control unit within a range of about 7 meters (23 feet) and angles of up to 30 degrees aiming at the remote sensor. LOADING BATTERIES Remove the cover. Load two batteries matching the polarity. •...
  • Seite 10: Operations

    Operations LISTENING TO A PROGRAM SOURCE Before operation • Push the POWER switch. • This unit enters the standby mode and the STANDBY indi- cator lights up. This means that the receiver is not disconnected from the AC mains and a small amount of current is retained to sup- port the operation readiness.
  • Seite 11 Select the desired input source. • Press the button to select the desired input source. Operate the selected component for playback. Adjust the volume to a comfortable listening level. To mute the sound. • "MUTE" flickers. (Muting the MAIN ZONE) •...
  • Seite 12 Adjusting the tone (bass and treble) Enter the tone mode. • Each time this button is pressed, the corresponding tone mode is selected and shown for 5 seconds as follows: BASS TRBL ∑Note: • When the tone direct function is activated, the tone mode cannot be entered and “TON DIR”...
  • Seite 13 Adjusting the sound volume balance Enter the balance mode. • "BAL" and the balance level are displayed for 5 seconds. Adjust the sound volume balance between the left and right speakers. • If the balance display disappears, start from the step 11 again.
  • Seite 14: Listening To Radio Broadcasts

    LISTENING TO RADIO BROADCASTS Auto tuning Select the tuner and then the desired band. • Each time this button is pressed, the tuner is automatically selected and the band is changed as follows : FM ST FM MONO • When the FM stereo broadcast is tuned, the FM mode changes as follows: Stereo mode : "ST"...
  • Seite 15 Auto presetting • Auto presetting function automatically searches for FM sta- tions only and store them in the memory. • While listening to radio broadcasts, press and hold down the MEMORY/ENTER button for more than 2 seconds. • Then "AUTO MEM" is displayed and this receiver starts auto presetting.
  • Seite 16 Repeat the above steps 1 to 3 to memorize other stations. ∑MEMORY BACKUP FUNCTION The following items, set before the receiver is turned off, are memorized. • FUNCTION settings • Preset stations, etc. • The SUB ZONE settings. • If the power supply is interrupted for 3 days or longer, all the settings kept in memory (such as preset stations and timer set- tings) will be erased.
  • Seite 17: Listening To Rds Broadcasts (Fm Only)

    RDS Tuner (Regional Option for some countries in Europe, etc.) listening to rds broadcasts (fm only) RDS (Radio Data System) is a method for sending information signals together with the transmitter signals. Your tuner is capable of translating these signals and putting the information on the display. These codes contain the following informations.
  • Seite 18 When "TP SRCH" is displayed, press the TUNING/PRESET UP ( ° ) or DOWN ( ‡ ) button to search the sta- tion. • "TP" flickers and the tuner automatically searches for sta- tions broadcasting the traffic program. • "NO TRAFF"is displayed if the signal is too weak or there are no other stations broadcasting the traffic program.
  • Seite 19 DISPLAY In the FM mode, • Each time this button is pressed, the display mode changes as follows : Program Clock Radio Program Type Time Text Service name Frequency (PS) (PTY) (CT) (RT) • If the signals are too weak or no RDS service is available, "NO NAME", "NO PTY", "NO TIME"...
  • Seite 20: Recording

    RECORDING • The volume, tone(bass, treble) and balance settings have no effect on the recording signals. • When you select tuner, CD, DVD, AUX or PHONO as a recording source, recording can be made on the TAPE. • The SUB ZONE input source cannot be recorded onto the TAPE. Recording with TAPE Select the desired input as a recording source except for TAPE.
  • Seite 21: Sub Zone Playback

    SUB ZONE PLAYBACK • This function allows enjoying one source in the main room and playing another in a different room at the same time. • Even when this receiver enters the standby mode, in such a case that "R2" is dimly lit, meaning only the SUB ZONE circuitry operates, the SUB ZONE source can be played independently.
  • Seite 22 Select the desired SUB ZONE input. • Press this button to enter the SUB ZONE mode. Start play on the component related to the SUB ZONE source. Adjust the SUB ZONE volume to a comfortable listening level. To mute the sound. •...
  • Seite 23: Troubleshooting Guide

    Troubleshooting Guide If a fault occurs, run through the table below before taking your receiver for repair. If the fault persists, attempt to solve it by switching the receiver off and on again. If this fails to resolve the situation, consult with your dealer.
  • Seite 24: Specifications

    Specifications AMPLIFIER SECTION ∑ • Power output, 4Ω, THD 0.1 %, only a pair of speakers driven ..................2 × 65 W • Total harmonic distortion, 8Ω, @ -3dB, 20 Hz~20 kHz ......................0.05% • Input sensitivity, 47 kΩ Phono(MM) ..................................2.5 mV Line(CD,DVD,TAPE,AUX) ..............................
  • Seite 25: Sommaire

    SOMMAIRE SOMMAIRE ................................Raccordement du système ............................Panneau avant et télécommande ..........................• PLAGE DE FONCTIONNEMENT DE LA TÉLÉCOMMANDE ....................31 • MISE EN PLACE DES PILES ..............................31 Fonctionnement ............................... 32 • ÉCOUTE D’UN PROGRAMME ..............................32 • ÉCOUTE D’ÉMISSIONS DE RADIO ............................36 •...
  • Seite 26: Raccordement Du Système

    Raccordement du système • Ne branchez pas le cordon d’alimentation sur une prise secteur murale avant que tous les branchements soient terminés. • Assurez-vous de raccorder les cordons à fiche RCA blanche aux prises L (gauche) et les cordons à fiche RCA rouge aux pris- es R (droite) lors des branchements audio.
  • Seite 27 BRANCHEMENT D’UN TOURNE-DISQUES ∑Note • Ne branchez pas directement un tourne-disques avec une cartouche de type MC. Pour le faire, utilisez un amplificateur de tête séparé ou un transformateur élévateur. BRANCHEMENT D’AUTRES APPAREILS AUDIO • Les prises AUX peuvent aussi être raccordées à un appareil extérieur. •...
  • Seite 28: Branchement Des Enceintes

    BRANCHEMENT DES ENCEINTES • Vous pouvez brancher un maximum de quatre paires d’en- ceintes à ce récepteur et sélectionner diverses combi- Enceintes A Enceintes C naisons d’enceintes en fonction de vos préférences. (pièce principale) (pièce principale/SUB ZONE) • Les enceintes C et D peuvent êtres installées dans la pièce Droite Gauche Droite Gauche principale de même que les enceintes A et B, ou bien dans...
  • Seite 29: Panneau Avant Et Télécommande

    Panneau avant et télécommande ∑ PANNEAU AVANT 28 22 16 17 23 12 19 20 ∑ AFFICHAGE FLUORESCENT ∑ TÉLÉCOMMANDE TA-Anzeige PTY-Anzeige Stereoanzeige Speicheranzeige TP-Anzeige TUNED-Anzeige RDS-Anzeige Schlaf-Anzeige SUB ZONE-Anzeige Speichernummer-/Schlafzeit-Anzeige DIRECT-Anzeige Eingang, Frequenz, Lautstärkepegel, Betriebsinformationen, usw.
  • Seite 30 1. INTERRUPTEUR POWER ° ‡ 14. TOUCHE BALANCE, AIGUS/GRAVE/HAUT/BAS ( Appuyez sur cet interrupteur pour entrer en mode de veille. En mode de balance, ces touches permettent d’ajuster la Pour mettre l’appareil hors tension, appuyez de nouveau balance du son entre les enceintes gauche et droite. sur cet interrupteur.
  • Seite 31: Plage De Fonctionnement De La Télécommande

    PLAGE DE FONCTIONNEMENT DE LA TÉLÉCOMMANDE • Utilisez la télécommande en la dirigeant sur le capteur de télécommande dans une plage d’environ 7 mètres et avec un angle de 30 degrés maximum. MISE EN PLACE DES PILES Retirez le couvercle. Insérez deux piles en respectant les polarités.
  • Seite 32: Fonctionnement

    Fonctionnement ÉCOUTE D’UN PROGRAMME Avant de commencer • Poussez sur l’interrupteur d’alimentation POWER. • L’appareil entre en mode de veille et l’indicateur STANDBY s’allume. Cela signifie que le récepteur n’est pas déconnecté du secteur et qu’une faible quantité de courant est utilisée en permanence pour que l’appareil soit toujours prêt.
  • Seite 33 Sélectionnez la source d’entrée souhaitée. • Appuyez sur ces touches pour sélectionner la source d’en- trée souhaitée. Utilisez l’appareil sélectionner pour démarrer la lecture. Réglez le volume sur un niveau d’écoute confortable. HAUT Pour couper le son. • “MUTE” clignote. ( Mise en sourdine de la ZONE PRINCIPALE) •...
  • Seite 34 Réglage de la tonalité (graves et aigus) Entrez en mode de tonalité. • Chaque vous que vous appuyez sur cette touche, le mode de tonalité correspondant est sélectionné et apparaît de la façon suivante pendant 5 secondes: BASS TRBL ∑Note: •...
  • Seite 35 Réglage de la balance du volume sonore Entrez en mode de balance. • “BAL” et le niveau de balance sont affichés pendant 5 sec- ondes. Réglez la balance du volume sonore entre les enceintes gauche et droite. • Si l’affichage de la balance disparaît, recommencez à partir de l’étape 11.
  • Seite 36: Écoute D'émissions De Radio

    ÉCOUTE D’ÉMISSIONS DE RADIO Sélection automatique Sélectionnez le syntoniseur puis la bande souhaitée. • Chaque fois que vous appuyez sur la touche, le syntoniseur est choisi automatiquement et la bande change comme suit: FM ST FM MONO • Quand une émission FM stéréo est syntonisée, le mode FM change comme suit: Mode stéréo: "ST"...
  • Seite 37 Préréglage automatique • La fonction de préréglage automatiquement recherche automatiquement uniquement les stations FM et les mémorise. • Lors de l’écoute d’une émission de radio, maintenez pressée la touche MEMORY/ENTER pendant plus de 2 sec- ondes. • “AUTO MEM” est affiché et le récepteur démarre le préréglage automatique.
  • Seite 38 Répétez les étapes 1 à 3 ci-dessus pour mémoriser d’autres stations. ∑FONCTION DE SAUVEGARDE DE LA MÉMOIRE Les réglages suivants, fait avant que le récepteur soit mis hors tension sont mémorisés. • Réglages FUNCTION • Stations préréglée,etc. • Les réglages SUB ZONE. •...
  • Seite 39: Écoute D'émissions Rds (Fm Uniquement)

    Syntoniseur RDS (option régionale pour certains pays d’Europe, etc.) ÉCOUTE D’ÉMISSION RDS (FM UNIQUEMENT) Le système RDS (Radio Data System) est une méthode permettant d’envoyer des signaux d’informations en même temps que les signaux de la radio. Votre syntoniseur est capable d’interpréter ces signaux et d’afficher les informations sur l’af- fichage.
  • Seite 40 Quand "TP SRCH" est affiché, appuyez sur la touche TUNING/PRESET HAUT ( ° ) ou BAS ( ‡ ). pour rechercher une station. • “TP” clignote et le syntoniseur recherche automatiquement les stations diffusant des programmes d’informations routières. • “NO TRAFF” est affiché si le signal est trop faible ou si il n’y a pas d’autres stations diffusant des informations routières.
  • Seite 41 DISPLAY (AFFICHAGE) En mode FM • Chaque fois que vous appuyez sur la touche, le mode d’af- fichage change comme suit: Type de Radio- Nom de Heure programme texte la station Fréquence (CT) (PS) (PTY) (RT) • Si les signaux sont trop faibles ou si le service RDS n’est pas disponible, “NO NAME”, “NO PTY”, “NO TIME”...
  • Seite 42: Enregistrement

    ENREGISTREMENT • Le réglage du volume, de la tonalité (graves, aigus) et de la balance n’ont aucun effet sur les signaux enregistrés. • Quand vous sélectionnez le syntoniseur, CD, DVD, AUX ou PHONO comme source d’enregistrement, l’enregistrement peut être réalisé sur une cassette (TAPE). •...
  • Seite 43: Lecture Sub Zone

    LECTURE SUB ZONE • Cette fonction vous permet d’écouter en même temps une source dans la pièce principale et une autre dans une pièce différente. • Quand ce récepteur entre en mode de veille, l’indication "R2" s’allume légèrement pour signifier que le circuit SUB ZONE est en service et la source SUB ZONE peut être reproduite indépendamment.
  • Seite 44 Sélectionnez l’entrée SUB ZONE souhaitée. • Appuyez sur cette touche pour entrer en mode SUB ZONE. Démarrez la lecture sur l’appareil associé à la source SUB ZONE. Réglez le volume SUB ZONE sur un niveau d’écoute confortable. HAUT Pour couper le son. •...
  • Seite 45: Guide De Dépannage

    Guide de dépannage Si un problème se produit, consultez le tableau ci-dessous avant d’amener votre récepteur à réparer. Si le problème persiste, essayez de le résoudre en mettez le récepteur hors tension puis de nouveau sous tension. Si cela ne résout pas non plus le problème, consultez votre revendeur.
  • Seite 46: Spécifications

    Spécifications SECTION DE l’AMPLIFICATEUR ∑ • Puissance de sortie, 4Ω, DHT 0,1 %, quand une seule paire d’enceintes est en charge ..........2 × 65 W • Distorsion harmonique totale, 8Ω, @ -3dB, 20 Hz~20 kHz ....................0,05 % • Sensibilité d’entrée, 47 kΩ Phono (MM) ..................................
  • Seite 47: Índice

    ÍNDICE ÍNDICE ..................................Conexiones ................................Panel frontal y mando a distancia ..........................• RANGO DE OPERACIÓN DEL MANDO A DISTANCIA ......................53 • INSTALACIÓN DE LAS PILAS ..............................53 Operaciones ................................• ESCUCHA UNA FUENTE DEL PROGRAMA ......................... 54 • ESCUCHA DE EMISIONES DE RADIO ..........................58 •...
  • Seite 48: Conexiones

    Conexiones • No enchufe el cable de alimentación en la tomacorriente de CA hasta que complete todas las conexiones. • Asegúrese de conectar los cables de clavija RCA blanca a las tomas L (canal izquierdo), y los cables de clavija RCA roja a las tomas R (canal derecho) cuando haga las conexiones de audio.
  • Seite 49: Conexión De Componentes De Audio

    CONEXIONES DE TOCADISCOS ∑Nota • No conecte un tocadiscos con cápsula tipo MC directa- mente. Si lo hace, utilice un preamplificador separado o un transformador elevador. Tocadiscos con cápsula tipo MM CONEXIÓN DE COMPONENTES DE AUDIO • Las tomas AUX también pueden conectarse a un componente adicional. •...
  • Seite 50: Conexión De Los Altavoces

    CONEXIÓN DE LOS ALTAVOCES • Puede conectar hasta cuatro pares de altavoces a este receptor y seleccionar las varias combinaciones de altavo- Altavoz A Altavoz C ces de acuerdo con su preferencia. (Habitación principal) (Habitación principal/SUB ZONE) • Se puede instalar los altavoces C y D en la habitación prin- Derecha Izquierda Derecha Izquierda cipal y los altavoces A y B en otra habitación para la repro-...
  • Seite 51: Panel Frontal Y Mando A Distancia

    Panel frontal y mando a distancia ∑ PANEL FRONTAL 28 22 16 17 23 12 19 20 ∑ PANTALLA FLUORESCENTE ∑ MANDO A DISTANCIA INDICADOR DEL INDICADOR TA TEMPORIZADOR DE APAGADO INDICADOR PTY INDICADOR TP INDICADOR ESTÉREO INDICADOR RDS INDICADOR DE INDICADOR DE SINTONIZADO MEMORIA INDICADOR SUB ZONE...
  • Seite 52 14. BOTONES BALANCE, TREBLE/BASS ARRIBA/ABAJO 1. INTERRUPTOR POWER ° ‡ Pulse este interruptor para entrar en el modo de espera. En el modo de balance, ajuste el balance del volumen del Para desconectar la alimentación, pulse de nuevo este sonido entre los altavoces izquierdo y derecho con estos interruptor.
  • Seite 53: Rango De Operación Del Mando A Distancia

    RANGO DE OPERACIÓN DEL MANDO A DISTANCIA • Utilice el mando a distancia dentro de un rango de aproxi- madamente 7 metros y ángulos de hasta 30 grados, apuntándolo al sensor remoto. INSTALACIÓN DE LAS PILAS Quite la tapa. Coloque dos pilas con las polaridades correctas. •...
  • Seite 54: Operaciones

    Operaciones ESCUCHA UNA FUENTE DEL PROGRAMA Antes de operar • Pulse el interruptor POWER. • La unidad entra en el modo de espera y el indicador STANDBY se enciende. Esto significa que el receptor no está desconectado de la rede eléctrica de CA y una pequeña cantidad de corriente fluye para proveer la prontitud a la operación.
  • Seite 55 Seleccione la fuente de entrada deseada. • Pulse el botón correspondiente a la fuente de entrada que desee seleccionar. Opere el componente seleccionado para la reproducción. Ajuste el volumen a un nivel de escucha confortable. ABAJO ARRIBA Para silenciar el sonido. •...
  • Seite 56 Ajuste del tono (graves y agudos) Seleccione el modo de tono. • Cada vez que se pulsa este botón, se selecciona y se visu- aliza durante 5 segundos el modo de tono correspondiente de la siguiente manera: BASS TRBL ∑Nota: •...
  • Seite 57 Ajuste del balance del volumen del sonido Seleccione el modo de balance. • “BAL” y el nivel de balance se visualizan durante 5 segun- dos. Ajuste el balance del volumen del sonido entre los altavoces izquierdos y derechos. • Si la visualización de balance desaparece, comience de nuevo desde el paso 11.
  • Seite 58: Escucha De Emisiones De Radio

    ESCUCHA DE EMISIONES DE RADIO Sintonización automática Seleccione el sintonizador y, a continuación, la banda deseada. • Cada vez que se pulsa este botón, el sintonizador se selec- ciona automáticamente y la banda cambia de la siguiente manera: FM ST FM MONO •...
  • Seite 59 Preajuste automático • La función de preajuste automático busca automáticamente las emisoras FM solamente y las almacena en la memoria. • Mientras escucha emisiones de radio, pulse el botón MEM- ORY/ENTER por más de 2 segundos. • Luego, se visualizará “AUTO MEM” y el receptor iniciará el preajuste automático.
  • Seite 60 Repita los pasos de 1 a 3 anteriores para memorizar otras emisoras. ∑FUNCIÓN DE RESPALDO DE LA MEMORIA Los siguientes ítems, ajustados antes del apagado del receptor, se memorizan. • Configuraciones del botón FUNCTION • Emisoras preajustadas, etc. • Configuraciones de SUB ZONE •...
  • Seite 61: Escucha De Emisiones De Rds (Fm Solamente)

    Sintonizador RDS (Opción regional para algunos países en Europa, etc.) ESCUCHA DE EMISIONES DE RDS (FM SOLAMENTE) RDS (Radio Data System (Sistema de Datos de Radio) es el método para enviar señales de información junto con las señales del transmisor. Su sintonizador es capaz de traducir estas señales e poner la información en la pantalla. Estos códigos contienen la siguiente información.
  • Seite 62 Cuando se visualice “TP SRCH”, pulse el botón TUNING/PRESET ARRIBA ( ° ) o ABAJO ( ‡ ) para buscar la emisora. • “TP” parpadea y el sintonizador busca automáticamente las emisoras que están transmitiendo un programa de tráfico. • Se visualiza “NO TRAFF” no la señal está muy débil o si no hay otras emisoras que estén transmitiendo un programa de tráfico.
  • Seite 63 DISPLAY En el modo de FM • Cada vez que se pulsa este botón, el modo de visualización cambia de la siguiente manera: Tipo de Hora Texto Nombre del programa de reloj de radio servicio de Frecuencia programa (PS) (PTY) (CT) (RT) •...
  • Seite 64: Grabación

    GRABACIÓN • Las configuraciones del volumen, tono (graves, agudos) y balance no tienen efecto sobre las señales de grabación. • Se puede grabar en el reproductor de casetes (TAPE) seleccionando TUNER, CD, DVD, AUX o PHONO como la fuente de grabación.
  • Seite 65: Reproducción De Sub Zone

    REPRODUCCIÓN DE SUB ZONE • Esta función le permite disfrutar de una fuente en la habitación principal y reproducir otra fuente en una habitación diferente al mismo tiempo. • Aunque el receptor entre en el modo de espera, si “R2” está encendido débilmente, significando que solamente el circuito SUB ZONE está...
  • Seite 66 Seleccione la entrada SUB ZONE deseada. • Pulse este botón para seleccionar el modo SUB ZONE. Inicie la reproducción en el componente asociado a la fuente SUB ZONE. Ajuste el volumen de SUB ZONE a un nivel de escucha confortable. ABAJO ARRIBA Para silenciar el sonido.
  • Seite 67: Guía De Localización Y Solución De Problemas

    Guía de localización y solución de problemas Si ocurre un problema, lea la tabla a continuación antes de llevar su receptor para reparación. Si el problema persiste, intente solucionarlo apagando y encendiendo el receptor. Si esto no soluciona la situación, consulte su revendedor.
  • Seite 68: Especificaciones

    Especificaciones SECCIÓN DEL AMPLIFICADOR ∑ • Potencia de salida, 4Ω, THD 0,1%, solamente un par de altavoces accionado .............. 2 × 65 W • Distorsión harmónica total, 8Ω, @ –3 dB, 20 Hz ~ 20 kHz ....................0.05 % • Sensibilidad de entrada, 47 kΩ Tocadiscos (MM) ................................
  • Seite 69: Inhaltsverzeichnis

    Inhaltsverzeichnis Inhaltsverzeichnis ..............................Systemanschlüsse ..............................Frontplatte und Fernbedienung ..........................• BETRIEBSBEREICH DER FERNBEDIENUNG ........................75 • EINSETZEN DER BATTERIEN .............................. 75 Betrieb ..................................• WIEDERGABE EINER PROGRAMMQUELLE ........................76 • RADIO HÖREN ..................................80 • WIEDERGABE VON RDS-SENDUNGEN (NUR UKW) ......................83 RDS-Tuner (Regionale Option für einige Länder in Europa usw.) •...
  • Seite 70: Systemanschlüsse

    Systemanschlüsse • Führen Sie den Netzstecker erst in Wandsteckdose ein, nachdem Sie alle Anschlüsse durchgeführt haben. • Achten Sie darauf, die weißen Cinch-Stecker an die linke Cinch-Buchse (L) und die roten RCA-Stecker an die rechte Cinch- Buchse (R) anzuschließen. • Führen Sie die Anschlüsse fest und richtig durch. Anderenfalls kann es zu Tonverlust, Rauschen oder einer Beschädigung des Receivers kommen.
  • Seite 71: Phono-Anschluss

    PHONO-ANSCHLUSS ∑Hinweis • Schließen Sie keinen Plattenspieler mit MC-Tonabnehmer direkt an. Falls Sie einen derartigen Plattenspieler anschließen möchten, verwenden Sie einen getrennten Vorverstärker oder Aufwärtstransformator. Plattenspieler mit MM-Tonabnehmer ANSCHLIESSEN DER AUDIOKOMPONENTEN • Die AUX-Buchsen dienen auch zum Anschluss von zusätzlichen Komponenten. •...
  • Seite 72: Anschliessen Der Lautsprecher

    ANSCHLIESSEN DER LAUTSPRECHER • Sie können bis zu vier Lautsprecherpaare an diesen Lautsprecher A Lautsprecher C Receiver anschließen verschiedenen (Hauptzimmer/SUB ZONE) (Hauptzimmer) Lautsprecherkombinationen nach Wunsch wählen. Rechts Links Rechts Links • Die Lautsprecher C und D können im Hauptzimmer instal- liert werden, genauso wie die Lautsprecher A und B, oder Sie können in einem anderen Zimmer für die SUB ZONE- Wiedergabe verwendet werden.
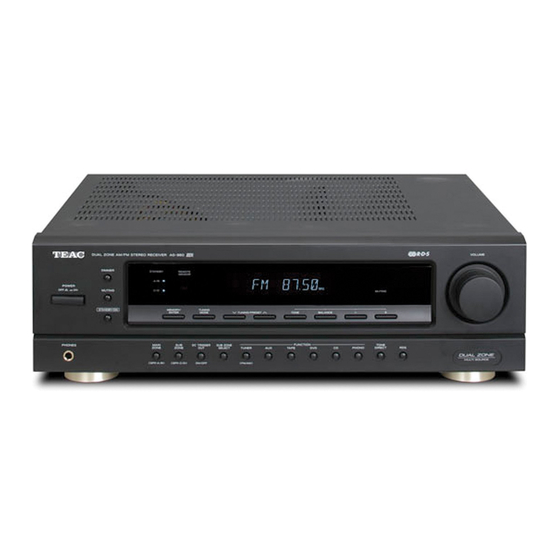
  • Seite 73: Frontplatte Und Fernbedienung

    Frontplatte und Fernbedienung ∑ FRONTPLATTE 28 22 16 17 23 12 19 20 ∑ FLUORESZENZANZEIGE ∑ FERNBEDIENUNG TA-Anzeige PTY-Anzeige Stereoanzeige Speicheranzeige TP-Anzeige TUNED-Anzeige RDS-Anzeige Schlaf-Anzeige SUB ZONE-Anzeige Speichernummer-/Schlafzeit-Anzeige DIRECT-Anzeige Eingang, Frequenz, Lautstärkepegel, Betriebsinformationen, usw.
  • Seite 74 1. Stromschalter POWER ° ‡ 14. Tasten BALANCE, TREBLE/BASS ( Drücken Sie diesen Schalter, um auf den Stellen Sie die Lautstärke-Balance zwischen dem rechten Bereitschaftsmodus umzuschalten. und linken Lautsprecher im Balance-Modus mit diesen Um das Gerät auszuschalten, drücken Sie den Schalter Tasten ein.
  • Seite 75: Betriebsbereich Der Fernbedienung

    BETRIEBSBEREICH DER FERNBEDIENUNG • Verwenden Sie die Fernbedienung innerhalb eines Abstands von 7 Metern und einem Winkel von bis zu 30 Grad vom Fernbedienungssensor. EINSETZEN DER BATTERIEN Entfernen Sie den Deckel. Setzen Sie zwei Batterien polaritätsrichtig ein. • Entnehmen Sie die Batterien, falls Sie die Fernbedienung für längere Zeit nicht verwenden möchten.
  • Seite 76: Betrieb

    Betrieb WIEDERGABE EINER PROGRAMMQUELLE Vor dem Betrieb • Drücken Sie den Stromschalter POWER. • Das Gerät schaltet auf den Bereitschaftsmodus um, und die Anzeige STANDBY leuchtet. Dies bedeutet, dass der Receiver nicht vom Stromnetz abgetrennt ist und eine kleine Menge Strom aufgenommen wird, um den Bereitschaftszustand aufrechtzuerhalten.
  • Seite 77 Wählen Sie die gewünschte Eingangsquelle. • Drücken Sie die Taste für die gewünschte Eingangsquelle. oder Bedienen Sie die gewählte Komponente, um mit der Wiedergabe zu beginnen. Stellen Sie die Lautstärke auf einen angenehmen Hörpegel ein. oder ERHÖHUNG VERRINGERUNG Um die Tonwiedergabe stummzuschalten. •...
  • Seite 78 Einstellen des Klanges (Bass und Höhen) Aktivieren Sie den Klangmodus. • Mit jedem Drücken der Taste wird der entsprechende Klangmodus gewählt und ca. 5 Sekunden lang angezeigt, wie folgt: BASS TRBL oder ∑Hinweis: • Wenn die Klangdirektwahl-Funktion aktiviert ist, kann der Klangmodus nicht aktiviert werden und „TON DIR“...
  • Seite 79 Einstellen Sie die Lautstärke-Balance Aktivieren Sie den Balance-Modus. • „BAL“ und der Balance-Pegel werden 5 Sekunden lang angezeigt. oder Stellen Sie die Lautstärke-Balance zwischen dem rechten und linken Lautsprecher ein. • Falls die Balance-Anzeige erlischt, beginnen Sie den Vorgang erneut ab Schritt 11. •...
  • Seite 80: Radio Hören

    RADIO HÖREN Automatische Abstimmung Wählen Sie den Tuner und dann das gewünschte Frequenzband. • Mit jedem Drücken dieser Taste wird der Tuner automatisch gewählt, und das Frequenzband wechselt wie folgt: FM ST FM MONO oder • Wenn ein UKW-Stereoprogramm empfangen wird, wechselt der UKW-Modus wie folgt: Stereo-Modus: Die Anzeige „ST“...
  • Seite 81 Automatische Senderspeicherung • Die automatische Speicherfunktion führt automatisch einen Suchlauf nach UKW-Sendern durch und speichert die gefundenen Sender. • Drücken Sie, während Sie Radio hören, die Taste MEMO- RY/ENTER länger als 2 Sekunden. oder • Dann erscheint die Anzeige „AUTO MEM“, und dieser Receiver beginnt automatischen...
  • Seite 82 Wiederholen Sie die Schritte 1 bis 3, um weitere Sender zu speichern. ∑SPEICHERSICHERUNGSFUNKTION Die folgenden Posten, die vor dem Ausschalten des Receivers eingestellt wurden, werden gespeichert. • Einstellungen der Eingangswahltasten • Gespeicherte Sender usw. • Einstellungen der SUB ZONE • Wenn die Stromversorgung 3 Tage oder länger unterbrochen wird, gehen alle Speicherinhalte (wie zum Beispiel Senderspeicherplätze und Timereinstellungen) verloren.
  • Seite 83: Wiedergabe Von Rds-Sendungen (Nur Ukw)

    RDS-Tuner (Regionale Option für einige Länder in Europa usw.) WIEDERGABE VON RDS-SENDUNGEN (NUR UKW) RDS (Radiodatensystem) ist eine Methode zur Übertragung von Informationssignalen zusammen mit den normalen Sendersignalen. Ihr Tuner kann diese Signale übersetzen und die enthaltenen Informationen auf dem Anzeigenfeld ein- blenden.
  • Seite 84 Wenn „TP SRCH“ angezeigt wird, drücken Sie die Taste TUNING/PRESET ( ° ) oder ( ‡ • „TP“ blinkt, und der Tuner sucht automatisch Sender zu suchen, die Verkehrsnachrichten übertragen. • „NO TRAFF“ wird angezeigt, wenn das Signal zu schwach ist oder keine Sender empfangen werden, die oder Verkehrsnachrichten übertragen.
  • Seite 85 ANZEIGE Im UKW-Modus Mit jedem Drücken dieser Taste ändert sich der Anzeigemodus wie folgt: Programm- Programmtyp Uhrzeit Radiotext dienst- Frequenz (PTY) (CT) (RT) name (PS) • Falls die Signale zu schwach sind oder kein RDS-Dienst vorhanden ist, wird „NO NAME“, „NO PTY“, „NO TIME“ oder „NO TEXT“...
  • Seite 86: Aufnahme

    AUFNAHME • Die Lautstärke-, Klangregelungs- und Balance-Einstellungen haben keinen Einfluss auf die Aufnahmesignale. • Wenn Sie den Tuner, CD, DVD, AUX oder PHONO als Aufnahmequelle wählen, kann die Aufnahme auf dem Kassettendeck (TAPE) erfolgen. • Die SUB ZONE-Eingangsquelle kann nicht auf Kassette (TAPE) aufgenommen werden. Aufnahme auf Kassette (TAPE) Wählen Sie die gewünschte Signalquelle (außer TAPE) als Aufnahmequelle.
  • Seite 87: Sub Zone-Wiedergabe

    SUB ZONE-WIEDERGABE • Diese Funktion ermöglicht Ihnen die gleichzeitige Wiedergabe einer Tonquelle im Hauptzimmer und einer anderen Tonquelle im Nebenzimmer. • Selbst wenn dieser Receiver auf den Bereitschaftsmodus umschaltet, in dem die Anzeige „R2“ dann matt leuchtet, um darauf hinzuweisen, dass nur die SUB ZONEschaltung funktioniert, kann die SUB ZONE-Tonquelle getrennt wiedergegeben werden. Wenn Sie daher die SUB ZONE-Funktion nicht verwenden, schaltet Sie sie aus, um Strom zu sparen.
  • Seite 88 Wählen Sie die gewünschte SUB ZONE-Eingangsquelle. • Drücken Sie diese Taste, um den SUB ZONE-Modus zu aktivieren. oder Starten Sie die Wiedergabe auf der Komponente, die als SUB ZONE-Eingangsquelle verwendet werden soll. Stellen Sie die SUB ZONE-Lautstärke auf einen angenehmen Hörpegel ein. oder VERRINGERUNG ERHÖHUNG...
  • Seite 89: Fehlersuche

    Sie den AG-D8850 auf die werkseitig voreingestellten Werte zurücksetzen. Gehen Sie hierbei bitte folgendermaßen vor: 1. Versetzen Sie den AG-980 mittels STANDBY/ON-Taste in den Bereitschaftsmodus (Standby). 2. Betätigen Sie die STANDBY/ON-Taste der Hauptkomponente während Sie die MAIN ZONE-Taste nieder gedrückt halten.
  • Seite 90: Technische Daten

    Technische Daten VERSTÄRKER-TEIL ∑ • Ausgangsleistung, 4 Ω, Gesamtklirrfaktor 0,1 %, nur ein Paar Lautsprecher angetrieben ..........2 × 65 W • Gesamtklirrfaktor, 8 Ω, bei -3 dB, 20 Hz bis 20 kHz ......................0,05 % • Eingangsempfindlichkeit, 47 kΩ Phono (MM) ..................................
  • Seite 91: Indice

    INDICE INDICE ..................................Collegamenti di sistema ............................Pannello frontale e telecomando ..........................• PORTATA UTILE DEL TELECOMANDO ..........................97 • INSERIMENTO DELLE BATTERIE ............................97 Uso dell'apparecchio ..............................98 • ASCOLTO DI UNA SORGENTE ............................98 • ASCOLTO DELLE STAZIONI RADIO ..........................102 •...
  • Seite 92: Collegamenti Di Sistema

    Collegamenti di sistema • Si raccomanda di non collegare il cavo di alimentazione alla presa di rete CA prima di avere completato tutti i collegamenti. • Durante i collegamenti audio, i cavetti RCA con spina bianca devono essere collegati alla presa L (sinistra) e quelli RCA con spina rossa alla presa R (destra).
  • Seite 93: Collegamento Dei Componenti Audio

    COLLEGAMENTO ALLA PRESA PHONO ∑Nota • Non vi si deve collegare direttamente un piatto giradischi provvisto di cartuccia tipo MC. Per il collegamento è neces- sario usare un amplificatore separato oppure un trasforma- tore a elevazione di tensione. Piatto giradischi con cartuccia tipo MM COLLEGAMENTO DEI COMPONENTI AUDIO •...
  • Seite 94: Collegamento Dei Diffusori

    COLLEGAMENTO DEI DIFFUSORI • Al ricevitore è possibile collegare sino a quattro coppie di diffusori e selezionarne quindi le possibili combinazioni per ottenere il tipo di suono desiderato. Diffusore A Diffusore C • I diffusori C e D possono essere installati nell'ambiente di (ambiente principale) (ambiente principale/SUB ZONE) Destra Sinistra...
  • Seite 95: Pannello Frontale E Telecomando

    Pannello frontale e telecomando ∑ PANNELLO FRONTALE 28 22 16 17 23 12 19 20 ∑ DISPLAY FLUORESCENTE ∑ TELECOMANDO Indicatore TA Indicatore PTY Indicatore di suono stereo Indicatore TP Indicatore di memoria Indicatore di sintonizzazione Indicatore RDS Indicatore di spegnimento automatico Indicatore SUB ZONE Numero di preimpostazione, periodo di spegnimento Indicatore di toni diretti...
  • Seite 96 14. Tasti di bilanciamento del suono e di regolazione dei toni 1. Tasto POWER (alimentazione) ° ‡ Da premere per passare allo stato di standby. (alti e bassi) ( Nella modalità di bilanciamento del suono con questi tasti Per spegnere l'apparecchio è necessario premerlo una sec- lo si regola tra i diffusori di destra e quelli di sinistra.
  • Seite 97: Portata Utile Del Telecomando

    PORTATA UTILE DEL TELECOMANDO • Il telecomando deve essere usato a una distanza massima di circa 7 metri dal sensore del ricevitore ed entro un ango- lo di ± 30° rispetto allo stesso. INSERIMENTO DELLE BATTERIE Rimuovete il coperchio. Inserite due batterie rispettando il corretto orientamento delle polarità. •...
  • Seite 98: Uso Dell'apparecchio

    Uso dell'apparecchio ASCOLTO DI UNA SORGENTE Prima dell'uso • Premete il tasto POWER di accensione: • Il ricevitore si porta in standby e l'indicatore STANDBY si accende. Ciò significa che l'apparecchio rimane alimentato dalla presa CA e che solo una piccola quantità di energia fluisce per mantenerlo pronto all'uso.
  • Seite 99 Selezionate la sorgente d'interesse. • Premendo questi tasti si seleziona la sorgente d'ingresso desiderata. Regolate il componente dal quale eseguire la riproduzione. Regolate il volume al livello d'ascolto desiderato. ALTI BASSI Per attenuare il suono. • L'indicatore "MUTE" lampeggia. (Attenuazione nell'ambiente principale) •...
  • Seite 100 Regolazione dei toni (alti e bassi) Accedete alla modalità di regolazione dei toni. • Ad ogni pressione di questo tasto si seleziona nell'ordine di seguito mostrato la corrispondente modalità di regolazione dei toni, la quale rimane visualizzata per 5 secondi: BASS TRBL ∑Nota:...
  • Seite 101 Regolazione del bilanciamento del volume Accedete alla modalità di bilanciamento del volume. • Appaiono per 5 secondi l'indicazione "BAL" e il livello di bilanciamento del suono. Regolate il bilanciamento del volume tra diffusori di destra e di sinistra. • Se l'icona del bilanciamento scompare è necessario ripartire dal passo 11.
  • Seite 102: Ascolto Delle Stazioni Radio

    ASCOLTO DELLE STAZIONI RADIO Sintonizzazione automatica Selezionate il sintonizzatore e quindi la banda desiderata. • Ad ogni pressione del tasto si seleziona automaticamente il sintonizzatore e la banda cambia nel seguente ordine: FM ST FM MONO • Quando si sintonizza una stazione FM stereo la modalità FM cambia nel seguente modo: Modalità...
  • Seite 103 Preimpostazione automatica • La funzione di preimpostazione automatica esegue auto- maticamente la ricerca delle sole stazioni FM salvandole quindi in memoria. • Durante l'ascolto delle stazioni radio premete per oltre 2 secondi il tasto MEMORY/ENTER. • Appare così l'indicazione "AUTO MEM" e il ricevitore avvia la preimpostazione automatica.
  • Seite 104 Ripetete i passi da 1 a 3 per salvare altre stazioni. ∑FUNZIONE DI BACKUP IN MEMORIA Il ricevitore memorizza i seguenti parametri in atto prima dello spegnimento: • Impostazione del selettore ingressi (FUNCTION) • Stazioni preimpostate, ecc. • Impostazione della funzione SUB ZONE •...
  • Seite 105: Ascolto Di Diffusioni Rds (Solo Fm)

    Sintonizzatore RDS (opzione regionale per alcuni Paesi europei e altri Paesi) ASCOLTO DI DIFFUSIONI RDS (solo FM) L'RDS (Radio Data System, o sistema di trasmissione dati via radio) è un metodo per l'invio d'informazioni congiuntamente alle normali trasmissioni radio. Questo sintonizzatore è in grado di comprendere tali informazioni e di visualizzarle sul display. Tali informazioni sono: nome dei servizi (PS), tipi di programma (PTY), annunci sul traffico (TA), orario (CT) e testi radio (RT).
  • Seite 106 Quando appare l'indicazione "TP SRCH" premete il tasto TUNING/PRESET ( ° ) o ( ‡ • L'indicazione "TP" inizia a lampeggiare e il sintonizzatore avvia automaticamente la ricerca delle stazioni che trasmet- tono i servizi sul traffico. • Se il segnale è troppo debole oppure non vi sono nell'area stazioni che trasmettono tale servizio, sul display appare il messaggio "NO TRAFF".
  • Seite 107 Visualizzazioni sul display Nella modalità FM: • Ad ogni pressione del tasto la modalità di visualizzazione cambia nel seguente ordine: Tipo di Testi Nome del Orario programma radio servizio Frequenza (CT) (PS) (PTY) (RT) • Se i segnali sono troppo deboli oppure nell'area non è disponibile alcun servizio RDS sul display appare "NO NAME", "NO PTY", "NO TIME"...
  • Seite 108: Registrazione

    REGISTRAZIONE • La regolazione del volume, dei toni (alti e bassi) e del bilanciamento non hanno alcun effetto sulla registrazione. • Quando quale sorgente da registrare si seleziona il sintonizzatore, oppure CD, DVD, AUX o PHONO, è possibile eseguire la registrazione su nastro.
  • Seite 109: Riproduzione Nell'ambiente Sub Zone

    RIPRODUZIONE NELL'AMBIENTE SUB ZONE • Con questa funzione è possibile ascoltare una sorgente nell'ambiente principale e contemporaneamente riprodurne un'altra in un altro ambiente definito ambiente secondario. • La sorgente SUB ZONE può operare in modo indipendente anche mentre il ricevitore è in standby con l'indicatore "R2" attenua- to, ovvero mentre opera esclusivamente la circuiteria relativa alla funzione SUB ZONE.
  • Seite 110 Selezionate l'ingresso da assegnare alla funzione SUB ZONE. • Premendo questo tasto si accede alla modalità SUB ZONE (ambiente d'ascolto secondario). Avviate la riproduzione del componente assegnato alla sorgente SUB ZONE. Regolate il volume della sorgente SUB ZONE al livello d'ascolto desiderato: ALTI BASSI Per attenuare il suono:...
  • Seite 111: Guida Alla Risoluzione Dei Problemi

    Preliminari all’azionamento Quando, dopo aver apportato molte modifiche alle varie impostazioni, si desidera ripristinare l’utilizzo con le rego- lazioni originarie, è possibile riportare l’AG-980 alle rego- lazioni predisposte in fabbrica in questo modo: 1. Accendere l’apparecchio tramite il tasto STANDBY/ON.
  • Seite 112: Caratteristiche Tecniche

    Caratteristiche tecniche SEZIONE AMPLIFICATORE ∑ • Uscita di potenza, 4Ω, THD 0,1%, eccitazione di una sola coppia di diffusori ..............2 × 65 W • Distorsione armonica totale, 8Ω, @ -3dB, 20 Hz~20kHz ....................0,05% • Sensibilità d'ingresso, 47 kΩ Phono(MM) ..................................
  • Seite 113: Inhoud

    INHOUD INHOUD................................... Systeemverbindingen ............................. Voorpaneel en Afstandsbediening .......................... • BEREIK VAN DE AFSTANDSBEDIENING .......................... 119 • INZETTEN VAN DE BATTERIJEN ............................119 Bediening ................................120 • LUISTEREN NAAR EEN SIGNAALBRON ........................... 120 • LUISTEREN NAAR DE RADIO ............................124 • LUISTEREN NAAR RDS UITZENDINGEN (ALLEEN FM) ....................127 RDS ontvanger (Regionale optie voor bepaalde landen in Europa enz.) •...
  • Seite 114: Systeemverbindingen

    Systeemverbindingen • Doe de stekker pas in het stopcontact nadat u alle aansluitingen heeft gemaakt. • Let op dat u de witte tulpstekkers (RCA stekkers/snoeren) verbindt met de "L" (links) aansluitingen, en de rode tulpstekkers (RCA stekkers/snoeren) met de "R" (rechts) aansluitingen wanneer u de audioverbindingen maakt. •...
  • Seite 115: Aansluiten Van Audio-Apparatuur

    AANSLUITEN VAN EEN PLATENSPELER ∑Opmerking • Maak geen directe verbinding met een draaitafel met een MC type cartridge. Heeft u een dergelijk toestel, gebruik dan een aparte kopversterker of versterkende transformator. AANSLUITEN VAN AUDIO-APPARATUUR • De AUX aansluitingen kunnen ook worden verbonden met aanvullende apparatuur. •...
  • Seite 116: Aansluiten Van Luidsprekers

    AANSLUITEN VAN LUIDSPREKERS • U kunt maximaal vier paren luidsprekers aansluiten op deze receiver en diverse combinaties van luidsprekers kiezen aan de hand van uw eigen smaak en voorkeur. • De luidsprekers C en D kunnen in de eerste ruimte worden ge_nstalleerd, net als de luidsprekers A en B, of in de tweede ruimte (SUB ZONE).
  • Seite 117: Voorpaneel En Afstandsbediening

    Voorpaneel en Afstandsbediening ∑ VOORPANEEL 28 22 16 17 23 12 19 20 ∑ LICHTGEVEND DISPLAY ∑ Afstandsbediening SUB ZONE INDICATOR...
  • Seite 118 In de TUNER (radio) stand kunt u met deze toetsen een voorkeuzezender selecteren. 12. TONE toets Druk op deze toets om de gewenste instelfunctie te 26. TEAC CASSETTEDECK (I / II) BEDIENINGSTOETSEN kiezen wanneer u de toonregeling (lage en hoge tonen) wilt gebruiken. 27. TEAC CD-SPELER BEDIENINGSTOETSEN •...
  • Seite 119: Bereik Van De Afstandsbediening

    BEREIK VAN DE AFSTANDSBEDIENING • U kunt de afstandsbediening gebruiken binnen een bereik van ongeveer 7 meter en binnen een hoek van maximaal 30 graden ten opzichte van de sensor. INZETTEN VAN DE BATTERIJEN Verwijder de klep. Doe twee batterijen met de polen in de juiste richting in het vak. •...
  • Seite 120: Bediening

    Bediening LUISTEREN NAAR EEN SIGNAALBRON Voor u begint • Druk de POWER hoofdschakelaar in. • Dit toestel staat nu uit (standby) en de STANDBY indicator zal dan ook oplichten. Dit betekent dat het toestel van stroom voorzien wordt en dat er een klein beetje stroom verbruikt wordt zodat het toestel klaar voor gebruik staat.
  • Seite 121 Selecteer de gewenste signaalbron. • Druk op de bijbehorende toets om de gewenste signaalbron te selecteren. Bedien de geselecteerde apparatuur zodat deze gaat spelen. Zet het volume op een geschikt niveau. LAGER HOGER U kunt de geluidsweergave tijdelijk uitschakelen. • "MUTE" gaat knipperen. (Tijdelijk de geluidsweergave in de MAIN ZONE uitschakelen) •...
  • Seite 122 Toonregeling (lage en hoge tonen) Schakel de toonregeling in. • Met elke druk op deze toets zal 5 seconden lang de vol- gende instelfunctie worden geselecteerd en getoond: BASS TRBL ∑Opmerking: • Wanneer de directe weergavefunctie (Tone Direct) is ingeschakeld, werkt de toonregeling niet en zal de melding "TON DIR"...
  • Seite 123 Regelen van de balans Schakel de instelfunctie voor de balans in. • De melding "BAL" en het balansniveau zullen 5 seconden lang op het display worden aangegeven. Stel de balans tussen het volume van de linker en dat van de rechter luidspreker zo in dat ze even hard klinken. •...
  • Seite 124: Luisteren Naar De Radio

    LUISTEREN NAAR DE RADIO Automatisch afstemmen Selecteer de radio (TUNER) als signaalbron en kies de gewenste radioband. • Met elke druk op deze toets zal de radio als signaalbron ges- electeerd worden en zal de radioband als volgt veranderen: FM ST FM MONO •...
  • Seite 125 Als u de nummertoetsen gebruikt wordt de geselecteerde zender automatisch, zonder dat u op de MEMORY/ENTER Druk om zender no. 3 te selecteren op 0 + 3: toets hoeft te drukken, in het geheugen van de AG-980 om zender no. 6 te selecteren op 6: opgeslagen.
  • Seite 126 Herhaal de stappen 1 t/m 3 hierboven om nog meer zenders op te slaan. ∑GEHEUGEN BACK-UP De volgende instellingen, indien verricht voor het toestel uit wordt gezet, blijven bewaard in het geheugen. • De geselecteerde signaalbron • Voorgeprogrammeerde zenders enz. •...
  • Seite 127: Luisteren Naar Rds Uitzendingen (Alleen Fm)

    RDS ontvanger (Regionale optie voor bepaalde landen in Europa enz.) LUISTEREN NAAR RDS UITZENDINGEN (ALLEEN FM) RDS (Radio Data Systeem) is een techniek voor het meesturen van digitale gegevens met reguliere signalen. Uw radio is in staat deze gegevens op te pikken en de informatie op het display te tonen. Deze signalen bevatten de volgende gegevens.
  • Seite 128 Druk op de TUNING/PRESET hoger ( ° ) of lager ( ‡ ) toetsen wanneer de melding "TP SRCH" (verkeerspro- gramma zoeken) op het display verschijnt. • "TP" gaat knipperen op het display en de radio gaat automatisch op zoek naar zenders die verkeersprogram- ma's uitzenden.
  • Seite 129 DISPLAY In de FM stand. • Met elke druk op deze toets zal de instelling voor de aan- duiding op het display als volgt veranderen: Programma Klok/ Radio- Programma type tijd tekst Servicenaam Frequentie (PS) (PTY) (CT) (RT) • Als de ontvangst te slecht is of als er helemaal geen RDS diensten van de soort in kwestie gevonden kunnen worden, zullen de meldingen "NO NAME"...
  • Seite 130: Opnemen

    OPNEMEN • De instellingen voor het volume, de toonregeling (lage tonen, hoge tonen) en de balans hebben geen effect op de signalen voor opname. • Wanneer u de radio, CD, DVD, AUX of PHONO als signaalbron selecteert, kunnen er via de TAPE aansluitingen opnamen gemaakt worden.
  • Seite 131: Sub Zone Weergave

    SUB ZONE WEERGAVE • Deze functie stelt u in staat te luisteren naar de ene signaalbron in de eerste ruimte en tegelijkertijd in een andere ruimte een andere signaalbron te laten weergeven. • Ook wanneer deze receiver uit (standby) staat, kan de weergavefunctie voor de SUB ZONE gebruikt worden; de "R2" indicator zal in dat geval zwak blijven oplichten op het display ten teken dat alleen de SUB ZONE functie in gebruik is.
  • Seite 132 Selecteer de gewenste signaalbron voor weergave in de SUB ZONE. • Druk op deze toets om de weergavefunctie voor de SUB ZONE in te schakelen. Laat de weergave beginnen op de apparatuur die u geselecteerd heeft als SUB ZONE signaalbron. Stel het volume voor de SUB ZONE in op een geschikt niveau.
  • Seite 133: Problemen Oplossen

    1. Schakel de AG-980 naar de standby-stand met de STANDBY/ON-toets. 2. Houd de MAIN ZONE-toets ingedrukt en druk op de STANDBY/ON-toets van de hoofdcomponent.
  • Seite 134: Technische Gegevens

    Technische gegevens VERSTERKERGEDEELTE ∑ • Eindvermogen, 4 Ω, thv 0.1 %, slechts één paar aangedreven luidsprekers ..............2 × 65 W • Totale harmonische vervorming, 8 Ω, @-3 dB, 20 Hz ~ 20 kHz ..................0,05% • Ingangsgevoeligheid 47 kΩ PHONO (MM) ..................................
  • Seite 136 7733 Telegraph Road, Montebello, California 90640 Phone: (323) 726-0303 TEAC CANADA LTD. 5939 Wallace Street, Mississauga, Ontario L4Z 1Z8, Canada Phone: (905) 890-8008 TEAC MEXICO, S.A. De C.V Campesinos N°184, Colonia Granjas Esmeralda, Delegacion Iztapalapa, CP 09810, México DF Phone: (525) 581-5500 TEAC UK LIMITED Unit 19 &...

Inhaltsverzeichnis