Herunterladen Inhalt Inhalt Diese Seite drucken
Inhaltsverzeichnis

Werbung

Verfügbare Sprachen
  • DE

Verfügbare Sprachen

  • DEUTSCH, seite 38
`
Thanks for buying a TEAC.
Read this manual carefully to get the best performance from
this unit.
Nous vous remercions pour l'achat d'un appareil TEAC.
Lire ce manuel avec attention pour obtenir les meilleures
performances possibles de cet appareil.
Vielen Dank für den Kauf dieses TEAC-Geräts.
Bitte lesen Sie diese Anleitung sorgfältig durch, um die
Leistungsfähigkeit dieses Geräts optimal nutzen zu können.
Grazie per aver acquistato un prodotto TEAC.
Leggere attentamente questo manuale per ottenere le
migliori prestazioni da questo apparecchio.
Enhorabuena por la adquisición de un TEAC.
Lea detenidamente este manual a fin de obtener el mejor
rendimiento de esta unidad.
Ü
The lightning flash with arrowhead symbol, within an equilateral triangle, is intended to alert
ÿ
the user to the presence of uninsulated "dangerous voltage" within the product's enclosure
that may be of sufficient magnitude to constitute a risk of electric shock to persons.
The exclamation point within an equilateral triangle is intended to alert the user to the
Ÿ
presence of important operating and maintenance (servicing) instructions in the literature
accompanying the appliance.
This appliance has a serial number located
on the rear panel. Please record the model
number and serial number and retain them
for your records.
Model number
Serial number
ag-680
OWNER'S MANUAL........................................... 2
MANUEL DUPROPRIETAIRE ......................... 20
BEDIENUNGSANLEITUNG .............................. 38
MANUALE DI ISTRUZIONI.............................. 56
MANUAL DEL USUARIO................................. 74
CAUTION: TO REDUCE THE RISK OF ELECTRIC SHOCK, DO NOT
REMOVE COVER (OR BACK). NO USER-SERVICEABLE PARTS INSIDE.
REFER SERVICING TO QUALIFIED SERVICE PERSONNEL.
WARNING: TO PREVENT FIRE OR SHOCK
HAZARD, DO NOT EXPOSE THIS
APPLIANCE TO RAIN OR MOISTURE.
AM/FM Stereo Receiver
9A07125400

Werbung

Inhaltsverzeichnis
loading

Inhaltszusammenfassung für Teac AG-680

  • Seite 1 Thanks for buying a TEAC. Read this manual carefully to get the best performance from this unit. Nous vous remercions pour l’achat d’un appareil TEAC. Lire ce manuel avec attention pour obtenir les meilleures performances possibles de cet appareil. Vielen Dank für den Kauf dieses TEAC-Geräts.
  • Seite 2: Inhaltsverzeichnis

    Buttons for the Operation of Other If the plug fitted is not suitable for the power points TEAC Components ............17 in your home or the cable is too short to reach a power point, then obtain an appropriate safety TROUBLESHOOTING ............
  • Seite 3: Connections

    CONNECTIONS CAUTION: Connecting Audio Equipment … Do not plug the power cord of any component into AC outlets and do not turn their POWER switches on until all connections have been performed. AUDIO signal jacks … The cable connectors should be fully inserted into the PHONO IN jacks jacks.
  • Seite 4: Connecting Antennas

    CONNECTIONS Connecting Antennas How to connect a coaxial cable to the matching transformer FM Indoor Antenna 1 Strip the cable and dress it as shown. If you live reasonably close to a transmitter and want to use the provided lead-type FM antenna, you will have to connect it direct to the "FM 75Ω"...
  • Seite 5: Connecting Speaker Systems

    Connect the cable from each speaker to the AM (MW) Antenna corresponding terminal on the rear of the receiver. Most speaker cables have different markings, textures AM Indoor Loop Antenna or colors to help you tell the difference between A high-performance AM loop antenna provided with the negative and positive.
  • Seite 6: Controls And Indicators

    CONTROLS AND INDICATORS Front Panel – 6 –...
  • Seite 7 Remote Control Unit 1 Main POWER Switch/POWER (standby on) Button 2 REMOTE SENSOR Window 3 Multi-Function Display 4 BASS Button 5 TUNING MODE Button 6 TUNING/PRESET Buttons 7 TREBLE Button 8 VOLUME Control/JOG Dial 9 LOUDNESS Button 0 BALANCE Button q RDS MODE Button w MEMORY Button e FM MODE Button...
  • Seite 8: Audio Operations

    AUDIO OPERATIONS Note: Basic Operations The following points apply throughout the "AUDIO OPERATIONS" section unless otherwise noted. To simplify explanations, instructions refer to names of buttons and controls on the front panel, making no mention of the use of remote control unit. To listen to a source other than the tape deck, press the TAPE MONITOR button to the OFF position (the TAPE monitor indicator will not light in the display).
  • Seite 9: Radio Reception

    Audio Adjustments Radio Reception Auto Tuning POWER ON BASS/TREBLE/BALANCE 2 3 4 POWER ON SPEAKERS LOUDNESS Main POWER Switch 1. Press the TUNER button*. Press the POWER button to turn the power on. Press it * The TUNER button can also be pressed instead again to turn the system off (power standby mode).
  • Seite 10: Preset Tuning

    AUDIO OPERATIONS Manual Tuning Preset Tuning This facility is used to store FM, AM broadcasting from Channel 1 to 30 respectively. 2 3 4 POWER ON Automatic Memory Presetting POWER ON Manual Tuning is generally used to tune to stations broadcasting a signal that is too weak to be received by Auto Tuning.
  • Seite 11: Rds (Radio Data System)

    Manual Memory Presetting RDS (Radio Data System) RDS is a broadcasting service which allows stations to send additional information along with the regular 2 3 4,6 POWER ON radio program signal. RDS services can be received only in FM band. RDS Display 2 3 3 4 POWER ON...
  • Seite 12 AUDIO OPERATIONS (2) CT mode CHILDREN children’s programs When you select CT with the RDS MODE button, "CT" will blink for about 4 seconds. After 4 seconds, SOCIAL-A social affairs the clock time will be displayed. If there is no CT data among received broadcastings, RELIGION religious programs "NO CT"...
  • Seite 13: Playing Audio Sources

    How to Search For Your Desired Program Playing Audio Sources Using PTY Search Listening to Records and Compact Discs POWER ON POWER ON 1. Select the TUNER function. Turntable 2. Press the BAND button to select FM. 3. Press the RDS MODE button for longer than 2 CD Player seconds.
  • Seite 14: Recording A Source

    MEMORY BACKUP FUNCTION AUDIO OPERATIONS Recording a Source BACK-UP Memory Recording Program Source This is the function which preserves the preset memory and most-recent memory functions. In the You can record a program source such as a record or event of a power failure, or if the power cord of this Compact Disc onto a cassette deck connected to the unit is disconnected from the electric outlet, the back- TAPE REC jacks.
  • Seite 15: Remote Control Unit

    Using the Remote Control Unit Battery Installation By using the provided remote control unit, the receiver and some other TEAC components used with it can be controlled from your listening position. To use the remote control unit, point it at the REMOTE SENSOR window of the receiver (or other TEAC component).
  • Seite 16: Teac System Remote-Controlled Operation

    Remote Control Unit Remote Control Unit Remote Control Unit Provided with Receiver As shown, if the other TEAC components have REMOTE SENSOR windows, the provided Remote Control Unit can remotely control the operations of these other components directly, in addition to the remote control of the receiver.
  • Seite 17: Buttons For The Operation Of Other Teac Components

    1 TAPE I buttons Buttons for the Operation of Other TEAC The TAPE I mechanism of a double-transport Components cassette deck with full-logic control can be operated using these buttons. Notes: To start recording, simply press the RECORD button; it does not have to be pressed together with PLAY.
  • Seite 18: Troubleshooting

    TROUBLESHOOTING To determine any problem with your receiver, always check the most obvious possible causes first. If any problem still remains after you have checked the items below, consult your nearest TEAC dealer. Problem Probable Cause Remedy Amplifier When listening to the music in stereo, Speakers are connected wrongly.
  • Seite 19: Specifications

    SPECIFICATIONS Amplifier Section AM Tuner Section Output Power: Tuning Range: RMS Power (40 Hz – 20 kHz): 522 kHz – 1,620 kHz (9 kHz steps) 100 watts/8 ohms, 0.9% Usable Sensitivity: 55 dB/m Total Harmonic Distortion: Total Harmonic Distortion: 1.5% at 85 dB/m 0.02 % (at 100 watts, 1 kHz) Signal-to-Noise Ratio: 35 dB at 85 dB/m Input Sensitivity/Impedance:...
  • Seite 20: Avant Utilisation

    FONCTIONNEMENT TÉLÉCOMMANDE Ne pas essayer de nettoyer l'appareil avec des solvants chimiques car ceci pourrait endommager le D'UNE CHAÎNE TEAC ............34 fini de l'appareil. Utiliser un chiffon propre et sec. En utilisant un lecteur CD ou une platine à cassette avec une fenêtre Garder soigneusement ce manuel d'instructions REMOTE SENSOR............
  • Seite 21: Raccordements

    RACCORDEMENTS Attention: Raccordement de matériel audio … Ne pas brancher le cordon d'alimentation de l'un des composants sur les sorties CA et ne pas mettre leurs Prises de signal AUDIO interrupteurs POWER sur marche tant que tous les Prises PHONO IN raccordements n'ont pas été...
  • Seite 22: Raccordements D'antenne

    RACCORDEMENTS Raccordements d'antenne Comment raccorder un câble coaxial au transformateur d'adaptation Antenne FM intérieure 1 Dénuder le câble et le préparer comme montré. Si vous habitez à proximité d'un émetteur et souhaitez utiliser l'antenne FM fournie, branchez celle-ci directement sur la prise "FM 75Ω". Placez le manchon métallique de l'antenne sur le conducteur central (centre) de la prise "FM 75Ω", dépliez le fil et le fixer sur un encadrement de fenêtre...
  • Seite 23: Raccordement D'enceintes Acoustiques

    Raccorder les fils de chaque haut-parleur à la borne Antenna AM (MW) correspondante à l'arrière du récepteur. La plupart des câbles de haut-parleur ont des Antenne-cadre intérieure AM marquages, des textures ou des couleurs différentes L'antenne cadre AM haute performance, fournie avec le pour vous aider à...
  • Seite 24: Commandes Et Indicateurs

    COMMANDES ET INDICATEURS Panneau avant – 24 –...
  • Seite 25 Boîtier de télécommande 1 Interrupteur d'alimentation secteur (POWER)/Touche de marche/attente d'alimentation POWER (standby on) 2 Fenêtre de détection de télécommande (REMOTE SENSOR) 3 Affichage à fonctions multiples 4 Touche BASS 5 Touche de syntonisation mode (TUNING MODE) 6 Touches de syntonisation/préréglage (TUNING/PRESET) 7 Touche TREBLE 8 Commande de volume (VOLUME)/molette...
  • Seite 26: Fonctionnement Audio

    FONCTIONNEMENT AUDIO Remarque: Fonctionnement de base Les points suivants s'appliquent à toute la section "FONCTIONNEMENT AUDIO" sauf indications contraires. Pour simplifier les explications, les instructions utilisent les noms des touches et commandes sur le panneau avant, sans mentionner l'utilisation de la télécommande.
  • Seite 27: Réception De La Radio

    Réglages audio Réception de la radio Syntonisation automatique POWER ON BASS/TREBLE/BALANCE 2 3 4 POWER ON SPEAKERS LOUDNESS Interrupteur d'alimentation secteur (POWER) 1. Appuyer sur la touche TUNER*. Appuyer sur la touche POWER pour mettre en marche. * La touche TUNER peut également être pressée si La presser de nouveau pour couper la chaîne (mode d'attente d'alimentation).
  • Seite 28: Syntonisation Préréglée

    FONCTIONNEMENT AUDIO Syntonisation manuelle Syntonisation préréglée Cette fonction est utilisée pour ranger des émissions FM, AM respectivement du canal 1 à 30. 2 3 4 POWER ON Préréglage automatique de la mémoire POWER ON La syntonisation manuelle est généralement utilisée pour syntoniser des stations diffusant un signal trop faible pour être reçues par la syntonisation automatique.
  • Seite 29: Rds (Radio Data System)

    Préréglage manuel de la mémoire RDS (Radio Data System) Le RDS est un service de diffusion qui permet aux stations d'envoyer des informations complémentaires 2 3 4,6 POWER ON avec le signal du programme radio normal. Les services RDS ne peuvent être reçus que dans la gamme FM. Afficheur RDS 2 3 3 4 POWER ON...
  • Seite 30 FONCTIONNEMENT AUDIO (2) Mode CT WEATHER Rapports, prévisions météo Lorsque vous sélectionnez le mode CT à l'aide de la touche RDS MODE, l'indication "CT" clignote Rapports financiers, commerce, affaires FINANCE pendant environ 4 secondes. Au bout de 4 secondes, l'heure sera affichée. CHILDREN Programmes pour les enfants S'il n'y a pas de données CT parmi les informations reçues, "NO CT"...
  • Seite 31: Lecture De Sources Audio

    Comment chercher votre programme voulu Lecture de sources audio en utilisant la recherche PTY Ecoute de disques ou de disques audio- numériques POWER ON POWER ON 1. Sélectionner la fonction TUNER. Platine tourne-disque 2. Appuyer sur la touche BAND pour sélectionner FM. 3.
  • Seite 32: Enregistrement D'une Source

    FONCTION DE SOUTIEN MÉMOIRE FONCTIONNEMENT AUDIO Enregistrement d'une source Mémoire de soutien (BACK-UP) Enregistrement d'une source de programme C'est la fonction qui retient la mémoire des préréglages Vous pouvez enregistrer une source de programme tel et les fonctions mémoire les plus récentes. Dans le cas un disque ou un CD sur une platine à...
  • Seite 33: Télécommande

    Utilisation de la télécommande Mise en place des piles En utilisant la télécommande fournie, l'amplificateur et certains autres appareils TEAC utilisés avec lui peuvent être commandés à partir de votre position d'écoute. Pour utiliser la télécommande, la pointer vers la fenêtre REMOTE SENSOR du récepteur (ou d'un autre appareil...
  • Seite 34: Fonctionnement Télécommande D'une Chaîne Teac

    CD fourni avec le récepteur la platine à cassette Comme montré, si d'autres appareils TEAC ont des fenêtres REMOTE SENSOR, le boîtier de télécommande fourni peut télécommander directement le fonctionnement de ces autres appareils, en plus de la télécommande du récepteur.
  • Seite 35: Touches Pour Le Fonctionnement D'autres Appareils Teac

    1 Touches TAPE I Touches pour le fonctionnement d'autres Le mécanisme TAPE I d'une platine à cassette à appareils TEAC double transport avec commandes entièrement logiques peut être commandé en utilisant ces touches. Remarques: Pour lancer l'enregistrement, appuyer simplement sur la touche RECORD; elle n'a pas besoin d'être pressée avec la touche PLAY.
  • Seite 36: En Cas De Difficultés

    EN CAS DE DIFFICULTÉS Pour déterminer tout problème avec votre récepteur, toujours vérifier les causes les plus probables en premier. Si le problème persiste même après avoir vérifier les items suivants, consulter votre revendeur TEAC le plus proche. Problème Cause Probable Remède...
  • Seite 37: Caractéristiques Techniques

    CARACTÉRISTIQUES TECHNIQUES Section amplificateur Section syntoniseur AM Puissance de sortie: Plage de syntonisation: Puissance RMS (40 Hz à 20 kHz): 522 kHz à 1.620 kHz (paliers de 9 kHz) 100 watts/8 Ω, 0,9% Sensibilité utilisable: 55 dB/m Distorsion harmonique totale: Distorsion harmonique totale: 1,5% à...
  • Seite 38: Vor Inbetriebnahme

    Zur Gehäusereinigung niemals Lösungsmittel Fernbedienungseinheit..........51 verwenden, da hierdurch die Gehäuseoberfläche Einlegen der Batterien..........51 beschädigt werden kann. Ein sauberes trockenes BETRIEB MIT DER TEAC SYSTEM- Tuch verwenden. FERNBEDIENUNG ............52 Bewahren Sie diese Bedienungsanleitung auf, um bei Verwendung eines CD-Players und eines eventuell später auftauchenden Fragen darin...
  • Seite 39: Anschlüsse

    ANSCHLÜSSE VORSICHT: Anschluß von Audio-Komponenten Verbinden Sie das Gerät erst dann mit dem Stromnetz, bzw. schalten Sie es erst ein, wenn Sie alle erforderlichen Anschlüsse vorgenommen haben. AUDIO-Buchsen Alle Kabelstecker müssen vollständig bis zum Phono-Eingang (PHONO IN) Anschlag an den zugehörigen Buchsen Die Ausgangsbuchsen eines Schallplattenspielers mit aufgeschoben werden.
  • Seite 40: Antennenanschluß

    ANSCHLÜSSE Antennenanschluß Anschluß des Koaxialkabels am Anpaßübertrager 1 Das Kabel abisolieren und wie gezeigt vobereiten. UKW-Innenantenne Wenn Sie in der Nähe einer Sendeanlage wohnen und die beigepackte Dipol-Antenne verwenden wollen, schließen Sie diese direkt an den FM 75 Ω Anschluß an. 2 Beide Sperren nach außen drücken und die Verbinden Sie die beiden Drähte am unteren Ende des Abdeckung abnehmen.
  • Seite 41: Lautsprecheranschluß

    Die Lautsprecherkabel jeweils wie erforderlich an der (MW) AM Antenne Receiver-Rückseite anschließen. Die meisten Lautsprecherkabel sind durch Farbe, AM Rahmen-Antenne Markierungen oder Muster gekennzeichnet, damit Im Lieferumfang des Receivers befindet sich eine Plus- und Minuskabel voneinander unterscheidbar Hochleistungs-Mittelwellen-Innenantenne, die in fast sind.
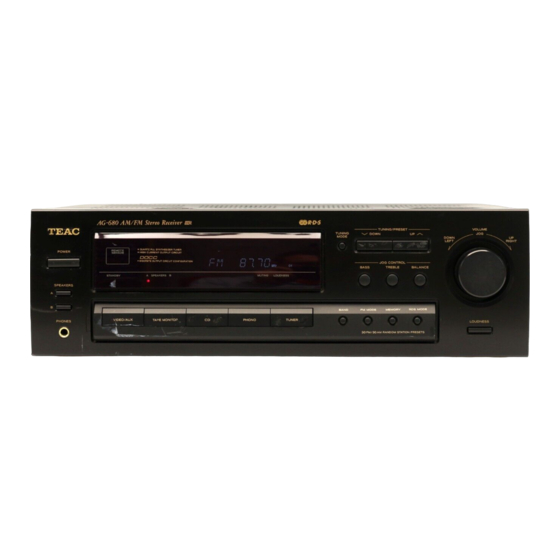
  • Seite 42: Anzeige- Und Bedienungselemente

    ANZEIGE- UND BEDIENUNGSELEMENTE Geräte-Vorderseite – 42 –...
  • Seite 43 Fernbedienung 1 Bereitschafts-/Betriebstaste POWER (standby on) 2 Fernbediensignalsensor (REMOTE SENSOR) 3 Mehrfachanzeige-Displayfeld 4 Tiefen-Taste (BASS) 5 Abstimmbetriebs-Taste (TUNING MODE) 6 Abstimm-/Preset-Tasten 7 Höhen-Taste (TREBLE) 8 Lautstärke-/Jogregler (VOLUME/JOG) 9 LOUDNESS-Taste 0 BALANCE-Taste q RDS MODE-Taste w MEMORY-Taste e UKW-Betriebsart-Taste (FM MODE) r Taste zur Wahl des Empfangsbereichs (BAND) t Programmquellentasten...
  • Seite 44: Audio-Betriebsarten

    AUDIO-BETRIEBSARTEN Hinweis: Grundfunktionen Folgendes gilt, sofern nicht ausdrücklich anders beschrieben, in den Beschreibungen der "AUDIO- BETRIEBSARTEN": Zur Vereinfachung von Anweisungen und Erklärungen werden die Bezeichnungen der Bedienungselemente des Receivers verwendet, ohne auf die entsprechenden Tasten der Fernbedienung näher einzugehen. Soll eine andere Signalquelle als das Cassettendeck gehört werden, die TAPE MONITOR-Taste drücken (OFF), so daß...
  • Seite 45: Hörfunk-Empfang

    Allgemeine Audio-Einstellungen Hörfunk-Empfang Auto-Tuning POWER ON BASS/TREBLE/BALANCE GERÄT IST 2 3 4 POWER ON EINGESCHALTET SPEAKERS LOUDNESS Netzschalter (POWER) 1. Die TUNER-Taste drücken*. Mit Taste POWER die Betriebsspannung einschalten. * Mit der TUNER-Taste kann auch von einer anderen Nochmals drücken, um auf Betriebsbereitschaft Programmquelle auf Radioempfang umgeschaltet (Standby) zu schalten.
  • Seite 46: Manuelle Senderabstimmung

    AUDIO-BETRIEBSARTEN Manuelle Senderabstimmung Preset-Tuning UKW- und MW-Sender können auf den Speicherplätzen 1 bis 30 abgespeichert werden. GERÄT IST 2 3 4 POWER ON EINGESCHALTET Automatische Preset-Abspeicherung GERÄT IST POWER ON EINGESCHALTET Generell kommt das manuelle Abstimmen dann zum Einsatz, wenn die Sendeleistung des betreffenden Senders für die Auto-Tuning-Funktion nicht ausrei- chend ist.
  • Seite 47: Rds (Radio Data System)

    Manuelle Preset-Abspeicherung RDS (Radio Data System) RDS ist ein Sendeservice, mit dem Sender programmbegleitende Signaldaten ausstrahlen. Das GERÄT IST 2 3 4,6 POWER ON RDS-Signal ist nur im UKW-Empfangsbereich EINGESCHALTET verfügbar. Die RDS-Anzeige GERÄT IST 2 3 3 4 POWER ON EINGESCHALTET 1.
  • Seite 48 AUDIO-BETRIEBSARTEN (2) CT Modus Soziale Themen SOCIAL-A Nachden Sie mittels der RDS-MODE Taste die Betriebsart CT angewählt haben, blinkt "CT" ca. 4 Religiöse Sendungen RELIGION Sekunden im Display. Nach 4 Sekunden wird die Uhrzeit angezeigt. PHONE-IN Telefonumfragen Werden keine CT-Daten empfangen, erscheint die Anzeige "NO CT".
  • Seite 49: Programmquellenwiedergabe

    Programmquellenwiedergabe Senderwahl mit dem PTY-Suchlauf Wiedergabe von Schallplatten und CD's GERÄT IST POWER ON EINGESCHALTET GERÄT IST EINGESCHALTET 1. Die TUNER-Programmquelle anwählen. 2. Mit Taste BAND auf UKW-Empfang schalten. Plattenspieler oder 3. Die Taste RDS MODE für mehr als 2 Sek. drücken. Die Anzeige "PTY SEEK"...
  • Seite 50: Aufnahme Einer Programmquelle

    GANGRESERVE AUDIO-BETRIEBSARTEN Aufnahme einer Programmquelle Gangreservespeicher Aufnahme einer Programmquelle Die Preset-Abspeicherungen und die weiteren jeweils aktuellen abgespeicherten Einstellungen werden vor Eine Programmquelle wie Schallplatte oder CD kann Löschung geschützt, falls ein Stromausfall auftritt oder auf einem an den TAPE REC-Buchsen angeschlossenen das Netzkabel abgezogen wird.
  • Seite 51: Fernbedienungseinheit

    FERNBEDIENUNGSEINHEIT Verwendung der mitgelieferten Einlegen der Batterien Fernbedienungseinheit Die mitgelieferte Fernbedienungseinheit ist zur Fernbedienung des Receivers und weiterer TEAC- Komponenten geeignet. Bei Verwendung die Fernbedienungseinheit stets auf das REMOTE SENSOR-Fenster des Receivers bzw. der zusätzlichen TEAC-Komponente ausrichten. REMOTE SENSOR-Fenster am Receiver oder einer zusätzlichen TEAC-...
  • Seite 52: Betrieb Mit Der Teac System-Fernbedienung

    Fernbedienung des Fernbedienung des CD-Players (zum Receiver mitgeliefert) Cassettendecks Da alle hier dargestellten TEAC-Geräte REMOTE SENSORen besitzen, kann die mitgelieferte Fernbedienung zur Steuerung des Receivers und der anderen Komponenten benutzt werden. Wenn Sie zur Steuerung weiterer Geräte, zusätzliche, nicht von der Fernbedieneinheit des Receivers zur Verfügung...
  • Seite 53: Tasten Zur Steuerung Weiterer Teac Komponenten

    1 TAPE I-Tasten Tasten zur Steuerung weiterer TEAC Das TAPE I-Laufwerk eines Doppel-Cassettendecks Komponenten mit kompletter Logik-Steuerung kann mittels dieser Tasten ferngesteuert werden. Hinweise: Um die Aufnahme auszulösen, drücken Sie einfach die RECORD-Taste. Sie müssen nicht zusätzlich die PLAY-Taste betätigen.
  • Seite 54: Hilfe Bei Der Fehlersuche

    Sollten Sie einmal eine Fehlfunktion an Ihrem Receiver feststellen, überprüfen Sie bitte zunächst die naheliegenste Ursache. Sollte das Problem nach einer Überprüfung, anhand der folgenden Aufstellung, nach wie vor auftreten, wenden Sie sich bitte an Ihren TEAC-Händler. Problem Mögliche Ursache Abhilfe Verstärker...
  • Seite 55: Technische Daten

    TECHNISCHE DATEN Verstärkerteil MW-Empfangsteil Ausgangsleistung: Empfangsbereich: Eff. Leistung (40 Hz bis 20 kHz): 522 kHz – 1620 kHz (9-kHz-Schritte) 100 Watt/8 Ohm, 0,9 % Nutzbare Empfindlichkeit: 55 dB/m Klirrfaktor: Klirrfaktor: 1,5 % an 85 dB/m 0,02 % (an 100 Watt, 1 kHz) Signal/Rausch-Abstand: 35 dB an 85 dB/m Eingangsempfindlichkeit/Impedanz: PHONO: 6,0 mV/22 kOhm...
  • Seite 56: Prima Dell'uso

    REMOTE Fare semplicemente uso di un panno pulito ed asciuto. SENSOR............... 70 Tasti per azionare altri apparecchi TEAC....71 Tenere questo manuale in un luogo di facile accesso, RICERCA GUASTI ............72 per ogni eventuale futuro riferimento.
  • Seite 57 COLLEGAMENTI ATTENZIONE: Collegamento di altri apparecchi audio … Non inserire il cavo di alimentazione di qualsiasi elemento del sistema in una presa di rete AC e non Prese dei segnali audio (AUDIO) attivare l'interruttore POWER fino a quando siano Prese di ingresso per il giradischi (PHONO IN) stati effettuati tutti i collegamenti.
  • Seite 58: Collegamento Delle Antenne

    COLLEGAMENTI Collegamento delle antenne Come collegare un cavo coassiale ad un trasformatore di adattamento Antenna FM interna 1 Denudare il cavo e prepararlo come indicato. Chi abita abbastanza vicino ad un trasmettitore e vuole utilizzare l'antenna FM a filo in dotazione, dovrà collegarla direttamente alla presa "FM 75 ohm".
  • Seite 59 Collegare il cavo di ogni altoparlante al terminale Antenna AM (MW) corrispondente, ubicato sul lato posteriore del sintoamplificatore. Antenna AM interna a telaio La maggior parte dei cavi per altoparlanti portano L'antenna AM a telaio di elevate prestazioni, in contrassegni, forme o colori diversi per facilitare la dotazione al sintonizzatore, è...
  • Seite 60 Unità de telecomando 1 Interruttore principale di alime n tazione (POWER) / Tasto di attesa e attivazione (POWER (standby on)) 2 Sensore dei segnali del telecomando (REMOTE SENSOR) 3 Quadrante a visualizzazioni multiple 4 Tasto di comando dei suoni bassi (BASS) 5 Tasto della modalità...
  • Seite 61: Controlli E Indicatori

    CONTROLLI E INDICATORI Pannello frontale – 60 –...
  • Seite 62 AZIONAMENTI AUDIO Nota: Azionamenti di base Quanto affermato nei due punti che seguono vale per i paragrafi completi degli "AZIONAMENTI AUDIO", salvo diversamente indicato. Per semplificare la descrizione, le istruzioni fanno riferimento al nome del tasti e dei controlli sul pannello anteriore, senza alcun accenno all'utilizzo del telecomando.
  • Seite 63 Regolazioni audio Ricezione radio Sintonia automatica POWER ON BASS/TREBLE/BALANCE 2 3 4 POWER ON SPEAKERS LOUDNESS Interruttore principale di alimentazione (POWER) 1. Premere il tasto TUNER*. Premere il tasto POWER per attivare l'apparecchio. * Il tasto TUNER può anche essere utilizzato per Premere di nuovo lo stesso tasto per disattivare l'ascolto della radio, sull'ultima stazione che era l'apparecchio (riportandolo alla posizione di attesa).
  • Seite 64 AZIONAMENTI AUDIO Sintonia manuale Sintonizzazione a predisposizione Questa funzione è usata per la memorizzazione delle stazioni FM o AM nei canali da 1 a 30. 2 3 4 POWER ON Predisposizione automatica della memoria POWER ON Si utilizza di solito la sintonia manuale per localizzare le emittenti che inviano un segnale troppo debole per essere captato dalla sintonia automatica.
  • Seite 65 Predisposizione manuale della memoria RDS (Radio Data System) Il sistema RDS è un sistema di trasmissione che consente alle stazioni di trasmettere anche altre 2 3 4,6 POWER ON informazioni addizionali insieme al normale programma radio. I servizi dei segnali RDS possono essere ricevuti solamente nella banda FM.
  • Seite 66 AZIONAMENTI AUDIO Dopo 4 secondi, verrà visualizzato PS oppure il nome informazioni di carattere finanziario e FINANCE dell'emittente. commerciale CHILDREN programmi per bambini (2) Modo CT Quando si seleziona questa funzione con il tasto RDS affari sociali SOCIAL-A MODE, lampeggerà per circa 4 secondi la scritta "CT"...
  • Seite 67 Come ricercare il programma desiderato Riproduzione di sorgenti audio per mezzo della riceraca PTY Ascolto di dischi e CD POWER ON POWER ON 1. Selezionare la funzione del sintonizzatore. Giradischi 2. Agire sul tasto BAND per selezionare la banda FM. 3.
  • Seite 68 FUNZIONE MEMORIA DI SUPPORTO AZIONAMENTI AUDIO Registrazione di una sorgente Memoria di appoggio Sorgente del programma da registrare Questa funzione consente di conservare le Su un deck a cassette eventualmente collegato alle predisposizioni effettuate e le funzioni memorizzate per prese TAPE REC, si può procedere alla registrazione di ultime.
  • Seite 69 UNITÀ DI TELECOMANDO Uso dell'unità di telecomando Installazione batterie L'amplificatore ed altri componenti TEAC possono essere comandati dalla posizione di ascolto per mezzo dell'unità di telecomando. Per utilizzare l'unità di telecomando, puntarla verso la finestrella REMOTE SENSOR dell'amplificatore (o di un altro componente TEAC).
  • Seite 70 Telecomando del lettore CD fornito con il sintonizzatore registratore Come risulta dalla figura, se altri apparecchi TEAC sono muniti di finestra REMOTE SENSOR, il telecomando in dotazione può controllarli a distanza direttamente, in aggiunta al controllo del sintonizzatore. Se questi apparecchi necessitano di altre funzioni, oltre a quelle di base comandate dal telecomando "UR", utilizzare le...
  • Seite 71 1 Tasti TAPE I Tasti per azionare altri apparecchi TEAC Servono ad azionare la meccanica TAPE I di un doppio registratore a cassette, con controllo full logic. Note: Per iniziare la registrazione, basta premere il tasto RECORD, tenendo presente che non deve essere premuto insieme a PLAY.
  • Seite 72: Ricerca Guasti

    RICERCA GUASTI Per risolvere qualsiasi problema su questo apparecchio, in primo luogo verificare sempre le cause più ovvie. Se il problema non rientra nei casi qui elencati, rivolgersi al rappresentante TEAC. Problema Causa probabile Rimedio Amplificatore Ascoltando musica stereo, il suono...
  • Seite 73: Dati Tecnici

    DATI TECNICI Sezione dell'amplificatore Sezione del sintonizzatore AM Potenza in uscita: Gamma di sintonizzazione: Potenza RMS (da 40 Hz a 20 kHz): Da 522 kHz a 1.620 kHz (a scatti di 9 kHz) 100 watt ad 8 ohm, distors. arm. tot. dello 0,9% Sensibilità...
  • Seite 74: Previo Al Empleo

    Guarde este manual en un lugar seguro para usarlo una platina de cassette con ventanilla como referencia en el futuro. REMOTE SENSOR............88 Botones para la operación de otros componentes TEAC ............ 89 LOCALIZACION DE AVERIAS ......... 90 ESPECIFICACIONES ............91 – 74 –...
  • Seite 75: Conexión Del Equipo De Audio

    CONEXIONES AVISO: Conexión del equipo de audio No enchufe el cable de corriente de ningún componente en una toma de alimentación y no lo enchufe hasta que todas las conexiones hayan sido Jacks de señal AUDIO realizadas. Jacks PHONO IN Los cables conectores deben estar completamente Conecte los jacks de salida del giradiscos a los jacks insertados en los jacks.
  • Seite 76: Conexión De Antenas

    CONEXIONES Conexión de antenas Método para conectar un cable coaxial al transformador de adaptación Antena FM para interiores 1 Pele y arregle el extremo del cable tal como se muestra. Si vive en un área con una buena cobertura de radiofrecuencia y desea usar la antena FM tipo guía que el equipo incluye, deberá...
  • Seite 77 Conecte el cable de cada altavoz al terminal Antena AM (MW) correspondiente en la parte trasera del receptor. La mayoría de los cables para altavoces tienen Antena AM de cuadro diferentes marcas, texturas o colores para ayudarle a La antena de cuadro de AM de altas prestaciones reconocer la diferencia entre el terminal negativo y el suministrada con el receptor es suficiente para una positivo.
  • Seite 78: Mandos E Indicadores

    MANDOS E INDICADORES Panel frontal – 78 –...
  • Seite 79 Control remoto 1 Conmutador principal POWER / Botón POWER (standby/on) 2 Ventanilla REMOTE SENSOR 3 Indicación multifuncional 4 Botón BASS de graves 5 Botón TUNING MODE (modo de sintonización) 6 Botones TUNING/PRESET 7 Botón TREBLE (agudos) 8 Control VOLUME/ Disco JOG 9 Botón LOUDNESS 0 Botón BALANCE q Botón RDS MODE...
  • Seite 80 OPERACIONES DE AUDIO Nota: Funcionamiento básico Los siguientes puntos se aplican a las secciones de "OPERACIONES DE AUDIO" a menos que se indique lo contrario. Para simplificar las explicaciones e instrucciones, refiérase a los nombres de los botones y mandos en el panel frontal, sin preocuparse por el control remoto.
  • Seite 81 Ajustes de audio Recepción de radio Sintonización automática POWER ON BASS/TREBLE/BALANCE 2 3 4 POWER ON SPEAKERS LOUDNESS Conmutador principal POWER 1. Presione el botón TUNER*. Presione el botón POWER para conectar la * El botón TUNER también puede ser presionado alimentación.
  • Seite 82 OPERACIONES DE AUDIO Sintonización manual Sintonización preajustada Esta función es empleada para almacenar radiodifusoras de FM y AM en el canal 1 a 30 2 3 4 POWER ON respectivamente. Preajuste de memoria automática POWER ON La sintonización manual es generalmente empleada para sintonizar radiodifusoras con una señal demasiado débil para ser recibida por la sintonización automática.
  • Seite 83 Preajuste manual de memoria El servicio de radiodifusión con radiodifusoras que envían información adicional conjuntamente con los 2 3 4,6 POWER ON servicios RDS de señales de programas normales puede ser recibido sólo en la banda de FM. Pantalla RDS 2 3 3 4 POWER ON 1.
  • Seite 84 OPERACIONES DE AUDIO (2) Modo CT CHILDREN programas infantiles Cuando selecciona CT con el botón RDS MODE, "CT" parpadeará durante 4 segundos aprox. Después de 4 asuntos sociales SOCIAL-A segundos la hora del reloj será indicada. Si no hay datos CT en las radiodifusiones recibidas, programas religiosos RELIGION aparecerá...
  • Seite 85 Método para buscar el programa deseado Reproducción de fuentes de audio utilizando la búsqueda PTY Para escuchar discos o discos compactos POWER ON POWER ON 1. Seleccione la función de sintonizador. Tocadiscos 2. Presione el botón BAND para seleccionar FM. Reproductor 3.
  • Seite 86 FUNCION DE MEMORIA DE APOYO OPERACIONES DE AUDIO Grabación de una fuente BACK-UP memoria Grabación de una fuente de programa Esta función mantiene la memoria preajustada y la memoria de funciones más recientes. En caso de un Usted puede grabar una fuente de programa tal como corte de energía eléctrica, o si desconecta el cable de un disco o disco compacto en la platina de cassette alimentación de esta unidad del tomacorriente, la...
  • Seite 87: Control Remoto

    Instalación de las baterías Utilizando la unidad de control remoto suministrada, el amplificador y algunos de los otros componentes TEAC utilizados con la misma pueden ser controlados desde su posición de escucha. Para utilizar la unidad de control remoto, apúntela a la ventanilla REMOTE SENSOR del amplificador (o de otros componentes TEAC).
  • Seite 88 Control remoto suministrado reproductor de CD platina de cassette con el receptor Tal como se muestra, si otros componentes TEAC tienen ventanillas REMOTE SENSOR, el control remoto suministrado puede controlar a distancia las operaciones de estos componentes además del control remoto del receptor.
  • Seite 89 1 Botones TAPE I Botones para la operación de otros El mecanismo TAPE I con platina de cassette de componentes TEAC doble transporte y control totalmente lógico puede ser operado empleando estos botones. Notas: Para iniciar la grabación presione el botón RECORD;...
  • Seite 90: Localizacion De Averias

    LOCALIZACION DE AVERIAS Para determinar cualquier problema en su receptor, inspeccione las causas más obvias primero. Si el problema persiste después de haber inspeccionado los ítemes abajo, consulte con su agente TEAC más cercano. Problema Causa probable Remedio Amplificador Cuando se escucha música en estereo- Los altavoces están incorrectamente...
  • Seite 91 ESPECIFICACIONES Sección del amplificador Distorsión armónica total (1 kHz): Monofónico: 0,4% Potencia de salida: Estereofónico: 0,5% Potencia RMS (40 Hz - 20 kHz): Respuesta de frecuencia: 100 vatios/8 ohmios, 0,9% 30 Hz - 15 kHz, +1/–3 dB Distorsión armónica total: Separación de estéreo (1 kHz): 0,02% (a 100 vatios, 1 kHz) 40 dB...
  • Seite 92 TEAC FRANCE S. A. 17 Rue Alexis-de-Tocqueville, CE 005 92182 Antony Cedex, France Phone: 01.42.37.01.02 TEAC BELGIUM NV/SA P.A. TEAC Nederland BV, Perkinsbaan 11a, 3439 ND Nieuwegein, Netherlands Phone: 0031-30-6048115 TEAC NEDERLAND BV Perkinsbaan 11a, 3439 ND Nieuwegein, Netherlands Phone: 030-6030229 TEAC AUSTRALIA PTY., LTD.

Inhaltsverzeichnis