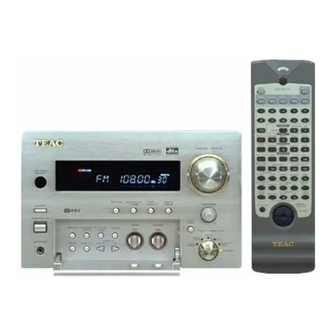
Teac AG-H350 Bedienungsanleitung
Av digital home theater receiver
Inhaltsverzeichnis
9A08901300
AG-H350
AV Digital Home Theater Receiver
OWNER'S MANUAL
MANUEL DU PROPRIETAIRE
BEDIENUNGSANLEITUNG
MANUALE D'ISTRUZIONI
MANUAL DEL USUARIO
Thanks for buying a TEAC. Read this manual carefully to get the best performance from this unit.
Nous vous remercions pour l'achat d'un appareil TEAC.
Lire ce manuel avec attention pour obtenir les meilleures performances possibles de cet appareil.
Vielen Dank für den Kauf dieses TEAC-Geräts. Bitte lesen Sie diese Anleitung sorgfältig durch,
um die Leistungs-fähigkeit dieses Geräts optimal nutzen zu können.
Grazie per aver acquistato un prodotto TEAC.
Leggere attentamente questo manuale per ottenere le migliori prestazioni da questo apparecchio.
Enhorabuena por la adquisición de un TEAC.
Lea detenidamente este manual a fin de obtener el mejor rendimiento de esta unidad.
Inhaltsverzeichnis

Verwandte Anleitungen für Teac AG-H350


Inhaltszusammenfassung für Teac AG-H350
- Seite 1 MANUALE D’ISTRUZIONI MANUAL DEL USUARIO Thanks for buying a TEAC. Read this manual carefully to get the best performance from this unit. Nous vous remercions pour l’achat d’un appareil TEAC. Lire ce manuel avec attention pour obtenir les meilleures performances possibles de cet appareil.
- Seite 2 IMPORTANT (for U.K.Customers) Contents Sommaire DO NOT cut off the mains plug from this equipment. If the plug fitted is not suitable for the power points in your home or the cable is too short to reach a power point, Before Use ............4 Avant utilisation..........4 then obtain an appropriate safety approved...
-
Seite 3: Inhaltsverzeichnis
Inhalt Indice Indice Vor Inbetriebnahme........5 Prima dell’uso ..........5 Previo al empleo..........5 Bevor Sie beginnen ........7 Operazioni preliminari ........7 Antes de la conexión ........7 Aufstellungsort der Lautsprecherboxen..9 Posizionamento dei diffusori.......9 Emplazamiento de los altavoces ....9 Anschlu ß ..........11-17 Collegamento ..........11-17 Conexión ..........11-17 Antemmenamschlu ß... -
Seite 4: Before Use
Before Use Avant Utilisation Lire ceci avant de faire fonctionner Read this before operation l'appareil < Choose the installation location of your < Choisir avec soin l'endroit où vous unit carefully. Avoid placing it in direct placerez votre appareil. Eviter de le placer sunlight or close to a source of heat. -
Seite 5: Vor Inbetriebnahme
Vor Inbetriebnahme Prima dell'uso Previo al empleo Leggere questo manuale prima di procedere Bitte vor Inbetriebnahme lesen Lea lo siguiente antes de poner en all'uso < Wählen Sie einen geeigneten Standort für funcionamiento el aparato < Scegliere con cura il luogo in cui installare den Receiver. -
Seite 6: Before Connection
Before Connection Avant d’effectuer les raccordements CAUTION ATTENTION Turn off the power of all the equipment Mettre tous les éléments de votre chaîne before making connections. hors tension avant de procéder au Read instructions of each component you raccordement de cet appareil. intend to use with this unit. -
Seite 7: Bevor Sie Beginnen
PRECAUCIÓN Prima di effettuare i collegamenti, spegnere Apague todos los componentes antes de Schalten Sie Ihre gesamte Anlage aus, bevor Sie Ihren neuen AG-H350 anschließen und in Betrieb tutti gli apparecchi interessati. realizar las conexiones. Leggere i manuali d’istruzioni degli Lea las instrucciones de todos los nehmen. -
Seite 8: Positionnement Des Enceintes
Positioning of the Speakers Positionnement des enceintes The positioning of speakers differs La position des enceintes varie en fonction according to the size and acoustics of the de la taille et de l'acoustique de la pièce. listening room. While actually listening to a Pour déterminer la meilleure position des program source, try various speaker enceintes, procéder de la façon suivante:... -
Seite 9: Aufstellungsort Der Lautsprecherboxen
Posizionamento dei diffusori Emplazamiento de los altavoces Aufstellungsort der Lautsprecherboxen Abhängig von der Größe sowie den La posizione dei diffusori va scelta in base El emplazamiento de los altavoces akustischen Gegebenheiten eines Raumes alle dimensioni e all’acustica dell’ambiente dependerá de las dimensiones y la acústica kann der optimale Aufstellungsort für die d’ascolto. - Seite 10 SPEAKERS SUB WOOFER Connection Connexions Cordon d'alimentation (AC) Power cord (AC) Bien brancher le cordon d'alimentation sur Be sure to connect the power cord to an AC outlet which supplies the correct voltage. une prise de courant qui fournit la tension correcte.
-
Seite 11: Anschluß
S-VIDEO S-VIDEO Anschluß Collegamento Conexión Cavo di alimentazione (AC) Netzkabel (AC) Cordón de alimentación (AC) Il cavo di alimentazione deve essere collegato Darauf achten, daß bei Netzanschluß die Asegúrese de conectar el cordón de ad una presa di corrente che fornisca corrente zulässige Voltzahl eingehalten wird. - Seite 12 SAT/AUX MONITOR Connection Connexions DVD, SAT/AUX DVD, SAT/AUX Connect the component with RCA pin cords. Make sure to connect : Raccorder l'appareil à l'aide de cordons munis d'une prise RCA. Veiller white plug w white jack(L:left) à brancher: red plug w red jack(R:right) Fiche blanche w connecteur blanc(L : gauche) yellow plug w yellow jack(VIDEO) Fiche rouge w connecteur rouge (R :Droite)
- Seite 13 Collegamento Conexión Anschluß DVD, SAT/AUX DVD, SAT/AUX DVD, SAT/AUX Verbinden Sie die einzelnen Komponenten Utilizzando cavi con terminali RCA, Utilice cables provistos de conectores RCA: mittels Cinchkabel, und achten Sie dabei auf effettuare le seguenti connessioni: eine einheitliche Verbindung: conector blanco spinotto bianco w jack bianco (L: sinistro) w terminal blanco (L: izquierda) weißer Stecker w weiße Buchse (L:links)
- Seite 14 CD-R/MD OPTICAL COAXIAL Connexions Connection Raccorder l'appareil à l'aide de cordons munis d'une prise RCA. Connect the component with RCA pin cords. Make sure to connect : Veiller à brancher: white plug w white jack(L:left) Fiche blanche w connecteur blanc(L : gauche) red plug w red jack(R:right) Fiche rouge w connecteur rouge (R :Droite) Prises DIGITAL IN/OUT...
- Seite 15 Anschluß Collegamento Conexión Verbinden Sie die einzelnen Komponenten Utilizzando cavi con terminali RCA, effettuare Utilice cables provistos de conectores RCA: mittels Cinchkabel, und achten Sie dabei auf le seguenti connessioni: eine einheitliche Verbindung: conector blanco spinotto bianco w jack bianco (L: sinistro) w terminal blanco (L: izquierda) weißer Stecker w weiße Buchse (L:links) spinotto rosso w jack rosso (R: destro)
- Seite 16 Connection Connexions Reference 300 Référence 300 If you have TEAC Reference 300 series, Si vous possédez des appareils de la série convenient system control operations and Référence 300 de TEAC, vous pourrez AI direct play functions are possible. utiliser un système de commandes pratiques et des fonctions de lecture <...
-
Seite 17: Antemmenamschlu Ss
< Premendo il tasto STANDBY/ON dell’AG- < Durch das Betätigen der STANDBY/ON- H350 si possono accendere/commutare in < Con el botón STANDBY/ON del AG-H350, Taste des AG-H350, können Sie alle standby tutti gli apparecchi collegati podrá encender y apagar todos los Geräte, die über Fernbedienungskabel... -
Seite 18: Connecting Antennas
Connecting Antennas (1) Raccordements d'antenne (1) Lead-type FM Antenna(75Ω) (provided) FM Indoor Antenna Antenne FM intérieure Antenne Filaire FM (75Ω) (fournie) 75-Ω-(UKW) FM-Antennenkabel (mitgeliefert) Si vous habitez à proximité d’un émetteur et If you live reasonably close to a transmitter Antenna FM a filo da 75 Ω... -
Seite 19: Antennenanschluß
Antennenanschluß (1) Collegamento delle antenne (1) Conexión de antenas (1) Antenna FM interna Antena FM para interiores UKW-Innenantenne Wenn Sie in der Nähe einer Sendeanlage Chi abita abbastanza vicino ad un Si vive en un área con una buena cobertura wohnen und die beigepackte Dipol-Antenne trasmettitore e vuole utilizzare l'antenna FM de radiofrecuencia y desea usar la antena... - Seite 20 Connecting Antennas (2) Raccordements d'antenne (2) AM Indoor Loop Antenna Antenne-cadre intérieure AM > > A high-performance AM loop antenna L'antenne cadre AM haute performance, provided with the receiver is sufficient for fournie avec le récepteur permet une très good reception in most areas. bonne réception dans la plupart des régions.
- Seite 21 Antennenanschluß (2) Collegamento delle antenne (2) Conexión de antenas (2) AM Rahmen-Antenne Antenna AM interna a telaio Antena AM interna a telaio > > > Im Lieferumfang des Receivers befindet sich L'antenna AM a telaio di elevate prestazioni, La antena de cuadro de AM de altas eine Hochleistungs-Mittelwellen-Innenantenne, in dotazione al Sintonizzatore, è...
-
Seite 22: Remote Control Unit
Remote Control Unit (1) Télécommande (1) By using the provided remote control unit, the En utilisant la télécommande fournie, receiver and some other TEAC components l'amplificateur et certains autres appareils used with it can be controlled from your TEAC utilisés avec lui peuvent être... -
Seite 23: Fernbedienungseinheit
TEAC-Komponenten geeignet. Bei ascolto per mezzo dell'unità di telecomando. los otros componentes TEAC utilizados con Verwendung die Fernbedienungseinheit stets Per utilizzare l'unità di telecomando, puntarla la misma pueden ser controlados desde su... - Seite 24 Remote Control Unit (2) Télécommande (2) Buttons for the Operation of TEAC Touches pour le fonctionnement Reference 300 d'autres appareils TEAC Reference sleep button This button is used for engaging the sleep touche veille (sleep) timer. permet d'activer la temporisation de veille.
-
Seite 25: Betrieb Mit Der Fernbedienung
Contador de tiempo (2) Betrieb mit der Fernbedienung (2) Funzionamento col telecomando (2) Tasten zur Steuerung TEAC Tasti per azionare altri apparecchi Botones para la operación de Reference 300 TEAC Reference 300 otros componentes TEAC Reference 300 Taste für Abschaltzeit (Sleep Timer) Tasto sleep Betätigen Sie diese Taste, um die Sleep... -
Seite 26: Basic Operations
Basic Operations (1) Fonctionnement de base (1) Press the POWER button, followed by the Presser la touche POWER puis la touche STANDBY/ON button. STANDBY/ON. Select the desired source with the INPUT Sélectionnez la source désirée avec le SELECTOR knob. sélecteur d'entrée (INPUT SELECTOR). VCR/TAPE VCR/TAPE SAT/AUX (OPT 1, OPT 2, COAX) -
Seite 27: Grundlegende Bedienung
Grundlegende Bedienung (1) Operazioni fondamentali (1) Funcionamiento básico (1) Drücken Sie die Taste POWER und dann Premere l’interruttore POWER e poi il Presione el interruptor POWER y luego el die Taste STANDBY/ON, um das Gerät tasto STANDBY/ON per accendere l’unità. botón STANDBY/ON para encender la enzuschalten. - Seite 28 Basic Operations (2) Fonctionnement de base (2) Main POWER switch and STANDBY/ON Interrupteur d'alimentation secteur (POWER) et touche d'attente/mise en Button marche (STANDBY/ON) When the main POWER switch is Lorsque l'interrupteur d'alimentation depressed: secteur est enfoncé: Press STANDBY/ON button to turn the Appuyer sur la touche STANDBY/ON pour power on.
- Seite 29 Grundlegende Bedienung (2) Operazioni fondamentali (2) Funcionamiento básico (2) Netzschalter (POWER) und Betriebstaste Interruttore principale di alimentazione Conmutador principal POWER y botón (STANDBY/ON) (POWER) e tasto di attesa e attivazione STANDBY/ON (STANDBY/ON) Drücken Sie die Taste POWER und dann Presione el interruptor POWER y luego el die Taste STANDBY/ON, um das Gerät Premere l’interruttore POWER e poi il botón STANDBY/ON para encender la...
- Seite 30 Basic Operations (3) Fonctionnement de base (3) PHONES jack Prise PHONES private listening, insert Pour l'écoute privée, brancher le casque headphones (1/4-inch plug) into the d'écoute (fiche de 6,35 mm) à la prise PHONES jack. The sound from speakers PHONES. Ceci a pour effet de couper le will be cut off.
- Seite 31 Grundlegende Bedienung (3) Operazioni fondamentali (3) Funcionamiento básico (3) PHONES–Anschluß (Kopfhörer) Connettore PHONES Conector PHONES Durch den Anschluß eines Kopfhörers Per l’ascolto individuale, inserire la spina Para la escucha en privado, conecte los (1/4”-Stecker) an der PHONES–Buchse. da 1/4” di una cuffia nel connettore auriculares (1/4") a la toma PHONES.
-
Seite 32: Réception De La Radio
Radio Reception (1) Réception de la radio (1) Select the TUNER mode by turning the Commuter l’appareil sur TUNER en INPUT SELECTOR knob. tournant le bouton INPUT SELECTOR. Select the AM or FM by pressing the Sélectionner AM ou FM en appuyant sur BAND button. -
Seite 33: Hörfunk-Empfang
Hörfunk-Empfang (1) Ricezione radio (1) Recepción de radio (1) Mit dem Eingangswähler die TUNER- Ruotare il selettore INPUT SELECTOR per Seleccione TUNER con el selector INPUT Programmquelle anwählen. impostare l’apparecchio sulla posizione SELECTOR. TUNER. Mit der BAND-Taste den Empfangsbereich Selezionare la banda AM o FM agendo Seleccione AM o FM presionando el (AM oder FM) einstellen. - Seite 34 Radio Reception (2) Réception de la radio (2) FM MODE Button Touche FM MODE Pressing this button alternates between Une pression sur cette touche fait Stereo mode and Mono mode. alterner entre le mode Stéréo et le mode Mono. M Stereo FM stereo broadcasts are received in M Stéréo stereo and the STEREO indicator lights in...
- Seite 35 Hörfunk-Empfang (2) Ricezione radio (2) Recepción de radio (2) UKW-Empfangs-Modus-Taste (FM MODE) Tasto FM MODE Botón FM MODE Das Betätigen dieser Taste schaltet Premendo questo tasto l'apparecchio El presionar este botón conmuta entre el zwischen Stereo- und Mono-Empfang um. commuta alternativamente tra i modi modo estereofónico o monofónico.
-
Seite 36: Preset Tuning
Radio Reception (3) Réception de la radio (3) Preset Tuning Syntonisation préréglée Cette fonction est utilisée pour ranger des This facility is used to store FM, AM émissions FM, AM respectivement du canal 1 broadcasting from Channel 1 to 30 à... - Seite 37 Hörfunk-Empfang (3) Ricezione radio (3) Recepción de radio (3) Preset-Tuning Sintonizzazione a predisposizione Sintonización preajustada Questa funzione è usata per la memorizzazione UKW- und MW-Sender können auf den Esta función es empleada para almacenar delle stazioni FM o AM nei canali da 1 a 30. Speicherplätzen 1 bis 30 abgespeichert radiodifusoras de FM y AM en el canal 1 a 30 werden.
- Seite 38 Radio Reception (4) Réception de la radio (4) Manual Memory Presetting Préréglage manuel de la mémoire Select the TUNER mode by turning the Sélectionner le mode TUNER en tournant INPUT SELECTOR knob. le bouton INPUT SELECTOR. Select the AM or FM by pressing the Sélectionner AM ou FM en appuyant sur BAND selector button.
-
Seite 39: Manuelle Preset-Abspeicherung
Hörfunk-Empfang (4) Ricezione radio (4) Recepción de radio (4) Manuelle Preset-Abspeicherung Predisposizione manuale della Preajuste manual de memoria memoria Mit dem Eingangswähler die TUNER- Seleccione TUNER con el selector INPUT programmquelle anwählen. SELECTOR. Ruotare il selettore INPUT SELECTOR per impostare l’apparecchio sulla posizione TUNER. -
Seite 40: Rds (Radio Data System) (1
RDS (Radio Data System) (1) RDS (Radio Data System) (1) RDS is a broadcasting service which allows Le RDS est un service de diffusion qui permet stations to send additional information along aux stations d'envoyer des informations with the regular radio program signal. RDS complémentaires avec le signal du programme services can be received only in FM band. -
Seite 41: Die Rds-Anzeige
RDS (Radio Data System) (1) RDS (Radio Data System) (1) RDS (Radio Data System) (1) RDS ist ein Sendeservice, mit dem Sender Il sistema RDS è un sistema di trasmissione El servicio de radiodifusión con radiodifusoras programmbegleitende Signaldaten che consente alle stazioni di trasmettere envían información adicional... - Seite 42 RDS (Radio Data System) (2) RDS (Radio Data System) (2) (3) PTY mode (3) Mode PTY < When you select PTY with the RDS MODE < Lorsque vous sélectionnez l'option PTY à button, "PTY" will blink for about 4 seconds. l'aide de la touche RDS MODE, l'indication After 4 seconds, the type of received PTY "PTY"...
- Seite 43 RDS (Radio Data System) (2) RDS (Radio Data System) (2) RDS (Radio Data System) (2) (3) PTY Modus (3) Modo PTY (3) Modo PTY < Nachdem Sie mittels der RDS-MODE Taste < Quando si seleziona questa funzione con il < Cuando se selecciona PTY con el botón die Betriebsart PTY angewählt haben, tasto RDS MODE, lampeggerà...
- Seite 44 RDS (Radio Data System) (3) RDS (Radio Data System) (3) CHILDREN children’s programs. CHILDREN Programmes pour les enfants. social affairs. Affaires sociales. SOCIAL-A SOCIAL-A religious programs. Programmes religieux. RELIGION RELIGION program in which the public Programme dans lequel le public PHONE-IN PHONE-IN expresses its view by phone.
- Seite 45 RDS (Radio Data System) (3) RDS (Radio Data System) (3) RDS (Radio Data System) (3) CHILDREN Kindersendungen. CHILDREN programmi per bambini. CHILDREN programas infantiles. Soziale Themen. affari sociali. asuntos sociales. SOCIAL-A SOCIAL-A SOCIAL-A Religiöse Sendungen. programmi religiosi. programas religiosos. RELIGION RELIGION RELIGION programmi in cui il pubblico...
-
Seite 46: Pty Search
PTY Search Recherche PTY How to Search For Your Desired Comment chercher votre programme Program Using PTY Search voulu en utilisant la recherche PTY Select the TUNER function. Sélectionner la fonction TUNER. Press the BAND button to select FM. Appuyer sur la touche BAND pour sélectionner FM. -
Seite 47: Pty-Suchlauf
PTY-Suchlauf Riceraca PTY Recherche PTY Come ricercare il programma desiderato Método para buscar el programa Senderwahl mit dem PTY-Suchlauf per mezzo della riceraca PTY deseado utilizando la búsqueda PTY Die TUNER-Programmquelle anwählen. Selezionare la funzione del sintonizzatore. Seleccione la función de sintonizador. Mit Taste BAND auf UKW-Empfang Agire sul tasto BAND per selezionare la Presione el botón BAND para seleccionar... - Seite 48 Video Operations (1) Fonctionnement Vidéo (1) Playing Video Sources Lecture de sources vidéo Note: Remarque: When playing videos that feature surround Pour lire des programmes vidéo utilisant sound, refer to "Available Surround une certaine fonction d'effet Surround, se Modes". reporter à la section "Modes Surround disponibles.
-
Seite 49: Video-Betriebsarten
Video-Betriebsarten (1) Azionamenti Video (1) Operaci nes de Video (1) ó Wiedergabe von Videoaufzeichnungen Riproduzione da sorgenti video Reproducción de fuentes de video Hinweis: Nota: Nota: Nähere Informationen zur Wiedergabe von Per la riproduzione di video con suono Para la reproducción de videos grabados Surround Sound-kodierten Bildtonträgern Surround, riferirsi al paragrafo “Modi con sonido envolvente, consulte "Modos... - Seite 50 Video Operations (2) Fonctionnement Vidéo (2) Video Dubbing Copie de bande vidéo Turn the INPUT SELECTOR knob to select Turner le bouton INPUT SELECTOR pour the VIDEO source to be recorded. sélectionner source vidéo à enregistrer. Play back the source. Mettre la source en lecture.
-
Seite 51: Überspielbetrieb
Video-Betriebsarten (2) Azionamenti Video (2) Operaciones de Video (2) Überspielbetrieb Duplicazione di un nastro video Copia de cinta video Mit dem Eingangswähler (INPUT Ruotare opportunatamente il selettore Gire il selector INPUT SELECTOR para SELECTOR) die aufzunehmende Video- INPUT SELECTOR e selezionare la seleccionar la fuente video a ser grabada. -
Seite 52: Modes Surround Disponibles
Available Surround Modes (1) Modes Surround disponibles The surround functions create a “live” Lorsque vous utilisez la fonction surround, le atmosphere such as that experienced in son crée une atmosphère "vivante" comme movie theaters, discos, stadiums and concert celle obtenue dans les salles de cinéma ou halls. -
Seite 53: Verfügbare Surround-Modi
Verfügbare Surround-Modi (1) Modalità di suono Modos de difusión de avvolgente disponibili sonido disponibles Surround-Funktionen vermitteln La funzioni Surround creano un’atmosfera Las funciones de sonido envolvente crean un Klangeindrücke, wie Sie sie aus Filmtheatern, sonora “dal vivo” paragonabile a quella di ambiente "en vivo"... - Seite 54 Available Surround Modes (2) Modes Surround disponibles DOLBY DIGITAL Surround Surround DOLBY DIGITAL The Dolby Digital surround format lets you Le format surround Dolby Digital vous permet enjoy up to 5.1 channels of digital surround de profiter jusqu'à 5,1 canaux de son sound from a Dolby Digital program source.
- Seite 55 Video-Betriebsarten (2) Azionamenti Video (2) Operaciones de Video (2) DOLBY DIGITAL-Surround Suono avvolgente DOLBY DIGITAL Difusión de sonido DOLBY DIGITAL El formato de difusión de sonido Dolby Digital Das Dolby Digital Surround-Format bietet bis Il formato di suono avvolgente Dolby Digital le permite disfrutar de hasta canales 5,1 de zu 5,1 Kanäle mit Digital Surround-Sound von permette di godere di sino a 5,1 canali di...
- Seite 56 Available Surround Modes (3) Modes Surround disponibles Press the SURROUND MODE button to Appuyer sur la touche SURROUND MODE turn the surround mode on. de manière à activer le mode surround. Every time the SURROUND MODE button A chaque pression sur la touche is pressed, the mode is changed as SURROUND MODE, le mode change follows:...
- Seite 57 Surround Sound (3) Suono Avvolgente (3) Difusión de Sonido (3) Zum aktivieren des Surround-Betriebs Premere il tasto SURROUND MODE per Pulse el botón SURROUND MODE para betätigen Sie die SURROUND MODE- attivare il modo Surround. activar el modo envolvente. Taste. Ogni volta che si preme il tasto Cada vez que pulse el botón SURROUND Bei jedem Betätigen der SURROUND...
- Seite 58 Available Surround Modes (4) Modes Surround disponibles THEATER Surround Surround THEATER This mode provides a three dimensional Ce mode offre un effet à trois dimensions effect similar to that of movie theater. similaire à celui d'une salle de cinéma. With this mode, you can enjoy a surround Avec ce mode, vous pouvez profiter d'un effet effect similer to Dolby Surround sound even Surround similaire au son Surround Dolby...
- Seite 59 Surround Sound (4) Suono Avvolgente (4) Difusión de Sonido (4) THEATER Surround Suono avvolgenteTHEATER Difusión de sonido THEATER Dieser Modus bietet einen dreidimensionalen Questo modo crea un effetto tridimensionale, Este modo suministra un efecto tridimensional Effekt, ähnlich dem Raumeindruck in einem simile a quello che si sente in una sala similar al de una sala de cine.
-
Seite 60: Speaker Configuration
Speaker Configuration (1) Configuration de haut-parleurs (1) It is important to perform speaker configuration Il est important d'effectuer la configuration de prior to using the decoder. haut-parleurs avant d'utiliser le décodeur. This allows the unit to sense the available Ce qui permet à l'appareil de savoir quels haut- speakers and automatically select decoding parleurs sont disponibles et de sélectionner modes. -
Seite 61: Lautsprecherkonfiguration
Lautsprecherkonfiguration (1) Configurazione degli altoparlanti (1) Configuraci n de altavoz (1) ó Vor Gebrauch des Decoders muß die Prima di passare all’uso del decodificatore è Es importante ejecutar previamente la Lautsprecherkonfiguration vorgenommen necessario eseguire la configurazione degli configuración de altavoz usando el werden. - Seite 62 Speaker Configuration (2) Configuration de haut-parleurs (2) FRONT SPEAKER Mode: Mode FRONT SPEAKER: < F-LARGE: The mode to choose if a large < F-LARGE: Choisissez ce mode si une speaker is installed. Front channels output grande enceinte est installée. Les canaux is full range.
- Seite 63 Lautsprecherkonfiguration (2) Configurazione degli altoparlanti (2) Configuraci n de altavoz (2) ó FRONT SPEAKER-Modus: Modalità FRONT SPEAKER: Modo FRONT SPEAKER: F-LARGE: Wählen Sie diese Betriebsart, F-LARGE(Grandi): La modalità da scegliere F-LARGE: Seleccione este modo si los < < < wenn Sie großvolumige Lautsprecher se è...
- Seite 64 Speaker Configuration (3) Configuration de haut-parleurs (3) SUBWOOFER output : Sortie SUBWOOFER : SUB-ON:The mode to choose if a SUB-ON: Choisissez ce mode si un caisson < < subwoofer is used. Sound with frequencies de grave est utilisé. Les fréquences de 90 of 90 Hz and below is reproduced by Hz ou inférieures sont reproduits par votre subwoofer.
- Seite 65 Lautsprecherkonfiguration (3) Configurazione degli altoparlanti (3) Configuraci n de altavoz (3) ó SUBWOOFER-Ausgang: Uscita SUBWOOFER: Salida SUBWOOFER: SUB-ON: Wählen Sie diese Betriebsart, SUB-ON: La modalità da scegliere se viene SUB-ON: Seleccione este modo si está < < < wenn Sie einen Subwoofer angeschlossen utilizzato un altoparlante subwoofer.
-
Seite 66: Delay Time
Delay Time Retard Delay Time Durée de retard The delay time can be individually set for the La durée de retard peut être réglée Dolby Digital/Dolby Pro Logic modes using indépendamment pour les modes Dolby the DELAY buttons. Digital et Dolby Pro Logic en utilisant les touches DELAY. -
Seite 67: Surround Effekte
Surround Effekte Effetti Surround Difusión de sonido Verzögerungszeit/Effekt Tempo di ritardo ed effetti Efecto/tiempo de retardo Die Verzögerungszeiten für DOLBY DIGITAL- Il tempo di ritardo può essere predisposto tiempo retardo puede und DOLBY PRO LOGIC-Modus können mezzo tasti DELAY, simultáneamente ajustado para los modos gleichzeitig DELAY-Tasten contemporaneamente per i due sistemi... -
Seite 68: Test De Tonalité
Test Tone Test de tonalité Balancing relative volume Réglage du volume entre les between speakers enceintes The test tone function is useful to adjust La fonction "Test de tonalité" permet de the relative volume between speakers in régler le volume entre les enceinte en DTS, DOLBY DIGITAL or DOLBY PRO LOGIC mode DTS, DOLBY DIGITAL ou DOLBY PRO mode. -
Seite 69: Testtonfunktion
Testtonfunktion Test Tone Prueba de sonido Einstellen relativen Bilanciamento del volume tra Balance entre altavoces Lautstärkeverhältnisses der gli altoparlanti Lautsprecherboxen zueinander La prueba de tono es una función muy útil Torna utile la funzione Test Tone quando para ajustar el volumen relativo entre In den DTS, DOLBY DIGITAL oder DOLBY si deve bilanciare il volume tra gli altavoces en los modos DTS, DOLBY... - Seite 70 Troubleshooting If you have problems with your system, look through this chart and see if you can solve the problem yourself before calling your dealer or TEAC service center. No power e Check the connection to the AC power supply.
-
Seite 71: Fehlerbeseitigung
Specifications Amplifier Section FM Tuner Section (Without notes 100.1 MHz, 65 dBf) Output Power (Stereo) Tuning Range: 50 watts RMS per channel minimum, both channels driven into 8 ohms from 20 Hz to 20kHz with no more than 0.9% 87.5 MHz – 108.0 MHz (50 kHz steps) total harmonic distortion AM Suppression Ratio: 45 dB Surround Output Power (0.9 % THD, 1 kHz, 8 ohms):... -
Seite 72: Ricerca Guasti
Dépannage En cas de problème, commencer par chercher dans ce tableau pour voir si on peut trouver soi-même la solution avant de contacter le revendeur ou le centre de service client TEAC. L'appareil n'est pas alimenté e Vérifier que le cordon d'alimentation est bien branché. -
Seite 73: Section Amplificateur
Spécifications Section amplificateur Section syntoniseur FM Puissance de sortie (stéréo) 50 (max.) watts de valeur efficace par canal, deux canaux (Sans remarqe : 100,1 MHz, 65 dBf) sous 8 ohms, 20 Hz-20 kHz de fréquence, 0,9% ou moins de Plage de syntonisation : distorsion harmonique totale. - Seite 74 Überprüfen Sie die Batterien. Falls diese verbraucht sind, ersetzen Sie sie durch frische. e Verwenden Sie die Fernbedienung in einem Abstand von ca. 5 m und richten Sie sie auf den Sensor am AG-H350. e Entfernen Sie Objekte, die sich zwischen der Fernbedienung und dem AG-H350 befinden oder ändern Sie Ihre Position, von der aus Sie die Fernbedienung benutzen.
-
Seite 75: Technische Daten
Technische Daten Verstärkerteil UKW-Empfangsteil (Wenn nicht angegeben 100,1 MHz, 65 dBf) Ausgangsleistung (stereo) Empfangsbereich: 50 (max.)-Watt-Effectivwert pro Kanal; beide Kanäle unter 8 Ohm; Frequenz 20 Hz-20 kHz; Klirrfactor nich mehr als 87,5 MHz - 108,0 MHz (50-kHz-Schritte) 0,9% MW-Dämpfungs Empfindlichkeit: 45 dB Surround-Ausgangsleistung Klirrfaktor (1 kHz): Mono : 0,4% (0,9 % Klirrfactor, 1 kHz, 8 Ohm) :... -
Seite 76: Ricerca Guasti
Ricerca guasti Nell’eventualità di un comportamento difettoso dell’apparecchio, prima di chiamare il rivenditore o rivolgersi a un Centro Assistenza TEAC, verificare se il difetto è riportato nell’elenco che segue e provare a risolverlo come consigliato. Non arriva corrente e Verificare il collegamento all’alimentazione di rete... -
Seite 77: Dati Tecnici
Dati tecnici Sezione dell’amplificatore Sezione del sintonizzatore FM (100,1 MHz, 65 dBf, slavo diverse indicazioni) Potenza in uscita (stereo) Gamma di sintonizzazione: 50 watts (al massimo) di valore efficace per canale, due canali sotto 8 ohm, 20 Hz-20 kHz di frequenza, 0,9% (non da 87,5 MHz a 108,0 MHz, a scatti di 50 kHz più) di distorsione armonica totale Rapporto di sppressione AM : 45 dB... -
Seite 78: Solución De Problemas
Solución de problemas Si surge algún problema con la unidad, consulte la siguiente tabla y pruebe a solucionarlo antes de ponerse en contacto con su distribuidor o con el servicio técnico de TEAC. No hay corriente. e Revise la conexión al suministro de alimentación. - Seite 79 Especificaciones Seccón del amplificador Section syntoniseur FM Potencia de salida (estereo) 50 (máx.) vatios de valor eficaz por canal, dos canales (Sin notas 100,1 MHz, 65 dBf) sobre 8 ohmios, 20 Hz a 20 kHz de frequencia, 0,9% o Límites de sintonizacion: memos de distorsión armónica total.
- Seite 80 TEAC NEDERLAND BV Oeverkruid 15, NL-4941 VV Raamsdonksveer, Nederland Phone: 0162-510210 TEAC BELGIUM NV/SA c/o TEAC NEDERLAND BV, Oeverkruid 15, NL-4941 VV Raamsdonksveer, Nederland Phone: +31-162-510860 TEAC ITALIANA S.p.A. Via C. Cantù 11, 20092 Cinisello Balsamo, Milano, Italy Phone: 02-66010500 TEAC AUSTRALIA PTY., LTD.