Inhaltsverzeichnis
Werbung
Verfügbare Sprachen
Verfügbare Sprachen
Quicklinks
Werbung
Inhaltsverzeichnis
Fehlerbehebung

Verwandte Anleitungen für Salvis Vitality Pro SDS 1/1-13


Inhaltszusammenfassung für Salvis Vitality Pro SDS 1/1-13
- Seite 1 All manuals and user guides at all-guides.com SALVIS Druck‐Steamer Vitality Pro SALVIS Pressure Steamer Vitality Pro SALVIS Cuiseur à vapeur Vitality Pro SDS 1/1‐13 Installations‐ und Gebrauchsanweisung Installation‐ and Operating Instruction Instructions d'installation et mode d'emploi...
-
Seite 2: Inhaltsverzeichnis
All manuals and user guides at all-guides.com Inhaltsverzeichnis / Table of contents / Table des matières Seite / Page / Page Installations- und Gebrauchsanweisung − de ..Hinweise zur Betriebssicherheit ..........Bedienblende und Funktionsbeschreibung . - Seite 3 All manuals and user guides at all-guides.com Inhaltsverzeichnis / Table of contents / Table des matières Seite / Page / Page Einstellen und Regenerieren des Wasserenthärters ......Einstellen des Wasserenthärters .
- Seite 4 All manuals and user guides at all-guides.com Inhaltsverzeichnis / Table of contents / Table des matières Seite / Page / Page Creating, modifying and deleting programmes ....... . . Creating programmes .
- Seite 5 All manuals and user guides at all-guides.com Inhaltsverzeichnis / Table of contents / Table des matières Seite / Page / Page Maintenance ..............Notes on waste disposal .
- Seite 6 All manuals and user guides at all-guides.com Inhaltsverzeichnis / Table of contents / Table des matières Seite / Page / Page Réglage de la présélection- de l’heure de démarrage ......Fin de l’utilisation .
-
Seite 7: Installations- Und Gebrauchsanweisung − De
All manuals and user guides at all-guides.com Installations- und Gebrauchsanweisung − de Sehr geehrte Kundin, sehr geehrter Kunde, lesen Sie die Gebrauchsanweisung sorgfältig durch, bevor Sie den Druck-Steamer in Betrieb nehmen. Die Gebrauchsanweisung enthält wichtige Hinweise für eine ordnungsgemäße Bedienung und Installation. Die Gebrauchsanweisung ist Teil des Gerätes. -
Seite 8: Hinweise Zur Betriebssicherheit
All manuals and user guides at all-guides.com Hinweise zur Betriebssicherheit Täglicher Betrieb D Das Gerät dient zur gewerblichen Nutzung und darf nur betrieben werden − von eingewiesenem Personal, − mit eingesetzter Tropfschale, − wenn das Gerät beaufsichtigt wird, − für den nach Gebrauchsanweisung vorgesehenen Zweck. D Das Gerät darf im Freien nur betrieben werden, mit Überdachung und ausreichendem Wind- schutz! Das Gerät und die Anschlusskabel vor Feuchtigkeit schützen! D Das Gerät nicht als Ablage und Abstellfläche verwenden! - Seite 9 All manuals and user guides at all-guides.com Beschädigungsgefahr D Lüftungs-Öffnungen an der Geräterückseite nicht abdecken. D Keine fest geschlossenen Behälter wie z. B. Konservendosen mit Speisen erhitzen. Die ge- schlossenen Behälter und Dosen können platzen. D Die Umgebungstemperatur am Aufstellort darf nicht unter den Gefrierpunkt absinken. Das Wasser in den Leitungen und Bauteilen würde gefrieren und somit das Gerät beschädigen.
-
Seite 10: Bedienblende Und Funktionsbeschreibung
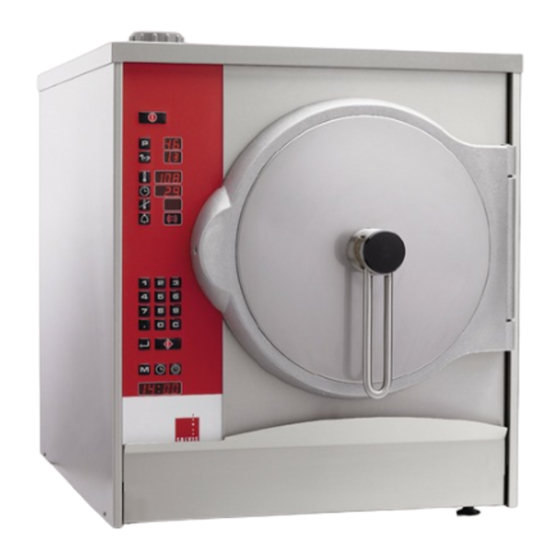
All manuals and user guides at all-guides.com Bedienblende und Funktionsbeschreibung Bedienung nur von Hand! Nicht mit scharfen oder spitzen Gegenständen bedienen, sonst Be- schädigung der Bedienblende! Taste Anzeigefeld für Programmnum- Gerät Ein-/Ausschalten Kontrolllampe Anzeigefeld Garphasen: Anzahl der programmierten Gar- Taste Programm phasen (max. -
Seite 11: Inbetriebnahme
All manuals and user guides at all-guides.com Inbetriebnahme Für einen ordnungsgemäßen Betrieb muss − das Gerät durch einen autorisierten Kundendienst fachgerecht angeschlossen werden (Seite 34 Kapitel 11.), − der eingebaute Wasserenthärter auf die vorhandene Wasserhärte eingestellt werden (Seite 29 Kapitel 8.). . -
Seite 12: Einsetzen Der Teile
All manuals and user guides at all-guides.com Einsetzen der Teile Dichtung Dichtung . Dichtung für Garraumtür einsetzen. . Tropfschale einhängen. Einhängegestell . Einhängegestelle einhängen. Einhängegestell Tropfschale Platzieren des Kerntemperatur-Fühlers bei Nichtgebrauch Halterung . Wenn der Kerntemperatur-Fühler für den Garvorgang nicht benötigt wird, −... -
Seite 13: Beschicken Des Garraumes Und Entnehmen Der Speisen
All manuals and user guides at all-guides.com Beschicken des Garraumes und Entnehmen der Speisen Beschicken des Garraumes D Nur hitzebeständige Gastronorm-Behälter verwenden! D Um bei der Verwendung von Lochgittern Korrosionsschäden im Garraum zu vermeiden, die Gerichte erst nach dem Garvorgang mit Salz würzen. Dies hat auch den Vorteil, dass Sie weit weniger Salz benötigen, als wenn Sie vor dem Garvorgang salzen. -
Seite 14: Einstellen Uhrzeit Und Datum
All manuals and user guides at all-guides.com Einstellen Uhrzeit und Datum Die Einstellung und Anzeige kann nicht während eines Garvorganges durchgeführt werden. Ist das Gerät mehrere Tage ohne Stromversorgung, wird die Uhrzeit auf Null gesetzt und muss nach dem Einschalten neu eingegeben werden. Die Eingaben können nur in der nachfolgenden Reihenfolge vorgenommen werden. -
Seite 15: Garen Ohne Programme
All manuals and user guides at all-guides.com Anzeigen von Uhrzeit, Datum und Jahr . Um alle Werte nacheinander anzeigen zu lassen − Taste Eingabebestätigung so oft drücken, bis der gewünschte Wert angezeigt wird. D Nach dem Einschalten des Gerätes und Eingeben eines Programmes wird immer die Uhr- zeit angezeigt. -
Seite 16: Einstellen Der Garzeit
All manuals and user guides at all-guides.com Einstellen der Garzeit . Taste Garzeit drücken. D Die Kontrolllampe in der Taste blinkt. D Im Anzeigefeld erscheint . Garzeit mit den Zifferntasten eingeben, z. B. Minuten D Einstellbarer Bereich von 0.1 bis 999 Minuten. Einstellen der Kerntemperatur Die Funktion Kerntemperatur muss nicht angewendet werden und kann auch übersprungen... -
Seite 17: Arbeiten Mit Dem Kerntemperatur-Fühler
All manuals and user guides at all-guides.com Arbeiten mit dem Kerntemperatur-Fühler D Mit dem Kerntemperatur-Fühler wird die Innentemperatur des Gargutes genau erfasst. Nach Erreichen der eingestellten Kerntemperatur wird das Gerät automatisch abge- schaltet und ein Summer ertönt. D Wenn Sie die Funktion Kerntemperatur verwenden, ist die Garzeit abgeschaltet. D Die Kerntemperatur kann in allen Garphasen angewendet werden. -
Seite 18: Garen Mit Programmen Und Funktionen
All manuals and user guides at all-guides.com Garen mit Programmen und Funktionen Werksseitig sind ca. 80 Programme belegt und gespeichert. Die Programmnummern finden Sie im Kochhandbuch und im Rezeptesteller. Einstellen Programm nach dem Einschalten . Taste Programm drücken. D Die Kontrolllampe in der Taste blinkt. D Das zuletzt eingestellte Programm z. -
Seite 19: Änderung- Und Abfragemöglichkeiten Während Des Betriebes
All manuals and user guides at all-guides.com Änderung- und Abfragemöglichkeiten während des Betriebes Während des Garvorganges können Sie Veränderungen vornehmen − an der Gartemperatur. − zur Garzeit oder − Kerntemperatur. Sie können sich vor oder während eines Garvorganges Daten anzeigen lassen, wie −... -
Seite 20: Abfrage Der Garzeit Und Der Gartemperatur Im Garraum
All manuals and user guides at all-guides.com 3.7.2 Abfrage der Garzeit und der Gartemperatur im Garraum Anzeige während des Anzeige während dem Drücken Garvorganges Taste drücken der Taste ”Dezimalpunkt” und halten Eingestellte Temperatur im Gartemperatur Garraum Zuvor einge- stellte Garzeit Rest Garzeit 3.7.3 Abfrage der Temperatur am Kerntemperatur-Fühler... -
Seite 21: Erstellen, Ändern Und Löschen Von Programmen
All manuals and user guides at all-guides.com Erstellen, Ändern und Löschen von Programmen Vorsicht, wenn der Kundendienst die Softwareversion neu lädt, sind alle Ihre geänderten und gespeicherten Daten verloren. Notieren Sie daher zuvor Ihre vorgenommen Einstellungen! Erstellen von Programmen In einem Programm können bis zu drei Garphasen eingespeichert werden. Ein Programm ent- hält mindestens eine Garphase. -
Seite 22: Erstellen Eines Neuen Programmes
All manuals and user guides at all-guides.com 4.1.2 Erstellen eines neuen Programmes . Wenn in der Anzeige eine Programmnummer angezeigt wird − Taste Programm drücken. D Die Kontrolllampe in der Taste und die Anzeige blinkt. . Die freie Programmnummer mit den Zifferntasten eingeben, z. B. Erste Garphase . -
Seite 23: Anzeige Fehlernummer − Fehlende Daten Für Garvorgang "Er 13
All manuals and user guides at all-guides.com Daten speichern und Programmierung abschließen . Taste Programmspeicher drücken. D Die Kontrolllampe in der Taste Programmspeicher und die Anzeige für Programmnum- blinken. . Die freie Programmnummer nochmals mit den Zifferntasten eingeben, z. B. . -
Seite 24: Ändern Von Programmen
All manuals and user guides at all-guides.com Ändern von Programmen Sie können die Einstellungen an den eigenen und werkseitig gespeicherten Programmen verändern. . Taste Programm drücken. D Die Anzeige blinkt. . Die zu ändernde Programmnummer mit den Zifferntasten eingeben, z. B. . -
Seite 25: Einstellen Der Startzeit-Vorwahl
All manuals and user guides at all-guides.com Einstellen der Startzeit-Vorwahl Mit dieser Funktion können Sie ein eingestelltes Programm z. B. zu einem von Ihnen bestimmten Zeitpunkt starten lassen. Die Startzeit-Vorwahl (bis zu 24 Stunden) ist nur möglich bei der Anwendung von Programmen. Während der Anzeige von “rE”... -
Seite 26: Anzeigen Der Gardaten Wenn Die Startzeit-Vorwahl Aktiviert Ist
All manuals and user guides at all-guides.com Anzeigen der Zeituhr und Programmnummer wenn die Funktion Startzeit-Vor- wahl aktiviert ist . Taste Dezimalpunkt drücken. D Die Uhrzeit und die eingestellte Programmnummer wird angezeigt. Anzeigen der Gardaten wenn die Startzeit-Vorwahl aktiviert ist . -
Seite 27: Reinigung Und Pflege
All manuals and user guides at all-guides.com Reinigung und Pflege Achten Sie auf die Sauberkeit des Gerätes und des Garraumes. Die Erwärmung alter Fett- und Speisereste beeinträchtigt die Geruchs- und Geschmacksrichtung des Gargutes. Hinweise zur Reinigung D Keine ätzenden Reiniger auf die Bedienblende und die Tür bringen! D Das Gerät nicht mit Wasserleitungsschlauch, Hochdruckreiniger, Dampf-Hochdruckreiniger oder Dampfreiniger abspritzen bzw. -
Seite 28: Reinigung Und Pflege Der Dichtung An Der Garraumtür
All manuals and user guides at all-guides.com Reinigung und Pflege der Dichtung an der Garraumtür Die Lebensdauer der Dichtung hängt stark von der Pflege ab. Scharfe Reinigungsmittel greifen das Dichtungsmaterial an und beschleunigen den Verschleiß. Reinigen der Dichtung Dichtung . Dichtung abnehmen und fettlösendem Spül- mittel reinigen, klarspülen und abtrocknen. -
Seite 29: Einstellen Und Regenerieren Des Wasserenthärters
All manuals and user guides at all-guides.com Einstellen und Regenerieren des Wasserenthärters Einstellen des Wasserenthärters D Der eingebaute Wasserenthärter verhindert Kalkablagerungen im Gerät und ist werksseitig auf Stufe 4 eingestellt. Es sind Einstellungen von 1 bis 9 Stufen möglich. D Die Einstellung des Wasserenthärters muss durch den autorisierten Kundendienst erfolgen. Regenerieren des Wasserenthärters Bitte beachten, der Regeneriervorgang dauert ca. - Seite 30 All manuals and user guides at all-guides.com Befüllen des Wasserenthärters Deckel . Deckel des Wasserenthärters abschrauben. Einfüllöffnung . Entnahme des Deckels bestätigen − Taste drücken. D Die Anzeige neben der Uhr blinkt D Ca. eine Minute warten bis der Summer er- tönt und die Anzeige scheint.
-
Seite 31: Störungen Und Abhilfe
All manuals and user guides at all-guides.com Störungen und Abhilfe Sollten an diesem Gerät Störungen auftreten, so überprüfen Sie diese bitte anhand folgender Tabelle: Störung Mögliche Ursache Abhilfe Hauptschalter vor dem Gerät Hauptschalter einschalten. nicht eingeschaltet. Die gesamte Stromversorgung Energieversorgungsunternehmen fehlt. -
Seite 32: Anzeige Von Störungen Im Anzeigefeld
All manuals and user guides at all-guides.com Anzeige von Störungen im Anzeigefeld Sollten am Gerät Störungen auftreten, ertönt ein Signal und eine Fehler-Nummer wird ange- zeigt. . Zum Abschalten des Summers, die Taste Summer drücken. Anzeige Fehler- Ursache Abhilfe Nummer Bedienfehler Der Kerntemperatur-Fühler ist nicht in Kerntemperatur-Fühler in das Gargut... -
Seite 33: Technische Daten
All manuals and user guides at all-guides.com Technische Daten Technische Daten Druck-Steamer SDS 1/1-13 Druck-Steamer SDS 1/1-13 230 V Artikel-Nr. BI371400, 953520, BI371402, BI371413 BI371408, BI371434 Nutzinhalt Garraum 2 x GN 1/1-100 1 x GN 1/1-200 Gesamtanschlusswert 16 kW Spannung − Absicherung 400 V 3N 50 Hz −... -
Seite 34: Aufstellen Und Anschließen
All manuals and user guides at all-guides.com Aufstellen und Anschließen D Beachten Sie die örtlichen küchentechnischen Vorschriften. D Die Installationen müssen nach den Montageanweisungen des Herstellers und nach den anerkannten Regeln der Technik durchgeführt werden. D Auf das Gerät dürfen keine weiteren Geräte gestellt werden! D Lassen Sie die Aufstellung und Einweisung der Geräte vom autorisierten Kundendienst durchführen. -
Seite 35: Anschlüsse
All manuals and user guides at all-guides.com 11.1 Anschlüsse Wasseranschluss G3/4 Anschluss für Po- tentialausgleich Ablauf Durchmesser 20 mm Typenschild Verstellbarer Gerätefuß Elektrischer Anschluss und Anschluss für Leistungsbegrenzungs-System bzw. Ener- gieoptimierungs-Anlage Luftventil Dampferzeuger und Überlauf Sicherheitsventil Ansicht von unten 11.2 Wasseranschluss D Beachten Sie die Vorschriften der örtlichen Wasserversorgungsunternehmen! D Nicht an Warmwasserzulauf, Durchlauferhitzer oder offene Warmwassergeräte anschlie-... -
Seite 36: Wasserablauf
All manuals and user guides at all-guides.com 11.3 Wasserablauf D Die verwendeten Schläuche und Abwasserrohre müssen temperaturbeständig > 100°C sein. D Abwasserrohr und Schlauch mit mindesten 3% Gefälle zum Abfluss verlegen. D Eine Querschnittsverjüngung des Abwasserrohres ist nicht zulässig. D Gerät nicht direkt an den Abfluss anschließen. Der Anschluss muss nach den nachfolgend aufgeführten Möglichkeiten ausgeführt werden. -
Seite 37: Elektrischer Anschluss
All manuals and user guides at all-guides.com 11.4 Elektrischer Anschluss D Der Elektroanschluss muss von einem zugelassenen Elektro-Installateur vorgenommen wer- − nach den geltenden Bestimmungen VDE 0100 − und den Bestimmungen der jeweils zuständigen Energieversorgungsunternehmen. D Die bewegliche Netzanschlussleitung muss mindestens nach H 07 RN-F ausgeführt sein. D Ein elektrischer Schalter (Hauptschalter) −... -
Seite 38: En − Installation- And Operating Instruction
All manuals and user guides at all-guides.com en − Installation- and Operating Instruction Dear Madam, Dear Sir Please read these operating instructions carefully before you use the pressure steamer for the first time. The operating instructions contain important information for correct operation and installation. These operating instructions are part of the equipment. -
Seite 39: Notes On Safe Operation
All manuals and user guides at all-guides.com Notes on safe operation Daily operation D The appliance is for commercial use and may only be operated − by trained personnel, − with the drip tray inserted, − if the appliance is supervised, −... - Seite 40 All manuals and user guides at all-guides.com Risk of damage D Do not cover air vents on the rear of the appliance. D Do not heat securely sealed containers such as canned food. The closed containers and cans may explode. D The ambient temperature at the installation site must not fall below freezing.
-
Seite 41: Control Panel And Description Of Functions
All manuals and user guides at all-guides.com Control panel and description of functions Manual operation only. Do not use a sharp or pointed object, otherwise you could damage the control panel. Key: Programme number display field Switch appliance on/off Indicator light Cooking phase display field: number of cooking phases Programme key... -
Seite 42: Commissioning
All manuals and user guides at all-guides.com Commissioning To operate the appliance correctly − the appliance must be correctly connected by an authorized customer service (page 65 sec- tion 11.), − the built-in water softener must be set to the prevailing water hardness (page 60 section 8.). . - Seite 43 All manuals and user guides at all-guides.com Fitting the parts Seal Seal . Insert the seal for the cooking compartment door. Shelf-support . Hook the drip tray in place. rails . Hook the shelf-support rails in place. Shelf-support rails Drip tray Placement of the core temperature sen- sor if not used Holder...
-
Seite 44: Filling The Cooking Compartment And Removing The Cooked Food
All manuals and user guides at all-guides.com Filling the cooking compartment and removing the cooked food Filling the cooking compartment D Use only heat-resistant Gastronorm containers. D Do not season your dishes with salt until after the cooking process to avoid corrosion damage when using perforated grilles in the cooking compartment. -
Seite 45: Setting The Time And Date
All manuals and user guides at all-guides.com Setting the time and date Adjustment and display is not possible during a cooking process. If the appliance has been without a power supply for a number of days, the time will be set to zero and will have to be re-entered once the appliance is switched on. -
Seite 46: Cooking Without A Programme
All manuals and user guides at all-guides.com Displaying the time, date and year . To have all the values displayed in sequence − press the entry confirmation key repeatedly until the desired value is displayed. D The display always shows the time after the appliance is switched on and a programme is entered. - Seite 47 All manuals and user guides at all-guides.com Setting the cooking time . Press the cooking time key D The indicator light in the key flashes. D The display field shows . Enter the cooking time using the numeric keys, e.g. minutes D Range variable from 0.1 to 999 minutes.
-
Seite 48: Working With The Core Temperature Sensor
All manuals and user guides at all-guides.com Working with the core temperature sensor D The internal temperature of the food being cooked is measured precisely with the core temperature sensor. Once the core temperature set is reached, the appliance is automatically switched off and a buzzer sounds. -
Seite 49: Cooking With Programmes And Functions
All manuals and user guides at all-guides.com Cooking with programmes and functions Some 80 programmes have been assigned and saved in the factory. You will find the pro- gramme numbers in the cookbook and the recipes. Setting a programme after switching on . -
Seite 50: Options For Changing And Querying During Operation
All manuals and user guides at all-guides.com Options for changing and querying during operation You can make changes during the cooking process − to the cooking temperature − to the cooking time or − to the core temperature. You can have data displayed before or during a cooking process, such as −... -
Seite 51: Querying The Cooking Time And The Cooking Temperature In The Cooking Compartment
All manuals and user guides at all-guides.com 3.7.2 Querying the cooking time and the cooking temperature in the cooking compartment Display during the Display while pressing the cooking process Press and hold decimal point key Temperature in Cooking the cooking temperature set compartment Cooking time... -
Seite 52: Creating, Modifying And Deleting Programmes
All manuals and user guides at all-guides.com Creating, modifying and deleting programmes Caution. If the customer service uploads a new version of the software, all your modified and stored data will be lost. You should therefore first note down the settings you have applied. Creating programmes Up to three cooking phases can be stored in a programme. -
Seite 53: Creating A New Programme
All manuals and user guides at all-guides.com 4.1.2 Creating a new programme . Press the programme key when a programme number is showing in the display. D The indicator light in the key and the display flash. . Enter the free programme number using the numeric keys, e.g. First cooking phase . -
Seite 54: Error Number Display − Missing Data For Cooking Process "Er 13
All manuals and user guides at all-guides.com Storing the data and ending programming . Press the programme memory key D The indicator light in the program memory key and the programme number dis- play flash. . Enter the free programme number again using the numeric keys, e.g. . -
Seite 55: Modifying Programmes
All manuals and user guides at all-guides.com Modifying programmes You are able to modify the settings on your own programmes and those stored in the factory. . Press the programme key D The display flashes. . Enter the programme number to be modified using the numeric keys, e.g. . -
Seite 56: Setting The Start Time Preselection
All manuals and user guides at all-guides.com Setting the start time preselection- You can use this function to have a programme you have selected, e.g. started at a time you specify. Start time preselection (up to 24 hours) is only possible if you are using programmes. The start time preselection function is not possible while ”rE”... -
Seite 57: Finishing Work
All manuals and user guides at all-guides.com Displaying the clock and programme number when the start time preselection function is active . Press the decimal point key D The time and the programme number set will be displayed. Displaying the cooking data when the start time preselection function is active- . -
Seite 58: Cleaning And Care
All manuals and user guides at all-guides.com Cleaning and care Keep the appliance and the cooking compartment clean. Old grease and food remains war- ming up will impair the odour and taste of the food being cooked. Notes on cleaning D Do not use any caustic cleaners on the control panel or door. -
Seite 59: Cleaning And Care Of The Seal On The Cooking Compartment Door
All manuals and user guides at all-guides.com Cleaning and care of the seal on the cooking compartment door The service life of the seal is very dependent on its care. Harsh cleaning materials attack the seal material and accelerate wear. Cleaning the seal Seal . -
Seite 60: Setting And Regenerating The Water Softener
All manuals and user guides at all-guides.com Setting and regenerating the water softener Setting the water softener D The built-in water softener prevents scale build-up in the appliance and is set to level 4 in the factory. Settings from 1 to 9 are available. D The water softener must be adjusted by the authorized customer service. - Seite 61 All manuals and user guides at all-guides.com Filling the water softener . Unscrew the water softener cap. Filling hole . Confirm removal of the cap − press key. D The display next to the clock flashes D Wait about a minute until you hear the buz- zer and appears in the dis- play.
-
Seite 62: Troubleshooting
All manuals and user guides at all-guides.com Troubleshooting If faults should occur on this appliance, check them using the following table: Fault Possible cause Remedy Main switch on front of the app- Turn on the main switch. liance is not turned on. There is no power supply at all. -
Seite 63: Display Of Faults In The Display Panel
All manuals and user guides at all-guides.com Display of faults in the display panel If faults should arise on the appliance, a signal is heard and a fault number is displayed. . Press the buzzer key to switch off the buzzer. Fault number Cause Remedy... -
Seite 64: Technical Specifications
All manuals and user guides at all-guides.com Technical specifications Technical specifications SDS 1/1−13 pressure steamer SDS 1/1−13 pressure steamer 230 V Item no. BI371400, 953520, BI371402, BI371413 BI371408, BI371434 Cooking compartment capacity 2 x GN 1/1−100 1 x GN 1/1−200 Total connected load 16 kW Voltage fusing... -
Seite 65: Installation And Connection
All manuals and user guides at all-guides.com Installation and connection D Follow the local technical regulations for kitchens. D Installation work must be carried out in accordance with the manufacturer’s assembly in- structions and in accordance with accepted technical regulations. D No other appliances may be placed on the appliance. -
Seite 66: Connections
All manuals and user guides at all-guides.com 11.1 Connections Water connection G3/4 Equipotential bonding connection 20 mm diameter outlet Type plate Adjustable appliance foot Electrical connection and connection for output limiting system or energy optimisation system Steam generator air valve and overflow relief valve View from below 11.2... -
Seite 67: Water Drain
All manuals and user guides at all-guides.com 11.3 Water drain D The hoses and waste pipes must be heat-resistant > 100°C. D Lay the waste pipe and hose with a fall of at least 3% to the drain. D The waste pipe may not become narrower. D Do not connect the appliance directly to the drain. -
Seite 68: Electrical Connection
All manuals and user guides at all-guides.com 11.4 Electrical connection D The electrical connection must be made by a qualified electrician- − according to the current VDE 0100 regulations − and the rules of the power supply company concerned. D The flexible mains connection shall comply at least with H 07 RN-F. D An electric switch (mains switch) −... -
Seite 69: Instructions D'installation Et Mode D'emploi − Fr
All manuals and user guides at all-guides.com Instructions d’installation et mode d’emploi − fr Chère cliente, cher client, Lisez attentivement le présent mode d’emploi, avant de mettre le cuiseur -vapeur en service. Il contient des informations importantes pour la bonne utilisation et l’installation de cet appareil. Le mode d’emploi fait partie de l’appareil. -
Seite 70: Consignes Concernant La Sécurité De Fonctionnement
All manuals and user guides at all-guides.com Consignes concernant la sécurité de fonctionnement Fonctionnement quotidien D L’appareil est destiné à un usage commercial et doit être utilisé uniquement − par un personnel ayant été formé, − avec un égouttoir monté, −... - Seite 71 All manuals and user guides at all-guides.com Risques de dommages ! D Ne pas recouvrir les orifices- d’aération qui se trouvent au dos de l’appareil. D Ne pas faire chauffer les récipients scellés, comme les boîtes de conserve p. ex., contenant de la nourriture.
-
Seite 72: Panneau De Commande Et Description Des Fonctions
All manuals and user guides at all-guides.com Panneau de commande et description des fonctions Commande manuelle uniquement! Ne pas manipuler avec des objets acérés ou pointus, autre- ment le panneau de commande pourrait être endommagé! Champ d’affichage pour numéro Touche de programme Mettre en marche-/arrêter l’appareil... -
Seite 73: Mise En Service
All manuals and user guides at all-guides.com Mise en service Pour assurer un fonctionnement en bonne et due forme, − l’appareil doit être branché de façon appropriée par un service après-vente agréé (page 96 chapitre 11.), − l’adoucisseur d’eau intégré doit être réglé sur la dureté réelle de l’eau (page 91 chapitre 8.). . - Seite 74 All manuals and user guides at all-guides.com Montage des pièces Joint Joint . Monter le joint de la porte de la chambre de cuisson. Support d’accrochage . Accrocher l’égouttoir. . Accrocher le support d’accrochage. Support d’accrochage Egouttoir Placer le détecteur de température à coeur- en cas de non utilisation .
-
Seite 75: Mettre Dans Et Enlever Les Aliments De La Chambre De Cuisson
All manuals and user guides at all-guides.com Mettre dans et enlever les aliments de la chambre de cuisson Enfourner dans la chambre de cuisson D Utiliser uniquement des- récipients gastronormes résistants aux températures élevées! D Pour éviter les dommages de corrosion dans la chambre de cuisson lors de l’utilisation des treillis, saler les plats après la cuisson. -
Seite 76: Réglage De L'heure Et La Date
All manuals and user guides at all-guides.com Réglage de l’heure et la date Le réglage et l’affichage ne peuvent pas être effectués durant la cuisson. Si l’appareil n’est pas alimenté en courant durant plusieurs jours, l’heure est remise à zéro et doit être entrée de nouveau après la mise en marche. -
Seite 77: Cuisson Sans Programme
All manuals and user guides at all-guides.com Indication de l’heure, la date et l’année . Afin d’afficher toutes les valeurs l’une après l’autre − Appuyer sur la touche confirmation de saisie jusqu’à ce que la valeur souhaitée soit affichée. D L’heure est toujours indiquée après la mise en marche de l’appareil et la saisie d’un pro- gramme. - Seite 78 All manuals and user guides at all-guides.com Réglage du temps de cuisson . Appuyer sur la touche temps de cuisson D Le témoin de contrôle dans la touche clignote. D Le champ d’affichage indique . Saisir le temps de cuisson avec les touches chiffre, p. ex. minutes D Réglable de 0.1 à...
-
Seite 79: Travailler Avec Le Détecteur De Température- À Coeur
All manuals and user guides at all-guides.com Travailler avec le détecteur de température- à coeur D Il est possible, avec le détecteur de température- à coeur, de saisir la température in- térieure de l’aliment avec exactitude. Une fois que la température à coeur réglée à été atteinte, l’appareil s’arrête automatiquement et un vibreur retentit. -
Seite 80: Cuisiner Avec Les Programmes Et Fonctions
All manuals and user guides at all-guides.com Cuisiner avec les programmes et fonctions Environ 80 programmes sont installés et sauvegardés en usine. Vous trouvez les numéros de programme dans le manuel de cuisine et dans l’éditeur de recettes. Réglage du programme après la mise en marche . -
Seite 81: Possibilités De Modification- Et D'interrogation Pendant Le Fonctionnement
All manuals and user guides at all-guides.com Possibilités de modification- et d’interrogation pendant le fonc- tionnement Vous pouvez effectuer des modifications en cours de cuisson − sur la température de cuisson. − sur le temps de cuisson ou − la température à coeur. Avant ou durant la cuisson, vous pouvez vous faire indiquer des données comme −... -
Seite 82: Interrogation Du Temps De Cuisson Et De La Température De Cuisson Dans La Chambre De Cuisson
All manuals and user guides at all-guides.com 3.7.2 Interrogation du temps de cuisson et de la température de cuisson dans la chambre de cuisson Affichage en cours de Affichage pendant que la touche cuisson ”Point décimal” est appuyée Appuyer sur la touche et la maintenir appuyée Température dans Température de... -
Seite 83: Créer, Modifier Et Supprimer Des Programmes
All manuals and user guides at all-guides.com Créer, modifier et supprimer des programmes Prudence! Lorsque le service après-vente charge la nouvelle version du logiciel, toutes les données modifiées et sauvegardées sont perdues. Notez donc, au préalable, les réglages que vous avez effectués! Création de programmes Il est possible de sauvegarder jusqu’à... -
Seite 84: Création D'un Nouveau Programme
All manuals and user guides at all-guides.com 4.1.2 Création d’un nouveau programme . Lorsqu’un numéro de programme est indiqué dans le champ d’affichage − appuyer sur la touche programme D Le témoin de contrôle de la touche et l’affichage clignotent. . -
Seite 85: Affichage Numéro D'erreur − Données Manquantes Pour Le Processus De
All manuals and user guides at all-guides.com Sauvegarder les données et terminer la programmation . Appuyer sur la touche mémoire de programme. D Le témoin de contrôle de la touche mémoire de programme et l’affichage pour le numéro du programme clignotent. -
Seite 86: Modification De Programmes
All manuals and user guides at all-guides.com Modification de programmes Vous pouvez modifier les réglages sur les programmes ayant été sauvegardés par vous même ou en usine. . Appuyer sur la touche programme D L’affichage clignote. . Saisir le numéro de programme devant être modifié avec les touches chiffre, p. ex. . -
Seite 87: Réglage De La Présélection- De L'heure De Démarrage
All manuals and user guides at all-guides.com Réglage de la présélection- de l’heure de démarrage Cette fonction vous permet de faire démarrer un programme réglé, p. ex. à un moment que vous déterminez. La présélection- de l’heure de démarrage (jusqu’à 24 heures) n’est possible que lorsque des programmes sont utilisés. -
Seite 88: Fin De L'utilisation
All manuals and user guides at all-guides.com Affichage de l’horloge et du numéro de programme lorsque la fonction présélec- tion- de l’heure de démarrage est activée . Appuyer sur la touche point décimal D L’heure et le numéro de programme réglé sont indiqués. Affichage des données de cuisson lorsque la présélection de l’heure de démar- rage- est activée . -
Seite 89: Nettoyage Et Entretien
All manuals and user guides at all-guides.com Nettoyage et entretien Veillez à la propreté de l’appareil et de la chambre de cuisson. Le réchauffement de vieilles graisses- et de restes de nourriture fausse l’arôme- et le goût de l’aliment. Consignes relatives au nettoyage D Ne pas appliquer de détergent corrosif sur le panneau de commande et sur la porte! D Ne pas arroser ou nettoyer l’appareil au jet d’eau, avec un nettoyeur haute pression, un nettoyeur haute pression -à... -
Seite 90: Nettoyage Et Entretien Du Joint De La Porte De La Chambre De Cuisson
All manuals and user guides at all-guides.com Nettoyage et entretien du joint de la porte de la chambre de cuisson La durée de vie du joint dépend en grande partie de l’entretien. Les détergents récurant attaquent le matériau d’étanchéification et accélère l’usure. Nettoyage du joint Joint . -
Seite 91: Réglage Et Régénération De L'adoucisseur D'eau
All manuals and user guides at all-guides.com Réglage et régénération de l’adoucisseur d’eau Réglage de l’adoucisseur d’eau D L’adoucisseur d’eau intégré empêche les dépôts de calcaire dans l’appareil et est réglé en usine sur le niveau 4. Les réglages sont possibles des niveaux 1 à 9. D Le réglage de l’adoucisseur d’eau doit être effectué... - Seite 92 All manuals and user guides at all-guides.com Remplissage de l’adoucisseur d’eau Bouchon . Dévisser le bouchon de l’adoucisseur d’eau. Orifice de remplissage . Confirmer que vous enlevez le bouchon − appuyer sur la touche D L’affichage à côté de l’horloge clignote D Attendre environ une minute jusqu’à...
-
Seite 93: Pannes Et Remèdes
All manuals and user guides at all-guides.com Pannes et remèdes En cas de panne de l’appareil, contrôler celui-ci au moyen du tableau suivant : Panne Cause possible Remède L’interrupteur principal de l’- Allumer l’interrupteur principal. appareil n’est pas allumé. L’alimentation générale en Avertir le fournisseur d’énergie courant n’existe pas. -
Seite 94: Indication Des Dérangements Dans Le Champ D'affichage
All manuals and user guides at all-guides.com Indication des dérangements dans le champ d’affichage Si des dérangements devaient survenir sur l’appareil, un signal retentit et un- numéro d’erreur est indiqué. . Afin d’arrêter le vibreur, appuyer sur la touche vibreur Affichage Cause Remède... -
Seite 95: Caractéristiques Techniques
All manuals and user guides at all-guides.com Caractéristiques techniques Caractéristiques techniques Cuiseur-vapeur SDS 1/1-13 Cuiseur-vapeur SDS 1/1-13 230 V N -d’article BI371400, 953520, BI371402, BI371413 BI371408, BI371434 Capacité utile chambre de 2 x GN 1/1-100 cuisson 1 x GN 1/1-200 Valeur générale de raccorde- 16 kW ment... -
Seite 96: Mise En Place Et Raccordement
All manuals and user guides at all-guides.com Mise en place et raccordement D Respecter les prescriptions locales applicables pour les cuisines. D Les installations doivent être réalisées conformément aux instructions de montage du fabri- cant et dans le respect des règles techniques connues. D Ne pas poser d’autres appareils sur cet appareil! D Faire réaliser la mise en place et l’installation des appareils par le service après-vente agréé. -
Seite 97: Raccordements
All manuals and user guides at all-guides.com 11.1 Raccordements Alimentation en eau G3/4 Raccord pour la liaison équipotentielle Evacuation des eaux diamètre 20 mm Plaque signalétique Pied de la machine ajustable Raccordement électrique et raccord pour système de limitation- de puissance et/ou Soupape à... -
Seite 98: Ecoulement D'eau
All manuals and user guides at all-guides.com 11.3 Ecoulement d’eau D Les tuyaux flexibles et tuyaux d’eaux usées utilisés doivent résister aux températures > 100°C. D Poser les tuyaux flexibles et tuyaux d’eaux usées avec une inclinaison d’au moins 3%. D Il n’est pas permis d’effectuer une section décroissante du tuyau d’eau usées. -
Seite 99: Raccordement Électrique
All manuals and user guides at all-guides.com 11.4 Raccordement électrique D Le raccordement électrique doit être réalisé par un électricien- agréé − conformément à la réglementation VDE 0100 et − aux réglementations de l’entreprise d’électricité compétente. D Le câble mobile de branchement au secteur doit au moins être réalisé selon le type H 07 RN-F. - Seite 100 All manuals and user guides at all-guides.com 974196 / 7.08 / 3.09 SALVIS AG Nordstrasse 15 CH‐4665 Oftringen Tel. +41 (0)62 788 18 18 Fax. +41 (0)62 788 18 98 Internet: www.salvis.ch E‐Mail: info@salvis.ch...