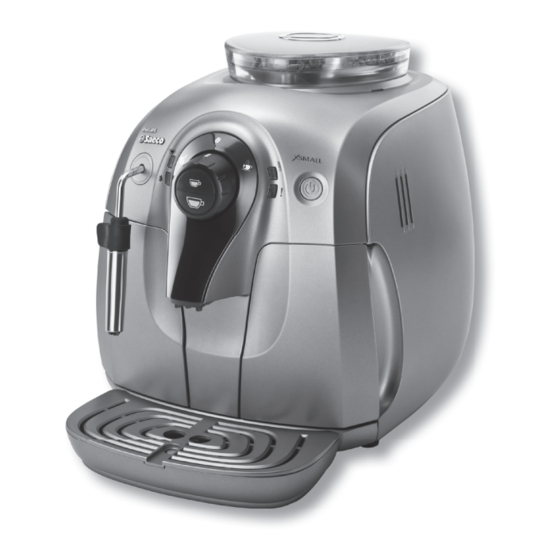
Philips Saeco XSmall HD8743 Bedienungsanleitung
Vorschau ausblenden
Andere Handbücher für Saeco XSmall HD8743:
- Kurzanleitung (60 Seiten) ,
- Bedienungsanleitung (56 Seiten) ,
- Bedienungsanleitung (44 Seiten)

Verwandte Anleitungen für Philips Saeco XSmall HD8743


Inhaltszusammenfassung für Philips Saeco XSmall HD8743
- Seite 1 All manuals and user guides at all-guides.com Quick Instruction Guide Type HD8743 / HD8745 / HD8747 READ THIS GUIDE CAREFULLY BEFORE USING THE MACHINE. FOR COMPLETE INSTRUCTIONS DOWNLOAD USER MANUAL FROM WWW.PHILIPS.COM/SUPPORT Register your product and get support at www.philips.com/welcome...
- Seite 2 (fare riferimento al numero di modello indicato sulla copertina). Herzlich Willkommen in der Welt von Philips Saeco! Registrieren Sie sich auf der Internetseite WWW.PHILIPS.COM/WELCOME und erhalten Sie Hinweise und Aktualisierungen zur Wartung.
- Seite 3 COME et retrouvez les conseils et les mises à jour concernant l'entretien de votre appareil. Ce mode d'emploi fournit de brèves instructions pour le bon fonctionnement et le détartrage de la machine. Consul- ter le site www.philips.com/support pour télécharger la dernière version du mode d'emploi (se référer au numéro du modèle indiqué sur la couverture).
-
Seite 4: Inhaltsverzeichnis
All manuals and user guides at all-guides.com EN - CONTENT SAFETY INSTRUCTIONS ..................................6 FIRST INSTALLATION ..................................10 FIRST ESPRESSO/COFFEE .................................. 12 MY FAVORITE ESPRESSO ................................... 12 ADJUSTING THE COFFEE GRINDER ..............................13 FROTHING MILK....................................13 STEAM/COFFEE SWITCHOVER ................................14 HOT WATER ..................................... - Seite 5 All manuals and user guides at all-guides.com FR - TABLE DES MATIÈRES CONSIGNES DE SÉCURITÉ .................................. 28 PREMIÈRE INSTALLATION ................................. 30 PREMIER CAFÉ EXPRESSO / CAFÉ ............................... 32 MON CAFÉ EXPRESSO IDÉAL ................................32 RÉGLAGE DU MOULIN À CAFÉ ................................33 COMMENT ÉMULSIONNER LE LAIT ..............................
-
Seite 6: Safety Instructions
Only have repairs hopper. If ground coffee, instant coffee or carried out by a service centre authorised by any other substance is put in the coffee bean Philips to avoid a hazard. hopper, it may damage the machine. - Seite 7 The water can be contaminated. Use This Philips appliance complies with all the ap- fresh water every time you use the machine. plicable standards and regulations relating to the exposure to electromagnetic fields.
-
Seite 8: Norme Di Sicurezza
Tutte tori o analoghe sorgenti di calore. le riparazioni devono essere eseguite da un • Immettere nel contenitore sempre e soltan- centro assistenza autorizzato da Philips per... -
Seite 9: Smaltimento
Ogni volta che si usa la macchina, presso il quale avete acquistato il prodotto. utilizzare acqua fresca. Questo apparecchio Philips è conforme a tutti Smaltimento gli standard e le normative applicabili in mate- ria di esposizione ai campi elettromagnetici. -
Seite 10: First Installation
All manuals and user guides at all-guides.com Instructions www.philips.com/support Istruzioni FIRST INSTALLATION PRIMA INSTALLAZIONE Fully insert the drip tray. Remove the water tank. Fill it up to the MAX level Remove the lid. Fill the co ee bean hopper. with fresh water and put it back in the machine. - Seite 11 All manuals and user guides at all-guides.com Instructions www.philips.com/support Istruzioni Place the container under The indicator lights ash counterclockwise. Some hot water Wait for the water dispensing to stop. The light is now the dispensing spout. is dispensed. shining steadily.
-
Seite 12: First Espresso/Coffee
All manuals and user guides at all-guides.com Instructions www.philips.com/support Istruzioni Now the machine is ready for making co ee. A questo punto la macchina è pronta per preparare il caff è. FIRST ESPRESSO / COFFEE PRIMO ESPRESSO / CAFFÈ Place a cup under the dis-... -
Seite 13: Adjusting The Coffee Grinder
All manuals and user guides at all-guides.com Instructions www.philips.com/support Istruzioni ADJUSTING THE COFFEE GRINDER REGOLAZIONE DEL MACINACAFFÈ You can only adjust the grinder settings when the machine is grinding cof- fee beans. È possibile regolare le impostazioni del maci- nacaff è solo mentre la Press and turn the grinder adjustment knob one notch at a Select ( ) for coarse grind - milder taste. -
Seite 14: Steam/Coffee Switchover
All manuals and user guides at all-guides.com Instructions www.philips.com/support Istruzioni Froth milk by gently swirling the carafe and moving it up Turn the control dial back to position to stop dispensing. and down. Montare il latte facendo compiere alla caraff a dei leggeri... -
Seite 15: Hot Water
All manuals and user guides at all-guides.com Instructions www.philips.com/support Istruzioni HOT WATER ACQUA CALDA Danger of scalding! Dis- pensing may be preceded by small jets of hot water. Pericolo di scottature! All’inizio dell’ e rogazione Place a cup under the hot... -
Seite 16: Descaling
All manuals and user guides at all-guides.com Instructions www.philips.com/support Istruzioni DESCALING 30 MIN. DECALCIFICAZIONE 30 MIN. When the red light starts ashing quickly and the green light is on, you need to descale the machine. Not doing this will ultimately make your machine stop working properly. In this case repair is NOT covered under your warranty. - Seite 17 All manuals and user guides at all-guides.com Instructions www.philips.com/support Istruzioni Turn o the machine! Turn the control dial in the Place a large container under the hotwater/steam wand. If you don’t turn o the machine you will be making a position.
- Seite 18 All manuals and user guides at all-guides.com Instructions www.philips.com/support Istruzioni Empty the large container and the drip tray and place them Rinse the water tank and ll it up to the MAX level with fresh Rinsing Cycle 1 back. water. Put it back in the machine.
- Seite 19 All manuals and user guides at all-guides.com Instructions www.philips.com/support Istruzioni Empty the large container and the drip tray and place them Rinse the water tank and ll it up to the MAX level with fresh Rinsing Cycle 2 back. water. Put it back in the machine.
-
Seite 20: Brew Group Cleaning
All manuals and user guides at all-guides.com Instructions www.philips.com/support Istruzioni BREW GROUP CLEANING PULIZIA DEL GRUPPO CAFFÈ Remove the co ee grounds Push and then remove the Carry out maintenance to the Check the alignment. Push and then insert the drawer and open the service brew group. - Seite 21 All manuals and user guides at all-guides.com Instructions www.philips.com/support Istruzioni STEAM WAND/PANNARELLO CLEANING PULIZIA TUBO VAPORE/PANNARELLO without Pannarello: with Pannarello: senza Pannarello: con Pannarello: Weekly Settimanale Clean the hot water/steam wand with a wet cloth to remove Remove the external part of the Pannarello and wash it with milk residues.
-
Seite 22: Machine Signals
All manuals and user guides at all-guides.com Instructions www.philips.com/support Istruzioni MACHINE SIGNALS SEGNALI PRESENTI SULLA MACCHINA Steady on Slowly ashing Quickly ashing Flashing quickly and light steady on The machine has the right The machine is warming up. Overheating protection ac- You need to descale the machine! temperature. - Seite 23 The machine is out of order. Turn the machine o . After 30-seconds, turn it rinse/self-cleaning cycle. another espresso. back on. Try this 2 or 3 times. If the machine does NOT start, contact the Philips Saeco hotline. Lampeggianti in senso antio- Lampeggianti contemporaneamente Lampeggianti alternati rario Anomalia nel gruppo caff è: prova-...
-
Seite 24: Maintenance Products
CA6706 Filtro acqua INTENZA+ Kit manutenzione numero prodotto: CA6702 numero prodotto: CA6706 Visit Philips online shop to check availability and purchasing oppor- tunities in your country. Visita il negozio online Philips (se disponibile nel Vostro paese) per verifi care la disponibilità e le op- portunità... - Seite 25 All manuals and user guides at all-guides.com...
-
Seite 26: Sicherheitshinweise
• Stellen Sie das Gerät auf eine waagerechte, falls modifiziert werden. Alle Reparaturen ebene und stabile Fläche. müssen durch ein von Philips autorisiertes • Das Gerät nicht auf heißen Flächen, in der Kundendienstzentrum ausgeführt werden, Nähe von heißen Öfen, Heizgeräten oder... -
Seite 27: Entsorgung
Geräts ist frisches Wasser zu benutzen. dem Geschäft, in dem Sie das Produkt gekauft haben. Entsorgung - Die Verpackungsmaterialien können recy- Dieses Philips-Gerät entspricht allen Standards celt werden. und anwendbaren Vorschriften zum Einfluss - Gerät: Den Stecker von der Steckdose abzie- elektromagnetischer Felder. -
Seite 28: Consignes De Sécurité
Consignes de sécurité les réparations doivent être effectuées par FR - CONSIGNES DE SÉCURITÉ un centre d’assistance agréé par Philips pour La machine est dotée de dispositifs de sécuri- éviter tout danger. té. Il est toutefois nécessaire de lire attentive- •... - Seite 29 L'eau pourrait être contami- produit. née. Utiliser de l'eau fraîche à chaque utili- sation de la machine. Cet appareil Philips est conforme à tous les stan- Élimination dards et toutes les réglementations applicables en matière d'exposition aux champs électroma- - Les matériaux d'emballage peuvent être re-...
-
Seite 30: Erste Inbetriebnahme
All manuals and user guides at all-guides.com Hinweise www.philips.com/support Instructions ERSTE INBETRIEBNAHME PREMIÈRE INSTALLATION Die Abtropfschale vollstän- Den Wassertank herausneh- Diesen bis zum Füllstand Den Deckel entfernen. Den Ka eebohnenbehälter dig einsetzen. men. MAX mit frischem Wasser au üllen. füllen. Den Wassertank wie- der ins Gerät einsetzen. - Seite 31 All manuals and user guides at all-guides.com Hinweise www.philips.com/support Instructions Den Behälter unter den Kaf- Die Kontrolllampen blinken im Gegenuhrzeigersinn. Die Aus- Warten, bis das Gerät die Wasserausgabe beendet. Die LED feeauslauf stellen. gabe von heißem Wasser beginnt. leuchtet dauerhaft auf.
-
Seite 32: Erster Espresso/Kaffee
All manuals and user guides at all-guides.com Hinweise www.philips.com/support Instructions Nun ist das Gerät für die Ausgabe von Ka ee bereit. La machine est enfi n prête à préparer du café. ERSTER ESPRESSO/KAFFEE PREMIER CAFÉ EXPRESSO / CAFÉ Eine Tasse unter den Auslauf... -
Seite 33: Mahlwerkeinstellung
All manuals and user guides at all-guides.com Hinweise www.philips.com/support Instructions MAHLWERKEINSTELLUNG RÉGLAGE DU MOULIN À CAFÉ Das Mahlwerk kann nur dann eingestellt werden, wenn das Gerät die Kaf- feebohnen mahlt. Il est possible de régler les paramètres du mou- lin à café seulement Den Drehknopf für die Mahlgradeinstellung drücken und um... -
Seite 34: Umschalten Von Dampf Auf Kaffee
All manuals and user guides at all-guides.com Hinweise www.philips.com/support Instructions Die Milch aufschäumen, indem mit der Kara e leicht krei- Den Steuerknopf wieder auf drehen, um die Ausgabe zu sende Bewegungen nach oben und nach unten ausgeführt beenden. werden. Émulsionner le lait en faisant tourner la carafe par des Pour terminer la distribution, repositionner le bouton de mouvements circulaires vers le haut et vers le bas. -
Seite 35: Heisswasser
All manuals and user guides at all-guides.com Hinweise www.philips.com/support Instructions HEISSWASSER EAU CHAUDE Verbrennungsgefahr! Beim Start können heiße Wasserspritzer austreten. Danger de brûlures ! Il Eine Tasse unter die Dampf-/ Das Gerät führt die Aufhei- Den Steuerknopf wieder auf peut y avoir quelques Den Steuerknopf auf Heißwasserdüse stellen. -
Seite 36: Entkalken
All manuals and user guides at all-guides.com Hinweise www.philips.com/support Instructions ENTKALKEN 30 MIN. DÉTARTRAGE 30 MIN. Beginnt die rote LED mit sehr kurzen Intervallen zu blinken und die grüne LED leuchtet auf, so muss das Entkalken des Geräts gestartet werden. - Seite 37 All manuals and user guides at all-guides.com Hinweise www.philips.com/support Instructions Das Gerät ausschalten! Den Wahlschalter in Position Einen großen Behälter unter die Wasser-/Dampfdüse stellen. Wird das Gerät nicht ausgeschaltet, so erfolgt statt “ ” drehen. dem Beginn des Entkalkens eine Ka eeausgabe! Éteindre la machine !
- Seite 38 All manuals and user guides at all-guides.com Hinweise www.philips.com/support Instructions Den Behälter unter der Wasser-/Dampfdüse und die Ab- Den Wassertank herausnehmen, ausspülen und bis zum tropfschale entfernen und leeren, und danach wieder an- Erste Spülung Füllstand MAX mit frischem Wasser füllen. Den Wassertank bringen.
- Seite 39 All manuals and user guides at all-guides.com Hinweise www.philips.com/support Instructions Den Behälter unter der Wasser-/Dampfdüse und die Ab- Den Wassertank herausnehmen, ausspülen und bis zum tropfschale entfernen und leeren, und danach wieder an- Zweite Spülung Füllstand MAX mit frischem Wasser füllen. Den Wassertank bringen.
-
Seite 40: Reinigung Der Brühgruppe
All manuals and user guides at all-guides.com Hinweise www.philips.com/support Instructions REINIGUNG DER BRÜHGRUPPE NETTOYAGE DU GROUPE DE DISTRIBUTION Den Ka eesatzbehälter ent- Drücken und die Brühgruppe Die Wartung der Brühgruppe Die Ausrichtung überprüfen. Drücken und die Brühgruppe fernen und die Servicetür entfernen. - Seite 41 All manuals and user guides at all-guides.com Hinweise www.philips.com/support Instructions REINIGUNG DAMPFDÜSE/PANNARELLO NETTOYAGE BUSE DE VAPEUR/PANNARELLO ohne Pannarello: mit Pannarello: sans le Pannarello : avec le Pannarello : Wöchentlich Hebdomadaire Die Dampf-/Heißwasserdüse mit einem feuchten Tuch reini- Den äußeren Teil des Pannarello entfernen und mit frischem gen, um die Milchreste zu entfernen.
-
Seite 42: Auf Dem Gerät Vorhandene Signale
All manuals and user guides at all-guides.com Hinweise www.philips.com/support Instructions AUF DEM GERÄT VORHANDENE SIGNALE VOYANTS PRÉSENTS SUR LA MACHINE Dauerhaft au euchtend Langsam blinkend Schnell blinkend sehr schnell blinkend und LED leuchtet dauerhaft Gerät in Temperatur und be- Gerät in Aufheizphase. - Seite 43 Das Gerät funktioniert nicht. Das Gerät ausschalten. Nach 30 Sekunden er- nigung. chen, einen weiteren Espresso aus- neut einschalten. 2 oder 3 Mal versuchen. zugeben. Schaltet sich das Gerät NICHT ein, die Hotline Philips Saeco anrufen. Clignotements dans le sens in- Clignotements simultanés Clignotements alternés verse des aiguilles d'une montre Anomalie du groupe de distribu- La machine ne fonctionne pas.
-
Seite 44: Pflege-Produkte
Filtre à eau INTENZA+ Kit d'entretien numéro produit : CA6702 numéro produit : CA6706 Besuchen Sie den Online Shop von Philips (soweit in Ihrem Land vor- handen) für die Verfügbarkeit und die Kaufmöglichkeiten in Ihrem Land. Visitez le magasin en ligne Philips (si accessible de votre Pays) pour vérifi er la disponibilité... - Seite 45 All manuals and user guides at all-guides.com Pflege-Produkte go to www.shop.philips.com Produits pour l'entretien...
-
Seite 46: Normas De Seguridad
Normas de segurança rán ser efectuadas por un centro de asisten- ES - NORMAS DE SEGURIDAD cia técnica autorizado por Philips. La máquina está provista de dispositivos de se- • La máquina no está destinada a ser utilizada guridad. No obstante, es necesario leer atenta- por niños de edad inferior a 8 años. - Seite 47 Este aparato Philips cumple con todos los están- Eliminación dares y las normativas aplicables en materia de - Los materiales de embalaje pueden reciclarse.
-
Seite 48: Indicações Para A Segurança
• Não altere nem modifique de modo algum trabalho. o cabo de alimentação. Todas as reparações • Posicione sempre a máquina sobre uma su- devem ser realizadas por um centro de as- perfície plana e estável. sistência autorizado pela Philips, para evitar... - Seite 49 A quiriu o produto. água poderá sofrer contaminações. Sempre que utilizar a máquina, use água fresca. Este aparelho Philips está em conformidade com todos os padrões e as normas aplicáveis em Eliminação matéria de exposição aos campos electromag- - Os materiais da embalagem podem ser reci- néticos.
-
Seite 50: Primera Instalación
All manuals and user guides at all-guides.com Instrucciones www.philips.com/support Instruções PRIMERA INSTALACIÓN PRIMEIRA INSTALAÇÃO Introducir completamente la Extraer el depósito de agua. Llenarlo con agua fresca Quitar la tapa. Llenar el contenedor de café bandeja de goteo. hasta el nivel MAX. Volver a en grano. - Seite 51 All manuals and user guides at all-guides.com Instrucciones www.philips.com/support Instruções Colocar el recipiente debajo Los pilotos luminosos parpadearán en el sentido contrario Esperar hasta que la máquina termine el suministro de de la salida de café. a las agujas del reloj. Tendrá inicio el suministro de agua agua.
-
Seite 52: Primer Café Exprés / Café
All manuals and user guides at all-guides.com Instrucciones www.philips.com/support Instruções La máquina ya está lista para preparar el café. Nessa altura a máquina está pronta para preparar o café. PRIMER CAFÉ EXPRÉS / CAFÉ PRIMEIRO EXPRESSO / CAFÉ Colocar una taza bajo la sali- Asegurarse de que la rueda Pulsar el botón... -
Seite 53: Regulación Del Molinillo De Café
All manuals and user guides at all-guides.com Instrucciones www.philips.com/support Instruções REGULACIÓN DEL MOLINILLO DE CAFÉ AJUSTE DO MOINHO DE CAFÉ Es posible ajustar las con- guraciones del molinillo de café sólo mientras la máquina está moliendo el café en grano. -
Seite 54: Paso De Vapor A Café
All manuals and user guides at all-guides.com Instrucciones www.philips.com/support Instruções Montar la leche realizando con la jarra ligeros movimientos Volver a posicionar la rueda de mando en para detener circulares arriba y abajo. el suministro. Bata o leite fazendo ligeiros movimentos com a jarra para Volte a colocar o botão de comando em... -
Seite 55: Agua Caliente
All manuals and user guides at all-guides.com Instrucciones www.philips.com/support Instruções AGUA CALIENTE ÁGUA QUENTE ¡Riesgo de quemaduras! Al principio del suminis- tro se pueden producir pequeñas salpicaduras de agua caliente. Perigo de queimaduras! Colocar una taza bajo el tubo Girar la rueda de mando y La máquina empieza a... -
Seite 56: Descalcificación
All manuals and user guides at all-guides.com Instrucciones www.philips.com/support Instruções DESCALCIFICACIÓN 30 MIN. DESCALCIFICAÇÃO 30 MIN. Cuando el piloto luminoso rojo empieza a parpadear muy rápidamente y el piloto luminoso verde está encendido, es necesario iniciar la descalci cación de la máquina. - Seite 57 All manuals and user guides at all-guides.com Instrucciones www.philips.com/support Instruções ¡Apagar la máquina! Girar la rueda de mando y Colocar un recipiente grande bajo el tubo de agua/vapor. ¡Si no se apaga la máquina se suministrará un café en posicionarla en lugar de iniciar el proceso de descalci cación!
- Seite 58 All manuals and user guides at all-guides.com Instrucciones www.philips.com/support Instruções Extraer y vaciar el recipiente colocado bajo el tubo de agua\ Extraer el depósito de agua, enjuagarlo y llenarlo con agua vapor y la bandeja de goteo y volver a colocarlos en su sitio.
- Seite 59 All manuals and user guides at all-guides.com Instrucciones www.philips.com/support Instruções Extraer y vaciar el recipiente colocado bajo el tubo de agua\ Extraer el depósito de agua, enjuagarlo y llenarlo con agua vapor y la bandeja de goteo y volver a colocarlos en su sitio.
-
Seite 60: Limpieza Del Grupo De Café
All manuals and user guides at all-guides.com Instrucciones www.philips.com/support Instruções LIMPIEZA DEL GRUPO DE CAFÉ LIMPEZA DO GRUPO CAFÉ Sacar el cajón de recogida Pulsar y retirar el grupo de Realizar el mantenimiento Comprobar la alineación. Pulsar e introducir el grupo de posos y abrir la puerta de café. - Seite 61 All manuals and user guides at all-guides.com Instrucciones www.philips.com/support Instruções LIMPIEZA DEL TUBO DE VAPOR/PANNARELLO LIMPEZA DO TUBO DE VAPOR/PANNARELLO sin Pannarello: con Pannarello: sem Pannarello: com Pannarello: Semanal Semanal Limpiar el tubo de vapor/agua caliente con un paño húmedo Quitar la pieza externa del Pannarello y lavarla con agua para quitar los restos de leche.
-
Seite 62: Señales Presentes En La Máquina
All manuals and user guides at all-guides.com Instrucciones www.philips.com/support Instruções SEÑALES PRESENTES EN LA MÁQUINA SINAIS PRESENTES NA MÁQUINA Encendido sin parpadear Parpadeo lento Parpadeo rápido parpadeante muy rápido y piloto luminoso encendi- Temperatura alcanzada y má- Máquina en fase de calenta- Protección del sobrecalenta-... - Seite 63 A máquina não funciona. Desligue a máquina. Volte a ligá-la após 30 se- Máquina em fase de enxaguamen- tribuir um outro expresso. gundos. Experimente 2 ou 3 vezes. to/auto-limpeza. Se a máquina NÃO iniciar, contacte a hotline (linha directa) da Philips Saeco.
-
Seite 64: Productos Para El Mantenimiento
Filtro de água INTENZA+ Kit de manutenção número do produto: CA6702 número do produto: CA6706 Visite la tienda en línea de Philips (si está disponible en su país) para comprobar la disponibilidad y las ofertas de compra en su país. - Seite 65 All manuals and user guides at all-guides.com Productos para el mantenimiento go to www.shop.philips.com Produtos para a manutenção...
- Seite 66 All manuals and user guides at all-guides.com...
- Seite 67 All manuals and user guides at all-guides.com...
- Seite 68 All manuals and user guides at all-guides.com Il produttore si riserva il diritto d`apportare qualsiasi modifica senza preavviso. The manufacturer reserves the right to change the features of the product without prior notice. Der Hersteller behält sich das Recht vor, Änderungen am Produkt ohne Vorankündigung vorzunehmen. Le producteur se réserve le droit d‘apporter des modifications au produit sans aucun préavis.