Inhaltsverzeichnis
Werbung
Verfügbare Sprachen
Verfügbare Sprachen
Quicklinks
Werbung
Inhaltsverzeichnis

Verwandte Anleitungen für MARIMEX TrampolIna Serie


Inhaltszusammenfassung für MARIMEX TrampolIna Serie
- Seite 1 Návod k trampolíně Marimex BEZPEČNOST OVĚŘENA...
-
Seite 3: Obsah Balení
Návod k trampolíně Marimex Poděkování Děkujeme, že jste zakoupili trampolínu od společnosti Marimex. Věříme, že vám bude dělat radost mnoho let a vy i vaši blízcí s ní zažijete hezké chvíle. Před sestave- ním trampolíny si pečlivě prostudujte tento návod. Doporučujeme návod uschovat pro případ budoucí... - Seite 4 Upozornění Před stavbou a následným používáním je třeba se seznámit s instrukcemi v tomto návodu. Návod uschovejte pro případ, že uvedené informace budete někdy v bu- doucnu potřebovat. Trampolínu musí sestavovat minimálně dvě dospělé osoby v souladu s pokyny k montáži a poté musí být před prvním použitím zkontrolována. Trampolína musí být umístěna na rovném, pevném a nekluzkém povrchu.
-
Seite 5: Montážní Pokyny
Montážní pokyny Krok 1 Nástavce na nohu zasuňte do nohou ve tvaru U. Dohlédně- te, aby se u jednotlivých částí překrývaly otvory pro úchytné U-spony (č. 21) Krok 2 Připojte T spoj rámu na širší konec trubky rámu. Ověřte správné nasazení. Krok 3 Spojte všechny části rámu tak, aby tvořily kruh. - Seite 6 Krok 5 K nohám ve tvaru U je nutné připojit dolní tyče ochranné sítě přidanými sponami. Spony doporučujeme plně dotáhnout až po kompletním sestavení trampolíny. Na ukotvené tyči je pěnový rukáv nad horní sponou. Krok 6 Skákací plocha musí být umístěna kří- žem/logem nahoru.
- Seite 7 Krok 9 Krok 10 Upevněte kryt pružin pomocí stahova- Rovnoměrně rozložte ochrannou síť cích šňůrek. na plochu trampolíny tak, aby lemovaná část byla nahoře. Krok 11 Připravíme si sestavu kovových tyčí pro upevnění a napnutí ochranné sítě. Tyče spojíme spojkami obruče podle vyznačených zářezů. Spojením jednotlivých částí vzniknou dva dlouhé...
- Seite 8 Krok 13 Takto vypadá ochranná síť s navlečenou obručí, která je připravena k další montáži. Krok 14 Na konec horní tyče ochranné sítě připevněte držáky obruče - pozor na správný směr držáků. Místo, kam se uchytí obruč ochranné sítě bude na vnější části. Krok 15 Na tyč...
- Seite 9 Krok 17 Krok 18 Po montáži by Vaše trampolína měla Za asistence druhé osoby vyzvedneme vypadat jako na obrázku. ochrannou síť s obručí a postupně bude- me obruč upevňovat do držáků obruče. Krok 19 Provlékněte upínací lanko střídavě poutky na skákací ploše a otvory v ochranné síti. Poté...
- Seite 10 Gratulujeme, nyní je vaše trampolína připravena k použití. Před použitím trampolíny se poraďte se svým lékařem, zda je pro Vás tato akti- vita vhodná a bezpečná. Před každým použitím trampolínu zkontrolujte. Zvýšenou pozornost věnujte skákací ploše a případně chybějícím či uvolněným dílům. •...
- Seite 11 Upozornění • Pro trampolíny do 244 cm = max 100 kg • Pro trampolíny od 305 do 457 cm = max 150 kg • Nesmí skákat více než jedna osoba. Nebezpeční srážky. • Skákejte bez obuvi. • Nepoužívejte odrazovou plochu, když je mokrá. •...
- Seite 12 Pečujte o trampolínu – Údržba Trampolínu a její části je nutné zkontrolovat vždy na začátku sezóny a dále pravidel- ně kontrolovat, především její hlavní části (rám, pružiny, odrazovou (skákací) plochu, polstrování a ochrannou síť), jinak se trampolína může stát nebezpečnou. •...
- Seite 13 Základní techniky skákání Dbejte na to, abyste vždy dopadli na stejné místo, ze kterého jste se odrazili. Skákej- te vždy do středu trampolíny. Nesprávná technika skákání může vést k úrazu, proto si následující kapitolu pečlivě prostudujte. Základní skok • start ze stoje, nohy rozkročeny na šíři ramen, oči směřují...
- Seite 14 • Před skákáním vždy uzavřete vstupní otvor v síti. • Síť by se měla každé 2 roky vyměnit. • Pouze pro venkovní použití. • Není vhodné pro děti do 36 měsíců. DISTRIBUTOR: MARIMEX CZ s.r.o., LIBUŠSKÁ 221/264, PRAHA 4, TEL. +420 261 222 111...
-
Seite 15: Záruční Podmínky
• Deformace vzniklé v souvislosti s nestabilním nebo neupraveným podložím. • Konstrukce a schůdky nejsou vyrobeny z nerezového materiálu a proto může dojít působením vlhkosti ke korozi. Záruka se nevztahuje na případnou korozi ocelové konstrukce nebo schůdků. Kontakty BEZPEČNOST OVĚŘENA www.marimex.cz Zákaznické centrum tel.: 261 399 111 e-mail: info@marimex.cz... - Seite 16 Návod k trampolíne Marimex Poďakovanie Ďakujeme, že ste si zakúpili trampolínu od spoločnosti Marimex. Veríme, že vám bude slúžiť mnoho rokov a spoločne zažijete pekné chvíle nielen vy, ale aj vaši blízki. Pred zostavením trampolíny si starostlivo preštudujte tento návod. Odporúčame návod uschovať pre prípad budúcej potreby.
- Seite 17 Upozornenie Pred stavbou a následným používaním je potrebné sa zoznámiť s inštrukciami v tomto návode. Návod uschovajte pre prípad, že uvedené informácie budete nieke- dy v budúcnosti potrebovať. Trampolínu musia zostavovať minimálne dve dospelé osoby v súlade s pokynmi na montáž a potom ju treba pred prvým použitím skontrolovať. Trampolína musí byť umiestnená...
-
Seite 18: Montážne Pokyny
Montážne pokyny Krok 1 Nástavce na nohu zasuňte do nôh v tvare U. Dohliadni- te, aby sa u jednotlivých častí prekrývaly otvory pre úchytné skrutky (č. 21). Krok 2 Pripojte T spoj rámu na širší koniec trubky rámu. Overte správne nasadenie. Krok 3 Spojte všetky časti rámu tak, aby tvorili kruh. - Seite 19 Krok 5 K nohám v tvare U je nutné pripojiť dolné tyče ochrannej siete pridanými U-spona- mi. Spony odporúčame plne dotiahnuť až po kompletnom zostavení trampolíny. Na ukotvenej tyči je penový rukáv nad hornou U-sponou. Krok 6 Skákacia plocha musí byť umiestnená krížom / logom nahor. Prvé štyri pružiny zaháknite vždy proti sebe tak, aby vytvo- rili tvar kríža.
- Seite 20 Krok 9 Krok 10 Upevnite kryt pružín pomocou sťahova- Rovnomerne rozložte ochrannú sieť cích šnúrok. na plochu trampolíny tak, aby lemovaná časť bola navrchu. Krok 11 Pripravíme si zostavu kovových tyčí pre upevnenie a napnutie ochrannej siete. Tyče spojíme spojkami obruče podľa vyznačených zárezov. Spojením jednotlivých častí vzniknú...
- Seite 21 Krok 13 Takto vyzerá ochranná sieť s navlečenou obručou, ktorá je pripravená k ďalšej montáži. Krok 14 Na koniec hornej tyče ochrannej siete pripevnite držiaky obruče - pozor na správny smer držiakov. Miesto, kam sa uchytí obruč ochrannej siete bude na vonkajšej časti. Krok 15 Na tyč...
- Seite 22 Krok 17 Krok 18 Po montáži by Vaša trampolína mala Za asistencie druhej osoby zdvihneme vyzerať ako na obrázku ochrannú sieť s obručou a postupne bude- me obruč upevňovať do držiakov obruče. Krok 19 Prevlečte upínacie lanko striedavo pútkami na skákacie ploche a otvory v ochrannej sieti. Potom skontrolujte všetky spoje, dotiahnite a na koncoch upínacie lanko zaistite uzlíky, aby nedošlo...
- Seite 23 Gratulujeme, teraz je vaša trampolína pripravená k použitiu. Pred použitím trampolíny sa poraďte so svojím lekárom, či je pre vás táto akti- vita vhodná a bezpečná. Pred každým použitím trampolínu skontrolujte. Zvýšenú pozornosť venujte skákacej ploche a prípadne chýbajúcim či uvoľneným dielom. • Na trampolíne smie skákať iba 1 osoba. •...
- Seite 24 Upozornenie • Pre trampolíny do 244 cm = max 100 kg • Pre trampolíny od 305 do 457 cm = max 150 kg • Nesmie skákať viac ako jedna osoba. Nebezpečenstvo zrážky. • Skákajte bez obuvi. • Nepoužívajte odrazovú plochu, ak je mokrá. •...
- Seite 25 Starajte sa o trampolínu – Údržba Trampolínu a jej časti treba vždy skontrolovať na začiatku sezóny a potom kontro- lovať pravidelne predovšetkým jej hlavné časti (rám, pružiny, odrazovú (skákaciu) plochu, čalúnenie a ochrannú sieť), inak sa trampolína môže stať nebezpečnou. •...
- Seite 26 Základné techniky skákania Dbajte na to, aby ste vždy dopadli na rovnaké miesto, z ktorého ste sa odrazili. Skáčte vždy do stredu trampolíny. Nesprávna technika skákania môže viesť k úrazu, preto si nasledujúcu kapitolu starostlivo preštudujte. Základný skok • Štart zo stoja, nohy rozkročené na šír- ku ramien, oči smerujú...
- Seite 27 • Pred skákaním vždy zatvorte vstupný otvor v sieti. • Sieť by sa mala každé 2 roky vymeniť. • Iba pre použitie v exteriéri. • Nie je vhodné pre deti do 36 mesiacov. DISTRIBUTOR: MARIMEX SK, SPOL. S R.O., ROŽŇAVSKÁ 17, 83104 BRATISLAVA, TEL. +421 233 004 194...
-
Seite 28: Záručné Podmienky
• Konštrukcia a schodíky niesú vyrobené z nerezového materiálu a preto môže dôjsť pôsobením vlhkosti ku korózii. Záruka sa nevzťahuje na prípadnú koróziu oceľovej konštrukcie alebo schodíkov. Kontakty BEZPEČNOSŤ OVERENÁ www.marimex.sk Zákaznické centrum tel.: +421 233 004 194 e-mail: info@marimex.sk stability odolnosti plochy pevnosti konštrukcie bezpečnosti siete... - Seite 29 D’installation trampoline marimex Nous vous remercions d’avoir acheté le trampoline de la société Marimex. Elle vous servira pendant de nombreuses années et vous et vos proches vous y passerez de bons moments. A lire attentivement la notice de montage avant de commencer le montage de votre trampoline.
- Seite 30 Avertissement Avant le montage et l’utilisation du trampoline, veuillez lire attentivement les instructions. Conservez ce manuel pour le futur. Le trampoline doit etre assemblé par au moins deux adultes conformément aux instructions d‘installation et ensuite inspecté avant la premiere utilisation. Placer le trampoline sur un sol plat, ferme et non glissant.
-
Seite 31: Instructions D'installation
Instructions d'installation Etape 1 Les allonges pour le pied, emboîtez les dans les pieds en forme U. Veuillez a ce que les trous pour les vis d’atta- che de différentes parties se chevauchent (N. 21). Etape 2 Connectez le joint en T à l‘ex- trémité... - Seite 32 Etape 5 Il faut fixer aux pieds en forme U les tubes inférieures du filet de protection avec des brides U. Nous recommandons de serrer complètement les brides après avoir entièrement assemblé le trampoline. Sur le tube ancré, se trouve la manche en mousse au-dessus de la bride U supérieure.
- Seite 33 Etape 9 Etape 10 Fixez le cache ressorts à l’aide des cor- Répartissez uniformément le filet de pro- dons de serrage. tection sur la surface du trampoline de sorte que la partie bordée soit en haut. Etape 11 D Nous préparons l’ensemble des tubes métalliques pour fixer et tendre les filets de protection.
- Seite 34 Etape 13 Voici le filet de protection avec la structure métallique prête pour l’assemblage suivant. Etape 14 Sur l’extrémité du tube supérieur du filet de pro- tection, fixez les supports de la structure métallique – attention à la bonne direction des supports. La structure métallique du filet de protection se fixe à...
- Seite 35 Etape 17 Etape 18 Après avoir effectué l’assemblage, Avec l’aide d’une deuxième personne votre trampoline devrait ressembler à nous levons le filet de sécurité avec la cet ’image. structure métallique et puis nous la fixons dans les supports. Etape 19 Enfilez alternativement le câble de serrage a travers les boucles de la surface de saut et les trous...
- Seite 36 Assemblage termine Avant d’utiliser le trampoline, consultez votre médecin pour savoir si cette activité vous convient et si elle est sûre. Avant chaque utilisation, vérifiez le trampoline. Portez une attention particulière à la surface de saut et éventuellement aux pièces manquantes ou desserrées. •...
- Seite 37 Avertissement • Pour les trampolines 244 cm = 100 kg • Pour les trampolines a partir de 305 a 457 cm = 150 kg • Une personne a la fois est dans le trampoline. Risque de collision. • Sautez sans chaussures. •...
- Seite 38 Prenez soin du trampoline – Entretien Le trampoline et ses pieces doivent toujours etre contrôlés en début de saison et régulierement inspectés, en particulier les parties principales (cadre, ressorts, surface de rebond (saut), rembourrage et filet de sécurité), dans le cas contraire le trampoline peut devenir dangereux.
- Seite 39 Techniques de base de saut Veuillez à ce que vous tombez au même endroit d’où vous avez sauté. Sautez tou- jours dans le centre. Une mauvaise technique de saut peut entraîner les accidents. Pour cette raison lisez attentivement ce chapitre. Saut de base •...
- Seite 40 • Le filet devrait etre remplacé tous les 2 ans. • Pour une utilisation a l’extérieur uniquement. • Ne convient pas aux enfants de moins de 36 mois. FABRICANT: MARIMEX CZ, S.R.O., LIBUŠSKÁ 221/264, PRAHA 4, TEL. +420 261 222 111...
-
Seite 41: Conditions De Garantie
La garantie ne couvre pas la corrosion de la structure méta- llique ou des marches. Informations de contact SÉCURITÉ CERTIFIÉE www.marimex.cz tel.: +420 261 399 111 e-mail: info@marimex.cz stabilité résistance de la surface solidité de la structure sécurité du filet... - Seite 42 Montageanleitung für Trampolin Marimex Wir danken Ihnen, dass Sie sich für das Trampolin von der Gesellschaft Marimex ent- schieden haben. Zugleich hoffen wir, dass es Ihnen viele Jahre dienen wird, indem nicht nur Sie, sondern auch Ihre Familie und Freunde, gemeinsam schöne Augenb- licke erleben.
- Seite 43 Hinweis Vor der Montage und der Benutzung ist es erforderlich, sich mit den Hinweisen in dieser Anleitung bekanntzumachen. Bewahren Sie die Anleitung für die zukünftige Benutzung. Das Trampolin ist im Einklang mit den Montagehinweisen von mindestens zwei erwachsenen Personen zusammenzubauen und anschließend, vor der ersten Verwendung, zu kontrollieren.
- Seite 44 Montagehinweise Schritt 1 Schieben Sie die Aufsätze in die U-förmigen Standbeine. Achten Sie darauf, dass sich bei den einzelnen Teilen die Öffnungen für die Aufnahmeschrauben (Nr. 21) überdecken. Schritt 2 Verbinden Sie das breitere Ende des Rahmenrohrs mit dem T-Verbinder. Stellen Sie sicher, dass es gut passt.
- Seite 45 Schritt 5 An die Standbeine in U-Form sind die unteren Stäbe des Schutznetzes mittels der beiliegenden U-Klammern anzuschließen. Wir empfehlen, die Klammern erst nach dem kompletten Zusammenbau des Trampolins fest anzuziehen. Auf dem veranker- ten Stand befindet ein Schaumärmel über der obenen U-Klammer. Schritt 6 Die Sprungmatte muss mit dem Kreuz/Logo nach oben weisen.
- Seite 46 Schritt 9 Schritt 10 Befestigen Sie die Randabdeckung mit Verteilen Sie gleichmäßig das Sicherheit- Hilfe der Zugschnüre. snetz auf die Fläche des Trampolins so, dass das gesäumte Teil oben ist. Schritt 11 Bereiten Sie für weitere Montage die Stäbe zur Befestigung und zum Spannen des Sicherheitsnetzes vor.
- Seite 47 Schritt 13 So sieht das Sicherheitsnetz mit dem „aufgefädelten“ Reifen aus, der nun zur weite- ren Montage bereit ist. Schritt 14 Befestigen Sie die Halter des Reifens an das Ende des Stab des Schutznetze- s-Oben - beachten Sie die richtige Richtung der Halter. Der Teil, an welchem der Reifen zu befestigen ist, befindet sich am Außenteil.
- Seite 48 Schritt 17 Schritt 18 Nach der Montage sollte Ihr Trampolin Unter Assistenz einer weiteren Person wie auf der Abbildung aussehen. heben wir das Sicherheitsnetz mit dem Reifen an und befestigen schrittweise den Reifen an den Haltern des Reifens. Schritt 19 Führen Sie das Spannseil abwechselnd durch die Schlaufen auf der Sprungfläche und die...
-
Seite 49: Die Montage Ist Fertig
Die Montage ist fertig Vor der Benutzung des Trampolins konsultieren Sie Ihren Arzt, ob diese Akti- vität für Sie geeignet und sicher ist. Prüfen Sie das Trampolin vor jeder Benutzung. Widmen Sie erhöhte Aufmerksam- keit der Sprungmatte und ggf. den fehlenden oder lockeren Teilen. •... - Seite 50 Hinweis: • Für Trampolin 244 cm = 100 kg • Für Trampoline von 305 bis 457 cm = 150 kg • Es darf lediglich eine Person springen. Kollisionsgefahr. • Springen Sie ohne Schuhe. • Benutzen Sie die Sprungfläche nicht in nassem Zustand. •...
-
Seite 51: Pflege & Wartung
Pflege – Wartung Das Trampolin und seine Teile sind jeweils vor Beginn der Saison und ferner regel- mäßig zu kontrollieren, vor allem seine Hauptteile (Rahmen, Federn, Sprungfläche, Polsterung und Schutznetz), andernfalls kann das Trampolin gefährlich werden. • Kontrollieren Sie den festen Sitz aller Schrauben und Muttern und ziehen Sie sie im Falle des Bedarfs fest. -
Seite 52: Unterbrechungsmanöver
Grundtechniken des Springens Achten Sie darauf, dass Sie stets wieder auf die Absprungstelle auftreffen. Springen Sie stets in die Mitte des Trampolins. Eine falsche Sprungtechnik kann zu einem Unfall führen, sodass Sie das nachfolgende Kapitel sorgfältig studieren sollten. Grundsprung • Start aus dem Stand, die Bein bis auf Schulterbreite gespreizt, die Augen auf die Sprungfläche gerichtet •... -
Seite 53: Sprung Auf Die Knien
• Verschließen Sie vor dem Springen stets die Eingangsöffnung im Netz. • Das Netz sollte alle 2 Jahre ausgewechselt werden. • Nur für die Verwendung im Freien. • Nicht für Kinder bis 36 Monate geeignet. HERSTELLER: MARIMEX CZ, S.R.O., LIBUŠSKÁ 221/264, PRAG 4, TEL. +420 261 222 111... - Seite 54 • Die Konstruktion und die Stufen sind aus Edelstahl hergestellt, sodass infolge von Feuchtigkeit eine Korrosion eintreten kann. Die Garantie bezieht sich nicht auf die allfällige Korrosion der Stahlkonstruktion oder der Stufen. Kontakte SICHERHEIT ÜBERPRÜFT www.marimex.cz Kundencenter tel.: +420 261 399 111 e-mail: info@marimex.cz stabilität flächenbeständigkeit konstruktionsfestigkeit netzsicherheit...
- Seite 55 Marimex Trampoline Installation Manual Thank you for purchasing the Marimex trampoline. We are convinced it will serve you well for years and bring your family many happy moments together. Before assembling the trampoline, please study this instruction manual carefully. We recommend to keep the manual for future reference.
- Seite 56 Warning It is essential to read the instructions contained in this manual before assembling and using the trampoline. Keep the manual for future use. The trampoline must be assembled by at least two adults according to the instructi- ons in this manual and then inspected before first use. The trampoline must be located on an even, firm and non-slippery surface in order to avoid the overturning.
- Seite 57 Assembly instructions Step 1 Slide the leg bases onto the U-shaped legs. Ensure the holes for the clamping screws (Nr. 21) in the individual parts overlap. Step 2 Connect the big end of the frame tube with T connector. Make sure it fits well. Step 3 Connect all the parts of the frame - they must form a ring.
- Seite 58 Step 5 Safety net rod – lower parts must be connected to the U-shaped legs using the added U-clasps. We recommend to fully tighten the pins until the trampoline has been completely assembled. The protecting foam sleeve will be placed on the rod above the U-clasp.
- Seite 59 Step 9 Step 10 Secure the spring cover with the dra- Spread out the safety net evenly over wstrings. the surface of the trampoline so that the hemmed part is on top. Step 11 Prepare the set of metal rods for securing and tensioning the protective net. Co- nnect the rods using the ring connecting pieces according to the marked notches.
- Seite 60 Step 13 This is what the safety net should look like with the threaded metal ring. It is now ready for further assembly. Step 14 Secure the ring holders to the ends of the Safety net rod-upper parts - pay attention to the direction of the holders.
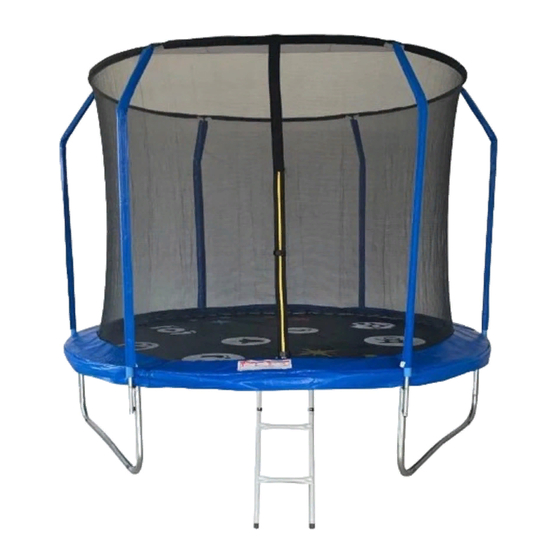
- Seite 61 Step 17 Step 18 The picture below shows, what the With the help of another person, pull trampoline should look like after the the safety net up and gradually insert rods have been installed. the ring into the ring holders. Step 19 Thread the clamping rope alternately through the loops...
- Seite 62 INSTALLATION IS COMPLETE Before using the trampoline, consult with your doctor, whether this kind of activity is suitable and safe for you. Check the trampoline before every use. Pay particular attention to the jumping mat and potential missing or loose parts. •...
- Seite 63 WARNINGS • For trampolines of 244 cm = 100 kg • For trampolines of 305 to 457 cm = 150 kg • Only one user. Collision hazard. • Jump without shoes. • Do not use the mat when it is wet. •...
- Seite 64 Care of the trampoline – Maintenance instructions The trampoline and its parts must always be checked at the beginning of the season and then regularly checked, especially its main parts (frame, springs, jumping mat, padding and safety net), otherwise the trampoline can become dangerous. •...
- Seite 65 Basic jumping techniques Make sure you always land on same place you jumped from. Always jump into the centre of the trampoline. An incorrect jumping technique may lead to injury, there- fore study the following chapter carefully. Straight jump • start in a standing position with legs apart at the width of your shoulders and eyes facing the jumping mat •...
- Seite 66 • Always close the net opening before jumping. • The net should be replaced every 2 years. • For outdoor use only. • Not intended for children under 36 months. MANUFACTURER: MARIMEX CZ, S.R.O., LIBUŠSKÁ 221/264, PRAGUE 4, TEL. +420 261 222 111...
-
Seite 67: Warranty Conditions
Claims for potential rusting of the steel frame or lad- der will not be accepted. Contact details SAFETY PROVEN www.marimex.cz Custome Service Centre tel.: +420 261 399 111 e-mail: info@marimex.cz stability surface resistance structure strength net safety... - Seite 68 Manuale di installazione tram- polino Marimex Elenco della confezione Č. 457 N. 244 cm 305 cm 366 cm 396 cm 457 cm Nome del componente 1 19000300 19000301 19000302 19000303 19000304 Tubo del telaio 2 19000305 19000305 19000305 19000305 19000306...
- Seite 69 Avvertenza Prima del montaggio e del successivo utilizzo e necessario leggere le istruzioni di questo manuale. Conservate le istruzioni in caso in futuro abbiate bisogno delle informazioni riportate. Il trampolino devono assemblare almeno due persone adulte in conformita alle ist- ruzioni al montaggio e dopo deve essere controllato prima d’uso.
-
Seite 70: Istruzioni Di Montaggio
Istruzioni di montaggio Passo 1 Inserite l’estensione per la gamba nella gamba a forma di U. Fate attenzione che le singole parti coprano i fori per le viti di fissaggio (N. 21). Passo 2 Collegare l‘estremità grande del tubo del telaio con il T-connettore. - Seite 71 Passo 5 Alle gambe a forma di U è necessario collegare le aste inferiori della rete di prote- zione con le U-clip aggiunte. Si consiglia di serrare completamente i giunti solo una volta completato il montaggio del tappeto elastico. Sull’asta fissata c’è il manicotto di schiuma sopra l’U-clip.
- Seite 72 Passo 9 Passo 10 Fissarela copertura delle molle per Stendete in modo uniforme la rete di mezzo dei cavetti di serraggio. protezione sulla superficie del tappeto elastico in modo che la parte rivestita si trovi verso l’alto. Passo 11 Prepariamo il kit di asti di metallo per il fissaggio e il tensionamento della rete di protezione.
- Seite 73 Passo 13 Così appare la rete di protezione con il cerchio infilato ed è pronta per proseguire nel montaggio. Passo 14 Fissate le staffe del cerchio all’estremità dell’asta superiore della rete di protezione - attenzione alla direzione corretta delle staffe. Il punto dove il cerchio della rete di pro- tezione si fissa alla parte esterna.
- Seite 74 Passo 17 Passo 18 Dopo il montaggio il vostro tappe- Con l’aiuto di un’altra persona sollevia- to elastico dovrebbe apparire come mo la rete di protezione con il cerchio e nell‘immagine. gradualmente fissiamo il cerchio nelle staffe del cerchio. Passo 19 Infilare alternativamente il cavo di serraggio attraverso i passanti sulla superficie...
- Seite 75 Avete montato Prima di utilizzare il tappeto elastico, consultate il vostro medico se questa attività per voi è sicura e appropriata. Controllare il tappeto elastico prima di ogni utilizzo. Prestate particolarmente attenzione • Solo 1 persona può saltare sul tappeto flessibile. •...
- Seite 76 Avvertenza • Per trampolini da 244 cm = 100 kg • Per trampolini da 305 a 457 cm = 150 kg • Non puo saldare piu di una persona. Pericolo di scontro. • Saltare senza scarpe. • Non utilizzare la superficie di rimbalzo quando e bagnata. •...
- Seite 77 Prendetevi cura del tappeto flessibile – Manutenzione Il Trampolino e le sue parti e necessario controllare sempre all’inizio della stagione e successivamente regolarmente soprattutto le parti principali (telaio, molle, super- ficie di pedana (di salto) e rete di protezione) altrimenti il trampolino puo diventare pericoloso.
- Seite 78 Tecniche di base che saltano Fate sempre attenzione a ricadere nello stesso punto dal quale vi siete respinti. Saltate sempre al centro del trampolino. Una tecnica errata di salto può causare un incidente, per questo leggete con attenzione i capitoli seguenti. Salto di base •...
- Seite 79 • Prima di saltare chiudere sempre il foro di entrata. • La rete dovrebbe essere cambiata ogni 2 anni. • Solo per l’uso esterno. • Non adatto per i bambini di eta inferiore ai 36 mesi. PRODUTTORE: MARIMEX CZ, S.R.O., LIBUŠSKÁ 221/264, PRAHA 4, TEL. +420 261 222 111...
-
Seite 80: Condizioni Di Garanzia
La garanzia non copre l’eventuale corrosione delle strutture in acciaio o dei ponticelli. Informazioni di contatto SICUREZZA VERIFICATA www.marimex.cz tel.: +420 261 399 111 e-mail: info@marimex.cz della stabilità della resistenza della superficie della solidità della struttura della sicurezza della rete... - Seite 81 Handleiding voor installatie Marimex Lijst van verpakkingsinhoud Č. 457 N. 244 cm 305 cm 366 cm 396 cm 457 cm Naam deel 1 19000300 19000301 19000302 19000303 19000304 Framebuis 2 19000305 19000305 19000305 19000305 19000306 T-verbindingsstuk frame 3 19000648 19000649 19000650 19000629 19000629...
- Seite 82 Attentie Voor de opbouw en daarna het gebruik moet men bekend zijn met instructies in deze handleiding. Bewaar de handleiding voor als u in de toekomst de genoemde informatie nodig heeft. De montage van de trampoline moet door minimaal twee volwassenen worden uitgevoerd overeenkomstig de montage-instructies en voor het eerste gebruik gecontroleerd worden.
-
Seite 83: Montage-Instructies
Montage-instructies Step 1 Zet de verticale verlengstukken in de U-vorm poten. Let op dat er bij deze delen de gaten voor bevestigingschroeven op elkaar aansluiten (N. 21). Step 2 Verbind het grote uiteinde van de framebuis met de T-connector. Zorg ervoor dat het goed past. - Seite 84 Step 5 Op de U-poten moeten de onderste staanders van het veiligheidsnet worden vast- gezet m.b.v. de bijgesloten Ugespen. Pas nadat de trampoline compleet geïnsta- lleerd is, de gespen goed aantrekken. Op de verankerde staander is een schuimrub- ber hoes aangebracht, boven de bovenste U-gesp. Step 6 De springmat moet met het kruis/ logo omhoog zijn geplaatst.
- Seite 85 Step 9 Step 10 Het randkussen m.b.v. spanbandjes Veiligheidsnet gelijkmatig over de spring- vastzetten. mat uitspreiden, met het omzoomde deel bovenaan. Step 11 Nu de set metalen stangen voor het bevestigen en opspannen van het veiligheid- snet klaarmaken. Verbind de stangen m.b.v. koppelstukken met elkaar door, vol- gens aangeduide inkepingen.
- Seite 86 Step 13 Zo ziet het veiligheidsnet met de cirkel bovenaan uit, klaar om door te gaan met de montage. Passo 14 Bevestig aan het uiteinde van de bovenstaander van het veiligheidsnet de houders van de cirkel - let op de juiste richting van de houders.
- Seite 87 Step 17 Step 18 Na de montage moet uw trampoline Met behulp van een tweede persoon eruitzien als op de afbeelding hierboven. het veiligheidsnet met cirkel optillen en stapsgewijs de cirkel in de houders vastzetten. Step 19 Leid de klemkabel afwisselend door de lussen op het springvlak en de gaten in het beschermnet.
- Seite 88 Het staat klaar Voordat u de trampoline gaat gebruiken, overleg met uw huisarts of deze acti- viteit voor u raadzaam en veilig is. Voor elk gebruik de trampoline controleren. Vooral de springmat en alle delen op volledigheid en of die niet losgeraakt zijn. •...
- Seite 89 Let op • Voor trampolines van 244 cm = 100 kg • Voor trampolines van 305 tot 457 cm = 150 kg • Er mag slechts één persoon tegelijk springen. Gevaar voor botsingen. • Spring zonder schoenen aan. • Gebruik de springmat niet als deze nat is. •...
- Seite 90 Zorg goed voor de trampoline – Onderhoud De trampoline en zijn onderdelen moeten aan het begin van het seizoen en verder periodiek gecontroleerd worden, vooral de belangrijkste onderdelen (frame, veren, springmat, beschermrand en veiligheidsnet), anders kan de trampoline gevaarlijk worden. •...
- Seite 91 Basistechnieken van sprongen Let op dat u steeds op zelfde plaats landt, waar vandaan u zich heeft afgezet. Spring steeds in het midden van de trampoline. Verkeerde sprongtechniek kant een ongeval tot gevolg hebben, bestudeer daarom zorgvuldig het volgende hoofdstuk. Basissprong •...
- Seite 92 • Sluit voor het springen altijd eerst de toegangsopening in het net. • Het net moet om de twee jaar worden vervangen. • Alleen voor gebruik buitenshuis. • Niet geschikt voor kinderen tot 36 maanden. PRODUCENT: MARIMEX CZ, S.R.O., LIBUŠSKÁ 221/264, PRAHA 4, TEL. +420 261 222 111...
-
Seite 93: Garantievoorwaarden
De garantie is niet van toe- passing op een eventuele corrosie van stalen constructie of de trap. Contact informatie VEILIGHEID IS GETEST www.marimex.cz tel.: +420 261 399 111 e-mail: info@marimex.cz stabiliteit bestendigheid springmat sterkte frame veiligheid veiligheidsnet... - Seite 94 Mod de instalare Marimex Conținutul ambalării Č. 457 N. 244 cm 305 cm 366 cm 396 cm 457 cm Denumirea piesei 1 19000300 19000301 19000302 19000303 19000304 Țeavǎ cadru 2 19000305 19000305 19000305 19000305 19000306 Îmbinare T cadru 3 19000648 19000649 19000650 19000629 19000629...
- Seite 95 Atenționare Înainte de a începe asamblarea și utilizarea, trebuie să faceți cunoștință cu in- strucțiunile din acest manual. Păstrați manualul pentru cazul, când veți avea nevoie de el în viitor. Asamblarea trambulinei trebuie efectuată de cel puţin doi adulţi, în conformitate cu instrucţiunile de montaj şi, înainte de prima utilizare, trebuie verifcată.
- Seite 96 Instrucţiuni de montaj Pasul 1 Întroduceți suporturile pentru picior pe picioarele sub formă de U. Aveți grijă, ca să se suprăpună orificiile pentru șuruburile de prindere (N. 21). Pasul 2 Conectați capătul mare al tubului cadrului cu conectorul T. Asigurați-vă că se potrivește bine.
- Seite 97 Pasul 5 Pe picioarele sub formă de U trebuie montate barele inferioare pentru plasele de protecție cu ajutorul închizătoarelor U. Recomandăm strângerea închizătoarelor abia după montarea completă a trambulinei. Pe bara ancorată, deasupra închizăto- rului U superiro se află mâneca de spumă. Pasul 6 Suprafața de sărit trebuie să...
- Seite 98 Pasul 9 Pasul 10 Fixați învelitoarea arcurilor cu ajutorul Desfaceți uniform plasa de protecție frânghiilor de strângere. pe suprafața trambulinei, în așa fel ca partea tivită să fie în partea de sus. Pasul 11 Pregătim formațiunea tijelor metalice pentru fixarea și întinderea plasei de pro- tecție.
- Seite 99 Pasul 13 Așa arată plasa de protecție cu cercul introdus, care este pregătită pentru următo- rul montaj. Pasul 14 La capătul tijei superioare a plasei de protecție, fixați suporții cercului – atenție la sensul corect al suporți- lor. Locul unde se prinde cercul plasei de protecție va fi pe partea exterioară.
- Seite 100 Pasul 17 Pasul 18 Dupa montaj, trambulina dvs. ar trebui Cu ajutorul celei de a doua persoane, să arate ca în imagine. ridicăm plasa de protecție cu cercul și fixăm treptat cercul în suporții cercului. Pasul 19 Înfășurați alternativ cablul de prindere prin buclele de pe suprafața de sărit și prin găurile din plasa de protecție.
- Seite 101 Aveți montat Înainte de utilizarea trambulinei, consultați medicul dvs. dacă această activitate este adecvată și sigură pentru dvs. Înaintea fiecărei utilizări controlați trambulina. Acordați o atenție deosebită suprafeței de sărit și eventualelor piese slăbite sau absente. • În trambulină poate să sară numai 1 persoană. •...
- Seite 102 Avertizare • Pentru trambuline de 244 cm = 100 kg • Pentru trambuline de 305 până la 457 cm = 150 kg • Poate sări pe trambulină numai o singură persoană. Pericol de coliziune. • Săriţi cu picioarele goale. • Nu utilizaţi suprafaţa de sărit dacă este udă. •...
- Seite 103 Aveți grijă de trambulină – Întreţinere Trambulina şi piesele sale trebuie întotdeauna verificate la începutul sezonului, iar apoi trebuie inspectate în mod regulat, îndeosebi părţile sale principale (cadrul, arcurile, suprafaţa de sărit, căptuşeala şi plasa de siguranţă), în caz contrar, trambu- lina poate deveni periculoasă.
- Seite 104 Tehnici de sărit de bază Aveți grijă să aterizați întotdeauna în locul din care ați săltat. Săriți întotdeauna în mijlocul trambulinei. Technica de sărit necorespunzătoare poate duce la accidente, de aceea studiați cu atenție capitolul următor. Săritură de bază • startul din picioare, picioarele în- depărtate la lățimea umerilor, ochii privesc suprafața de sărit •...
- Seite 105 • Plasa ar trebui înlocuită o dată la doi ani. • Numai pentru utilizare în aer liber. • Nu este potrivită pentru copii cu vârsta de până la 36 de luni. PRODUCĂTOR: MARIMEX CZ, S.R.O., LIBUŠSKÁ 221/264, PRAHA 4, TEL. +420 261 222 111...
- Seite 106 Garanția nu se referă la eventuala coroziune a construcției de oțel sau a scării. Informații de contact SECURITATE VERIFICATĂ www.marimex.cz tel.: +420 261 399 111 e-mail: info@marimex.cz stabilitate rezistența suprafeței rigiditatea construcției plase de protecție...
-
Seite 107: Csomag Tartalma
Telepítési útmutató Marimex Köszönjük, hogy megvásárolta a trambulint, a MARIMEX társaság gyártmányát. Hisszük, hogy jól szolgálja majd Önt sok éven át, és sok szép pillanatot nyújt majd nem csak Önnek, hanem szeretteinek is. A trambulin összeállítása előtt figyelme- sen tanulmányozza át ezt az útmutatót. Javasoljuk, hogy az útmutatót őrizze meg jövőbeni esetleges használata céljából. - Seite 108 Figyelmeztetés A telepítést megelőzően és a berendezés használatbavétele előtt meg kell ismer- kednie kell az útmutatóban közölt utasításokkal. Őrizze meg az útmutatót, mivel a közölt információkra szüksége lehet a jövőben is. A trambulint legalább két felnőtt személynek kell összeállítania, a szerelési út- mutatóban szereplő...
-
Seite 109: Szerelési Utasítások
Szerelési utasítások Az 1 Lépés A lábmeghosszabbítót tolja be az U alakú lábba. Ügyeljen arra, hogy az egyes részeknél a nyílások átfedjék egymást a rögzítő csavarok elhelyezésére (N. 21). Az 2 Lépés Csatlakoztassa a keretcső nagy végét a T csatlakozóval. Ügyel- jen arra, hogy jól illeszkedjen. - Seite 110 A 5 Lépés Az U-alakú lábakhoz,csatlakoztatni kell a biztonsági háló alsó rúdjait a leszállított U-csatokkal. A kapcsokat csak a trambulin teljes összeállítását követően javasol- juk teljesen meghúzni. A lehorgonyzott rúdon a felső U-csatok felett hab formájú persely helyezkedik el. A 6 Lépés UgrásI területet annak keresztjével/ emblémájával felfelé...
- Seite 111 A 9 Lépés A 10 Lépés Rögzítse a rugó burkolatokat fűzők Egyenletesen ossza el a biztonsági hálót segítségével. a trambulin teljes felületén úgy, hogy annak szegélyezett része felül legyen. A 11 Lépés Készítsünk el egy fém rudakból készült szerelvényt, ami a biztonsági háló rögzíté- sére és megfeszítésére szolgál.
- Seite 112 A 13 Lépés Igy néz ki a védőháló a felfűzött abronccsal, ami ezzel további szerelésre előkészí- tett állapotban van. A 14 Lépés A védőháló felső pálcája végére erősítse fel az abroncsok tartóját – vigy- ázzon a tartók helyes irány- ára. A védőháló abroncsa rögzítési helye annak külső...
- Seite 113 A 17 Lépés A 18 Lépés A szerelés befejeztével az Ön trambu- Egy másik személy segítségével fele- linja az ábra szerint néz majd ki. meljük a védőhálót az abronccsal együtt és az abroncsot fokozatosan felepősítjük az abroncstartókra. A 19 Lépés Vezesse fel a rögzítőkábelt felváltva az ugró...
- Seite 114 Befejeződött az összeállítás A trambulin használatbavétele előtt kérje ki orvosa véleményét arról, hogy az Ön részére ez az aktívitás megfelelő és biztonságos lesz-e. A trambulint annak minden egyes használatbavétele előtt ellenőrizze, Fordítson fokozott figyelmet az ugró felületre az esetlegesen hiányzó vagy meglazult al- katrészekre.
- Seite 115 Figyelem! • trambulin méretig 244 cm = 100 kg • trampolínhoz 305-től 457 cm = 150 kg • A trambulinon egyszerre csak egy személy ugrálhat. Összeütközés veszélye áll fenn. • A trambulinban csupán cipő nélkül ugráljon . • Ne használja a rugaszkodó felületet, ha az vizes. •...
- Seite 116 Gondozza a trambulin – Karbantartás A trambulint és az alkatrészeit a szezon elején mindig ellenőrizni kell és további rendszeres ellenőrzéseket kell rajta végezni, különösen annak fő részein (keret, rugók, rugaszkodó (ugró) felület, védőpárnázás és védőháló), ellenkező esetben a trambulin veszélyessé válhat. •...
- Seite 117 Az ugrálás alapvető technikája Ügyeljen arra, hogy ugyanarra a helyre essen vissza, ahonnan elrugaszkodott. Midig a trambulin közepén ugráljon. Az ugálás helytelen technikája sérülést okozhat ezért alaposan tanulmányozza át a következő fejezetet. Alap ugrálás • start álló helyzetből, a lábak vállszé- lességre tárva, szemeivelel az ug- rófelületet nézze •...
- Seite 118 • Az ugrálás előtt mindig zárja be a hálón lévő bejárati nyílást. • A hálót 2 évente cserélje újra. • Kizárólag kültérben használható. • Használata 36 hónap alatti korú gyermekek számára nem alkalmas. GYÁRTÓCÉG: MARIMEX CZ, S.R.O., LIBUŠSKÁ 221/264, PRAHA 4, TEL. +420 261 222 111...
-
Seite 119: Jótállási Feltételek
• A szerkezet és a lépcsők nem készültek rozsdamentes anyagokból ezért ned- vesség hatására azoknál korrózió jelentkezhet. A jótállás nem vonatkozik az acélszerkezet vagy a lépcsőzet esetleges korróziójára. Kapcsolati adatokat BIZTONSÁG ELLENŐRIZVE www.marimex.cz Ügyfélközpont tel.: +420 261 399 111 e-mail: info@marimex.cz stabilitás felület ellenállóképessége szerkezet szilárdsága veiligheid veiligheidsnet... - Seite 120 Instrukcja montażu Marimex Dziękujemy za to, że kupili Państwo trampolinę spółki Marimex. Wierzymy, że będ- zie Państwu służyć przez wiele lat i dostarczy miłych chwil nie tylko Państwu, ale i Państwa najbliższym. Przed montażem trampoliny prosimy uważnie przeczytać tę instrukcję. Zalecamy zachować instrukcję do użytku w przyszłości.
- Seite 121 Ostrzeżenie Przed montażem, a potem przed korzystaniem z trampoliny trzeba się zapoznać z zaleceniami zawartymi w tej instrukcji. Instrukcję należy zachować do ewentualnego wykorzystania w przyszłości. Trampolinę muszą montować co najmniej dwie dorosłe osoby zgodnie z instrukcja- mi montażu, a następnie przed pierwszym wykorzystaniem musi zostać poddana kontroli.
-
Seite 122: Instrukcje Montażu
Instrukcje montażu Krok 1 Nasadki zakładamy na nogi w kształcie litery U. Zwracamy uwagę, aby otwory na śruby w poszczególnych częściach po- krywały się ze sobą (Nr. 21). Krok 2 Połącz duży koniec rurki ramy ze złączem T. Upewnij się, że dobrze pasuje. - Seite 123 Krok 5 Do nóg w kształcie litery U trzeba teraz przymocować za pomocą dostarczonych uchwytów typu U dolne pręty ochronne. Uchwyty zaleca się w pełni dociągnąć dopiero po kompletnym złożeniu trampoliny. Na umocowanym pręcie nad górnym uchwytem typu U znajduje się piankowy rękaw. Krok 6 Materiał...
- Seite 124 Krok 9 Krok 10 Osłonę sprężyn mocujemy za pomocą Równomiernie rozkładamy siatkę linek do ściągania. ochronną na powierzchni trampoliny tak, aby część z obrzeżem była na górze. Krok 11 Przygotowujemy zestaw metalowych prętów do zamocowania i naciągnięcia siatki ochronnej. Pręty łączymy złączkami do obręczy zgodnie z nacięciami. Połączenie poszczególnych części utworzy dwa długie pręty, które przeciągamy przez obramo- wanie na brzegu siatki ochronnej.
- Seite 125 Krok 13 Zdjęcie siatki ochronnej z przewleczoną obręczą, która jest gotowa do dalszego montażu. Krok 14 Na końcu górnego pręta siatki ochronnej przymo- cowujemy uchwyty do obręczy – uwaga na właś- ciwy kierunek uchwytów. Miejsce, w którym mo- cuje się obręcz siatki ochronnej znajduje się...
- Seite 126 Krok 17 Krok 18 Po montażu trampolina powinna wyglą- Przy pomocą drugiej osoby podnosimy dać tak, jak na rysunku. siatkę ochronną z obręczą i kolejno mo- cujemy obręcz do uchwytów do obręczy. Krok 19 Przeciągnij linkę mocującą naprzemiennie przez pętle na powierzchni do skakania i otwory w siatce ochronnej.
- Seite 127 Po zakończeniu montażu Przed skorzystaniem z trampoliny należy zasięgnąć opinii lekarza, czy takie ćwiczenia są dla Państwa odpowiednie i bezpieczne. Przed każdym użyciem trampolinę trzeba sprawdzić. Zwiększoną uwagę poświęca się powi- erzchni przeznaczonej do skakania i ewentualnie brakującym albo poluzowanym częściom. •...
- Seite 128 Z trampoliny nie korzystamy • Do trampolin 244 cm = 100 kg • Do trampolin od 305 do 457 cm = 150 kg • Nie może skakać więcej niż jedna osoba. Niebezpieczeństwo zderzenia. • Skacz bez obuwia. • Nie korzystaj z powierzchni do odbijania, kiedy jest mokra. •...
- Seite 129 Dbajmy o trampolinę – Konserwacja Trampolinę i jej części należy sprawdzać zawsze na początku sezonu, na następnie regularnie, przede wszystkim jej główne części (ramę, sprężyn, powierzchnie do odbijania (skakania), obicie i siatkę ochronną, w przeciwnym wypadku trampolina może stać się niebezpieczna. •...
- Seite 130 Podstawowe techniki skakania Dbamy o to, aby zawsze wylądować w tym miejscu, z którego się odbiliśmy. Skacze- my zawsze na środek trampoliny. Niewłaściwa technika skakania może doprowadzić do wypadku i dlatego kolejny rozdział trzeba uważnie przeczytać. Podstawowy skok • rozpoczynamy w pozycji stojąc, z nogami rozstawionymi na szerokość...
- Seite 131 • Przed skakaniem zawsze zamknij otwór wejściowy w siatce. • Siatka powinna być wymieniana co 2 lata. • Wyłącznie do użytku zewnętrznego. • Niewłaściwe dla dzieci do 36 miesiąca. PRODUCENT: MARIMEX CZ, S.R.O., LIBUŠSKÁ 221/264, PRAHA 4, TEL. +420 261 222 111...
-
Seite 132: Warunki Gwarancji
• Konstrukcja i schodki nie są wykonane z nierdzewnego materiału i dlatego pod działaniem wilgoci może dojść do korozji. Gwarancja nie obejmuje ewentualnej korozji konstrukcji stalowej albo schodków. Dane kontaktowe BEZPIECZEŃSTWO GWARANTOWANE www.marimex.cz Centrum obsługi klienta tel.: +420 261 399 111 e-mail: info@marimex.cz stabilność odporność powierzchni wytrzymałość konstrukcji bezpieczeństwo siatki... - Seite 133 Kotvicí sada/Anchor kit Ukotvěte si trampolínu Anchor your trampoline Pro uchycení trampolíny do země To secure your trampoline to the ground...
- Seite 134 Range of more Range of more than 20 models than 15 models Více informací o značkovém zboží Marimex a prodejních místech najdete na www.marimex.cz a www.marimex.sk. For more information about Marimex products and sales points please visit www.marimex.cz or www.marimex.sk.
- Seite 135 BAZÉNY Marimex Aboveground pools Marimex Range of more than 60 models Více informací o značkovém zboží Marimex a prodejních místech najdete na www.marimex.cz a www.marimex.sk. For more information about Marimex products and sales points please visit www.marimex.cz or www.marimex.sk.