Renson Fixscreen Minimal Curtain wall 50 Montageanleitung
Inhaltsverzeichnis
Verfügbare Sprachen
Verfügbare Sprachen
Kapitel
Inhaltsverzeichnis

Verwandte Anleitungen für Renson Fixscreen Minimal Curtain wall 50


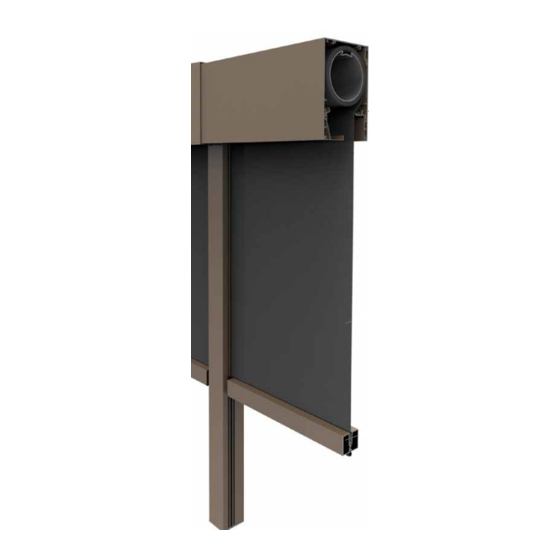
Inhaltszusammenfassung für Renson Fixscreen Minimal Curtain wall 50
- Seite 1 Fixscreen Minimal ® Curtain wall 50 Montageanleitung Installation instructions...
-
Seite 2: Inhaltsverzeichnis
Fixscreen Minimal Curtain wall 50 ® Inhaltsverzeichnis 1 • Allgemeines ............................................2 • Montagesituation ........................................3 • Montage ..............................................3.1 • Montage der Koppelseitenführung C.50 ......................3.2 • Montage der Kassette – Anfangsscreen ......................3.3 • Montage der Kassette – Zwischenscreen ...................... -
Seite 3: Allgemeines
Fixscreen Minimal Curtain wall 50 ® 1 • Allgemeines SICHERHEIT Geeignete Sicherheitsvorschriften am Standort beachten: - Keine Leitern, sondern einen Lift oder eine Arbeitsplattform verwenden - Die Zone unter/um die Installation herum deutlich absperren - Geeignete Sicherheitskleidung und Sicherheitsschuhe tragen - Präzises Arbeiten ist reibungsloser, sicherer und letztendlich schneller Überprüfen Sie, ob Sie alles erhalten haben. -
Seite 4: Montage
Fixscreen Minimal Curtain wall 50 ® 3 • Montage Bei der Montage muss immer mit dem Anfangsscreen begonnen werden. Dieser befindet sich immer auf der linken Seite der Fassade. Anschließend werden die Zwischenscreens und der Endscreen montiert. Wie erkennt man... …... -
Seite 5: Montage Der Koppelseitenführung
Fixscreen Minimal Curtain wall 50 ® 3.1 • Montage der Koppelseitenführung C.50 Demontieren Sie die Klicken Sie das abnehmbare Rasten Sie das Zwischen- Koppelseitenführung C.50. Profil von der Seitenführung. profil vom festen Profil der Seitenführung aus. Das feste Profil der Koppelseitenführung wird alle 500 mm mittig an der Klemmleiste der Vorhangfassade befestigt. -
Seite 6: Montage Der Kassette - Anfangsscreen
Fixscreen Minimal Curtain wall 50 ® 3.2 • Montage der Kassette – Anfangsscreen Füllprofil Füllprofil Die Kassette ist komplett vormontiert, sodass sie in Breite Breite Breite einem Stück montiert werden Anfangsscreen Zwischenscreen Endscreen kann. Die Endschiene wird separat geliefert und erst zu Der Anfangsscreen befindet sich –... - Seite 7 Fixscreen Minimal Curtain wall 50 ® Stützen Sie die Kassette weiterhin, bis die Seitenkonsolen festgeschraubt sind. Am Anfangsscreen müssen immer beide Seitenkonsolen angeschraubt werden. An einem Zwischen- screen oder einem Endscreen muss nur die Konsole an der Motorseite angeschraubt werden. Je nach Kabelführung kann die Kassette nach oben oder nach hinten gesichert werden.
-
Seite 8: Montage Der Kassette - Zwischenscreen
Fixscreen Minimal Curtain wall 50 ® 3.3 • Montage der Kassette – Zwischenscreen Schieben Sie die Kassette des Zwischenscreens Breite Breite Breite über die drei Stifte des Anfangsscreen Zwischenscreen Endscreen Anfangsscreens. Der Zwischenscreen befindet sich immer zwischen einem Anfangsscreen (linke Seite) und einem Endscreen (rechte Seite). -
Seite 9: Montage Der Kassette - Endscreen
Fixscreen Minimal Curtain wall 50 ® 3.4 • Montage der Kassette – Endscreen Schieben Sie die Kassette des Endscreens über die drei Breite Breite Breite Stifte des Anfangsscreens Anfangsscreen Zwischenscreen Endscreen oder des Zwischenscreens. Hierfür ist ein zusätzlicher Der Endscreen befindet sich – von außen gesehen – immer auf Einbauraum von 20 mm der rechten Seite der Vorhangfassade. -
Seite 10: Montage Des Optionalen Füllprofils
Fixscreen Minimal Curtain wall 50 ® 3.5 • Montage des optionalen Füllprofils Die Außenführungen des Anfangsscreens, Endscreens und einzelnen Screens sind standardmäßig mit einem ästhetischen Füllprofil anstelle der Reißverschlussführung ausgestattet. Dieses Profil kann auch EXTRA bestellt werden, um beispielsweise bei einer Türöffnung einen attraktiveren Abschluss zu gewährleisten. -
Seite 11: Befestigung Abschlussplatte Kassette
Fixscreen Minimal Curtain wall 50 ® 3.7 • Befestigung Abschlussplatte Kassette Die Kassette wird in Höhe der Koppelseitenführung C.50 mit einer kompletten Abschlussplatte oder einer Abschlussplatte nur an der Unterseite der Kassette abgeschlossen. Die komplette Abschlussplatte Die Abschlussplatte nur zum Abschluss der Kassettenunterseite der Kassette wird einfach wird auf die Seitenführung geschraubt. -
Seite 12: Befestigen Der Endschiene
Fixscreen Minimal Curtain wall 50 ® 3.8 • Befestigen der Endschiene Schließen Sie den Motor an. Halten Sie die Endschiene Um die Endschiene auf dem Senken Sie das Tuch auf eine richtig fest. Der feste untere Tuch einzurasten, beginnen angenehme Arbeitshöhe. Leistenfinger befindet Sie am besten auf einer Achtung! Führen Sie das... - Seite 13 Fixscreen Minimal Curtain wall 50 ® Stellen Sie sicher, dass sich die Clips ordnungsgemäß in der Positionieren Sie das Tuch Endschiene befinden. korrekt in der unteren Leistenstütze. Achten Sie darauf, dass sich das Tuch vollständig flach zwischen den unteren Leistenstützen befindet.
-
Seite 14: Elektrische Bedienung
Fixscreen Minimal Curtain wall 50 ® 4 • Elektrische Bedienung 4.1 • Technische Merkmale der Motoren Parameter Werte Spannung 230 Volt AC Elektrischer Strom 0,4 bis 1,5 Ampere (je nach Motortyp) Leistung 90 bis 300 Watt (je nach Motortyp) Schutzklasse IP 44 Maximale Laufzeit ca. -
Seite 15: Einstellung Der Motorendpunkte
Fixscreen Minimal Curtain wall 50 ® 5 • Einstellung der Motorendpunkte 5.1 • Detecto-Rensonmotor Safety First Die Endpunkte des Detecto-Rensonmotors Safety First sind nicht voreingestellt. Diese lassen sich durch automatisches Erkennen der Endpunkte leicht einstellen. Weitere Informationen finden Sie in den Dokumenten zum Einrichten dieses Motors. -
Seite 16: Endkontrolle
Fixscreen Minimal Curtain wall 50 ® 6 • Endkontrolle ➊ Vor dem Starten des Motors: Überprüfen Sie die Rechtwinkligkeit. Die Diagonalen (D1 und D2) und die Parallelen (H1 und H2) müssen für ein ordnungsgemäßes Abrollen des Tuches möglichst gleichmäßig sein. D1 = D2 und H1 = H2 ➋... -
Seite 17: Wartung
• Der elektrische Anschluss muss von einem qualifizierten Elektriker in Übereinstimmung mit den geltenden Normen vorgenommen werden. • Renson übernimmt keine Verantwortung oder Garantie für die automatische Steuerung des Screenmotors, außer für die Anwendungen von Somfy. • Renson kann nicht garantieren, dass das Kommunikationsprotokoll für die Gebäudeautomation und/oder die Haustechnik mit dem Screenmotor kompatibel ist. -
Seite 18: Entsorgung Des Produktes
Fixscreen Minimal Curtain wall 50 ® 8 • Entsorgung des Produktes Ihr Screen kann vollständig recycelt werden. Fragen Sie Ihre Gemeinde oder die nächstgelegene Recyclingstation nach den örtlichen Umweltvorschriften. Schalten Sie bei der Demontage des Screens die Stromversorgung aus. Materialien müssen bei der Entsorgung des Produktes getrennt werden. Brennbare Materialien müssen bei der Entsorgung des Produkts von nicht brennbaren Materialien getrennt werden. - Seite 40 All photos shown are for illustrative purposes; the actual product may vary due to product placement. Renson reserves the right to make technical changes to the products described in this brochure. ® The most recent product information, availability, and your local distributor can always be found on www.renson.eu *L6000198*...