Renson Fixscreen 100 Solar Montagerichtlinien
Inhaltsverzeichnis
Verfügbare Sprachen
Verfügbare Sprachen
Quicklinks
Kapitel
Inhaltsverzeichnis

Verwandte Anleitungen für Renson Fixscreen 100 Solar


Inhaltszusammenfassung für Renson Fixscreen 100 Solar
- Seite 1 Fixscreen 100 Solar ® Montagerichtlinien Installation instructions...
-
Seite 2: Inhaltsverzeichnis
Fixscreen 100 Solar ® Inhaltsverzeichnis 1 • Allgemeines ............................................2 • Montageart ............................................3 • Montage ..............................................3.1 • Demontage der Seitenführungen ............................ 3.2 • Montage der Seitenführungen ............................3.3 • Montage der Kassette ..................................3.4 • Fixieren der Kassette .................................. -
Seite 3: Allgemeines
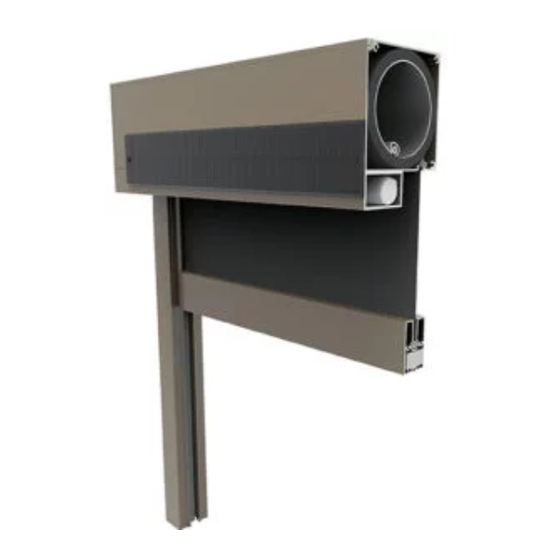
- Die Zone unter/um die Installation herum deutlich absperren - Geeignete Sicherheitskleidung und Sicherheitsschuhe tragen - Präzises Arbeiten ist reibungsloser, sicherer und letztendlich schneller Fixscreen 100 Solar EW1 besteht aus: - Quadratischem Design Kasten mit demontierbarer Tuchsatz mit Motorsteuerung, die direkt an der Konstruktion befestigt wird. -
Seite 4: Montageart
Fixscreen 100 Solar ® 2 • Montageart Es gibt 1 Einbauweise fur die Fixscreen 100 Solar. Square design Square design: Solarpanel auf einzelne Einheit montiert Vorbau, vor dem Fenster, mit vollständig Vorbau, vor dem Fenster, mit vollständig fertiggestellter Kassette fertiggestellter Kassette... -
Seite 5: Montage
Fixscreen 100 Solar ® 3 • Montage 3.1 • Demontage der Seitenführungen Schmale Seitenführung festes Profil ➀ Reißverschlussführung ➁ Schmale Seitenführung abnehmbares Profil ➂ Klicker ➃ Abschlusselement schmale Seitenführung ➄ • Bei der Installation der Führungen muss der Kasten bereits auf den Führungen sitzen. -
Seite 6: Montage Der Seitenführungen
Fixscreen 100 Solar ® 3.2 • Montage der Seitenführungen Montage der vorgebohrten Seitliche Montage der Seitenführung, festes vorgebohrten Seitenführung, festes Profil (Ø 5 mm) Profil, durch die Rückseite (Ø 5 mm) Die G-Führung (geschlossen) ist Standard vorgebohrt (Ø 10 mm). Es gibt 2 Einstellungsmöglich- keiten für die Seitenführungen: seitlich oder an die Rückseite. Das Bohrloch Ø 10 mm ist schon vorgebohrt, das Bohrloch Ø 5 mm muss bauseitig noch gebohrt werden. - Seite 7 Nur für Fixscreen Solar mit RTS-Motor: Entfernen Sie die Abdeckscheibe für das Kabel, durch die Schrauben zu lösen (dieser Schritt ist bei einem Solarpanel auf einzelne Einheit nicht nötig). Achtung: Entfernen Sie beim Fixscreen 100 Solar EW1 erst nach der Montage die Schutzhülle vom Solarpanel.
- Seite 8 Fixscreen 100 Solar ® Montage Solarpanel auf einzelne Einheit, nur für Fixscreen Solar mit RTS-Motor Die einzelne Einheit ist hinten nicht standardmäßig vorgebohrt. Bohren Sie links und rechts, um die Einheit an der Fassade zu befestigen (Befestigungsmaterial ist nicht mitgeliefert). Ziehen Sie das Motorkabel durch die ausgestanzte Öffnung des Kastens.
-
Seite 9: Fixieren Der Kassette
Fixscreen 100 Solar ® 3.4 • Fixieren der Kassette Platzieren Sie die leere Kassette auf das feste Profil der Seitenführungen. Tipp: Nach dem Aufsetzen der Kassette auf das feste Profil der Seitenführungen, vergewissern Sie sich met Hilfe der Wasserwaage, dass er gerade ist, bevor Sie fortfahren. -
Seite 10: Montage Des Tuchsatzes
Fixscreen 100 Solar ® 3.5 • Montage des Tuchsatzes Wenn die Kassette bereits definitiv an der ihn umgebenden Struktur befestigt wurde, muss man die Tuchrolle entlang der Innenseite einbringen. Hierfür am besten mit 2 Personen arbeiten! Unterstützen Sie dabei die Endschiene! Befestigen Sie die Abdeckscheibe mit den 2 Torx-Schrauben mit dem Werkzeug T20 wieder an der Kassette Aufgepasst! -
Seite 11: Schließen Der Kassette Und Der Seitenführungen
Fixscreen 100 Solar ® 3.6 • Schließen der Kassette und der Seitenführungen Dieser Schritt entfällt bei einem Solarpanel auf einzelne Einheit montiert. Verbinden Sie das Motorkabel mit dem Steckverbinder in der abnehmbares Profil von die Kassette. Achten Sie auf die korrekte Position des Hakens. -
Seite 12: Häufig Gestellte Fragen
Schnee auf dem Solarpanel liegt und die Photozellen nicht durch Vegetation, Über- hänge usw. bedeckt werden. In den unten aufgeführten Situationen raten wir von einer Montage des Fixscreen 100 Solar ab. Unter Umständen kann die Ausführung mit einem Solarpanel auf einzelne Einheit in Erwägung gezogen werden. - Seite 13 ® Kann der Fixscreen 100 Solar in allen Ländern eingesetzt werden? Der Fixscreen 100 Solar ist weltweit erhältlich, für Länder zwischen 52° Nord und Süd auf der Karte unten. Dieses Einsatzgebiet wurde von den Vorschriften von Somfy übernommen. Der Fixscreen 100 Solar kann in den "Nicht möglich"-Zonen angewendet werden, muss aber immer mit der Solar by Somfy-App abgemeldet werden.
-
Seite 14: Technische Merkmale
Fixscreen 100 Solar ® 5 • Technische Merkmale 5.1 • Technische Merkmale des Motors Spannungsversorgung 12 V DC (min 11,5 V, max 14 V) 868 MHz (IO) Funkfrequenz 433,42 MHz (RTS) Schutzart IP 44 normal -10°C / +50°C und kurzfristig -20°C / Temperaturbereich +60°C 9 (IO) -
Seite 15: Endabstellung
Fixscreen 100 Solar ® 6 • Endabstellung 6.1 • Somfymotor DIE ENDPUNKTE (OBEN UND UNTEN) EINSTELLEN! Die Endpunkte (oben und unten) sind noch nicht eingestellt. Der oberen Endpunkt: Stellen Sie sicher, dass die Endschiene so dicht wie möglich an die Kassette anschließt (End- schiene mit Abdichtungslippe bleibt teilweise sichtbar). -
Seite 16: Wartung
Wichtiger Hinweis: • RENSON übernimmt keine Verantwortlichkeit/Garantie falls die Motoren anders angesteuert werden als von Somfy angegeben. • RENSON übernimmt dazu keine Garantie das Protokol der Screenmotoren sei kompatibel zu Automatisation/Domotik. • Geringfügige Abweichungen zwischen den Farbmustern und den Profilen des Sonnenschutz-Screens können im Herstellungsprozess auftreten. -
Seite 17: Einstellung Produkt
Fixscreen 100 Solar ® 9 • Einstellung Produkt Ihr Screen kann vollständig recycelt werden. Informieren Sie sich bei Ihrer Stadt oder Recycelstation über die lokalen Umweltauflagen. Beim Demontieren des Screens sollen Sie die Installation spannungslos machen. Materialien sollen getrennt werden bei der Vernichtung des Produktes. Brennbare Materialien sollen von nicht brennbaren Materialien getrennt werden bei der Vernichtung des Produktes. - Seite 34 Fixscreen 100 Solar ®...
- Seite 35 Fixscreen 100 Solar ®...
- Seite 36 All photos shown are for illustrative purposes; the actual product may vary due to product placement. Renson reserves the right to make technical changes to the products described in this brochure. ® The most recent product information, availability, and your local distributor can always be found on www.renson.eu *L2001241*...