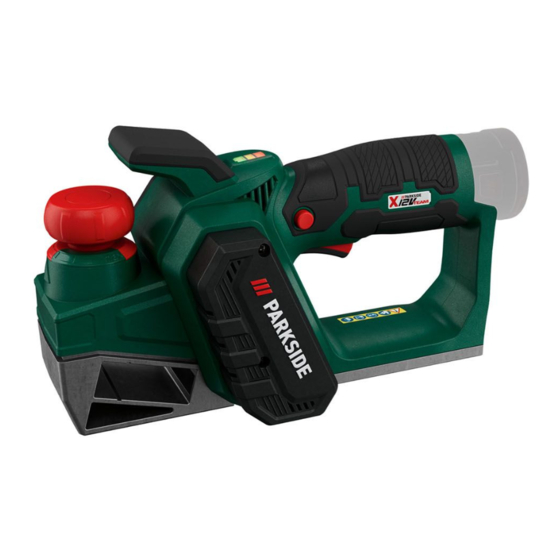
Parkside PHA 12 B2 Originalbetriebsanleitung
Akku-hobel
Vorschau ausblenden
Andere Handbücher für PHA 12 B2:
- Originalbetriebsanleitung (264 Seiten) ,
- Originalbetriebsanleitung (36 Seiten) ,
- Originalbetriebsanleitung (172 Seiten)
Inhaltsverzeichnis
Verfügbare Sprachen
Verfügbare Sprachen
Akku-Hobel / Cordless Planer / Rabot sans fi l
PHA 12 B2
Akku-Hobel
Originalbetriebsanleitung
Rabot sans fi l
Traduction des instructions d'origine
Strug akumulatorowy
Tłumaczenie oryginalnej instrukcji obsługi
Akumulátorový hoblík
Preklad originálneho návodu na obsluhu
IAN 334013_1907
Cordless Planer
Translation of the original instructions
Accu-schaafmachine
Vertaling van de originele gebruiksaanwijzing
Aku hoblík
Překlad originálního provozního návodu
Kapitel
Inhaltsverzeichnis

Verwandte Anleitungen für Parkside PHA 12 B2


Inhaltszusammenfassung für Parkside PHA 12 B2
- Seite 2 Klappen Sie vor dem Lesen die Seite mit den Abbildungen aus und machen Sie sich anschließend mit allen Funktionen des Gerätes vertraut. Before reading, unfold the page containing the illustrations and familiarise yourself with all functions of the device. Avant de lire le mode d‘emploi, ouvrez la page contenant les illustrations et familiarisez-vous ensuite avec toutes les fonctions de l‘appareil.
-
Seite 4: Inhaltsverzeichnis
Holzwerkstoffen, wie z. B. Bretter oder Falzen ..........14 Wartung und Pflege ....14 Balken, geeignet. Hobelmesser austauschen ....14 Das Gerät ist Teil der Serie Parkside X 12 V TEAM und kann mit dem Akku des Reinigung ........15 X 12 V TEAM betrieben werden. Die Akkus Lagerung ........15 Entsorgung/Umweltschutz ..16... -
Seite 5: Allgemeine Beschreibung
• Aufbewahrungskoffer • Betriebsanleitung Technische Daten Akku und Ladegerät sind nicht im Lieferumfang enthalten. Akku-Hobel ......PHA 12 B2 Nennspannung U ......12 V Funktionsbeschreibung Leerlaufdrehzahl n ....14500 min Schutzart.........IPX0 Der Akku-Hobel besitzt eine rotierende Gewicht (inkl. Akku) ....ca. 1,6 kg... -
Seite 6: Sicherheitshinweise
Sicherheitshinweise Achtung! Eine aktuelle Liste der Akkukompatibilität fin- Dieser Abschnitt behandelt die den Sie unter: grundlegenden Sicherheitsvorschrif- www.lidl.de/akku ten bei der Arbeit mit dem Gerät. Dieses Gerät kann ausschließlich mit Symbole in der Anleitung folgenden Akkus betrieben werden: PAPK 12 A1, PAPK 12 A2, PAPK 12 B2. Gefahrenzeichen mit Dieses Akkus dürfen mit folgenden Angaben zur Verhütung... -
Seite 7: Allgemeine Sicherheitshinweise Für Elek Tro Werk Zeuge
Das Gerät ist Teil den. Elek tro werk zeuge erzeu- gen Funken, die den Staub oder der Serie Parkside X 12 V TEAM die Dämpfe entzünden können. c) Halten Sie Kinder und an- dere Personen während der Allgemeine Benutzung des Elek tro werk- Sicherheitshinweise für... - Seite 8 das Elek tro werk zeug zu Alkohol oder Medikamen- tragen, aufzuhängen oder ten stehen. Ein Moment der um den Stecker aus der Unachtsamkeit beim Gebrauch Steckdose zu ziehen. Hal- des Elek tro werk zeuges kann zu ernsthaften Verletzungen führen. ten Sie die Anschlussleitung fern von Hitze, Öl, scharfen b) Tragen Sie persönliche Kanten oder sich bewegen-...
-
Seite 9: Ziehen Sie Den Stecker
tionen besser kontrollieren. werk zeug, dessen Schalter f) Tragen Sie geeignete defekt ist. Ein Elek tro werk- zeug, das sich nicht mehr ein- Kleidung. Tragen Sie kei- oder ausschalten lässt, ist gefähr- ne weite Kleidung oder Schmuck. Halten Sie Haa- lich und muss repariert werden. -
Seite 10: Verwendung Und Behandlung Des Akkuwerkzeugs
Elek tro werk zeugen. kus in den Elek tro werk- f) Halten Sie Schneidwerk- zeugen. Der Gebrauch von zeuge scharf und sauber. anderen Akkus kann zu Verlet- Sorgfältig gepflegte Schneid- zungen und Brandgefahr füh- werkzeuge mit scharfen ren. c) Halten Sie den nicht be- Schneidkanten verklemmen sich weniger und sind leichter zu nutzten Akku fern von... -
Seite 11: Zusätzliche Sicherheitshinweise Für Hobel
sungen zum Laden und Zwingen oder auf eine laden Sie den Akku oder andere Art und Weise an das Akkuwerkzeug nie- einer stabilen Unterlage. mals außerhalb des in der Wenn Sie das Werkstück nur mit der Hand oder gegen Ihren Betriebsanleitung ange- Körper halten, bleibt es labil, gebenen Temperaturbe-... -
Seite 12: Entfernen Sie Den Akku
Grüne LED leuchtet ohne eingesetzten Akku: Ladegerät Betriebsanleitung Ihres Akkus und Ladege- betriebsbereit. räts der Serie Parkside X 12 V Team gegeben Grüne LED leuchtet: Akku ist geladen. sind. Eine detaillierte Beschreibung zum La- Rote LED leuchtet: Akku lädt. devorgang und weitere Informationen finden Späne/Staub absaugen... -
Seite 13: Bedienung
Spanauswurf Der grüne Bereich der Skala unterhalb des Reglers ( 1) kennzeichnet den Ein- Setzen Sie den Spanauswurf (12) in den stellungsbereich in dem weniger Material Auswurfschacht (8). Achten Sie darauf, abgetragen wird. dass die Führungsschiene auf dem Span- Der rote Bereich der Skala kennzeichnet auswurf (12) in die Nuten im Auswurf- den Einstellungsbereich in dem viel Materi- schacht (8) passen. -
Seite 14: Hobeln
Hobeln 2. Beginnen Sie mit den Akku-Hobel in kleinen Schritten das Holz 1-2 mm Achtung! Rückschlaggefahr! neben der angerissenen Falzbreite ab- Führen Sie nur einen einge- zutragen. Die Kante die Sie ins Holz einarbeiten schalteten Hobel an das zu be- arbeitende Werkstück heran. -
Seite 15: Reinigung
Reinigung 1. Lösen Sie die beiden Muttern (15) mit dem Maulschlüssel (10). 2. Versenken Sie den Hobelmesser-Schutz Nehmen Sie immer den Akku 18) und schieben Sie die Mes ser- aus dem Gerät, bevor Sie Ar- aufnahme (14) seitlich aus der Hobel- beiten am Gerät durchführen. -
Seite 16: Entsorgung/Umweltschutz
Entsorgung/ Umweltschutz Nehmen Sie den Akku aus dem Gerät und • Geben Sie das Gerät an einer Verwer- führen Sie Gerät, Akku, Zubehör und Ver- tungsstelle ab. Die verwendeten Kunst- stoff- und Metallteile können sortenrein packung einer umweltgerechten Wieder- verwertung zu. getrennt werden und so einer Wieder- verwertung zugeführt werden. -
Seite 17: Garantie
Garantie Garantieumfang Das Gerät wurde nach strengen Qualitäts- Sehr geehrte Kundin, sehr geehrter Kunde, richtlinien sorgfältig produziert und vor Sie erhalten auf dieses Gerät 3 Jahre Ga- Anlieferung gewissenhaft geprüft. rantie ab Kaufdatum. Im Falle von Mängeln dieses Gerätes Die Garantieleistung gilt für Material- oder stehen Ihnen gegen den Verkäufer des Fabrikationsfehler. -
Seite 18: Reparatur-Service
Service-Center E-Mail. Sie erhalten dann weitere In- formationen über die Abwicklung Ihrer Reklamation. Service Deutschland • Ein als defekt erfasstes Gerät können Tel.: 0800 54 35 111 Sie, nach Rücksprache mit unserem E-Mail: grizzly@lidl.de Kundenservice, unter Beifügung des IAN 334013_1907 Kaufbelegs (Kassenbons) und der Angabe, worin der Mangel besteht Service Österreich... -
Seite 107: Original-Eg-Konformitätserklärung
Original-EG-Konformitätserklärung Hiermit bestätigen wir, dass der Akku-Hobel Modell PHA 12 B2 Seriennummer: 201912000001 - 202001027743 folgenden einschlägigen EU-Richtlinien entspricht: 2006/42/EG • 2014/30/EU • 2011/65/EU* Um die Übereinstimmung zu gewährleisten, wurden folgende harmonisierte Normen sowie nationale Normen und Bestimmungen angewendet: EN 62841-1:2015 • EN 62841-2-14:2015 EN 55014-1:2017 •... -
Seite 108: Translation Of The Original Ec Declaration Of Conformity
Translation of the original EC declaration of conformity We hereby confirm that the Cordless Planer model PHA 12 B2 Serial number 201912000001 - 202001027743 conforms with the following applicable relevant version of the EU guidelines: 2006/42/EC • 2014/30/EU • 2011/65/EU*... -
Seite 109: Traduction De La Déclaration De Conformité Ce Originale
Traduction de la déclaration de conformité CE originale Nous certifions par la présente que le Rabot sans fil de construction PHA 12 A1 Numéro de série 201912000001 - 202001027743 est conforme aux directives UE actuellement en vigueur : 2006/42/EC • 2014/30/EU • 2011/65/EU* En vue de garantir la conformité... -
Seite 110: Vertaling Van De Originele Ce-Conformiteitsverklaring
Vertaling van de originele CE-conformiteitsverklaring Hiermede bevestigen wij dat de Accu-schaafmachine bouwserie PHA 12 B2 Serienummer 201912000001 - 202001027743 is overeenkomstig met de hierna volgende, van toepassing zijnde EU-richtlijnen: 2006/42/EC • 2014/30/EU • 2011/65/EU* Om de overeenstemming te waarborgen, werden de hierna volgende, in overeenstemming gebrachte normen en nationale normen en bepalingen toegepast: EN 62841-1:2015 •... -
Seite 111: Tłumaczenie Oryginalnej Deklaracji Zgodności We
Tłumaczenie oryginalnej deklaracji zgodności WE Niniejszym oświadczamy, że konstrukcja Strug akumulatorowy seriia produkcyjna PHA 12 B2 Numer seryjny 201912000001 - 202001027743 spełnia wymogi odpowiednich Dyrektyw UE w ich aktualnie obowiązującym brzmieniu: 2006/42/EC • 2014/30/EU • 2011/65/EU* W celu zapewnienia zgodności z powyższymi dyrektywami zastosowano następujące normy harmonizujące oraz normy i przepisy krajowe:... -
Seite 112: O Shodě Ce
Překlad originálního prohlášení o shodě CE Potvrzujeme tímto, že konstrukce Aku hoblík konstrukční řady PHA 12 B2 Pořadové číslo 201912000001 - 202001027743 odpovídá následujícím příslušným směrnicím EÚ v jejich právě platném znění: 2006/42/EC • 2014/30/EU • 2011/65/EU* Aby byl zaručen souhlas, byly použity následující harmonizované normy, národní nor- my a ustanovení:... -
Seite 113: Preklad Originálneho Prehlásenia O Zhode Ce
Preklad originálneho prehlásenia o zhode CE Potvrdzujeme týmto, že tento Akumulátorový hoblík konštrukčnej série PHA 12 B2 Poradové číslo 201912000001 - 202001027743 zodpovedá nasledujúcim príslušným smerniciam EÚ v ich práve platnom znení: 2006/42/EC • 2014/30/EU • 2011/65/EU* Aby bola zaručená zhoda, boli použité nasledovné harmonizované normy ako i národ- né... - Seite 114 GRIZZLY TOOLS GMBH & CO. KG Stockstädter Straße 20 DE-63762 Großostheim GERMANY Stand der Informationen · Last Information Update · Version des informations · Stand van de informatie · Stan informacji · Stav informací · Stav informácií: 12/2019 Ident.-No.: 72036465122019-8 IAN 334013_1907...