Herunterladen Diese Seite drucken
Rimage PrismPlus! Benutzerhandbuch
Vorschau ausblenden Andere Handbücher für PrismPlus!:

Werbung

Verfügbare Sprachen
  • DE

Verfügbare Sprachen

  • DEUTSCH, seite 26
Printer
PrismPlus!
User Guide
Benutzerhandbuch  ユーザー ガイド  Manuel d'utilisation  Guía del usuario  Manuale per l'utente
Downloaded from
www.Manualslib.com
manuals search engine

Werbung

loading

Inhaltszusammenfassung für Rimage PrismPlus!

  • Seite 1 ™ Printer PrismPlus! User Guide Benutzerhandbuch  ユーザー ガイド  Manuel d’utilisation  Guía del usuario  Manuale per l’utente Downloaded from www.Manualslib.com manuals search engine...
  • Seite 2 Rimage Corporation reserves the right to make improvements to the equipment and software described in Rimage Corporation this document at any time without any prior notice. Rimage 7725 Washington Avenue South Corporation reserves the right to revise this publication and...
  • Seite 3: Support Information

    • Functional and technical description of the problem. • Exact error message received. Learn more online At www.rimage.com/support.html, you can experience Rimage’s world-class Support and Services. 1. Select your product family. 2. Select your product. Learn more on your product page.
  • Seite 4: Inhaltsverzeichnis

    Contents Contents Introduction ......................1 Operating System Requirements....................1 Media Requirements ......................... 1 Ribbon Requirements ....................... 1 Label Design Requirements...................... 1 Identify the Parts of the Prism Printer...............2 Front View ..........................2 Control Panel ..........................2 Operator button..........................2 Indicator lights ..........................3 Rear View..........................
  • Seite 5: Introduction

    USB port or one parallel port. Media Requirements You must use discs that are coated with a surface designed for thermal printing. The media in Rimage Media Kits™ is designed for optimum use in the Prism. For information about Rimage Media Kits™ – convenient packages of discs and ribbons, all guaranteed by Rimage –...
  • Seite 6: Identify The Parts Of The Prism Printer

    Rimage PrismPlus! Identify the Parts of the Prism Printer Front View Ribbon Guides Clamping Pins Printer tray and Supply Roller Take-up Roller Centering Pin Control Panel There are four indicator lights and an operator button on the operator panel located on the front of the printer.
  • Seite 7: Indicator Lights

    Identify the Parts of the Prism Printer Indicator lights The indicator light conditions described below reflect conditions on a Standalone Prism printer. Prism printers that are mounted on autoloaders have different conditions. For conditions of printers on autoloaders, refer to the autoloader’s user guides. Image Name Functionality...
  • Seite 8: Operating The Prism Printer

    Rimage PrismPlus! Operating the Prism Printer This section provides information about setting up a standalone printer, installing the printer driver, loading discs, and setting up your printing preferences. Setting Up a Standalone Printer Use these procedures to step up a standalone Prism printer.
  • Seite 9: Install The Software

    Information on the latest version of driver, including features and release date, is available at www.rimage.com/support.html. Navigate: Support - Prism > Downloads > Release Notes for Prism Driver Win2000/2003/XP.
  • Seite 10 Prism is being used, you may see one or both of these files. Rimage Pe rfect Image Printer PF Prism on COMX Select Delete. Download the new driver file from the Rimage website: Navigate: www.rimage.com/su pport.html > Printers > Support - Prism > Downloads. Under Drivers, select Prism Driver Win2000/2003/XP. iii.
  • Seite 11 Choose print settings: If the Prism is atta ched to a Rimage Producer system, select Print directly to the printer. If the Prism is being used as a standalone printer or is attached to an AutoPrinter, sele Spool print documents so program finishes printing fa ster.
  • Seite 12 Press the operator button to close the tray. Select the General t ab on the Rimage Perfect Image Printer Properties dialog box. Select Print Test Page. If the USB port selected is correct, a test image prints on the disc.
  • Seite 13: Power On The Printer

    Operating the Prism Printer Power on the printer To power on the printer press the power switch on the rear of the printer. The printer initializes. To power off the printer press the power switch again. Power Switch Loading Discs To open the printer tray, press the operator button.
  • Seite 14: Selecting The Printing Preferences

    In Windows XP and Windows Server 2003, navigate: Start > Printers and Faxes. The Printers and Faxes dialog box displays. Right-click on Rimage Perfect Imager Printer PF and select Properties from the drop-down list. The Rimage Perfect Image Printer PF Properties dialog box displays.
  • Seite 15: Print In Color

    Note: When the Detect Media Change option is enabled, you must press the operator button after you remove the printed disc and place a new disc on the tray. Disable the Perfect Print option. This option is only used for the Rimage AutoPrinter. Select the Media Type.
  • Seite 16: Set The Print Quality

    When printing multiple discs with serialized labels, the Detect Media Change option in the Printer Driver Properties must be enabled manually. This is required for standalone printing. Note: If the printer is being used with a Rimage Producer system or an AutoPrinter, this option must be disabled.
  • Seite 17: Maintain The Prism Printer

    Maintain the Prism Printer Maintain the Prism Printer Use the procedures in this section to keep your Prism printer in peak operating condition. Cleaning the Printer Clean the exterior Wipe the exterior of the printer with a lint free cloth. Clean the print head Clean the print head at every ribbon change, or more often if streaks start appearing or the ribbon has torn.
  • Seite 18: Clean The Print Head - Alternate Method

    Rimage PrismPlus! Prepare the Prism for use. Power off the Prism. Reinstall the ribbon. Replace the top cover. Note: If the printing pad on the tray becomes wet, allow the printing pad to completely dry before using the Prism. Power on the Prism.
  • Seite 19 Maintain the Prism Printer Note: If you are replacing the ribbon, now is a good time to clean the print head. Refer to Cleaning the print head on page 13. Access the ribbon area. Pull back Lift up Power on the Prism. Remove the top cover of the printer.
  • Seite 20 Rimage PrismPlus! Load the take-up roller. Place the new empty cardboard core on the take-up roller. It is notched to fit only one way. Place the take-up roller on top of the ribbon leader as shown. Cardboard Gear Important! The gear must be on the Core correct side.
  • Seite 21 Maintain the Prism Printer Roll the ribbon leader so that it is wrapped only once around the roller. Important! Do not roll past the marking on the leader that states STOP - Wind Leader Onto Take-up Core Stopping here. Install the cardboard take-up roller in the printer as shown.
  • Seite 22: Learn More

    Technical Support and Product Updates Support for the Prism printer is available through your authorized reseller. Important! Register your Prism online or complete and return the registration card so Rimage can notify you of upgrades as they become available. Safety Information This manual and the indications on the product allow proper and safe operation.
  • Seite 23: Safety Precautions

    Caution! All equipment with AC line voltage, or low DC voltages, such as switches, power supplies, fuses, fans, non-stepper motors, must be replace d with Rimage–approved components to maintain the safety approval issued by UL. Caution! Do not reach inside the printer unless absolutely necessary. There may be sharp edges on some metal parts.
  • Seite 24 Rimage PrismPlus! Canadian Department of Communications (DOC) Statement This digital apparatus does not exceed the Class B limits for radio noise for digital apparatus specified in the Radio Interference Regulations of the Canadian Department of Communications. Product Safety Statement This product is in compliance with CSA C22.2 No.60950.
  • Seite 25 Rimage PrismPlus Benutzerhandbuch Downloaded from www.Manualslib.com manuals search engine...
  • Seite 26 Hauptsitz Rimage Corporation behält sich das Recht vor, jederzeit und ohne vorherige Ankündigung die in Rimage Corporation diesem Dokument beschriebenen Geräte und 7725 Washington Avenue South Software zu verbessern. Dieses Dokument enthält Minneapolis, MN 55439 möglicherweise Links zu Webseiten, die zur Zeit der Veröffentlichung aktuell waren, jedoch inzwischen...
  • Seite 27: Weitere Informationen Finden Sie Im Internet

    • Problembezogene technische Beschreibung des Problems. • Genauer Wortlaut der angezeigten Fehlermeldung. Weitere Informationen finden Sie im Internet Informieren Sie sich unter www.rimage.com/support.html über den Support und Kundendienst von Rimage. 1. Wählen Sie Ihre 2. Wählen Sie Ihr Produkt Weitere Informationen Produktfamilie aus.
  • Seite 28 Inhalt Inhalt Einführung ..................1 Anforderungen an das Betriebssystem ..............1 Anforderungen an die Medien ................1 Anforderungen an das Druckband ................ 1 Anforderungen an das Grafikdesign..............2 Ansicht und Bedienelemente ............3 Frontansicht......................3 Rückansicht......................5 Inbetriebnahme des PrismPlus-Druckers ........6 Den PrismPlus als Stand-Alone-Drucker einrichten ........6 Kabel anschließen....................
  • Seite 29: Einführung

    Medien eignen sich optimal für den PrismPlus. Nähere Informationen über Rimage Media Kits™ – praktische Pakete mit Discs und Bändern mit Rimage-Garantie – erhalten Sie in den USA unter 800-445-8288 und in Europa unter +49 6074 8521 0. Anforderungen an das Druckband Für den PrismPlus benötigen Sie Bänder, die speziell für diesen Drucker entwickelt wurden.
  • Seite 30: Anforderungen An Das Grafikdesign

    Rimage PrismPlus! Anforderungen an das Grafikdesign • Auflösung – Verwenden Sie Bilder oder Logos mit 300x300 dpi (Punkte pro Zoll) oder 300x600 dpi. • Grafikgröße – Die Breite beträgt 5,12 Zoll (1536 Pixel) und die Höhe 4,52 Zoll (1356 Pixel).
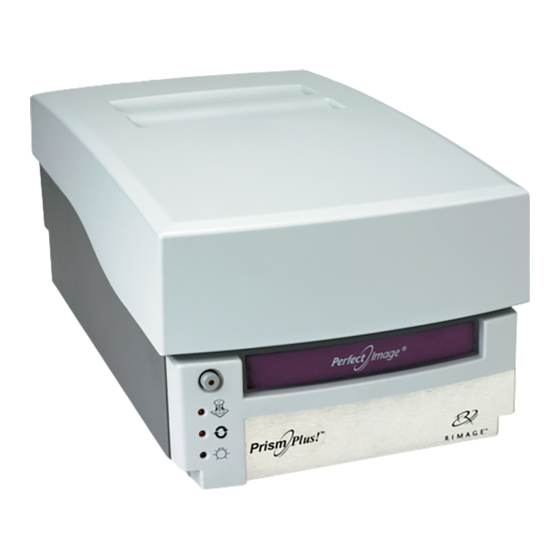
  • Seite 31: Ansicht Und Bedienelemente

    Ansicht und Bedienelemente Ansicht und Bedienelemente Frontansicht Bandführungen Klemmstifte Schublade und Zuführungsrolle Aufnahmerolle Zentrierstift Rückansicht Das Bedienfeld an der Vorderseite des Druckers umfasst vier Kontrollleuchten und eine Bedienertaste. Kontrollleuchte „Disc nicht vorhanden“ Kontrollleuchte „Aktiv“ Netzanzeige 110635_I Downloaded from www.Manualslib.com manuals search engine...
  • Seite 32 Rimage PrismPlus! Bedienertaste Mit der Bedienertaste öffnen und schließen Sie die Druckerschublade. In der Mitte der Taste befindet sich eine gelbe Kontrollleuchte. Kontrollleuchten Die nachstehend beschriebenen Anzeigen der Kontrollleuchten gelten für einen eigenständigen PrismPlus-Drucker. PrismPlus-Drucker auf Autoloadern verhalten sich unterschiedlich. Eine Beschreibung der Kontrollleuchten bei Druckern auf Autoloadern finden Sie in den Autoloader- Handbüchern.
  • Seite 33: Rückansicht

    Ansicht und Bedienelemente Kontollleuchte Beschreibung Bedeutung • Ist der Drucker in Betrieb, leuchtet die gelbe Kontrollleuchte „Aktiv“. in Betrieb • Befindet sich der Drucker im AutoPrinter-Modus, blinkt die Kontrollleuchte „Aktiv“ langsam und kontinuierlich. • Die grüne Netzanzeige leuchtet auf, wenn der PrismPlus eingeschaltet wird.
  • Seite 34: Inbetriebnahme Des Prismplus-Druckers

    Rimage PrismPlus! Inbetriebnahme des PrismPlus-Druckers Den PrismPlus als Stand-Alone-Drucker einrichten Gehen Sie gemäß den folgenden Schritten vor, um einen PrismPlus als Stand-Alone-Drucker einzurichten. Kabel anschließen 1. Schließen Sie das parallele Kabel am parallelen Anschluss auf der Rückseite des Druckers 2. Schließen Sie das andere Ende des parallelen Kabels an einem parallelen Anschluss auf der Rückseite des PCs an.
  • Seite 35: Software Installieren

    Inbetriebnahme des PrismPlus-Druckers Software installieren Legen Sie zum Installieren des CD Designers die CD Designer-Disc in das entsprechende Laufwerk des PCs ein und folgen Sie den Anweisungen. Druckertreiber installieren Sie müssen den Treiber für den PrismPlus installieren, bevor Sie den Drucker mit einer Software für die Grafikbearbeitung einsetzen können.
  • Seite 36 Rimage PrismPlus! 6. Passen Sie die Einstellungen an. a. Doppelklicken Sie auf die Einstellung Installation von Druckern, die Kernelmodustreiber verwenden, nicht zulassen, um sie auszuwählen. Das Dialogfeld „Eigenschaften“ für die Einstellung Installation von Druckern, die Kernelmodustreiber verwenden, nicht zulassen wird geöffnet.
  • Seite 37 Wählen Sie die Datei ccd 2kxp.inf aus. Klicken Sie auf Öffnen. Klicken Sie auf OK. In der Druckerliste wird „Rimage Perfect Image Printer PF“ angezeigt. Klicken Sie auf Weiter. War der PrismPlus-Druckertreiber zuvor bereits installiert, w erden Sie vom Druckerinstallations-Assistent en gefragt, ob Sie den vorhandenen Treiber behalten oder ihn ersetzen wollen.
  • Seite 38 Sie die Möglichkeit haben, den Drucker umzubenennen. Wichtig: Ändern Sie nicht den Druckernamen. 4. Richten Sie den Drucker ein. a. Klicken Sie auf Ja, wenn der Rimage PrismPlus als Standarddrucker v erwendet werden soll. b. Klicken Sie auf Weiter. Das Dialogfeld Druckerfreigabe wird geöffnet.
  • Seite 39: Drucker Einschalten

    Inbetriebnahme des PrismPlus-Druckers Drucker einschalten 1. Betätigen Sie zum Einschalten des Druckers den Netzschalter auf der Rückseite des Geräts. Der Drucker wird initialisiert. 2. Zum Ausschalten des Druckers betätigen Sie erneut den Netzschalter. Netzschalter 110635_I Downloaded from www.Manualslib.com manuals search engine...
  • Seite 40: Discs Laden

    Gehen Sie in Windows XP und Windows Server 2003 zu: Start > Einstellungen > Drucker und Faxgeräte. Das Dialogfeld Drucker und Faxgeräte wird geöffnet. Klicken Sie mit der rechten Maustaste auf Rimage Perfect Imager Printer PF und wählen Sie Eigenschaften aus der Dropdo wn-Liste. Das Dialogfeld Rimage Perfect Image Printer PF - Eigenschaften wird geöffnet.
  • Seite 41: Bandtyp, Medientyp Und Druckintensität Einstellen

    Hinweis: Wenn die Option Medienwechsel erkennen aktiviert ist, müssen Sie die Bedienertaste drücken, nachdem Sie die bedruckte Disc entnommen haben, und eine neue Disc in die Schublade einlegen. Deaktivieren Sie die Option Perfect Print. Diese Option wird nur für den Rimage-AutoPrinter verwendet. Wählen Sie den Medientyp aus.
  • Seite 42 Bedienertaste drücken, nachdem Sie die b edruckte Disc entnommen haben, und eine neue Disc in die Schublade einlegen. Deaktivieren Sie die Option Perfect Print. Diese Option wird nur für den Rimage-AutoPrinter verwendet. Änderungen, die sich auf Farbintensität, Farbbala nce oder Farbprofil auswirken, nehmen Sie über die Halbton-Setup-Eigenschaften vor.
  • Seite 43: Druckqualität Einstellen

    Gehen Sie in Windows XP oder Windows Server 2003 zu: Start > Einstellungen > Drucker und Faxgeräte. Das Dialogfeld Drucker und Faxgeräte wird geöffnet. 2. Klicken Sie mit der rechten Maustaste auf Rimage Perfect Imager Printer PF und wählen Sie Druckeinstellungen aus der Dropdown-Liste. Das Dialogfeld Rimage Perfect Image Printer PF - Druckeinstellungen wird geöffnet.
  • Seite 44: Wartung Des Prismplus

    Rimage PrismPlus! Wartung des PrismPlus Allgemeines Reinigen Von außen reinigen Wischen Sie die Außenseite des Druckers mit einem nicht fusselnden Tuch ab. Druckkopf reinigen Reinigen Sie den Druckkopf bei jedem Bandwechsel bzw. häufiger, wenn sich beim Drucken Streifen zeigen oder das Band gerissen ist.
  • Seite 45 Wartung des PrismPlus Drücken Sie die Bedienertaste, um die Schublade zu schließen und den Reinigungszyklus zu starten. Nach Abschluss des Reinigungszyklus wird die Schublade geöffnet. Wiederholen Sie Schritt d, falls erforderlich. Nehmen Sie das Reinigungsvlies mit der Disc heraus. Reinigen Sie die beiden vorderen Bandführungen mit einem mit dem Reinigungsmittel getränkten Tuch.
  • Seite 46: Verbrauchsmaterialien Ersetzen

    Rimage PrismPlus! Verbrauchsmaterialien ersetzen Druckband wechseln Tipp: Werden Bänder an einem Ort gelagert, der sich in den Umgebungsbedingungen deutlich vom Einsatzort des Druckers unterscheidet, ist sicherzustellen, dass sich die Bänder zunächst an die neuen Bedingungen anpassen können. Je größer der Temperatur- und/oder Feuchtigkeitsunterschied ist, desto mehr Zeit muss berücksichtigt werden.
  • Seite 47 Wartung des PrismPlus Setzen Sie die Zuführungsrolle wie gezeigt ein. Ziehen Sie das Vorlaufband nicht ganz straff. g. Drücken Sie die Bedienertaste, bis die Schublade ausgefahren wird. Das Band wird zur Vorderseite des PrismPlus gezogen. h. Entfernen Sie das Klebeband von der Schublade.
  • Seite 48 Rimage PrismPlus! Setzen Sie die Aufnahmerolle in den PrismPlus ein und drücken Sie sie fest bis zum Einrasten herunter. Wichtig! Wickeln Sie die Markierung STOP - Wind Leader Onto Take-up Core Stopping here auf dem Vorlaufband nicht auf die Aufnahmerolle. Die Markierung darf nicht hinter dem in der Abbildung auf Seite Error! Bookmark not defined.
  • Seite 49: Weitere Informationen

    Weitere Informationen Weitere Informationen PrismPlus-Druckerspezifikationen Thema Beschreibung Druckgeschwindigkeit 16 mm/Sekunde bei 300 x 300 dpi, typisch 11 mm/Sekunde bei 300 x 600 dpi, typisch Druckrichtung Die Bilder werden von oben nach unten aufgedruckt, während die Medien durch das Gerät laufen. Druckmodi Einfachdruck (Standard) und Doppeldruck (nur einfarbiges Band) zur Verbesserung der Druckqualität bei einigen Medientypen...
  • Seite 50: Technischer Support Und Produkt-Updates

    Der Support für den PrismPlus erfolgt über Ihren Vertragshändler. Wichtig! Registrieren Sie Ihren PrismPlus online oder schicken Sie uns die ausgefüllte Registrierungskarte, damit Sie von Rimage über neue Upgrades informiert werden. Sicherheitshinweise Durch dieses Handbuch und die Angaben auf dem Produkt wird der ordnungsgemäße und sichere Betrieb ermöglicht.
  • Seite 51: Sicherheitstests

    Weitere Informationen Sicherheitstests Produktname: PrismPlus-Drucker Modell: cdprs Hinweis für USA Wurde getestet und erfüllt die FCC-Bestimmungen FÜR DIE PRIVATE UND DIE GESCHÄFTLICHE NUTZUNG. HINWEIS: Dieses Gerät wurde getestet und entspricht den Grenzwerten für ein digitales Gerät der Klasse B gemäß Teil 15 der FCC-Bestimmungen. Diese Grenzwerte dienen dem angemessenen Schutz vor schädlichen Störungen in Wohnanlagen.
  • Seite 52 Rimage PrismPlus! Manuel d'utilisation Downloaded from www.Manualslib.com manuals search engine...
  • Seite 53 à l'équipement et au logiciel décrits Rimage Corporation dans ce document à tout moment et sans préavis. 7725 Washington Avenue South Rimage Corporation se réserve le droit de réviser Minneapolis, MN 55439 cette publication et d’y apporter des modifications États-Unis ponctuelles sans obligation d’aviser quiconque de...
  • Seite 54 • Une description fonctionnelle et technique du problème. • La transcription exacte du message d'erreur reçu. Apprenez-en plus en ligne Sur www.rimage.com/support.html, vous découvrirez les services et l'assistance de classe mondiale offerts par Rimage. 1. Sélectionnez la famille de 2. Sélectionnez votre Apprenez-en plus sur la produits.
  • Seite 55 Table des matières Table des matières Introduction ..................1 Spécifications du système d'exploitation ............... 1 Spécifications des supports................... 1 Spécifications des rubans ..................1 Spécifications de conception des étiquettes ............2 Identification des pièces de la PrismPlus ........3 Vue de face ......................3 Vue arrière......................
  • Seite 56: Introduction

    Les supports contenus dans les Rimage Media Kits™ sont conçus pour une utilisation optimale avec la PrismPlus. Pour de plus amples informations sur les Rimage Media Kits™ – des packs pratiques de disques et de rubans, tous garantis par Rimage – contactez Rimage au 800-445-8288.
  • Seite 57: Spécifications De Conception Des Étiquettes

    Rimage PrismPlus! Spécifications de conception des étiquettes • Résolution – Utilise des images ou des logos d'une définition de 300 x 300 PPP (Points Par Pouce) ou 300 x 600 PPP. • Dimensions de conception des étiquettes – Largeur de 1536 pixels (130 mm ou 5,12 po) et hauteur de 1356 pixels (114,8 mm ou 4,52 po).
  • Seite 58: Identification Des Pièces De La Prismplus

    Identification des pièces de la PrismPlus Identification des pièces de la PrismPlus Vue de face Guides de ruban Broches de serrage Plateau et broche Rouleau Rouleau de centrage d'alimentation d'entraînement Panneau de commande Vous trouverez quatre voyants lumineux et un bouton de commande sur le panneau de commande qui se trouve en face avant de l'imprimante.
  • Seite 59: Bouton De Commande

    Rimage PrismPlus! Bouton de commande Appuyez sur le bouton de commande pour ouvrir et fermer le plateau de l'imprimante. Il y a un voyant lumineux jaune au centre de ce bouton. Voyants lumineux Les états des voyants lumineux décrits ci-dessous représentent les états d'une imprimante PrismPlus en mode autonome.
  • Seite 60: Vue Arrière

    Identification des pièces de la PrismPlus Image Fonctionnalité • Le voyant Alimentation de couleur verte s'allume lorsque la PrismPlus est mise sous tension. • Le voyant Alimentation clignote lorsque la carte système a besoin d'être reprogrammée. • Le voyant Alimentation s'éteint lorsque l'imprimante détecte un élément pixel défectueux dans la tête d'impression.
  • Seite 61: Fonctionnement De La Prismplus

    Rimage PrismPlus! Fonctionnement de la PrismPlus Configuration d'une PrismPlus en mode autonome Suivez ces procédures pour configurer une imprimante PrismPlus en mode autonome. Connexion des câbles 1. Connectez le câble parallèle sur la connexion du câble parallèle à l'arrière de l'imprimante.
  • Seite 62: Installation Du Logiciel

    Fonctionnement de la PrismPlus Installation du logiciel Pour installer CD Designer, insérez le disque CD Designer dans le lecteur de votre PC et suivez les invites. Installation du pilote de l'imprimante Vous devez installer le pilote de la PrismPlus avant de pouvoir utiliser l'imprimante avec n'importe quel logiciel d'édition d'étiquettes.
  • Seite 63 Sous Windows XP et Windows Server 2003, naviguez : Démarrer > Imp rimantes et télécopieurs. La boîte de dialogue Imprimantes et télécopieurs s'ouvre. Important ! Si vous avez un e version antérieure du pilote de l'imprimante Rimage PrismPlus, vous devez la supprimer avant de continuer. Ajoutez le pilote d'imprimante.
  • Seite 64 Sélectionnez le fichier ccd2kxp.inf. Sélectionnez Ouvrir. Sélectionnez OK. Rimage Perfect Image Printer PF s'affiche dans la liste des imprimantes. Sélectionnez Suivant. Si le pilote de l'imprimante PrismPlus a déjà été installé, l'assistant Ajouter une imprimante demande si vous désirez conserver le pilote existan t ou le remplacer.
  • Seite 65: Mise Sous Tension De L'imprimante

    Rimage PrismPlus! Mise sous tension de l'imprimante 1. Pour mettre l'imprimante sous tension, appuyez sur l'interrupteur d'alimentation à l'arrière de l'imprimante. L'imprimante s'initialise. 2. Pour mettre l'imprimante hors tension, appuyez à nouveau sur l'interrupteur d'alimentation. Interrupteur d'alimentation 110635_I Downloaded from www.Manualslib.com...
  • Seite 66: Chargement Des Disques

    La boîte de dialogue Imprimantes et télécopieurs s'affiche. Cliquez avec le bouton droit sur Rimage Perfect Imager Printer PF et sélectionnez Propriétés dans la lis te déroulante. La boîte de dialogue Propriétés de l'imprimante PF Rimage Perfect Image s'affiche.
  • Seite 67: Définition Du Type De Ruban, Du Type De Support Et De L'impression Stroboscopique

    Rimage PrismPlus! Définition du type de ruban, du type de support et de l'impression stroboscopique 1. Naviguez jusqu'aux propriétés d'impression 2. Sélectionnez l'onglet Paramètres du dispositif. 3. Sélectionnez le type de ruban monté. Remarque : La caractéristique Double impression vous permet d'imprimer la même étiquette deux fois sur le disque.
  • Seite 68 Fonctionnement de la PrismPlus 6. Sélectionnez l'option Détection de changement de support. • Si vous utilisez un chargeur automatique Rimage, sélectionnez Non. • Si vous réalisez des copies multiples sur une PrismPlus en autonome, sélectionnez Oui. Remarque : Lorsque l'option Détection du changement de support est activée, vous devez appuyer sur le bouton de commande après avoir retiré...
  • Seite 69 8. Sélectionnez l'option Détection de changement de support : • Si vous utilisez un système Rimage Producer ou un AutoPrinter, sélectionnez Non. • Si vous réalisez des copies multiples sur une imprimante autonome, sélectionnez Remarque : Lorsque l'option Détection du changement de support est activé...
  • Seite 70: Définition De La Qualité D'impression

    Sous Windows XP ou Windows Server 2003, naviguez : Démarrer > Imprimantes et télécopieurs. La boîte de dialogue Imprimantes et télécopieurs s'affiche. 2. Cliquez avec le bouton droit sur Rimage Perfect Imager Printer PF et sélectionnez Préférences d'impression dans la liste déroulante. La boîte de dialogue Préférences d'impression Rimage Perfect Imager Printer PF s'ouvre.
  • Seite 71: Maintenance De La Prismplus

    Rimage PrismPlus! Maintenance de la PrismPlus Nettoyage général Nettoyage extérieur Essuyez l'extérieur de l'imprimante avec un chiffon non pelucheux. Nettoyage de la tête d'impression Nettoyez la tête d'impression à chaque changement de ruban ou plus souvent si des marques commencent à apparaître, ou en cas de déchirure du ruban.
  • Seite 72 Maintenance de la PrismPlus d. Pour fermer le tiroir et démarrer le cycle de nettoyage, appuyez sur le bouton de commande. Dès que le cycle de nettoyage est terminé, le tiroir s'ouvre. e. Au besoin, répétez l'étape d. Retirez le tampon de nettoyage et le disque auquel il adhère. g.
  • Seite 73: Remplacement Des Consommables

    Rimage PrismPlus! Remplacement des consommables Changement du ruban d'impression Conseil : Si les rubans sont stockés dans un environnement très différent de celui de l'imprimante, laissez-leur le temps de s'acclimater à leurs nouvelles conditions. Laissez plus de temps pour les températures élevées et/ou les différences d'humidité.
  • Seite 74 Maintenance de la PrismPlus Plateau de Adhésif Guide de ruban e. Fixez l'amorce du ruban à l'arrière du l'imprimante plateau de l'imprimante comme illustré. Amorce de ruban Montez le rouleau d'alimentation comme illustré. Laissez du mou sur l'amorce du ruban. g.
  • Seite 75 Rimage PrismPlus! d. Enroulez l'amorce du ruban de sorte qu'elle n'entoure qu'une seule fois le rouleau. Important ! N'enroulez pas la marque sur l'amorce qui indique STOP - Enrouler l'amorce sur le rouleau d'entraînement en arrêtant ici. e. Montez le rouleau d'entraînement en carton sur l'imprimante comme illustré.
  • Seite 76: Pour En Savoir Plus

    Pour en savoir plus Pour en savoir plus Spécifications de l'imprimante PrismPlus Élément Description Vitesse d’impression 0,65 po/s à 300 x 300 ppp, vitesse nominale 0,45 po/s à 300 x 600 ppp, vitesse nominale Direction de Les images sont imprimées du haut vers le bas au fur et à mesure l'impression que le support se déplace en dehors de la machine.
  • Seite 77: Assistance Technique Et Mises À Jour Du Produit

    Une assistance technique pour la PrismPlus peut être obtenue auprès de votre revendeur agréé. Important ! Enregistrez votre PrismPlus en ligne ou remplissez et renvoyez la carte d'inscription pour que Rimage puisse vous aviser des mises à niveau dès qu'elles sont disponibles.
  • Seite 78: Tests De Sécurité

    Pour en savoir plus Tests de sécurité Nom du produit : Imprimante PrismPlus Modèle : cdprs Avis pour les États-Unis d'Amérique Testé pour la conformité avec les normes FCC POUR UNE UTILISATION À LA MAISON OU AU BUREAU. Remarque : Cet équipement a été testé et déclaré conforme aux limitations prévues dans le cadre de la classe B des appareils numériques, définie par l’article 15 du règlement de la FCC.
  • Seite 79 Rimage PrismPlus Guía del usuario Downloaded from www.Manualslib.com manuals search engine...
  • Seite 80 Estados Unidos cambios de vez en cuando al contenido de la misma, no siendo obligación de Rimage Corporation avisar a 800 553 8312 (asistencia telefónica gratuita en Estados Unidos) ninguna persona u organización acerca de dichas Servicio: +1 952 946 0004 revisiones o cambios.
  • Seite 81: Información De Soporte

    • La descripción funcional y técnica del problema. • El mensaje de error exacto recibido. Obtenga información adicional en línea En www.rimage.com/support.html, encontrará el soporte y los servicios de primera línea de Rimage. 1. Seleccione su familia de 2. Seleccione su producto.
  • Seite 82 Contenido Contenido Introducción..................1 Requisitos del sistema operativo................1 Requisitos de medios .................... 1 Requisitos de cinta ....................1 Requisitos del diseño de etiquetas................ 2 Identificación de las piezas de la impresora PrismPlus ....3 Vista delantera ...................... 3 Vista posterior ....................... 5 Funcionamiento de la impresora PrismPlus........
  • Seite 83: Introducción

    Este manual proporciona la información necesaria para configurar, instalar y operar la impresora PrismPlus y para la identificación de sus piezas. Requisitos del sistema operativo Rimage PrismPlus sólo es compatible con Windows 2000, Windows XP y Windows Server 2003. Requiere un puerto USB o un puerto paralelo. Requisitos de medios Debe utilizar discos recubiertos con una superficie diseñada para impresión térmica.
  • Seite 84: Requisitos Del Diseño De Etiquetas

    Rimage PrismPlus! Requisitos del diseño de etiquetas • Resolución - Use imágenes o logotipos configurados en 300x300 DPI (puntos por pulgada) o 300x600 DPI. • Tamaño del diseño de la etiqueta - El ancho es de 5,12 pulg. (1536 píxeles) y el alto es de 4,52 pulg (1356 píxeles).
  • Seite 85: Identificación De Las Piezas De La Impresora Prismplus

    Identificación de las piezas de la impresora PrismPlus Identificación de las piezas de la impresora PrismPlus Vista delantera Guías de cinta Pasadores de sujeción Gaveta y pasador Rodillo de Rodillo de para centrar suministro recogida Panel de control En el panel de funcionamiento, ubicado en la parte delantera de la impresora, hay cuatro luces indicadoras y un botón de funcionamiento.
  • Seite 86: Botón De Funcionamiento

    Rimage PrismPlus! Botón de funcionamiento Presione el botón de funcionamiento para abrir y cerrar la bandeja de la impresora. Hay una luz indicadora amarilla en el centro de este botón. Luces indicadoras Las condiciones de las luces indicadoras que se describen a continuación reflejan las condiciones de una impresora PrismPlus independiente.
  • Seite 87: Vista Posterior

    Identificación de las piezas de la impresora PrismPlus Imagen Nombre Funcionalidad • La luz indicadora verde Power (Encendido) se ilumina al encender la impresora PrismPlus. • La luz indicadora Power (Encendido) parpadea cuando el tablero del sistema requiere una reprogramación. •...
  • Seite 88: Funcionamiento De La Impresora Prismplus

    Rimage PrismPlus! Funcionamiento de la impresora PrismPlus Configuración de una impresora PrismPlus independiente Utilice estos procedimientos para configurar una impresora PrismPlus independiente. Conexión de los cables 1. Conecte el cable paralelo a la conexión de cable paralelo que se encuentra en la parte posterior de la impresora.
  • Seite 89: Instalación Del Software

    Funcionamiento de la impresora PrismPlus Instalación del software Para instalar CD Designer, coloque el disco CD Designer en la unidad de disco del equipo y siga las instrucciones. Instalación del controlador de la impresora Debe instalar el controlador de PrismPlus antes de poder utilizar la impresora con cualquier software de edición de etiquetas.
  • Seite 90 Rimage PrismPlus! 5. Vaya a la configuración de impresoras. a. Para expandir Local Computer Policy (Directiva de equipo local), en el panel izquierdo seleccione +. b. Para expandir Computer Configuration (Configuración de equipo), en el panel izquierdo seleccione +. c. Para expandir Administrative template (Plantilla administrativa), en el panel izquierdo seleccione +.
  • Seite 91 En Windows XP y Windows Server 2003, vaya a: Start (Inicio) > Printers and Faxes (Impresoras y faxes). Se abre el cuadro de diálogo Printers and Faxes (Impresoras y faxes). ¡Importante! Si tiene una versión anterior del controlador de la impresora Rimage Prism Plus , elimínela antes de continuar.
  • Seite 92 ¡Importante! No cambie el nombre de la impresora. 4. Configure la impresora. a. Si se utilizará Rimage PrismPlus como impresora predeterminada, seleccione Yes (Sí). b. Seleccione Next (Siguiente). Se abre el cuadro de diálogo de impresoras compartidas. c. Seleccione Do not share this printer (No compartir esta impresora).
  • Seite 93: Encendido De La Impresora

    Funcionamiento de la impresora PrismPlus Encendido de la impresora 1. Para encender la impresora, presione el interruptor de encendido en la parte posterior de la impresora. La impresora se inicializa. 2. Para apagarla, vuelva a presionar el interruptor de encendido mas una ves. Interruptor de encendido 110635_I...
  • Seite 94: Carga De Discos

    Aparece el cuadro de diálogo Printers and Faxes (Impresoras y faxes). Haga clic con el botón derecho sobre Rimage Perfect Imager Printer PF y seleccione Properties (Propiedades) en el menú desplegable. Aparece el cuadro de diálogo Rimage Perfect Image Printer PF Properties (Propiedades de Rimage Perfect Image Printer PF).
  • Seite 95: Configuración Del Tipo De Cinta, Tipo De Medios Y Estroboscopio De Impresión

    Funcionamiento de la impresora PrismPlus Configuración del tipo de cinta, tipo de medios y estroboscopio de impresión 1. Vaya a las propiedades de impresión. 2. Seleccione la solapa Device Settings (Configuración de dispositivo). 3. Seleccione el tipo de Installed Ribbon (Cinta instalada). Nota: la función Double Print (Impresión doble) le permite imprimir la misma etiqueta dos veces en el disco.
  • Seite 96: Configuración De Las Opciones De Color

    6. Seleccione la opción Detect Media Change (Detectar cambio de medios). • Si utiliza un autoloader de Rimage, seleccione No. • Si realiza varias copias en una impresora PrismPlus independiente, seleccione Yes (Sí). Nota: cuando activa la opción Detect Media Change (Detectar cambio de medios), debe presionar el botón de funcionamiento luego de sacar el disco impreso y...
  • Seite 97 8. Seleccione la opción Detect Media Change (Detectar cambio de medios): • Si utiliza un sistema Rimage Producer o una AutoPrinter, seleccione No. • Si realiza varias copias en una impresora independiente, seleccione Yes (Sí).
  • Seite 98: Configuración De La Calidad De Impresión

    (Impresoras y faxes). Aparece el cuadro de diálogo Printers and Faxes (Impresoras y faxes). 2. Haga clic con el botón derecho sobre Rimage Perfect Imager Printer PF y seleccione Printing Preferences (Preferencias de impresión) en el menú desplegable. Se abre el cuadro de diálogo Rimage Perfect Image Printer PF Printing Preferences (Preferencias de impresión...
  • Seite 99: Mantenimiento De La Impresora Prismplus

    Mantenimiento de la impresora PrismPlus Mantenimiento de la impresora PrismPlus Limpieza general Limpieza exterior Limpie el exterior de la impresora con un paño que no desprenda pelusas. Limpieza del cabezal de impresión Limpie el cabezal de impresión cada vez que cambie la cinta, o con mayor frecuencia si comienzan a aparecer rayas o si la cinta se rompe.
  • Seite 100 Rimage PrismPlus! d. Para cerrar la bandeja y comenzar el ciclo de limpieza, presione el botón de funcionamiento. La bandeja se abre cuando finaliza el ciclo de limpieza. e. Si es necesario, repita el paso d. Extraiga el disco con la almohadilla de limpieza.
  • Seite 101: Reemplazo De Los Suministros

    Mantenimiento de la impresora PrismPlus Reemplazo de los suministros Cambio de la cinta de impresión Sugerencia: si las cintas se guardan en un ambiente diferente al de la impresora, permita que se aclimaten al nuevo entorno antes de instalarlas. Si hay mayores diferencias de temperatura y/o humedad, espere un tiempo prudente.
  • Seite 102 Rimage PrismPlus! Instale el rodillo de suministro, tal como se indica. Deje un poco suelto el comienzo de la cinta. Presione el botón de funcionamiento hasta que salga la bandeja de la impresora. La cinta se enrolla en la parte delantera de la impresora PrismPlus.
  • Seite 103 Mantenimiento de la impresora PrismPlus Instale el rodillo de recogida en la impresora PrismPlus y presione con fuerza hasta que el rodillo se ajuste en su lugar. ¡Importante! No enrolle sobre la marca STOP - Wind Leader Onto Take-up Core Stopping here (Deténgase: enrolle el comienzo de la cinta en el centro de recogida y deténgase aquí) en el comienzo de la cinta en el rollo de recogida.
  • Seite 104: Información Adicional

    Rimage PrismPlus! Información adicional Especificaciones de la impresora PrismPlus Elemento Descripción Velocidad de impresión 0,65 pulgadas/segundos a 300 x 300 dpi, típica 0,45 pulgadas/segundos a 300 x 600 dpi, típica Dirección de la Las imágenes se imprimen en una orientación de arriba hacia abajo impresión...
  • Seite 105: Soporte Técnico Y Actualizaciones De Productos

    Puede encontrar soporte para la impresora PrismPlus a través de su distribuidor autorizado. ¡Importante! Registre su impresora PrismPlus en línea o llene y envíe la tarjeta de registro, de modo que Rimage pueda notificarle sobre actualizaciones en el momento que éstas se encuentren disponibles.
  • Seite 106: Prueba De Seguridad

    Rimage PrismPlus! Prueba de seguridad Nombre del producto: Impresora PrismPlus Modelo: cdprs Aviso para Estados Unidos Ha sido sometido a pruebas y cumple con los estándares de la FCC PARA USO DOMÉSTICO O DE OFICINA. Nota: Este equipo ha sido sometido a pruebas y se ha determinado que cumple con los límites establecidos para un dispositivo digital Clase B, conforme a la Parte 15 de las...
  • Seite 107 Rimage PrismPlus ユーザー ガイド Downloaded from www.Manualslib.com manuals search engine...
  • Seite 108 ファックス: +49-(0) 6074-8521-21 は、サード パーティのサイトの内容に対して は、責任を負いかねます。 ディスクおよび DVD 記録ソフトウェアの ©2007, Rimage Corporation 免責条項 本製品、ソフトウェア、説明書は、著作権の所有者も Rimage™ は、Rimage Corporation の商標です しくは著作権者から書面によるコピーの許可を受けて 。 Prismplus!™ は、Rimage Corporation の商標 いる場合、 です。Dell® は、Dell Computer Corporation の 再利用することができます。 著作権を所有していな 登録商標です。FireWire® は、Apple Computer, かったり、著作権者から許可を得ていない場合、あな たは著作権法に違反し、 Inc. の登録商標です。 損害に対する支払いおよびその他の救済方法を実施し...
  • Seite 109 サービス: Rimage Europe テクニカル ウェブ サイト 北米: 800-553-8312 http://www.rimage.de/support.html アジア/太平洋、メキシコ/ラテンアメリカ: 952-946- 適切なサポートリンクを選択して、詳細情 報を得ます。 当社のウェブサイトで解決方 0004 法が見つからない場合 support@rimage.de FAX: 952-946-6956 のRimage Services Europe 宛に E メール Rimage Services に、お問い合わせをされる際は、以下 をお送りください。 のものをご用意ください: • 機器のシリアル番号およびソフトウェアのバージョン。 • 問題の動作と技術的な説明。 。 • 表示された正確なエラーメッセージ オンラインの詳細情報 www.rimage.com/support.html で、Rimage のワールド クラスのサポートおよびサービスを受...
  • Seite 110 • 製品仕様 • トラブルシューティングのヒントおよびよくあるお問い合わせ • 最新のドキュメント • 印刷のヒント • 最新のファームウェアとドライバのダウンロード Downloaded from www.Manualslib.com manuals search engine...
  • Seite 111 目次 目次 はじめに ..................... 1 オペレーティング システムの要件............... 1 メディアの要件 ..................... 1 リボンの要件......................1 ラベル デザインの要件..................2 PrismPlus の部品の確認..............3 正面図........................3 背面図........................6 PrismPlus の操作 ................7 スタンドアロンの PrismPlus のセットアップ..........7 ケーブルの接続 ..................... 7 ソフトウェアのインストール................8 プリンタ ドライバのインストール............... 8 プリンタの電源オン .................... 14 ディスクのローディング...
  • Seite 112 Rimage PrismPlus! 詳細 ....................29 PrismPlus プリンタの仕様 ................. 29 技術サポートと製品のアップデート..............31 安全に関する情報....................31 安全検査 ......................33 Downloaded from www.Manualslib.com manuals search engine...
  • Seite 113: はじめに

    はじめに はじめに 本マニュアルにより、PrismPlus プリンタのセットアップ、インストールおよび操作、および部 品の確認に必要な情報が提供されます。 オペレーティング システムの要件 Rimage PrismPlus は、 Windows 2000、Windows XP、および Windows Server 2003 にのみ対 応します。 Rimage PrismPlus を利用するには、USB ポートが 1 つ、もしくはパラレルポート が 1 つ必要です。 メディアの要件 熱転写印刷用に表面がコーティングされたディスクを使用する必要があります。 Rimage Media Kits™ のメディアは、PrismPlus で最適に使用されるように設計されています。 Rimage がすべてを保証する、ディスクおよびリボンの便利なパッケージである、Rimage Media Kits™ についての情報は、800-445-8288 の Rimage にお問い合わせください。...
  • Seite 114: ラベル デザインの要件

    Rimage PrismPlus! ラベル デザインの要件 解像度 – 300 ×300 DPI (ドット パー インチ) または 300 × 600 DPI に設定した画像あるい • はロゴを使用します。 ラベル デザイン サイズ – 幅は、5.12 インチ (1536 ピクセル)、高さは 4.52 インチ (1356 • ピクセル)です。 印刷範囲 – PrismPlus を使用するときのディスクの印刷範囲は、116mm (4.567 インチ) で、...
  • Seite 115: Prismplus の部品の確認

    PrismPlus の部品の確認 PrismPlus の部品の確認 正面図 リボン ガイド クランピング ピン トレイおよびセ 供給ローラー 巻き取りローラー ンタリング ピ コントロール パネル プリンタの前面にあるオペレータ パネル上には、4 個の表示ランプとオペレータ ボタンがあり ます。 ディスク配置ランプ アクティブランプ 電源ランプ 110635_I Downloaded from www.Manualslib.com manuals search engine...
  • Seite 116: オペレータ ボタン

    Rimage PrismPlus! オペレータ ボタン オペレータ ボタンを押して、プリンタ トレイの開閉を行います。 オペレータボタンの中央に は、黄色の表示ランプがあります。 表示ランプ 以下に説明する表示ランプの状態は、スタンドアロンの PrismPlus プリンタの状態を反映します。 オートローダに取り付けられている PrismPlus プリンタは、状態が異なります。 オートローダ に取り付けられたプリンタの状態については、オートローダのユーザー ガイドを参照してくだ さい。 イメー 名前 機能 ジ • 印刷中にエラーが生じると、オペレータ ボタンの上にある黄色 の表示ラン プが点灯します。 • プリンタがクリーニング モードのときは、エラー表示ランプお エラー よびデ ィスク配置ランプが点滅します。 • リボンが無くなったとき、エラー表示ランプが点灯し、ディスク 配置ラ ンプがゆっくり点滅します。 110635_I Downloaded from www.Manualslib.com...
  • Seite 117 PrismPlus の部品の確認 イメー 名前 機能 ジ • エラーが生じると、黄色のディスク配置ランプは、故障コードで 点滅します。 エラーが解決された後、オペレータボタンを押し て、表示ランプを消します。 • ディスク配置ランプは、トレイが空であったりディスクが正しく 固定され ていないときに点灯します。 ディスクがトレイに置かれたと き、ディスク 配置ランプは消灯します。 • 多重コピー モードのとき、ディスク配置ランプは、ディスクが パッドから 取り除かれるまで点灯しています。 ディスク配置 • ディスク配置ランプは、リボンが少なくなる (残り 100 枚以下) と、ゆっ くりと連続して点滅します。 これは、単色のリボンが装着され てから、 変更したり交換していない場合に限ります。 • リボンが無くなったとき、ディスク配置ランプは、ゆっくり点滅 します。 • ディスク配置ランプおよびエラー表示ランプは、プリンタがクリ ーニング モードのとき、点滅します。...
  • Seite 118: 背面図

    Rimage PrismPlus! イメー 名前 機能 ジ • 緑色の電源ランプは、PrismPlus の電源がオンのとき点灯しま す。 電源ランプは、システム ボードが、再プログラミングを必要 • とするとき、 点滅します。 • 電源ランプは、プリントヘッドに、不良のピクセル素子を検出す 電源 ると消灯します。 継続してディスクを印刷できますが(電源ラン プは、ディスクがトレイ 上に置かれると再び点灯します)、印刷の際に小さな線が現れる 場合があります。 これは、プリントヘッドの交換が必要であ るという表示です。 • 電源ランプは、PrismPlus の電源がオフになると消灯します。 背面図 Perfect Print 接続 交流電源接続 電源スイッチ (3 ビン AutoPrinter のみ) パラレル ケ...
  • Seite 119: Prismplus の操作

    PrismPlus の操作 PrismPlus の操作 スタンドアロンの PrismPlus のセットアップ 以下の手順でスタンドアロンの PrismPlus をセットアップします。 ケーブルの接続 1. プリンタの背面にあるパラレル ケーブル接続端子に、パラレル ケーブルを接続します。 2. パラレルケーブルの反対側を PC のパラレル ポートに接続します。 3. 電源コードをプリンタに接続します。 4. 電源コードをコンセントに接続します。 電源コード パラレル ケーブル 110635_I Downloaded from www.Manualslib.com manuals search engine...
  • Seite 120: ソフトウェアのインストール

    Rimage PrismPlus! ソフトウェアのインストール CD Designer をインストールするには、CD Designer のディスクを、ご使用の PC のディスクドライブに 入れ、指示に従います。 プリンタ ドライバのインストール 任意のラベル編集ソフトウェアでプリンタを使用できるようにするには、PrismPlus 用のドライバをインス トールする必要があります。 この手順では、Windows 2000、Windows XP および Windows Server 2003 用のプリンタ ドライバのイン ストールの方法が説明されています。 はじめる前に • CD Designer が開いている場合は、終了させてください。 • Windows Server 2003 をご使用の場合は、[カーネルモードのドライバを使用しているプリンタのイン ストールを禁止する]を無効にする必要があります。 以下のステップに従い、設定を無効にします。 操作: [スタート]>[ファイル名を指定して実行]。 [ファイル名を指定して実行]ウィンドウが開きま...
  • Seite 121 PrismPlus の操作 [スナップインの追加と削除] ウィンドウで、[OK] を選択します。 [スナップインの追 加と削除] ウィンドウが閉じ、[コンソール 1] ウインドウの左側のペインと名前のリストに[ロ ーカル コンピュータ ポリシー]が表示されます。 プリンタ設定の操作。 左ペインの[+] を選択し、[ローカル コンピュータ ポリシー] を展開します。 左ペインの[+] を選択し、[コンピュータの構成] を展開します。 左ペインの[+] を選択し、[管理用テンプレート]を展開します。 プリンタ 左ペインでプリンタを選択します。 の設定は、右ペインで表示されます。 110635_I Downloaded from www.Manualslib.com manuals search engine...
  • Seite 122 Rimage PrismPlus! 6. 設定の調整。 a. [カーネル モードのドライバを使用しているプリンタのインストールを禁止する] を ダブルクリックします。 [カーネル モードのドライバを使用しているプリンタのイ ンストールを禁止するのプロパティ] ダイアログ ボックスが開きます。 ヒント: 設定を選択すると、ペインに情報が表示されます。 b. ダイアログ ボックスで、無効オプションボタンを選択します。 c. [適用] を選択します。 d. [OK] を選択します。 [プロパティ] ダイアログ ボックスが閉じます。 7. [コンソール 1] ウィンドウ を閉じます。 保存するように勧められます。 8. ご希望であれば、[コンソール 1] を保存します。 メモ: たとえ、MMC (Microsoft 管理コンソール) が保存されなくても、プリンタ...
  • Seite 123 Windows 2000 では、以下のように移動します: [スタート] > [設定] > [プリンタ]。 [プリン • タ] ダイアログ ボックスが開きます。 Windows XP および Windows Server 2003 では、以下のように移動します: [スタート] > [プ • リンタと FAX] 。 [プリンタと FAX] ダイアログ ボックスが開きます。 重要! Rimage PrismPlus の初期バージョンをご使用であれば、続行する前に、これを削除しま す。 プリンタドライバを追加します。 [プリンタの追加] を選択します。 [プリンタの追加ウィザード] ダイアログ ボックスが開きます。 [次へ] を選択します。 メモ: コンピュータがネットワークに接続されている場合、[ローカル プリンタまたはネ...
  • Seite 124 Rimage PrismPlus! [開く]を選択します。 [OK] を選択します。 Rimage Perfect Image Printer PF がプリンタリストに表示されます。 [次へ] を選択します。PrismPlus のプリンタドライバが既にインストールされている場合は、 [プリンタの追加ウィザード] は現在のドライバを使うか、新しいドライバに置き換えるか聞いて きます。 「新しいドライバに置き換える] を選択し、[次へ] を選択します。オプションのある[プリンタ名] の入力が促されます。 重要: プリンタの名前を変更しないでください。 4. プリンタをセットアップします。 a. Rimage PrismPlus を既定のプリンタとしてご使用する場合は、[はい] を選択します。 b. [次へ] を選択します。[プリンタ共有] ダイアログ ボックスが開きます。 c. [このプリンタを共用しない] を選択します。 d. [次へ]を選択します。[試験ぺージ印刷] ダイアログ ボックスが開きます。...
  • Seite 125 PrismPlus の操作 • PrismPlus が、Rimage Producer システムに組み込まれている場合、[プリンタに直 接印刷データを送る] を選択します。 lus がスタンドアロン プリンタまたはオート プリンタとして使用する場合、 • PrismP [印刷ドキュメントをスプールし、プログラムの印刷処理を高速に行う] を選択しま す。 7. [OK] を選択します。 Windows 2000 および XP、および Server 2003 のドライバのインス トールは完了しました。 110635_I Downloaded from www.Manualslib.com manuals search engine...
  • Seite 126: プリンタの電源オン

    Rimage PrismPlus! プリンタの電源オン 1. プリンタの電源をオンにするには、プリン タの背面にある電源スイッチを押してくだ さい。 プリンタを初期化します。 2. プリンタの電源をオフにするために電源ス イッチを再度押してください。 電源スイッチ 110635_I Downloaded from www.Manualslib.com manuals search engine...
  • Seite 127: ディスクのローディング

    PrismPlus の操作 ディスクのローディング 1. プリンタのトレイを開くには、オペレータ ボタンを押します。 2. ディスクをゴム パッド上の 2 個のクランピング ピンとセンタリング ピンの間に置きます。 重要! ディスクの記録面が下を向くように置きます。 記録面には、ハブの近くに指で 感じることができるスタック リングがあります。 スタック リングの面を上に向けて ディスクを挿入すると、印刷ヘッドを損傷させてしまいます。 メモ: ディスクがクランピング ピンの上にあると、プリンタのトレイは閉じません。 メモ: 印刷パッドおよびプレートは、スタンドアロン モデルと自動式モデルとでは変 わります。 自動式モデルでは、プレートの中央を通る穴があり、スタンドアロン モデ ルにはありません。 すべてのモデルにセンタリング ピンがあります。 3. プリンタトレイを閉めるには、オペレータボタンを押してください。 センタリング ピン クランピング ピン 印刷プリファレンスの選択 印刷プロパティの操作...
  • Seite 128 Rimage PrismPlus! Windows XP および Windows Server 2003 では、以下のように移動します。 [スター • ト] > [プリンタと FAX] [プリンタと FAX] ダイアログ ボックスが表示されます。 2. [Rimage Perfect Image Printer PF] 上で右クリックし、ドロップダウン リストの [プロパ ティ] を選択します。[Rimage Perfect Image Printer PF のプロパティ] ダイアログボックス が表示されます。 110635_I Downloaded from www.Manualslib.com...
  • Seite 129: リボンの種類、メディアの種類および印刷ストローブの設定

    トローブ設定 トローブ設定 トローブ設定 DVD または標準 325 - 400 375 - 425 350 - 400 熱転写用ホワイト 350 - 400 375 - 425 350 - 400 コーティング [Detect Media Change] メディア変更検出オプションを選択します。 Rimage オートローダをご使用の場合は、[いいえ] を選択します。 • 110635_I Downloaded from www.Manualslib.com manuals search engine...
  • Seite 130 Rimage PrismPlus! スタンドアロンの PrismPlus 上で複数コピーを使用する場合は、[はい] を選択します。 • メモ: [Detect Media Change] オプションが有効になっているときは、印刷済みのディスク を取り除いた後にオペレータボタンを押して、新しいディスクをトレイに載せる必要があり ます。 [Perfect Print] 完全印刷オプションを無効にします。 このオプションは、Rimage AutoPrinter にの み使用されます。 [Media Type] メディアの種類を選択します。 変更を保存するには、[OK] を選択します。 カラー印刷 プリンタにマルチカラー リボンを装着します。25ページの「印刷リボンの交換」を参照し てください。 2. 印刷プロパティを操作します。 3. [デバイスの設定] タブを選択します。 4. [Installed Ribbon] でリボンを選択します。 5. ドロップダウン リストから [Color, Three Panel CMY] を選択します。...
  • Seite 131 PrismPlus の操作 Rimage Producer システム または、AutoPrinter を使用する場合は[いいえ] を選択してください • 。 スタンドアロン プリンタで複数コピーを行う場合は、[はい] を選択します。 • メモ: メディア変更検出オプションが有効になっているときは、印刷済みのディスクを取り 除いた後にオペレータボタンを押して、新しいディスクをトレイに載せる必要があります。 [Perfect Print] 完全印刷オプションを無効にします。 このオプションは、Rimage AutoPrinter にのみ 使用されます。 10. 色の強さ、カラーバランスまたはパターンに影響を与える変更を行うには、[ハーフトーンセットア ップ] のプロパティを選択します。 11. 変更を保存するには、[OK] を選択します。 110635_I Downloaded from www.Manualslib.com manuals search engine...
  • Seite 132: 印刷品質の設定

    2. [Rimage Perfect Image Printer PF] 上で右クリックし、ドロップダウン リストの [印刷設 定] を選択します。[Rimage Perfect Image Printer PF 印刷設定] ダイアログボックスが開き ます。 3. [詳細設定] を選択します。 [Rimage Perfect Printer PF 詳細オプション] ダイアログ ボック スが開きます。 4. 目的の解像度を選択します。 5. [OK] を選択します。 [Rimage Perfect Printer PF 詳細オプション] ダイアログ ボックスが...
  • Seite 133 PrismPlus の操作 110635_I Downloaded from www.Manualslib.com manuals search engine...
  • Seite 134: Prismplus の保守

    Rimage PrismPlus! PrismPlus の保守 クリーニング 外側の清掃 糸くずの出ない布でプリンタの外側を拭きます。 プリントヘッドの清掃 毎回リボンを交換する時や、すじが現れた時、リボンが裂けた場合は頻繁にプリントヘッドを清 掃します。 この作業には、PrismPlus クリーニング キット (PN 210555-001) が必要です。 このキットに は、必要なクリーニング パッドおよび液剤が含まれています。 1. PrismPlus を用意します。 a. PrismPlus の電源をオフにします。 b. 上端カバーを取り外します。 c. リボンを外します。25ページの「印刷リボンの交換」を参照してください。 d. オペレータ ボタンを押しながら、PrismPlus の電源をオンにします。 e. ディスク配置ランプが点滅したら、オペレータ ボタンを放します。 2. クリーニング パッドを用意します。 a. クリーニング パッドから保護シートをはがします。...
  • Seite 135 PrismPlus の保守 3. プリントヘッドを清掃します。 a. ディスクの付いたクリーニング パッ センサの上にパ ドをトレイに載せます。 ッドを押し下げる b. センサーの上でクリーニング パッド を押し下げます。 クリーニング パッドが付 いたディスク c. クリーニング パッド上にクリーニン 前面リボン ガイド グ液を 5 滴落とします。 クリーニング パッド クリーニング液 トレイを閉めて、清掃サイクルを開始するために、オペレータボタンを押します。 清 掃サイクルが完了すると、トレイが開きます。 必要に応じて、ステップ d を繰り返します。 ディスクの付いたクリーニング パッドを取り出します。 g. クリーニング液に浸した綿棒を使用して、前面の 2 本のリボン用ガイドを清掃します。 使用する...
  • Seite 136 Rimage PrismPlus! プリントヘッドのクリーニング - 代替方法 クリーニング パッドが使用できない場合、以下の清掃手順で行います。 PrismPlus を用意します。 PrismPlus の電源をオンにします。 b. プリンタのトレイを開くには、オペレータ ボタンを押します。 PrismPlus の電源をオフにします。 上端カバーを取り外します。 リボンを外します。25ページの「印刷リボンの交換」を参照してください。 プリントヘッドを清掃します。 重要! プリントヘッドは取り外さないでください。 綿棒をイソプロピル アルコールに、軽く浸してください。 b. 綿棒をトレイの上側から挿入し、プリントヘッドにあたるよう、綿棒を持ち上げ動かし ます。 印刷ヘッドの取り付け中に、凸面を清掃します 清掃の説明用に図示された印刷ヘッドの下部 プリンヘッド上のアルコールが乾いた後、使用する PrismPlus を用意します。 リボンを交換します。 上端カバーを交換します。 PrismPlus の電源をオンにします。 110635_I Downloaded from www.Manualslib.com manuals search engine...
  • Seite 137: 消耗品の交換

    PrismPlus の保守 消耗品の交換 印刷リボンを変更します。 ヒント: リボンの保存環境がプリンタの保存環境と大きく異なる場合、時間を与えて新し い環境に慣れるようにします。 温度や湿度の違いが大きい場合は、さらに時間をかけます。 リボンは、-5℃ (23℉)~40℃ (104℉) の温度、30%~80%の相対湿度で結露無しの状態で保管 します。 直射日光を避けます。 メモ: リボンの交換中であれば、今がプリントヘッドの清掃に良い時です。22ページの 「プリントヘッドのクリーニング」を参照してください。 1. リボン部分の取り扱い。 引き戻す 持ち上 PrismPlus の電源をオンにしま す。 プリンタの上端カバーを取り外し ます。 c. 巻き取りローラーを取り外すには、 歯車のついた端の部分を図のように 指で引き上げ、それを持ち上げてプ リンタの外に出します。 巻き取りローラー 供給ローラー 供給ローラーを取り外すには、こ れを持ち上げます。 印刷リボンを装着します。 a. 印刷リボンに供給ローラーを差し込 印刷リボン みます。. b.
  • Seite 138 Rimage PrismPlus! リボン ガイド テープ プリンタ トレイ e. 図のように、リボン リーダーをプ リンタトレイの後ろ側にテープで貼 ります。 リボン リーダー 図のように供給ローラーを取り付け ます。 リボンリーダーに幾分たる みを残します。 プリンタトレイが現れるまでオペ レータボタンを押し続けます。 リ ボンが、PrismPlus の前面に出て来 ます。 プリンタトレイからテープを外し ます。 リボンリーダーから粘着保護シート を剥がします。 巻き取りローラーを装着します。 a. 新しい、使用していない厚紙の芯を 巻き取りローラーに取り付けます。 一方向にのみ合うように溝がありま す。 厚紙の芯 ギア b. 図のように、巻き取りローラーの上 リボン リ...
  • Seite 139 PrismPlus の保守 を貼り付けます。 図の矢印が巻く 方向を示します。 リボンリーダーを、ローラーの回りに 1 回だけ包まれるように、回します。 重要! 「STOP Wind Leader Onto Take-up Core Stopping Here.」と 記載されている、リーダー上のマ ークを越えて巻くのは止めてくだ さい。 e. 表示されているように、厚紙の巻き取 リボン リーダー マーキング 巻き取りローラー りローラーをプリンタの中に取り付け てください。 リボンはピンと張った状 態にし、リボンにしわが無いようにす る必要があります。 巻き取りローラーを PrismPlus 内に取り付け、巻き取りローラーが所定の位置にはまるま で、しっかりと押し下げます。 重要! 巻き取りローラーに向かうリボンリーダー上の「STOP Wind Leader Onto Take-up Core Stopping Here.」と記載されたマークを巻くのは止めてください。25ペ...
  • Seite 140 Rimage PrismPlus! 110635_I Downloaded from www.Manualslib.com manuals search engine...
  • Seite 141: Prismplus プリンタの仕様

    詳細 詳細 PrismPlus プリンタの仕様 項目 説明 印刷速度 標準。300 × 300 dpi で 0.65 インチ/秒 標準。300 × 600 dpi で 0.45 インチ/秒 印刷方向 メディアがマシンから出て行くときに、画像は、上端から下端の方 向に印刷されます。 印刷モード 単一パス (標準) 、およびいくつかのメディアの種類について印刷 の品質を向上させた二重パス (単色リボンのみ)。 印刷品質 300 × 300 dpi または 300 × 600 dpi (1 mm 当たり 11.8 ドット) メディアの種類...
  • Seite 142 Rimage PrismPlus! 110635_I Downloaded from www.Manualslib.com manuals search engine...
  • Seite 143: 技術サポートと製品のアップデート

    す。 注意: 本ガイドラインを守らない場合、機器、製品、ソフトウェアまたはデータに損失ま たは損傷が生じる恐れがあることを表示します。 安全対策 警告! プリンタを分解したり、これにツール使用したりしないでください。 すべてのサ ービス手順は、認定されたフィールド技術者によって行われるようにするか、または、修理 品としてお送りくださ い。 電源コードを交流コンセントに差し込んだままプリンタを点検 しないでください。 注意! スイッチ、電源、ヒューズ、非ステッピングモーターなどの交流線電圧または直流 低電圧を有するすべての機器は、UL 規格によって発行された安全承 認を維持するために、 Rimage に承認されたコンポーネントと交換する必要があります。 注意! 必要でない限り、 絶対に プリンタの内部に手を入れないでください。 金属部品に、 鋭い角がある場合があります。 注意! プリンタが過熱していたり、異臭が検出される場合は、使用しないでくださ い。 使用すると、火事に至ったり、電気ショックが生じる場合があります。 過熱してい たり、異臭がする場合は、直ちに、コンセントから ケーブルを抜いてください。 修理を依 頼するときは販売業者に問い合わせてください。 注意! プリンタを子供の手の届く所に置いたり保管したりしないでください。 プリンタ を裏返しにしたり落としたりした場合、深刻な傷害や機器の損傷が生じる場合があります。 110635_I Downloaded from www.Manualslib.com...
  • Seite 144 Rimage PrismPlus! 注意! プリンタ トレイを開くための十分なスペースを確保してください。 プリンタ トレ イが動いているときは触らないでください。 110635_I Downloaded from www.Manualslib.com manuals search engine...
  • Seite 145: 安全検査

    詳細 安全検査 製品名: PrismPlus プリンタ モデル: cdprs 米国に対する注意 家庭用またはオフィス用の FCC 規則に適合することを試験しました。 メモ: 本装置は、FCC 規則の第 15 章によって B クラスのデジタル装置の制限に適合 するか試験を行い、適合することが分かりました。 これらの制限は、住宅への設置にお ける有害な妨害に対して妥当な保護を提供することを目的にしています。 本機は、無線 周波数エネルギーを発生、使用し、放射することができ、指示に従って取り付け、使用 しない場合、無線通信に有害な妨害を引き起こす場合があります。 しかし、特別な取り 付け方をした場合、妨害が発生しないという保証はありません。 本機が無線またはテレ ビの受信に有害な妨害を引き起こさない場合 - 本機の電源をオフにしたりオンにしたり することによって決定できる - ユーザーに、以下の方法の 1 つ、または複数によって妨 害を是正することを奨励します: • 受信アンテナの向きを変えたり、置く位置を変えたりします。 • 本機と受信機の間距離間隔を増加させます。 •...
  • Seite 146 Rimage PrismPlus! 110635_I Downloaded from www.Manualslib.com manuals search engine...
  • Seite 147 Rimage PrismPlus! Manuale per l'utente Downloaded from www.Manualslib.com manuals search engine...
  • Seite 148 Direzione generale aziendale: Rimage Corporation si riserva il diritto di apportare migliorie all'apparecchio e al software descritti nel Rimage Corporation presente documento in qualsiasi momento e senza 7725 Washington Avenue South preavviso. Rimage Corporation si riserva il diritto di Minneapolis, MN 55439...
  • Seite 149: Ulteriori Informazioni On Line

    • Descrizione tecnica e funzionale del problema. • Messaggio esatto di errore ricevuto. Ulteriori informazioni on line All’indirizzo www.rimage.com/support.html, è possibile conoscere l’ottima qualità del supporto e dei servizi Rimage. 1. Selezionare la famiglia di 2. Selezionare il prodotto.
  • Seite 150 Indice Indice Introduzione ..................1 Requisiti del sistema operativo................1 Requisiti dei supporti ..................... 1 Requisiti del nastro....................1 Requisiti del modello di etichetta................2 Componenti della PrismPlus............3 Vista anteriore ....................... 3 Vista posteriore ..................... 5 Funzionamento della PrismPlus ............. 6 Configurazione di una PrismPlus autonoma............6 Collegamento dei cavi ...................
  • Seite 151: Introduzione

    È necessario l’uso di dischi rivestiti con superficie progettata per la stampa termica. I supporti dei Rimage Media Kit™ sono progettati per un uso ottimale nella stampante PrismPlus. Per maggiori informazioni sui Rimage Media Kit™ – pratici pacchetti di dischi e di nastri, tutti garantiti da Rimage – contattare Rimage al numero verde USA 800-445-8288.
  • Seite 152: Requisiti Del Modello Di Etichetta

    Rimage PrismPlus! Requisiti del modello di etichetta • Risoluzione: utilizzare immagini o logo impostati su 300x300 DPI (punti/pollice) o su 300x600 DPI. • Dimensioni del modello di etichetta: la larghezza è di 1536 pixel (5,12”) e l’altezza di 1356 pixel (4,52”).
  • Seite 153: Componenti Della Prismplus

    Componenti della PrismPlus Componenti della PrismPlus Vista anteriore Guide nastro Perni di fissaggio Cassetto e perno Rotolo di Rotolo di di centraggio alimentazione avvolgimento Pannello di comando Ci sono quattro spie e un pulsante operatore sul pannello di comando posto sulla parte anteriore della stampante.
  • Seite 154: Pulsante Operatore

    Rimage PrismPlus! Pulsante operatore Per aprire e chiudere il vassoio della stampante, utilizzare il pulsante operatore. Al centro del pulsante vi è una spia. Spie Lo stato delle spie descritto qui di seguito illustra le condizioni di una stampante PrismPlus autonoma.
  • Seite 155: Vista Posteriore

    Componenti della PrismPlus Immagine Nome Funzione • La spia verde dell’alimentazione si illumina quando viene accesa la stampante. • La spia dell’alimentazione lampeggia quando la scheda di sistema deve essere riprogrammata. • La spia di alimentazione si spegne quando la stampante rileva un elemento pixel guasto nella testina di stampa.
  • Seite 156: Funzionamento Della Prismplus

    Rimage PrismPlus! Funzionamento della PrismPlus Configurazione di una PrismPlus autonoma Per la configurazione di una stampante PrismPlus seguire queste procedure. Collegamento dei cavi 1. Collegare il cavo parallelo al relativo collegamento sul retro della stampante. 2. Collegare l’altro capo del cavo parallelo alla porta parallela posta nella parte posteriore del 3.
  • Seite 157: Installazione Del Software

    Funzionamento della PrismPlus Installazione del software Per installare CD Designer, collocare il CD nel lettore del PC e seguire le istruzioni. Installazione del driver della stampante Prima di poter usare la stampante con un software di creazione di etichette, è necessario installare il driver della PrismPlus.
  • Seite 158 Rimage PrismPlus! 6. Regolare le impostazioni. a. Per selezionare l’impostazione Disabilita installazione delle stampanti mediante driver in modalità kernel, fare doppio clic sull’impostazione. La relativa finestra di dialogo delle Proprietà verrà aperta. Suggerimento: La selezione di un’impostazione apre un riquadro di informazioni su di essa.
  • Seite 159 Selezionare il file c cd2kxp.inf. Selezionare Apri. g. Scegliere OK. L’elenco Stampanti visualizza la stampante Rimage Perfect Image PF. Selezionare Avanti. Se la stampante PrismPlus era stata installata in precedenza, la Procedura guidata di a ggiunta stampante chiede se si desidera mantenere il driver corrente o sostituirlo.
  • Seite 160 Selezionare la scheda Avanzate. Scegliere Impostazioni di stampa. • Se PrismPlus è collegata ad un sistema Rimage Producer, selezionare Stampa direttamente sulla stampante. • Se PrismPlus viene usata come stampante autonoma o collegata ad un AutoPrinter, selezionare Stampa documenti in spool, in modo che il programma termini più...
  • Seite 161: Accensione Della Stampante

    Funzionamento della PrismPlus Accensione della stampante 1. Per accendere la stampante premere l’apposito interruttore sulla parte posteriore. La stampante esegue le operazioni di inizializzazione. 2. Per spegnerla, premere nuovamente l’interruttore. Interruttore di alimentazione 110635_I Downloaded from www.Manualslib.com manuals search engine...
  • Seite 162: Caricamento Dei Dischi

    Start > Stampanti e fax. Verrà visualizzata la finestra di dialogo Stampanti e fax. Cliccare con il tasto destro su Rimage Perfect Imager Printer PF e selezionare Proprietà dall’elenco a disces a, per aprire la finestra di dialogo delle Proprietà della stampante Rimage Perfect Image PF.
  • Seite 163: Selezione Delle Proprietà Di Stampa

    Funzionamento della PrismPlus Impostazione del tipo di supporto, del tipo di nastro e dell’impulso di stampa 1. Selezionare le proprietà di stampa. 2. Selezionare la scheda Impostazioni periferica. 3. Selezionare il tipo di Nastro installato. Nota: La funzione Doppia stampa consente di stampare la stessa etichetta due volte sul disco.
  • Seite 164: Impostazione Delle Opzioni Di Colore

    7. Disattivare l’opzione Perfect Print, che viene utilizzata solo per Rimage AutoPrinter. 8. Selezionare Tipo supporto. 9. Selezionare OK per salvare le modifiche.
  • Seite 165 8. Selezionare l’opzione Rileva sostituzione supporto: • Se si usa un sistema Rimage Producer o un AutoPrinter, selezionare No. • Se si fanno di verse copie da una stampante autonoma, selezionare Sì.
  • Seite 166: Impostazione Della Qualità Di Stampa

    In Windows XP o Windows Server 2003, scegliere: Start > Stampanti e fax. Verrà visualizzata la finestra di dialogo Stampanti e fax. 2. Cliccare con il tasto destro sulla stampante Rimage Perfect Imager PF e selezionare Preferenze di stampa dall’elenco a discesa, per aprire la finestra di dialogo delle Preferenze di stampa della stampante Rimage Perfect Image PF.
  • Seite 167: Manutenzione Della Prismplus

    Manutenzione della PrismPlus Manutenzione della PrismPlus Pulizia generale Pulizia esterna Passare sul rivestimento esterno della stampante un panno privo di lanugine. Pulizia della testina di stampa Pulire la testina ad ogni sostituzione di nastro, o più spesso, se cominciano ad apparire delle strisce o se il nastro si è...
  • Seite 168 Rimage PrismPlus! d. Per chiudere il vassoio e avviare il ciclo di pulizia, premere il pulsante operatore. Quando è completato il ciclo di pulizia, il vassoio si apre. e. Se necessario, ripeter la fase d. Rimuovere il tampone di pulizia con il disco.
  • Seite 169: Sostituzione Del Materiale Di Consumo

    Manutenzione della PrismPlus Sostituzione del materiale di consumo Sostituzione del nastro di stampa Suggerimento: Se i nastri sono conservati in ambienti molto diversi da quelli della stampante, lasciare che raggiungano la temperatura del nuovo ambiente. In caso di maggiori differenze di temperatura e/o di umidità, lasciare trascorrere più tempo. Conservare i nastri ad una temperatura compresa tra –5°C e 40°C (23°...
  • Seite 170 Rimage PrismPlus! Installare il rullo di alimentazione come illustrato. Lasciare la parte iniziale del nastro leggermente allentata. g. Tenere premuto il pulsante operatore finché non esce il vassoio della stampante. Il nastro viene guidato verso la parte anteriore della PrismPlus.
  • Seite 171 Manutenzione della PrismPlus Installare il rullo di avvolgimento nella PrismPlus e premere con decisione verso il basso finché non si insedia con uno scatto. Importante! Non avvolgere il segno STOP - Arrestare qui l’avvolgimento della parte iniziale sull’anima del rullo di avvolgimento. Il segno non deve oltrepassare il punto indicato sulla figura di pagina 20.
  • Seite 172: Ulteriori Informazioni

    Rimage PrismPlus! Ulteriori informazioni Specifiche della stampante PrismPlus Voce Descrizione Velocità di stampa Tipica: 16 mm (0,65 in)/secondo a 300 x 300 dpi Tipica: 11,43 mm (0,45 in)/secondo a 300 x 600 dpi Direzione di stampa Le immagini vengono stampate con orientamento dall’alto al basso, mentre il supporto esce dalla macchina.
  • Seite 173: Supporto Tecnico E Aggiornamenti Del Prodotto

    Il supporto per la PrismPlus è disponibile attraverso il proprio rivenditore autorizzato. Importante! Registrando la propria PrismPlus on line o completando e inviando la scheda di registrazione si consente a Rimage di avvisare tempestivamente della disponibilità di aggiornamenti. Informazioni sulla sicurezza Il manuale e le indicazioni sul prodotto consentono un uso corretto e sicuro.
  • Seite 174: Prove Di Sicurezza

    Rimage PrismPlus! Prove di sicurezza Nome del prodotto: Stampante PrismPlus Modello: cdprs Avviso per gli USA Collaudato conformemente alle norme FCC UNICAMENTE PER USO DOMESTICO O IN UFFICIO. NOTA: L’apparecchiatura è stata testata e dichiarata conforme ai limiti di un dispositivo digitale di Classe B, secondo i dettami della Parte 15 della normativa FCC.