Herunterladen Inhalt Inhalt Diese Seite drucken
Klarstein AeroVital Fry Bedienungsanleitung

Klarstein AeroVital Fry Bedienungsanleitung

Heißluftfritteuse

Werbung

Verfügbare Sprachen
  • DE

Verfügbare Sprachen

  • DEUTSCH, seite 1
AeroVital Fry
Heißluftfritteuse
Hot Air Fryer
Freidora de aire caliente
Friteuse à air chaud
Friggitrice ad aria calda
10034575

Werbung

Inhaltsverzeichnis
loading

Inhaltszusammenfassung für Klarstein AeroVital Fry

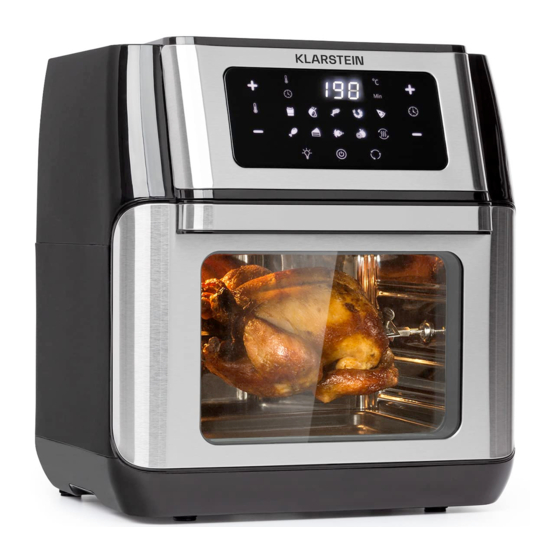
  • Seite 1 AeroVital Fry Heißluftfritteuse Hot Air Fryer Freidora de aire caliente Friteuse à air chaud Friggitrice ad aria calda 10034575...
  • Seite 3: Inhaltsverzeichnis

    Sehr geehrter Kunde, wir gratulieren Ihnen zum Erwerb Ihres Gerätes. Lesen Sie die folgenden Hinweise sorgfältig durch und befolgen Sie diese, um möglichen Schäden vorzubeugen. Für Schäden, die durch Missachtung der Hinweise und unsachgemäßen Gebrauch entstehen, übernehmen wir keine Haftung. Scannen Sie den folgenden QR-Code, um Zugriff auf die aktuellste Bedienungsanleitung und weitere Informationen rund um das Produkt zu erhalten.
  • Seite 4: Weiteres Zubehör

    WEITERES ZUBEHÖR Hinweis: Zu diesem Artikel ist weiteres Zubehör unter den folgenden Artikelnummern erhältlich: Artikelnummer 10034576 10034577 Zubehörteil Gitterrost Kebab-Set SICHERHEITSHINWEISE • Überprüfen Sie vor der ersten Verwendung, ob die Spannung Ihrer Steckdose mit der angegebenen Spannung übereinstimmt. • Tauchen Sie das Netzkabel oder das Gerät selbst nicht in Wasser oder andere Flüssigkeiten, um einen Stromschlag zu vermeiden.
  • Seite 5 • Schalten Sie das Gerät vor der Reinigung und bei Nichtverwendung aus und ziehen Sie den Netzstecker aus der Steckdose. Lassen Sie das Gerät zuerst abkühlen, bevor Sie Geräteteile entnehmen oder hinzufügen. • Stellen Sie das Gerät nicht in die unmittelbare Nähe von heißen Gas- oder Elektroöfen oder in einen aufgeheizten Backofen.
  • Seite 6: Geräteübersicht

    GERÄTEÜBERSICHT...
  • Seite 7: Bedienfeld

    10 Trommelkorb-Haken Display Bedienelement (berührungs- Braten-/Geflügel-Drehspieß empfindliche Sensortasten) Handgriff (Tür) Drehspieß-Gabeln Sichtfenster (Tür) Frittier-Behälter Tür Frittier-Behälter (Handgriff) Blech zum Dörren und für Drehspieß/Kebab-Spieß (optional) mehrstufiges Kochen (optional) Kebab-Zubehör (Außenplatten) Abtropfschale (optional) Spieße (optional) Schutzgitter für das Heizelement Trommelkorb BEDIENFELD Temperatur- und Zeiteinstellung Licht-Taste (Ein/Aus) Aufwärmen-Taste Rotieren-Taste (Ein/Aus)
  • Seite 8: Programme

    PROGRAMME Pommes Frites Fisch Garnelen Dörren und Ganzes Pizza Dehydrieren Hähnchen Hähnchen Steak Backen EINSCHÜBE Frittier-Behälter Um den Griff am Korb zu befestigen, öffnen Sie die Griffverriegelung, drücken Sie den abnehmbaren Frittierbehälter-Handgriff zusammen und befestigen Sie ihn am Korbgriffeinsatz. Sobald der Griff mit dem Korb verbunden ist, schließen Sie die Griffverriegelung, um den Korbgriff zu sichern.
  • Seite 9: Einschübe Einsetzen

    Braten/Geflügel-Drehspieß Stecken Sie die Stange in Längsrichtung durch die Mitte des Geflügels oder des Bratens. Schieben Sie die Drehspieß- Gabeln durch die Drehspieß-Stange und in das Geflügel bzw. den Braten und verriegeln Sie die Gabeln mit den Schrauben. Stellen Sie sicher, dass die Größe des Geflügels oder des Bratens genügend Platz in der Heißluftfritteuse lässt, damit sich der Spieß...
  • Seite 10: Bedienung

    2. Schließen Sie die Tür. 3. Drücken Sie die „Rotieren“-Taste, um die Rotation einzuschalten. 4. Um die Einschübe nach dem Kochvorgang wieder zu entnehmen, nehmen Sie den Trommelkorb-Haken (10) und haken Sie diesen von unten an den Einschub ein. Drücken Sie die Entriegelungstaste und ziehen Sie den Einschub langsam heraus.
  • Seite 11: Funktionsprogramme

    10. Wenn Sie anschließend noch etwas mehr Kochzeit benötigen, stellen Sie Zeit und Temperatur individuell ein und starten Sie den Vorgang erneut. 1 1. Um die Lebensmittel noch einmal aufzuwärmen, drücken Sie die Aufwärmen-Taste . Der Timer stellt sich automatisch auf 6 Minuten und 140 °C ein. 12.
  • Seite 12: Reinigung Und Pflege

    REINIGUNG UND PFLEGE Hinweis: Folgende Teile sind für Geschirrspülmaschinen geeignet: Kebabzubehör (7 + 8), Trommelkorb (9), Braten/Geflügel-Drehspieß (1 1 + 12), Frittier-Behälter (13) und Bleche (15 + 16). • Ziehen Sie den Netzstecker aus der Steckdose und stellen Sie sicher, dass das Gerät spannungsfrei ist.
  • Seite 13 Problem Mögliche Ursache Lösungsansatz Die Lebensmittel wurden Manche Lebensmittel Entnehmen Sie den nicht gleichmäßig frittiert. müssen Sie ungefähr in Einschub in der Mitte der der Mitte der Kochzeit Kochzeit und schütteln Sie einmal durchschütteln. den Inhalt einmal durch, sodass dieser vermengt wird.
  • Seite 14: Rezepte

    Teller mit den zerbröselten Cornflakes vorbereiten. Daraufhin die Filetstücke zuerst im Mehl wenden, mit Ei und dann vollständig mit den Cornflakes bedecken. Daraufhin die panierten Lachsstücke in der AeroVital Fry Heißluftfritteuse mit einem Teelöffel Öl bei 190 °C etwa 6-8 Minuten knusprig...
  • Seite 15 Wasser legen, um die Stärke aus den Kartoffeln zu lösen. Nun die Streifen im Öl wenden und mit Paprika und Salz würzen. Letztlich die Pommes oder Wedges in der AeroVital Fry Heißluftfritteuse bei 200 °C für ca. 10 Minuten knusprig backen.
  • Seite 16 Sobald das Äußere des Teigs bereits knusprig ist, sollte noch etwas Teig am Stäbchen kleben bleiben. Entnehmen Sie den Teig aus der AeroVital Fry Heißluftfritteuse und lassen Sie diesen kurz abkühlen. Nun können Sie den fertigen Teig in mundgerechte Brownies...
  • Seite 17: Hinweise Zur Entsorgung

    HINWEISE ZUR ENTSORGUNG Befindet sich die linke Abbildung (durchgestrichene Mülltonne auf Rädern) auf dem Produkt, gilt die Europäische Richtlinie 2012/19/EU. Diese Produkte dürfen nicht mit dem normalen Hausmüll entsorgt werden. Informieren Sie sich über die örtlichen Regelungen zur getrennten Sammlung elektrischer und elektronischer Gerätschaften.
  • Seite 19 Dear Customer, Congratulations on purchasing this device. Please read the following instructions carefully and follow them to prevent possible damages. We assume no liability for damage caused by disregard of the instructions and improper use. Scan the QR code to get access to the latest user manual and more product information.
  • Seite 20: Further Accessories

    FURTHER ACCESSORIES Note: Further accessories are available for this item under the following item numbers: Item number 10034576 10034577 Accessory Mesh Rack Kebab Set SAFETY INSTRUCTIONS • Before using for the first time, check that the voltage of your power outlet matches the specified voltage.
  • Seite 21 • If the power plug does not fi t properly, always contact a qualifi ed electrician to minimize the potential for electrical shock. Never try to manipulate the power plug in any way. • Do not clean the device with metallic scouring pads. Small metal parts could break off and short out the electrical components of the device, which could result in electric shock or damage the device.
  • Seite 22: Device Overview

    DEVICE OVERVIEW...
  • Seite 23: Control Panel

    10 Drum basket hook Display Operating element (touch-sensitive Roast / poultry rotisserie sensor buttons) Handle (door) Rotisserie forks Viewing window (door) Deep-frying container Door Deep frying container (handle) Sheet for dried goods and for Rotisserie / kebab skewer (optional) multi-level cooking (optional) Kebab accessories (outer plates) Drip tray (optional)
  • Seite 24: Programs

    PROGRAMS French fries Fish Shrimp Drying and Whole Pizza Dehydrating Chicken Chicken Steak Baking INSERTS Frying Container To attach the handle to the basket, open the handle latch, squeeze the removable frying container handle, and secure it to the basket handle insert.
  • Seite 25: Inserting The Inserts

    Roast / Poultry Rotisserie Insert the bar longitudinally through the center of the poultry or roast. Push the rotisserie forks through the rotisserie skewer and into the poultry or roast and lock the forks with the screws. Make sure the size of the poultry or roast leaves enough space in the hot air fryer to allow the skewer to spin.
  • Seite 26: Operation

    2. Close the door. 3. Press the “rotate” button to turn on the rotation. 4. To remove the inserts after cooking, take the drum basket hook (10) and hook it into the insert from below. Press the release button and slowly pull out the insert.
  • Seite 27: Function Programs

    12. To stop the current cooking process, briefly press the ON / OFF button . To cancel the operation, press and hold the ON / OFF button 13. To switch the device off completely, disconnect the plug from the socket. FUNCTION PROGRAMS French fries Pizza...
  • Seite 28: Cleaning And Care

    CLEANING AND CARE Note: The following items are suitable for dishwashers: kebab accessories (7 + 8), drum basket (9), roast / poultry rotisserie (1 1 + 12), frying container (13) and trays (15 + 16). • Pull the power plug out of the socket and make sure that the device is not powered. Clean the containers in warm rinse water.
  • Seite 29 Problem Possible Cause Solution The insert is difficult to push The insert is too full. The contents of the insert into the hot air fryer. must never exceed the maximum mark. The insert has not been Make sure that the insert is inserted correctly.
  • Seite 30: Recipes

    Turn the fillets first in the flour, cover with egg and then completely with the cornflakes. Finally bake the breaded salmon pieces in the AeroVital Fry hot air fryer with a teaspoon of oil at 190 °C for about 6-8 minutes until crispy and serve...
  • Seite 31 Finally mix the quinoa with the mushrooms and add the Parmesan cheese and fill the peppers. Put the pepper in the AeroVital Fry hot air fryer with a little oil for about 12-15 minutes at about 160 °C.
  • Seite 32 As soon as the outside of the batter is crispy, some batter should stick to the stick. Remove the cooked batter from the AeroVital Fry hot air fryer and allow it to cool briefly. Now you can cut the mass into bite-sized brownies.
  • Seite 33: Hints On Disposal

    HINTS ON DISPOSAL According to the European waste regulation 2012/19/EU this symbol on the product or on its packaging indicates that this product may not be treated as household waste. Instead it should be taken to the appropriate collection point for the recycling of electrical and electronic equipment.
  • Seite 35: Fiche Technique

    Chère cliente, cher client, Toutes nos félicitations pour l’acquisition de ce nouvel appareil. Veuillez lire attentivement et respecter les instructions de ce mode d’emploi afin d’éviter d’éventuels dommages. Nous ne saurions être tenus pour responsables des dommages dus au non-respect des consignes et à...
  • Seite 36: Autres Accessoires

    AUTRES ACCESSOIRES Remarque : Des accessoires supplémentaires sont disponibles pour cet article sous les numéros d’article suivants Numéro 10034576 10034577 d'article Accessoire Grille Accessoire à kébab CONSIGNES DE SÉCURITÉ • Avant la première utilisation, vérifiez que la tension de votre prise secteur correspond à...
  • Seite 37 • Ne placez pas l’appareil et ne l’utilisez pas sur des surfaces en verre sensibles, en bois ou des nappes à la chaleur. Assurez-vous de placer une plaque résistante à la chaleur avec une isolation thermique sous l’appareil sur ces surfaces. •...
  • Seite 38: Aperçu De L'appareil

    APERÇU DE L‘APPAREIL...
  • Seite 39: Panneau De Commande

    10 Crochet du panier de cuisson Ecran Elément de commande (touches Support de panier tactiles) Poignée (de porte) Tournebroche pour rô-ti/volaille Fenêtre de contrôle (de porte) Fourche de tournebroche Porte Récipient à friture rôtissoire /broche à Kebab (en Récipient à friture (poignée) option) Accessoire à...
  • Seite 40: Programmes

    PROGRAMMES Frites Poisson Crevettes Séchage et Pizza Pain déshydrata-tion Poulet Steak Pâtisserie ACCESSOIRES Récipient à friture Pour fixer la poignée au panier, ouvrez le loquet de la poignée, appuyez sur la poignée amovible du récipient de friture et fixez-la sur la poignée accessoire du panier.
  • Seite 41: Installation Des Accessoires

    Tournebroche pour rôti/volaille Insérer la barre longitudinalement au centre de la volaille ou du rôti. Poussez les fourches de la rôtissoire à travers la tige de la rôtissoire et dans la volaille ou le rôti et fixez-les avec les vis. Assurez-vous que la taille de la volaille ou du rôti laisse assez d’espace dans la friteuse à...
  • Seite 42: Utilisation

    2. Fermez la porte. 3. Appuyez sur le bouton „rotation“ pour activer la rotation. 4. Pour retirer les accessoires après la cuisson, prenez le crochet du panier de cuisson (10) et accrochez-le dans la fente par le bas. Appuyez sur le bouton de déverrouillage et retirez lentement l‘accessoire.
  • Seite 43: Programmes

    12. Pour arrêter la cuisson en cours, appuyez brièvement sur la touche . Pour annuler l’opération, maintenez la touche 13. Pour éteindre complètement l’appareil, débranchez la fiche de la prise. PROGRAMMES Frites Pizza Pain Steak Aliment Durée 20 minutes 12 minutes 30 minutes 15 minutes Temp.
  • Seite 44: Nettoyage Et Entretien

    NETTOYAGE ET ENTRETIEN Remarque : Les pièces suivantes sont compatibles lave-vaisselle : accessoires pour kebab (7 + 8), panier de cuisson (9), rôtissoire rôti / volaille (12 + 13), récipient pour la friture (14) et plaques (16 + 17). • Débranchez le cordon d‘alimentation de la prise et assurez-vous que l‘appareil est hors tension.
  • Seite 45 Problème Cause possible Solution Les aliments ne sont pas Certains aliments doivent Retirez l'accessoire à uniformément frits. être secoués une fois à mi-cuisson et secouez le mi-cuisson. contenu une fois pour le mélanger. L'accessoire est difficile à L'accessoire est trop plein. Le contenu de l'acces- glisser dans la friteuse à...
  • Seite 46: Recettes

    émiettés. Tournez ensuite les filets dans la farine, dans l‘œuf battu puis panez-les dans les cornflakes. Ensuite, faites cuire les morceaux de saumon panés dans la friteuse chaude AeroVital Fry avec une cuillère à café d‘huile à 190 °C pendant environ 6-8 minutes jusqu‘à ce qu‘ils...
  • Seite 47 Retournez les lamelles dans l‘huile et assaisonnez avec du paprika et du sel. Enfin, faites frire les frites ou les quartiers dans la friteuse à air chaud AeroVital Fry à 200 °C pendant environ 10 minutes jusqu‘à ce qu‘ils soient croustillants.
  • Seite 48 Couvrez le plat à pizza avec du papier sulfurisé et étalez doucement la pâte. Faites glisser l‘accessoire dans la friteuse à air chaud AeroVital Fry et faites cuire la pâte à 180 °C pendant 18 à 20 minutes. Pour vous assurer que l‘intérieur de la pâte est crémeux, piquez-la avec un bâton en bois.
  • Seite 49: Informations Sur Le Recyclage

    INFORMATIONS SUR LE RECYCLAGE Vous trouverez sur le produit l’image ci-contre (une poubelle sur roues, barrée d‘une croix), ce qui indique que le produit se trouve soumis à la directive européenne 2012/19/ UE. Renseignez-vous sur les dispositions en vigueur dans votre région concernant la collecte séparée des appareils électriques et électroniques.
  • Seite 51: Datos Técnicos

    Estimado cliente: Le felicitamos por la adquisición de este producto. Lea atentamente el siguiente manual y siga cuidadosamente las instrucciones de uso con el fin de evitar posibles daños. La empresa no se responsabiliza de los daños ocasionados por un uso indebido del producto o por haber desatendido las indicaciones de seguridad.
  • Seite 52: Otros Accesorios

    OTROS ACCESORIOS Atención: Para este artículo existen accesorios con el siguiente número de artículo: Número de 10034576 10034577 artículo Accesorio Parrilla Set de kebab INDICACIONES DE SEGURIDAD • Antes de utilizar el aparato por primera vez, compruebe que la tensión de su enchufe corresponde a la tensión especificada.
  • Seite 53 • Apague el aparato y desconecte el enchufe de la toma de corriente antes de limpiarlo o cuando no lo utilice. Deje que el aparato se enfríe completamente antes de montarlo o desmontarlo. • No coloque el aparato cerca de hornos eléctricos o de gas, o dentro de un horno caliente.
  • Seite 54: Vista General Del Aparato

    VISTA GENERAL DEL APARATO...
  • Seite 55: Panel De Control

    10 Gancho para el cilindro grill Display Panel de control (botones con sensor, Soporte del cilindro sensibles al tacto) Tirador (puerta) Espetón para asar Ventana (puerta) Horquilla del espetón Puerta Recipiente para frituras Espetón para kebab Mango ecipiente para frituras Bandeja para deshidratar Accesorio para kebab (placa y otros métodos de cocción...
  • Seite 56: Programmes

    PROGRAMMES Patatas fritas Pescado Gambas Pizza Deshidratar Pollo Filete Hornear ACCESORIOS Recipiente para frituras Para fijar el mango al recipiente para frituras, abra el seguro del mango, apriete el mango extraíble del recipiente para frituras y fíjelo en el recipiente. Una vez que el mango esté...
  • Seite 57: Introducir Los Accesorios

    Espetón para asar Inserte el espetón a lo largo a través de la mitad del producto que desea asar. Empuje las horquillas a través de la barra hasta llegar al producto y bloquee las horquillas con los tornillos. Asegúrese de que el tamaño del producto deja suficiente espacio en la freidora sin aceite para que el espetón pueda girar.
  • Seite 58: Funcionamiento

    2. Cierre la puerta. 3. Pulse el botón «Rotación» para activar la rotación. 4. Para volver a retirar el accesorio después de la cocción, coja el gancho del cilindro grill (10) e insértelo en el accesorio desde abajo. Presione el botón de desbloqueo y retire lentamente el accesorio.
  • Seite 59: Ajustes De Programas

    1 1. Para calentar un poco más los alimentos, pulse el botón de calentar temporizador se ajusta automáticamente a 6 minutos y 140 °C. 12. Para cancelar el proceso actual, mantenga pulsado el botón de encendido/ apagado . Para cancelar el proceso actual, mantenga pulsado el botón de encendido/apagado 13.
  • Seite 60: Limpieza Y Cuidado

    LIMPIEZA Y CUIDADO Nota: Los siguientes accesorios son aptos para lavavajillas: accesorio para kebab (7 + 8), cilindro grill (9), espetón para asar (12 + 13), recipiente para frituras (14) y bandeja (16 + 17). • Desconecte el enchufe de la toma de corriente y asegúrese de que el aparato está apagado.
  • Seite 61 Anomalía Posible causa Posible solución Los alimentos no se fríen Algunos alimentos Retire el accesorio a mitad uniformemente. requieren ser agitados una del tiempo de cocción y vez aproximadamente agite el contenido una vez a la mitad del tiempo de para que se mezcle.
  • Seite 62: Recetas

    Voltee los trozos de filete primero en la harina, úntelos en huevo y luego esparza por encima los cereales. A continuación, hornee los trozos de salmón empanizado en la freidora de aire caliente AeroVital Fry con una cucharadita de aceite a 190 °C durante unos 6-8 minutos hasta que estén...
  • Seite 63 1 cm de grosor y colóquelas en agua fría durante 10 minutos para eliminar el almidón. Ahora, esparza el aceite sobre las tiras y sazónelas con pimienta y sal. Hornee las patatas en la freidora de aire caliente AeroVital Fry a 200 °C durante aprox. 10 minutos.
  • Seite 64 Tan pronto como la parte exterior de la masa ya esté crujiente, un poco más de masa debe adherirse al palillo. Saque la masa de la freidora de aire caliente AeroVital Fry y deje que se enfríe un poco. Ahora puede cortar la masa en brownies.
  • Seite 65: Retirada Del Aparato

    RETIRADA DEL APARATO Si el aparato lleva adherida la ilustración de la izquierda (el contenedor de basura tachado), entonces rige la directiva europea 2012/19/UE. Este producto no debe arrojarse a un contenedor de basura común. Infórmese sobre las leyes territoriales que regulan la recogida separada de aparatos eléctricos y electrónicos.
  • Seite 67: Dati Tecnici

    Gentile Cliente, La ringraziamo per aver acquistato il dispositivo. La preghiamo di leggere attentamente le seguenti istruzioni per l’uso e di seguirle per evitare possibili danni tecnici. Non ci assumiamo alcuna responsabilità per danni scaturiti da una mancata osservazione delle avvertenze di sicurezza e da un uso improprio del dispositivo.
  • Seite 68: Ulteriori Accessori

    ULTERIORI ACCESSORI Avvertenza: per questo articolo, sono disponibili altri accessori ai seguenti numeri articolo: Numero 10034576 10034577 articolo Accessorio Griglia Set per kebab AVVERTENZE DI SICUREZZA • Prima del primo utilizzo, controllare che la tensione della presa elettrica utilizzata corrisponda alla tensione indicata. •...
  • Seite 69 • Non utilizzare assolutamente il dispositivo se il cavo di alimentazione è danneggiato, se il dispositivo presenta malfunzionamenti o se è stato danneggiato in qualche modo. • Prima della pulizia e in caso di non utilizzo, spegnere il dispositivo e staccare la spina.
  • Seite 70: Descrizione Del Dispositivo

    DESCRIZIONE DEL DISPOSITIVO...
  • Seite 71: Pannello Di Controllo

    10 Gancio cestello rotante Display Elemento di controllo (tasti touch) Piede d’appoggio cestello Spiedo girevole per arrosti/ Maniglia (sportello) pollame Finestrella (sportello) Forca spiedo girevole Sportello Contenitore per friggere Spiedo girevole /spiedo per kebab Contenitore per friggere (opzionale) (impugnatura) Accessorio per kebab (pannello Teglia per essiccare o cuocere a esterno) (opzionale) più...
  • Seite 72: Programmi

    PROGRAMMI Patatine fritte Pesce Gamberi Essiccare e Pizza Pane disidratare Pollo Bistecca Torte INSERTI Contenitore per frittura Per fissare l’impugnatura al cestello, aprire il blocco dell’impugnatura, premere insieme l’impugnatura rimovibile del contenitore di frittura e fissarla al cestello. Quando l’impugnatura è collegata al cestello, chiudere il blocco per fissarla.
  • Seite 73: Posizionamento Degli Inserti

    Spiedo girevole per arrosto/pollame Far passare l’asta per la lunga al centro del pollo o dell’arrosto. Far passare la forca dello spiedo attraverso l’asta dello spiedo e nel pollo o nell’arrosto e fissare la forca con le viti. Assicurarsi che ci sia spazio sufficiente nella friggitrice per permettere al pollo o all’arrosto di ruotare.
  • Seite 74: Utilizzo

    2. Chiudere lo sportello 3. Premere il tasto “Rotazione” per attivare la rotazione. 4. Per togliere gli inserti dopo la cottura, prendere il gancio del cestello rotante (10) e agganciarlo all’inserto dal basso. Premere il tasto di sblocco e rimuovere lentamente l’inserto. UTILIZZO 1.
  • Seite 75: Programmi Funzionali

    13. Per spegnere completamente il dispositivo, staccare la spina. PROGRAMMI FUNZIONALI Patatine fritte Pizza Pane Bistecca Alimento Durata 20 minuti 12 minuti 30 minuti 15 minuti Temperatura 200 °C 180 °C 180 °C 180 °C Essiccare e Pesce Gamberi pollo disidratare Alimento Durata 15 minuti 12 minuti 2-24 minuti 30 minuti...
  • Seite 76: Pulizia E Manutenzione

    PULIZIA E MANUTENZIONE Nota: i seguenti componenti sono adatti alla lavastoviglie: set per kebab (7+8), cestello rotante (9), spiedo girevole per arrosto/ pollame (12+13), contenitore di frittura (14) e teglie (16+17). • Staccare la spina dalla presa elettrica e assicurarsi che il dispositivo sia libero da tensione elettrica.
  • Seite 77 Problema Possibile causa Soluzioni Gli alimenti non vengono Alcuni alimenti devono Togliere l’inserto a metà fritti in modo omogeneo. essere smossi a circa metà del tempo di cottura e del tempo di cottura. smuovere il contenuto, in modo da mescolarlo. È...
  • Seite 78: Ricette

    Passare i filetti di pesce nella farina, poi nell’uovo e infine coprirli completamente con i fiocchi di mais. Cuocere poi i cubetti di salmone impanati nella friggitrice ad aria AeroVital Fry con un cucchiaino d’olio, a 190 °C per circa 6-8 minuti e servire su un piatto.
  • Seite 79 10 minuti, in modo da rimuovere l’amido. Far passare le patate in un po’ d’olio e condirle con sale e paprika. Cuocere le patatine fritte o a spicchi nella friggitrice ad aria calda AeroVital Fry per circa 10 minuti a circa 200 °C, fino a quando sono belle croccanti.
  • Seite 80 Coprire poi la teglia con carta da forno e distribuire l’impasto in modo che sia piatto e liscio. Mettere l’inserto nella friggitrice ad aria calda AeroVital Fry per circa 18-20 minuti a 180 °C. Per garantire che l’interno dei brownie sia cremoso, inserire uno stuzzicadenti.
  • Seite 81: Smaltimento

    SMALTIMENTO Se sul prodotto è presente la figura a sinistra (il bidone dei rifiuti con le ruote), si applica la direttiva europea 2012/19/ UE. Questi prodotti non possono essere smaltiti con i rifiuti normali. Informarsi sulle disposizioni vigenti per la raccolta di dispositivi elettrici ed elettronici.

Inhaltsverzeichnis