
Verwandte Anleitungen für Klarstein AeroVital Cube


Inhaltszusammenfassung für Klarstein AeroVital Cube
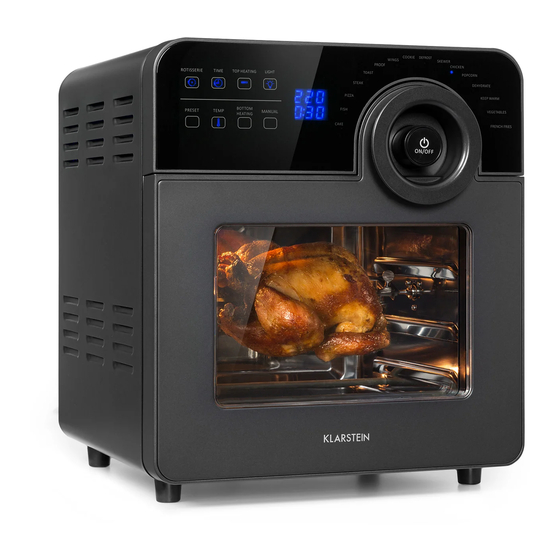
- Seite 1 AeroVital Cube Chef Heißluftfritteuse Hot Air Fryer Freidora de aire caliente Friteuse à air chaud Friggitrice ad aria calda 10034217...
-
Seite 3: Inhaltsverzeichnis
Sehr geehrter Kunde, wir gratulieren Ihnen zum Erwerb Ihres Gerätes. Lesen Sie die folgenden Hinweise sorgfältig durch und befolgen Sie diese, um möglichen Schäden vorzubeugen. Für Schäden, die durch Missachtung der Hinweise und unsachgemäßen Gebrauch entstehen, übernehmen wir keine Haftung. Scannen Sie den folgenden QR-Code, um Zugriff auf die aktuellste Bedienungsanleitung und weitere Informationen rund um das Produkt zu erhalten. -
Seite 4: Sicherheitshinweise
ZUBEHÖR Hinweis: Das folgende Zubehör wird nicht mitgeliefert, ist aber für diesen Artikel unter den folgenden Artikelnummern erhältlich: Artikelnummer 10034407 10034408 10034409 Zubehör Korb Steakgitter Spießrost Artikelnummer 10034410 10034411 Zubehör Drehkorb Spieß-Set SICHERHEITSHINWEISE • Bewahren Sie diese Bedienungsanleitung für den zukünftigen Gebrauch auf. •... - Seite 5 • Verwenden Sie das Gerät nicht, wenn das Netzkabel beschädigt ist, das Gerät Fehlfunktionen aufweist oder auf sonstige Art und Weise beschädigt wurde. • Schalten Sie das Gerät aus und ziehen Sie den Netzstecker aus der Steckdose, bevor sie das Gerät reinigen oder warten und wenn Sie es nicht mehr verwenden. Lassen Sie das Gerät zuerst abkühlen, bevor Sie Geräteteile entnehmen oder hinzufügen.
-
Seite 6: Geräteübersicht
GERÄTEÜBERSICHT Gehäuse Korbzange Drehkorb (optional) Bedienfeld Hähnchenspieß Steakgitter (optional) Drehregler mit Gitter Spießrost (optional) EIN/AUS-Taste Netzkabel Gitterkorb Frittierkorb (optional) Innenraum Abtropfblech Hoher Gittereinsatz (optional) Tür Korb (optional) -
Seite 7: Bedienfeld
BEDIENFELD Tasten Display Programmwahl Rotisserie Zeit Ober- Licht (Drehen) hitze Zeit- Tempe- Unter- Manuell Drehregler vorwahl ratur hitze mit EIN/AUS-Taste (Preset) (ON/OFF) INSTALLATION Vor der ersten Verwendung 1. Entfernen Sie alle Verpackungsmaterialien, Aufkleber und Etiketten. 2. Reinigen Sie das gesamte Zubehör mit heißen Wasser, Spülmittel und einem nicht scheuerndem Schwamm. -
Seite 8: Verwendung Des Zubehörs
VERWENDUNG DES ZUBEHÖRS Abtropfblech • Öffnen Sie die Tür des Geräts. • Schieben Sie das Abtropfblech in das Gerät (siehe nachfolgende Abbildung). Gitter • Schieben Sie das Gitter in das Gerät hinein (siehe Abbildung unten). Gitterkorb • Legen Sie die Lebensmittel, die Sie zubereiten möchten, in den Gitterkorb. Platzieren Sie diesem im Inneren des Geräts und schließen Sie die Tür (siehe Abbildung unten). - Seite 9 Drehgabel • Die 360-Grad-Drehung ermöglicht ein gleichmäßiges Garen. Der Drehmodus ist werkseitig voreingestellt. In der Abbildung unten wird die richtige Methode zum Garen eines ganzen Hähnchens mit Spindel und Rotisseriegabeln dargestellt. Korb mit Griff (optional) • Befestigen Sie den Griff, indem Sie ihn in dem dafür vorgesehenen Schlitz am Korb einrasten.
- Seite 10 Drehkorb (optional) Spieß-Set (optional) Drehkorb-Griff...
- Seite 11 Hoher Gittereinsatz (optional) • Der hohe Gittereinsatz kann auf dem Abtropfblech platziert werden, so dass Pfannen oder andere Kochutensilien ausreichend Abstand zu den Heizstäben am Boden des Geräts aufweisen. Hinweise zum bestimmungsgemäßen Gebrauch des Zubehörs • Verwenden Sie für verschiedene Zubereitungsarten immer geeignetes Kochzubehör. •...
-
Seite 12: Bedienung
BEDIENUNG 1. Wenn Sie den Netzstecker des Geräts in die Steckdose stecken, ertönt ein Signalton und der digitale Bildschirm und alle Betriebsleuchten blinken kurz auf und gehen dann wieder aus. 2. Drücken Sie die EIN/AUS-Taste, die Displayanzeige leuchtet und das Gerät wird in den Standby-Modus versetzt. -
Seite 13: Programme
PROGRAMME • Das Gerät verfügt über eine Vielzahl an Kombinationen von Zubereitungszeit und Zubereitungstemperatur, um unterschiedlichen Kochbedürfnissen zu entsprechen. • Wenn Sie im Standby-Modus am Regler drehen, um das gewünschte Programm auszuwählen, leuchtet die entsprechende Leuchtanzeige auf. Drücken Sie nun zum Starten des Geräts die EIN/AUS-Taste. -
Seite 14: Funktionen Einstellen
FUNKTIONEN EINSTELLEN Garzeit und Temperatur einstellen 1. Wenn Sie nach der Auswahl des Programms die Zubereitungszeit und die Zubereitungstemperatur anpassen möchten, drücken Sie die ZEIT-Taste und die TEMPERATUR-Taste 2. Drücken Sie zur Anpassung der Zubereitungstemperatur die TEMPERATUR-Taste . Die entsprechende Zahl beginnt in der Displayanzeige zu blinken. Drehen Sie am Regler, um die Temperatur in 10 °C-Schritten zu erhöhen oder zu senken. -
Seite 15: Manuelle Einstellungsfunktion
Hinweis: Das Gesamtgewicht des Hähnchens sollte für die Verwendung des Drehspießes 1,2 kg nicht überschreiten. Bereiten Sie Hähnchen, die ein höheres Gewicht aufweisen, im Frittierkorb zu. TIPP: Fixieren Sie die Hähnchenschenkel und -flügel mit einem Faden. Stechen Sie vor der Zubereitung kleine Löcher in die Hähnchenschenkel, da das Fleisch an dieser Stelle sehr dick ist und schwer von der Hitze durchdrungen werden kann. -
Seite 16: Zubereitungsende
• Drücken Sie, nachdem Sie die gewünschte Zeit bis zum Start ausgewählt haben, die EIN/AUS-Taste, um die Einstellung der Zeitvorwahl abzuschließen. Mit Ausnahme der EIN/AUS-Taste und der LICHT-Taste sind alle anderen Tasten nun gesperrt. Die Zeitvorwahl kann jetzt nur noch durch erneutes Drücken der EIN/AUS-Taste abgebrochen werden. -
Seite 17: Reinigung Und Pflege
REINIGUNG UND PFLEGE WARNUNG Stromschlaggefahr! Tauchen Sie das Netzkabel, den Stecker und das Gehäuse des Gerätes nicht in Wasser oder andere Flüssigkeiten. Es kann zu Schäden am Gerät, Feuer oder Verletzungen. Hinweis: Schalten Sie das Gerät vor der Reinigung aus und ziehen Sie den Netzstecker aus der Steckdose. -
Seite 18: Hinweise Zur Entsorgung
HINWEISE ZUR ENTSORGUNG Befindet sich die linke Abbildung (durchgestrichene Mülltonne auf Rädern) auf dem Produkt, gilt die Europäische Richtlinie 2012/19/EU. Diese Produkte dürfen nicht mit dem normalen Hausmüll entsorgt werden. Informieren Sie sich über die örtlichen Regelungen zur getrennten Sammlung elektrischer und elektronischer Gerätschaften. -
Seite 19: Technical Data
Dear Customer, Congratulations on purchasing this device. Please read the following instructions carefully and follow them to prevent possible damages. We assume no liability for damage caused by disregard of the instructions and improper use. Scan the QR code to get access to the latest user manual and more product information. -
Seite 20: Accessories
ACCESSORIES Note: The following accessories are not supplied, but are available for this item under the following item numbers: Item number 10034407 10034408 10034409 Accessory Basket Steak Rack Skewer Rack Item number 10034410 10034411 Accessory Rolling Cage Fry Set SAFETY INSTRUCTIONS •... - Seite 21 • Do not place the device in the immediate vicinity of hot gas or electric ovens or in a heated oven. • If the power plug does not fi t properly, always contact a qualifi ed electrician to minimize the potential for electrical shock. Never try to manipulate the power plug in any way.
-
Seite 22: Product Overview
PRODUCT OVERVIEW Housing Cage tong Rolling cage (optional) Control panel Chicken fork Steak rack (optional) Control knob with Wire rack Skewer rack (optional) ON/OFF button Power cord Mesh basket Frying pan (optional) Inner chamber Drip tray High rack (optional) Door Basket (optional) -
Seite 23: Control Panel
CONTROL PANEL Buttons Digital Program selection display Rotisserie Time Light screen heating Preset Temper- Bottom Manual Control knob ature heating with ON/OFF button INSTALLATION Before first Use 1. Remove all packaging materials, stickers and labels. 2. Clean the basket and all other accessories with hot water, dishwashing liquid, and a non-abrasive sponge. -
Seite 24: Usage Of The Accessories
USAGE OF THE ACCESSORIES Drip tray • Open the front door. • Put the drip tray into the according to the directions shown in the figure below: Wire rack • Insert the wire rack into the unit according to the directions shown in the figure below: Mesh basket •... - Seite 25 Rotisserie fork • By 360 degree rotation, more evenly. The scroll cooking mode is the default. Below figures show the right way to cook a whole chicken with spindle and rotisserie forks: Basket with handle (optional) • Assemble the handle by clipping it into the corresponding slot of the basket. Then place food into the basket, and take the basket into the inner chamber, remove the handle, then close the door.
- Seite 26 Skewer set (optional) Rotisserie handle High rack (optional) • The high rack can be placed onto the drip tray, so that pans or cookware can be separated from bottom heating tubes. Notes for proper usage of the accessories • Choose proper accessories for different cooking. •...
-
Seite 27: Operation
There is a safety switch as shown in the picture on the right: Note: Only when the door is closed the appliance can work properly. If the switch is not touched, the screen will display “--”. OPERATION 1. When the power plug is plugged into the wall outlet, a beep sounds and the digital screen and all indicator lights flash briefly and turn off again. -
Seite 28: Programs
9. If you press the ON/OFF button during operation, the running program is cancelled, the display flashes and the appliance enters standby mode. The fan will continue to run for one minute to dissipate heat, and the appliance will then turn off automatically. -
Seite 29: Function Settings
Menu Default Default Temperature Time Heating temperature time selection Selection mode Vegetables 180 °C 12 min 50 – 220 °C 1 min – 1 h French Fries 220 °C 20 min 50 – 220 °C 1 min – 1 h Note: The larger the chicken or the amount of food, the longer the preparation time. Adjust the preparation temperature and time to your individual needs. - Seite 30 Rotating function • This function allows the food to be heated evenly. Press the ROTISSERIE button . The corresponding button icon lights up on the control panel. Press the ROTISSERIE button again to deactivate the function. • Use the roast chicken fork as shown in the figure below: Note: The total weight of the chicken should not exceed 1.2 kg when using the roast chicken fork.
- Seite 31 • As long as the program has not been started yet, the start delay can be cancelled by pressing the PRESET button . (ATTENTION: If you press the TIME button instead , the display will show the time of the selected program and not the setting of the start delay function!) •...
-
Seite 32: Cleaning And Maintenance
CLEANING AND MAINTENANCE WARNING Risk of electric shock! Do not immerse the power cord, plug or housing in water or other liquids. This may result in damage to the product, fi re or injury. Note: Before cleaning, turn off the power and unplug the appliance from the wall outlet. -
Seite 33: Hints On Disposal
HINTS ON DISPOSAL According to the European waste regulation 2012/19/EU this symbol on the product or on its packaging indicates that this product may not be treated as household waste. Instead it should be taken to the appropriate collection point for the recycling of electrical and electronic equipment. -
Seite 35: Fiche Technique
Chère cliente, cher client, Toutes nos félicitations pour l’acquisition de ce nouvel appareil. Veuillez lire attentivement et respecter les instructions de ce mode d’emploi afin d’éviter d’éventuels dommages. Nous ne saurions être tenus pour responsables des dommages dus au non-respect des consignes et à... -
Seite 36: Consignes De Sécurité
ACCESSOIRES Remarque : Les accessoires suivants ne sont pas inclus, mais sont disponibles pour cet article sous les références suivantes: Numéro d'article 10034407 10034408 10034409 Accessoire Panier Grille à steak Grille à brochettes Numéro d'article 10034410 10034411 Accessoire Panier rotatif Kit brochettes CONSIGNES DE SÉCURITÉ... - Seite 37 • Ne placez pas l‘appareil sur une surface en verre ou en bois ou des nappes sensibles à la chaleur. Assurez-vous de placer une plaque résistante à la chaleur comme protection contre la chaleur sous l‘appareil avant de l‘utiliser sur ces surfaces.
-
Seite 38: Aperçu De L'appareil
APERÇU DE L‘APPAREIL Corps de l‘appareil Pince du panier Panier rotatif (option) Panneau de Broche à poulet Grille à steak (option) commande Bouton avec fonction Grille Grille à brochettes marche/arrêt (option) Câble d‘alimentation Panier grillagé Panier à friture (option) Espace intérieur Plaque Accessoire grille d‘égouttement... -
Seite 39: Panneau De Commande
PANNEAU DE COMMANDE Touches Ecran Sélection du programme Rôtissoire Durée Chaleur Eclairage (tourner) voûte Temporisation Temp. Chaleur Manuel Bouton (Preset) de sole avec commande (ON/OFF) INSTALLATION Avant la première utilisation 1. Retirez tous les matériaux d‘emballage, les autocollants et les étiquettes. 2. -
Seite 40: Utilisation Des Accessoires
UTILISATION DES ACCESSOIRES Plaque d‘égouttement • Ouvrez la porte de l‘appareil. • Faites glisser la plaque d‘égouttement dans l’appareil (voir la figure suivante). Grille • Glissez la grille à l‘intérieur de l‘appareil (voir la figure ci-dessous). Panier grillagé • Placez les aliments que vous souhaitez préparer dans le panier grillagé. Placez celui-ci à... - Seite 41 Fourche de rôtissoire • La rotation à 360 degrés permet une cuisson uniforme. Le mode de rotation est réglé en usine. L‘illustration ci-dessous montre la méthode correcte pour cuire un poulet entier avec une fourche et une rôtissoire. Panier avec poignée (option) •...
- Seite 42 Panier rotatif (option) Kit brochettes (option) Poignée du panier rotatif...
- Seite 43 Accessoire grille surélevée (option) • La grille surélevée peut se placer sur la plaque d‘égouttage de manière à ce que les casseroles ou autres ustensiles de cuisson soient suffisamment espacés des barres de chauffage au bas de l‘appareil. Remarques sur l‘utilisation prévue des accessoires •...
-
Seite 44: Utilisation
UTILISATION 1. Lorsque vous branchez le cordon d‘alimentation dans la prise, un bip retentit, l‘écran numérique et tous les voyants clignotent brièvement, puis s‘éteignent à nouveau. 2. Appuyez sur la touche ON / OFF, l‘écran s‘allume et l‘appareil passe en mode veille. -
Seite 45: Programmes
PROGRAMMES • L‘appareil offre de nombreuses combinaisons de temps et de températures de cuisson pour répondre aux différents besoins. • Tournez le bouton en mode veille pour sélectionner le programme souhaité et allumer le voyant correspondant. Appuyez maintenant sur la touche ON / OFF pour démarrer l’appareil. -
Seite 46: Réglage Des Fonctions
RÉGLAGE DES FONCTIONS Réglage de la durée et de la température de cuisson 1. Si, après avoir sélectionné le programme, vous souhaitez régler le temps et la température de cuisson, appuyez sur les touches TIME et TEMPERATUR 2. Appuyez sur la touche TEMPERATUR-Taste ... - Seite 47 Remarque : Le poids total du poulet ne doit pas dépasser 1,2 kg pour l‘utilisation de la rôtissoire. Préparez les poulets plus lourds dans le panier à friture. CONSEIL : Fixez les cuisses et les ailes de poulet avec un fil. Faites de petits trous dans les cuisses de poulet avant de les cuire car la viande est très épaisse à...
- Seite 48 • Après avoir sélectionné l‘heure de démarrage souhaitée, appuyez sur la touche ON / OFF pour terminer le réglage du délai. À l‘exception des touches ON / OFF et LIGHT, toutes les autres touches sont maintenant verrouillées. La temporisation ne peut maintenant être annulée qu’en appuyant de nouveau sur la touche ON / OFF.
-
Seite 49: Nettoyage Et Entretien
NETTOYAGE ET ENTRETIEN MISE EN GARDE Risque d‘électrocution ! N‘immergez pas le cordon d‘alimentation, la fi che et le boîtier de l‘appareil dans de l‘eau ou tout autre liquide. Cela pourrait endommager l‘appareil, provoquer un incendie ou des blessures. Remarque : Eteignez l‘appareil avant de le nettoyer et débranchez le cordon d‘alimentation de la prise. -
Seite 50: Informations Sur Le Recyclage
INFORMATIONS SUR LE RECYCLAGE Vous trouverez sur le produit l’image ci-contre (une poubelle sur roues, barrée d‘une croix), ce qui indique que le produit se trouve soumis à la directive européenne 2012/19/ UE. Renseignez-vous sur les dispositions en vigueur dans votre région concernant la collecte séparée des appareils électriques et électroniques. -
Seite 51: Datos Técnicos
Estimado cliente, Le felicitamos por la adquisición de este producto. Lea atentamente las siguientes instrucciones y sígalas para evitar posibles daños. No asumimos ninguna responsabilidad por los daños causados por el incumplimiento de las instrucciones y el uso inadecuado. Escanee el siguiente código QR para obtener acceso a la última guía del usuario y más información sobre el producto. -
Seite 52: Indicaciones De Seguridad
ACCESORIOS Nota: Los siguientes accesorios no están incluidos, pero están disponible por separado para este artículo con el siguiente número de producto: Número de artículo 10034407 10034408 10034409 Accesorio Cesta Rejilla para filetes Espetón Número de artículo 10034410 10034411 Accesorio Cesta giratoria Set de espetón INDICACIONES DE SEGURIDAD... - Seite 53 • No utilice el aparato en ningún caso si el cable de alimentación está dañado, si el aparato presenta problemas en el funcionamiento o si se ha visto dañado de cualquier modo. • Antes de limpiar el aparato o si no lo utiliza, apáguelo y desconecte el enchufe de la toma de corriente.
-
Seite 54: Descripción Del Aparato
DESCRIPCIÓN DEL APARATO Estructura Mango para la Cesta giratoria cesta (opcional) Panel de control Espetón para pollo Rejilla para filetes (opcional) Regulador con botón Rejilla Espetón de rejilla ON/OFF (opcional) Cable de Cesta de rejilla Cesta para freír alimentación (opcional) Interior Bandeja antigoteo Accesorio de rejilla... -
Seite 55: Panel De Control
PANEL DE CONTROL Botones Pantalla Selección de programa Asado Tiempo Calor (girar) arriba Preselección Tempe- Calor Manual Regulador de tiempo ratura abajo con botón (ON/OFF) (Preset) INSTALACIÓN Antes del primer uso 1. Retire todo el material de embalaje, pegatinas y etiquetas. 2. -
Seite 56: Uso De Los Accesorios
USO DE LOS ACCESORIOS Bandeja antigoteo • Abra la puerta del aparato. • Deslice la bandeja antigoteo en el interior del aparato (véase la siguiente ilustración). Rejilla • Introduzca la rejilla dentro del aparato (véase ilustración inferior). Cesta de rejilla •... - Seite 57 Espetón • La rotación de 360 grados le permite lograr una cocción uniforme. El modo giratorio está preconfigurado de fábrica. En la ilustración siguiente se representa el método correcto para preparar un pollo entero con espetón y brochetas de asado. Cesta con asa (opcional) •...
- Seite 58 Cesta giratoria (opcional) Juego de espetón (opcional) Mango de la cesta giratoria...
- Seite 59 Accesorio de rejilla elevado (opcional) • El accesorio de rejilla elevado se puede colocar sobre la bandeja antigoteo de modo que las sartenes u otros utensilios de cocina tengan una distancia suficiente con las resistencias de la base del aparato. Indicaciones para un uso correcto de los accesorios •...
-
Seite 60: Utilización
UTILIZACIÓN 1. Cuando conecte el enchufe a la toma de corriente, suena una señal y la pantalla digital y todos los indicadores de funcionamiento parpadean brevemente y luego se apagan. 2. Pulse el botón ON/OFF, el indicador luminoso se ilumina y el aparato cambia al modo standby. -
Seite 61: Programas
PROGRAMAS • El aparato dispone de una variedad de combinaciones de tiempos y temperatura de preparación para corresponder con distintas necesidades de cocción. • Si selecciona con el regulador el modo standby para seleccionar el programa deseado, el indicador luminoso se enciende. Pulse el botón ON/OFF para iniciar el aparato. -
Seite 62: Configurar Funciones
CONFIGURAR FUNCIONES Regular tiempo de cocción y temperatura 1. Si después de la selección del programa desea ajustar el tiempo y la temperatura de preparación, pulse el botón y el botón 2. Pulse el botón para ajustar la temperatura de preparación. El dígito correspondiente empieza a parpadear en pantalla. - Seite 63 Nota: El peso total del pollo no debe superar 1,2 kg para utilizar el espetón. Prepare pollos que tengan un peso elevado en la cesta para freír. CONSEJO: Fije los muslos y las alas del pollo con un hilo. Antes de preparar, haga pequeños orificios en el muslo del pollo, pues la carne en esta zona es muy gruesa y es difícil que el calor traspase.
- Seite 64 • Pulse el botón ON/OFF después de haber seleccionado el tiempo deseado al inicio para finalizar la configuración de preselección de tiempo. Excepto el botón ON/OFF y el botón de la LUZ todos los botones se encuentran bloqueados. La preselección de tiempo solo puede interrumpirse pulsando de nuevo el botón ON/ OFF.
-
Seite 65: Limpieza Y Cuidado
LIMPIEZA Y CUIDADO ADVERTENCIA Riesgo de descarga eléctrica. No sumerja el aparato, el cable de alimentación ni el enchufe en agua ni en ningún otro líquido. Puede provocar daños en el aparato, fuego o lesiones. Nota: Apague el aparato y desconecte el enchufe de la toma de corriente antes de limpiarlo. -
Seite 66: Retirada Del Aparato
RETIRADA DEL APARATO Si el aparato lleva adherida la ilustración de la izquierda (el contenedor de basura tachado) entonces rige la normativa europea, directiva 2012/19/UE. Estos productos no pueden depositarse en los contenedores destinados a la basura común. Infórmese sobre las leyes territoriales que regulan la recogida separada de aparatos eléctricos y electrónicos. -
Seite 67: Dati Tecnici
Gentile Cliente, La ringraziamo per aver acquistato il dispositivo. La preghiamo di leggere attentamente le seguenti istruzioni per l’uso e di seguirle per evitare possibili danni tecnici. Non ci assumiamo alcuna responsabilità per danni scaturiti da una mancata osservazione delle avvertenze di sicurezza e da un uso improprio del dispositivo. -
Seite 68: Avvertenze Di Sicurezza
ACCESSORI Nota: i seguenti accessori non sono inclusi in consegna ma possono essere acquistati ai seguenti numeri articolo: Numero articolo 10034407 10034408 10034409 Accessorio Cestello Griglia per Rack spiedo bistecche Numero articolo 10034410 10034411 Accessorio Cestello rotante Set spiedo AVVERTENZE DI SICUREZZA •... - Seite 69 • Non utilizzare assolutamente il dispositivo se il cavo di alimentazione è danneggiato, se il dispositivo presenta malfunzionamenti o se è stato danneggiato in qualche modo. • Prima della pulizia e in caso di non utilizzo, spegnere il dispositivo e staccare la spina.
-
Seite 70: Descrizione Del Dispositivo
DESCRIZIONE DEL DISPOSITIVO Alloggiamento Impugnatura Cestello rotante cestello (opzionale) Pannello di controllo Spiedo per pollo Griglia per bistecche (opzionale) Manopola con tasto Griglia Rack spiedo ON/OFF (opzionale) Cavo di Cestello con griglia Cestello per friggere alimentazione (opzionale) Vano interno Contenitore di Inserto a griglia gocciolamento sollevato (opzionale) -
Seite 71: Pannello Di Controllo
PANNELLO DI CONTROLLO Tasti Display Selezione programma Rotisserie Tempo Cottura Luce (girarrosto) superiore Preselezione Tempe- Cottura Manuale Manopola tempo ratura inferiore con tasto (ON/OFF) (Preset) INSTALLAZIONE Prima del primo utilizzo 1. Rimuovere i materiali di imballaggio, gli adesivi e le etichette. 2. -
Seite 72: Utilizzo Degli Accessori
UTILIZZO DEGLI ACCESSORI Contenitore di gocciolamento • Aprire lo sportello del dispositivo. • Far scorrere il contenitore di gocciolamento nel dispositivo (vedere l’illustrazione sottostante) Griglia • Inserire la griglia nel dispositivo (v. immagine sotto). Cestello con griglia • Mettere gli alimenti da preparare nel cestello, posizionarlo all’interno del dispositivo e chiudere lo sportello (v. - Seite 73 Forca rotante • La rotazione a 360° permette una cottura omogenea. La modalità rotante è impostata in fabbrica. Nell’immagine sotto viene mostrato il modo corretto per cuocere un pollo intero con il girarrosto. Cestello con impugnatura (opzionale) • Fissare l’impugnatura, incastrandola nell’apposita fessura sul cestello. Mettere poi gli alimenti da preparare nel cestello e metterlo all’interno del dispositivo.
- Seite 74 Cestello rotante (opzionale) Set spiedo (opzionale) Impugnatura cesto rotante...
- Seite 75 Inserto a griglia sollevato (opzionale) • L’inserto a griglia sollevato può essere posizionato sopra al contenitore di gocciolamento, in modo che padelle o altri utensili da cucina siano a una distanza sufficiente dalle resistenze sul fondo del dispositivo. Avvertenze per il corretto utilizzo degli accessori •...
-
Seite 76: Utilizzo
UTILIZZO 1. Quando si inserisce la spina del dispositivo nella presa elettrica, viene emesso un segnale acustico e lo schermo digitale e tutte le spie di funzionamento lampeggiano brevemente. 2. Premere ON/OFF, il display si illumina e il display passa in standby. 3. -
Seite 77: Programmi
PROGRAMMI • Il dispositivo è dotato di numerose combinazioni di tempi e temperatura di preparazione, in modo da soddisfare diverse necessità. • Se si gira la manopola in standby per selezionare un programma, si illumina l’indicazione corrispondente. Premere ON/OFF per avviare il dispositivo. •... -
Seite 78: Impostare Le Funzioni
IMPOSTARE LE FUNZIONI Impostare tempo e temperatura di cottura 1. Se si desiderano impostare tempo e temperatura dopo la selezione del programma, premere il tasto e il tasto 2. Premere il tasto per regolare la temperatura per la preparazione. La relativa cifra inizia a lampeggiare sul display. -
Seite 79: Impostazione Manuale
Nota: il peso totale del pollo non deve superare 1,2 kg per poter utilizzare lo spiedo. Preparare il pollo nel cestello per friggere se è più pesante. NOTA: bloccare cosce e ali con un filo da cucina. Fare di piccoli fori nella coscia prima della cottura, dato che la carne in questa zona è... - Seite 80 Fine della preparazione 1. Terminata la preparazione, il dispositivo emette tre segnali acustici e smette di riscaldare. La ventola continua a funzionare per un minuto, fino a quando la temperatura interna inizia ad abbassarsi. 2. Aprire lo sportello e togliere il cestello con le pietanze pronte. Poggiare il cestello su una superficie piana e termoresistente.
-
Seite 81: Pulizia E Manutenzione
PULIZIA E MANUTENZIONE AVVERTENZA Pericolo di folgorazione! Non immergere cavo di alimentazione, spina e alloggiamento in acqua o altri liquidi. Possono risultare danni, incendi o lesioni. Nota: prima della pulizia, spegnere il dispositivo e staccare la spina. • Rimuovere gli accessori. •... -
Seite 82: Smaltimento
SMALTIMENTO Se sul prodotto è presente la figura a sinistra (il bidone dei rifiuti con le ruote), si applica la direttiva europea 2012/19/ UE. Questi prodotti non possono essere smaltiti con i rifiuti normali. Informarsi sulle disposizioni vigenti per la raccolta di dispositivi elettrici ed elettronici.