
Verwandte Anleitungen für Klarstein AeroVital easy touch


Inhaltszusammenfassung für Klarstein AeroVital easy touch
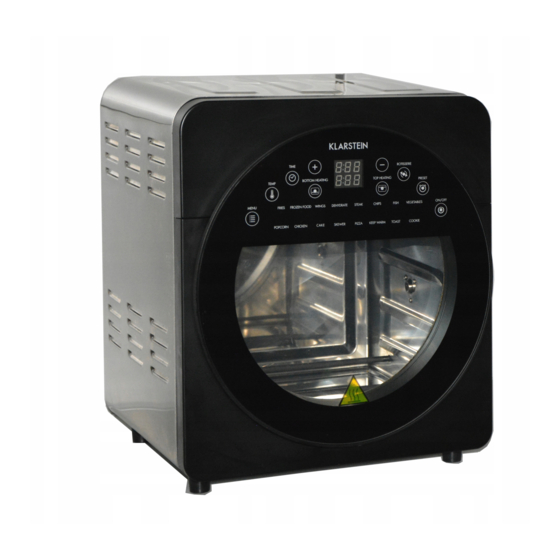
- Seite 1 AeroVital easy touch Heißluftfritteuse Hot Air Fryer Freidora de aire caliente Friteuse à air chaud Friggitrice ad aria calda 10034451 10034452...
-
Seite 3: Inhaltsverzeichnis
Sehr geehrter Kunde, wir gratulieren Ihnen zum Erwerb Ihres Gerätes. Lesen Sie die folgenden Hinweise sorgfältig durch und befolgen Sie diese, um möglichen Schäden vorzubeugen. Für Schäden, die durch Missachtung der Hinweise und unsachgemäßen Gebrauch entstehen, übernehmen wir keine Haftung. Scannen Sie den folgenden QR-Code, um Zugriff auf die aktuellste Bedienungsanleitung und weitere Informationen rund um das Produkt zu erhalten. -
Seite 4: Sicherheitshinweise
SICHERHEITSHINWEISE • Überprüfen Sie vor der ersten Verwendung, ob die Spannung Ihrer Steckdose mit der angegebenen Spannung übereinstimmt. • Tauchen Sie das Netzstromkabel oder das Gerät selbst nicht in Wasser oder andere Flüssigkeiten, um einen Stromschlag zu vermeiden. • Halten Sie Kinder und Haustiere während des Betriebs vom Gerät fern. •... -
Seite 5: Geräteübersicht
• Das Gerät ist nur für den häuslichen Gebrauch im Innenbereich ausgelegt. • Verwenden Sie das Gerät ausschließlich für den dafür vorgesehenen Verwendungszweck. • Bewahren Sie diese Bedienungsanleitung für den zukünftigen Gebrauch auf. • Kinder ab 8 Jahren, psychisch, sensorisch und körperlich eingeschränkte Menschen dürfen das Gerät nur benutzen, wenn sie vorher von einer für sie verantwortlichen Aufsichtsperson ausführlich mit den Funktionen und den Sicherheitsvorkehrungen vertraut gemacht wurden und die damit verbundenen Risiken verstehen. -
Seite 6: Zubehör Einsetzen
ZUBEHÖR EINSETZEN Auffangwanne Legen Sie die Auffangwanne immer auf den Boden des Innenraums, um Öl und Wasser während des Garvorgangs aufzufangen. Gitterrost Schieben Sie den Gitterrost in eine der drei Schienen. -
Seite 7: Drehspieß
Gitterkorb Schieben Sie den Gitterkorb in einen der beiden oberen Schienen und schließen Sie die Tür. Drehspieß Durch die 360° Drehung wird das Grillgut gleichmäßiger durchgegart. Der Drehmodus ist standardmäßig eingestellt. Befestigen Sie das Grillgut, wie auf der Abbildung dargestellt. - Seite 8 Korb mit Griff Hinweis: Der Korb ist nicht im Lieferumfang enthalten aber separat bestellbar. Befestigen Sie den Griff, indem Sie ihn in den entsprechenden Schlitz des Korbes einclipsen. Legen Sie dann das Essen in den Korb, schieben Sie den Gitterrost in die unterste Schiene und stellen Sie den Korb darauf ab.
-
Seite 9: Bedienung
Am Gerät befindet sich ein Sicherheitsschalter, den Sie drücken können, falls das Gerät nicht ordnungsgemäß funktioniert: BEDIENUNG Bedienfeld Vor dem ersten Betrieb • Entfernen Sie alle Verpackungsmaterialien, Aufkleber und Etiketten. • Reinigen Sie den Korb und alle anderen Zubehörteile mit heißem Wasser, Geschirrspülmittel und einem nicht scheuernden Schwamm. - Seite 10 Allgemeine Bedienung Stecken Sie den Stecker in die Steckdose. Der Summer ertönt, der digitale Bildschirm und alle Kontrollleuchten leuchten einmal kurz, dann geht das Display wieder aus. Drücken Sie die Taste ON/OFF, die Kontrollleuchte und das digitale Display leuchten. Das Gerät befindet sich nun im Standby-Modus. Im Standby-Modus sind alle Tasten außer ON / OFF, MENU und PRESET gesperrt.
- Seite 11 Einstellungen • Drücken Sie die Taste ON/OFF, um das Gerät einzuschalten, und drücken Sie die Taste MENU, um eine gewünschte Funktion auszuwählen. • Um die Zeit einzustellen, drücken Sie die Taste TIME und benutzen Sie die Tasten [+] und [-]. Mit jedem Tastendruck, wird die Zeit um Minute erhöht/verringert. Halten Sie die Tasten gedrückt, um die Zeit in 10-Minuten-Schritten anzupassen.
- Seite 12 Das Kochen unterbrechen Wenn Sie beim Kochen die Tür öffnen, wird das Kochen automatisch unterbrochen. Beim Schließen der Tür wird das eingestellte Garprogramm fortgesetzt, sofern die Tür nicht länger als 10 Minuten geöffnet ist. Wenn die Tür länger als 10 Minuten geöffnet bleibt, schaltet sich das Gerät automatisch aus.
-
Seite 13: Reinigung Und Pflege
REINIGUNG UND PFLEGE • Ziehen Sie den Stecker aus der Steckdose und lassen Sie das Gerät mindestens 30 Minuten lang abkühlen. • Entfernen Sie das Zubehör. • Reinigen Sie das Gerät nach jedem Gebrauch. Reinigen Sie das Zubehör und die Innenseite des Gerätes nicht mit spitzen oder scharfen Küchenutensilien oder Scheuermittel, da diese die Beschichtung beschädigen. -
Seite 14: Hinweise Zur Entsorgung
HINWEISE ZUR ENTSORGUNG Befindet sich die linke Abbildung (durchgestrichene Mülltonne auf Rädern) auf dem Produkt, gilt die Europäische Richtlinie 2012/19/EU. Diese Produkte dürfen nicht mit dem normalen Hausmüll entsorgt werden. Informieren Sie sich über die örtlichen Regelungen zur getrennten Sammlung elektrischer und elektronischer Gerätschaften. -
Seite 15: Technical Data
Dear Customer, Congratulations on purchasing this equipment. Please read this manual carefully and take care of the following hints to avoid damages. Any failure caused by ignoring the items and cautions mentioned in the instruction manual is not covered by our warranty and any liability. Scan the QR code to get access to the latest user mannual and other information about the product. -
Seite 16: Safety Instructions
SAFETY INSTRUCTIONS • Before using for the first time, check that the voltage of your power outlet matches the specified voltage. • To avoid electric shock, do not immerse the power cord or the device itself in water or other liquids. •... -
Seite 17: Product Overview
• This device is designed for indoor use only. • Use the device only for its intended purpose. • Keep this manual for future reference. • This device may be only used by children 8 years old or older and persons with limited physical, sensory and mental capabilities and / or lack of experience and knowledge, provided that they have been instructed in use of the device by a responsible person who understands the associated risks. -
Seite 18: Insert Accessories
INSERT ACCESSORIES Drip pan Always place the drip pan on the floor of the interior to collect oil and water during cooking. Wire rack Slide the wire rack into one of the three rails. - Seite 19 Mesh basket Slide the mesh basket into one of the two upper rails and close the door. Rotisserie fork The 360° rotation ensures that the food is cooked more evenly. The rotation mode is set by default. Attach the food to the rotisserie fork as shown in the illustration.
- Seite 20 Basket with Handle Note: The basket is not included but can be ordered separately. Attach the handle by clipping it into the appropriate slot in the basket. Then place the food in the basket, slide the wire rack into the lowest rail and place the basket on top. Remove the handle and close the door.
-
Seite 21: Operation
There is a safety switch on the unit that you can press if the unit does not function properly: OPERATION Control Panel Before first use • Remove all packing materials, stickers, and labels. • Clean the basket and all other accessories with hot water, dishwashing detergent, and a non-abrasive sponge. -
Seite 22: General Operation
General Operation Insert the plug into the socket. The buzzer sounds, the digital screen and all indicator lights light up briefly once, then the display goes out again. Press the ON/OFF key, the control lamp and the digital display light up. The unit is now in standby mode. - Seite 23 Settings • Press the ON/OFF button to turn on the unit and press the MENU button to select a desired function. • To set the time, press the TIME button and use the [+] and [-] buttons. Each time the button is pressed, the time is incremented/decreased by one minute.
-
Seite 24: After Cooking
Interrupt cooking If you open the door while cooking, cooking is automatically interrupted. When the door is closed, the cooking program continues as long as the door has not been open for more than 10 minutes. If the door remains open for longer than 10 minutes, the appliance switches off automatically. -
Seite 25: Cleaning And Care
CLEANING AND CARE • Unplug the appliance from the wall outlet and allow it to cool for at least 30 minutes. • Remove the accessories. • Clean the unit after each use. Do not use pointed or sharp kitchen utensils or abrasive cleaners to clean the accessories and the inside of the appliance, as these will damage the coating. -
Seite 26: Hints On Disposal
HINTS ON DISPOSAL According to the European waste regulation 2012/19/EU this symbol on the product or on its packaging indicates that this product may not be treated as household waste. Instead it should be taken to the appropriate collection point for the recycling of electrical and electronic equipment. - Seite 27 Estimado cliente: Le felicitamos por la adquisición de este producto. Lea atentamente el siguiente manual y siga cuidadosamente las instrucciones de uso con el fin de evitar posibles daños. La empresa no se responsabiliza de los daños ocasionados por un uso indebido del producto o por haber desatendido las indicaciones de seguridad.
-
Seite 28: Indicaciones De Seguridad
INDICACIONES DE SEGURIDAD • Antes de utilizar el aparato por primera vez, compruebe que la tensión de su enchufe corresponde a la tensión especificada. • No sumerja el cable de alimentación ni el producto en agua ni en ningún otro líquido para evitar descargas eléctricas. -
Seite 29: Vista General Del Aparato Y Accesorios
• El aparato solamente es apto para un uso doméstico y en interiores. • Utilice este aparato solamente con el fi n para el cual ha sido concebido. • Conserve este manual de instrucciones para futuras consultas. • Los niños mayores de 8 años y las personas con discapacidad física, sensorial o psíquica pueden utilizar el aparato si han sido previamente instruidos por su tutor o supervisor sobre el funcionamiento del mismo y conocen las funciones, las indicaciones de seguridad y los riesgos asociados. -
Seite 30: Empleo De Los Accesorios
EMPLEO DE LOS ACCESORIOS Bandeja esmaltada Coloque siempre la bandeja esmaltada en la parte baja del interior del aparato para recoger el aceite y el agua que se pueda desprender durante la cocción. Parrilla Coloque la parrilla en una de las tres posiciones posibles. - Seite 31 Cesta de malla Coloque la cesta de malla en una de las dos ranuras superiores y cierre la puerta. Asador giratorio La rotación de 360º del asador giratorio garantiza una cocción similar en toda la pieza de comida. Solo existe una única función de rotación. Coloque la pieza de comida en el asador giratorio como se muestra en la ilustración.
- Seite 32 Cesto para freír con mango Nota: El cesto para freír con mango no está incluido pero se puede adquirir por separado. Encaje el mango en la cesta empleando el enganche para ello. Coloque los alimentos en la cesta, ponga la cesta de malla en la posición más baja y encima el cesto para freír.
-
Seite 33: Funcionamiento
Existe un botón de emergencia que puede emplear en el caso de que el aparato no funcione correctamente. FUNCIONAMIENTO Panel de control Antes del primer uso • Retire todo los embalajes, pegatinas y etiquetas. • Limpie la cesta y todos los demás accesorios con agua caliente, jabón y un estropajo no abrasivo. - Seite 34 Uso general Enchufe el aparato. Sonará un pitido, la pantalla digital y todas las luces se encenderán una vez, después se apagarán de nuevo. Apriete la tecla ON/OFF, se encenderán las luces de control y la pantalla digital. El aparato esta en modo Standby. En el modo Standby solo funcionan las teclas ON/OFF, MENU y PRESET.
- Seite 35 Ajustes • Presione la tecla ON/OFF para encender el aparato y la tecla MENU para seleccionar una función. • Para seleccionar el tiempo pulse la tecla TIME y utilice las teclas [+] y [-]. Con cada pulsación incrementa o disminuye un minuto. Manténgalo pulsado para ajustar el tiempo en incrementos de 10 minutos.
- Seite 36 Interrupción de la cocción La cocción se interrumpe automáticamente si abre la puerta. El programa continuará si la puerta no permanece abierta durante más de 10 minutos. Si la puerta permanece más de 10 minutos abierta, el aparato se apaga automáticamente. Instrucciones del asador giratorio El giro de 360º...
-
Seite 37: Limpieza Y Mantenimiento
LIMPIEZA Y MANTENIMIENTO • Desenchufe el aparato y déjelo enfriar durante al menos 30 minutos. • Retire los accesorios. • Limpie el aparato después de cada uso. No limpie los accesorios o el compartimento interior con jabones o estropajos abrasivos ya que puede estropear el esmaltado. -
Seite 38: Retirada Del Aparato
RETIRADA DEL APARATO Si el aparato lleva adherida la ilustración de la izquierda (el contenedor de basura tachado) entonces rige la normativa europea, directiva 2012/19/UE. Este producto no debe arrojarse a un contenedor de basura común. Infórmese sobre las leyes territoriales que regulan la recogida separada de aparatos eléctricos y electrónicos. -
Seite 39: Fiche Technique
Chère cliente, cher client, Toutes nos félicitations pour l’acquisition de ce nouvel appareil. Veuillez lire attentivement et respecter les instructions de ce mode d’emploi afin d’éviter d’éventuels dommages. Le fabricant ne saurait être tenu pour responsable des dommages dus au non- respect des consignes de sécurité... -
Seite 40: Consignes De Sécurité
CONSIGNES DE SÉCURITÉ • Avant la première utilisation, vérifiez que la tension de votre prise secteur correspond à la tension spécifiée. • N‘immergez pas le cordon d‘alimentation ou l‘appareil lui-même dans de l‘eau ou dans tout autre liquide afin d‘éviter tout choc électrique. •... -
Seite 41: Aperçu De L'appareil
• L‘appareil est conçu pour une utilisation en intérieur uniquement. • Utilisez l‘appareil uniquement aux fi ns prévues. • Conservez ce mode d‘emploi pour vous y référer ultérieurement. • Les enfants âgés de 8 ans ou plus, les personnes ayant des capacités mentales sensorielles ou physiques réduites ne sont autorisés à... -
Seite 42: Installation Des Accessoires
INSTALLATION DES ACCESSOIRES Plateau d‘égouttement Placez toujours le plateau d‘égouttement sur le fond à l‘intérieur pour récupérer l‘huile et l‘eau de cuisson. Grille Faites glisser la grille dans l’un des trois rails. - Seite 43 Panier grillagé Faites glisser le panier grillagé dans l’un des deux rails supérieurs et fermez la porte. Broche La rotation à 360 ° permet de cuire les aliments uniformément. Le mode de rotation est défini par défaut. Fixez les aliments comme indiqué sur l‘image.
- Seite 44 Panier avec poignée Remarque : le panier n‘est pas fourni mais disponible séparément. Fixez la poignée en la clipsant dans la fente correspondante du panier. Placez ensuite les aliments dans le panier, glissez la grille dans le rail inférieur et placez le panier par-dessus.
-
Seite 45: Utilisation
L‘appareil possède un interrupteur de sécurité que vous pouvez utiliser en cas de dysfonctionnement : UTILISATION Panneau de commande Avant la première utilisation • Retirez tous les matériaux d‘emballage, autocollants et étiquettes. • Nettoyez le panier et tous les accessoires à l’eau chaude avec du liquide vaisselle et une éponge non abrasive. - Seite 46 Fonctionnement général Branchez la fiche dans la prise. La sonnerie retentit, l'écran numérique et tous les voyants s'allument brièvement, puis l'écran s'éteint à nouveau. Appuyez sur la touche ON / OFF, le voyant et l'écran numérique s'allument. L'appareil est maintenant en mode veille. En mode veille, toutes les touches sauf ON / OFF, MENU et PRESET sont verrouillées.
- Seite 47 Réglages • Appuyez sur la touche ON / OFF pour allumer l‘appareil et appuyez sur la touche MENU pour sélectionner la fonction souhaitée. • Pour régler la durée, appuyez sur la touche TIME et utilisez les touches [+] et [-]. Chaque pression sur la touche augmente / diminue la durée d‘une minute. Maintenez la touche enfoncée pour régler l‘heure par incréments de 10 minutes.
- Seite 48 Pour interrompre la cuisson Si vous ouvrez la porte pendant la cuisson, la cuisson s‘arrête automatiquement. Lorsque vous refermez la porte, le programme de cuisson sélectionné reprend sauf si la porte reste ouverte pendant plus de 10 minutes. Si la porte reste ouverte plus de 10 minutes, l‘appareil s‘éteint automatiquement.
-
Seite 49: Nettoyage Et Entretien
NETTOYAGE ET ENTRETIEN • Débranchez le cordon d‘alimentation et laissez l‘appareil refroidir pendant au moins 30 minutes. • Retirez les accessoires. • Nettoyez l‘appareil après chaque utilisation. Ne nettoyez pas les accessoires et l‘intérieur de l‘appareil avec des ustensiles de cuisine pointus ou coupants ou des produits abrasifs, car ils risqueraient d‘endommager le revêtement. -
Seite 50: Conseils Pour Le Recyclage
CONSEILS POUR LE RECYCLAGE Le pictogramme ci-contre apposé sur le produit signifie que la directive européenne 2012/19/UE s‘applique (poubelle à roues barrée d’une croix). Ces produits ne peuvent être jetés dans les poubelles domestiques courantes. Renseignez- vous concernant les règles appliquées pour la collecte d’appareils électriques et électroniques. -
Seite 51: Dati Tecnici
Gentile cliente, La ringraziamo per aver acquistato il dispositivo. La preghiamo di leggere attentamente le seguenti istruzioni per l’uso e di seguirle per evitare possibili danni tecnici. Non ci assumiamo alcuna responsabilità per danni scaturiti da una mancata osservazione delle avvertenze di sicurezza e da un uso improprio del dispositivo. -
Seite 52: Avvertenze Di Sicurezza
AVVERTENZE DI SICUREZZA • Prima del primo utilizzo, controllare che la tensione della presa elettrica utilizzata corrisponda alla tensione indicata. • Non immergere il cavo di alimentazione o il dispositivo in acqua o altri liquidi, in modo da evitare folgorazioni. •... -
Seite 53: Descrizione Del Dispositivo
• Il dispositivo è adatto solo all’utilizzo casalingo in ambienti chiusi. • Utilizzare il dispositivo solo per gli scopi previsti. • Conservare il presente manuale per future consultazioni. • Bambini a partire da 8 anni e persone con limitate capacità fi siche e psichiche possono utilizzare il dispositivo solo se sono stati istruiti in modo esaustivo da una persona responsabile del loro controllo sulle funzioni e sulle procedure di sicurezza e hanno compreso i rischi connessi. - Seite 54 INSERIRE ACCESSORI Vassoio di raccolta Posizionare sempre il vassoio sul pavimento all’interno, per raccogliere olio e acqua durante la cottura. Grata Far scorrere la griglia in una delle tre guide.
- Seite 55 Cestello a rete Far scorrere il cestello a rete in uno dei due assi superiori e chiudere lo sportello. Spiedo girevole Attraverso la rotazione di 360 °, il cibo viene consumato uniformemente. La modalità di rotazione è impostata come standard predefinito. Fissare il cibo come mostrato in figura.
- Seite 56 Cesto con manico Nota: il carrello non è incluso ma può essere ordinato separatamente. Fissare la maniglia ritagliandola nella fessura corrispondente nel cestino. Quindi posizionare il cibo nel cestino, far scorrere la griglia nell’asse inferiore e posizionare il cestino sopra. Rimuovere la maniglia e chiudere la porta. Dopo la cottura, assicurarsi che la maniglia e il cestello siano saldamente fi ssati, afferrare la maniglia, rimuovere il cestello dall‘interno e posizionarlo su una sottopentola.
- Seite 57 C‘è un interruttore di sicurezza sul dispositivo che puoi premere se il dispositivo non funziona correttamente: FUNZIONAMENTO Pannello di controllo Prima del primo utilizzo • Rimuovere tutti i materiali di imballaggio, sticher ed etichette. • Pulire il cestino e tutti gli altri accessori con acqua calda, detersivo per piatti e una spugna non abrasiva.
- Seite 58 Funzionamento in generale Inserire la spina nella presa. Verrà emesso un segnale acustico, lo schermo digitale e tutte le spie si accenderanno brevemente, quindi il display si spegnerà di nuovo. Premere il pulsante ON/OFF, la spia e il display digitale si accendono. Il dispositivo è...
- Seite 59 Impostazioni • Premere il pulsante ON / OFF per accendere l‘unità e premere il pulsante MENU per selezionare la funzione desiderata. • Per impostare l‘ora, premere il pulsante TIME e usare i pulsanti [+] e [-]. Ogni pressione del pulsante aumenta/diminuisce il tempo al minuto. Tenere premuto per regolare l‘ora in incrementi di 10 minuti.
- Seite 60 Smettere di cucinare Se si apre lo sportello durante la cottura, questa a si interrompe automaticamente. Alla chiusura dello sportello, il programma di cottura impostato continuerà a meno che lo sportello non rimanga aperto per più di 10 minuti. Se lo sposrtello rimane apertaoper più...
-
Seite 61: Pulizia E Cura
PULIZIA E CURA • Scollegare l‘apparecchio e lasciarlo raffreddare per almeno 30 minuti. • Rimuovere gli accessori. • Pulire il dispositivo dopo ogni utilizzo. Non pulire gli accessori e l‘interno dell‘elettrodomestico con utensili da cucina o agenti abrasivi affilati o taglienti, poiché... -
Seite 62: Smaltimento
SMALTIMENTO Se sul prodotto è presente la figura a sinistra (il cassonetto dei rifiuti mobile sbarrato), si applica la direttiva europea 2012/19/UE. Questi prodotti non possono essere smaltiti con i rifiuti normali. Informarsi sulle disposizioni vigenti in merito alla raccolta separata di dispositivi elettrici ed elettronici. Non smaltire i vecchi dispositivi con i rifiuti domestici.