Herunterladen Inhalt Inhalt Diese Seite drucken
Inhaltsverzeichnis

Werbung

Verfügbare Sprachen
  • DE

Verfügbare Sprachen

  • DEUTSCH, seite 4
Gaggenau
de Gebrauchs und Montageanleitung
en Operating and installation instructions
fr
Notices d'utilisation et de montage
it
Istruzioni per l'uso ed il montaggio
nl
Gebruiksaanwijzing en installatievoorschrift
RF 240

Werbung

Inhaltsverzeichnis
loading

Inhaltszusammenfassung für Gaggenau RF240

  • Seite 1 Gaggenau de Gebrauchs und Montageanleitung en Operating and installation instructions Notices d’utilisation et de montage Istruzioni per l’uso ed il montaggio Gebruiksaanwijzing en installatievoorschrift RF 240...
  • Seite 3 Inhaltsverzeichnis ..... Table of Contents ..... Sommaire .
  • Seite 4: Inhaltsverzeichnis

    Inhaltsverzeichnis Gratulation ....... . Leuchtkraft der Anzeige ....Sicherheits und Warnhinweise .
  • Seite 5: Gratulation

    Gratulation Sicherheits und Warnhinweise Mit dem Kauf Ihres neuen Gefrierschrankes haben Sie Bevor Sie das Gerät in Betrieb nehmen sich für ein modernes, qualitativ hochwertiges Haushaltsgerät entschieden. Lesen Sie die Gebrauchs und Montageanleitung aufmerksam durch! Ihr neues Gerät zeichnet sich durch einen sparsamen Sie enthalten wichtige Informationen über Aufstellen, Verbrauch an Energie aus.
  • Seite 6: Beim Gebrauch

    Dieses Gerät ist von Personen mit eingeschränkten Beim Gebrauch physischen, sensorischen oder psychischen Fähigkeiten oder mangelndem Wissen, nur mit Nie elektrische Geräte innerhalb des Gerätes Aufsicht oder ausführlicher Anleitung zu benutzen. verwenden (z. B. Heizgeräte, elektrische Eisbereiter usw.). Kinder im Haushalt Explosionsgefahr! Nie das Gerät mit einem Dampfreinigungsgerät Das Gerät ist kein Spielzeug für Kinder!
  • Seite 7: Hinweise Zur Entsorgung

    Hinweise zur Entsorgung Verpackung entsorgen Die Verpackung schützt Ihr Gerät vor Transportschäden. Alle eingesetzten Materialien sind umweltverträglich und wieder verwertbar. Bitte helfen Sie mit: Entsorgen Sie die Verpackung umweltgerecht. Über aktuelle Entsorgungswege informieren Sie sich bitte bei Ihrem Fachhändler oder bei der Gemeindeverwaltung.
  • Seite 8: Erforderliches Zubehör Und Werkzeug

    Erforderliches Zubehör und Werkzeug Einbaumaße Lieferumfang Kühl− und Gefriergerät Montageanleitung Gebrauchsanleitung Bohrschablone für Möbeltüren Installations Zubehör TorxR 20 TorxR 25 M5 x 15 Ø 4 x 20 19 mm SW 5 TorxR 15 Ø 4 x 14 Höhe des Gerätes a: 1395 mm Höhe der Nische b: 1397 mm −...
  • Seite 9: Einbau Des Gerätes

    Einbau des Gerätes Elektrischer Anschluss Warnung! Die Steckdose zum Anschluss des Gerätes muss frei Das Gerät darf nur von einem anerkannten zugänglich sein. Das Gerät an 220 − 240 V/50 Hz Installationsfachmann nach der zum Gerät Wechselstrom über eine vorschriftsmäßig installierte gehörenden Aufstellanleitung aufgestellt und Steckdose anschließen.
  • Seite 10: Türanschlag Wechseln

    Türanschlag wechseln Hinweis! Beschädigungsgefahr für Side−by−Side Geräte durch Kondenswasser! Wenn ein Side−by−Side Gerät zusammen mit einem zweiten Gerät aufgestellt wird (als Side−by−Side−Kombination) muss der Türanschlag des Auslieferungszustands bleiben. 1. Das Gerät zu 2/3 in die Nische einschieben. 2. Netzstecker ziehen. 3.
  • Seite 11: Gerät Einbauen

    Gerät einbauen 1. Die Einbaumaße prüfen. 2. Das Anschlusskabel von der Geräterückseite abnehmen. Dabei den Kabelhalter entfernen, sonst entstehen Vibrationsgeräusche! 7. Alle Befestigungswinkel (12) mit Schraube (13) auf die vorgebohrten Löcher der Gerätetür schrauben. 3. Anschlusskabel mit Hilfe einer Schnur so verlegen, dass das Gerät nach dem Einbau leicht angeschlossen werden kann.
  • Seite 12 16. Bei 16 mm dicken Möbelwänden: Die Distanzteile (14) an der Möbelseitenwand anschlagen lassen. 10. Abdeckungen (16) oben und unten auf die Befestigungswinkel (17) stecken. 11. Befestigungswinkel (17) oben und unten mit den Schrauben (19) befestigen. Schrauben nicht festziehen. Die Befestigungswinkel (17) müssen sich 17.
  • Seite 13 Das Gerät ist nun in der Tiefe richtig positioniert. Der Abstand von Vorderkante Möbelseitenwand zum Gerätekorpus beträgt umlaufend 42 mm. Hinweis! Funktionsstörung durch falsche Montage! Wenn das Abstandmaß nicht eingehalten wird, schließt die Gerätetür evtl. nicht. Dies kann zu Vereisung, Kondenswasserbildung und Funktionsstörungen führen.
  • Seite 14: Möbeltüren Montieren

    6. Bei Spanplattentüren: Möbeltüren montieren Befestigungstraverse (31) mit mindestens 6 Schrauben (34) festschrauben. Maximales Gewicht der Möbeltür: 20 kg. 7. Bei Kassettentüren: Hinweis! Befestigungstraverse (31) mit 4 Schrauben (34) am Rand festschrauben. Das zulässige Gewicht der Möbeltüre nicht überschreiten. Zu schwere Möbeltüren können die 8.
  • Seite 15 Hinweis! Die Noppen und Dichtungslippen dürfen nicht TorxR 15 anschlagen. 15. Wenn die beiden Metallkanten bündig sind (Symbol //): Befestigungslöcher in der Möbeltür vorbohren (evtl. mit einem Stichel vorstechen). 16. Gerätetür mit Schrauben (34) durch die Befestigungswinkel (12) mit der Möbeltür verschrauben.
  • Seite 16: Endanschlag Der Gerätetür Einstellen

    Endanschlag der Gerätetür einstellen 22. Obere Abdeckung (39) aufsetzen und einrasten. 23. Seitliche Abdeckung (40) aufsetzen, bis zum Die Endanschlagsfederung der Gerätetür kann bei Anschlag aufschieben und dann aufdrücken, bis sie Bedarf mit dem beiliegenden Inbusschlüssel (21) hörbar einrastet. einstellen: 24.
  • Seite 17: Nach Der Montage

    Nach der Montage 1. Alle Transportsicherungsteile entfernen. 2. Verpackung entsorgen. Siehe Kapitel "Verpackung entsorgen". Die folgenden Punkte prüfen, um sicherzustellen, dass das Gerät richtig eingebaut ist. Andernfalls kann es zu Vereisung, Kondenswasserbildung und Funktionsstörungen kommen: Die Gerätetür muss richtig schließen Die Möbeltür darf nicht am Möbelkorpus anliegen Die Dichtung muss an der griffseitigen oberen Ecke fest anliegen.
  • Seite 18: Ihr Neues Gerät

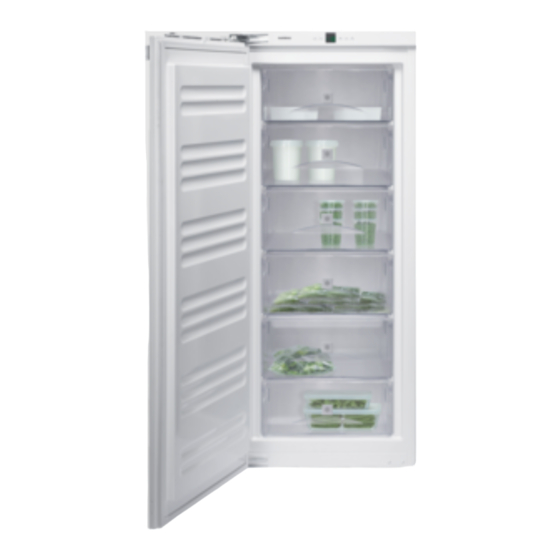
    Ihr neues Gerät 1. Bedienblende 4. Schublade 2. Kälte Akku 5. VarioSpace 3. Gefriertablett 6. Typenschild Bedienblende 1. Temperaturanzeige 5. SuperFrost Taste 2. Einstelltaste Down 6. Alarm Aus Taste 3. Einstelltaste Up 7. Symbol Kindersicherung 4. Ein/Aus Taste...
  • Seite 19: Gerät Einschalten

    Gerät einschalten SuperFrost 1. Netzstecker einstecken. Mit dieser Funktion können Sie frische Lebensmittel schnell bis auf den Kern durchfrieren. Das Gerät arbeitet mit maximaler Kälteleistung, dadurch können die Geräusche des Kälteaggregats vorübergehend lauter sein. Außerdem erhält bereits eingelagertes Gefriergut eine Kältereserve.
  • Seite 20: Türalarm

    Türalarm Kindersicherung Der Warnton ertönt immer, wenn die Gerätetür länger als Mit der Kindersicherung kann das Gerät vor 60 sec. geöffnet ist. ungewolltem Ausschalten gesichert werden. Der Warnton verstummt automatisch, wenn die Gerätetür geschlossen wird. Türalarm ausschalten: 1. Taste SuperFrost ca. 5 Sekunden drücken. Das Display zeigt ein c"...
  • Seite 21: Leuchtkraft Der Anzeige

    Leuchtkraft der Anzeige Ausstattung Die Helligkeit der Temperaturanzeige kann an die Einzelne Schublade oder Abstellfläche mit max. 25 kg Lichtverhältnisse im Aufstellraum angepasst werden. Gefriergut belasten. Schubfächer 1. Taste SuperFrost ca. 5 Sekunden drücken. Das Display zeigt ein c" für Kindersicherung. Die Taste SuperFrost blinkt.
  • Seite 22: Gefriertablett

    Gefriertablett Kälte Akkus Mit dem Gefriertablett können Beeren, Kräuter, Gemüse Die Kälte−Akkus verhindern bei Stromausfall, dass die und anderes kleines Gefriergut eingefroren werden, ohne Temperatur zu schnell ansteigt. dass dieses zusammenfriert. Das Gefriergut bleibt weitestgehend in seiner Form erhalten, und das spätere Portionieren ist leichter.
  • Seite 23: Gefrieren Und Lagern

    Gefrieren und Lagern Verpackung mit Inhalt und Einfrier Datum Tiefkühlkost einkaufen beschriften. Beachten Sie bereits beim Einkauf von Tiefkühlkost: Als Verpackung ungeeignet sind: − Überprüfen Sie die Verpackung, ob sie beschädigt Packpapier, Pergamentpapier, Cellophan, Müllbeutel ist. und gebrauchte Einkaufstüten. − Überprüfen Sie das Haltbarkeits Datum.
  • Seite 24: Maximales Gefriervermögen

    Maximales Gefriervermögen Lebensmittel sollen möglichst schnell bis zum Kern 4. Kälte−Akkus oben auf das Gefriergut legen. durchgefroren werden. Nur so bleiben Vitamine, 5. Gefriergut evtl. in der Schublade in Zeitungspapier Nährwert, Aussehen und Geschmack erhalten. oder Decken einschlagen und an einem kühlen Ort Angaben über das maximale Gefriervermögen in aufbewahren.
  • Seite 25: Gerät Reinigen

    Gerät reinigen Gerüche Weiche Putztücher und einen Allzweckreiniger mit Falls unangenehme Gerüche bemerkbar sind: neutralem pH−Wert verwenden. Im Geräteinnenraum nur lebensmittelunbedenkliche Reiniger und Pflegemittel 1. Gerät ausschalten. verwenden. 2. Alle Lebensmittel aus dem Gerät herausnehmen. Warnung! 3. Innenraum reinigen. Siehe Abschnitt Gerät reinigen".
  • Seite 26: Kleine Störungen Selbst Beheben

    Kleine Störungen selbst beheben Bevor Sie den Kundendienst rufen: Überprüfen Sie, ob Sie die Störung aufgrund der folgenden Hinweise selbst beheben können. Sie müssen die Kosten für Beratung durch den Kundendienst selbst übernehmen − auch während der Garantiezeit! Störung Mögliche Ursachen Abhilfe Gerät hat keine Kühlleistung.
  • Seite 27: Kundendienst

    Kundendienst Einen Kundendienst in Ihrer Nähe finden Sie im Telefon buch oder im Kundendienst Verzeichnis. Geben Sie bitte dem Kundendienst die Erzeugnisnummer (E Nr.) und die Fertigungsnummer (FD Nr.) des Gerätes an. Sie finden diese Angaben auf dem Typenschild. E−Nr. FD−Nr.
  • Seite 28 Table of contents Congratulations ......Appliance illuminating power ....Safety and warning notes .
  • Seite 29: Congratulations

    Congratulations Safety and warning notes By purchasing your new upright freezer, you have Before you put the appliance into chosen a modern, high quality household appliance. operation Your new appliance features economic energy Read the usage and assembly instructions carefully. consumption.
  • Seite 30: During Use

    During use Children in the household Never use electrical appliances inside the freezer The appliance is not a child’s toy. (e.g. heaters, electric ice makers, etc.). For appliances with a door lock: Keep the key out of Risk of explosion. the reach of children.
  • Seite 31: Notes On Disposal

    Notes on disposal Disposing of packaging The packaging protects your appliance from damage during transport. All of the materials used are environmentally friendly and can be recycled. Please help by disposing of the packaging in an environmentally responsible manner. You can obtain information about current disposal routes from your specialist dealer or local council.
  • Seite 32: Required Tools And Accessories

    Required tools and accessories Installation dimensions Scope of delivery Refrigerator and freezer unit Assembly instructions Instructions for use Drilling template for kitchen unit doors Installation accessories TorxR 20 TorxR 25 M5 x 15 Ø 4 x 20 19 mm W/F 5 TorxR 15 Ø...
  • Seite 33: Installing The Appliance

    Installing the appliance Electrical connection Warning! The socket for connecting the appliance must be freely The appliance may only be set up and connected by accessible. Connect the appliance to a correctly an accredited installation specialist in line with the installed socket providing 220 240 V / 50 Hz installation instructions pertaining to the appliance.
  • Seite 34: Changing The Side At Which The Door Is Hinged

    Changing the side at which the door is hinged Information! Risk of damage from condensation for side by side appliances. If a side by side appliance is set up together with a second appliance (as a side by side combination), the door must remain hinged on the same side as when it was delivered.
  • Seite 35: Fitting The Appliance

    Fitting the appliance 1. Check the installation dimensions. 2. Remove the connecting cable from the rear of the appliance. In doing so, remove the cable clip to prevent vibration noises. 7. Screw all mounting angles (12) with the screw (13) in the pre drilled holes on the appliance door.
  • Seite 36 16. If the kitchen unit walls are 16 mm thick: Allow the spacers (14) to butt against the side wall of the kitchen unit. 10. Place the covers (16) into the mounting angle at the top and bottom (17). 11. Secure the mounting angle (17) at the top and bottom using the screws (19).
  • Seite 37 The appliance is now positioned in the correct depth position. The distance from the front end of the kitchen unit side wall to the body of the appliance is 42 mm in circumference. Information! Malfunction due to incorrect installation. If the installation dimension is not adhered to, the appliance door may not close.
  • Seite 38: Fitting The Kitchen Unit Doors

    6. With fixing plate doors: Fitting the kitchen unit doors Tighten the mounting crossmember (31) with at least 6 screws (34). Maximum weight of the kitchen unit door: 20 kg. 7. With cassette doors: Information! Tighten the mounting crossmember (31) at the edge with 4 screws (34).
  • Seite 39 Information! The knobs and sealing lips must not butt against it. TorxR 15 15. If the two metal edges are flush (// symbol): Drill securing holes in the kitchen unit door (punch the holes first using a gouge, if necessary). 16.
  • Seite 40: Adjusting The End Stop For The Appliance Door

    Adjusting the end stop for the appliance door 22. Mount on the upper cover (39) and engage it. 23. Mount on the side cover (40), slide it in as far as the limit stop then press it until you hear it engage. The end stop suspension for the appliance door can be adjusted, if necessary, using the enclosed socket 24.
  • Seite 41: After Installation

    After installation 1. Remove all transport locking elements. 2. Disposing of packaging. See the section "Disposing of packaging". Check the following points to make sure that the appliance is installed correctly. Otherwise, the appliance may ice up, condensation may form or malfunctions may occur: The appliance door must close properly.
  • Seite 42: Your New Appliance

    Your new appliance 1. Control panel 4. Drawer 2. Rechargeable refrigeration battery 5. VarioSpace 3. Freezer tray 6. Rating plate Control panel 1. Temperature display 5. SuperFrost button 2. Down adjustment button 6. Alarm off button 3. Up adjustment button 7.
  • Seite 43: Switching On The Appliance

    Switching on the appliance SuperFrost 1. Plug the power cord into the mains. Using this function, you can freeze food quickly, right to the core. The appliance works with maximum cooling output, which means that appliance noise may temporarily increase. Moreover, there is a cooling reserve for frozen food that you have already stored.
  • Seite 44: Door Alarm

    Door alarm Childproof lock The audible warning signal always sounds if the The childproof lock allows the appliance to be secured appliance door is open for longer than 60 seconds. against being accidentally switched off. The audible warning signal goes off automatically when the appliance door is closed.
  • Seite 45: Appliance Illuminating Power

    Appliance illuminating power Features You can adjust the brightness of the temperature display Do not load individual drawers or shelves with more than according to the light conditions in the room. 25 kg of frozen foods. Drawers 1. Press the SuperFrost button and hold it for approx. 5 seconds.
  • Seite 46: Freezer Tray

    Freezer tray Rechargeable refrigeration batteries The freezer tray allows you to freeze berries, herbs, The rechargeable refrigeration batteries prevent the vegetables and other small frozen food items without temperature from rising too rapidly in the event of a them freezing together. The frozen foods retain their power failure.
  • Seite 47: Freezing And Storing

    Freezing and storing The following are unsuitable as packaging: Purchasing frozen foods Wrapping paper, greaseproof paper, cellophane, rubbish Pay attention when buying frozen foods: bags and used shopping bags. − Make sure that the packaging is not damaged. The following are suitable as packaging: −...
  • Seite 48: Maximum Freezing Capacity

    Maximum freezing capacity Food should be frozen thoroughly as quickly as possible. 4. Place the rechargeable refrigeration batteries on top This is the only way to retain vitamins, nutritional value, of the frozen food. appearance and taste. 5. If necessary, wrap frozen food in the drawer in You will find information on the maximum freezing newspaper or blankets and store it in a cool place.
  • Seite 49: Cleaning The Appliance

    Cleaning the appliance Odours Use soft cleaning cloths and an all purpose cleaner with If you notice unpleasant odours: a neutral pH value. Inside the appliance, use only food safe detergent and cleaning products. 1. Switch off the appliance. 2. Remove all food from the appliance. Warning! 3.
  • Seite 50: Rectifying Minor Faults Yourself

    Rectifying minor faults yourself Before you call the after sales service: Check whether you can rectify the fault yourself by using the notes below. You must bear the costs for consultations with the after sales service yourself − even during the warranty period. Fault Possible causes Remedy...
  • Seite 51: After Sales Service

    After sales service You can find an after sales service in your area in the telephone directory or the after sales service directory. When you call the after sales service, quote your appliance product number (E Nr.) and the production number (FD Nr.) of your appliance.
  • Seite 52 Sommaire Félicitations ! ......Luminosité de l’affichage ....Consignes de sécurité...
  • Seite 53: Félicitations

    Félicitations ! Consignes de sécurité et avertissements En achetant ce nouveau congélateur, vous avez fait le Avant la mise en service de l’appareil choix d’un appareil électroménager moderne et de haute qualité. Veuillez lire attentivement la notice de montage et d’utilisation.
  • Seite 54: Pendant L'utilisation

    Ne raclez pas le givre ou les aliments surgelés pris Pendant l’utilisation dans la glace à l’aide d’un couteau ou d’un objet pointu. Les éléments du circuit du fluide frigorigène N’utilisez jamais d’appareils électriques à l’intérieur risquent d’être endommagés. Toute fuite peut de l’appareil (par ex.
  • Seite 55: Indications Concernant La Mise Au Rebut

    Indications concernant la mise au rebut Mise au rebut de l’emballage L’emballage protège l’appareil contre les avaries de transport. Tous les matériaux qui le constituent sont non polluants et recyclables. Aidez−nous à recycler l’emballage en respectant l’environnement. Pour savoir comment éliminer l’emballage de manière écologique, veuillez vous adresser à...
  • Seite 56: Accessoires Et Outils Nécessaires

    Accessoires et outils nécessaires Cotes d’encastrement Éléments fournis Réfrigérateur−congélateur Notice de montage Notice d’utilisation Gabarit de perçage pour les portes du meuble Accessoires pour l’installation TorxR 20 TorxR 25 M5 x 15 Ø 4 x 20 19 mm OC 5 TorxR 15 Ø...
  • Seite 57: Encastrement De L'appareil

    Encastrement de l’appareil Branchement électrique Avertissement ! La prise de courant servant au branchement de L’appareil doit exclusivement être installé et branché l’appareil doit être facilement accessible. L’appareil doit par un professionnel habilité en respectant les être branché sur une prise secteur en indications de la notice d’installation de l’appareil.
  • Seite 58: Inversion Du Sens D'ouverture De La Porte

    Inversion du sens d’ouverture de la porte Remarque ! La condensation risque d’endommager deux appareils placés côte à côte. Lorsque deux appareils sont placés côte à côte (combinaison "Side−by−Side"), la butée dont est équipée la porte à la livraison ne doit pas être enlevée.
  • Seite 59: Montage De L'appareil

    Montage de l’appareil 1. Contrôlez les cotes d’encastrement. 2. Détachez le câble de raccordement de la paroi arrière de l’appareil. Enlevez également l’attache de câble pour éviter des bruits de vibration. 7. Fixez toutes les cornières (12) avec les vis (13) dans les trous pré−percés sur la porte de l’appareil.
  • Seite 60 15. Poussez l’appareil dans la niche, jusqu’à ce que les habillages (16) soient en contact avec la paroi latérale du meuble. 16. Pour un meuble aux parois de 16 mm d’épaisseur : Laissez l’entretoise (14) en contact avec la paroi latérale du meuble.
  • Seite 61 L’appareil est à présent bien positionné en profondeur. 25. Fixez l’habillage ajusté (16) sur la cornière L’écart entre le bord avant de la paroi latérale du meuble supérieure (17). et l’appareil est d’environ 42 mm tout autour de ce dernier. Remarque ! Risque de dysfonctionnement en cas de montage incorrect.
  • Seite 62: Montage Des Portes Du Meuble

    6. Pour les portes en panneaux de particules : Montage des portes du meuble Fixez la traverse (31) avec 6 vis (34) au minimum. Poids maximal de la porte du meuble : 20 kg. 7. Pour les portes alvéolaires : Fixez la traverse (31) avec 4 vis (34) sur le bord.
  • Seite 63 Remarque ! Les picots et les lèvres d’étanchéité ne doivent pas TorxR 15 venir en butée. 15. Lorsque les deux bords en métal sont sur le même plan (symbole //) : Pré−percez des trous de montage dans la porte du meuble (utilisez éventuellement un poinçon au préalable).
  • Seite 64: Réglage De La Butée De La Porte De L'appareil

    Réglage de la butée de la porte de l’appareil 22. Installez l’habillage supérieur (39) et enclenchez−le. 23. Placez l’habillage latéral (40), poussez−le jusqu’en butée et appuyez, vous devez l’entendre Si cela s’avère nécessaire, la résilience de la butée de la s’enclencher.
  • Seite 65: Après Le Montage

    Après le montage 1. Enlevez tous les éléments de protection qui ont servis pour le transport. 2. Éliminez l’emballage. Voir section "Mise au rebut de l’emballage". Contrôlez les points suivants pour vérifier que l’appareil est bien encastré. Si l’appareil n’est pas bien encastré, cela peut entraîner la formation de givre ou de condensation ainsi que des dysfonctionnements : La porte de l’appareil doit fermer correctement...
  • Seite 66: Votre Nouvel Appareil

    Votre nouvel appareil 1. Bandeau de commande 4. Tiroir 2. Accumulateur de froid 5. VarioSpace 3. Plateau de congélation 6. Plaque signalétique Bandeau de commande 1. Affichage de la température 5. Touche de congélation rapide 2. Touche de réglage − (Down) 6.
  • Seite 67: Mise En Marche De L'appareil

    Mise en marche de l’appareil Congélation rapide 1. Branchez la fiche mâle. Grâce à cette fonction, vous pouvez congeler des produits alimentaires en abaissant leur température à c ur le plus rapidement possible. L’appareil fonctionne alors à pleine puissance et il est possible que le compresseur fasse temporairement plus de bruit.
  • Seite 68: Alarme Porte Ouverte

    Alarme Porte ouverte Sécurité enfants L’alarme se déclenche de manière systématique lorsque La sécurité enfants permet d’éviter que l’appareil soit la porte reste ouverte pendant plus de 60 secondes arrêté de manière involontaire. Elle se coupe automatiquement à la fermeture de la porte.
  • Seite 69: Luminosité De L'affichage

    Luminosité de l’affichage Équipement La luminosité de l’affichage de la température peut être Chaque tiroir ou étagère ne doit pas contenir plus adaptée à l’éclairage de la pièce où se trouve l’appareil. de 25 kg d’aliments surgelés. Compartiments 1. Appuyez env. 5 secondes sur la touche de congélation rapide.
  • Seite 70: Plateau De Congélation

    Plateau de congélation Accumulateurs de froid Le plateau de congélation permet de congeler les baies, En cas de coupure de courant, les accumulateurs de les fines herbes, les légumes ainsi que les autres froid évitent que la température chute trop vite. aliments de petite taille sans que ceux−ci ne s’agglomèrent.
  • Seite 71: Congélation Et Stockage

    Congélation et stockage Fermez hermétiquement l’emballage. Achat de produits surgelés Indiquez le contenu et la date de congélation sur Lorsque vous achetez des produits surgelés, veuillez l’emballage. respecter les consignes suivantes : Emballages non appropriés : − vérifiez que l’emballage n’est pas abîmé ; Papier d’emballage, papier sulfurisé, cellophane, sacs −...
  • Seite 72: Capacité Maximale De Congélation

    Capacité maximale de congélation Les produits alimentaires doivent être congelés en 3. Débranchez la fiche mâle ou retirez le fusible. abaissant leur température à c ur le plus rapidement 4. Placez les accumulateurs de froid en haut des possible. Cela permet de préserver leurs vitamines, leur aliments surgelés.
  • Seite 73: Nettoyage De L'appareil

    Nettoyage de l’appareil Odeurs Utilisez des chiffons doux et un nettoyant universel au Si vous sentez des odeurs désagréables : pH neutre. Pour l’intérieur de l’appareil, utilisez uniquement des nettoyants et des produits d’entretien 1. Éteignez l’appareil. sans danger pour la santé. 2.
  • Seite 74: Remédier Soi−Même Aux Petites

    Remédier soi−même aux petites anomalies de fonctionnement Avant d’appeler le service après−vente : Vérifiez si vous ne pouvez pas remédier vous−même à l’anomalie constatée à l’aide des indications suivantes. Si vous faites appel à un technicien par le biais du service après−vente, sa prestation vous sera facturée, même pendant la période de garantie.
  • Seite 75: Service Après−Vente

    Service après−vente Pour connaître le service après−vente situé le plus près de chez vous, consultez l’annuaire téléphonique ou le répertoire des services après−vente. Veuillez indiquer au service après−vente le numéro de série (E−Nr.) ainsi que le numéro de fabrication (FD−Nr.) de votre appareil. Vous trouverez ces informations sur la plaque signalétique.
  • Seite 76 Indice Congratulazioni ......Luminosità del display ..... Indicazioni di sicurezza e di avvertimento .
  • Seite 77: Congratulazioni

    Congratulazioni Indicazioni di sicurezza e di avvertimento Acquistando il vostro nuovo congelatore avete scelto un Prima di mettere in funzione elettrodomestico moderno e di alta qualità. l’apparecchio Il vostro nuovo apparecchio si contraddistingue per un leggere attentamente le istruzioni per l’uso e il consumo energetico molto ridotto.
  • Seite 78: Durante L'uso

    Questo apparecchio può essere utilizzato da Durante l’uso persone con capacità fisiche, sensoriali o psichiche limitate o cui manchino le necessarie conoscenze, Non usare mai apparecchi elettrici all’interno di solo se sorvegliate e debitamente istruite. questo apparecchio (ad es. apparecchi per il riscaldamento o per la produzione di ghiaccio, ecc.).
  • Seite 79: Avvertenze Per Lo Smaltimento

    Avvertenze per lo smaltimento Smaltimento dell’imballaggio L’imballaggio protegge l’apparecchio da danni durante il trasporto. Tutti i materiali impiegati sono compatibili con l’ambiente e riciclabili. Si invita a collaborare: Si prega di smaltire gli imballaggi nel rispetto dell’ambiente. Il rivenditore o l’amministrazione comunale forniscono informazioni sulle attuali possibilità...
  • Seite 80: Accessori E Utensili Necessari

    Accessori e utensili necessari Dimensioni di ingombro Volume di fornitura Frigorifero e congelatore Istruzioni per il montaggio Istruzioni per l’uso Maschera di foratura per le porte dei mobili Accessori per l’installazione TorxR 20 TorxR 25 M5 x 15 Ø 4 x 20 19 mm SW 5 TorxR 15...
  • Seite 81: Montaggio Dell'apparecchio

    Montaggio dell’apparecchio Allacciamento elettrico Avvertenza! La presa per il collegamento dell’apparecchio deve L’apparecchio deve essere installato e collegato solo essere accessibile senza impedimenti. Allacciare da un tecnico installatore specializzato, seguendo le l’apparecchio ad una presa di rete di 220 − 240 V/50 Hz relative istruzioni per l’installazione.
  • Seite 82: Modifica Dell'apertura Della Porta

    Modifica dell’apertura della porta Indicazione! Rischio di danneggiamento da acqua di condensa per apparecchi side by side! Quando si installa un apparecchio side by side insieme a un secondo apparecchio (come combinazione side by side), l’apertura della porta deve rimanere uguale a quella esistente alla consegna.
  • Seite 83: Montaggio Dell'apparecchio

    Montaggio dell’apparecchio 1. Verificare le dimensioni di ingombro. 2. Rimuovere il cavo di alimentazione dal lato posteriore dell’apparecchio, togliendo anche il supporto del cavo, altrimenti potrebbero prodursi rumori dovuti alle vibrazioni! 7. Avvitare tutte le squadrette di fissaggio (12) con le viti (13) nei fori già...
  • Seite 84 16. Per pareti di mobili di spessore pari a 16 mm: Fare in modo che i distanziatori (14) tocchino contro la parete laterale del mobile. 10. Applicare le coperture (16) in alto e in basso sulle squadrette di fissaggio (17). 11.
  • Seite 85 L’apparecchio è ora correttamente posizionato in 25. Agganciare la copertura staccata (16) alla squadretta profondità. La distanza tra il bordo anteriore della parete di fissaggio superiore (17). laterale del mobile e il corpo dell’apparecchio è di 42 mm. Indicazione! Un montaggio scorretto può danneggiare il funzionamento! Se le distanze non vengono rispettate, è...
  • Seite 86: Montaggio Delle Porte Dei Mobili

    6. In caso di porte in pannelli di truciolare: Montaggio delle porte dei mobili Fissare la traversa di fissaggio (31) con almeno 6 viti (34). Peso massimo della porta del mobile: 20 kg. 7. Per porte a telaio: Indicazione! Fissare la traversa di fissaggio (31) al bordo con 4 viti (34).
  • Seite 87 Indicazione! I nottolini e i labbri di tenuta non devono toccare. TorxR 15 15. Quando i due spigoli metallici sono a filo (simbolo //): pre−perforare i fori di fissaggio nella porta del mobile (eventualmente inciderli in anticipo con un punteruolo). 16.
  • Seite 88: Regolazione Dell'arresto Di Fine Corsa Della Porta Dell'apparecchio

    Regolazione dell’arresto di fine corsa della porta dell’apparecchio 22. Collocare fino allo scatto la copertura superiore (39). 23. Collocare la copertura laterale (40), spingerla fino all’arresto e poi premerla, fino a quando va in All’occorrenza è possibile regolare la sospensione posizione con uno scatto udibile.
  • Seite 89: Al Termine Del Montaggio

    Al termine del montaggio 1. Eliminare tutti i componenti di sicurezza usati durante il trasporto. 2. Smaltire l’imballaggio. Vedere il capitolo "Smaltimento dell’imballaggio". Controllare i seguenti punti, per assicurarsi che l’apparecchio sia stato montato correttamente. In caso contrario possono verificarsi formazione di ghiaccio, formazione di acqua di condensa e guasti al funzionamento.
  • Seite 90: Il Nuovo Apparecchio

    Il nuovo apparecchio 1. Pannello di comando 4. Cassetto 2. Accumulatore di freddo 5. VarioSpace 3. Vassoio di congelamento 6. Targhetta di identificazione Pannello di comando 1. Display della temperatura 5. Tasto SuperFrost 2. Tasto di impostazione Giù 6. Tasto Alarm OFF 3.
  • Seite 91: Attivazione Apparecchio

    Attivazione apparecchio SuperFrost 1. Inserire la spina di alimentazione. Con questa funzione è possibile congelare integralmente alimenti freschi in modo molto rapido. L’apparecchio lavora alla capacità di refrigerazione massima, perciò il rumore del compressore può risultare temporaneamente più forte. Inoltre gli alimenti surgelati già presenti conservano una riserva di freddo.
  • Seite 92: Allarme Porta

    Allarme porta Sicurezza bambino Il segnale acustico di allarme viene emesso ogni volta Con la sicurezza bambino è possibile assicurare che la porta dell’apparecchio resta aperta per più di l’apparecchio contro la possibilità che venga 60 secondi. inavvertitamente disattivato. Il segnale acustico si interrompe automaticamente, quando la porta viene chiusa.
  • Seite 93: Luminosità Del Display

    Luminosità del display Dotazione La luminosità del display della temperatura può essere Su ogni singolo cassetto o ripiano si possono disporre al adattata alle condizioni di luminosità del locale. massimo 25 kg di cibi congelati. Cassetti 1. Premere il tasto SuperFrost per circa 5 secondi. Il display visualizza una c"...
  • Seite 94: Vassoio Di Congelamento

    Vassoio di congelamento Accumulatori di freddo Con questo vassoio è possibile congelare bacche, erbe, In caso di interruzione di corrente, gli accumulatori di verdure e altri cibi di piccole dimensioni senza che questi freddo impediscono che la temperatura cresca troppo si attacchino in una sola massa.
  • Seite 95: Congelazione E Conservazione

    Congelazione e conservazione Riportare sulla confezione il contenuto e la data di Acquisto dei cibi surgelati congelazione. Già al momento dell’acquisto dei cibi surgelati è Non sono adatti per impacchettare alimenti da necessario osservare i seguenti punti: congelare: − Controllare che la confezione non sia danneggiata. Carta da pacchi, carta pergamena, cellofan, sacchetti per la spazzatura e sacchetti della spesa usati.
  • Seite 96: Massima Capacità Di Congelamento

    Massima capacità di congelamento Gli alimenti devono congelarsi il più velocemente 4. Appoggiare gli accumulatori di freddo sopra i cibi possibile fino al loro interno. Solo così si conservano le congelati. vitamine, il potere nutritivo, l’aspetto e il gusto. 5. Disporre i cibi congelati eventualmente in uno dei Indicazioni sulla massima capacità...
  • Seite 97: Pulizia Dell'apparecchio

    Pulizia dell’apparecchio Odori Utilizzare panni morbidi e un detergente universale a pH Nel caso si percepiscano odori sgradevoli: neutro. All’interno dell’apparecchio, utilizzare solo detergenti ammessi per l’uso in campo alimentare. 1. Disattivare l’apparecchio. 2. Togliere tutti gli alimenti. Avvertenza! 3. Pulire l’interno. Vedere la sezione Pulizia Non pulire mai l’apparecchio con una pulitrice a dell’apparecchio".
  • Seite 98: Eliminazione Di Piccole Anomalie

    Eliminazione di piccole anomalie Prima di rivolgersi al servizio di assistenza tecnica: Verificare se non è possibile eliminare autonomamente l’anomalia, sulla base delle seguenti indicazioni. I costi del diritto di chiamata al servizio assistenza sono a carico del cliente − anche durante il periodo di garanzia! Guasto Possibili cause Rimedi...
  • Seite 99: Servizio Di Assistenza Tecnica

    Servizio di assistenza tecnica Per trovare il servizio assistenza più vicino consultare la guida telefonica o il relativo elenco. Si prega di indicare al servizio di assistenza clienti il codice del prodotto (N° E) e il numero di fabbricazione (N° FD) dell’apparecchio.
  • Seite 100 Inhoud Gefeliciteerd ......Helderheid van de indicatie ....Veiligheidsvoorschriften en waarschuwingen Uitrusting .
  • Seite 101: Gefeliciteerd

    Gefeliciteerd Veiligheidsvoorschriften en waarschuwingen Met de aankoop van uw nieuwe vrieskast heeft u gekozen voor een modern, kwalitatief hoogwaardig Voordat u het apparaat in bedrijf neemt huishoudelijk apparaat. Lees de gebruiks− en montagehandleiding aandachtig Uw nieuwe apparaat kenmerkt zich door een zuinig door! energieverbruik.
  • Seite 102: Bij Gebruik

    Dit toestel mag door personen met beperkte fysieke, Bij gebruik sensorische of psychische capaciteiten of gebrekkige kennis alleen onder toezicht of na Nooit elektrische apparaten in het apparaat uitvoerige instructies gebruikt worden. gebruiken (bijv. verwarmingsapparaten, elektrische ijsdispensers etc.). Kinderen in het gezin Explosiegevaar! Nooit het apparaat met een stoomreinigingsapparaat Het apparaat is geen speelgoed voor kinderen!
  • Seite 103: Instructies Voor Afvoer

    Instructies voor afvoer Verpakking afvoeren De verpakking beschermt het apparaat tegen transportschade. Alle gebruikte materialen zijn milieuvriendelijk en geschikt voor hergebruik. Werk a.u.b. mee aan het: Milieuvriendelijk afvoeren van het verpakkingsmateriaal. Informeer over de actuele afvoermethoden bij uw vakhandelaar of gemeente. d Verpakking en delen daarvan niet in de buurt van kinderen laten.
  • Seite 104: Vereist Toebehoren En Gereedschap

    Vereist toebehoren en gereedschap Inbouwmaten Leveromvang Koel− en diepvriestoestel Montagehandleiding Gebruiksaanwijzing Boorsjabloon voor meubeldeuren Installatietoebehoren TorxR 20 TorxR 25 M5 x 15 Ø 4 x 20 19 mm SW 5 TorxR 15 Ø 4 x 14 Hoogte van het apparaat a: 1395 mm Hoogte van de nis b: 1397 mm −...
  • Seite 105: Inbouw Van Het Apparaat

    Inbouw van het apparaat Elektrische aansluiting Waarschuwing! Het stopcontact voor de aansluiting van het toestel moet Het apparaat mag uitsluitend door een erkende vrij toegankelijk zijn. Het toestel via een reglementair installateur overeenkomstig de bij het apparaat geïnstalleerd stopcontact op 220 − 240 V/50 Hz horende installatiehandleiding worden geplaatst en wisselstroom aansluiten.
  • Seite 106: Deuraanslag Omwisselen

    Deuraanslag omwisselen Aanwijzing! Beschadigingsgevaar voor Side−by−Side apparaten als gevolg van condenswater! Wanneer een Side−by−Side apparaat samen met een tweede apparaat wordt geplaatst (als Side−by−Side−combinatie) dan moet de deuraanslag van de uitleveringstoestand worden gehandhaafd. 1. Het apparaat voor 2/3 in de nis schuiven. 2.
  • Seite 107: Toestel Inbouwen

    Toestel inbouwen 1. De inbouwmaten controleren. 2. De aansluitkabel van de achterkant van het apparaat nemen. Daarbij de kabelbinder verwijderen, anders kan er trillingsgeluid ontstaan! 7. Alle bevestigingshoeken (12) met schroef (13) op de voorgeboorde gaten van de apparaatdeur schroeven. 3.
  • Seite 108 16. Bij 16 mm dikke meubelwanden: De afstandstukken (14) tegen de meubelwand laten aanslaan. 10. Afdekkingen (16) boven en onder op de bevestigingshoek (17) steken. 11. Bevestigingshoek (17) boven en onder met de schroeven (19) bevestigen. Schroeven niet vastdraaien. De bevestigingshoeken (17) moet men 17.
  • Seite 109 Het apparaat is nu in de diepterichting gepositioneerd. De afstand van de voorkant van de meubelzijwand tot het apparaatcorpus bedraagt rondom 42 mm. Aanwijzing! Functiestoring door verkeerde montage! Wanneer de afstandsmaat niet wordt aangehouden, kan het zijn dat de apparaatdeur niet sluit. Dit kan leiden tot ijsvorming, ophoping van condenswater en kan leiden tot functiestoringen.
  • Seite 110: Meubeldeuren Monteren

    6. Bij spaanplaatdeuren: Meubeldeuren monteren Bevestigingstraverse (31) met minimaal 6 schroeven (34) vastschroeven. Maximaal gewicht van de meubeldeur: 20 kg. 7. Bij casettedeuren: Aanwijzing! Bevestigingstraverse (31) met 4 schroeven (34) aan de rand vastschroeven. Het toegestane gewicht van de meubeldeur niet overschrijden.
  • Seite 111 Aanwijzing! De noppen en afdichtingslippen mogen niet TorxR 15 aanslaan. 15. Wanneer de beide metaalkanten vlak liggen (symbool //): Bevestigingsgaten in de meubeldeur voorboren (evtl. met priem voorsteken). 16. Apparaatdeur met schroeven (34) door de bevestigingshoek (12) vastschroeven op de meubeldeur.
  • Seite 112: Eindaanslag Van De Apparaatdeur Instellen

    Eindaanslag van de apparaatdeur instellen 22. Bovenste afdekking (39) plaatsen en inklikken. 23. Zijafdekking (40) plaatsen, tot de aanslag er op schuiven en dan er op drukken tot een klik hoorbaar De eindaanslagveer van de apparaatdeur kan indien nodig met de meegeleverde inbussleutel (21) instellen: 24.
  • Seite 113: Na De Montage

    Na de montage 1. Alle transportborgingen verwijderen. 2. Verpakking afvoeren Zie hoofdstuk "Verpakking afvoeren". De volgende punten controleren, om te waarborgen dat het apparaat goed is ingebouwd. Anders kan dit leiden tot ijsvorming, condensvorming en storingen. De apparaatdeur moet correct sluiten De meubeldeur mag niet tegen het meubelcorpus aanliggen De afdichting moet aan de greepzijdige bovenhoek...
  • Seite 114: Uw Nieuwe Apparaat

    Uw nieuwe apparaat 1. Bedieningspaneel 4. Schuiflade 2. Koude accu 5. VarioSpace 3. Invriestableau 6. Typeplaatje Bedieningspaneel 1. Temperatuurindicatie 5. SuperFrost toets 2. Insteltoets Down 6. Alarm uit toets 3. Insteltoets Up 7. Symbool kinderslot 4. Aan/uit toets...
  • Seite 115: Apparaat Inschakelen

    Apparaat inschakelen SuperFrost 1. Netstekker erin stekken. Met deze functie kunt u verse levensmiddelen snel tot in de kern invriezen. Het apparaat werkt dan met maximale vriescapaciteit, daardoor kan de geluidsproductie van het koelaggregaat luider zijn. Daarnaast krijgen reeds ingevroren producten een koudereserve.
  • Seite 116: Deuralarm

    Deuralarm Kinderslot Het waarschuwingssignaal klinkt wanneer de Met het kinderslot kan het apparaat worden beveiligd apparaatdeur langer dan 60 s is geopend. tegen ongewenst uitschakelen. Het waarschuwingssignaal gaat automatisch uit wanneer de apparaatdeur wordt gesloten. Deuralarm uitschakelen: 1. Toets SuperFrost ca. 5 s indrukken. Op het display wordt een c"...
  • Seite 117: Helderheid Van De Indicatie

    Helderheid van de indicatie Uitrusting De helderheid van de temperatuurindicatie kan aan de Afzonderlijke schuiflade of rooster max. belasten met lichtomstandigheden van de ruimte waarin het apparaat 25 kg ingevroren producten. is geplaatst worden aangepast. Schuifladen 1. Toets SuperFrost ca. 5 s indrukken. Op het display wordt een c"...
  • Seite 118: Invriestableau

    Invriestableau Koude−accu’s Met het invriestableau kunnen bessen, kruiden, De koude−accu’s voorkomen bij stroomuitval dat de groenten en andere kleine in te vriezen producten temperatuur te snel oploopt. worden ingevroren, zonder dat ze aan elkaar vast gaan zitten. De ingevroren producten blijven hun vorm behouden en het later portioneren is gemakkelijker.
  • Seite 119: Invriezen En Opslaan

    Invriezen en opslaan Verpakking voorzien van vermelding van inhoud en Diepvriesproducten inkopen invriesdatum. Let bij de aankoop van diepvriesproducten op het Ongeschikt als verpakkingsmateriaal zjin: volgende: Pakpapier, perkamentpapier, cellofaan, vuilniszakken en − Controleer of de verpakking onbeschadigd is. gebruikte plastic tassen. −...
  • Seite 120: Maximaal Invriesvermogen

    Maximaal invriesvermogen Levensmiddelen moeten zo snel mogelijk tot de kern 4. Koude−accu’s op de diepvriesproducten leggen. worden ingevroren. Alleen zo blijven vitamines, 5. Diepvriesproducten eventueel een de lade in voedingswaarde, uiterlijk en smaak behouden. krantenpapier of deken wikkelen en op een koele Specificaties van het maximale invriesvermogen in plek bewaren.
  • Seite 121: Apparaat Reinigen

    Apparaat reinigen Geuren Zachte poetsdoeken en een allesreiniger met neutrale Wanneer onaangename geuren waarneembaar zijn: pH−waarde gebruiken. Binnenin het apparaat uitsluitend reinigings− en onderhoudsmiddelen gebruiken die geen 1. Apparaat uitschakelen. gevaar opleveren voor levensmiddelen. 2. Alle levensmiddelen uit het apparaat nemen. Waarschuwing! 3.
  • Seite 122: Kleine Storingen Zelf Oplossen

    Kleine storingen zelf oplossen Voordat u contact opneemt met de klantenservice: Controleer of u de storing op basis van de volgende instructies zelf kunt oplossen. U moet de kosten voor advies door de klantenservice zelf dragen − ook tijdens de garantieperiode! Storing Mogelijke oorzaken Oplossing...
  • Seite 123: Servicedienst

    Servicedienst Een servicedienst in uw buurt kunt u vinden in het telefoonboek of in het overzicht met de servicediensten. Geef aan de Servicedienst het typenummer (E Nr.) en het fabricagenummer (FD Nr.) van het apparaat door. U kunt deze informatie vinden op het typeplaatje. E−Nr.
  • Seite 124 Gaggenau Hausgeräte GmbH Carl Wery Straße 34 D 81739 München www.gaggenau.com 7084164−01 9000 397 291 (8901) de en fr it nl...

Inhaltsverzeichnis