Herunterladen Inhalt Inhalt Diese Seite drucken
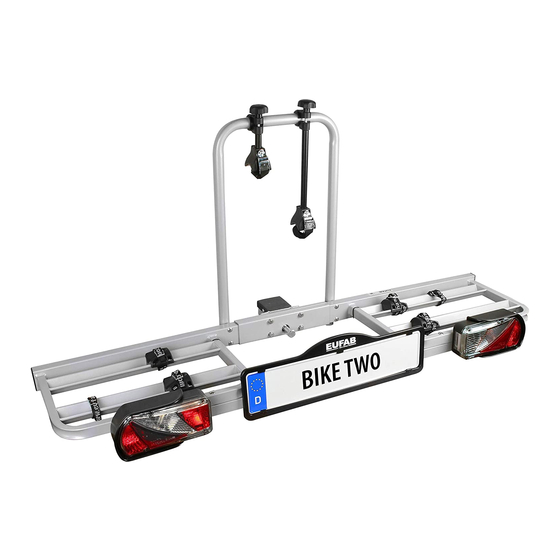
Eufab BIKE TWO Bedienungsanleitung

Eufab BIKE TWO Bedienungsanleitung

Heckträger für anhängekupplung, für 2 räder mit eg-be
Vorschau ausblenden Andere Handbücher für BIKE TWO:

Werbung

Verfügbare Sprachen

Verfügbare Sprachen

Art.-Nr.: 11411
Heckträger BIKE TWO für Anhängekupplung,
für 2 Räder mit EG-BE
Bedienungsanleitung . . . . . . . . . . . . . . . . . . . . . . . . . . . . . . . . 2
Article number 11411
Rear rack BIKE TWO for trailer coupling, for 2
bicycles with EU operating permit
Operating instructions . . . . . . . . . . . . . . . . . . . . . . . . . . . . . . . . 5
Réf. 11411
Porte-vélos arrière BIKE TWO pour
attelage de remorque, pour 2 vélos avec
certification CEE
Manuel de l'opérateur . . . . . . . . . . . . . . . . . . . . . . . . . . . 9
Cod. art. 11411
Portabici posteriore BIKE TWO per gancio
di traino, per 2 biciclette con omologazio-
ne europea
Istruzioni per l'uso . . . . . . . . . . . . . . . . . . . . . . . . . . . . . 13
1

Werbung

Inhaltsverzeichnis
loading

Inhaltszusammenfassung für Eufab BIKE TWO

  • Seite 1 Manuel de l‘opérateur ......9 Article number 11411 Cod. art. 11411 Rear rack BIKE TWO for trailer coupling, for 2 Portabici posteriore BIKE TWO per gancio bicycles with EU operating permit...
  • Seite 2: Bestimmungsgemässer Gebrauch

    Heckträger BIKE TWO für Anhängekupplung, für 2 Räder mit EG-BE ÜBERSICHT 1. BESTIMMUNGSGEMÄSSER GEBRAUCH 2. SPEZIFIKATIONEN 3. SICHERHEITSHINWEISE UND WICHTIGE INFORMATIONEN 4. BEDIENUNGSANLEITUNG 4.1 MONTAGE DES FAHRRADTRÄGERS 4.2 MONTAGE DES FAHRRADTRÄGERS AUF DER ANHÄNGERKUPPLUNG 4.3 MONTAGE DER FAHRRÄDER AUF DEM FAHRRADTRÄGER 5.
  • Seite 3 Achten Sie darauf, dass die Schrauben für den Kennzeichenhalter in der Trägertraverse außen sind. Verbinden Sie die beiden Trägerhälften mit den Verbindungsplatten und der Trägerbasis, achten Sie darauf, dass die große, mittige Bohrung der Verbindungsplatten mit der Bohrung des Trägertisches übereinander liegt. Stecken Sie vier Sechskantschrauben M8 x 50 mit Scheiben von innen durch die Verbindungsplatten und die Vierkantrohre des Trägertisches.
  • Seite 4: Montage Des Fahrradträgers Auf Der Anhängerkupplung

    Die übrigen zwei Gurte benötigen Sie später zusätzlich für die korrekte Befestigung der Fahrräder. Öffnen Sie die Schellen der Rahmenhalter indem Sie den Drehknauf abschrauben und legen diese mit den Einlagen um das Rohr des U – Bügels herum. Schließen Sie die Rahmenhalter wieder, aber noch nicht fest anziehen.
  • Seite 5: Intended Purpose

    Rear rack BIKE TWO for trailer coupling, for 2 bicycles with EU operating permit OVERVIEW 1. INTENDED PURPOSE 2. SPECIFICATIONS 3. SAFETY NOTES AND IMPORTANT INFORMATION 4. OPERATING INSTRUCTIONS 4.1 MOUNTING THE BICYCLE RACK 4.2 MOUNTING THE BICYCLE RACK ON THE TRAILER TOW BAR 4.3 MOUNTING THE BICYCLES TO THE CARRIER...
  • Seite 6 Rack table half, left Rack table half, right Lock screw M6 x 70, Washer 6 mm, Nut M6 Rack table traverse connection Pay attention to ensure that the screws for the license holder are on the outside of the rack traverse. Connect both rack halves with the connecting plate and the rack base. Make sure that the large, central drilled hole of the connecting plate is seated over the drilled hole of the rack table.
  • Seite 7 Protective mould left Washer 5 mm Nut M5 Protective mould right Rear driving light Rear light, left Rear light, right Mount the license plate holder to the rack traverse and align it so that it is positioned centrally to the license plate illumination. Seal the ends of the tubes on the rack traverse using the square plugs 30 x 20 [mm] and on the rack table with the square plugs 80 x 30 [mm].
  • Seite 8: Contact Information

    5. MAINTENANCE • Clean with a dry, soft cloth • Wash any mud or other dirt off using water • After use, store the bicycle carrier in a clean and dry place • Keep the trailer coupling clean and free of grease •...
  • Seite 9: Inhaltsverzeichnis

    Porte-vélos arrière BIKE TWO pour attelage de remorque, pour 2 vélos avec certification CEE SOMMAIRE 1. DOMAINE D'UTILISATION 2. SPÉCIFICATIONS 3. CONSIGNES DE SÉCURITÉ ET INFORMATIONS IMPORTANTES 4. NOTICE D'UTILISATION 4.1 MONTAGE DU PORTE-VÉLOS 4.2 MONTAGE DU PORTE-VÉLOS SUR L'ATTELAGE DE REMORQUE 4.3 MONTAGE DES VÉLOS SUR LE PORTE-VÉLOS...
  • Seite 10: Notice D'utilisation

    4. NOTICE D'UTILISATION 4.1 MONTAGE DU PORTE-VÉLOS Placez la moitié gauche et la moitié droite du plateau porteur sur un support plan, sachant que l'ouverture des rails de roue doit être orientée vers le haut. Fixez la traverse de support sur le plateau porteur en insérant les vis à tête bombée M6 x 70 par le haut à travers le plateau porteur et la traverse de support et en les vissant par le bas avec des rondelles et des écrous, ne serrez pas encore les écrous.
  • Seite 11: Montage Du Porte-Vélos Sur L'attelage De Remorque

    Coque de protection gauche Rondelle 5 mm Écrous M5 Coque de protection droite Feu de recul Feu arrière gauche Feu arrière droit Montez le support d'immatriculation sur la traverse de support et orientez-le de manière à ce qu'il se trouve en hauteur, centré, par rapport à l'éclairage d'immatriculation. Décalez les extrémités de tube de la traverse de support à...
  • Seite 12: Entretien

    Le second vélo est placé dans le sens inverse dans le second rail et fixé sur l'étrier en U avec le support de cadre long. Fixez à nouveau les roues comme décrit pour le premier vélo. Il est éventuellement nécessaire - contrairement à la description - d'orienter les vélos de manière individuelle sur le porte-vélos arrière afin de pouvoir fixer correcte- ment les supports de cadre.
  • Seite 13 Portabici posteriore BIKE TWO per gancio di traino, per 2 biciclette con omologazione europea PANORAMICA 1. DESTINAZIONE D'USO 2. SPECIFICHE 3. AVVERTENZE DI SICUREZZA E INFORMAZIONI IMPORTANTI 4. ISTRUZIONI D'USO 4.1 MONTAGGIO DEL PORTABICICLETTE 4.2 MONTAGGIO DEL PORTABICI SUL GANCIO DI TRAINO 4.3 MONTAGGIO DELLE BICICLETTE SUL PORTABICI...
  • Seite 14 Metà sinistra del Metà destra del piano di supporto piano di supporto Vite a testa tonda con quadro sottotesta M6 x 70, rondella 6 mm, dado M6 Traversa del piano di supporto connessione Assicurarsi che le viti per il porta-targa nella traversa siano rivolte all'esterno. Collegare le due metà del portabici alle piastre di collegamento e alla base del portabici, assicurandosi che il grande foro centrale delle piastre di collegamento coincida con il foro del piano di supporto.
  • Seite 15 Per il montaggio dei fanali posteriori, inserirli prima nelle mascherine di protezione. Accertarsi che il cavo sia bene inserito nella guida e non venga schiacciato. Il fanale posteriore con la luce di retromarcia si monta a destra nella direzione di marcia, quella con la luce posteriore antinebbia a sinistra in direzione di marcia; in entrambi i casi, le aperture per le luci della targa devono trovarsi all'interno.
  • Seite 16: Avvertenze Sulla Tutela Ambientale

    La seconda bicicletta va disposta sul secondo binario, in senso opposto alla prima, e fissata alla staffa a U con il braccio lungo. Bloccare le ruote come per la prima bicicletta. Può essere necessario sistemare le biciclette sul portabici posteriore diversamente da come descritto, in modo da poter fissare correttamente i bracci al telaio. Ora bloccare le biciclette con la cinghia di sicurezza lunga.
  • Seite 17 STÜCKLISTE / PARTS LIST FOR ITEM NUMBER / LISTE DES PIÈCES / LISTA PEZZI CODICE DE – Bezeichnung GB – Designation N° FR – Désignation IT – Designazione Trägertisch links Rack table half, left 90002 Table support de gauche Tavolo di supporto, sinistro Trägertisch rechts Rack table half, right 90001...
  • Seite 18 DE – Bezeichnung GB – Designation N° FR – Désignation IT – Designazione Schraube M16 x 1,5 x 90 Screw M16 x 1,5 x 90 90174 Vis M16 x 1,5 x 90 Vite M16 x 1,5 x 90 Schraube M8 x 50 Screw M8 x 50 90172 Vis M8 x 50...
  • Seite 19 DE – Bezeichnung GB – Designation N° FR – Désignation IT – Designazione Montageanleitung + EGBE Assembly instructions + type approval 90723 Instructions de montage + homologations EGBE Istruzioni per il montaggio + EGBE Montageschlüssel Assembly key 90178 Clé de montage Chiave di montaggio Lampenschutz links Protective mould left...
  • Seite 20 EAL GmbH +49 (0)202 42 92 83 0 info@eal-vertrieb.com Otto-Hausmann-Ring 107 42115 Wuppertal, Deutschland www.eal-vertrieb.com +49 (0) 202 42 92 83 – 160 © EAL GmbH, 11411, 03. 2019...

Inhaltsverzeichnis