Inhaltsverzeichnis
Werbung
Verfügbare Sprachen
Verfügbare Sprachen
Quicklinks
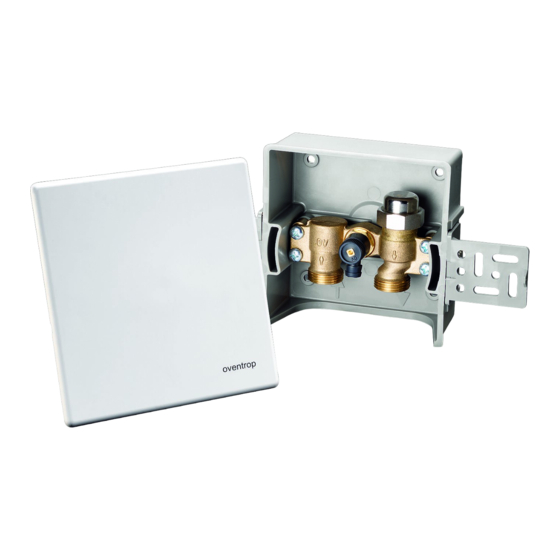
„Unibox RLA"
Art.-Nr. 1022663
Einbau- und
Betriebsanleitung
OVENTROP GmbH & Co. KG
Paul-Oventrop-Straße 1
D-59939 Olsberg
Telefon
+49 (0) 29 62 82-0
Telefax
+49 (0) 29 62 82-400
E-Mail
mail@oventrop.de
Internet www.oventrop.com
Eine Übersicht der weltweiten Ansprechpart-
ner finden Sie unter www.oventrop.de.
Vor der Inbetriebnahme Anlagenkomponenten, Steuerung, Not-Aus- und Sicherheitsein-
richtungen auf Zustand, Schäden und Funktion kontrollieren! Betriebsanleitung lesen!
Inhalt
1. Allgemeines . . . . . . . . . . . . . . . . . . . . . . 2
1.1. Information zur Betriebsanleitung . . . . . 2
1.2. Symbolerklärung . . . . . . . . . . . . . . . . . . 2
1.3. Urheberschutz . . . . . . . . . . . . . . . . . . . . 2
2. Sicherheitshinweise . . . . . . . . . . . . . . . . 2
3. Technische Daten . . . . . . . . . . . . . . . . . . 2
3.1. Abmessungen . . . . . . . . . . . . . . . . . . . . 2
3.2. Leistungsdaten. . . . . . . . . . . . . . . . . . . . 2
4. Aufbau und Funktion . . . . . . . . . . . . . . . 2
4.1. Übersicht . . . . . . . . . . . . . . . . . . . . . . . . 2
4.2. Funktionsbeschreibung . . . . . . . . . . . . . 2
5. Einbau und Montage . . . . . . . . . . . . . . . 3
5.1. Lieferumfang . . . . . . . . . . . . . . . . . . . . . 3
5.2. Einbau der „Unibox RLA". . . . . . . . . . . . 3
5.3. Installation . . . . . . . . . . . . . . . . . . . . . . . 3
5.4. Dichtprüfung . . . . . . . . . . . . . . . . . . . . . 4
Premium Armaturen + Systeme
E
5.5. Aufheizen . . . . . . . . . . . . . . . . . . . . . . . . 4
5.6. Inbetriebnahme . . . . . . . . . . . . . . . . . . . 5
6. Bedienung . . . . . . . . . . . . . . . . . . . . . . . . 5
6.1. Absperren des Ventils . . . . . . . . . . . . . . 5
7. Diagramm . . . . . . . . . . . . . . . . . . . . . . . . 6
1
Werbung
Kapitel
Inhaltsverzeichnis

Inhaltszusammenfassung für oventrop Unibox RLA
-
Seite 1: Inhaltsverzeichnis
5.1. Lieferumfang ..... 3 5.2. Einbau der „Unibox RLA“... . 3 5.3. -
Seite 2: Allgemeines
Abb. 4.1 Übersicht „Unibox RLA“ WARNUNG! Verbrennungsgefahr! 4.2. Funktionsbeschreibung Heiße, austretende Medien können zu Die „Unibox RLA“ ist ein Einbauset zur Ab- schweren Verbrennungen führen. Heiße Rohr- sperrung von Flächenheizkreisen in Kombina- leitungen können ebenso zu Verbrennungen tion mit „Uniboxen“. -
Seite 3: Einbau Und Montage
Warensendung nur unter Vorbehalt an- nehmen. Reklamation einleiten. Dabei Rekla- Um eine einwandfreie Funktion mationsfristen beachten. der „Unibox RLA“ zu gewährleisten, ist die 5.2. Einbau der „Unibox RLA“ Fließrichtung bei der Verlegung der Rohrlei- tungen und „Unibox“ unbedingt einzuhal- Die Unterkante der „Unibox RLA“... -
Seite 4: Dichtprüfung
Die Installation der Flächenheizung kann mit Rücklauf eingebaut) allen gängigen Rohrwerkstoffen erfolgen. Das Oventrop Lieferprogramm umfasst eine Fülle Einbau der „Unibox RLA“ zur Absperrung des von Klemmringverschraubungen. Die entspre- Rücklaufes bei der vor den Flächenheizkreis chende Montageanleitung ist zu beachten. -
Seite 5: Inbetriebnahme
Einbau- und Betriebsanleitung „Unibox RLA“ 6. Bedienung Anleitungen zum Aufheizen siehe Unterlagen der Flächenheizungshersteller. 6.1. Absperren des Ventils Die Hinweise zur Inbetriebnahme der jeweils Die Kappe des Absperrventils entfernen. Die montierten „Unibox (T / E T / RTL / E RTL / plus Ventilspindel mit einem Innensechskantschlüs-... -
Seite 6: Diagramm
Einbau- und Betriebsanleitung „Unibox RLA“ 7. Diagramm Voreinstellung Massenstrom q m [kg/h] Abb. 7.1: „Unibox RLA“ Technische Änderungen vorbehalten. 102266380 01/2018...


